Search the Community
Showing results for tags 'flatten'.
Found 22 results
-
 Hello everyone, How can I flatten an image in Photo? Here's my case: I open an image at 500x1000 px and want to resize its canvas to 1000x1000 Well, I do Document > Resize Canvas, unlink the dimensions, set one side to 1000, and press Resize Of course, Photo adds the transparent 250 px margins left and right Then I do Document > Flatten to make one 1000x1000 flat image And nothing happens; the image still has transparent margins, and when I save it to PNG, it saves the transparency as well. In this case, Photoshop makes a flat image with no transparency, which is right. How can I do it in Photo? Please help me understand the logic of this editor.
 -
 What is the difference between flatten (reduce) and merging layers? Is it that flatten is the same like merging layers but with all layers of a document?
 -
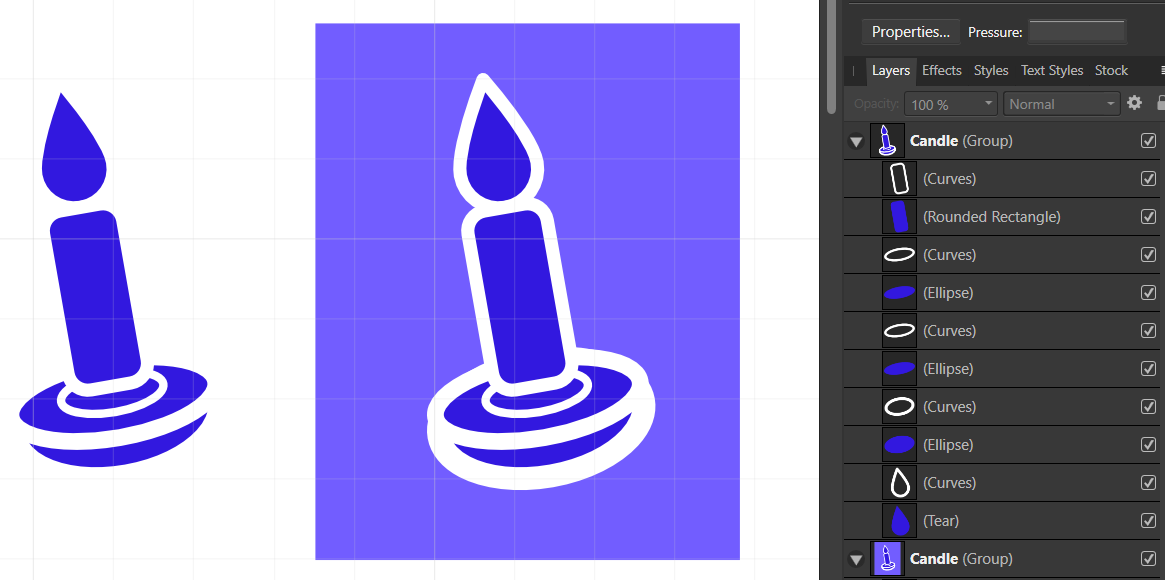
 I have designed myself into a corner that I can't figure out how to escape. I made a candle shape with thick lines that overlap in such a way that they obscure underlying shapes. It looks great with a white background, but I actually want the white lines to be transparent in the final export. I have tried expand stroke, but that just separates the white lines from the underlying shapes and using those as "cookie cutters" still doesn't yield what I want. Conceptually, a "flatten all to new curve" would do what I want (assuming I could specify to ignore white). I tried some fx masking, but still couldn't get there. Any thoughts on how to leave only the visible blue shapes in a new object?
-
 How copy for example R to G chabel etc in Affinity Photo desktop? i dont see menu selections what are earlier showed post in another thread (Sorry no link i tried found it again). Somehow when flatten project (I only added one these "colour brush strokes" what is available affinity page added. no avail but when flatten docuemnt i found them but i still can move tihs image element same thing for vector elements what i draw using program tools. earlier all goed single bitmap layer. Flatten seems work different way what done earlier. is mean work like this. of course i can keep such flatten such non moveable from using lock layers panel but.
 -
 Under the layers menu there is no merge or flatten layers or any other place. How/where can I flatten selected layers? I'v spent way to much time trying to find this. The help list says: " From the Layer menu, select Merge Selected." this is no where to be found.
 -
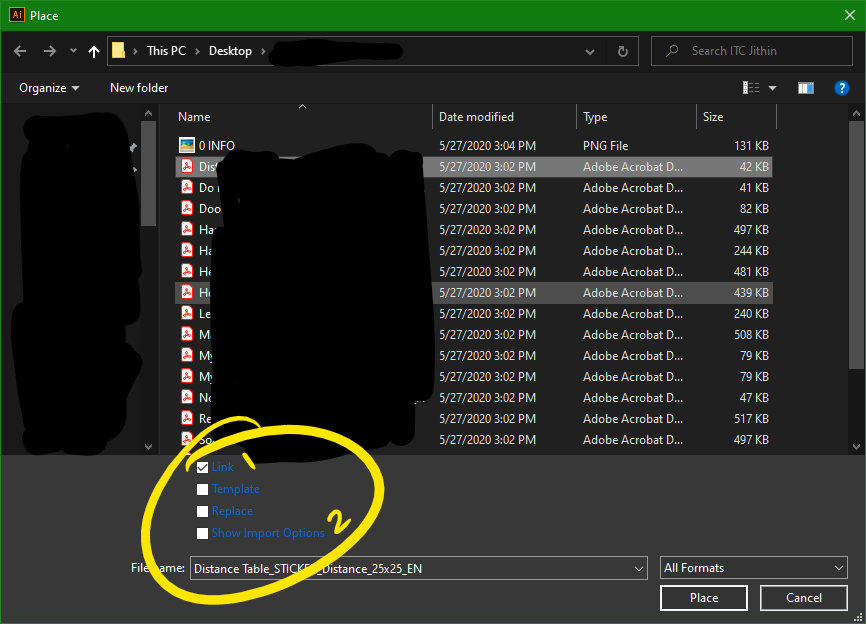
 1. we need to place a pdf as a link. it can be placed but all TEXT inside the pdf are missing because of the font missing. so the placed pdf are technically not linked. so we need an options like that (image pdf linking.png). 2. after placing a pdf some times we have to edit or need to some adjustments so that time we nee to outline the fonts so another option similar to Illustrator FLATTEN TRANSPARENCY required. with both of those we; printers can handle client files easily.
-
 Hello! I would like to design materials for school, so I purchased clip arts and fonts to design the materials I'll be selling. I would like to export my documents as pdf and want them to be protected, so when purchased by customers, they cannot change, alter or add anything to my work. How can I do that on PC? Thank you very much for your precious help!
 -
 Hi there, I'm using Designer, and need to export 40 artboards, that have complex groups, as a flattened PDF. What is the best way to do this? Thanks! Anj Edit: found out that there is an option for it in Export
 -
 Hi everyone, I've recently switched to Affinity Photo and am globally very happy with the program. However, I'm noticing something strange: The effect of a Live Filter sharpening layer (any of the three: clarity, UMF, high pass) seems to be dampened when I merge the layer down or flatten the image. The effect isn't completely lost, its just reduced, but visibly so. This isn't a jpeg compression thing, because the reduction is visible there in Affinity Photo, before any exporting or saving. I'm on a Windows 10 system, if for some reason that should be important. I've tried putting the sharpening filter immediately above the pixel layer, putting it at the very top, merging each layer as a separate step, just exporting without flattening... Am I doing something wrong? Has anyone else observed this? And if so, is there a workaround for it? Thanks to all in advance!
 -
 Please consider adding a Flatten Command to the Layers menu drop-down and in the Layers panel drop-down. I learned that the command exists in the Documents drop-down during a discussion on the AP Facebook group.. It works fine but would be much more efficient and intuitive to have it while working with multiple layers, including all those adjustment layers and filters. Thanks for the consideration, Dik Salsbury
 -
Hi, I know there was some discussion of this a long time ago and a feature was added for this, but I was wondering if the option could be expanded slightly. Within the Layers Panel in Affinity Photo, you can "Merge Visible" layers and also "Merge Down", but unlike Photoshop, the option to "Flatten" all the layers is not within the Layers Panel, instead it's within the Documents Menu at the bottom - not so obvious. Is there any chance of having this option added to the the Layers Panel Right click menu like the other options? It may seem that it already exists elsewhere, so there is not point, but it would be logical to include it in the Layers Options and it would also save the user time moving to the main menu instead of working within the Layers Panel. Thanks, Jay.
-
When I use editorial brushes (healing, blur, clone) when group of layers is selected, layers of this group being flattened automatically. In complicated projects this feauture can spoil some block of work. I made complicated group and just forgot to select exact layer which I want to edit with editorial brush and after edit group was flattened what I didn't want to. Because this group meant to be editable.
-
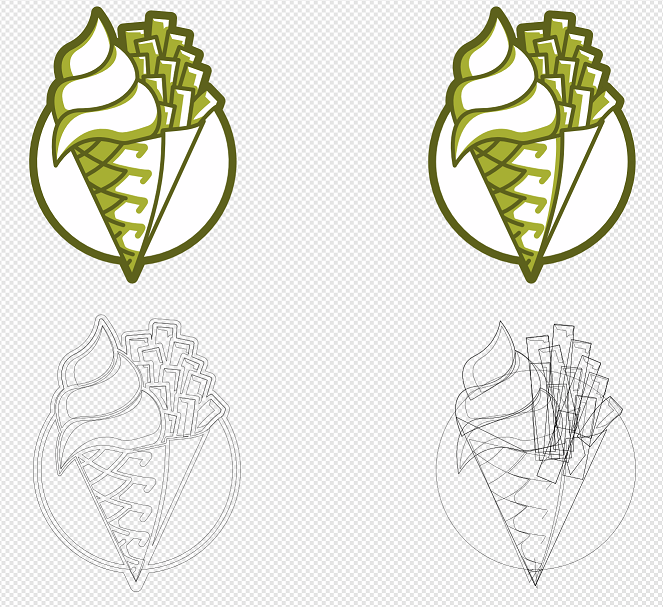
 I spent the past two hours reducing a logo from a billion separate elements to three (white, light, dark) for vinyl printing. But this shouldn't take as much effort as it did. I couldn't find a simple way to 'flatten' this image, so I had to manually add/subtract/divide many elements many times. The outermost line and white background are not a problem, simply select everything and add. But the darkest shade is made up entirely of outlines of shapes such as the fries. So I cannot simply add those together as it will create one big clump. I also can't just make them all outlines and transparent centers because you'd see the underlying layers. So for each fry i had to: -expand stroke -copy the inside -copy the shape and make transparent (so you only have the stroke) -subtract the stroke from the inside. -subtract the result from the original shape -subtract all the higher layers from the original shape Does anyone know a decent workflow for this type of work in Affinity Designer? I also reckon this is something that can be done algorithmically. At least in the sense that we should be able to divide the visual end result in contiguous blobs of one color. That means the dark green would be 1 element, and the white and light green about two dozen islands each. I'd still have to manually group those into one element but it'd already be much closer to what the endresult would be.
-
 Hi, I've just downloaded Affinity for iPad on my iPad Pro 12.9" and have been working on some photos. Doesn't really have any problem until I try to flatten my layers and the process takes forever. I've tried waited 30mins and it's still going, is this normal for the progress to be so long? I'm only working on 3 layers with some masking and layer adjustments. I've also tried to exported it as JPEG and I'm stuck at the "preparing to export". Anyone facing with the same problem? By the way, the photos are taken with my Cano 5Ds so the file size cold be a factor? regards, Calvin
 -
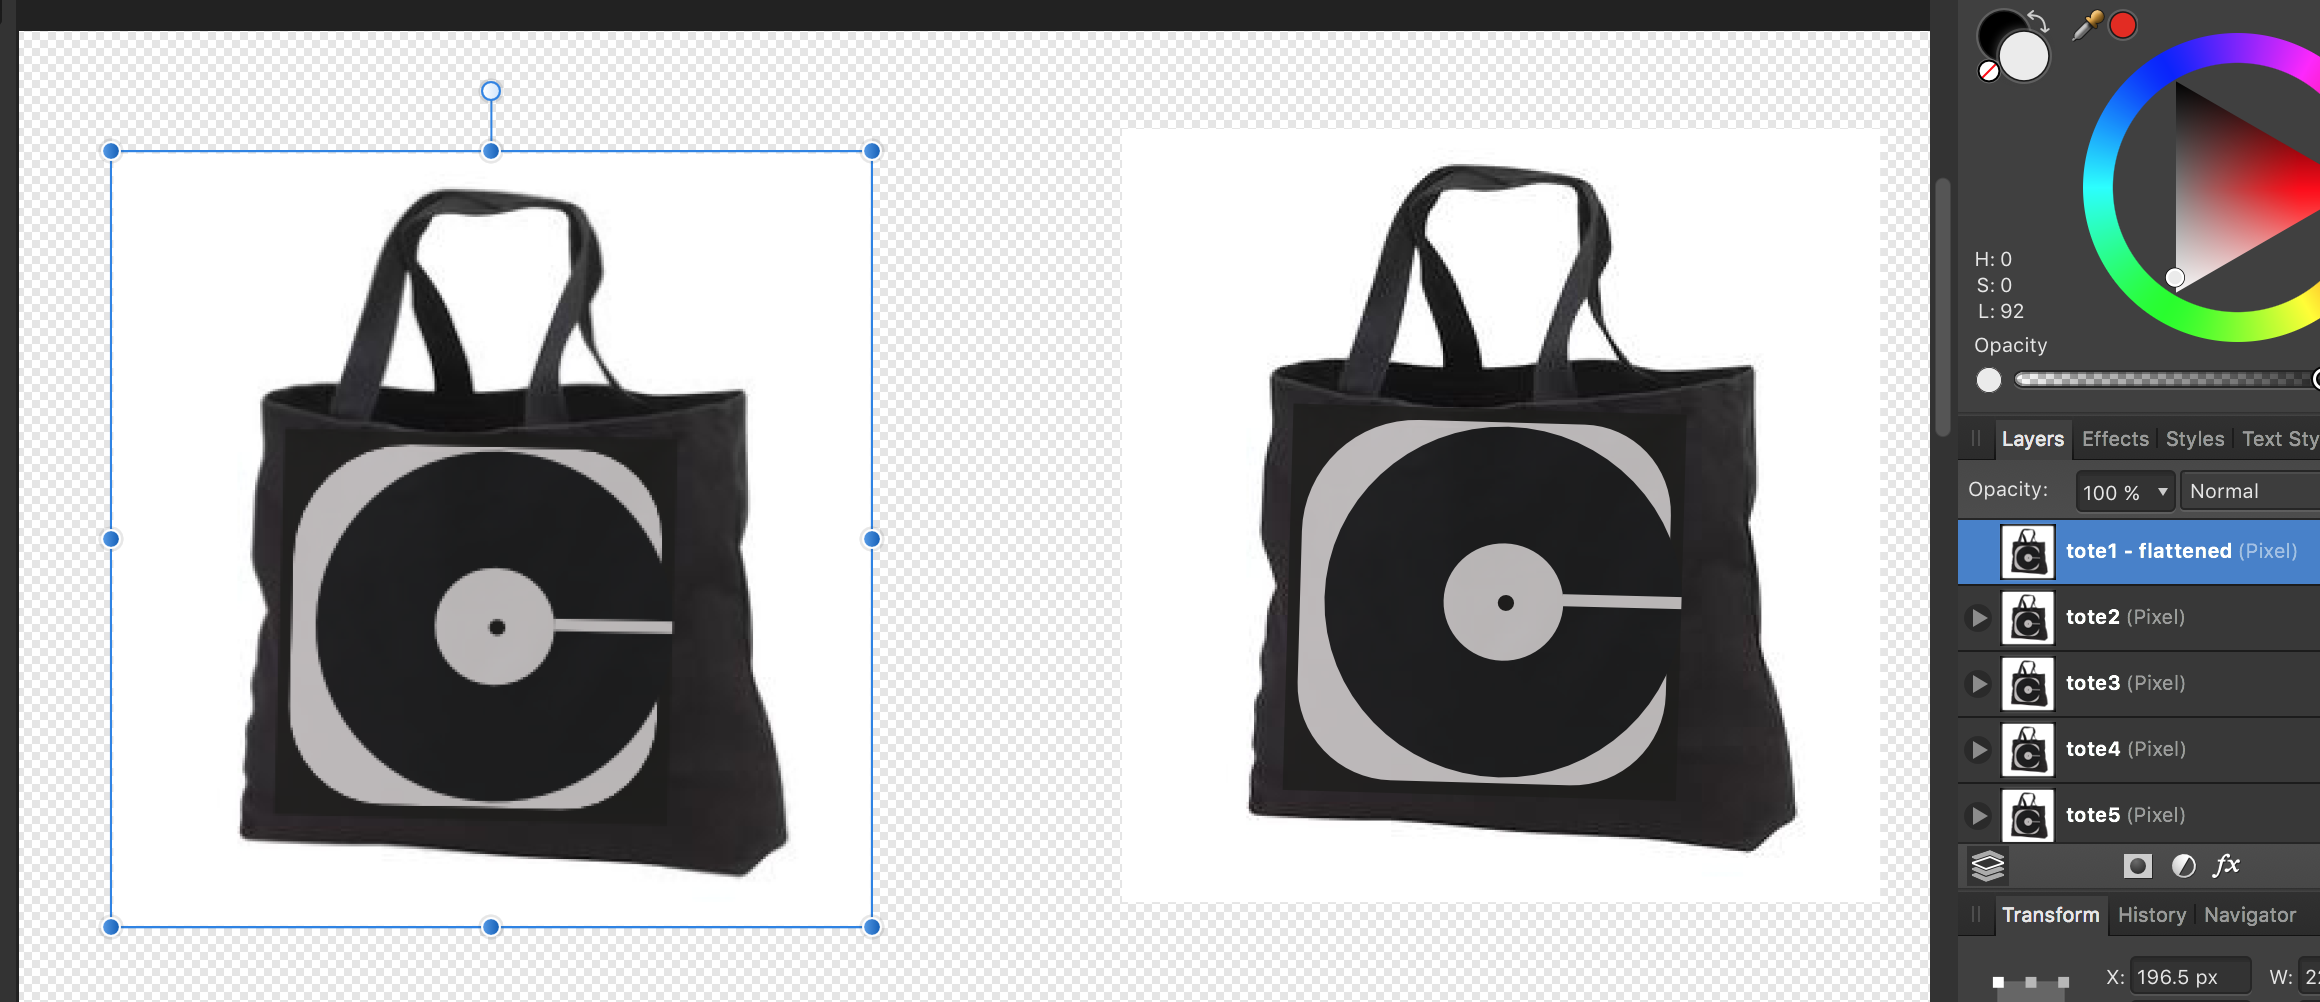
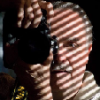
 'morning guys/gals, 2 quick questions please (and thanks): 1) in the image below (thumbnail and file attached) you will see a logo image that was originally on a black rectangular background. I cropped the L and R sides to get rid of portions of the background so as to create an even-ish border. How can I get rid of the still-remaining blue lines outlining the original boundaries of said black rectangle background? ...and, 2) in order to distort/stretch this image (logo portion), don't I simply 'convert to curves' the grouped layers then click/drag whichever node I'd like to 'pull' on? My goal is to be able to manipulate the image by independently move nodes to create perspective changes in some cases, or make the image look curved in other cases (as if on a cylindrical surface such as a telephone pole, etc). Does the image/layers need to first be flattened. Big thanks from a newbie! -Christo CVlogoBlueCropLines.afdesign
-
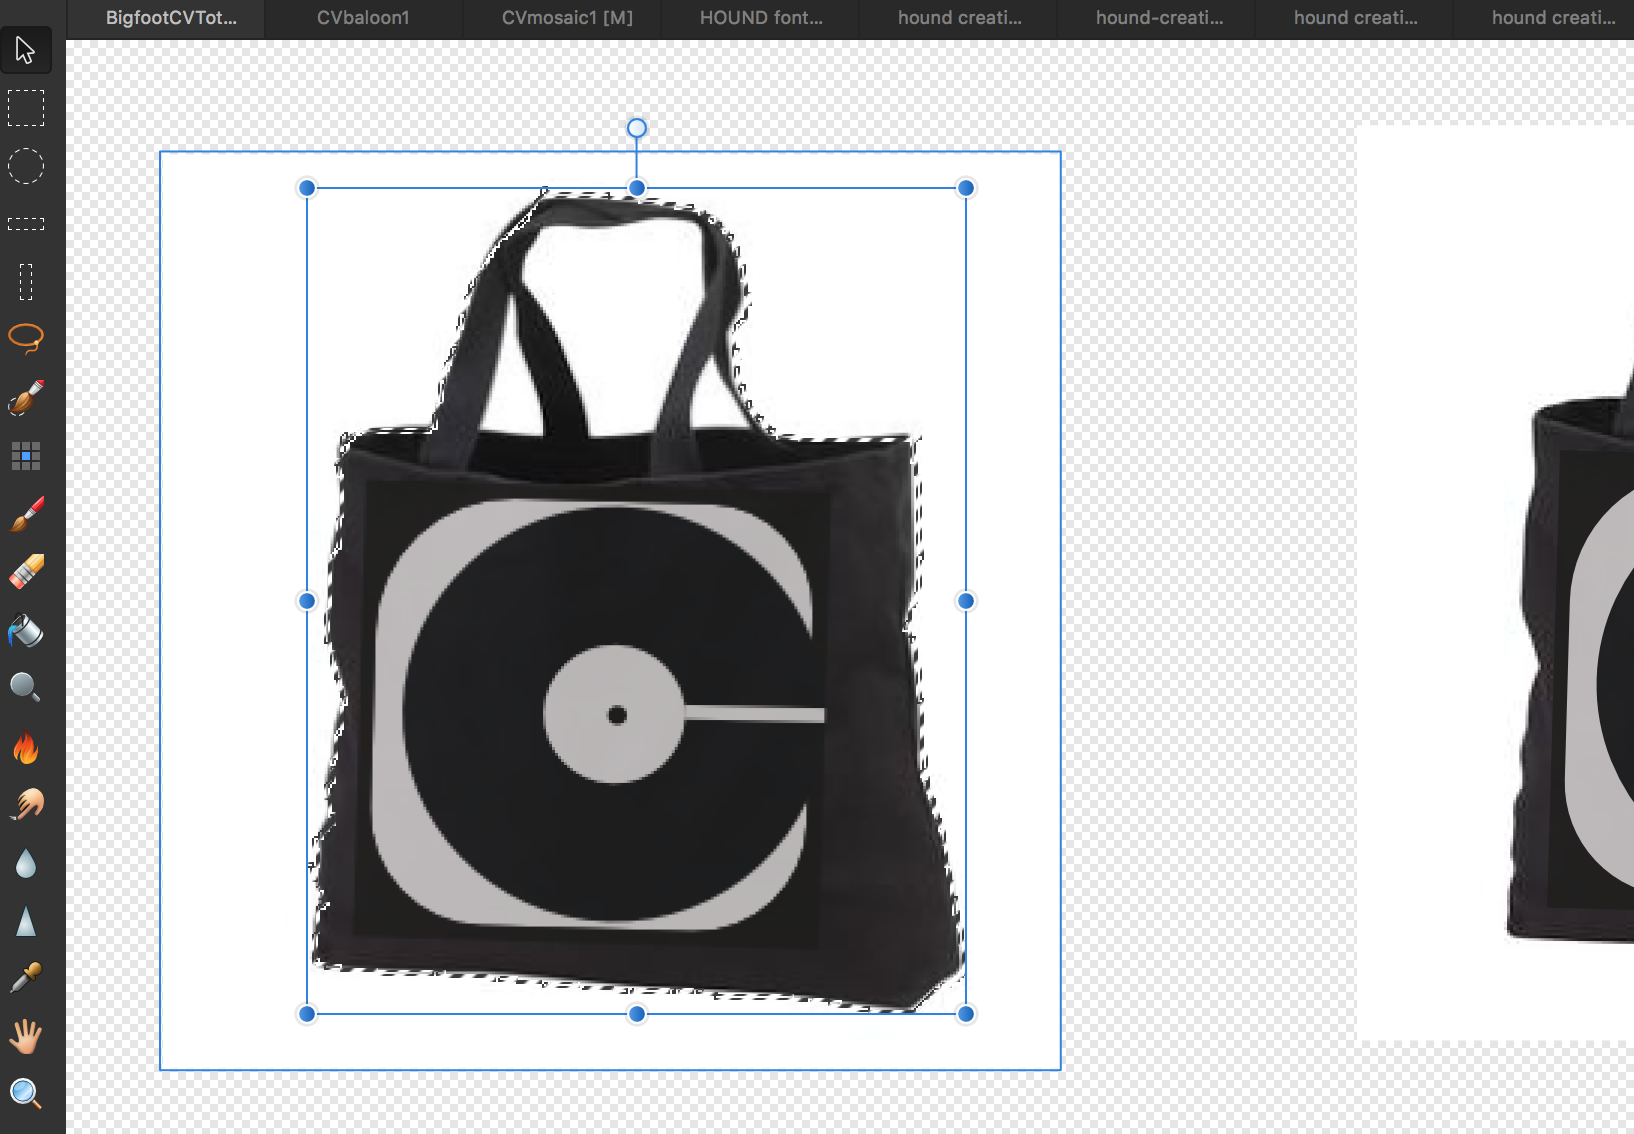
Thanks in advance friends... ...when flattening into a single pixel layer, do I first need to rasterize the grouped layers? Not sure how to do this, i.e, I'm unclear on the steps involved, and the proper order in which to perform them. A brief walk-thru would be greatly appreciated. FYI - I am wanting to manipulate the Flat image (bend, curve around a cylindrical surface such as a large barrel or a utility pole, alter perspective and/or viewing angle, stretch by pulling/moving nodes independently of each other, etc). greateful for your help, -Christo
-
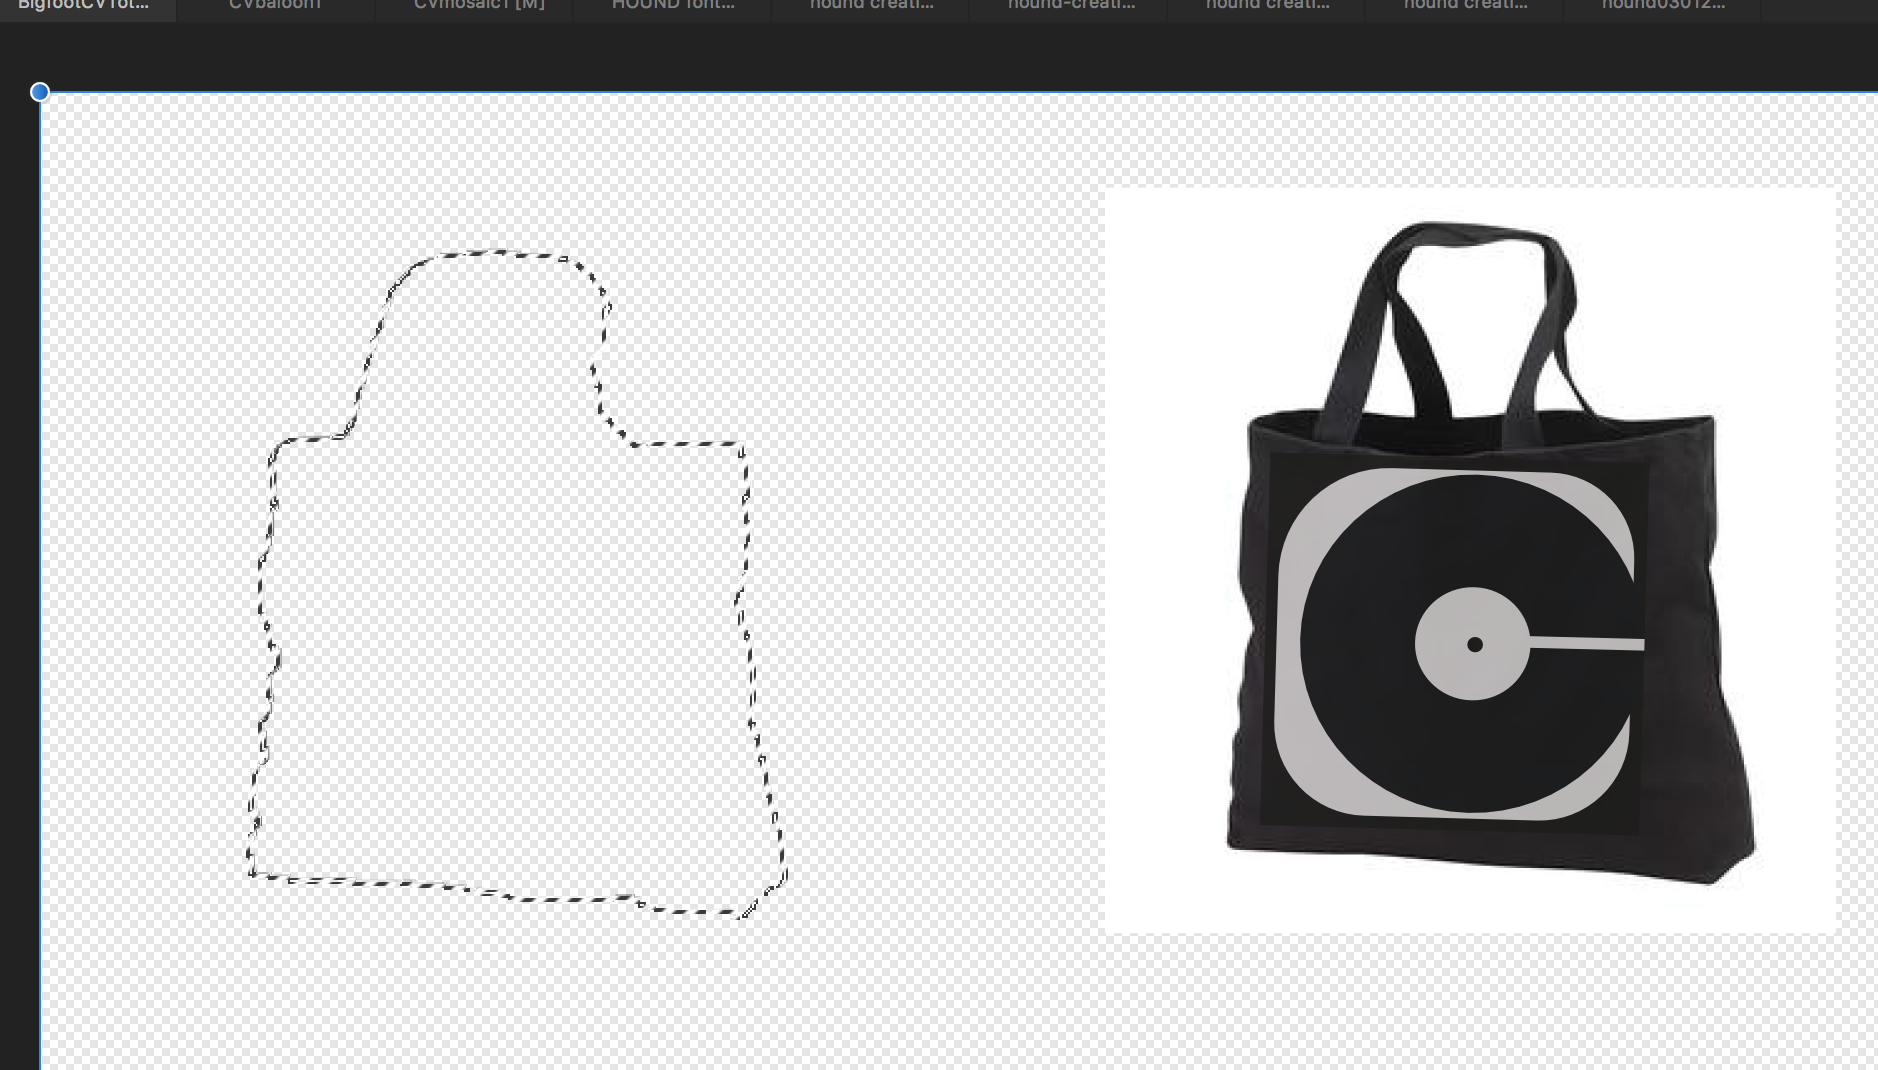
Dudes/Dudettes, a little help please... Missing something obvious and simple again, I'm sure - and I've sincerely tried to research the forums myself, doing my own leg-work but am just stuck on this one. This time I brought along some visual aides. Working on a MacBook Pro with AD 1.5, all I am trying to do is remove the white background behind this black tote back (see images below). After surveying the forums, I understood that in order to accomplish this I needed to do the following (please point out my error): 1) add new Pixel layer over image 2) outline the image wanting to kept using Selection tools (I used the Brush selection tool)...pardon the crudely traced selection line, I'm just practicing 3) Invert the Pixel selection (I used the Ctrl+Shift+I keyboard shortcut)... **this is where I'm stuck - a post in the forum says to now 'paint in the selected area'. Would I not used the In-Fill tool by selecting a color then clicking on the selected area? This is what I tried, yet was unable to paint-in the selection. Feel like a major dork here guys - what am I missing? -Thanks as always AD Fam, --Christo
-
 I hope I'm missing something that so far doesn't feel so intuitive... I'm trying to export a (scaleable) PDF for print, and am unable to figure out how to flatten the image prior to export so that all colour/effects are incorporated into the file (without raster). I've tried multiple export options (PDF), but it feels like I'm missing a step. Is there a way to 'flatten' the 'group'? And is a scaleable PDF possible via any export option so that the resulting image appears as vector? Thanks in advance.
 -
So when I used to use Illustrator, and I have a complex group of layered objects (on top of each other), I could 'Expand', 'Flatten Transparency', then 'Merge', and I would effectively have an object that was flattened only to its visible parts. I could then go in and delete the coloured areas and be left with a clean line art style image. As of yet, I have not been able to find any way of flattening my objects in Designer to only its visible parts. Does anyone have any suggestions on this? Thanks
-
I can understand that afphoto saves all the history and the original can be recovered, similar to Photoshops PSD, In Photoshop you can flatten the image and have the choice of saving as a JPEG. In Affinity you have to export to save as a JPEG, surely that is what flatten should do.
-
 Hello, After doing my work up on layers, I wish to "flatten image" (PS) in order to save it as tiff. Right now, I am doing "merge down" on each layer. Which is pretty boring. Is there any "flatten image" fonction ? Or I missed something. Thanks!
 -
 I've been trying to export as layered Photoshop file to bring into FCP X. However, seems to come out as flattened only. I saw a previously topic and I'm thinking that is the case. Can someone confirm? If so, I guess the only way to do it is to make a "slice" of each layer then export all. Am I correct in that assumption? Thanks