Our response time is longer than usual currently. We're working to answer users as quickly as possible and thank you for your continued patience.
Search the Community
Showing results for tags 'aphoto'.
Found 7 results
-
 Is it possible to switch keyboard commands for text only? I have a feeling the answer is no . . . Is it possible to take Command +V for "Paste" and assign it to "Paste without Format" and vice-versa? Or is this a general action that applies to everything rather than being contextual? To me it is a more useable than the existing setup . . .
 -
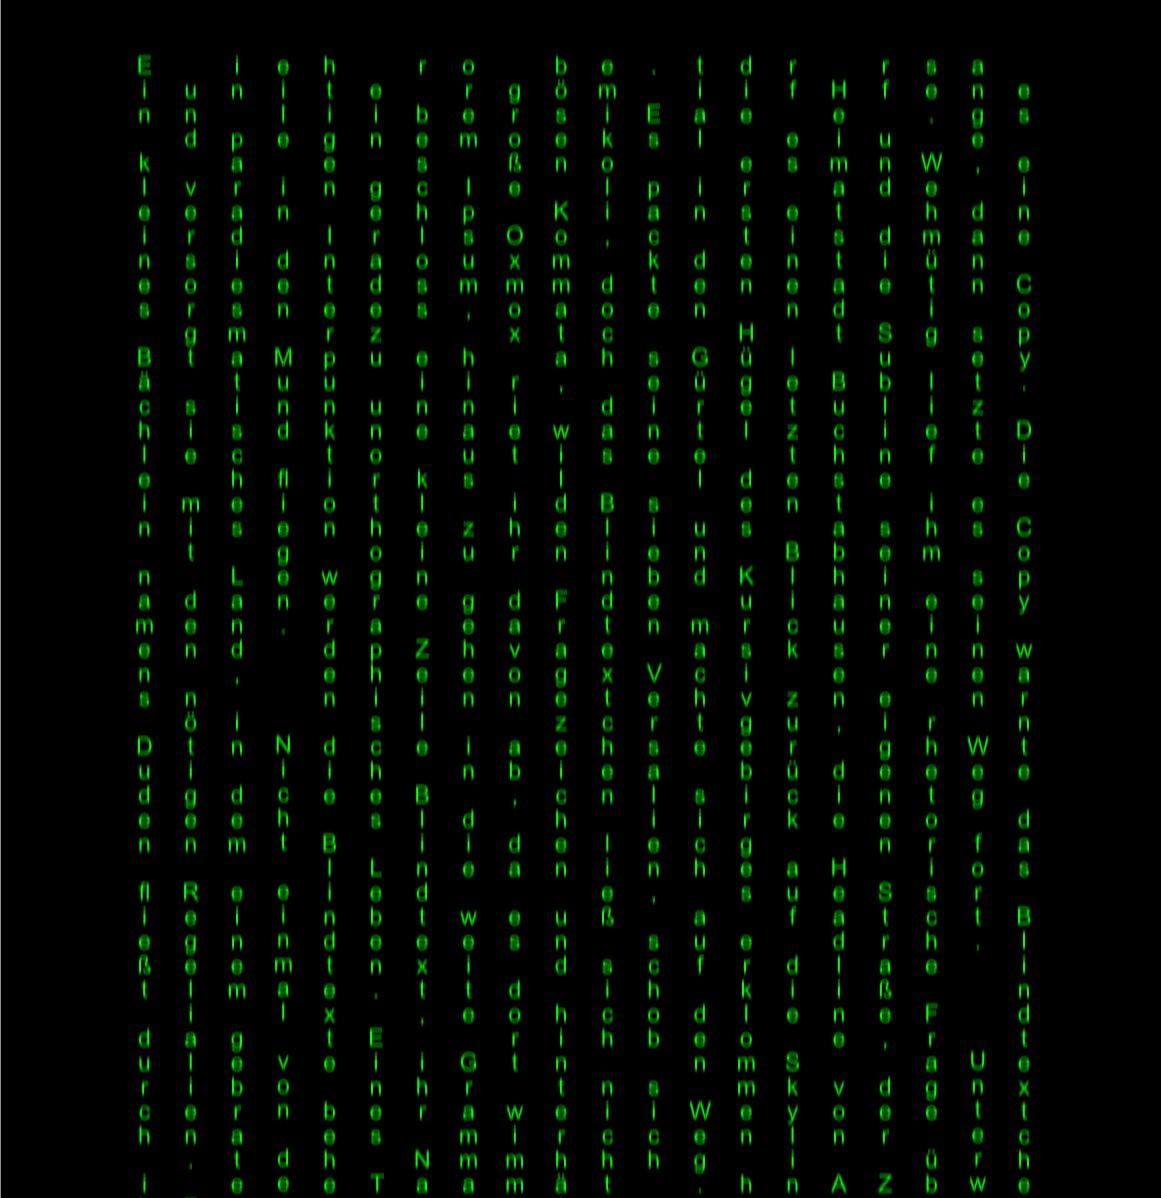
I was looking for something else, so this is just an accident. 1. Create a text frame in Affinity Publisher with as many columns as you like. Each column has to be this wide enough to hold a single character. In my case 1,825 mm, but this depends on the font size. 2. Add your text to the frame. 3. Add a motion blur from the Photo Persona. 4. Done! Depending on your used font, it could be that you have to replace spaces with non-breaking-spaces. Enter the Matrix and have fun! matrix-rain.afpub

-
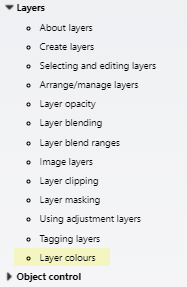
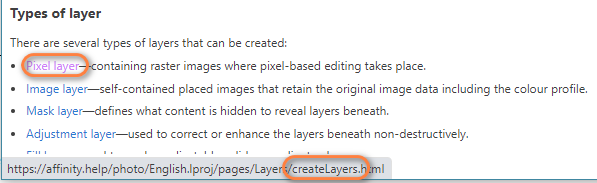
This item should probably be part of the Layers group, as it is in the ADesigner help. Link to Pixel Layer is incorrect (to Create Layer).
-
 Hi there, I used a 3D effect and Outer Glow on the ball and a layer behind the ball with a brush of white paint. The jpg looks even uglier. See screenshots. Best regards, Puck.
-
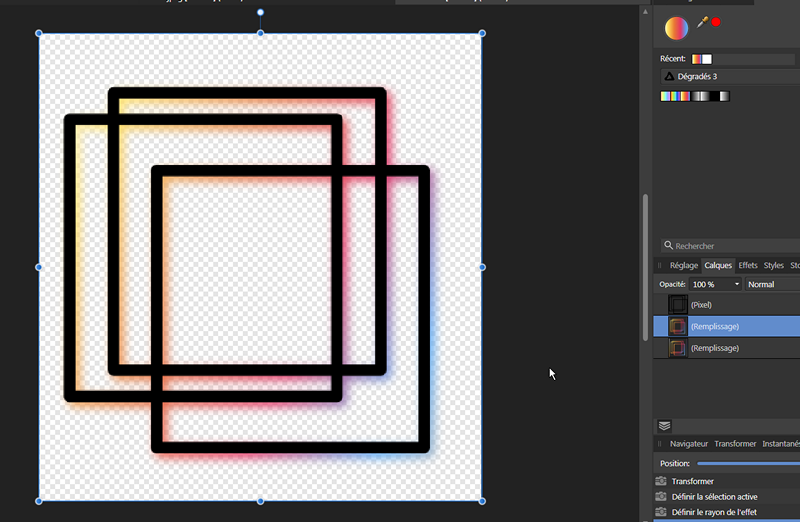
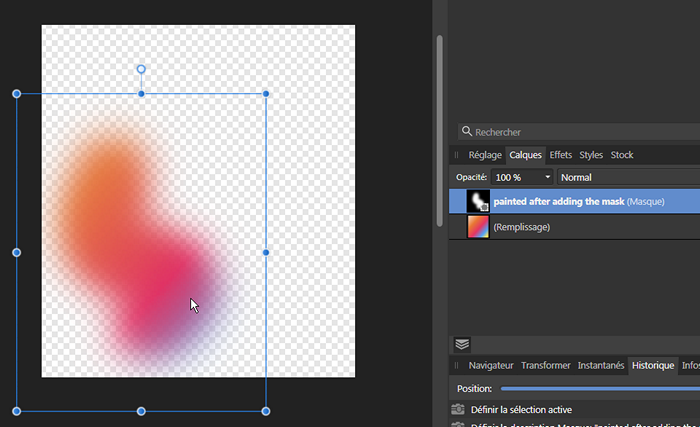
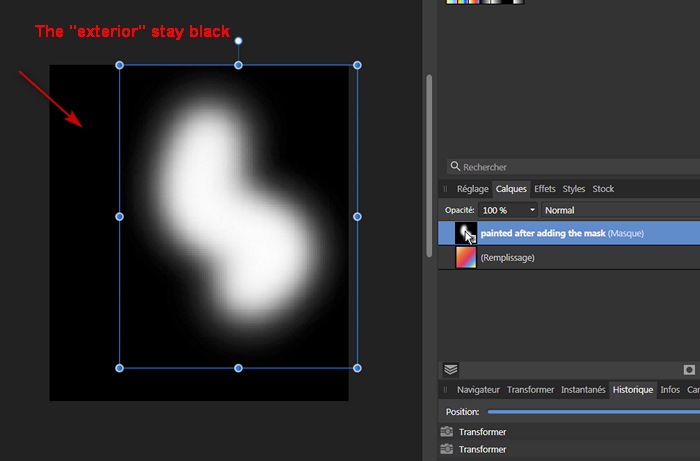
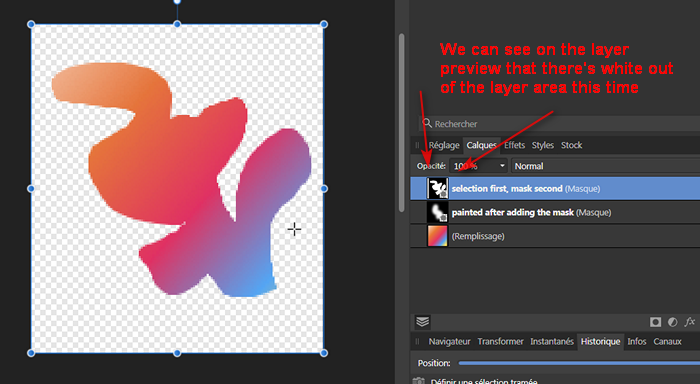
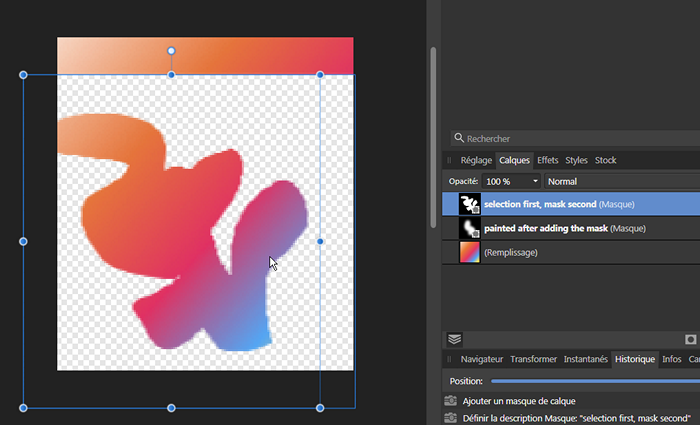
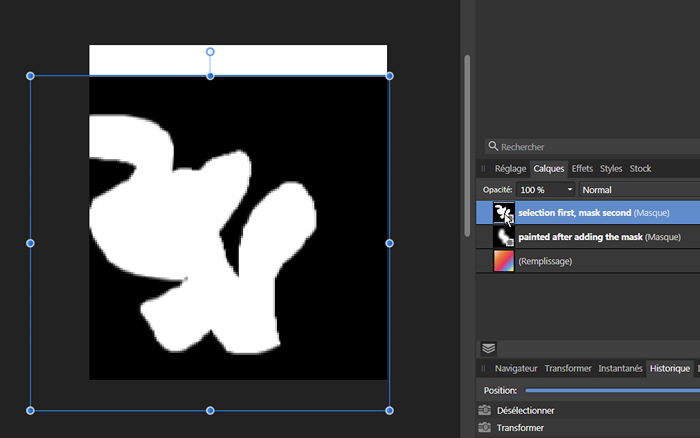
Hi, When applying a mask to a fill layer with a guassian blur effect, the mask cut 3/4 of the image instead of the right area, if the fill layer was moved (for giving a shadow effect, for example). Fill layer isn't moved: mask is OK Fill layer is moved: mask is incorrect fill_effect_mask.afphoto In general, it would be better if mask and fill layers were only taking in account the inside of the document's area, or of a selection, and would consider/attribute white or black to the exterior area of the document, the same way it's doing when adding a mask without any prior selection (when doing this, if you paint in white/black, on the mask all the area and BEYOND will be in the original colour of the mask, without delimitations for the document's area, and the move tool is able to select only the white/black painted area, letting us move it as any other shape). When selecting from a transparent layer (to get as selection the non-transparent area), before adding a mask, the mask will be limited to the inside of the document's area, and will show opposite colour white/black, when moving the mask. Example when adding a mask first, before painting or inverting some selected zone: only the "painted" white area is moved (or all the mask surface is/stay black) Using a selection before adding the mask: when moving the mask, it's not able to select only the original selection, and add white/black outside the layer's area. mask_before_after.afphoto If we create mask or fill layers before modifying them, painting, using a selection, etc., we can avoid this problem, but most of the time the worflow is to select something and add mask/fill layers... It would be nice if they behave the same from the start.
-
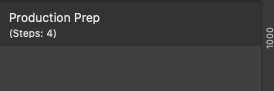
.thumb.jpg.6800ee623273eed4cf93a311483f65f9.jpg) So, here I am. I have a macro that I'm building up to apply a workflow state to production images. I recorded: creating a soft proof filter assigning the profile for that soft proof filter Set the document to "Save History With Document" changed the name of the soft proof filter with a name specific to the profile (so I can add different profile proofing for other providers later) turned off the visibility of that soft proof filter by default It all works as desired. That's the good news. The bad news? The "Save History With Document" step does not appear anywhere in the macro. Not in the edit, not in the number of steps. See the screenshots and the macro itself attached. Which is the bug? That I can include the menu selection or that the menu selection does not appear at all in the macro? One or the other has to be otherwise macros from outside sources cannot be trusted if all the steps involved are not identifiable. Whichever is the incorrect behavior, please log the bug. Thanks! [Affinity Photo 1.8.3 macOS, Catalina 10.15.4] photo_production_prep.afmacro
So, here I am. I have a macro that I'm building up to apply a workflow state to production images. I recorded: creating a soft proof filter assigning the profile for that soft proof filter Set the document to "Save History With Document" changed the name of the soft proof filter with a name specific to the profile (so I can add different profile proofing for other providers later) turned off the visibility of that soft proof filter by default It all works as desired. That's the good news. The bad news? The "Save History With Document" step does not appear anywhere in the macro. Not in the edit, not in the number of steps. See the screenshots and the macro itself attached. Which is the bug? That I can include the menu selection or that the menu selection does not appear at all in the macro? One or the other has to be otherwise macros from outside sources cannot be trusted if all the steps involved are not identifiable. Whichever is the incorrect behavior, please log the bug. Thanks! [Affinity Photo 1.8.3 macOS, Catalina 10.15.4] photo_production_prep.afmacro
-
 1. Create a style for a text frame in APu where the text is vertically centered. 2. Export the Styles Category. 3. Import the Styles Category in AP. Result: Everything works, but the text is not vertically centered aligned anymore. Textboxen.afstyles