Search the Community
Showing results for tags 'affinity designer'.
-
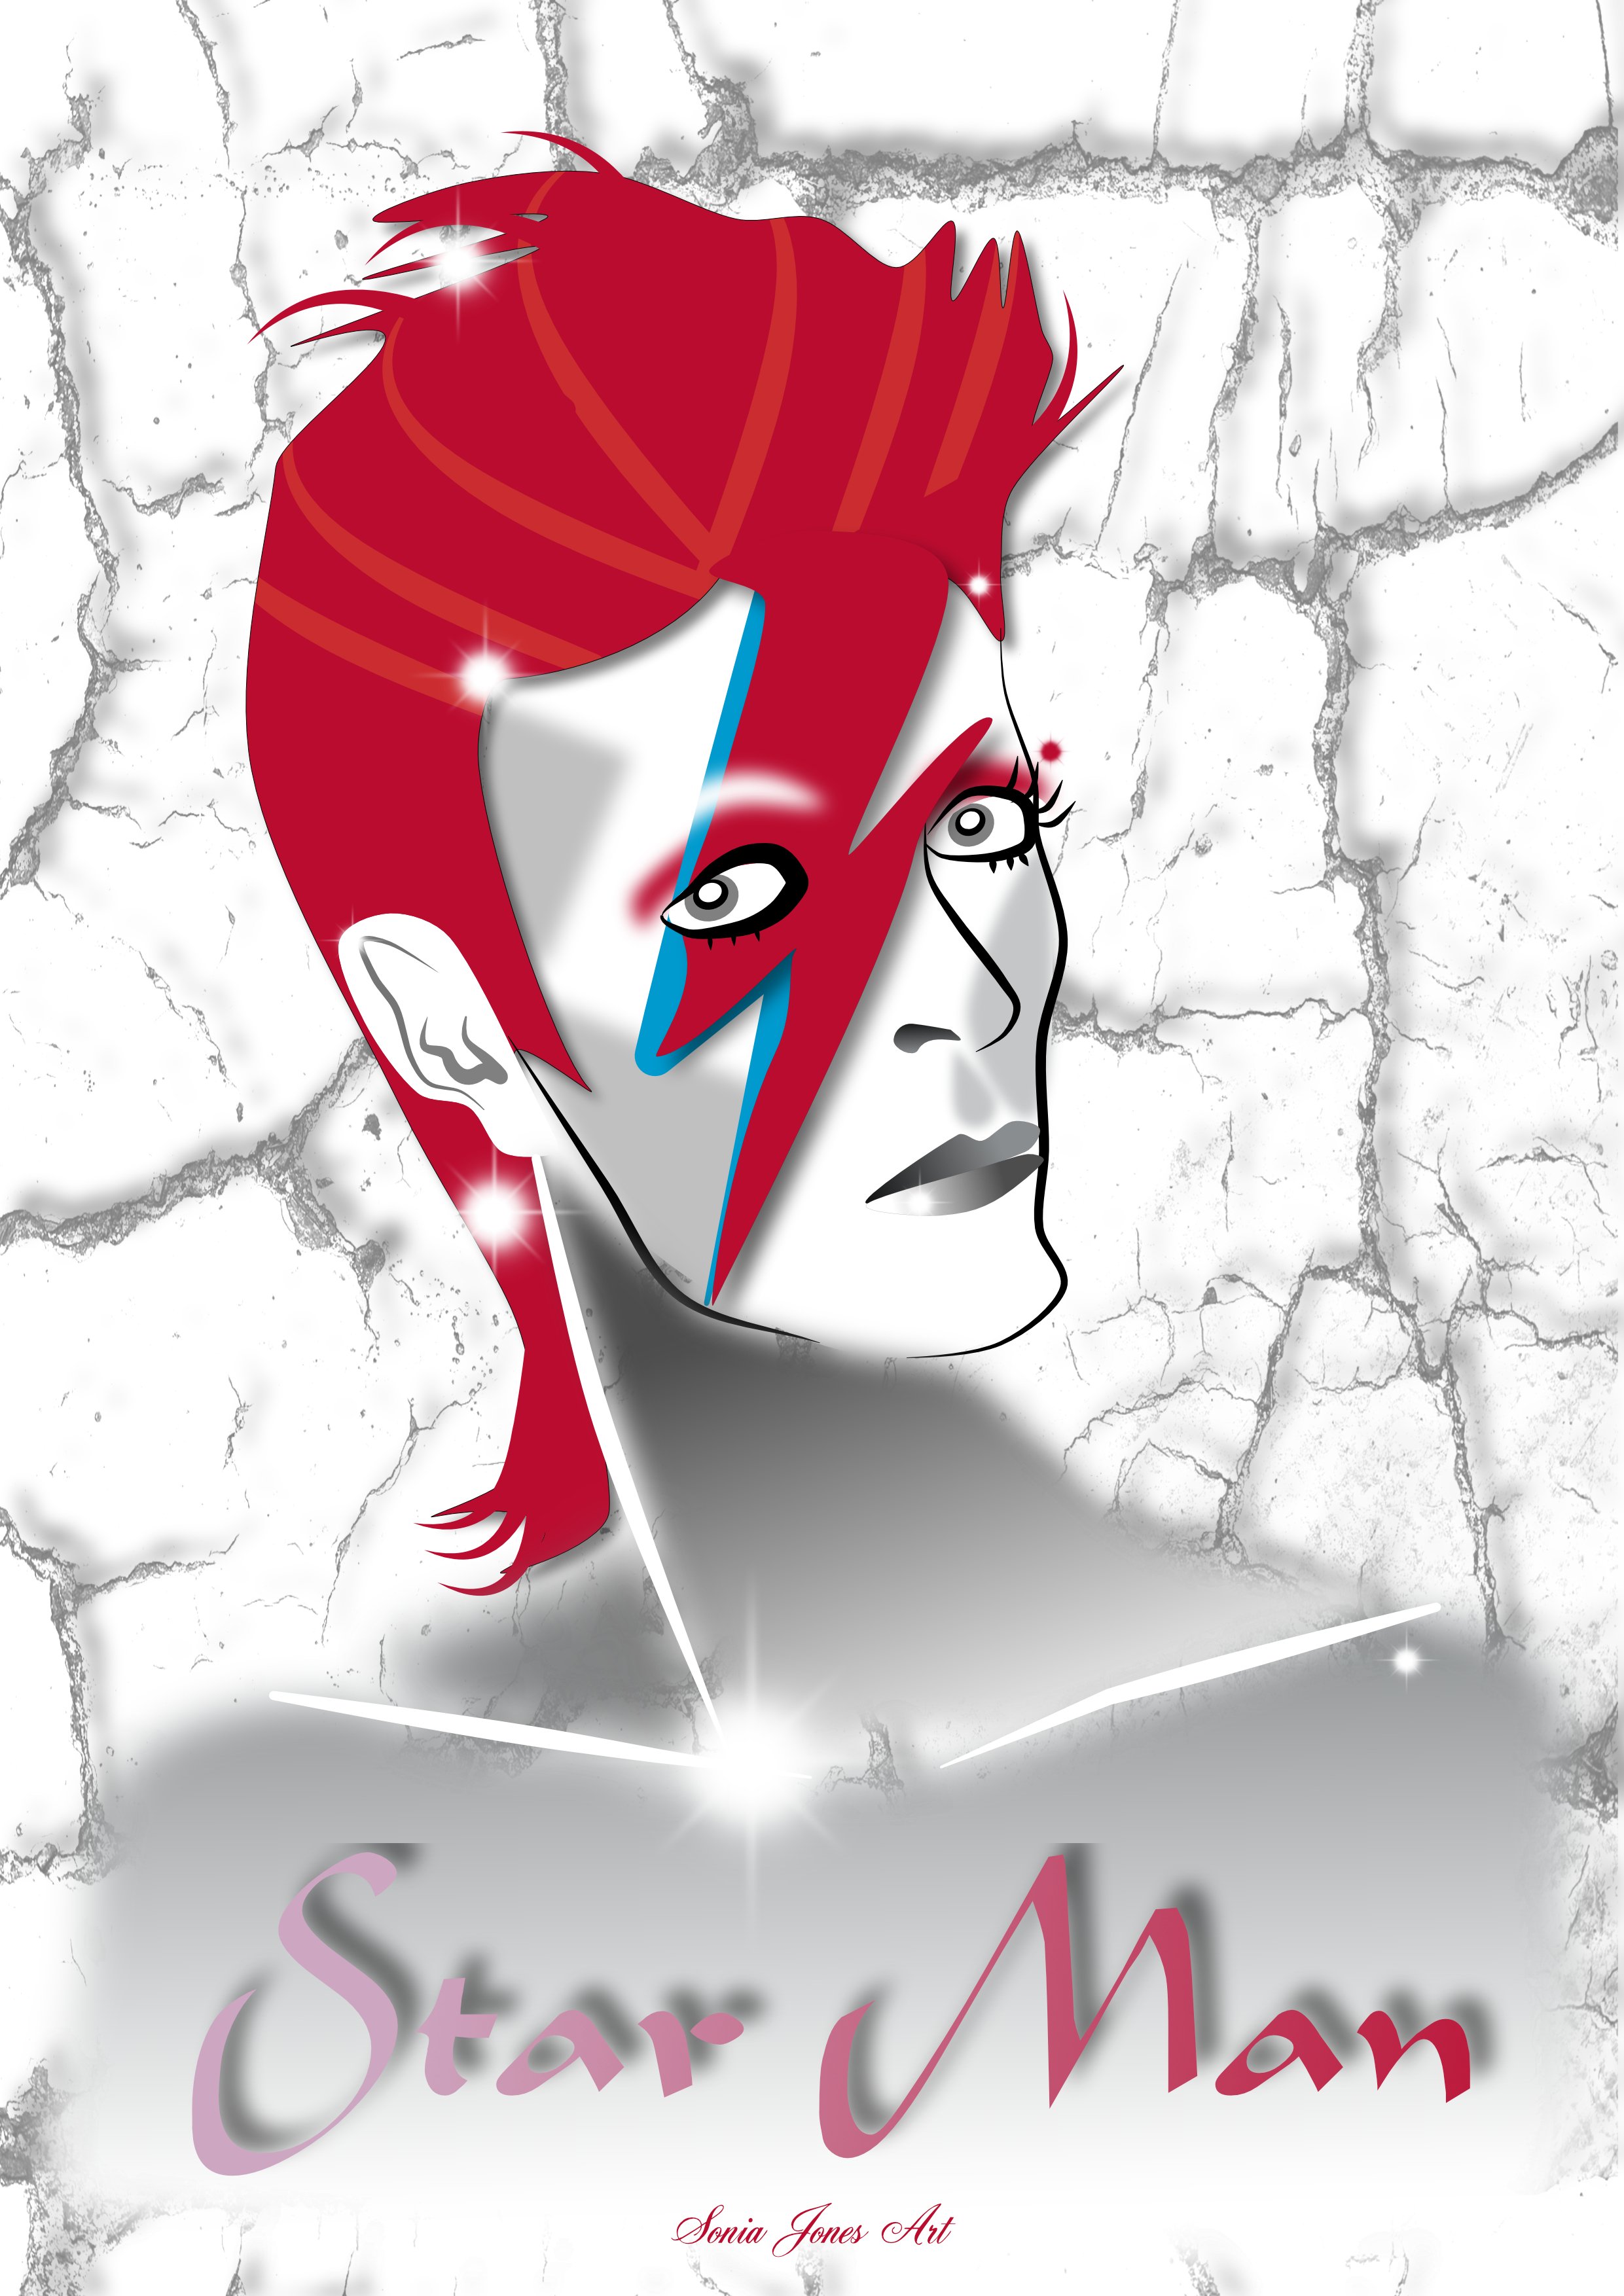
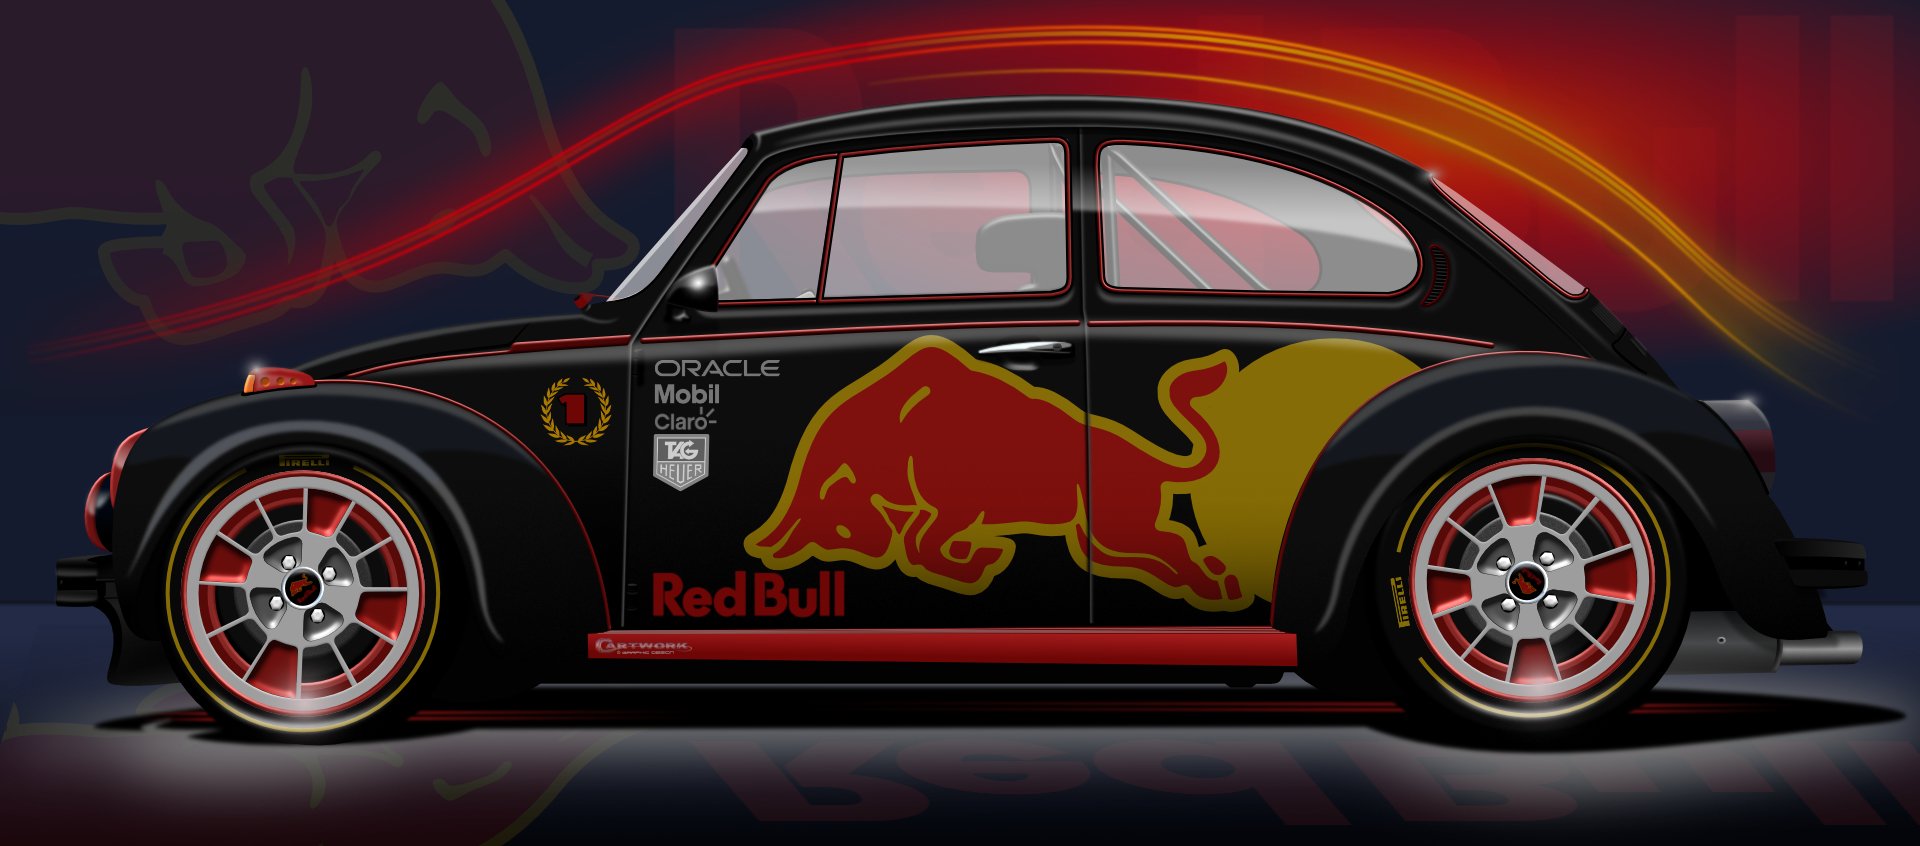
Just another study created with Affinity Designer . . . Red Bull Super Beetle

-
- 4
-

-
- beetle
- superbeetle
- (and 6 more)
-
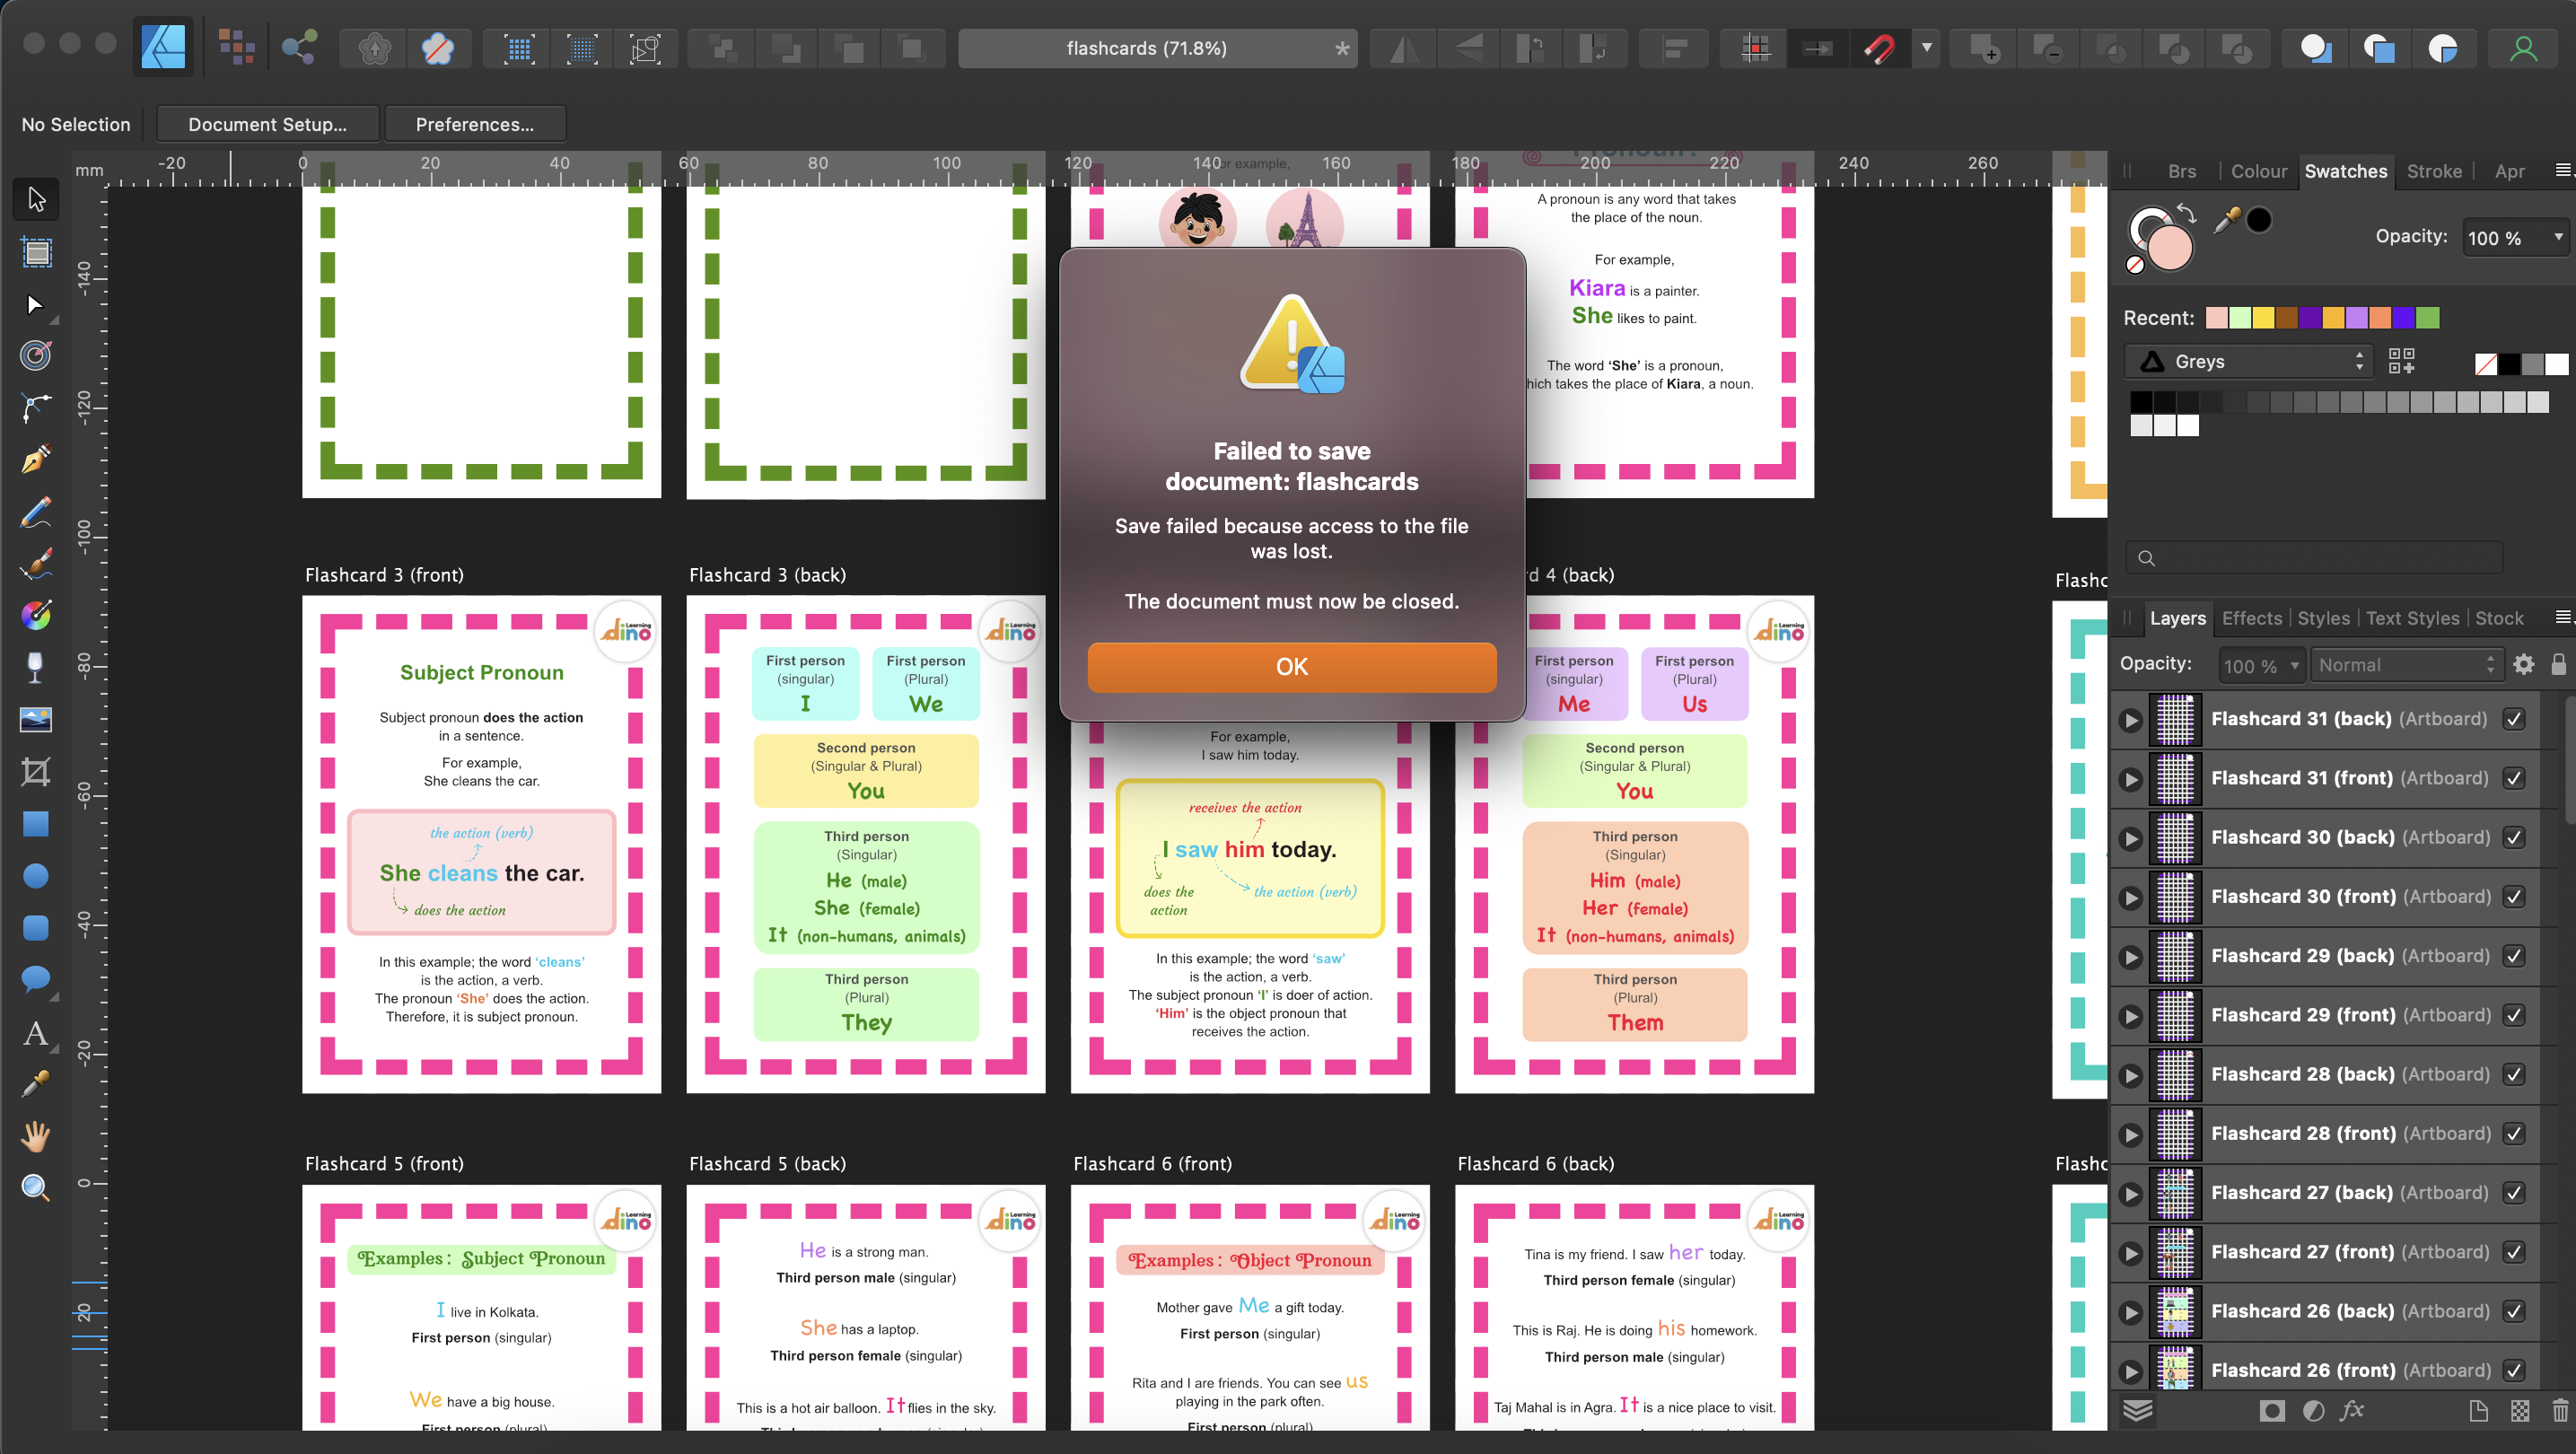
 Suddenly the file which I was working on all these days says, "Save failed because access to the file was lost". I just updated my macbook pro to mac os ventura today. I don’t know what went wrong, I'm not able to save my file after making some changes. Can someone please help me fast.
-
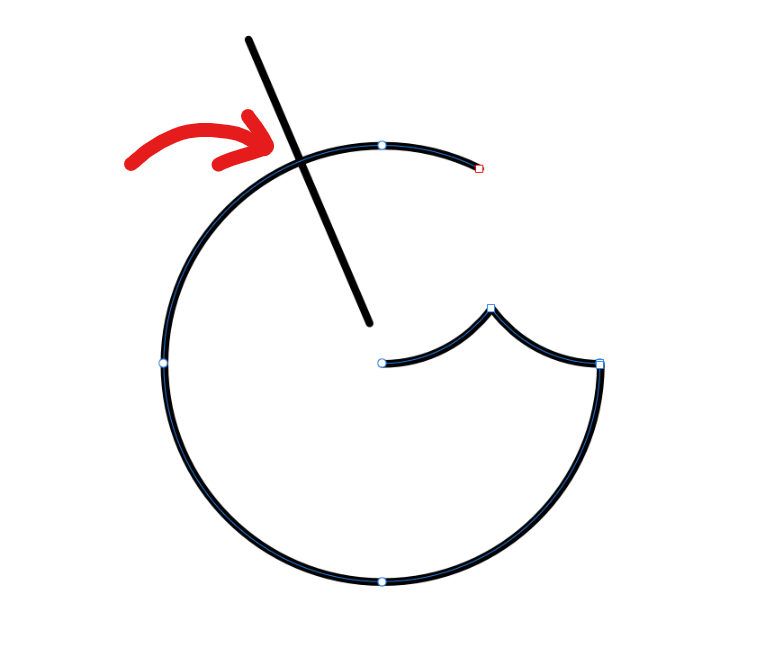
 There is an aliasing issue that occurs with shapes created with the Star, Double Star, Square Star, Cog, or Cloud tool in Designer 1.10.5 for macOS. There are various ways to reproduce this bug, but here is a reliable method that makes it quite easy to see. Create a small document (~100x100px, 144dpi). Enable retina pixel view mode, and zoom to fit. Select the Star Tool. Create a 50x50px star. Give it a 10pt black stroke, aligned to the outside of the shape. Decrease “Inner radius” and “Outer circle” to 0%. From 50->1%, the outer edge changes slightly, but the moment you reach 0%, suddenly the border is much harsher and more jagged. This same bug occurs with the other radial shape tools: Star — inner radius and outer circle to 0% Double Star — inner radius to 0% Square Star — cutout to 100% Cog — tooth size to 0% and notch size to 100%, or vice versa Cloud — inner radius to 0% This is a literal edge case, but there are circumstances in which any of these settings would be useful. For example, I encountered this bug when attempting to make a five-pointed asterisk character, which has spokes with no width besides the stroke. Affinity Designer 1.10.5 macOS 12.4 2019 MacBook Pro occurs with or without hardware acceleration no external hardware Star with 0% internal radius (left) vs. 1% internal radius (right): (for better comparison, please download the images and toggle between them) bug.afdesign
-
 Look up for vector flat tip brush for calligraphy and font creation.
 -
 I like to obtain hardcopy prints of my artwork from an online print house, in fact Viking Virtual Print House. I am in England. I upload PDF documents. The virtual print house has the option to print on both sides of the paper. I am wanting to be able to obtain a hardcopy print of artwork that I produce using Affinity Designer, with printed on the reverse a small amount of text information, such as the title of the artwork, my name, the date, whatever I choose at the time. Thus I would upload a 2 page PDF document and then order several prints of the PDF document and select that it be printed on the two sides of one piece of paper. Can I produce such a PDF document in Affinity Designer please, or do I need to add the second page using Affinity Publisher, or something like that? William
 -
 If I move a symbol back and forth between Designer and Photo and manipulate the Symbol in the linked layers of Photo, I get this weird result, where the vector shape shows as unlinked, but it remains linked in practice. 2022-10-24 14-03-41.mp4 Steps to reproduce 1. Open Affinity Designer 2. Create a rectangle 3. Convert the rectangle into a symbol 4. Go to File > Edit in Photo 5. In Photo, duplicate the symbol. Notice the symbol has linked layer properties 6. Move the top symbol to the right 7. Select the rectangle within the symbol and unlink the vector shape 8. Go to File > Edit in Designer 9. In Designer, resize the rectangle and notice how the shapes remain linked. 10. Go to File Edit in Photo Back in Photo, notice how the rectangle is displayed in the linked layers panel as being unlinked in the vector shape. 11. Resize the rectangle 12. Notice that both symbols are updated as if they were still linked by their vector shape.
 -
 hello I want to create and modify icons but when I export them in svg to use them in react I have a problem either I have the icon displayed well but I can't use the fill css to change the color or I don't see the curves and I can change the color and I have to edit the svg to remove this from the file otherwise I have compilation errors in react <?xml version="1.0" encoding="UTF-8" standalone="no"?><!DOCTYPE svg PUBLIC "-//W3C//DTD SVG 1.1//EN" > and xmlns:serif="http://www.serif.com/" here are some examples a digital svg export no curve but takes the color and one in flatten with the curves but fill css doesn't work I tried full export option but still same result did i forget to do something i am new to affinity publisher and designer logo.afpub
-
 Please see video below; when selecting a font with mouse it's all fine and hover works. But when using a keyboard shortcut (like hitting 'B' to go to a font starting with a B, than Affinity Designer immediately freezes, crashes and after a few seconds shuts down. Using windows 10. affinity-crashes-on-keyboard-use-in-font-dropdown.mp4
 -
-
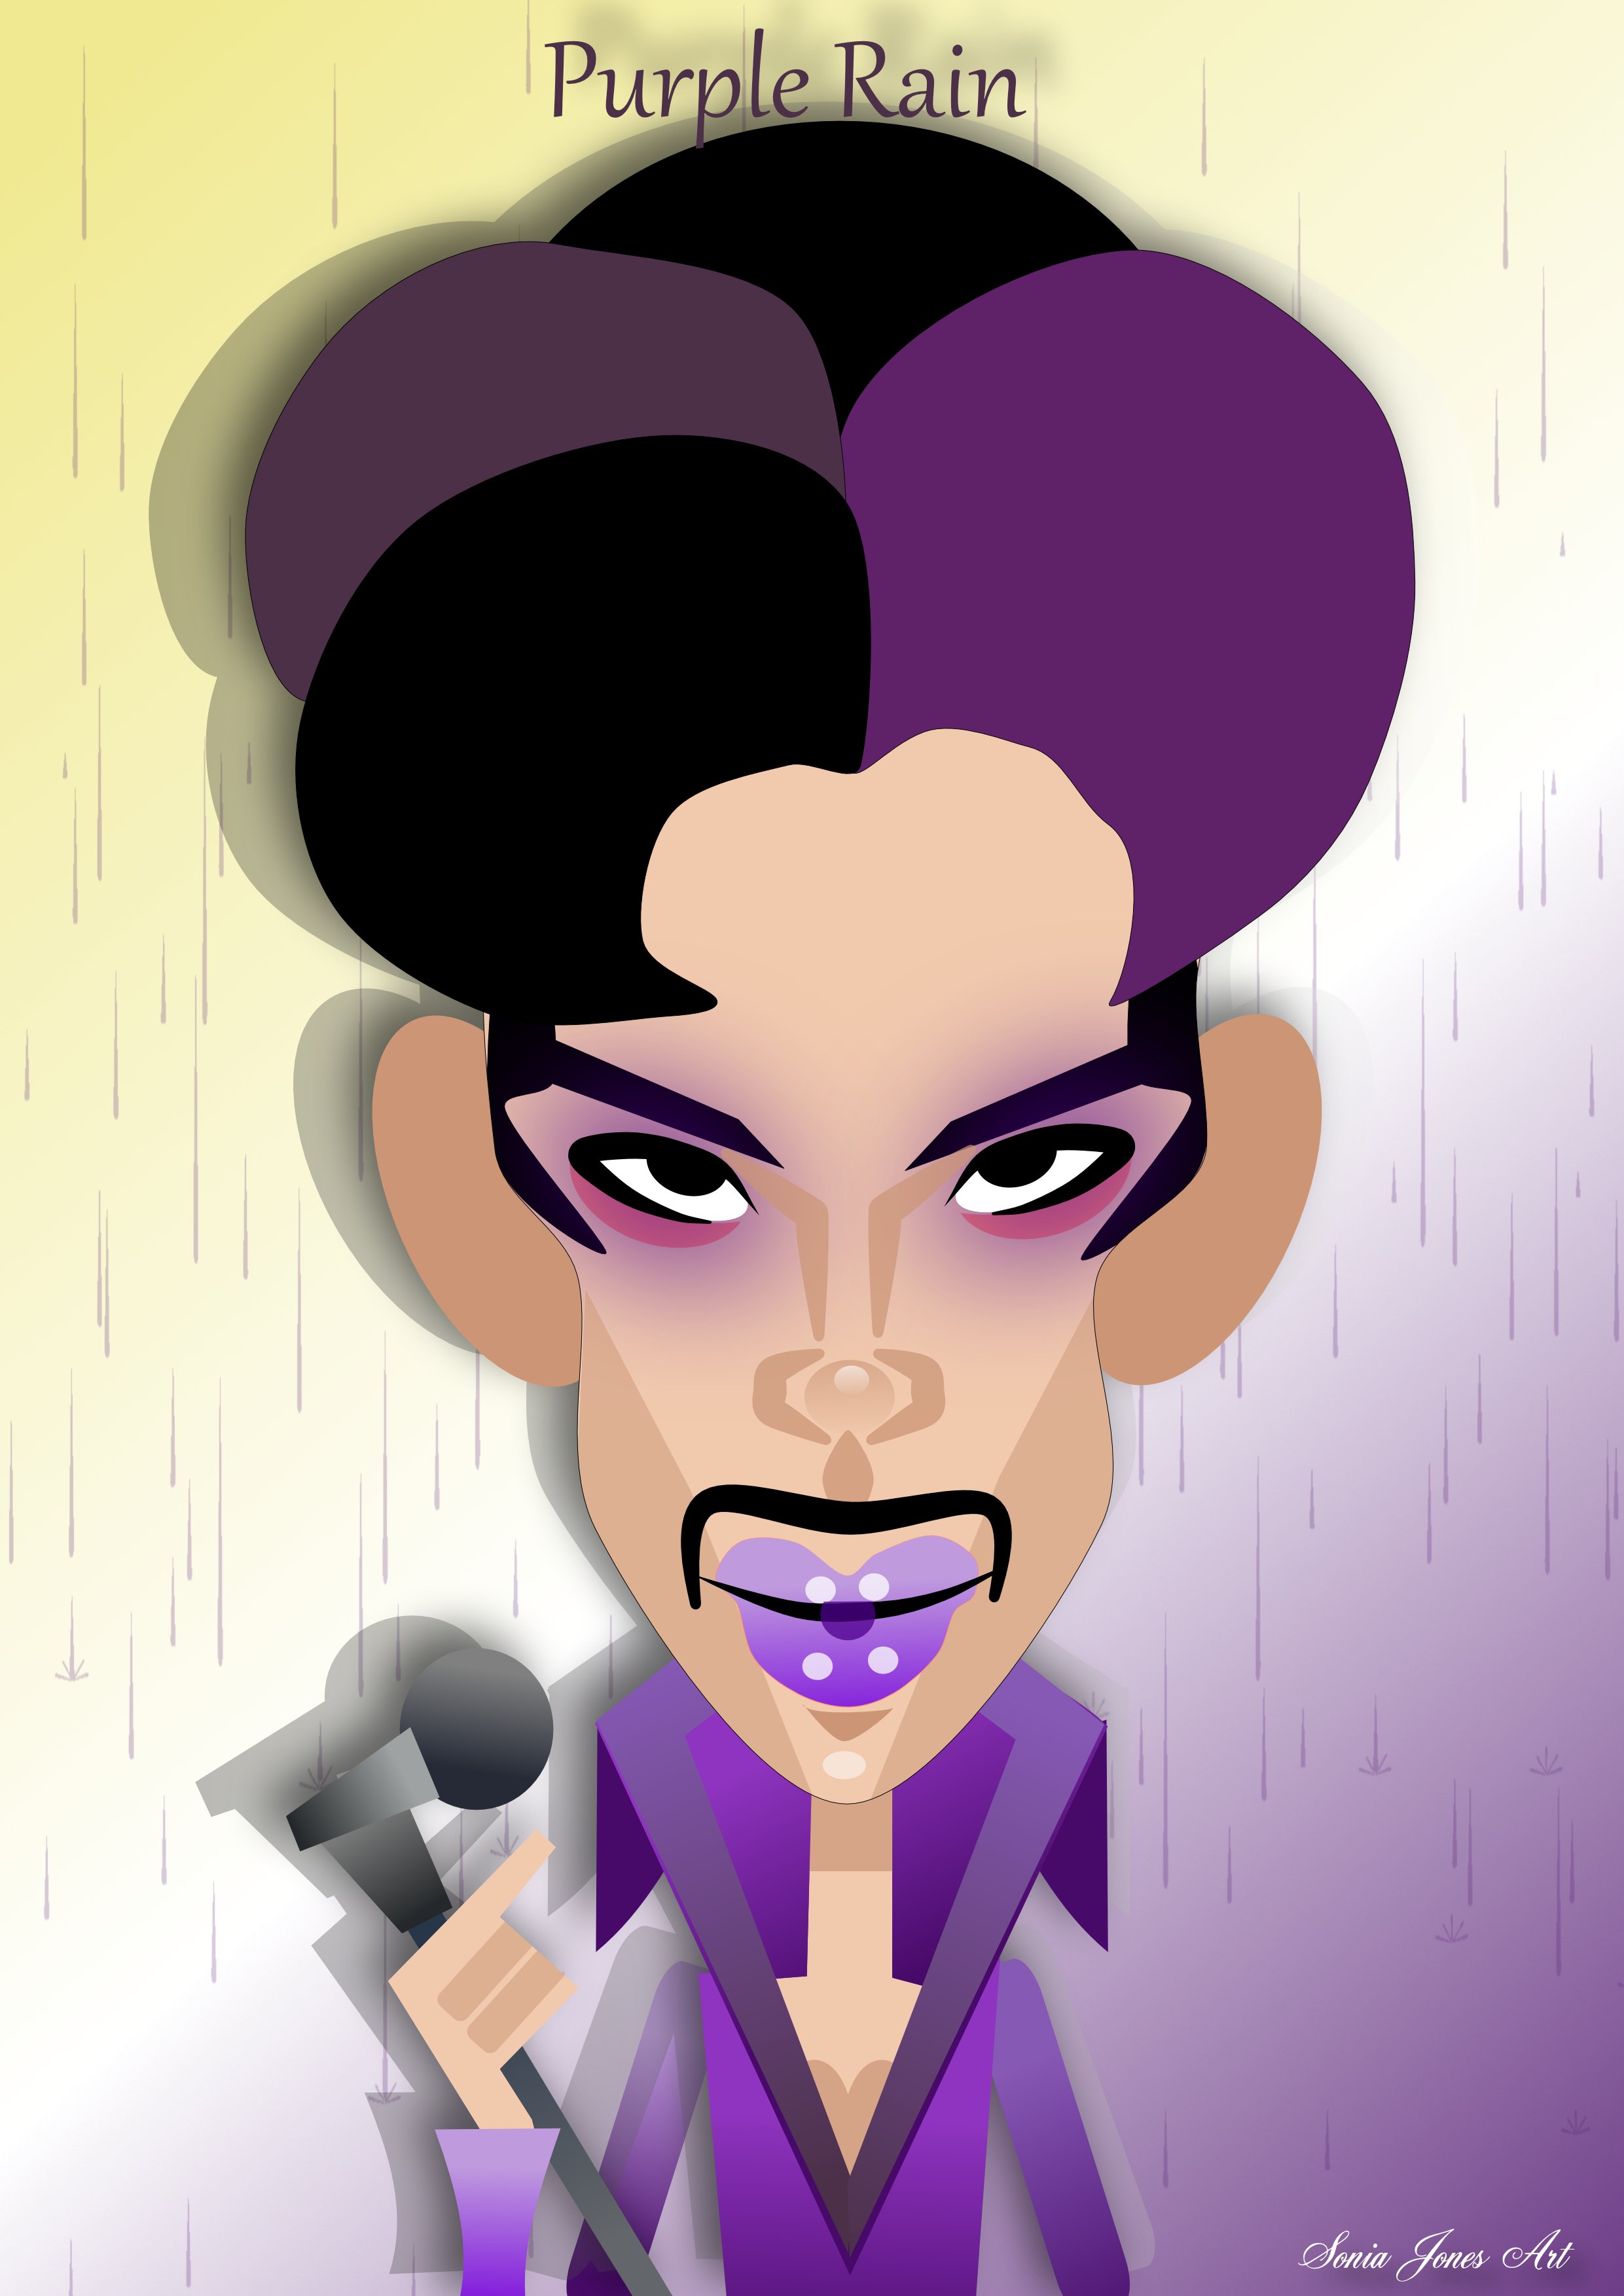
 Created with Affinity Designer. Still working on details but would be interested in feedback
- 9 replies
-
- 12
-
-

-
- christmas
- christmas card
- (and 1 more)
-
 At least one person asked for UI scaling two years ago (after a short search online). Still nothing implemented. I can understand that if you hadn't thought about that requirement initially, it may be hard to code up for the entire UI. Can we at least get the brushes panel to scale the images previews of brushes and can we have text names inline also instead of having to scroll through thousands of brushes to find one or make new sets of brushes from old ones every time we need a new specific style. The colour swatches allow for text which helps a lot in some circumstance. They can also me made different sizes so I know it cannot be that hard to do for the brush panels. Worry about full UI scaling later.
 -
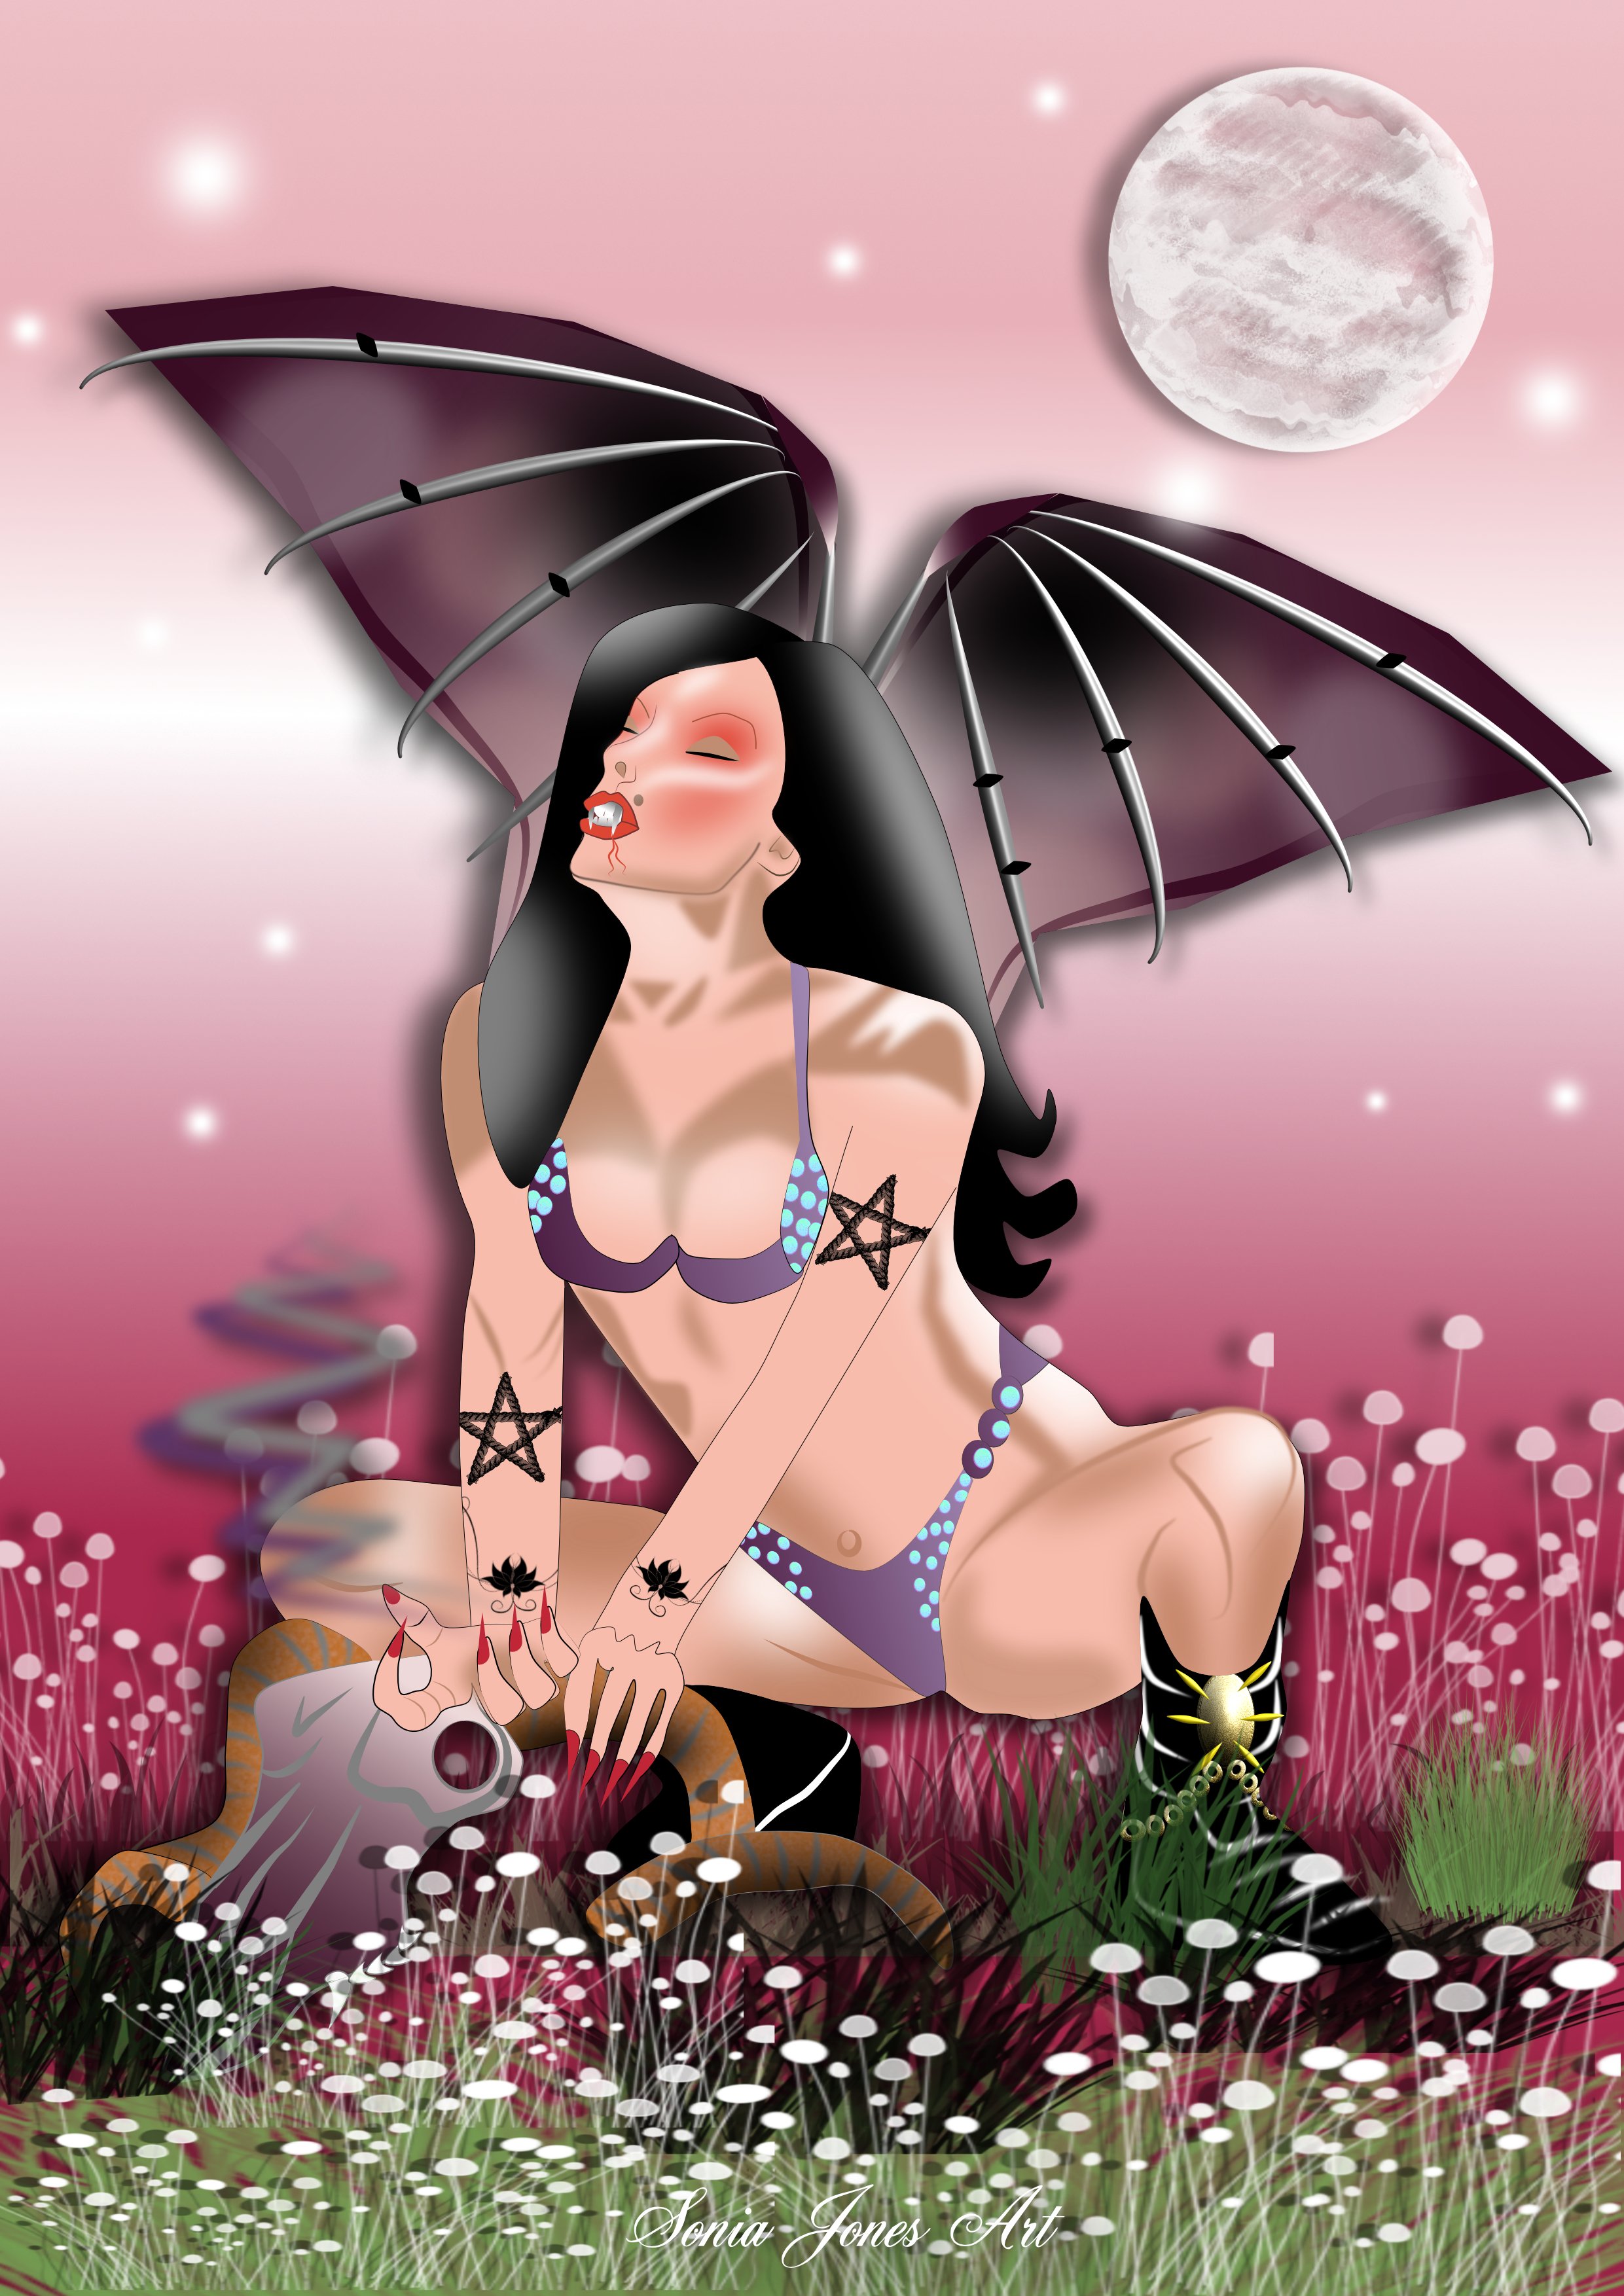
I’ve been sketching a lot of wolves lately as a basis for this werewolf character design, so hopefully it’s helped ☺️ feedback welcome
- 14 replies
-
- 1
-
-
- characterdesign
- vectorart
- (and 4 more)
-
 Hi there, I'm new to the forum and hope that everyone is doing well. I have a question in regards to dynamic guides in Affinity Designer. As I looked around on YouTube searching for a guide on how to create vector brushes in Affinity Designer I came across the following tutorial: After a straight line is created with the pen tool, at the 1:35 mark it shows nodes being added with the node tool and you can see pixel measurement displayed of how far apart consecutive new node is from the existing nodes. I'm using the latest version of Affinity Designer for Windows and snapping is working but no measurement gets displayed. Only when I place the nodes on the line first, then select one with the node tool and drag any of them on the line does the measurement display. But according to the video this should also happen when you just hover the mouse over the line with the node tool selected prior to placing a node. What am I missing? Thanks in advance, Tom
 -
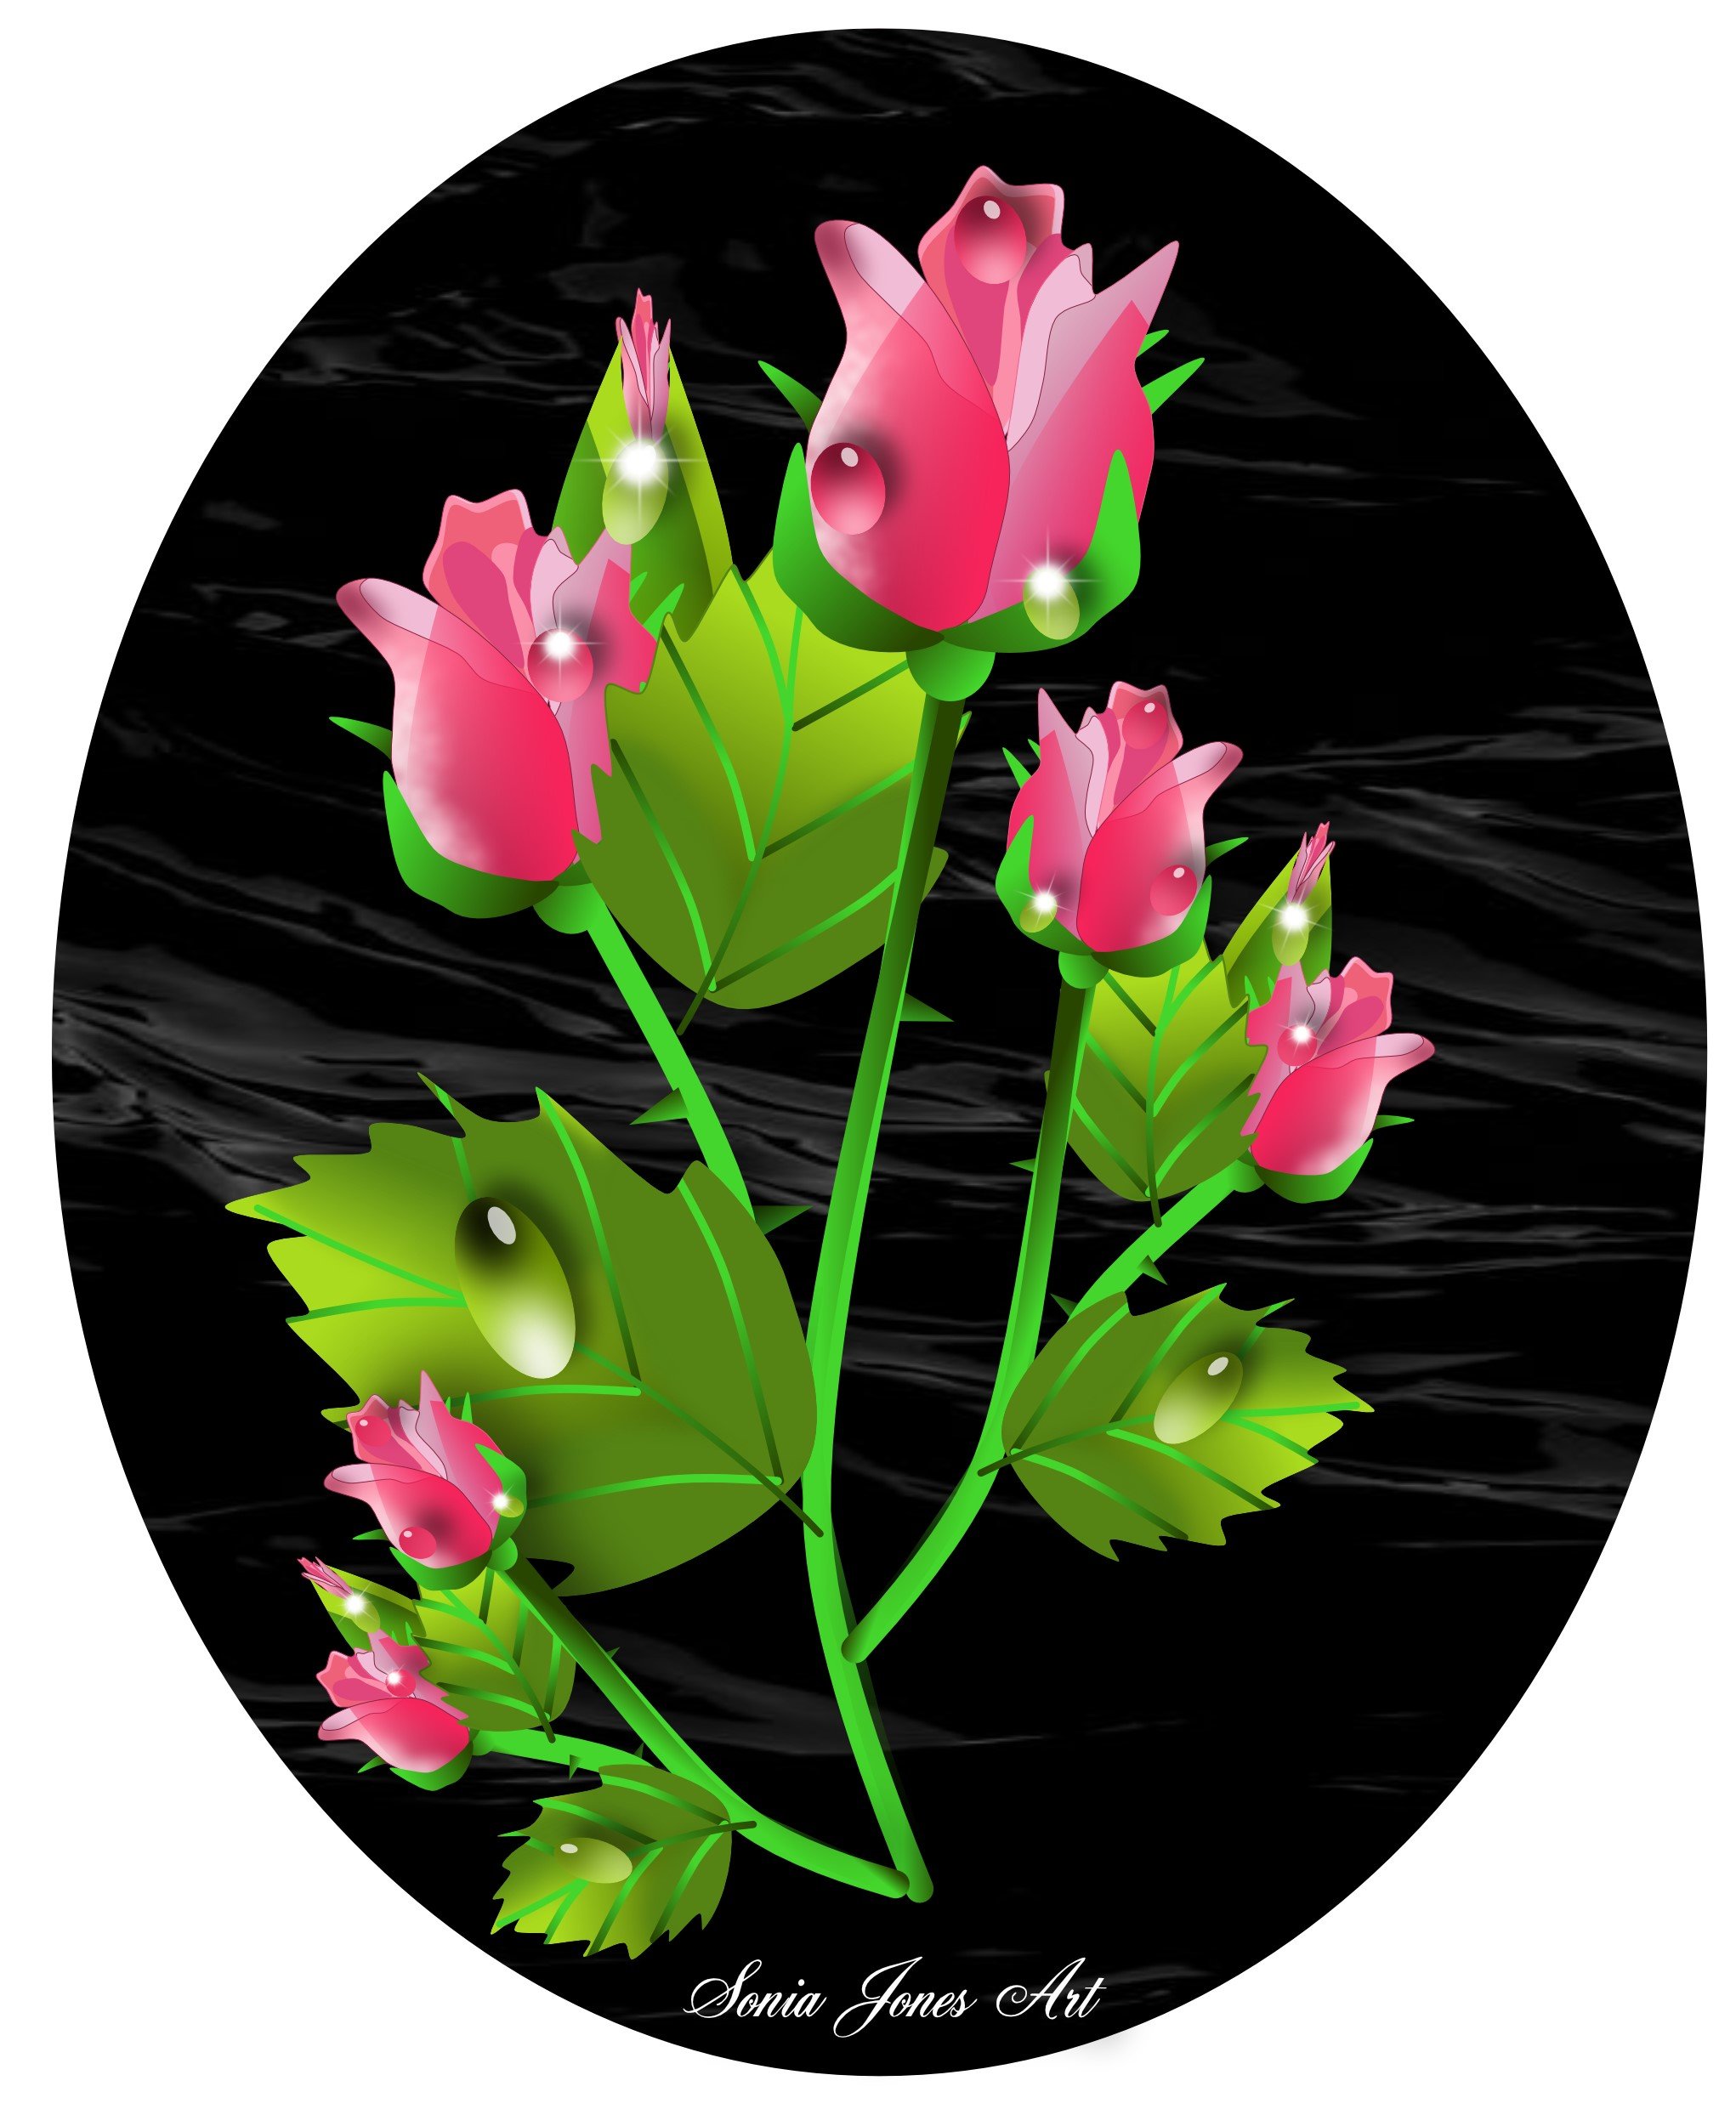
2 more vector illustration i love Affinity designer >)
-
 Hi all. very new to affinity in general so go easy on me 🙂 🙂 im wondering whats the best way to have links to other `.afinitydesgin` file or `svg/pdf` when creating a sketch in affinity design im trying to create a floorplan but i want to have links in each room to separate room sketch (see image attached) any idea on how this can be achieved? thanks so much in advance Z
-
 Hello. I'm attempting to upload art made in Affinity Designer to Teespring. I export as a PNG, Resample: Bilinear and don't resize the image larger when creating my listing. After creating the listing, the preview looks pixelated. Other shops don't have this pixelation problem on their product pages. I'm concerned about the quality of the shirt. Their design tips say to turn off anti-aliasing in Illustrator. Can I achieve a similar result in Designer to prevent pixilation of a printed product? I see an export option for nearest neighbor but I don't fully understand this or if it will allow my design to be printed with high quality. The artwork are vectors and they are only pixelated when uploaded to the shop. What would you suggest?
-
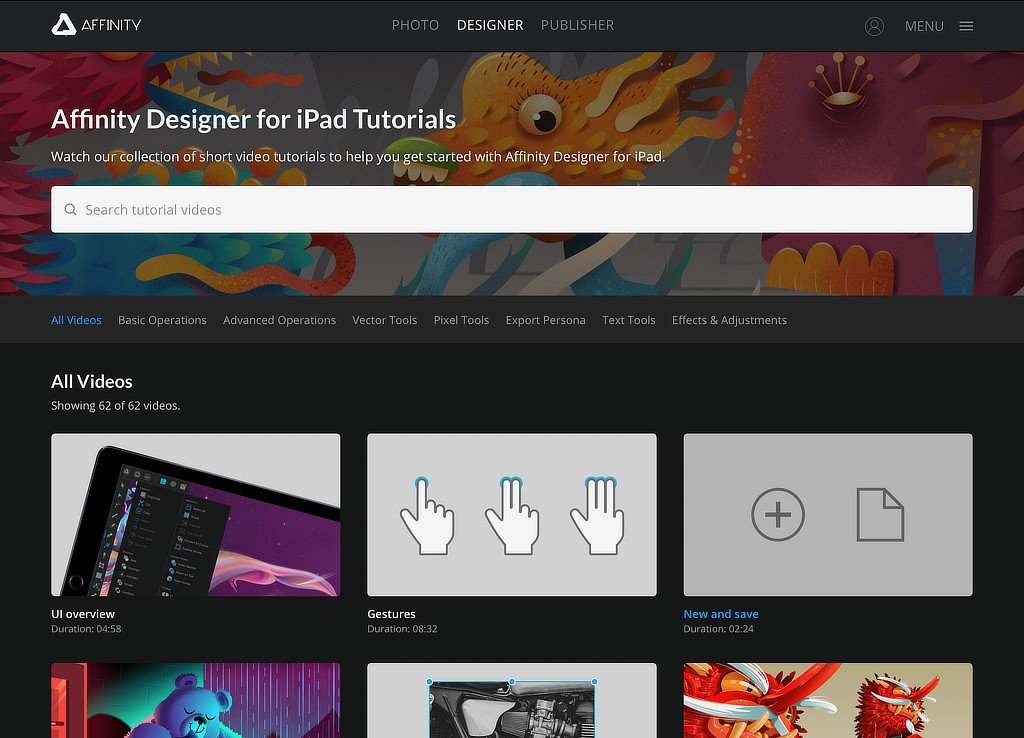
 We’re really happy to provide a brand new set of tutorials to accompany the newly launched Affinity Designer for iPad app. The tutorials are all available from the app’s Home screen via the Tutorials option at bottom left. You can also access them here: https://affinity.serif.com/tutorials/designer/ipad/ Some tutorial facts.. 62 video in total Seven tutorial categories Shot in 4k resolution Subtitling for eight languages (DE, FR, ES, IT, PT-BR, RU, JA, zh-Hans) Different tutors for specialist areas Here’s the full tutorial list.. Basic operations UI overview Gestures New and save Open and import Placing images Pan, zoom and rotate canvas Selecting Moving, resizing and rotating Grouping Ordering Layers Studio Align and distribute Copy, paste and power duplicate Undo, redo and history Quick export Advanced operations Art-boards Symbols Assets Studio Snapping Constraints View modes for pixel preview Vector Tools Pen Tool Node Tool Advanced curve drawing Editing strokes Pencil Tool Shape tools Corner Tool Boolean operations Colour Picker Tool Fill Tool Advanced colour Gradients Transparency Tool Vector Brush Tool Managing vector brushes Pixel Tools Pixel Tool Paint Brush Tool Advanced brush options Managing raster brushes Smudge tools Erase Brush Tool Flood Fill Tool Flood selections Drawn selections Selection modification tools Smart Selection Brush Tool Refine Selection Tool Export Persona Slice Tool Export Persona - Slices Studio Export Persona - Layers Studio Text Tools Frame Text Tool Art Text Tool Advanced typography Text on a path Importing fonts Effects & Adjustments Applying adjustments Masking adjustments Layer effects Advanced layer effects Blend modes Styles If you have any feedback, please comment on this thread. Best wishes Affinity documentation
-
 Good day everyone! I am trying to add a node here(refer to Sketch.png attached). I couldn't achieve it using the node tool, as it doesn't snap to the intersection. In Adobe Illustrator, we can achieve this by selecting both the open paths and selecting "divide" in the Pathfinder panel. When I do the same in AD, the straight line disappears and the open path(selected path) turns to a closed one. I'm trying to figure how to achieve this simple thing in AD. Please help!
-
Ii had to do Elm hill in vector I have already painted it in acrylics, a few years ago, so yesterday i set myself the challenge, this is the result
-
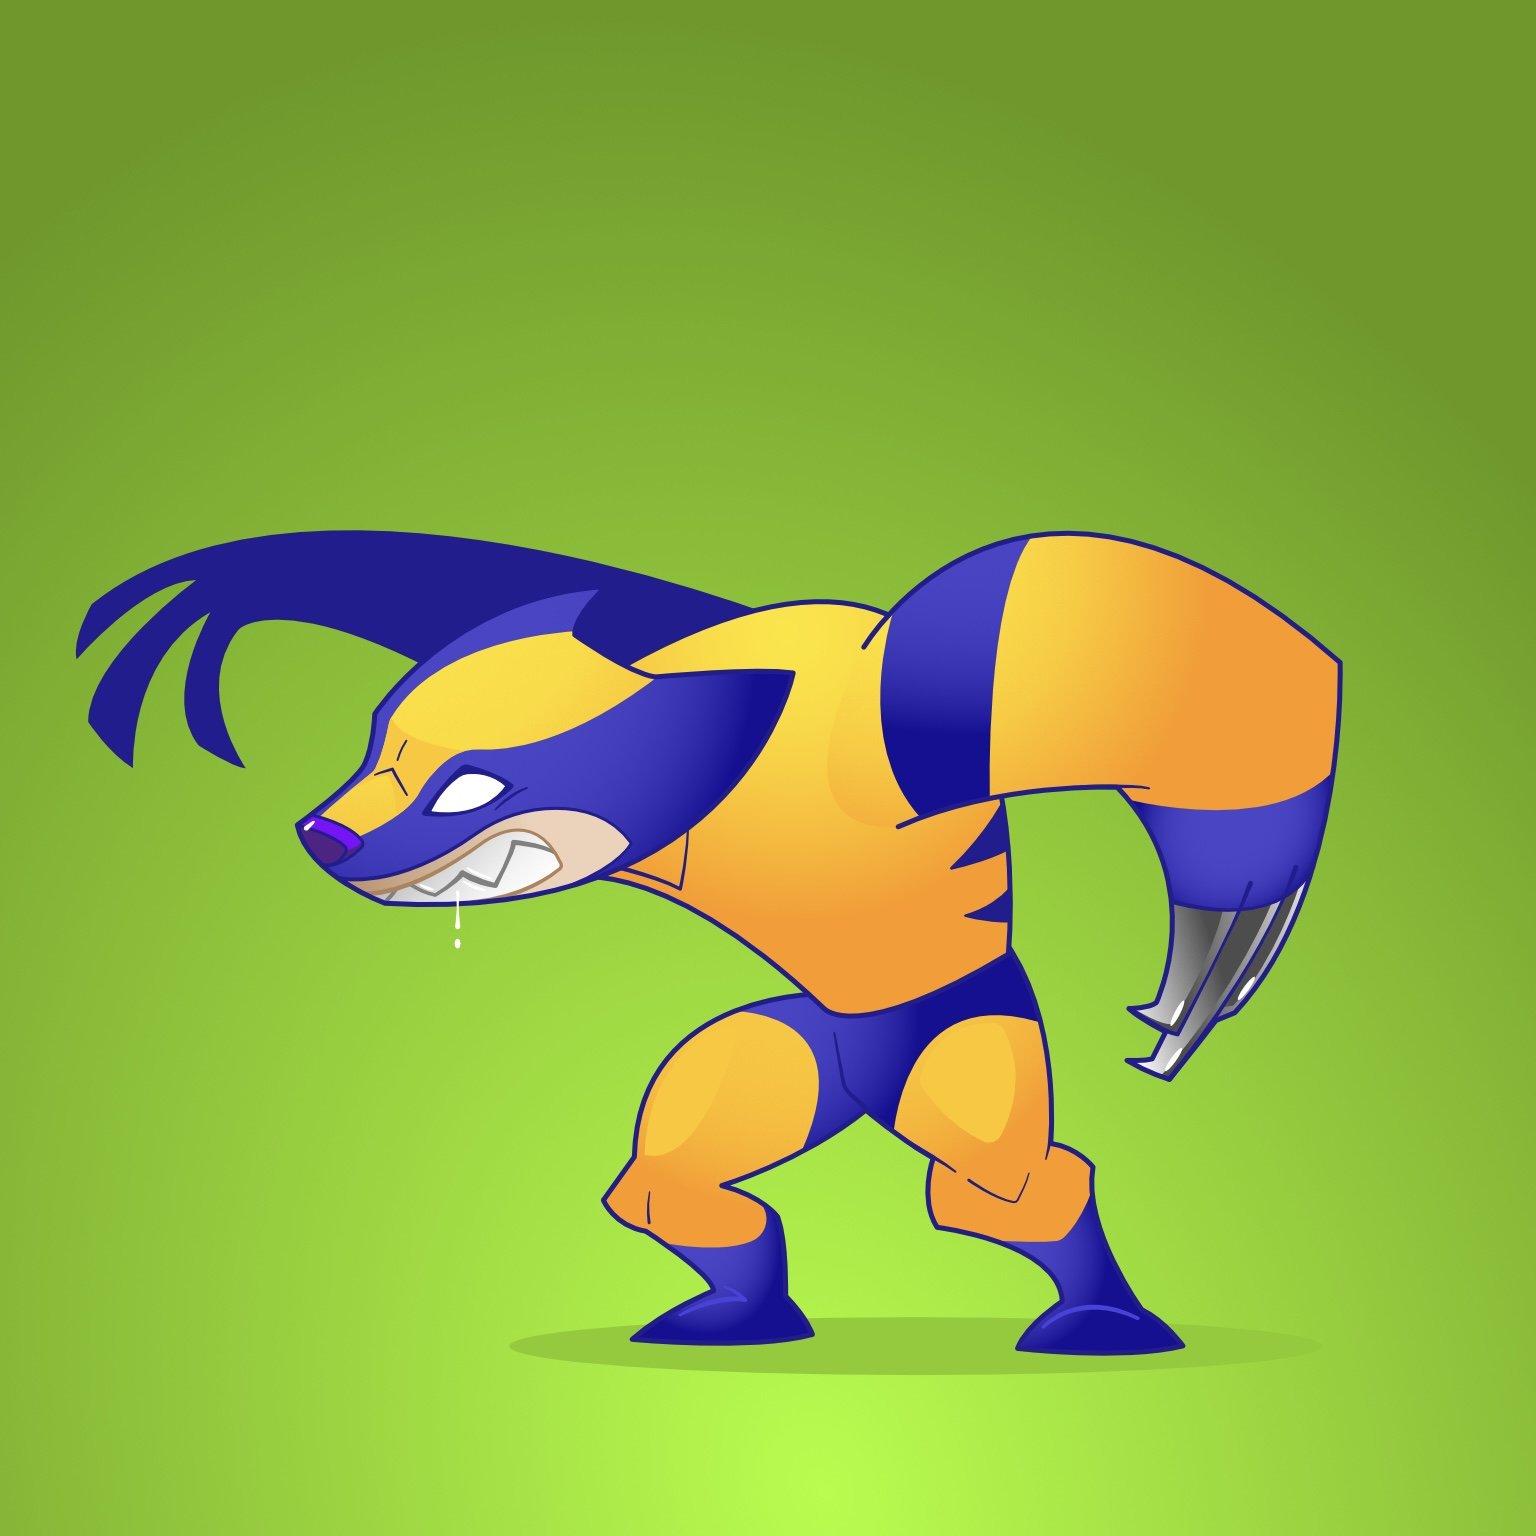
I’m trying to decide which works best… or wether or not he should have a tail
- 6 replies
-
- 6
-
-
- illustration
- marvel
- (and 4 more)
-
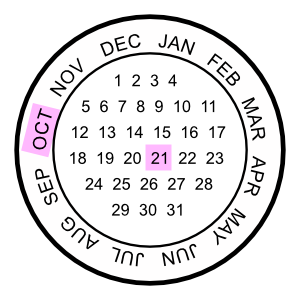
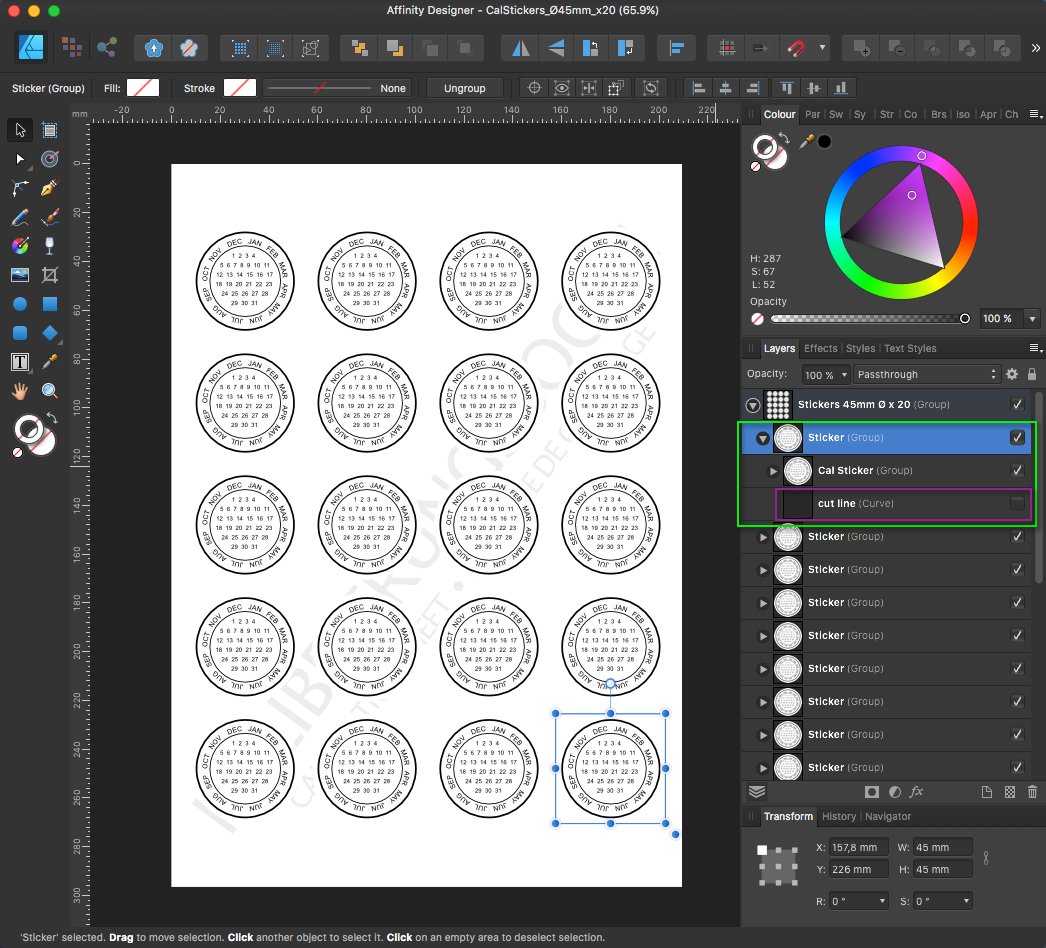
Here are some calendar based round reminder stickers, which can be used to place/glue on important dated things not to forget. Like for example " ...don't forget to sending the damned package until a specific date to someone..." and the like. The initial Sticker created here is a Ø45 mm one (...but can of course on demand be also scalled up to other sizes since it's vectors...) ... Personally I tend to print such reminder Stickers out on matching rounded Avery label sheets (in this case on Avery sheets of Ø45 mm x 20 round labels) ... ... here each of the same 20x Ø45 mm Stickers is in it's own Sticker-group, which in turn has a hidden cut line curve, since the later (a cut line) is not needed when printing onto Avery round label sheets. The sheets background text layer can be hidden or deleted before printing! - If needed you can of course adapt these Calendar-Stickers to other Ø-round sizes, since there are a bunch of different size Avery label sheets available! Hint/Tip: Before I forget, I mostly mark the reminder dates afterwards manually by hand, but you can also mark those directly inside ADe etc. if needed. For some marker colors see for example this Touch Twin Markers Palette and the like under the forums Resources section! Here are the corresponding Affinity Designer template files: Sticker-1x-Ø45mm.afdesign (1x Sticker Ø45 mm on white background) Sticker-1x-Ø45mm-transp.afdesign (1x Sticker Ø45 mm on transparent background) CalStickers_Ø45mm_x20.afdesign (20x Sticker Ø45 mm for Avery round labels sheet) - Have fun!
- 3 replies
-
- 7
-
-

-
- affinity designer
- vector
- (and 5 more)
-
This is a picture i painted way back 2011 in water colours. i decided to try and do it as vector
-
 Affinity Designer on the windows desktop was forcibly closed when I was looking for fonts in the search field, has anyone experienced this too? I don't know if this has anything to do with windows 11 22H2, but I never experienced this before updating my windows to 22H2
 -
https://youtu.be/krNiuOL6eF8 how i made this on https://youtu.be/krNiuOL6eF8
-
I am unable to start Designer 1.8.1 under Mac OS X 10.8.5. The splash screen comes up for about 78 seconds then disappears; no loading beyond that. Crash report attached. Any suggestions? Thanks in advance. Affinity Designer_2020-02-28-140633_MacBook-2.crash


.thumb.jpg.3383878d171da014e885a46d630e214c.jpg)