Aad Slingerland
-
Posts
172 -
Joined
-
Last visited
Everything posted by Aad Slingerland
-
 Greetings Callum As you requested I digged into some more settings and found a solution. When using the default Epson printer settings for Color Correction (which is automatic) the artefacts do appear. See image 4R_epson_color_correction_utomatic.jpg. And now for a big surprice. When setting the Color Correction for the Espon printer to None the issue is fixed! See image 4R_epson_no_color_correction. And yes I know that enabling Color Correction for the printer and in the application is not the optimal way to work, but it is just what it was. With Regards, Aad
-
Given an image of a Nikon D750 in .NEF format that has been passed through the Develop Persona in Affinity Photo and provided in the Photo Persona with an additional layer with a simple Frame Text. If I make a print of this image with both layers active then the print is in order (see image with_textbox_print_okay.jpg). If I make a print of this image with the Frame Text layer inactive the printout will have two black bands in the shape of a small triangle (see image without_textbox_black_artifacts.jpg). Affinity Photo: version 2.5.0 Settings, Performance, Hardware Acceleration is on (and tested with off as well) (NVIDIA GeForce GTX1070) Operating system: Windows 11 version 10.0.22631.3593 Printer: Epson XP-55 , up to date software Print size: 5R (5 * 7 inches) Fit Type: Fit to Printable Yes I can reproduce this. However, I do not know if this phenomenon was also an issue in older versions of Photo because this Frame Text addition I am now using for the first time. Any suggestions? 20240505_164541_38.afphoto
-
Most of the time when needed I use "OBS Studio" which is a open source product. Many features but a little difficult to start with. See also https://obsproject.com/
-
Unable to open image
Aad Slingerland replied to Olof's topic in Pre-V2 Archive of Desktop Questions (macOS and Windows)
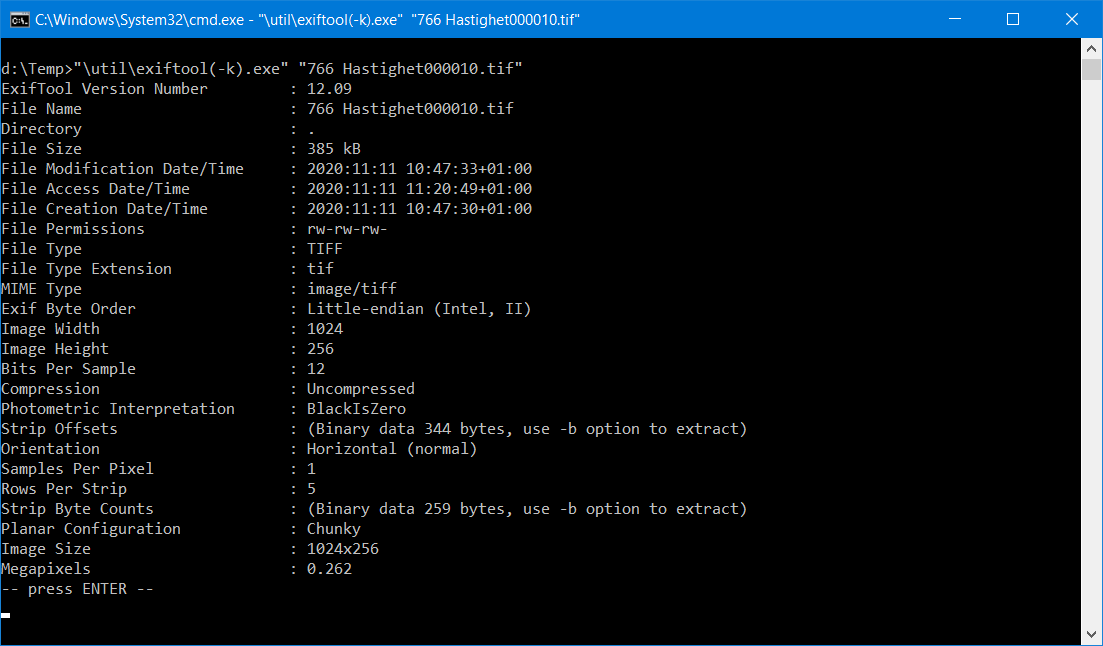
FWIW indeed opens in my irfanview and ImageGlass as well. I did have a look at the structure of the TIFF file with the utility exiftool.exe (windows, this is the link: https://exiftool.org/). See also screen shot below No errors wer reported though. IMO this post could best be picked up by one of the Serif people for further investigation.
-
Unable to open image
Aad Slingerland replied to Olof's topic in Pre-V2 Archive of Desktop Questions (macOS and Windows)
I checked this with AF version 1.8.5.703 and te beta version 1.9.0.834. No luck just a blanc image. Windows Explorer shows at least something in the preview pane. I can only confirm this, no solution however. -
Are you using File, Save or File, Save As?
-
Guess not. I just made two macros named LayerDown and LayerUp and they can be invoked form the Macro panel. But this is pointles since we cannot assign a keybord shortcut to a macro AFIK.
-
Plz have a look at this thread:
-
I sometimes use OBS studio, this is open source so no license fee involved, BUT this application takes some time to get acquainted with ...
-
Greetings Kellye2, This IS working in AF. So would could go wrong? Do you have one layer (default name is Background) or multiple layers? Are you working in the Photo Persona? (the default after opening a file with jpg or png extension) is it possible for you to record this sequence in a short video you could place on this forum?
-
Launch AF with the Ctrl key pressed and you get a "Clear User Data" window. Might help.
-
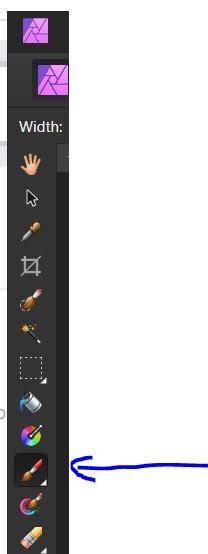
When you have selected the paint brush tool in the toolbar you should see the paintbrush related settings in the context toolbar. See also images below...
-
Disappearing changes
Aad Slingerland replied to palermo's topic in Pre-V2 Archive of Desktop Questions (macOS and Windows)
Assuming no cat is walking over your computer and tablet this is very hard to pinpoint. My system is windows and I never experience such 'sudden' changes. Since you posted this on _this_ forum I assume this 'behaviour' does not occur in other applications? -
What does the background look like? Is it possible to isolate your model from the background by selecting her?
-
Thanks Ron, I'll have a look at these tutorials....
-
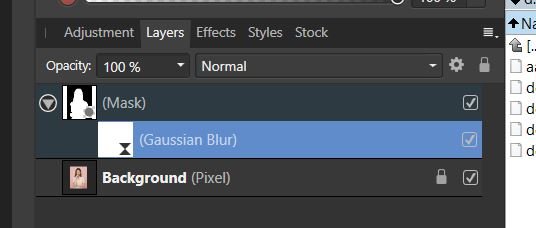
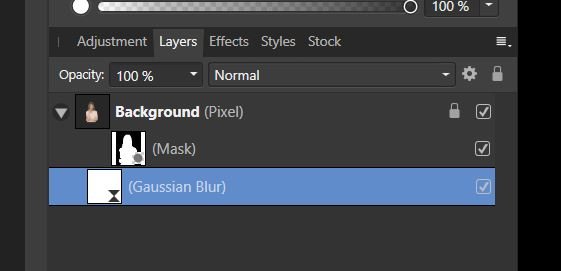
Bummer! The only weird thing I experienced now is that the Live filter layer wont let itself nest as a child layer of the Mask. I had to move the Mask layer to the top first and then pull the Gaussian Blur down as a child of it. For the total effect it makes no difference if I leave the Mask layer (with its child) on top of the stack or pull it down below the Background. Here are the results (with the blur way to overdone)
-
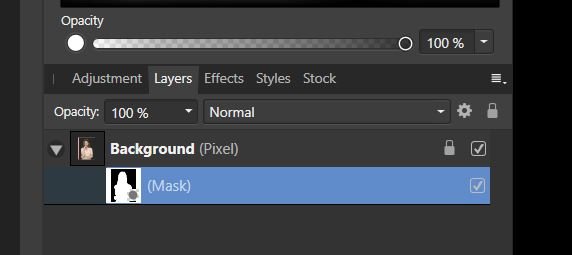
Greetings, For some pictures I would like to add some blur (Gaussian blur in this case) to a mask so the effect of that mask is kind off softened. I followed various tutorials but now I am stuck on some 'strange' effetc of the Gaussain blur. The attached picture "demo_mask_with_blur_1.png" and the corresponding (partial) screen shot of the layers panel "demo_mask_with_blur_1_layers.jpg" show the situation just before a Gaussian blur Live filter layer has been applied. So far so good. The attached picture "demo_mask_with_blur_2.png" and the corresponding (partial) screen shot of the layers panel "demo_mask_with_blur_2_layers.jpg" show the situation just after adding a Gaussian blur Live filter layer and pull it down as a child layer of the mas and setting the blur value to 20px. The content of the picture is blurred, not the mask effect. What did I do wrong? Is this not the correct 'recipe' for my goal? Hope to hear, Aad.
-
Maybe a small macro can help when converting a bunch of .afphoto files to 300 dpi ?
-
Hello RyanH99 First of all Welcome to this forum... You do not see the Persona buttons YET because if you open a RAW file you start in the Develop Persona. There are two buttons in the upper left of your screen. Just press Develop to get your first image in the Photo persona.
-
I'll send you one... Nikon D750 RAW. And yes Nikon RAW images (.NEF extension) always show up in 300 DPI when developped. dsc_2505.nef
-
Hello Big_Stan, In this particular case I suggest you try the Selection Brsh tool. With a large Brush for the large green background parts and a small or even smaller brush for the small green background part. IMHO that is a better approach then un-selection a large amount of parts of the image as you did show in the first post...
-
Hallo Optiplex, The screen shot below is straight from the help file (F1 when in AP)
-
Flood Select Blending
Aad Slingerland replied to DiVille's topic in Pre-V2 Archive of Desktop Questions (macOS and Windows)
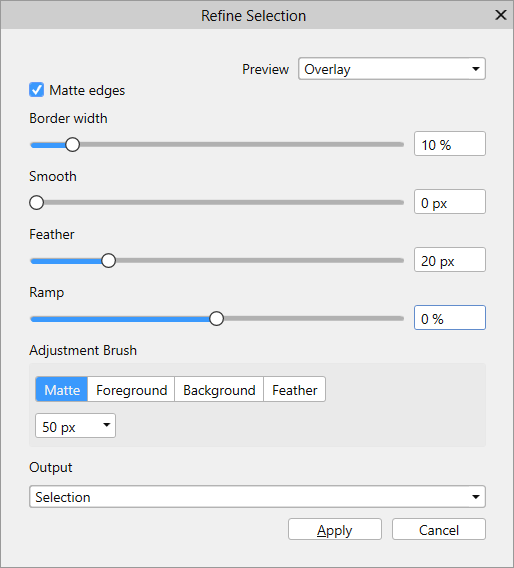
Did you happen to specify Refine Selection, Feather? This will cause a selection to 'fade' on the border.
-
Just checked further. Since you talk about 'Tolerance' I now assume you use the Flood Selection tool. Did you have the 'Contigous' option checked or not?