Uncle Mez
-
Posts
707 -
Joined
-
Last visited
Everything posted by Uncle Mez
-
Thanks @MEB so Serif will go the DAM route ? Happy to read that (if i'm right) but please make it to be far more the best DAM ever. Dono't forget to make it connect with everything Affinity installed on the same machine, Right click open with Photo or Send to Publisher etc... Love that !
-

affinity designer Smarty Studio : Our Project (made with Affinity)
Uncle Mez replied to Uncle Mez's topic in Share your work
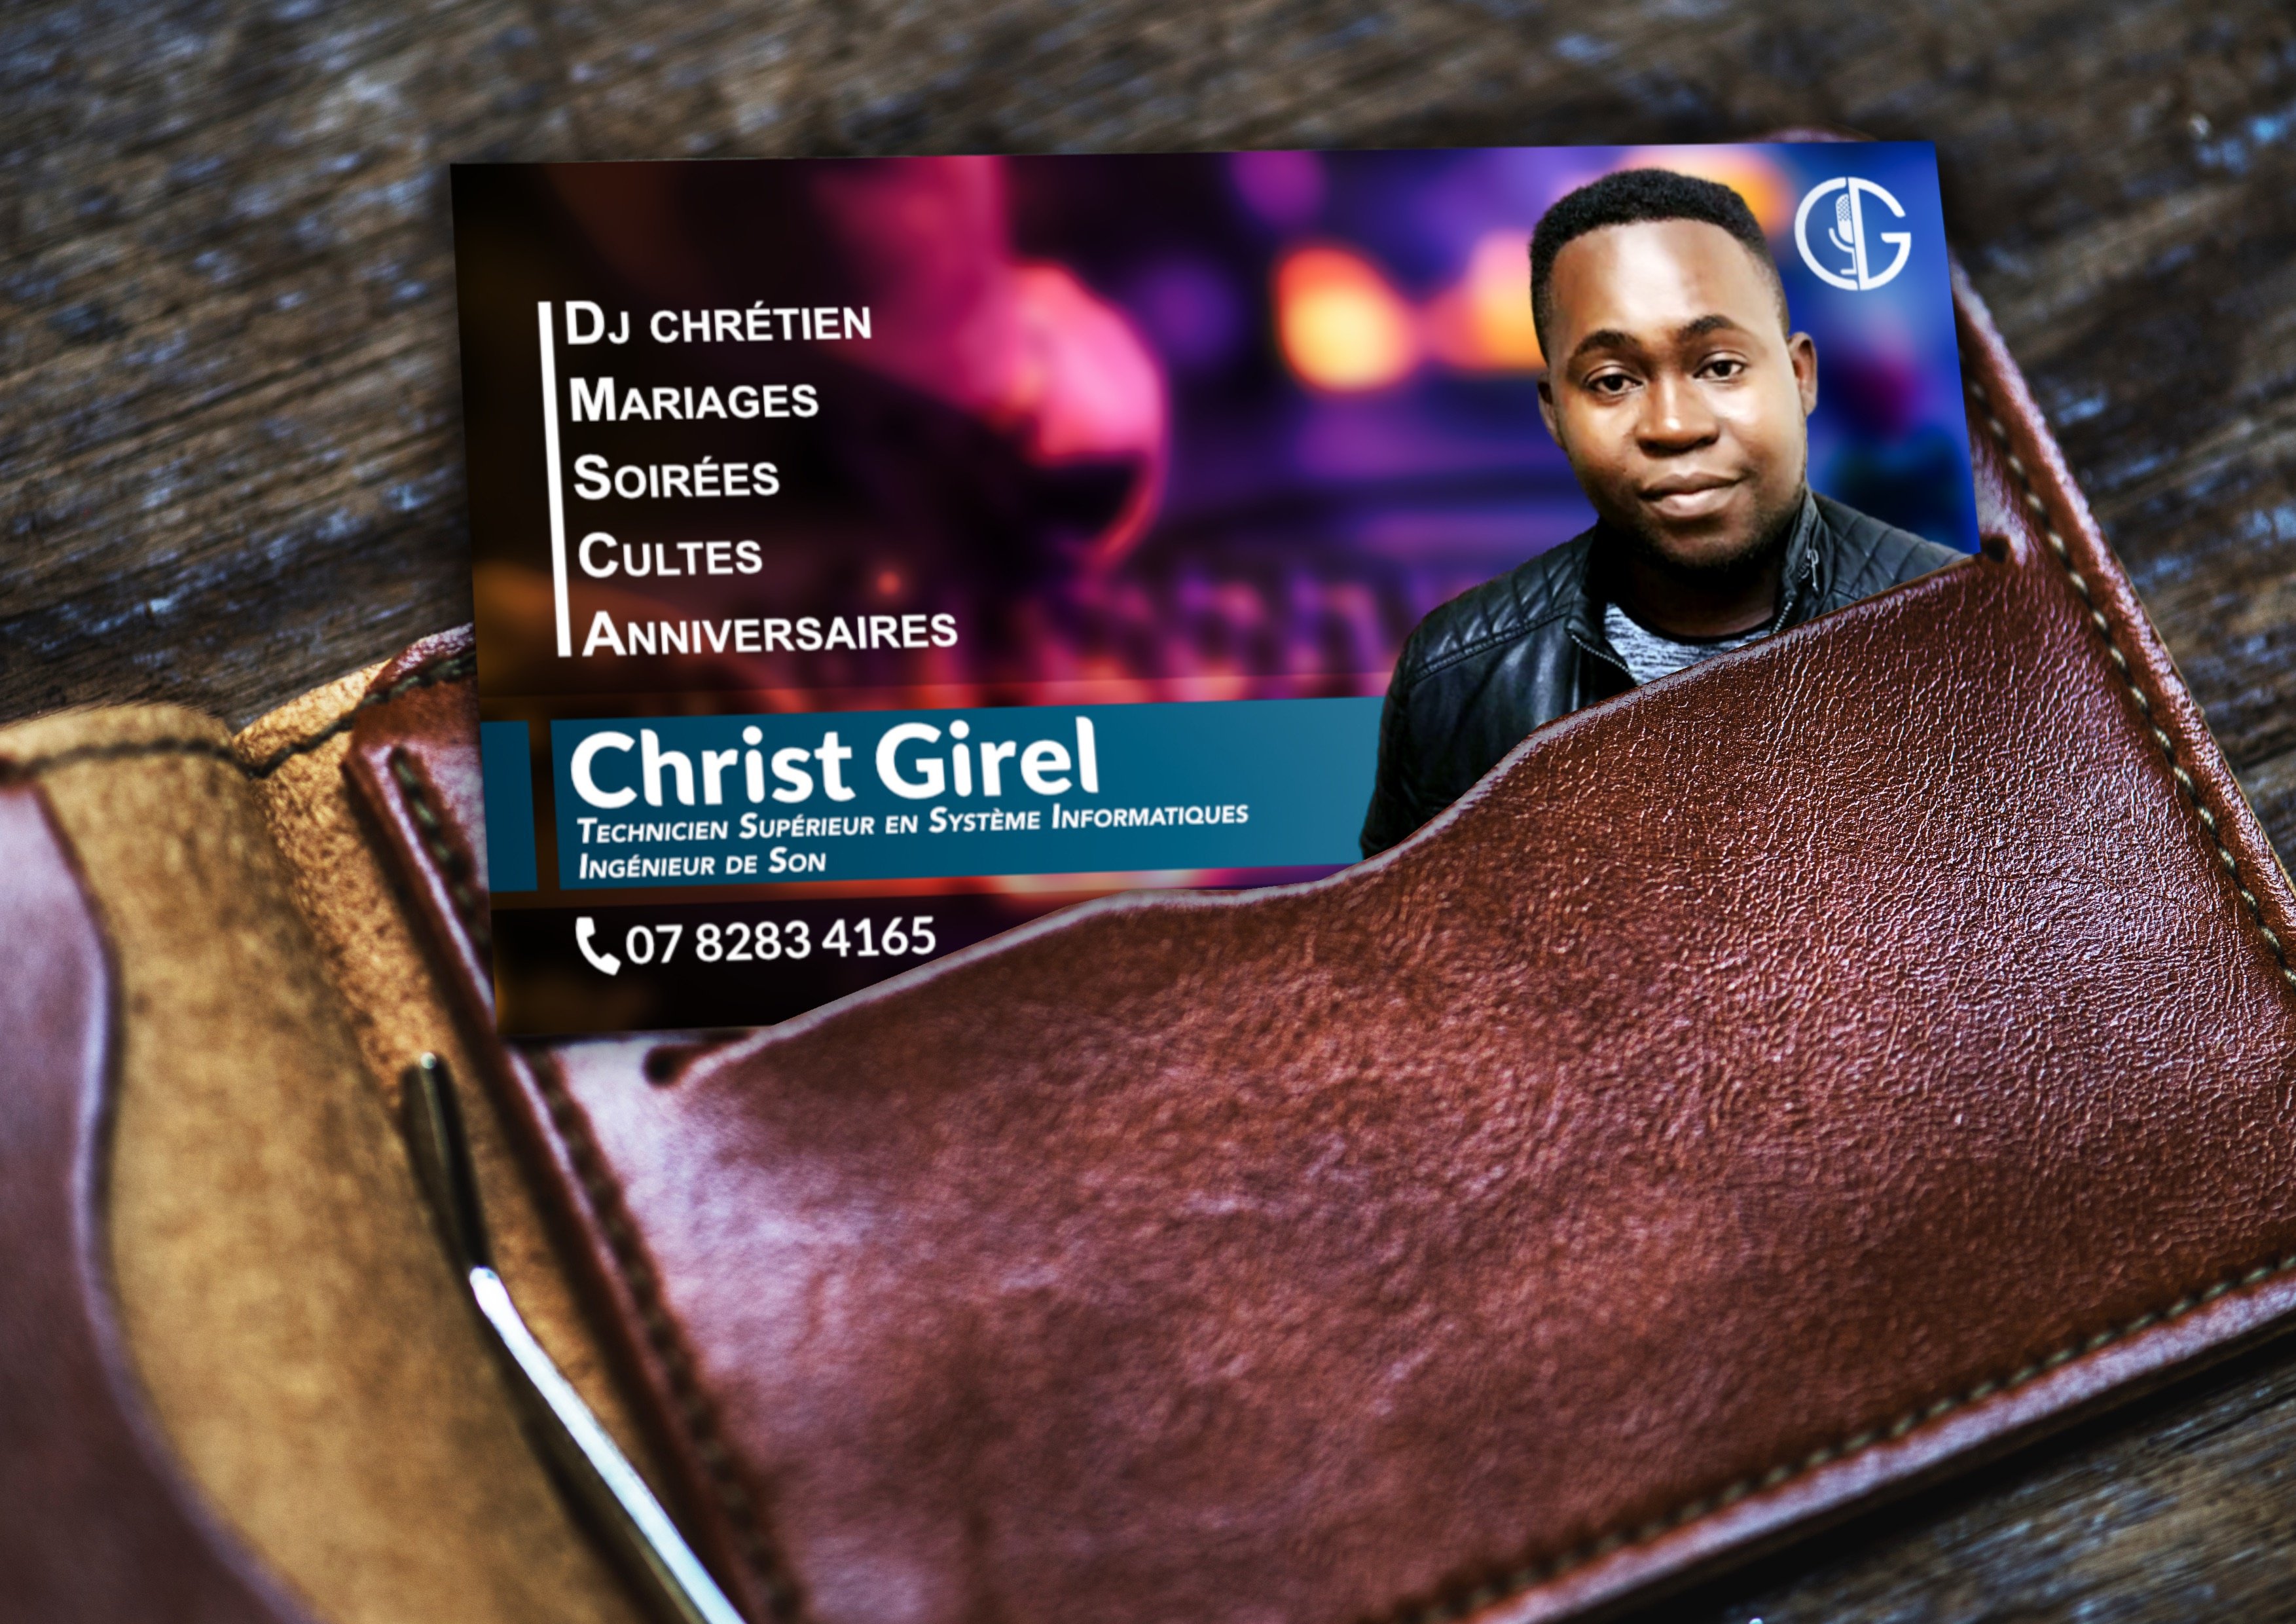
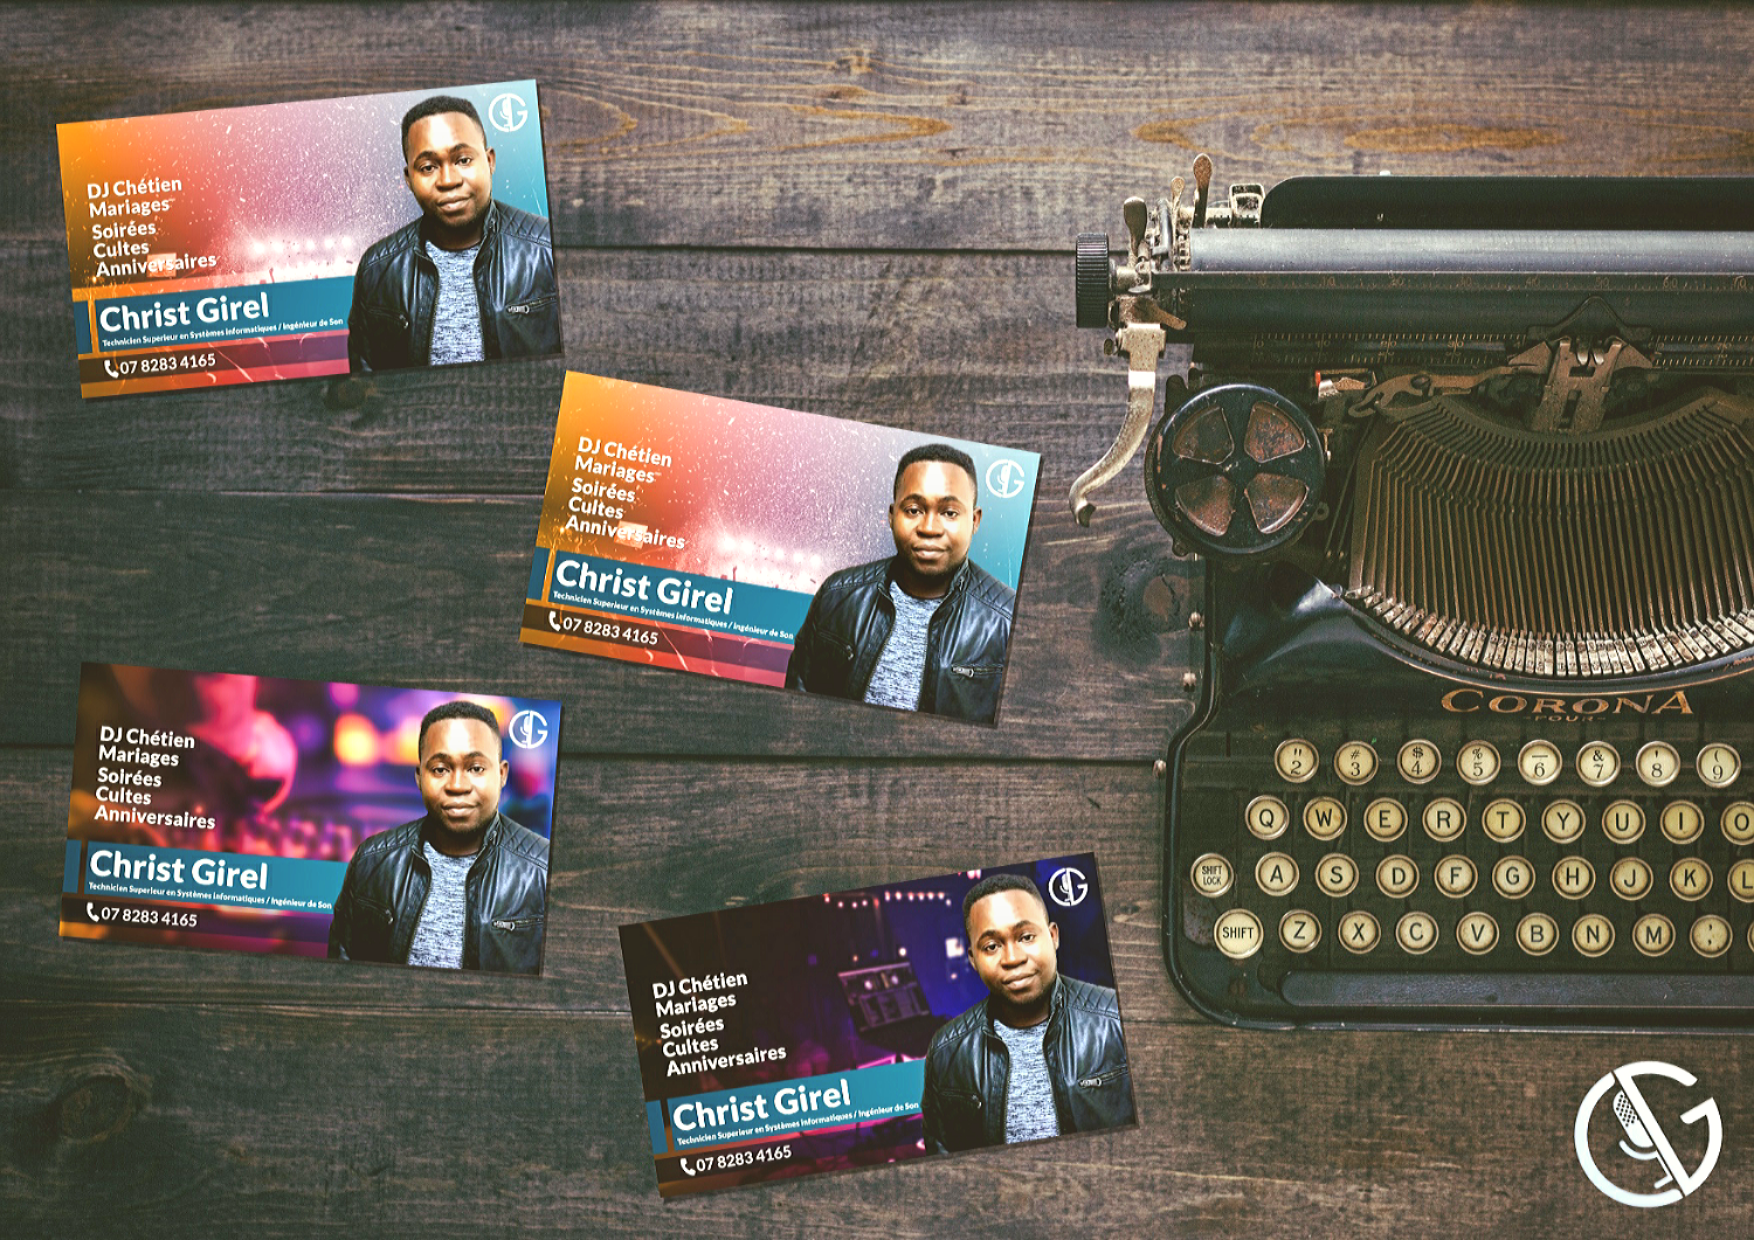
Hello People ! i'm back in this topic today to share a quick job i've done recently for a young DJ from Paris in France. Well it is only a Business card model ! He's specialized in Christian music but also does some IT works but the point was clearly on music. i will share two mockups i have made for him and you feel free to tell which one you would have chose and also please leave some inputs of what you would have changed in there to make it better. All was done with current Beta version of Affinity Suite, nothing stable version was used. it is my way of testing to find if there is a bug on what. i kindly invite @Chris B and @MEB to also check and see what can be achieved with those recent beta versions. Also i thank @AdamW @MattP and all the team member for the excellent job done with the recent Beta versions, it is a pleasure to work with it ! Take this to ask further improvement to be made to the Live perspective filter, it almost messed up the thing (with the mockup) so i was obliged to go the destructive route. Please guys don't break it but make it even fluid and better that it is today and also more suited for robust and flexible projects. Blessings !
- 103 replies
-
- 2
-

-
- graphic design
- projects
- (and 7 more)
-
About : Tools improvement and usability !
Uncle Mez replied to Uncle Mez's topic in [ARCHIVE] Photo beta on macOS threads
BTW @Chris B this is kind of video we want often want to see from Serif regarding the Affinity line of products. Something that demonstrate the real power, then other skilled peoples can discover more. remember there are not that much much video tutorial on what exactly Affinity Photo can or enable us to do. i can count how many peoples on the internet have channels dedicated to the power of Affinity products delivering real converting contents. So please help us improve so we don't guess, so we also lose less time trying to figure out this or that and deliver good contents on and offline. Blessings ! -
About : Tools improvement and usability !
Uncle Mez replied to Uncle Mez's topic in [ARCHIVE] Photo beta on macOS threads
Hi @MEB this is exactly what i meant when said the adjust. have its own mask or is a mask in itself. Well the only thing is the built mask should react the same as a normal mask if i press cmd+I it should invert (turn blank or gray) as a normal mask does. i make massive use of that function and found it really helpful and gives less work then PS it's just there and it works at perfection but please make it react the same as normal mask. I should invert it and see it is inverted then start painting as i usually do, just to help drop down the level of confusion (did the command worked or not ? if you see !) Please make it happen this is useful. i tried the flood selection thing = lost a lot of time (in the new beta it work a bit better than previous but not that okay when it comes to colors) i tried the range selection = even bad i tried them that i found and though could help but nothing so i stick with the flood selection plus add an adjustment layer, revert it and start painting using brush tool but still it is a lot of job and its often involve the use of another tool such as lasso tool to make it more precise. So making it possible to do the same thing as in the video would be really helpful for everyone working on composition + it will help save more time and do much much better stuffs then we do now ! Well, i'm happy there is hope to see it implemented sooner than later. Blessing ! -
About : Tools improvement and usability !
Uncle Mez replied to Uncle Mez's topic in [ARCHIVE] Photo beta on macOS threads
Well did that but nothing does, so i ask ! Maybe you can share a video or something on how you do that. -
About : Tools improvement and usability !
Uncle Mez replied to Uncle Mez's topic in [ARCHIVE] Photo beta on macOS threads
Well it does work on normal Mask but try to do the same with an adjustment layer which also is a mask in itself and it doesn't work the same as a normal mask does. i'm talking about color selection on a subject or an object. to make it simple please watch the attached video file, i trimmed it just to fit the Technic i want to achieve; please forgive because i couldn't speed it but leave in its normal speed so you can understand what i'm talking about. Please focus on the way he select the red color using the magic wand tool then press and maintain shift button plus click to add more to already selected color that helped him select a wider range. My point is : how to do the same with APhoto, I've tried the color select options but they're not working as expected and give more work. Please it is really needed and will surely help a lot. For the other thing i mentioned please give me time to check them again as they tend to not work with one precise project i started. I will start another project and see at what stage it get stuck. Blessings ! Selection_Method.mp4 -
Blending Mode: Better Organization?
Uncle Mez replied to Uncle Mez's topic in [ARCHIVE] Photo beta on macOS threads
Thank You so MUCH @Polygonius the text i put i red is so right to be implemented in the entire suite (APhoto - APublisher - ADesigner) @Chris B this is nice contribution from our friend possible to Log it too ? I'm pretty sure that the days ahead are brighter. Blessings ! -
Blending Mode: Better Organization?
Uncle Mez replied to Uncle Mez's topic in [ARCHIVE] Photo beta on macOS threads
+1 -
Okay Peoples ! i'm back with this quick one: * Liquify Persona is now quite okay and few stuffs like twirl works a bit more naturally but still the speed of this (even when increased) looks a bit mechanic and should be made more natural, do not forget the thing is done with a Brush and we should feel it naturally going and not machine style. * Flood selection tool is much intelligent then in previous version and does a better job but still you need to push further and get it do even better * brush selection tool also is far better than the previous beta did and this is really encouraging. * I like the refine button in both selection tools, i stopped touching it with previous version (beta and stable) because it was the best way to mess up with selection but now it is working and i like the way it makes difference between foreground and background and also the fuzziness is gone and that's good * i've tried to drag and drop a layer/mask/filter etc. from one opened tab to another but nothing does. Please fix as it is a common way to operate in the same software. * Select a Mask then Click + drag and drop it to above or bottom layer doesn work (or maybe i don't know how to do that) i can simply Click - cmd/ctrl+c - select layer and cmd/ctrl+v. Please fix ! * Now the software itself loads faster and uses less resources but still i believe this can be pushed high or simply improved. * it is not yet possible to increase the size of icons in the layer section, please make it possible to switch between at least 3 size small-medium and large. it is helpful for those doing public demonstration or simply teaching or even doesn't not have good eyes anymore. * There should be (on the welcome screen) a tab or a section added (within "View samples" - "View tutorials" - "Connect") that we can slide/click to and just view our recent project.works; it is painful to go search for it the "File" Menu, bringing it forward, beautifully and nicely made is . * Possible to implement a Home Button that switch us back to the welcome screen where we can view recent project and just click to open it ? Okay ... this is too much and i hope i have not pushed things too far. BTW ... This Beta is great and i can imagine how impresive and lovely R1.7 will be.
-
Hello Peoples ! Coming again here but with few questions that you may like or not but i believe it is quite useful to ask. All my questions here are based on Beta version of Affinity Photo not on the stable version and they're intended for understanding and helping to improve what already exist and not to raise comparatives between Apples and Oranges. ---------------------------------------------------------------------- Object: The Ring Function! I've been using it (not that much) since it was added to HSL Adjustment; well i really enjoy it and found it very useful when it comes to narrow and make precise color selection ...but i only see it in few of the adjustment layer that aims to work on colors. Q: Don't you think Recolor adjustment needs it to ? --------------------------------------------------------------------- Object: I've seen that there is the gear icon on the bottom right of adjustment layer when we have them opened but for unknown reason it does nothing when i click on it. Q: What it is intended to do or achieve ? --------------------------------------------------------------------- Object: As we all know that there is not enough online tutorial talking about really crazy tricks with Affinity Photo, i usually watch PS tutos and work on applying them in my AP workflow and they just work but ... for some reason i get lost when it come to do the Blend if thing. Q: Can you please point to a tutorial talking about that in details or simply share here how you do Blend if with Affinity Photo ? --------------------------------------------------------------------- Object: i often use the blend ranges function and just found it not working even if you click a million times on that gear. Q: Bug or me missing something ? Possible to fix it ? --------------------------------------------------------------------- Object: Let say i select a red color and want to add more to already selected using the same method, well ! on other software such as PS i would simply sample more color selection color by clicking Shift + Click and drag or click to add to already selected color. Q: How to that with Affinity Photo ? --------------------------------------------------------------------- Object: It is really useful to save selection made on a Photo or any other pixel related stuff but in the same time i personally found it to be quite hidden, burried into menues. Q: Possible to create a button on related tools (Sel. Brush - Flood Sel. etc.) next to the refine tool that allows that to be done without trying to find it in the menu ? -------------------------------------------------------------------- Object: in this last one, i will come to something i already asked about but i see no change until now. Let's talk about Masks (also i target adjustment layer because i love using their masking functionality). Okay ! Let's create a mask and press cmd/ctrl+i to invert it ... it stays the same i mean pure white when it should turn black (actually dark grey) when inverted and even when i paint with the brush tool on the mask it shows after i do another action such as cmd/ctrl+s or switch to another and start using it. Quite bad hein ! Q1: it is possible to fix this and make work as it should ? Q2: Possible to make the painting on mask more live and less delayed ? Okay ! Here i'm done with this. few here you will understand are bugs that need to be corrected and few other are kind of request but i count them as things that needs to be corrected at this level of development of Affinity Photo and what i point to here should also be checked and if possible get applied to Affinity Designer and Affinity Publisher because all 3 are based on the same principle and should not grow independently one another when it comes to these basic stuffs. Blessing to Y'all and don't forget it is not to raise a troll but to help improve the software.
-
Hello People ! i'm just installing and testing the recent Beta of APhoto and i can just say OKAY IT WORKS REALLY OKAY ! But ... because there is still a But ... i think Blending modes needs to be arranged or organized according to what they are intended to do. What i mean is simply represented in the attached capture. Well i know this is from another software but also it is not bad to copy (and making better of it) something that already exist. Hope this won't bring up a long discussion or a troll in here but also to every one who ever think this can/could be a nice thing please leave your inputs to help the devs understand it and maybe implement it. Blessings !
-
Affinity Publisher Public Beta - 1.7.0.227
Uncle Mez replied to AdamW's topic in [ARCHIVE] Publisher beta on macOS threads
Hello @AdamW the store link is failing to download again. I've recently downloaded APhoto Beta and it was shared through the S3 link and even before that i did the ADesigner Beta and they both worked like a charm through the S3 link. Okay maybe it works for some areas but please i would kindly ask you to make sure you share with both links "Store and S3" so we can chose from which one to download. BTW ... have to go do my second try, first one stopped at 165Meg ! EDIT: i can see that the Store server now allow retry on failed downloads which is a great thing as my DM just took it from where it stopped and finished the thing ! -
Hi @Andy Somerfield i'm so happy to find this anouncement. Was updated via @MEB twitter publication. Busy downloading the thing now and will report here asap. i'm more interested into what the inpainting and the flood selection tools can do now. Blessings !
-
Hi Dear ! well its actually depends on the kind of Job you are intended to do. When you read about Luminar they say it is not a Photo retouch software at the level of Photoshop nor APhoto that's the reason why even you ask a lot they will reply to you that they can't add tools that you enjoy using both with Ps and APhoto. So it is clear that Luminar 3 plays in another area and is not a challenger to APhoto, you can only compare it to Lightroom because they both plays in the same pool. APhoto is not only a Photo compositor but also a Photo Manipulation software which is intended to help you process in-depth pixel works of all kinds while Luminar can't do that. Believe me i use Luminar 3 and it is awesome a great software and i use it in my workflow for some precise task like sharpening, vibrance etc. (honestly Luminar does it much better than APhoto) but when it come to more elaborate stuffs like clarity or High Pass believe me APhoto does it even better. The only thing i believe Serif may copy or learn from Skylum are: Preset/Looks and the way Luminar handle its non-destructiveness. Well here there is need of a solution because the develop persona makes it all destructive which is ... kind of bad. But after all this is mentioned, just take note that Teaming Affinity Photo with Luminar 3 in the same workflow will make you increase fast and far better. i would finish by challenging you to try Movavi Photo Editor v5 (the last version should be 5.6) you will find it even easy and amazing but like Luminar 3 it is not intended for in-depth pixel works but Photo Retouching. Blessings !
-
affinity designer Smarty Studio : Our Project (made with Affinity)
Uncle Mez replied to Uncle Mez's topic in Share your work
Hi @Wosven I like that. You just pointed In the center Thank you so much! -
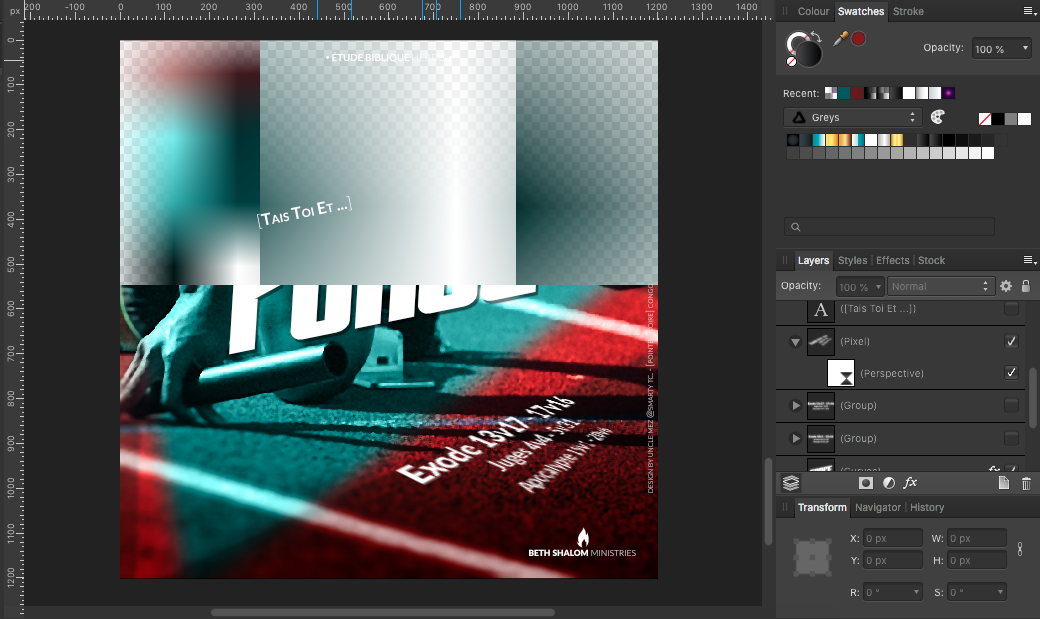
Hello @Andy Somerfield i was busy doing a quick design when i encountered a strange bug. Everything was fine until decide to add a Live Perspective filter 'cause i wanted to make my writings look like the one from "Fringe" but the second i put the filter the whole project became like you see in the screenshot. i closed, re-opened but nothing did, even tryed to open it with ADesigner and APub but stayed the same. So i don't know if you got this reported but here you find it. Note: i decided to use the destructive (non live) perspective filter tool to achieve the work as i wanted. Blessings !
-
Please Lightroom Replacement!
Uncle Mez replied to BluestarCK's topic in Feedback for the V1 Affinity Suite of Products
Hello @BluestarCK Happy to read your question ... didn't checked if it was on the right or the wrong thread but until the admin moves it if they have to, let me drop my input. if you want something that works, that is no expensive and does thing even better than LightRoom ... go for Luminar 3 from Skylum (Ex Macphun). They have released a version of Luminar that you can download and try for 30 days (fully no restrictions) from their website. Believe me you will like and enjoy it. i'm often adding Luminar to my Pixel workflow because it has the two amazing : Ai enhancer filter + Ai sky enhancer which makes things really easy so you can focus on the main work only. You can learn about Luminar by searching Photo Joseph on Youtube he is the best Luminar 3 teacher i've found on the internet up to now ! Blessings ! -
affinity designer Smarty Studio : Our Project (made with Affinity)
Uncle Mez replied to Uncle Mez's topic in Share your work
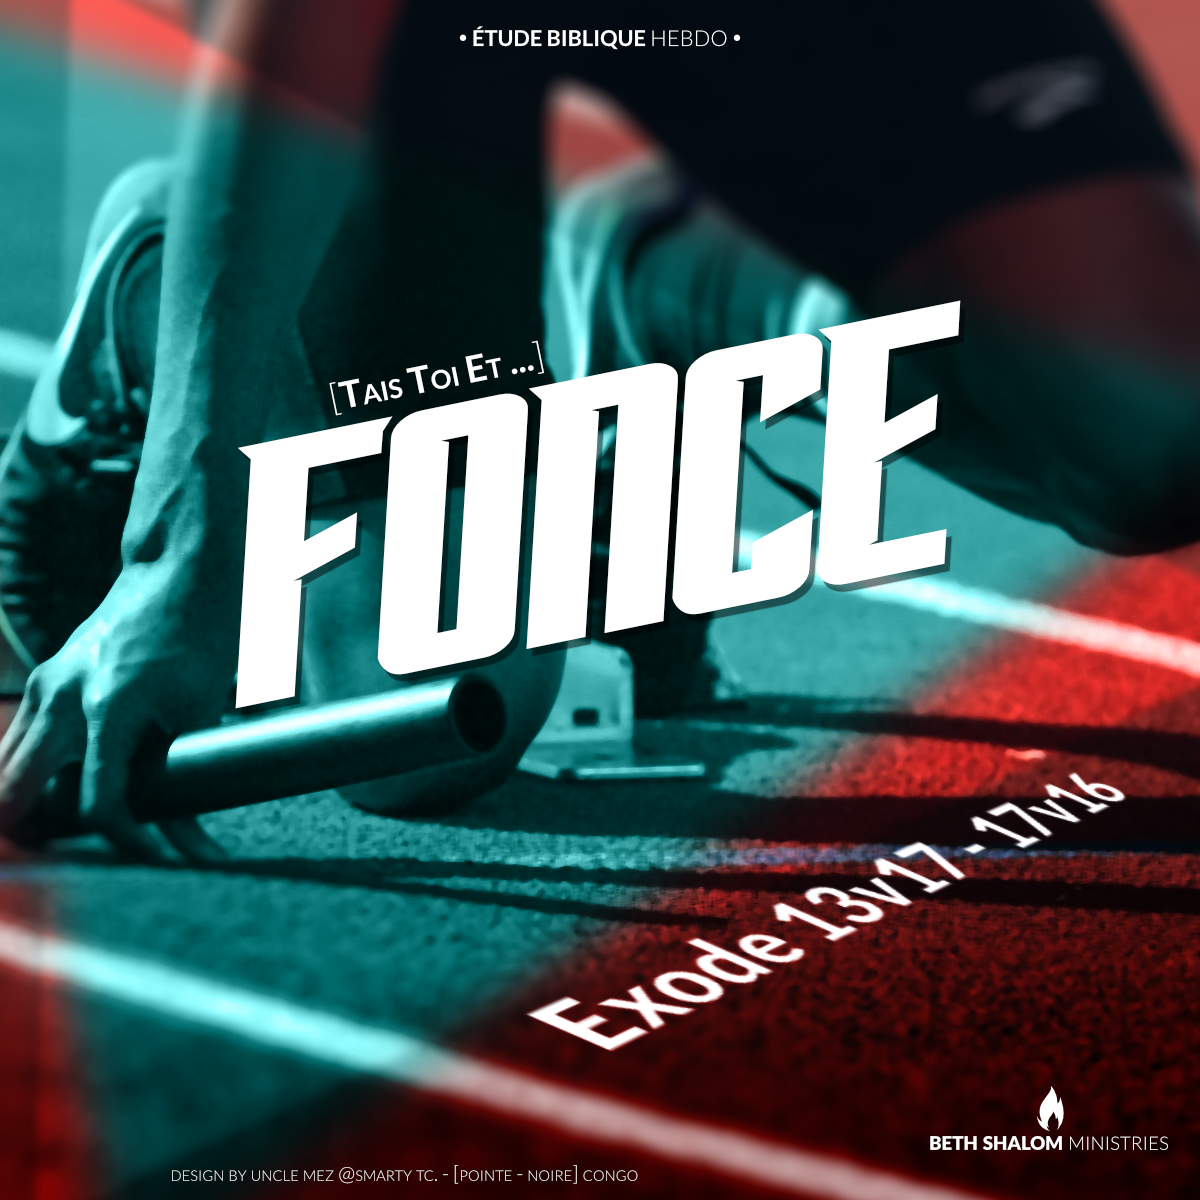
Hello dear Heroes ! i'm back here with this quick share. Just a fast design for church activities but the most important thing to note here is the teaming used to build it. Affinity Designer for Vectors Affinity Photo for everything Pixels Affinity Designer for the layout and the export (here i used the last published version of APub) Photo from Pixabay.com No major issues found and no crash ! As usual, please leave me your inputs telling what you would see changed or much better designed if it was You ! Blessings !
-
Affinity Publisher Public Beta - 1.7.0.221
Uncle Mez replied to AdamW's topic in [ARCHIVE] Publisher beta on macOS threads
Thank you so much @AdamW -
affinity designer Smarty Studio : Our Project (made with Affinity)
Uncle Mez replied to Uncle Mez's topic in Share your work
it is okay but it is hidden thus making it not the first thing to think about ! What i ask is a more present thing something we have right before us and we can eassily remember about ! Thanks a lot for pointing to that as many will now know there is such a menu/tool and use less Adobe color stuff. -
affinity designer Smarty Studio : Our Project (made with Affinity)
Uncle Mez replied to Uncle Mez's topic in Share your work
The biggest challenge I had with this project was with complementary colors. We really need a tool that makes it easier to find or generate those and not strugglewith external tools from Adobe etc. Please team,build a dedicated tool that will manage colors in an assistant style so we can figure out but very easily what colors we can work with on a project and not do the Arc-en-Ciel thing ! -
affinity designer Smarty Studio : Our Project (made with Affinity)
Uncle Mez replied to Uncle Mez's topic in Share your work
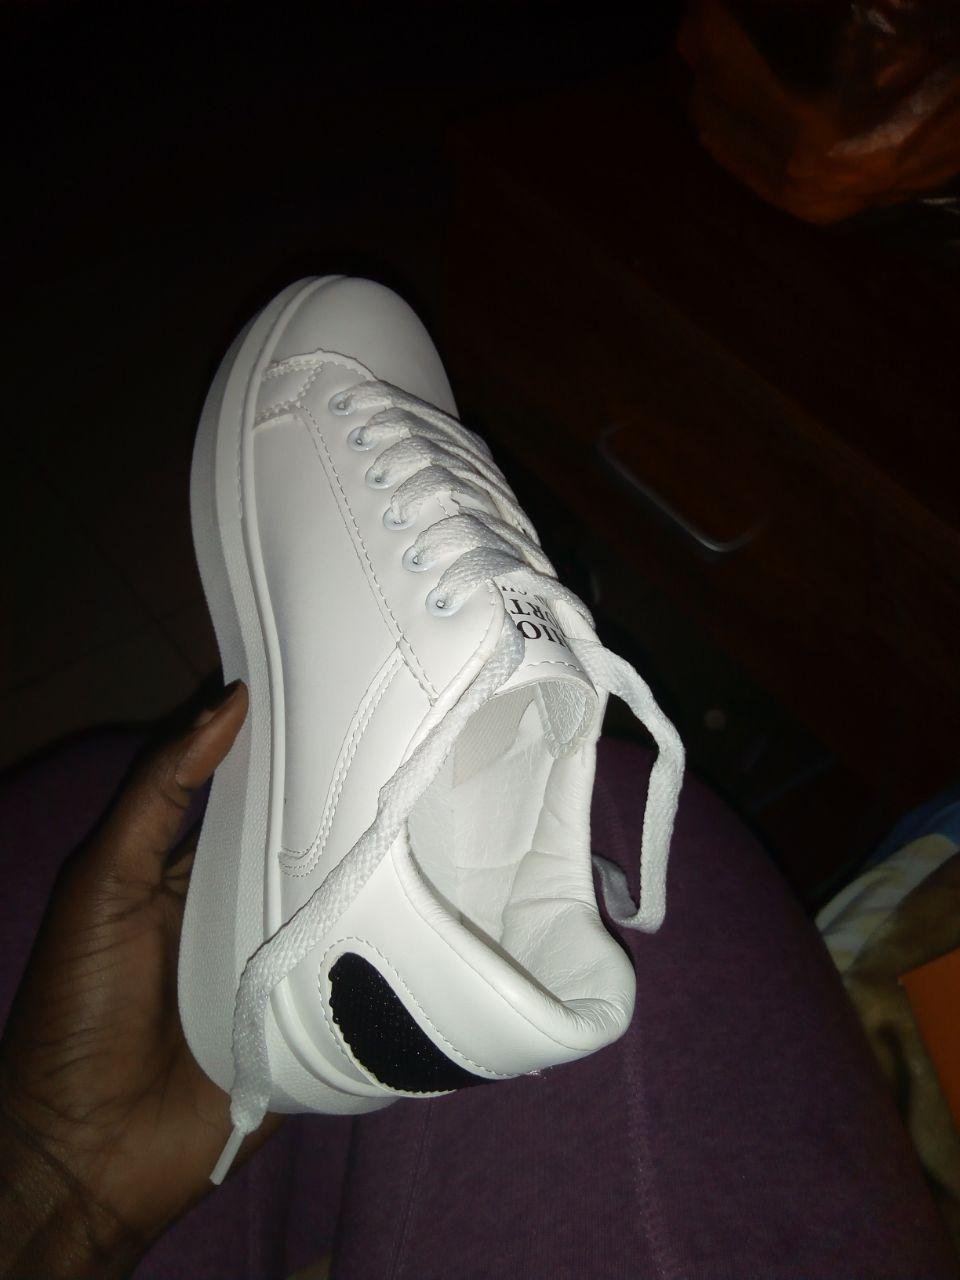
Hello @Wosven really this is the kind of advice i'm looking for ! I'm okay with this and you are right, btw i will try it and see if i can update here. Well you are right here too and i will see how to fix this, the original picture that you see was taken from a phone by a young girl in her room then shared through Telegram messenger in compression mode ... it was 78.2kB only so just imagine how much details was lost. But, your comments make me think i need to organize another retouch and bring some softness in there. Blessings !- 103 replies
-
- 1
-
-
- graphic design
- projects
- (and 7 more)
-
affinity designer Smarty Studio : Our Project (made with Affinity)
Uncle Mez replied to Uncle Mez's topic in Share your work
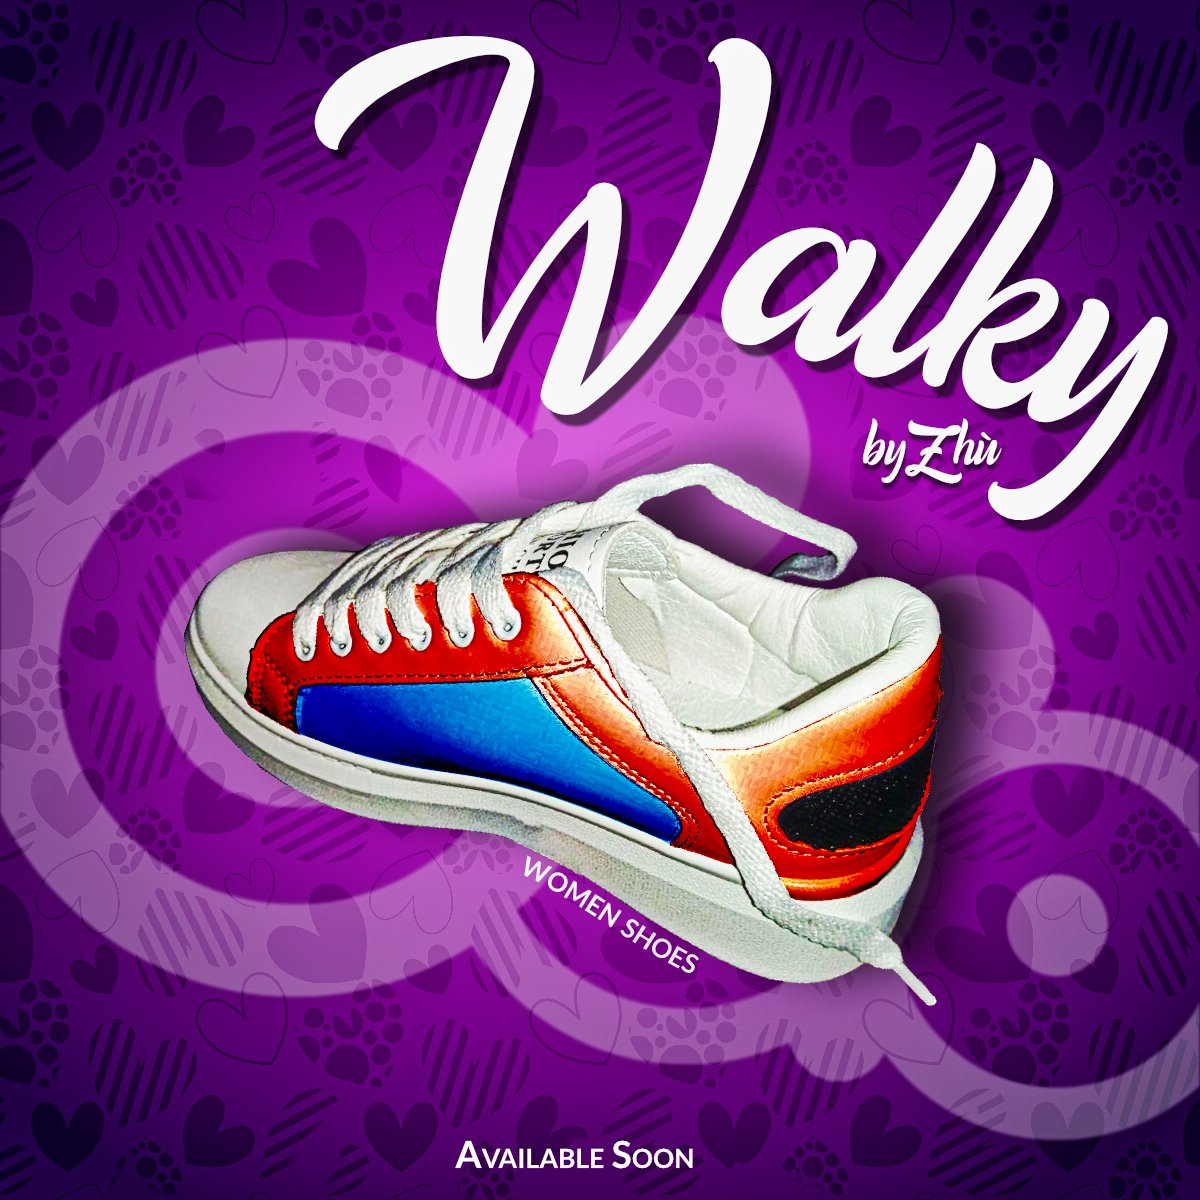
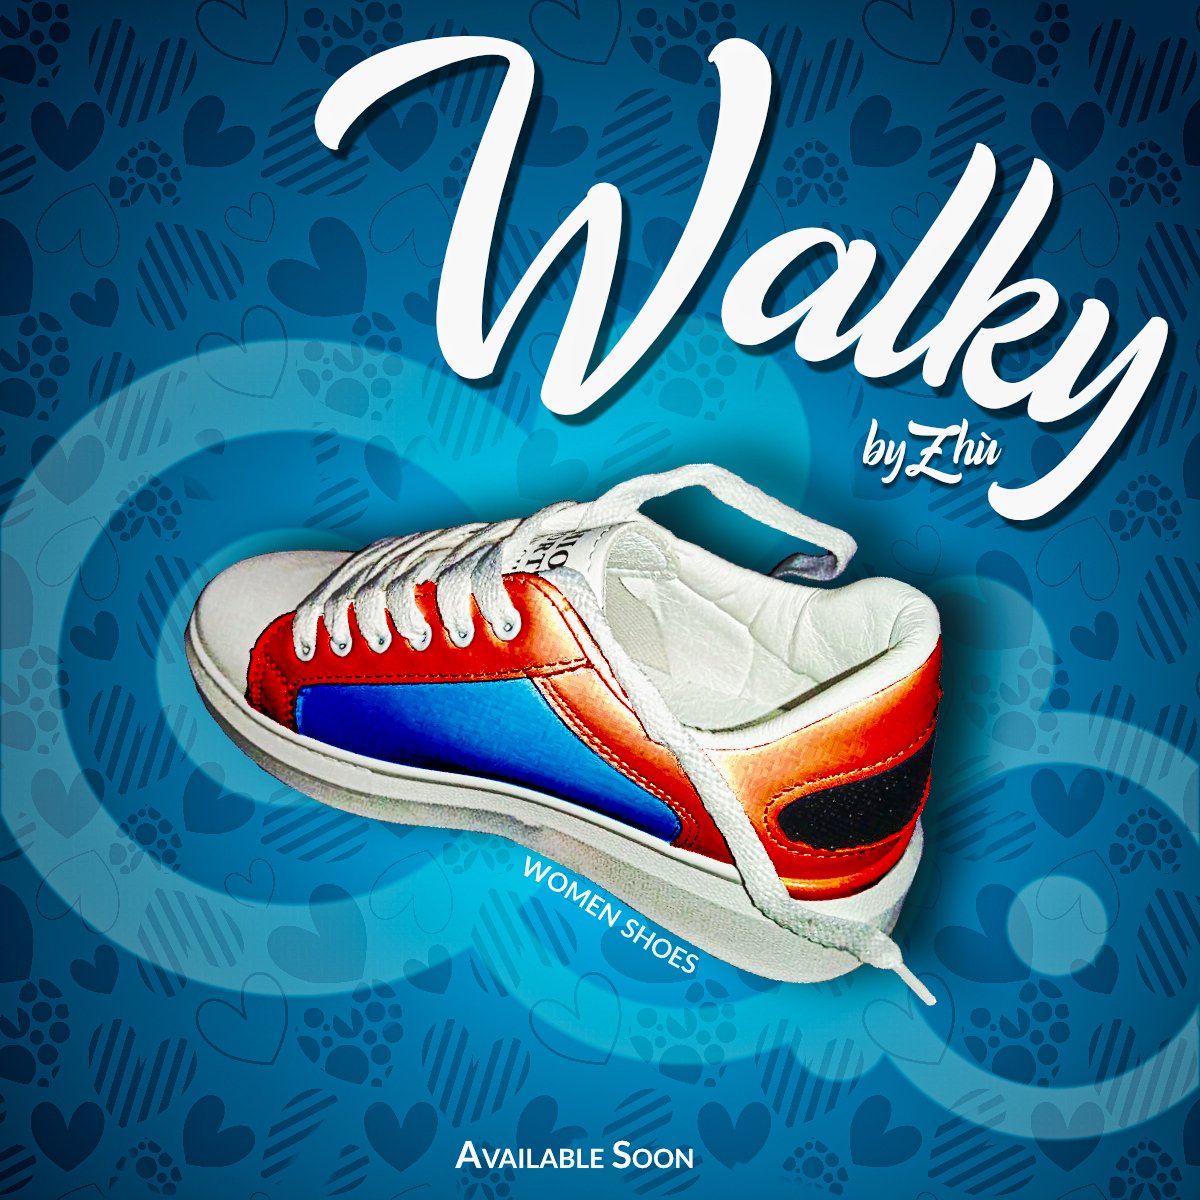
Hello everyone ! i'm back today with a quick one i wanted to share with you here ! Well it is something that only is concentrated on my pixel Technics learning process, i had an image before me and though i could use it to apply some of the nice Technics I've learned around the internet. i essentially used: * HSL adjustment layer * Lasso Tool * inPainting tool * Level adjustment layer * Clarity Live filter * High Pass Live filter The core layout was created unto Affinity Publisher Beta All Pixel works was done with Affinity Photo then placed into the project layout Everything Vector (fonts essentially) was done with Affinity Designer + the overlay heart stuffs was done using a vector brush which allowed me to paint it fast and easy. Tell me what you think about and what you think you could do to make it better ! I've also attached the original photo of the object used so you can compare and even get inspired. My Thanks to the Affinity Team. @MattP @Sean P as you can see this one was achieved with Beta version of the Affinity line of products, no stable version was used at all. Blessings !
- 103 replies
-
- 1
-
-
- graphic design
- projects
- (and 7 more)
-
Affinity Designer Customer Beta (1.7.0.4)
Uncle Mez replied to MattP's topic in [ARCHIVE] Designer beta on macOS threads
Hi @MattP @Sean P sorry if i ask this and it is in a wrong place but ... after looking around i simply realized this: 1- software icon is changed 2- many stuffs and tools have been upgraded/improved still the export persona have not seen visual improvement nor upgrade and none of the recent changelog have mentioned any thing to happen on that persona. Can we expect to see new stuffs in there too ? -
Affinity Designer Customer Beta (1.7.0.4)
Uncle Mez replied to MattP's topic in [ARCHIVE] Designer beta on macOS threads
Hello @Bri-Toon find me happy to read from you and see you are still around. Watched your content and was a bit surprised but at least you are here and i feel better thinking that i will run the test same period as you will but i'm also thining about all the geeks around who are helping ADesigner to become even better. i too will wait until the next beta release to talk about what i find in there.