Fotoloco
-
Posts
63 -
Joined
-
Last visited
Everything posted by Fotoloco
-
Does anyone know if the features of the pre-1.7 HSL adjustment layer are still available somewhere, such as the HSV mode? Thanks!
-
Agreed.
-
Saturation Mask
Fotoloco replied to dmstraker's topic in Tutorials (Staff and Customer Created Tutorials)
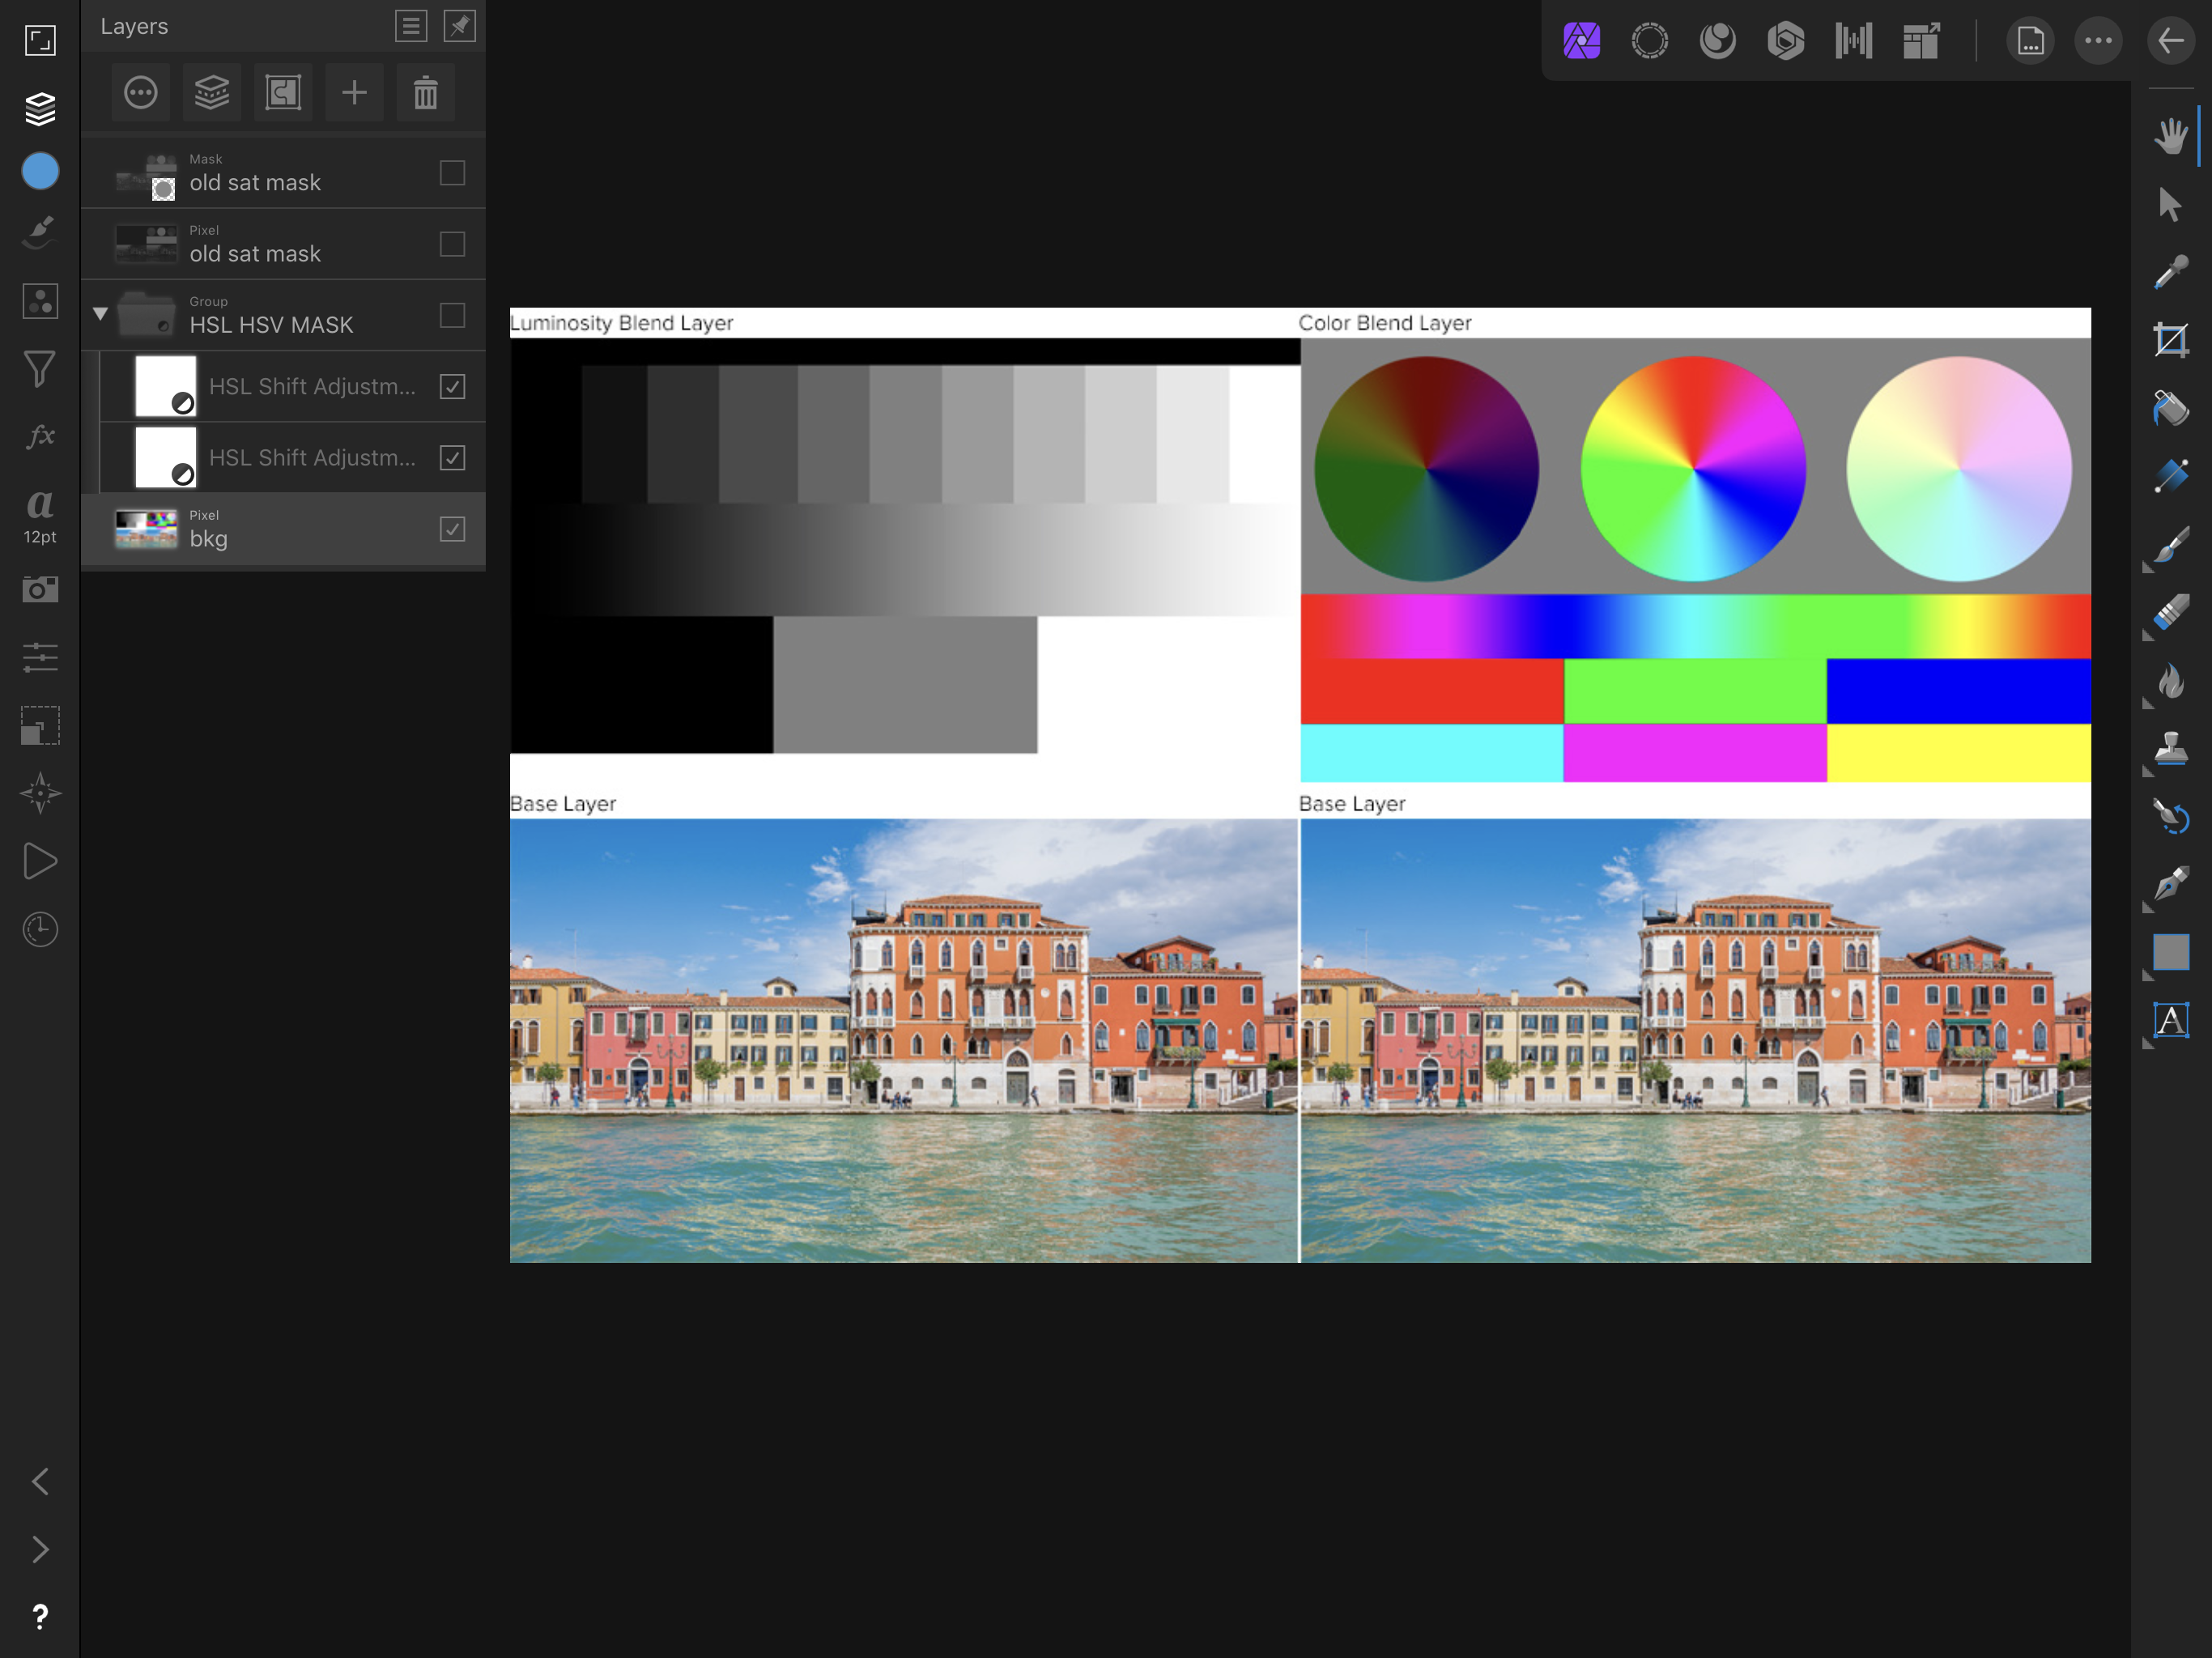
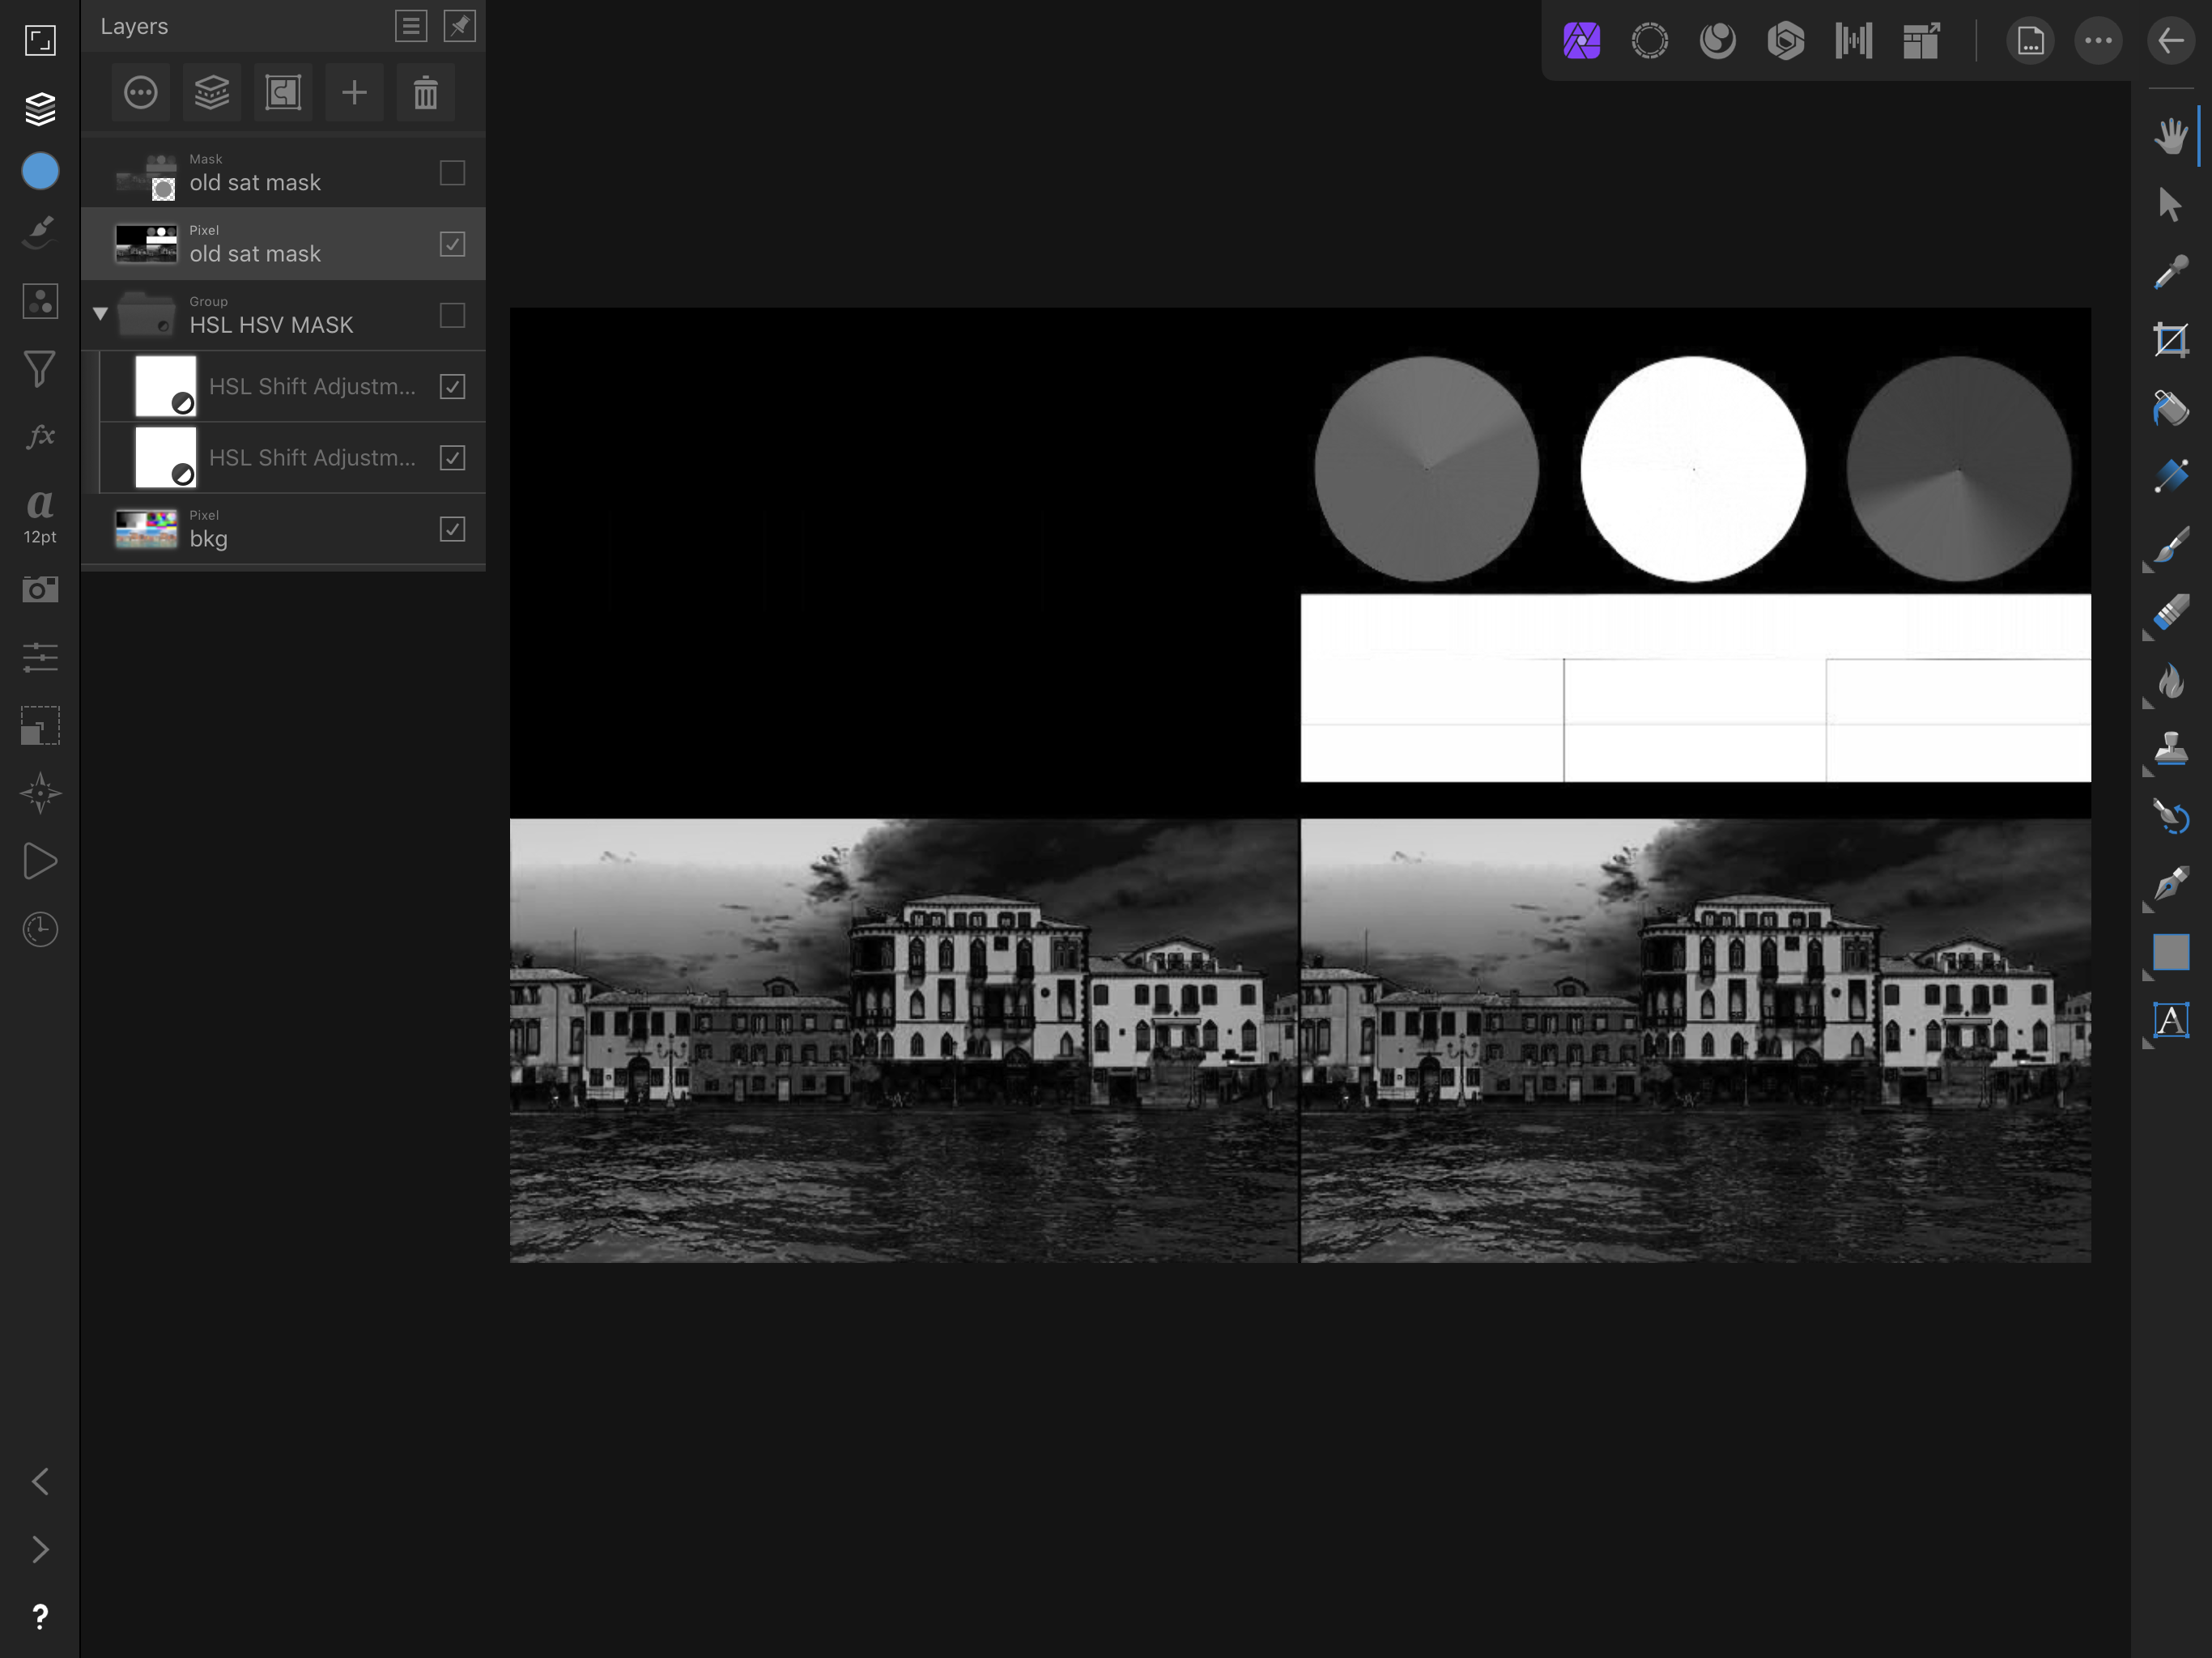
Here’s the same example, contrasting with the old method: (.afphoto file attached at the end.) sat mask old.afphoto
-
Saturation Mask
Fotoloco replied to dmstraker's topic in Tutorials (Staff and Customer Created Tutorials)
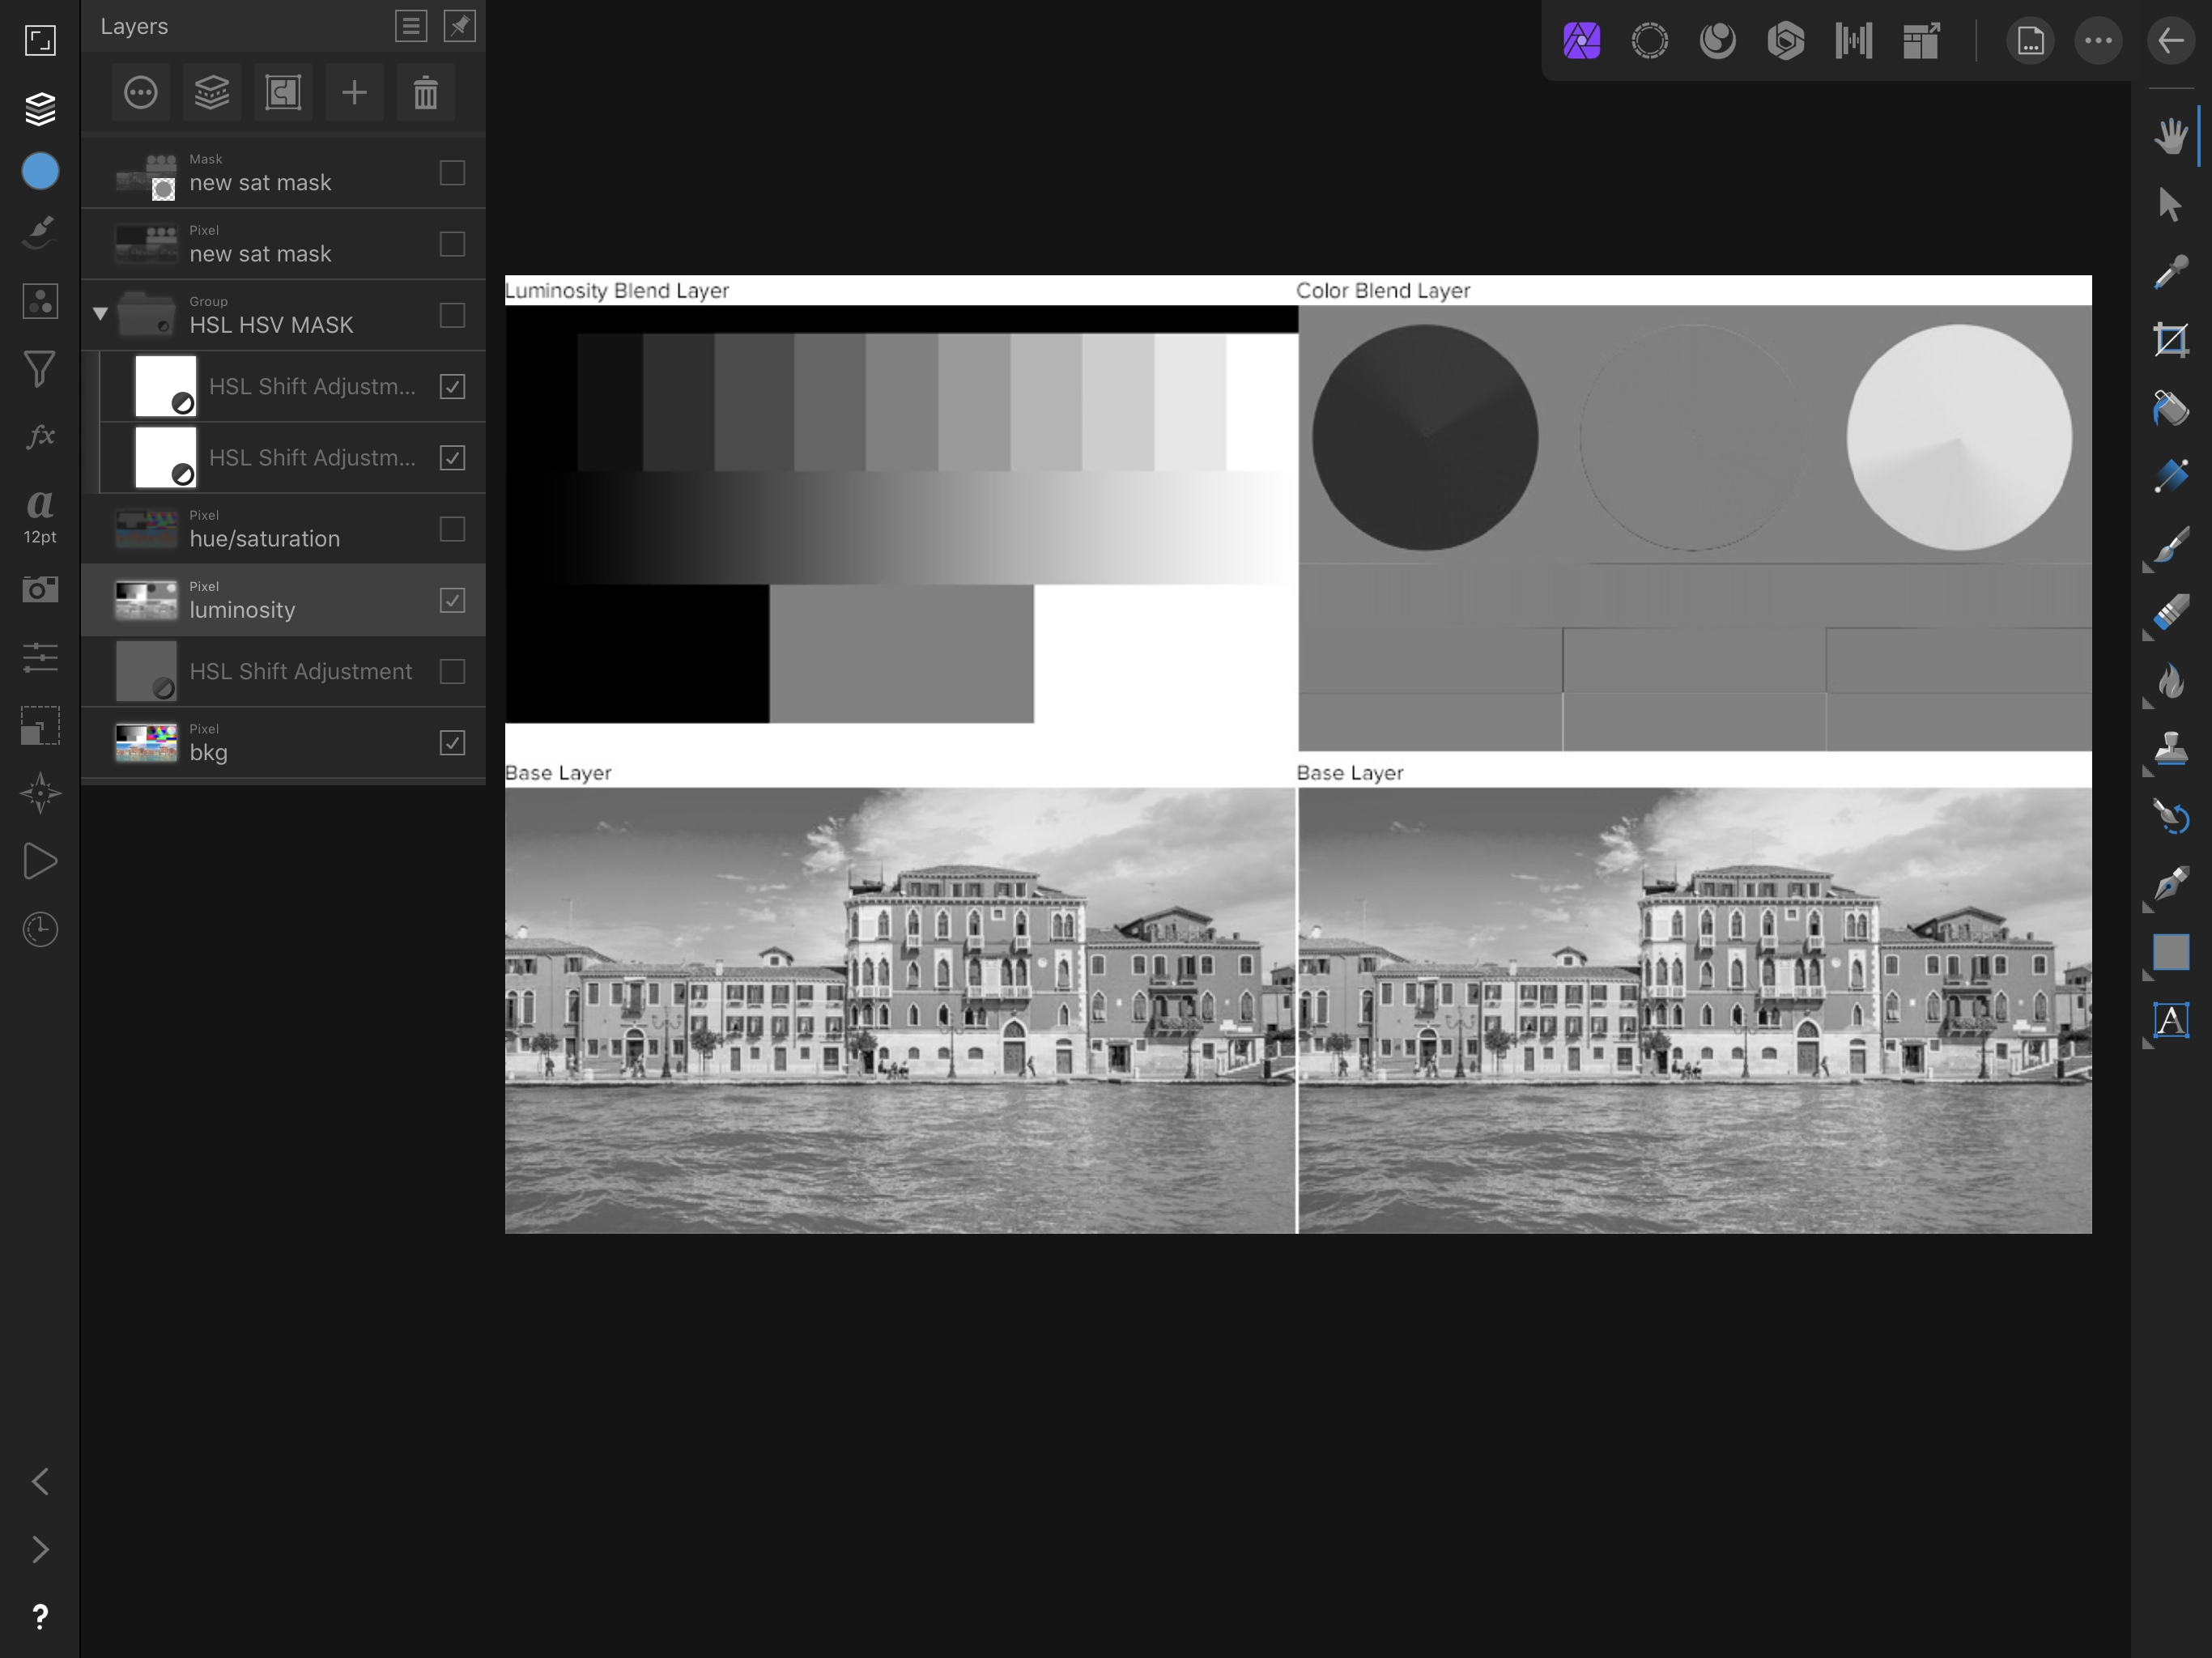
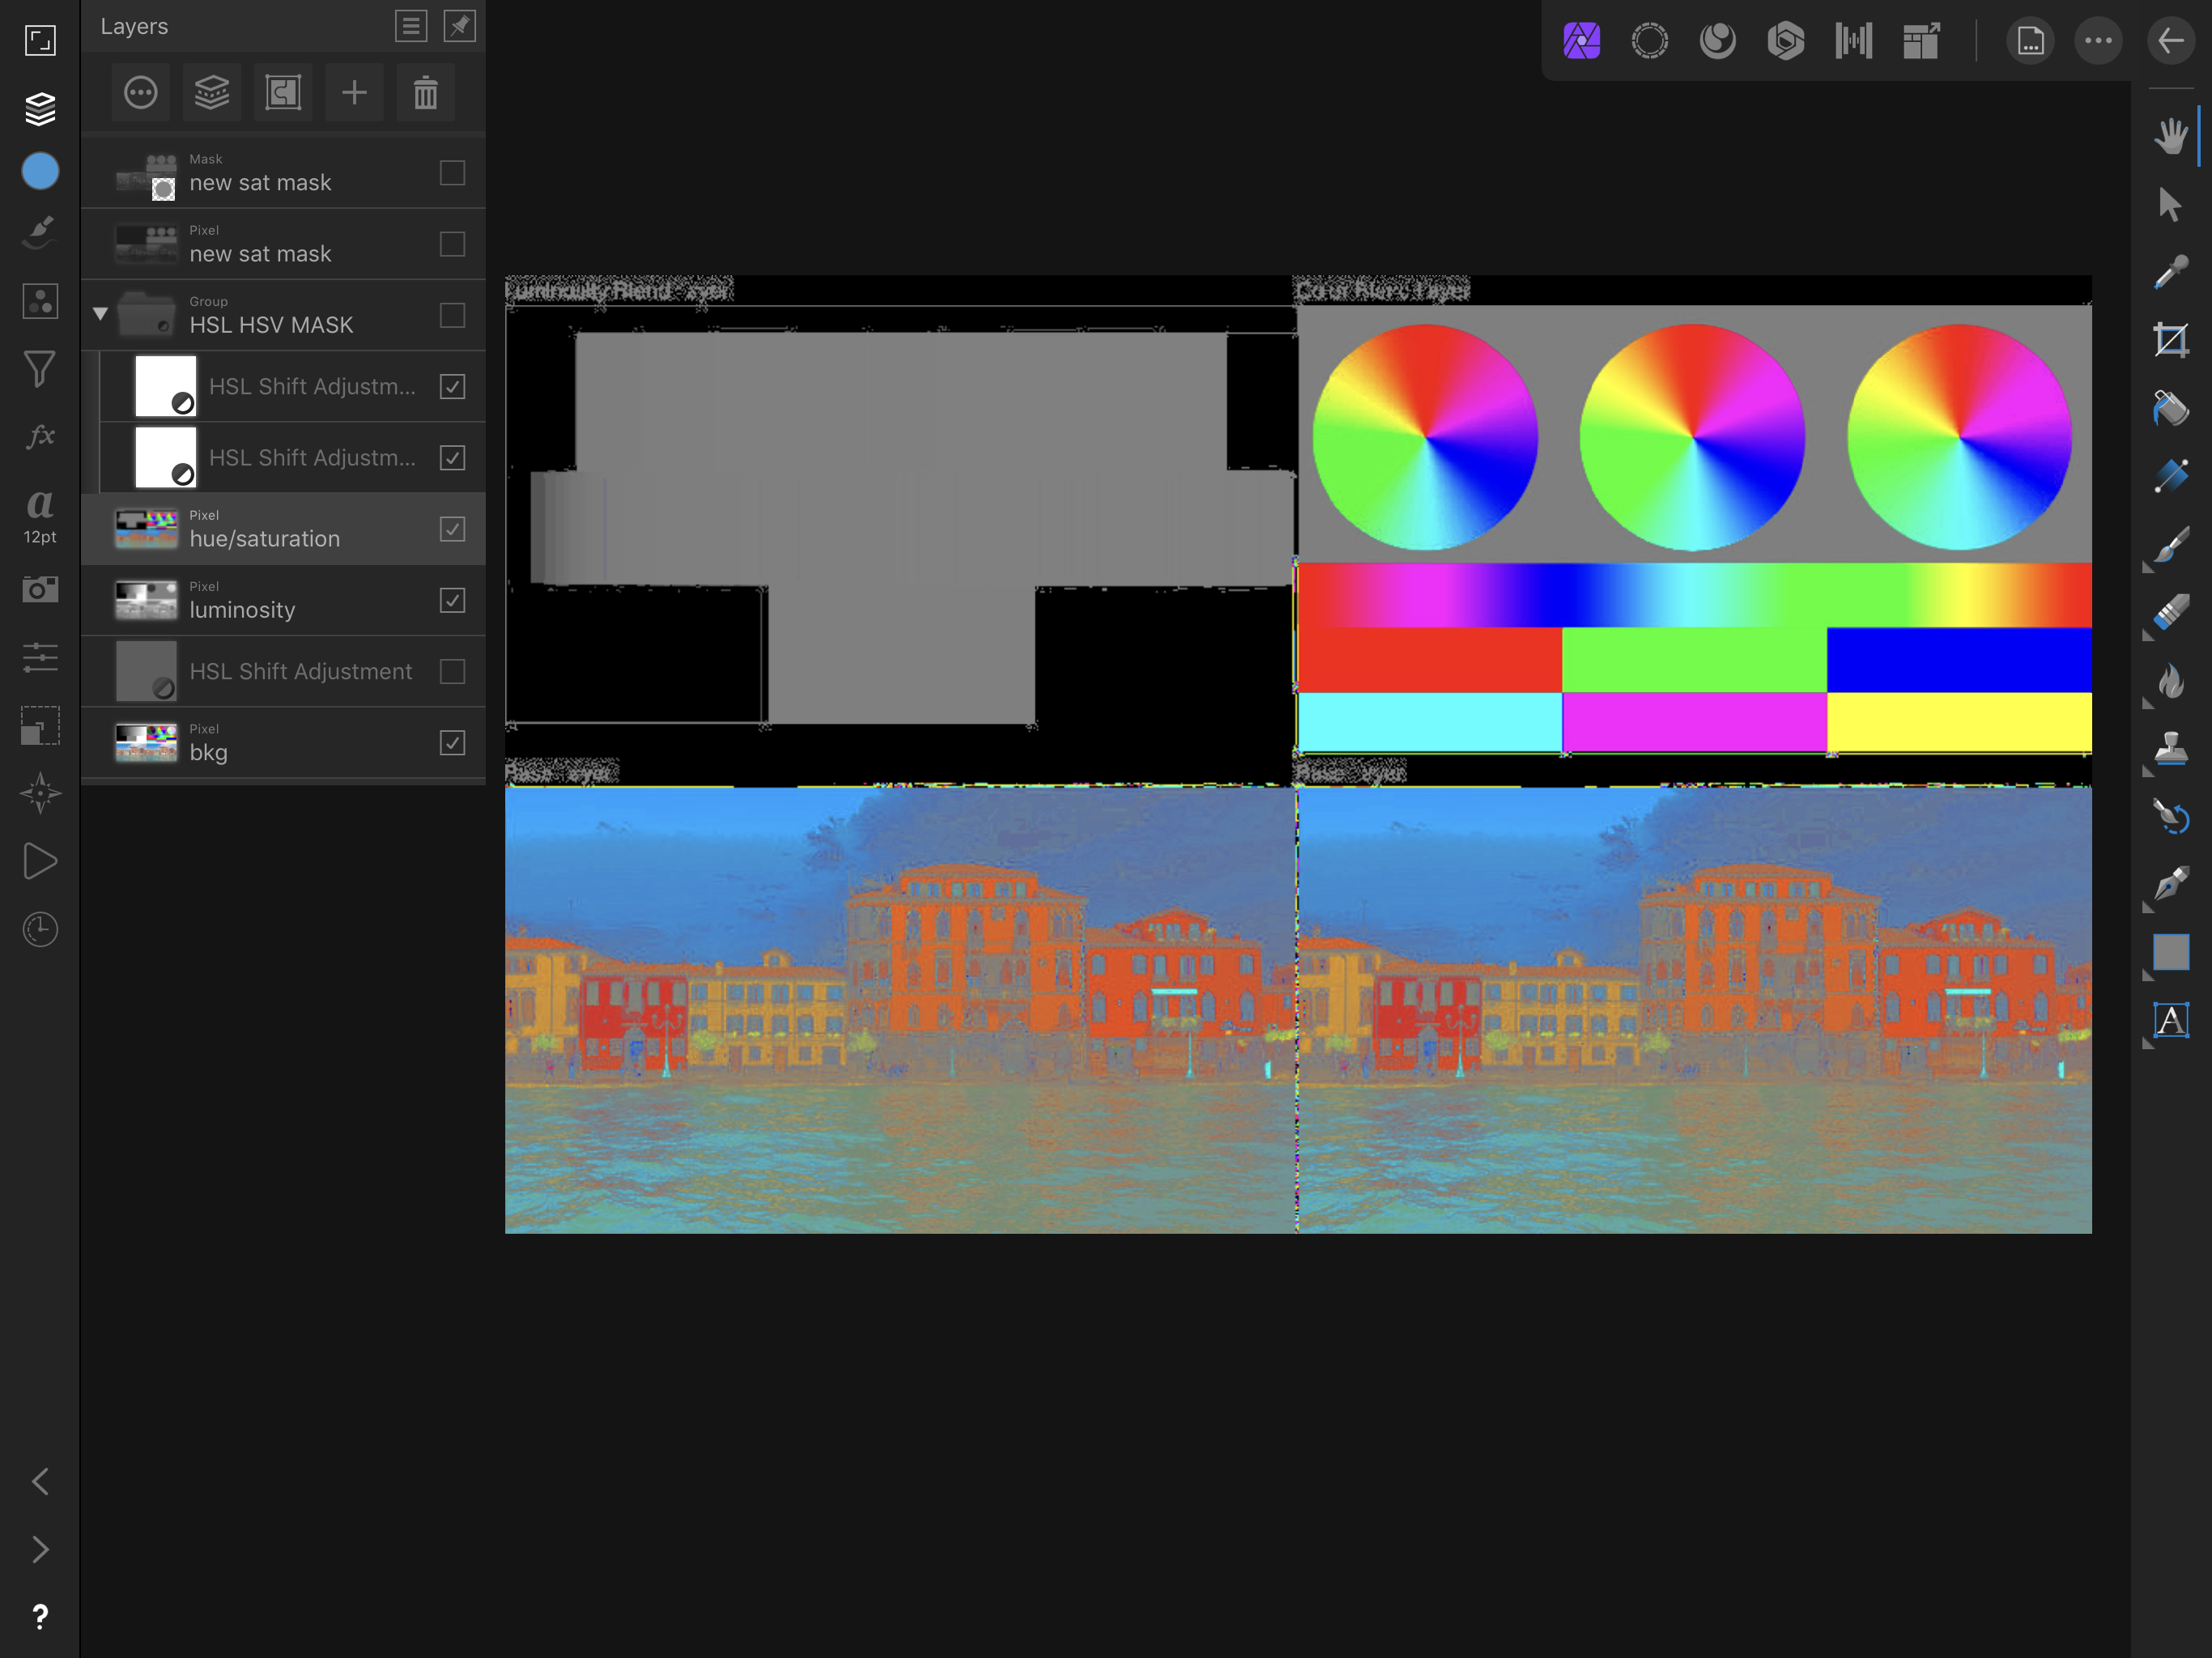
Here’s an example for the new method: (.afphoto file attached at the end.) (Note also that if you blend (mode = “overlay”) the hue/saturation layer over the luminosity layer, you get the original layer back... so this can also be used for other purposes.) sat mask new.afphoto
-
Saturation Mask
Fotoloco replied to dmstraker's topic in Tutorials (Staff and Customer Created Tutorials)
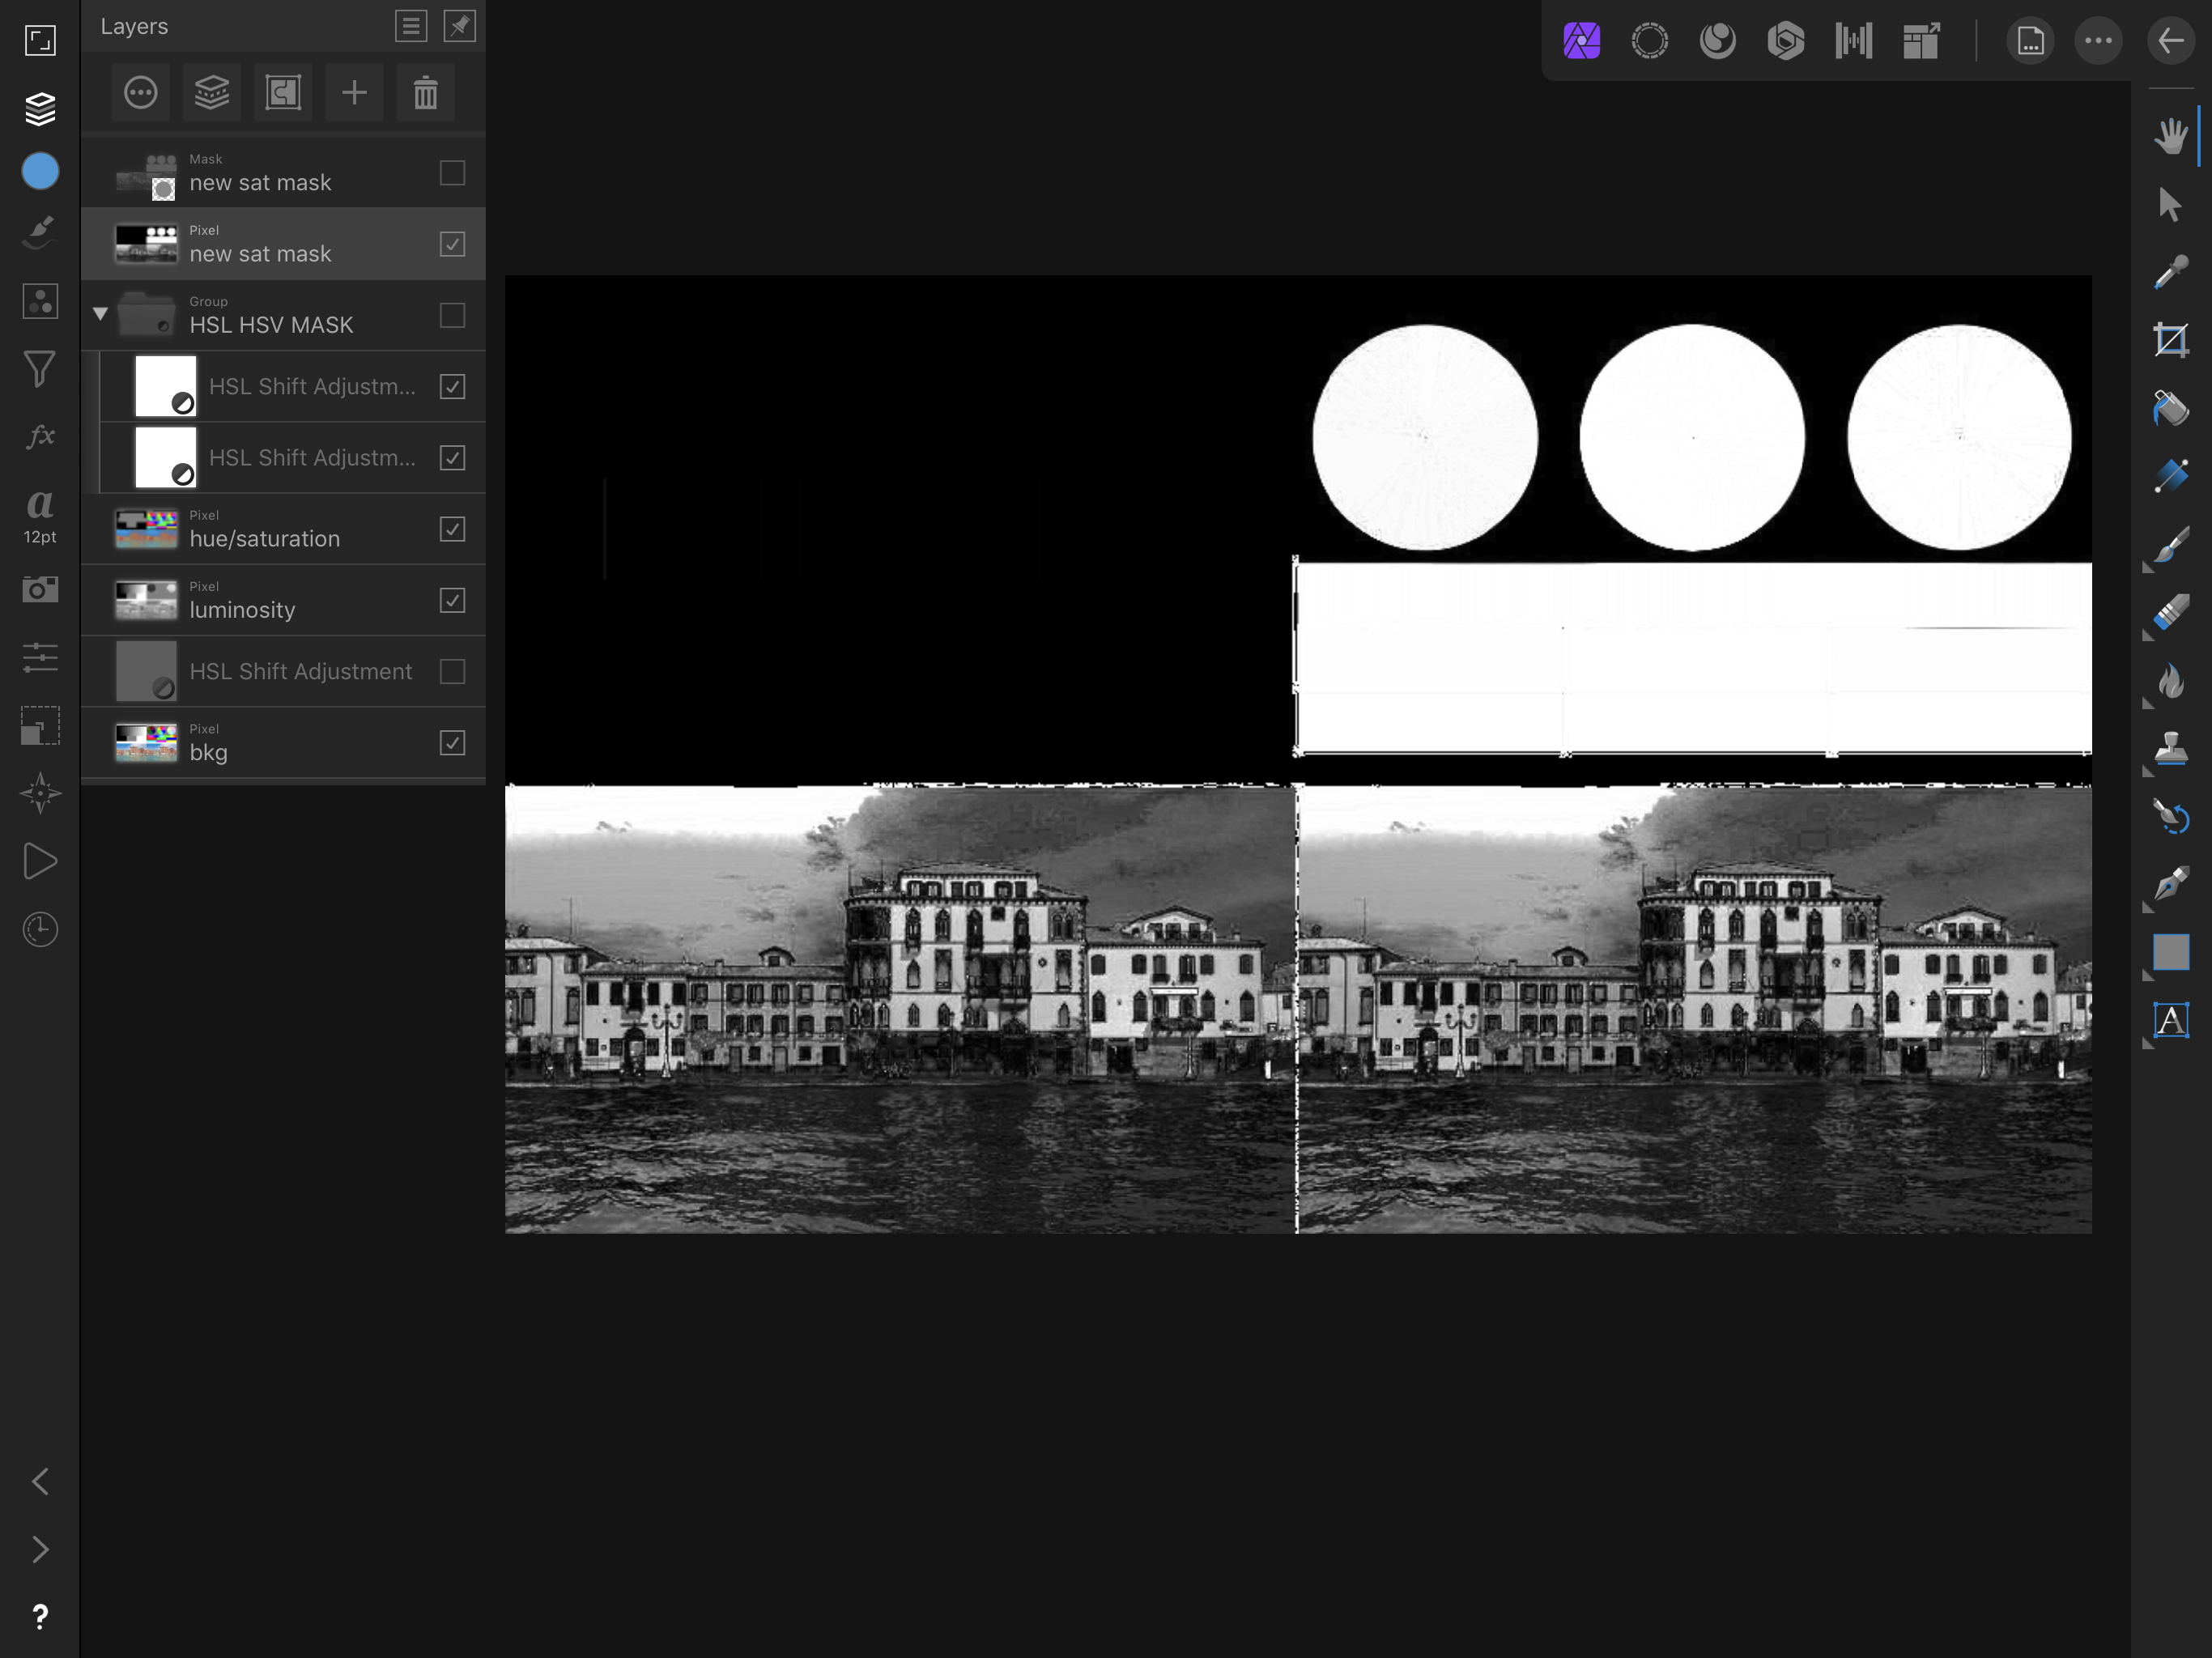
Thanks for sharing this! I’ve used this for a while now - the only issue is it underestimates saturation somewhat if the luminosity is not always 50 (HSL value). I found a way to make a layer where hue/saturation is preserved, but luminosity is set to 50. This resolves the issue. (Note: blending with a layer where luminosity is 50 with the “luminosity” blend mode does not work - nor do any similar approaches. The luminosity result is close to 50 but varies, and hue/saturation values are affected.) Here’s how to map saturation values exactly to luminosity values: 1. Create a HSL adjustment layer, and set saturation to -100. (Don’t turn on HSV!) 2. Merge visible. The result is a B&W layer that contains only luminosity values. (Note: desaturation, setting color to grey, etc. using pixel/fill layers/curves does not get this quite right!) 3. Invert the B&W luminosity layer, and set blend mode to “vivid light”. 4. Merge visible. The result is a layer containing only hue and saturation values. Luminosity is constant (always 50 by HSL). Now that you have separated luminosity and hue/saturation into their own layers, apply the instructions you shared above to the hue/saturation layer: 5. Create a HSL adjustment layer, and set saturation to -100. (Turn on HSV!) Set blend mode to “difference”. 6. Create another HSL adjustment layer, and set saturation to -100. (Turn on HSV!) Set blend mode to “normal”. 7. Merge visible. The result is a B&W layer containing only saturation values, mapped to luminosity values. This is your saturation mask. -
Free floating / always visible Histogram
Fotoloco replied to JGKK's topic in Feedback for Affinity Photo V1 on iPad
This, and brush tools. Would be VERY nice to not have to open them a thousand times. -
Also this site mentioned previously has the formulas for reflect and glow: http://www.pegtop.net/delphi/articles/blendmodes/quadratic.htm I confirmed this is how Affinity Photo's versions of these blend modes work. For example with reflect, if you multiply the blend layer by itself, then color dodge it by the base layer, you get the some result.
-
Blend modes notes (52 A4 pages)
Fotoloco replied to dmstraker's topic in Tutorials (Staff and Customer Created Tutorials)
Divide is still not available on any platform AFAIK. Don't know why, but you can use color dodge instead if you invert your blend layer. Same with linear burn which would be nice to have... The workaround is to use subtract, and invert your blend layer. -
Thought I would mention something I just figured out about the negation blend mode: it is equivalent to the difference blend mode if the blend layer and result layer are both inverted.
-
Layer icon - Blend Ranges
Fotoloco replied to sbp's topic in Feedback for Affinity Photo V1 on Desktop
This would be really nice and simple to add.- 1 reply
-
- 1
-

-
It would be very handy if we could make groups that take input from lower layers (like with the pass through blend mode) while allowing selection of any blend mode for the group. For example, you could use a pixel layer inside the group to apply an overlay blend, and then set the blend mode for the group to luminosity if the shift in colors/saturation is undesired. I use tricks like this all the time but currently I have to flatten the layers below and insert them into the group, which prohibits dynamic editing of those layers.
-
deform filter masking (freeze) regions?
Fotoloco replied to Fotoloco's topic in Feedback for Affinity Photo V1 on iPad
Bump... I still think this would be a hugely helpful addition. -
Fine tuning hue of selected color range
Fotoloco replied to LarsDaniel's topic in Feedback for Affinity Photo V1 on iPad
IMO, the ideal solution is to provide a HSL-type adjustment that allows only the selected color/hue range to pass through (effectively like a bandpass filter in music). It could be used to make a mask, and therefore used with any other adjustment or layer. -
Fine tuning hue of selected color range
Fotoloco replied to LarsDaniel's topic in Feedback for Affinity Photo V1 on iPad
We really need this... Any creative workarounds in the meantime? I haven't come up with anything that comes close to replicating the results of this approach in Photoshop. -
Info Panel in Affinity Photo iPad
Fotoloco replied to exploremoar's topic in Feedback for Affinity Photo V1 on iPad
Yep, we need this. -
When using the deform filter it is necessary to use a large number of pins to freeze regions that you don't want modified. An example of this is shown in the video below. It would be a huge time saver if we could freeze regions like we can in the liquify studio. Alternatively it would help if we could at least draw a series of closely positioned pins using a curves/pen/selection tool.
-
Agreed - this is a bizarre omission.
-
Affinity photo: Divide blending mode
Fotoloco replied to joconnell's topic in Feedback for Affinity Photo V1 on Desktop
Agreed, this would be handy to have. -
Currently we’re not able to record layers being moved, or selected... a good workaround is using the “move up” and “move down” commands for layers. Addition of a set of “move into/make child of” or “move out of parent layer” commands would be VERY helpful and would enable workarounds for the lack of general layer moving commands or ability to select multiple layers. (We need to be able to select multiple layers, or group them somehow, when rasterizing edits.)
-
All that you need to do is duplicate the layer, and apply whatever effect you want to the (upper) duplicate - blurring, embossing, etc. Select both layers and run the macro. Frequency separation generates the LP and HP layers in proper order setting linear light, and the high pass macro simply replaces the blurred (or otherwise) layer with the HP layer, blend set to normal. Custom.afmacros
-
Consider a PDF version of the manual to be a form of advertisement... it will serve that purpose, for sure.
-
bluetooth keyboard shortcuts support
Fotoloco replied to rtanski's topic in Pre-V2 Archive of iPad Questions
This really should be on the roadmap. -
Pin multiple studios at once
Fotoloco replied to Fotoloco's topic in Feedback for Affinity Photo V1 on iPad
Even just pinning the color studio open would be great - am I missing something? I don't know of a way to keep the color studio visible while shuffling through layers, etc. Is this possible? -
Apply image and blend modes
Fotoloco replied to Fotoloco's topic in Older Feedback & Suggestion Posts
The most obvious is creating blend modes that don't currently exist in Affinity like the "divide" one, or for creating saturation masks, etc. -
Is there a way to "pin" the color picker open even while using other tools or navigating layers? Having to swap back and forth constantly slows things down a lot.