
Affinity iPad Student
-
Posts
332 -
Joined
-
Last visited
Everything posted by Affinity iPad Student
-
 Title says it all. Current solution, back out of project and enter again, unfortunately… may not save your current work, you will re-launch into a previous edit from further back in your history timeline. My iPad & Affinity specs, are in my sig - if needed.
-
-
Wow -> now this a Pro comment! broke everything down in visuals! @Seth Hendrick I would take heed on this knowledge the photon collector dropped. That brother brought you light.
-
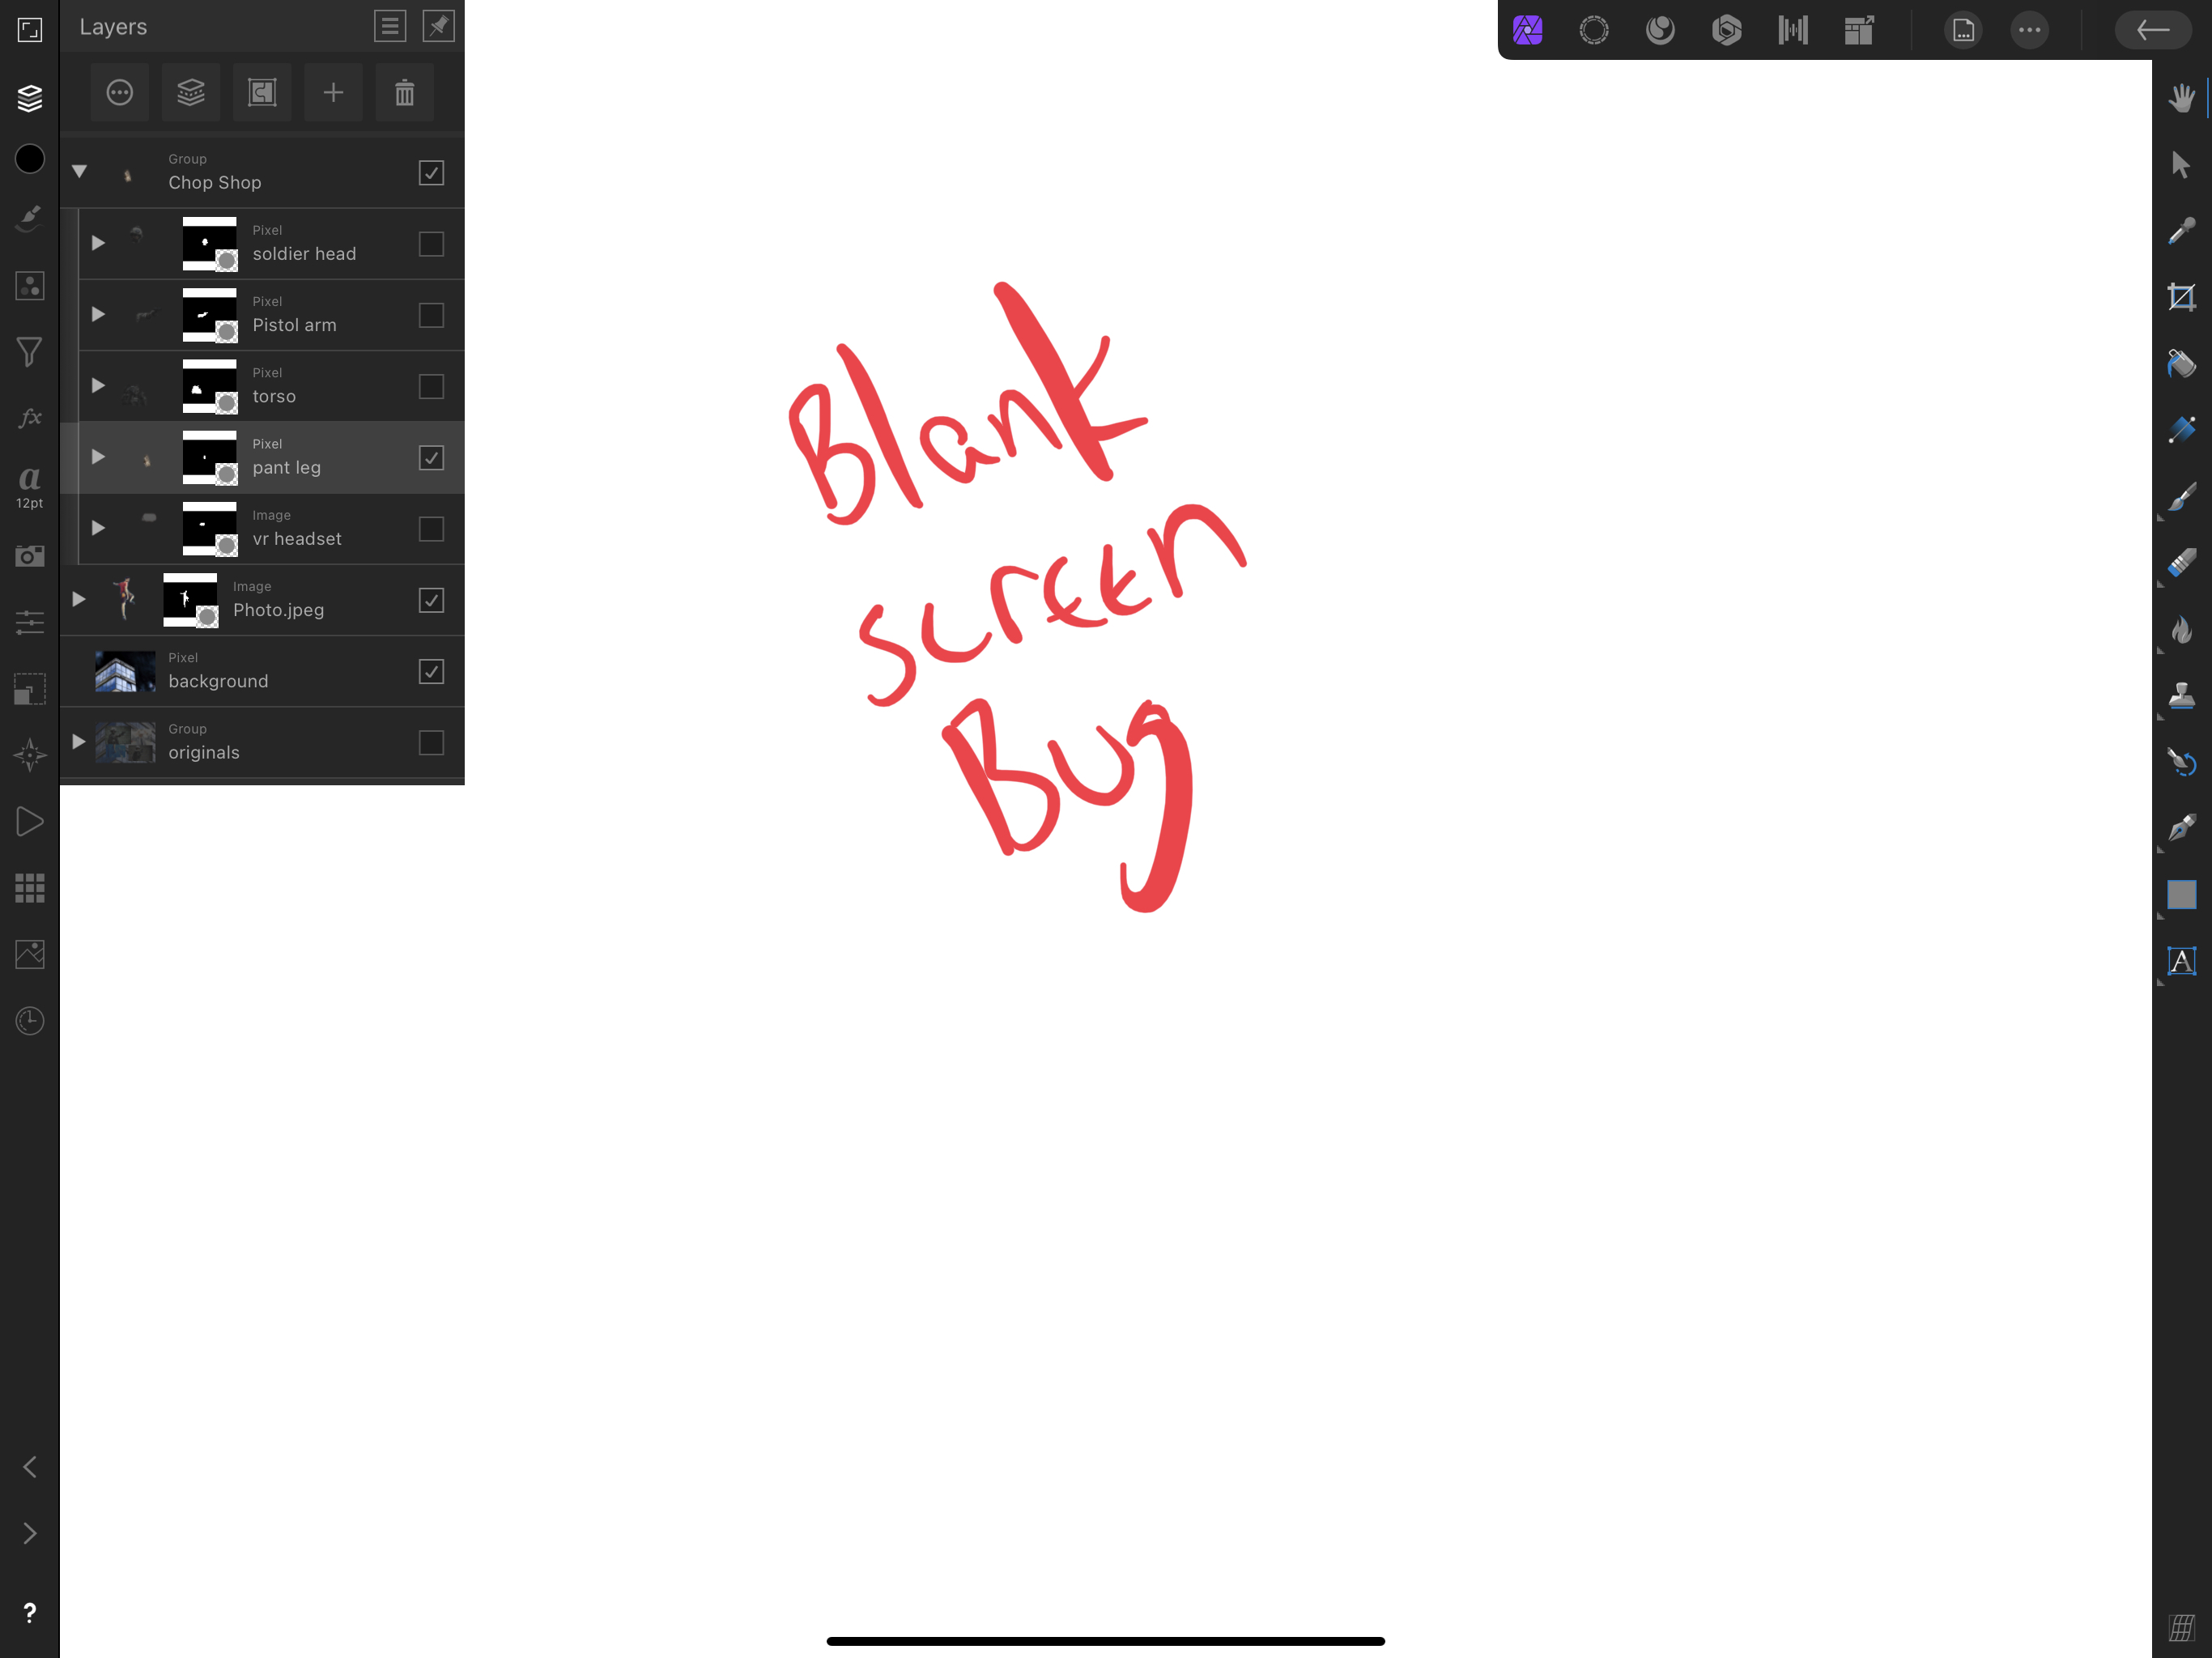
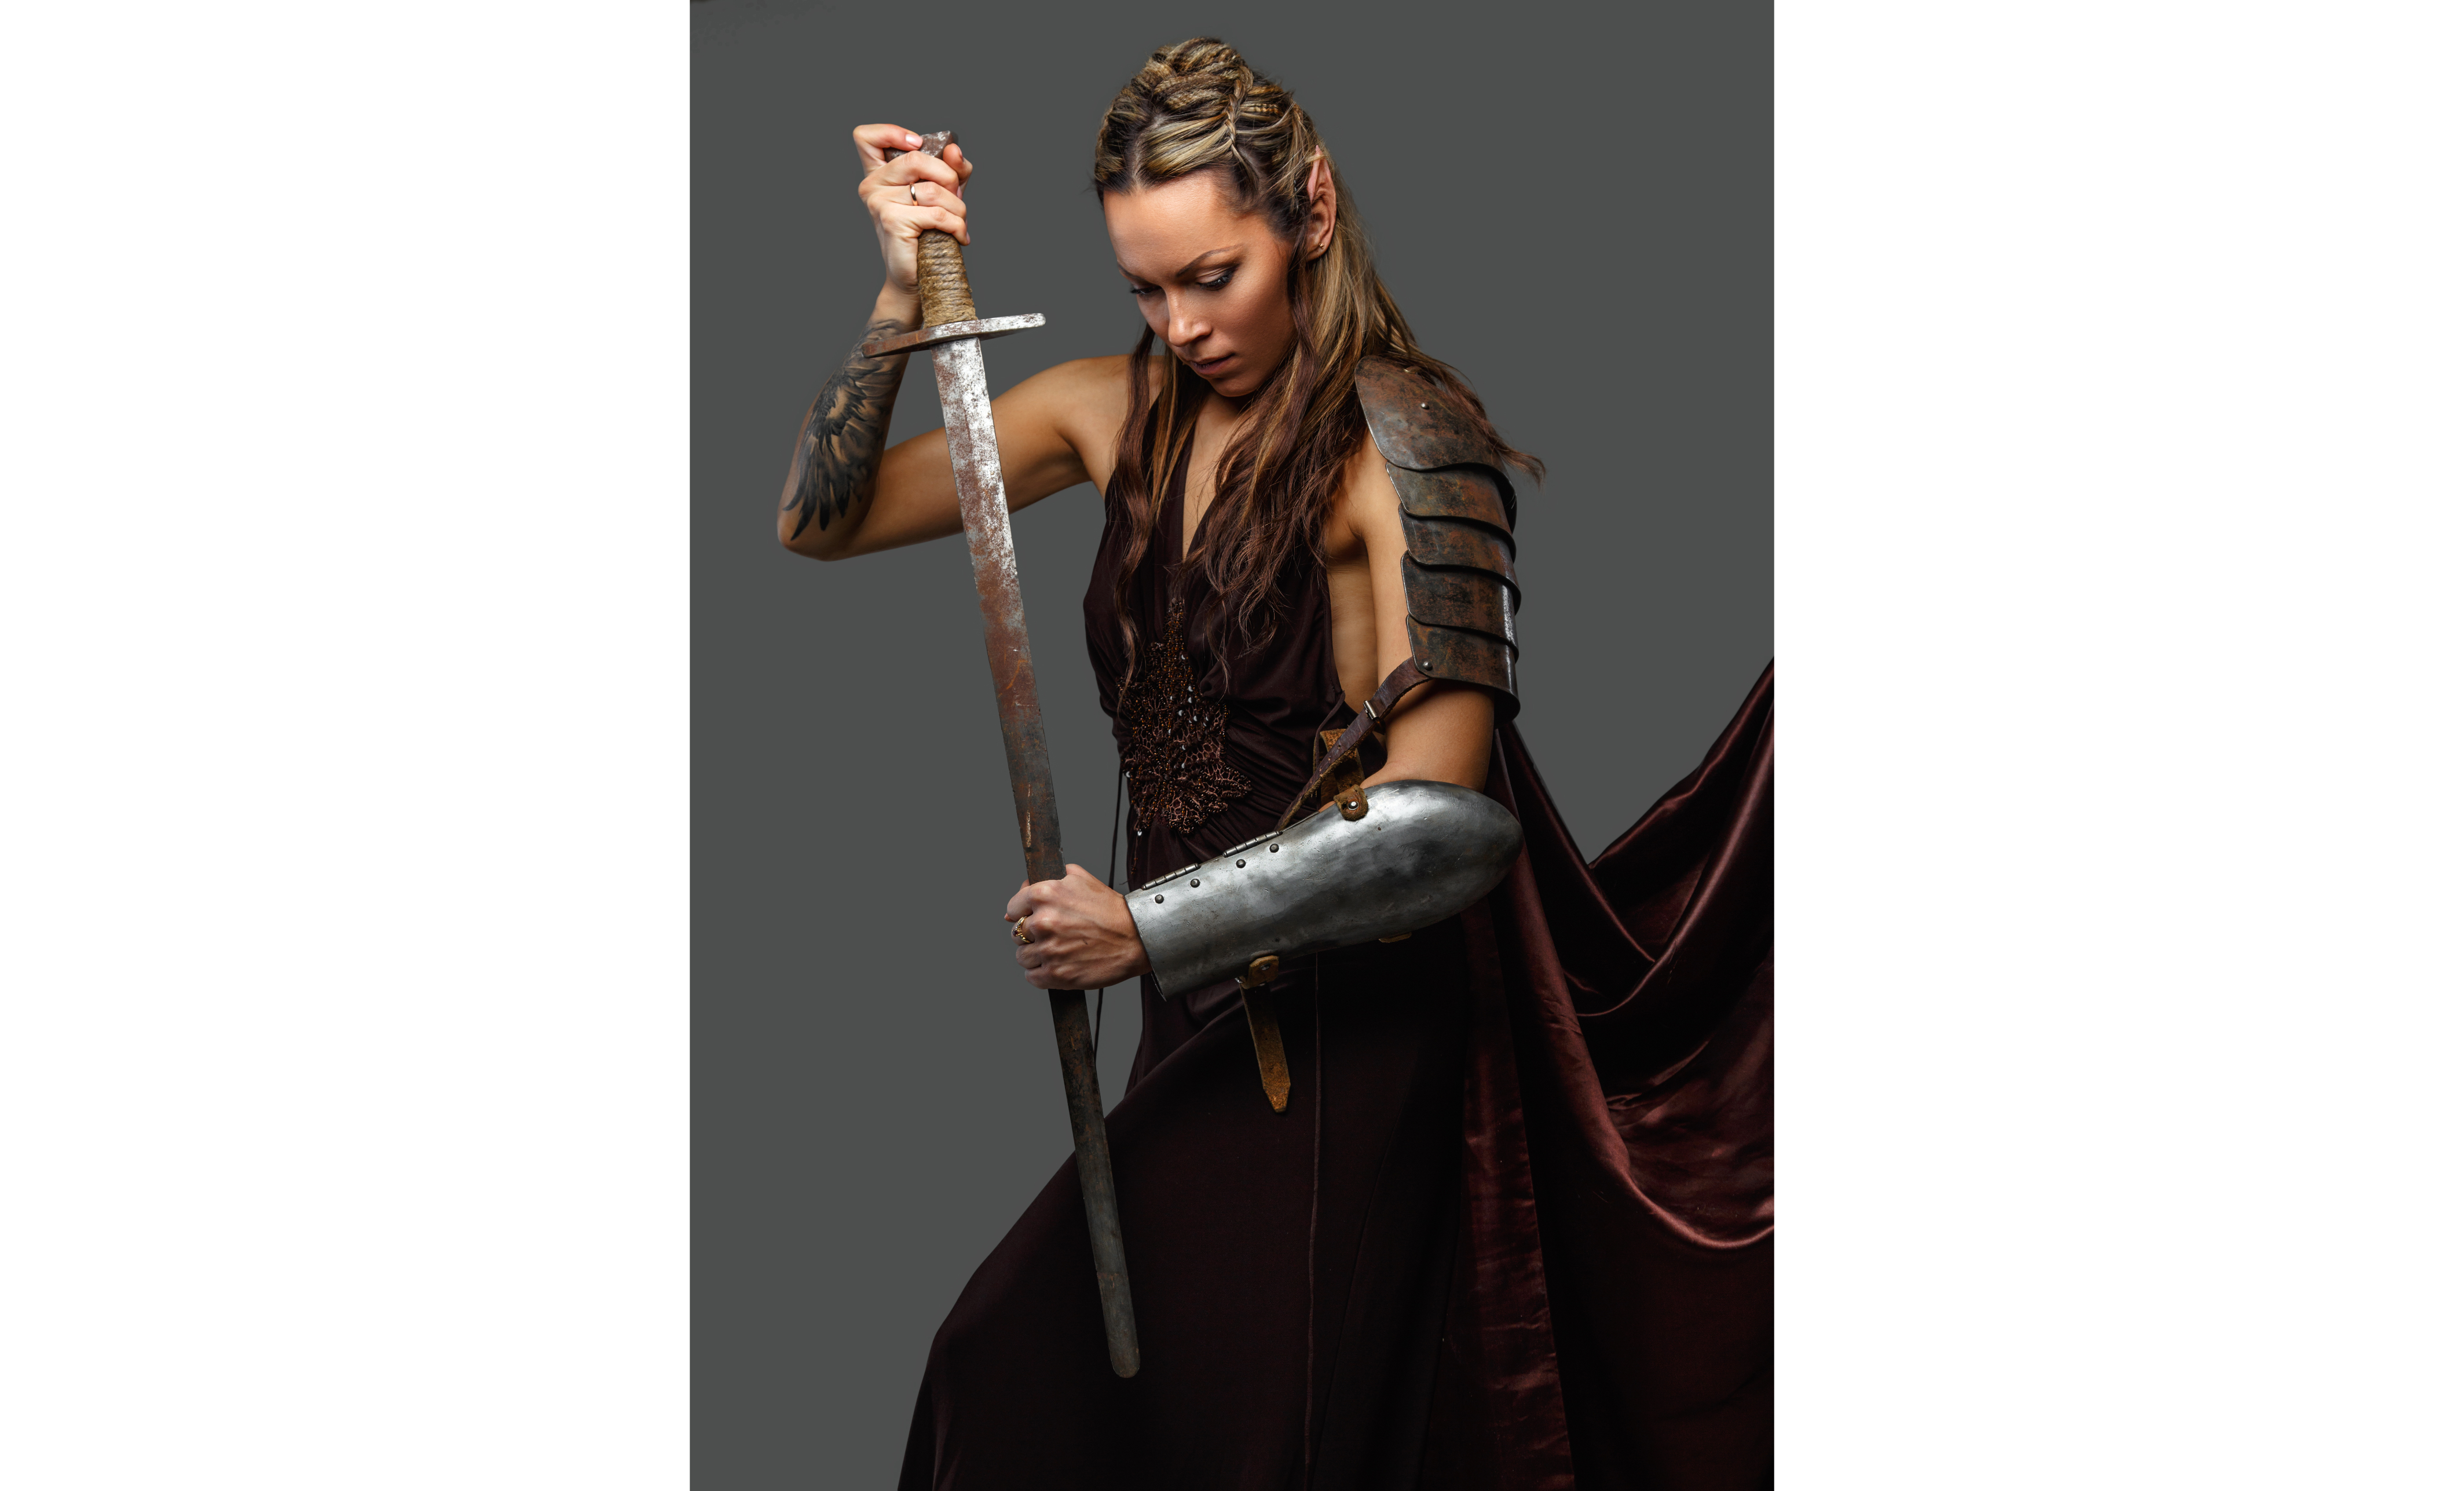
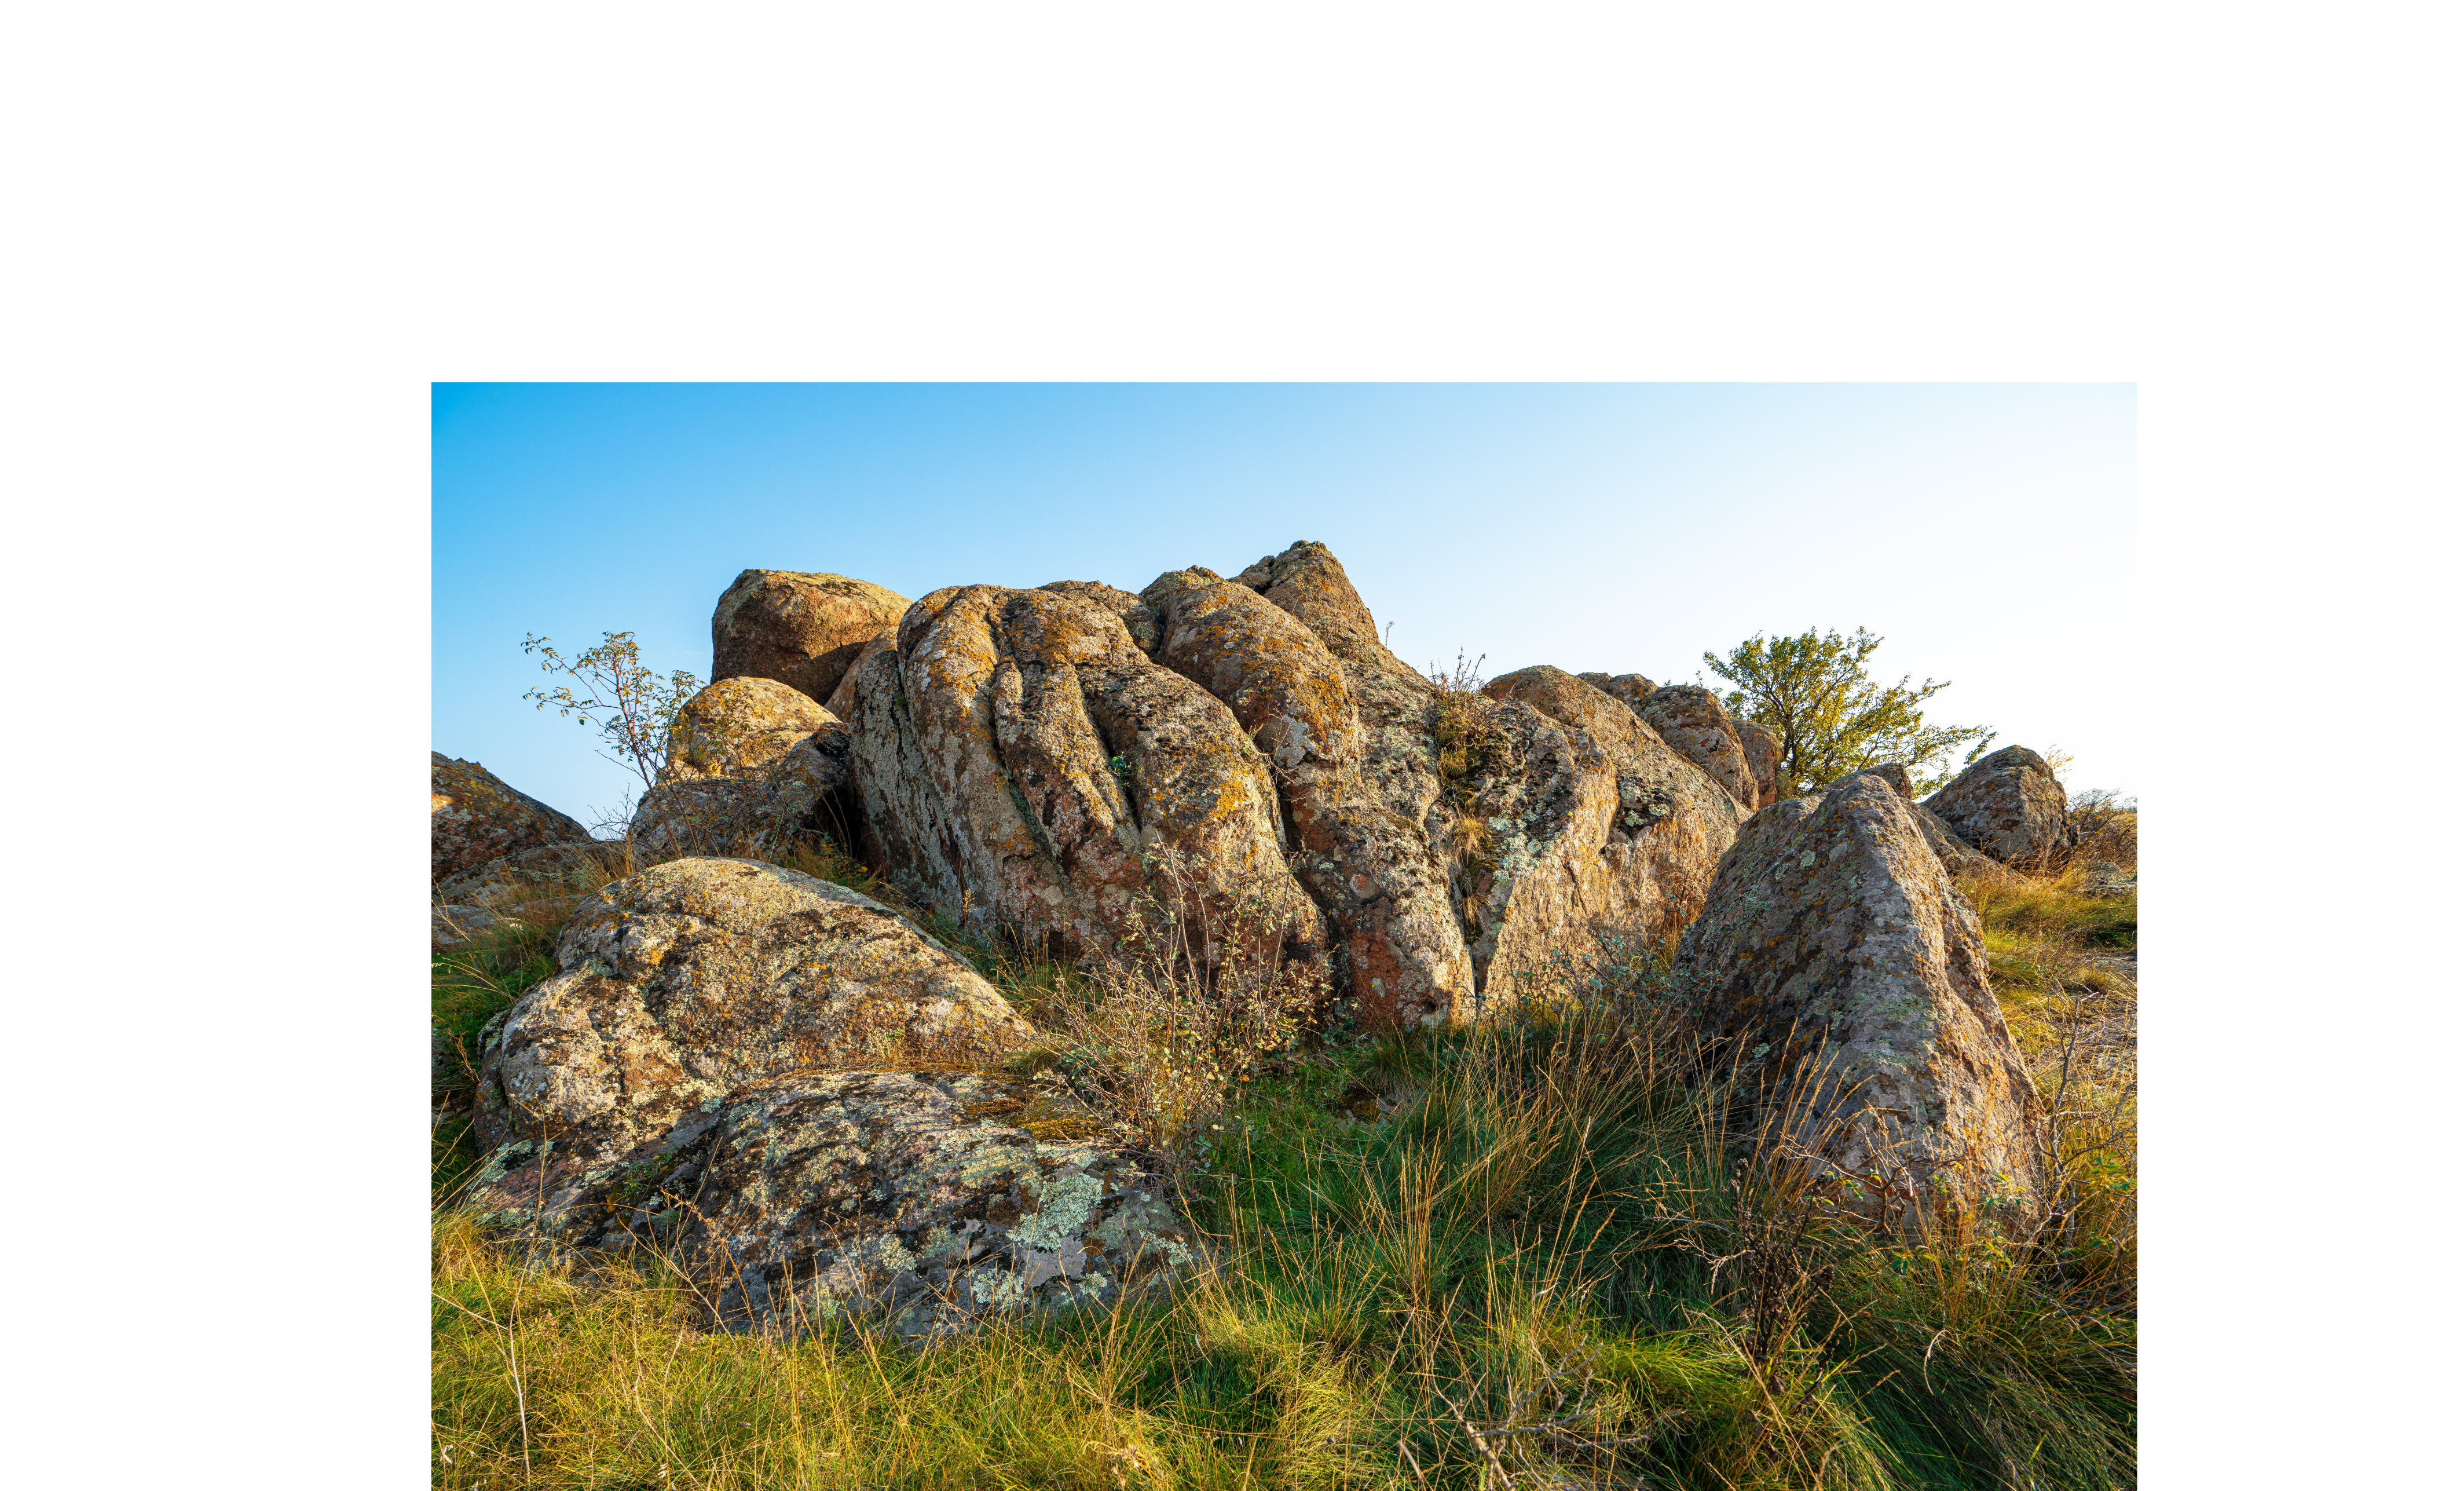
Specs iPad Pro (2020 Model) 12.9” iPad OS 15.2 Affinity Photo 1.10.1 Paid Photoshop Course followed: Kevin Carden Sword in the Stone Originals:
-
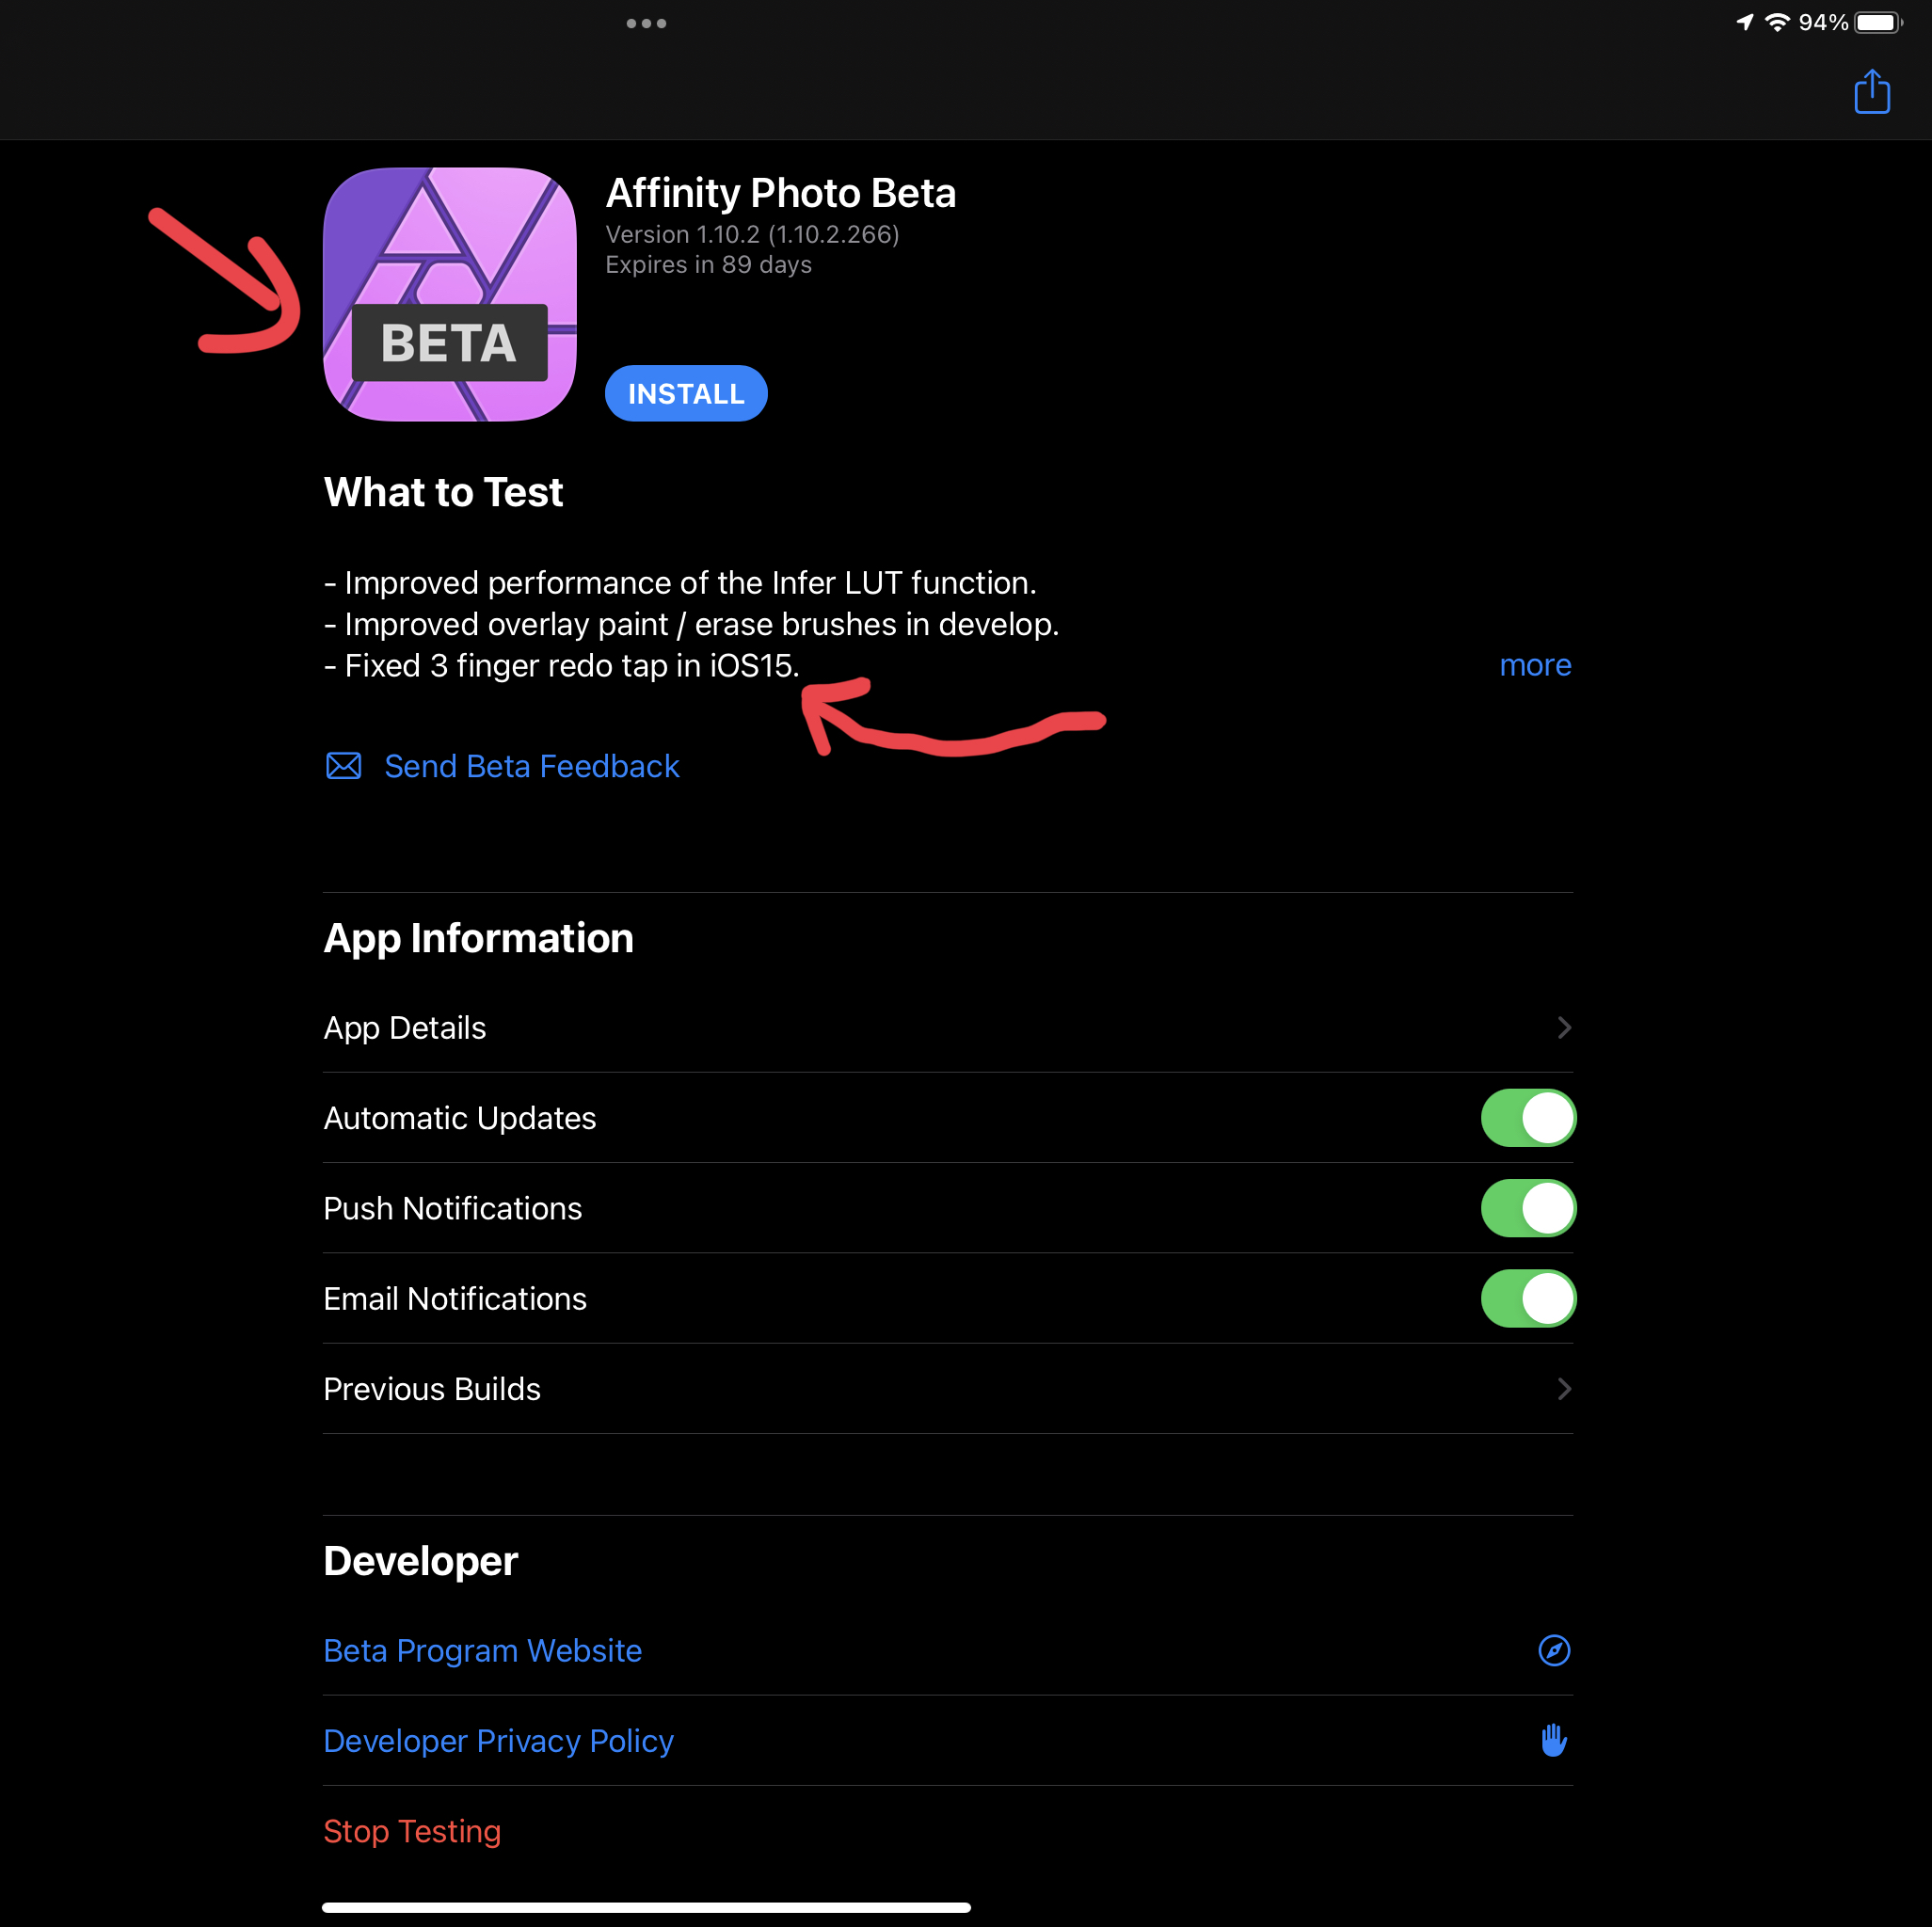
I cannot update my OP otherwise I would had put solved in the title, but @DM1 is correct. It’s in beta now:
-
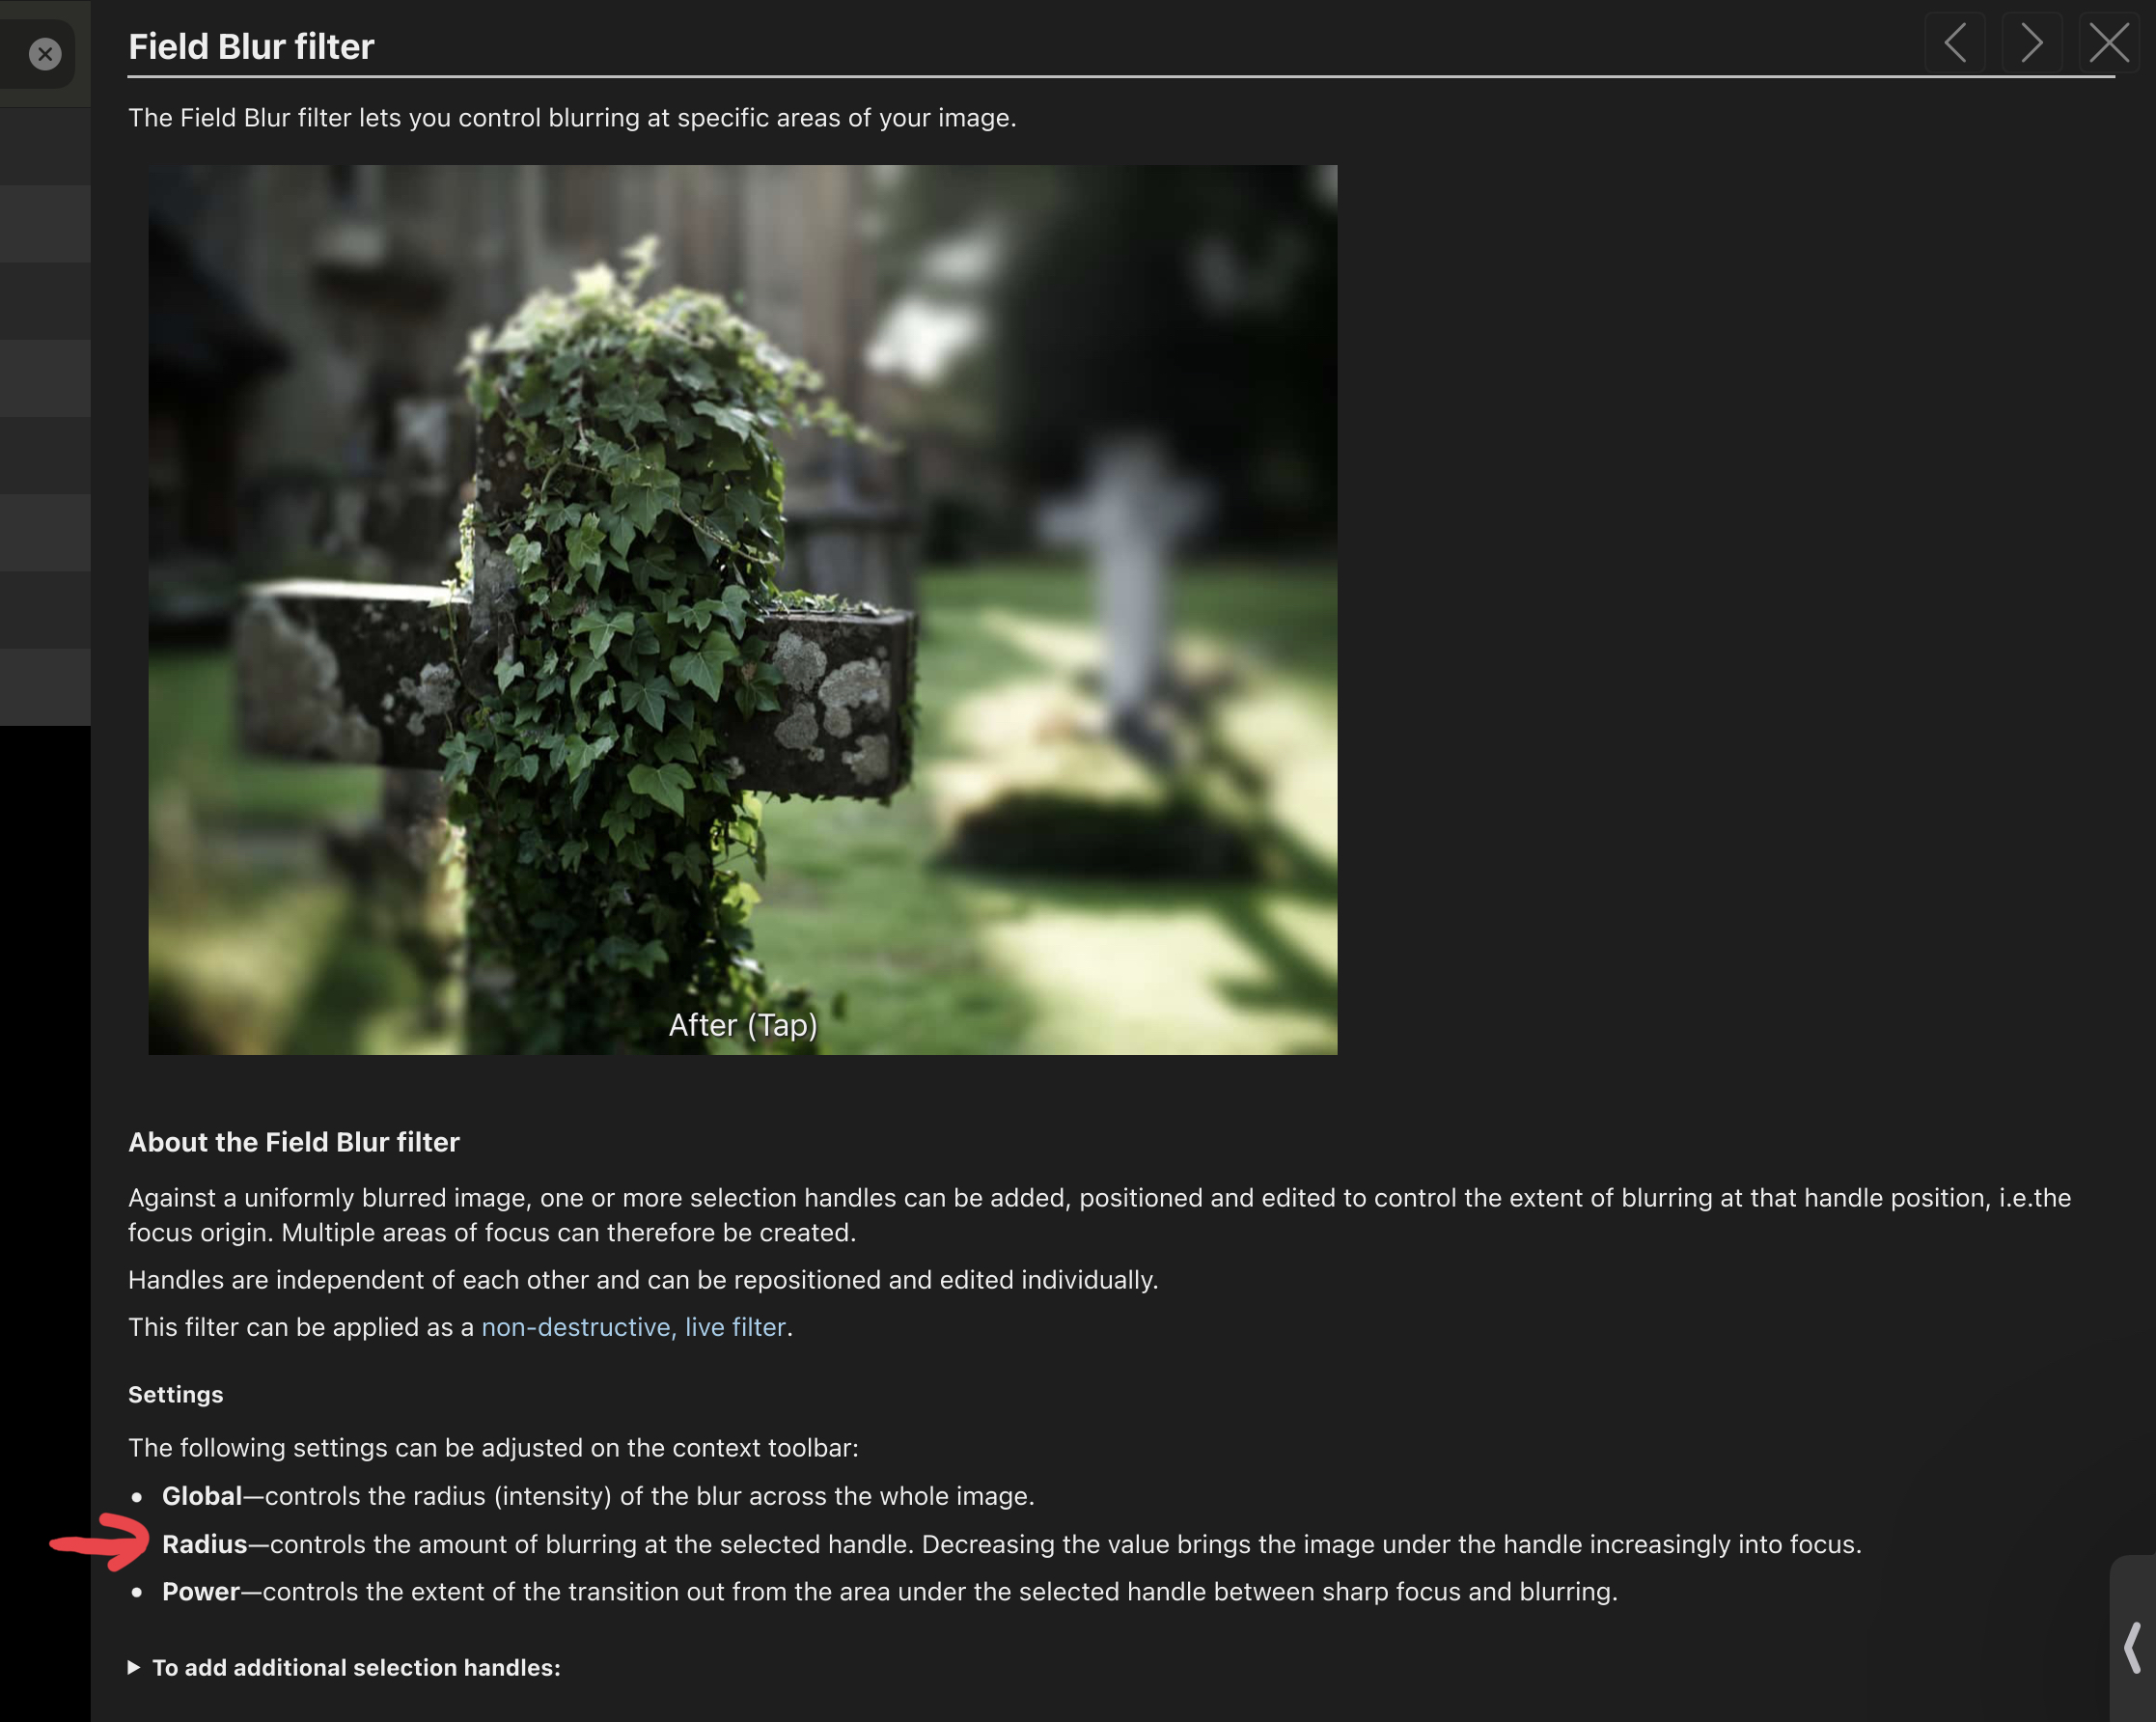
Solved: Global has to be set at 100% therefore allowing the independent handles to be adjusted via decreasing or increasing radius & power. Strange way to go about this for me. Needing the global middle man to mitigate this deal. Photoshop tutorial i’m following, they just apply a handle and from there they increase or decrease the blur values, without requiring a global value having to be maxed out, in order for the handles to activate and perform blur functions. Seems longer this way. Solved! FullSizeRender.mov iPad Specs: iPad Pro 2020 Model iPad OS 15.0.2 4gig ram 1tb of free hard drive space Issue: Field Blur handles are not working via it’s independent radius & power controls. Global works fine. Field Blur handle & radius rules:(see red arrow in image below) Video clip: (radius not working for independent handle, but global works fine) FullSizeRender.mov
-
Got the course from this site: https://kevincarden.gumroad.com/l/WlvZzB My Piece: Originals:
-
Specs iPad Pro (2020 Model) 12.9” iPad OS 15 Affinity Photo 1.10.1 Still learning… framing of composition to guide the eyes rim lighting atmosphere mood Grateful to have this on my iPad. Look forward to the future powerful updates Serif has in store. My Piece: The Originals:
-
Thank you guys. I’m on iPad Pro 12.9” (2020 model) in case the devs needed to know this information.
-
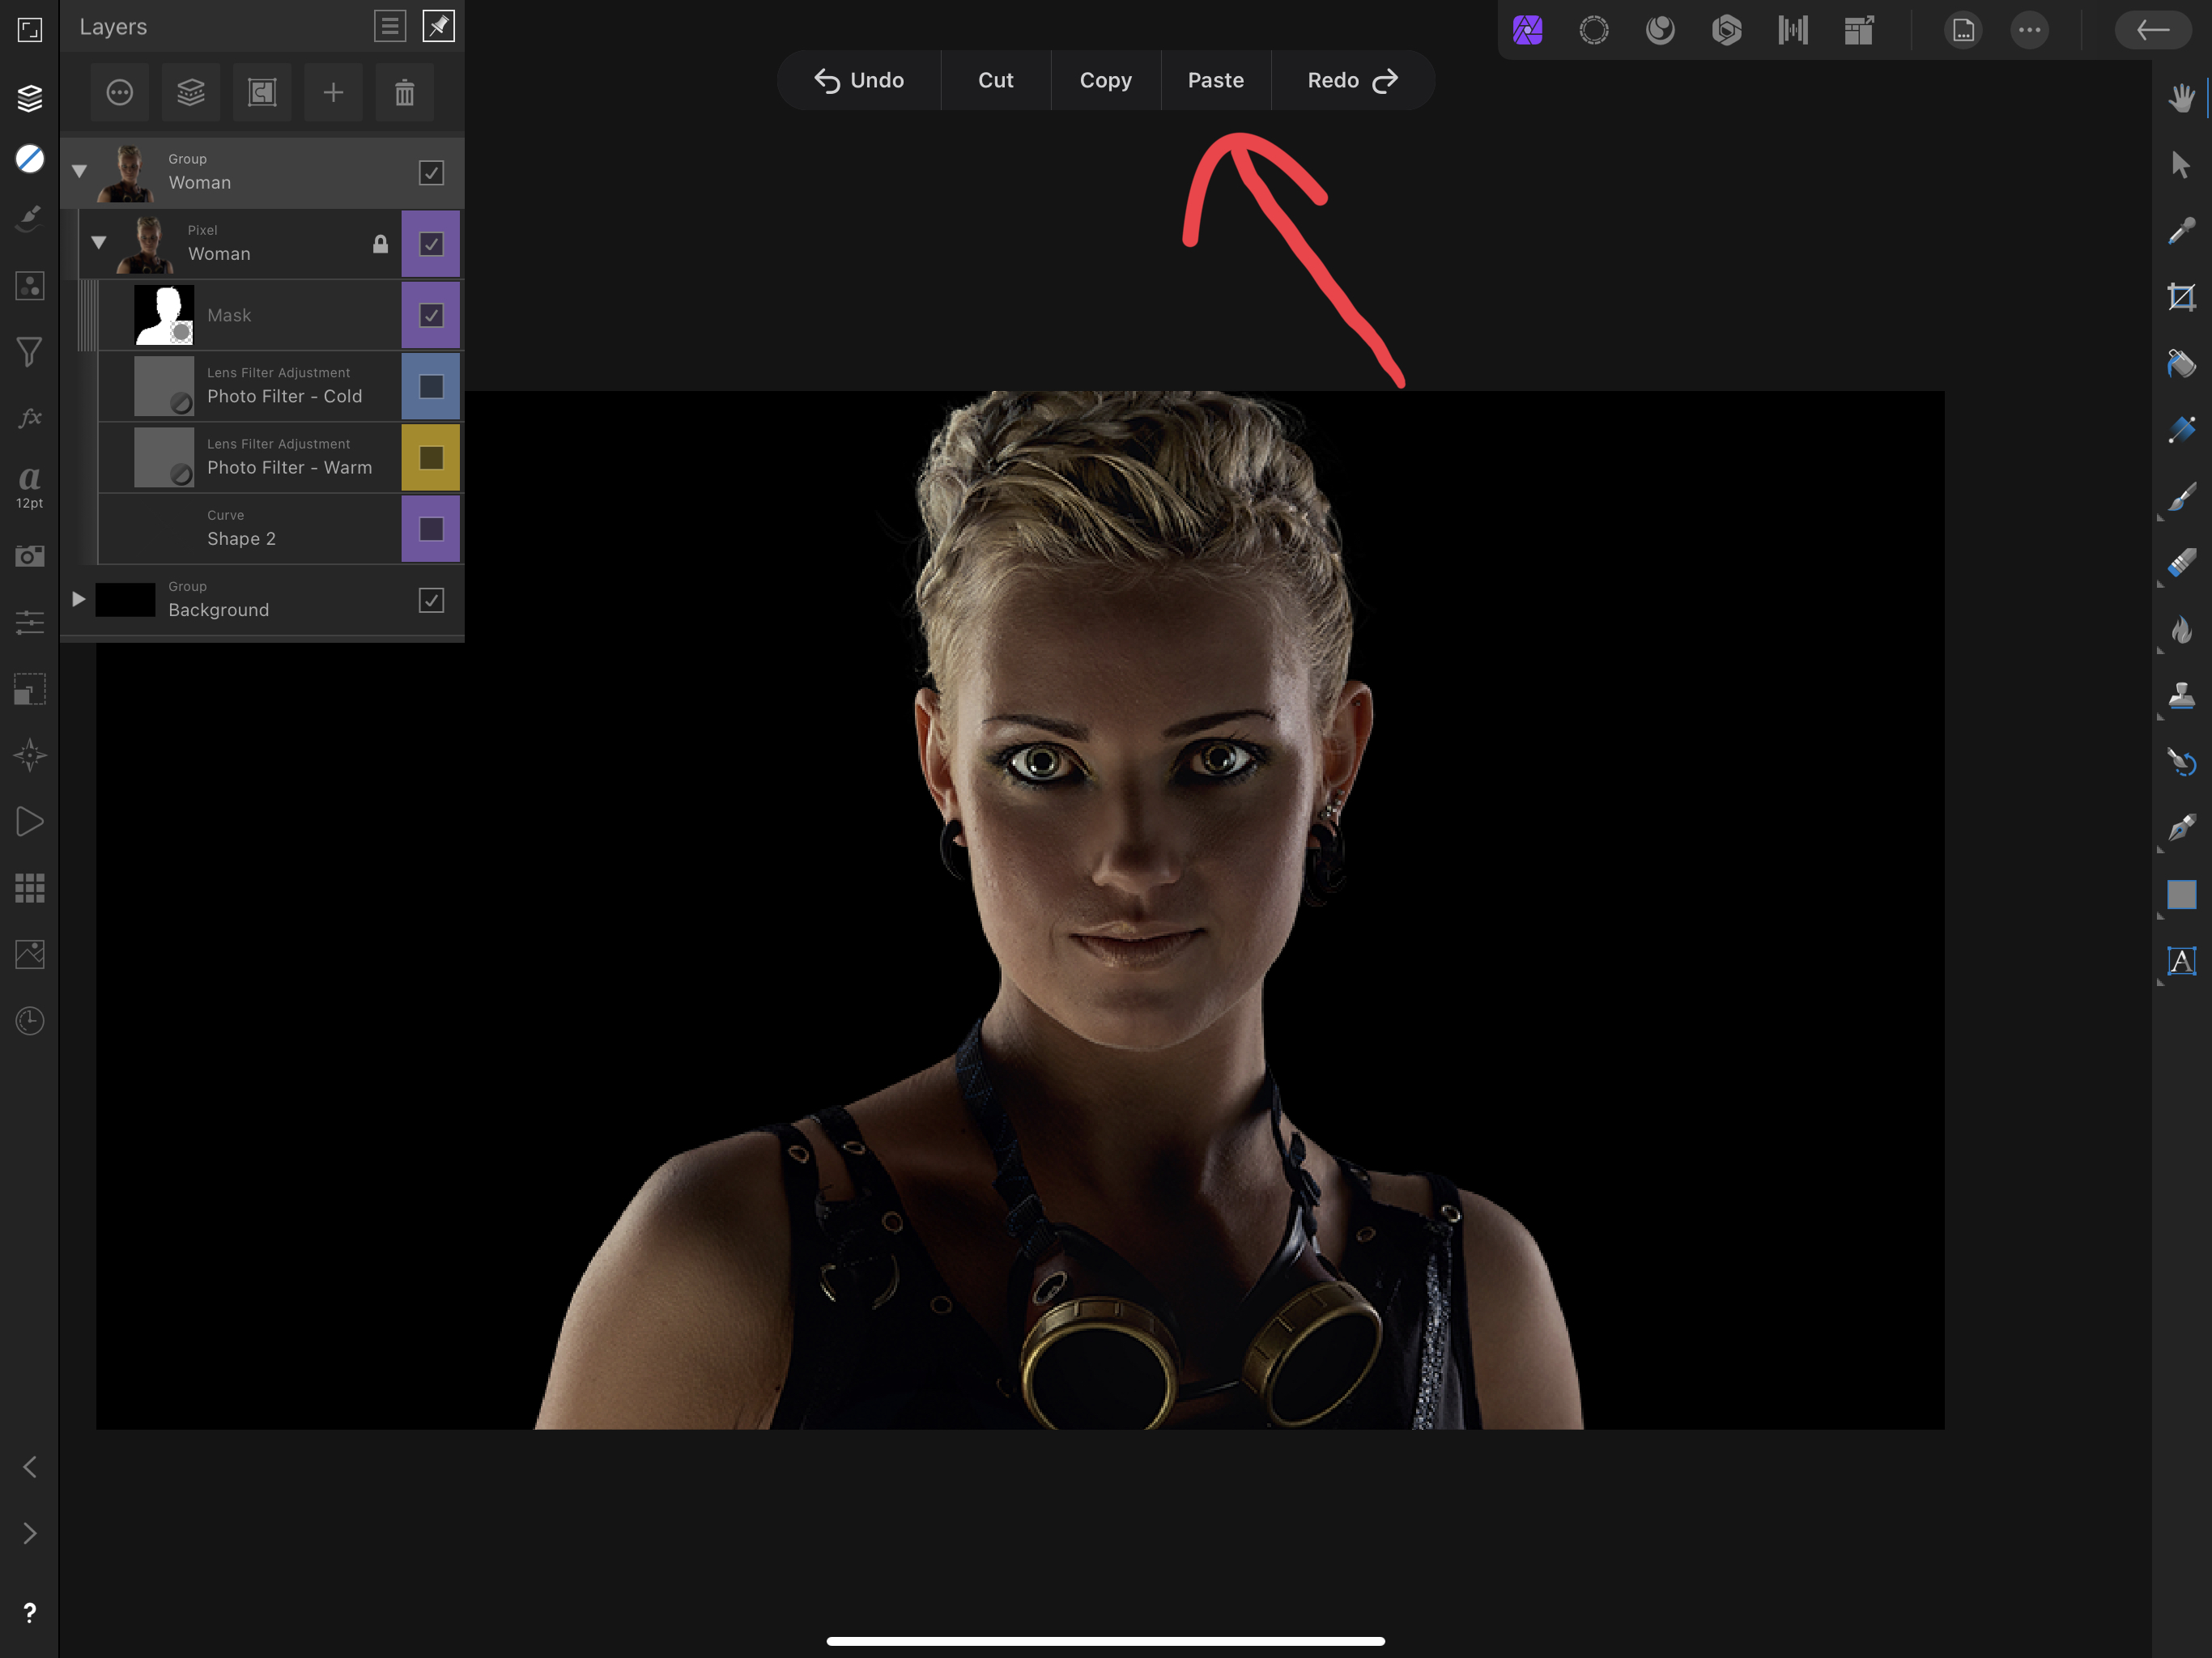
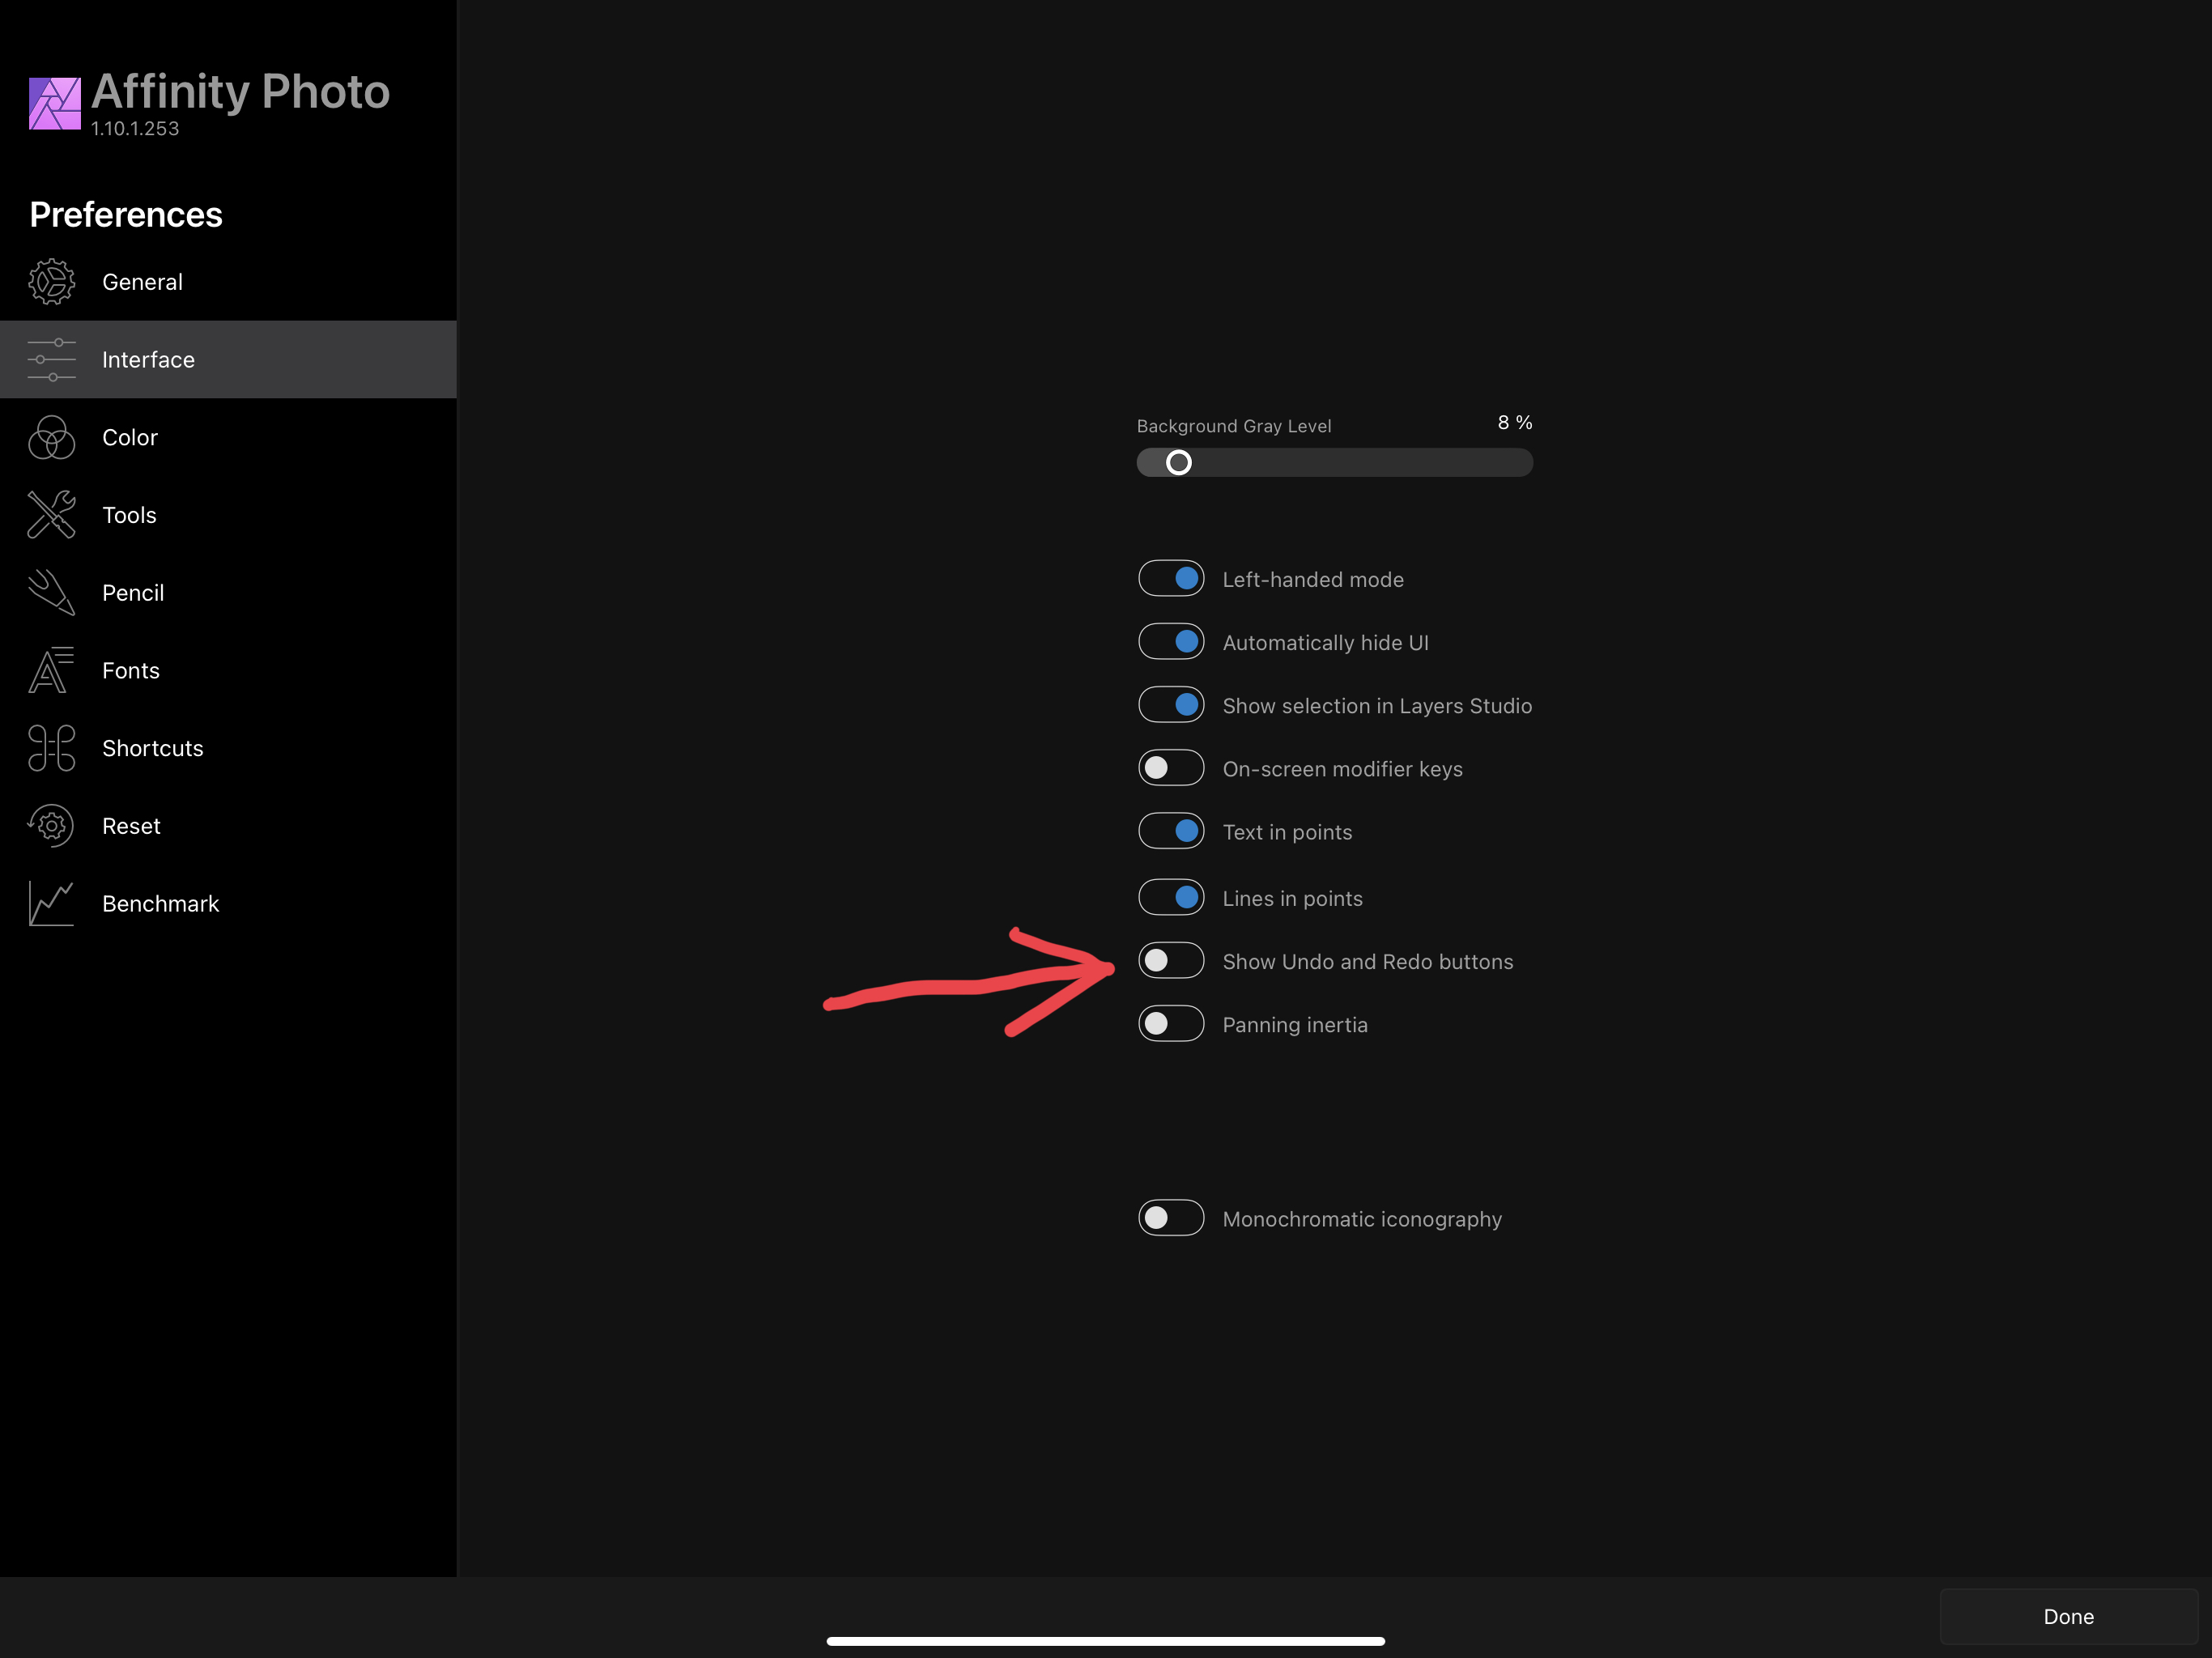
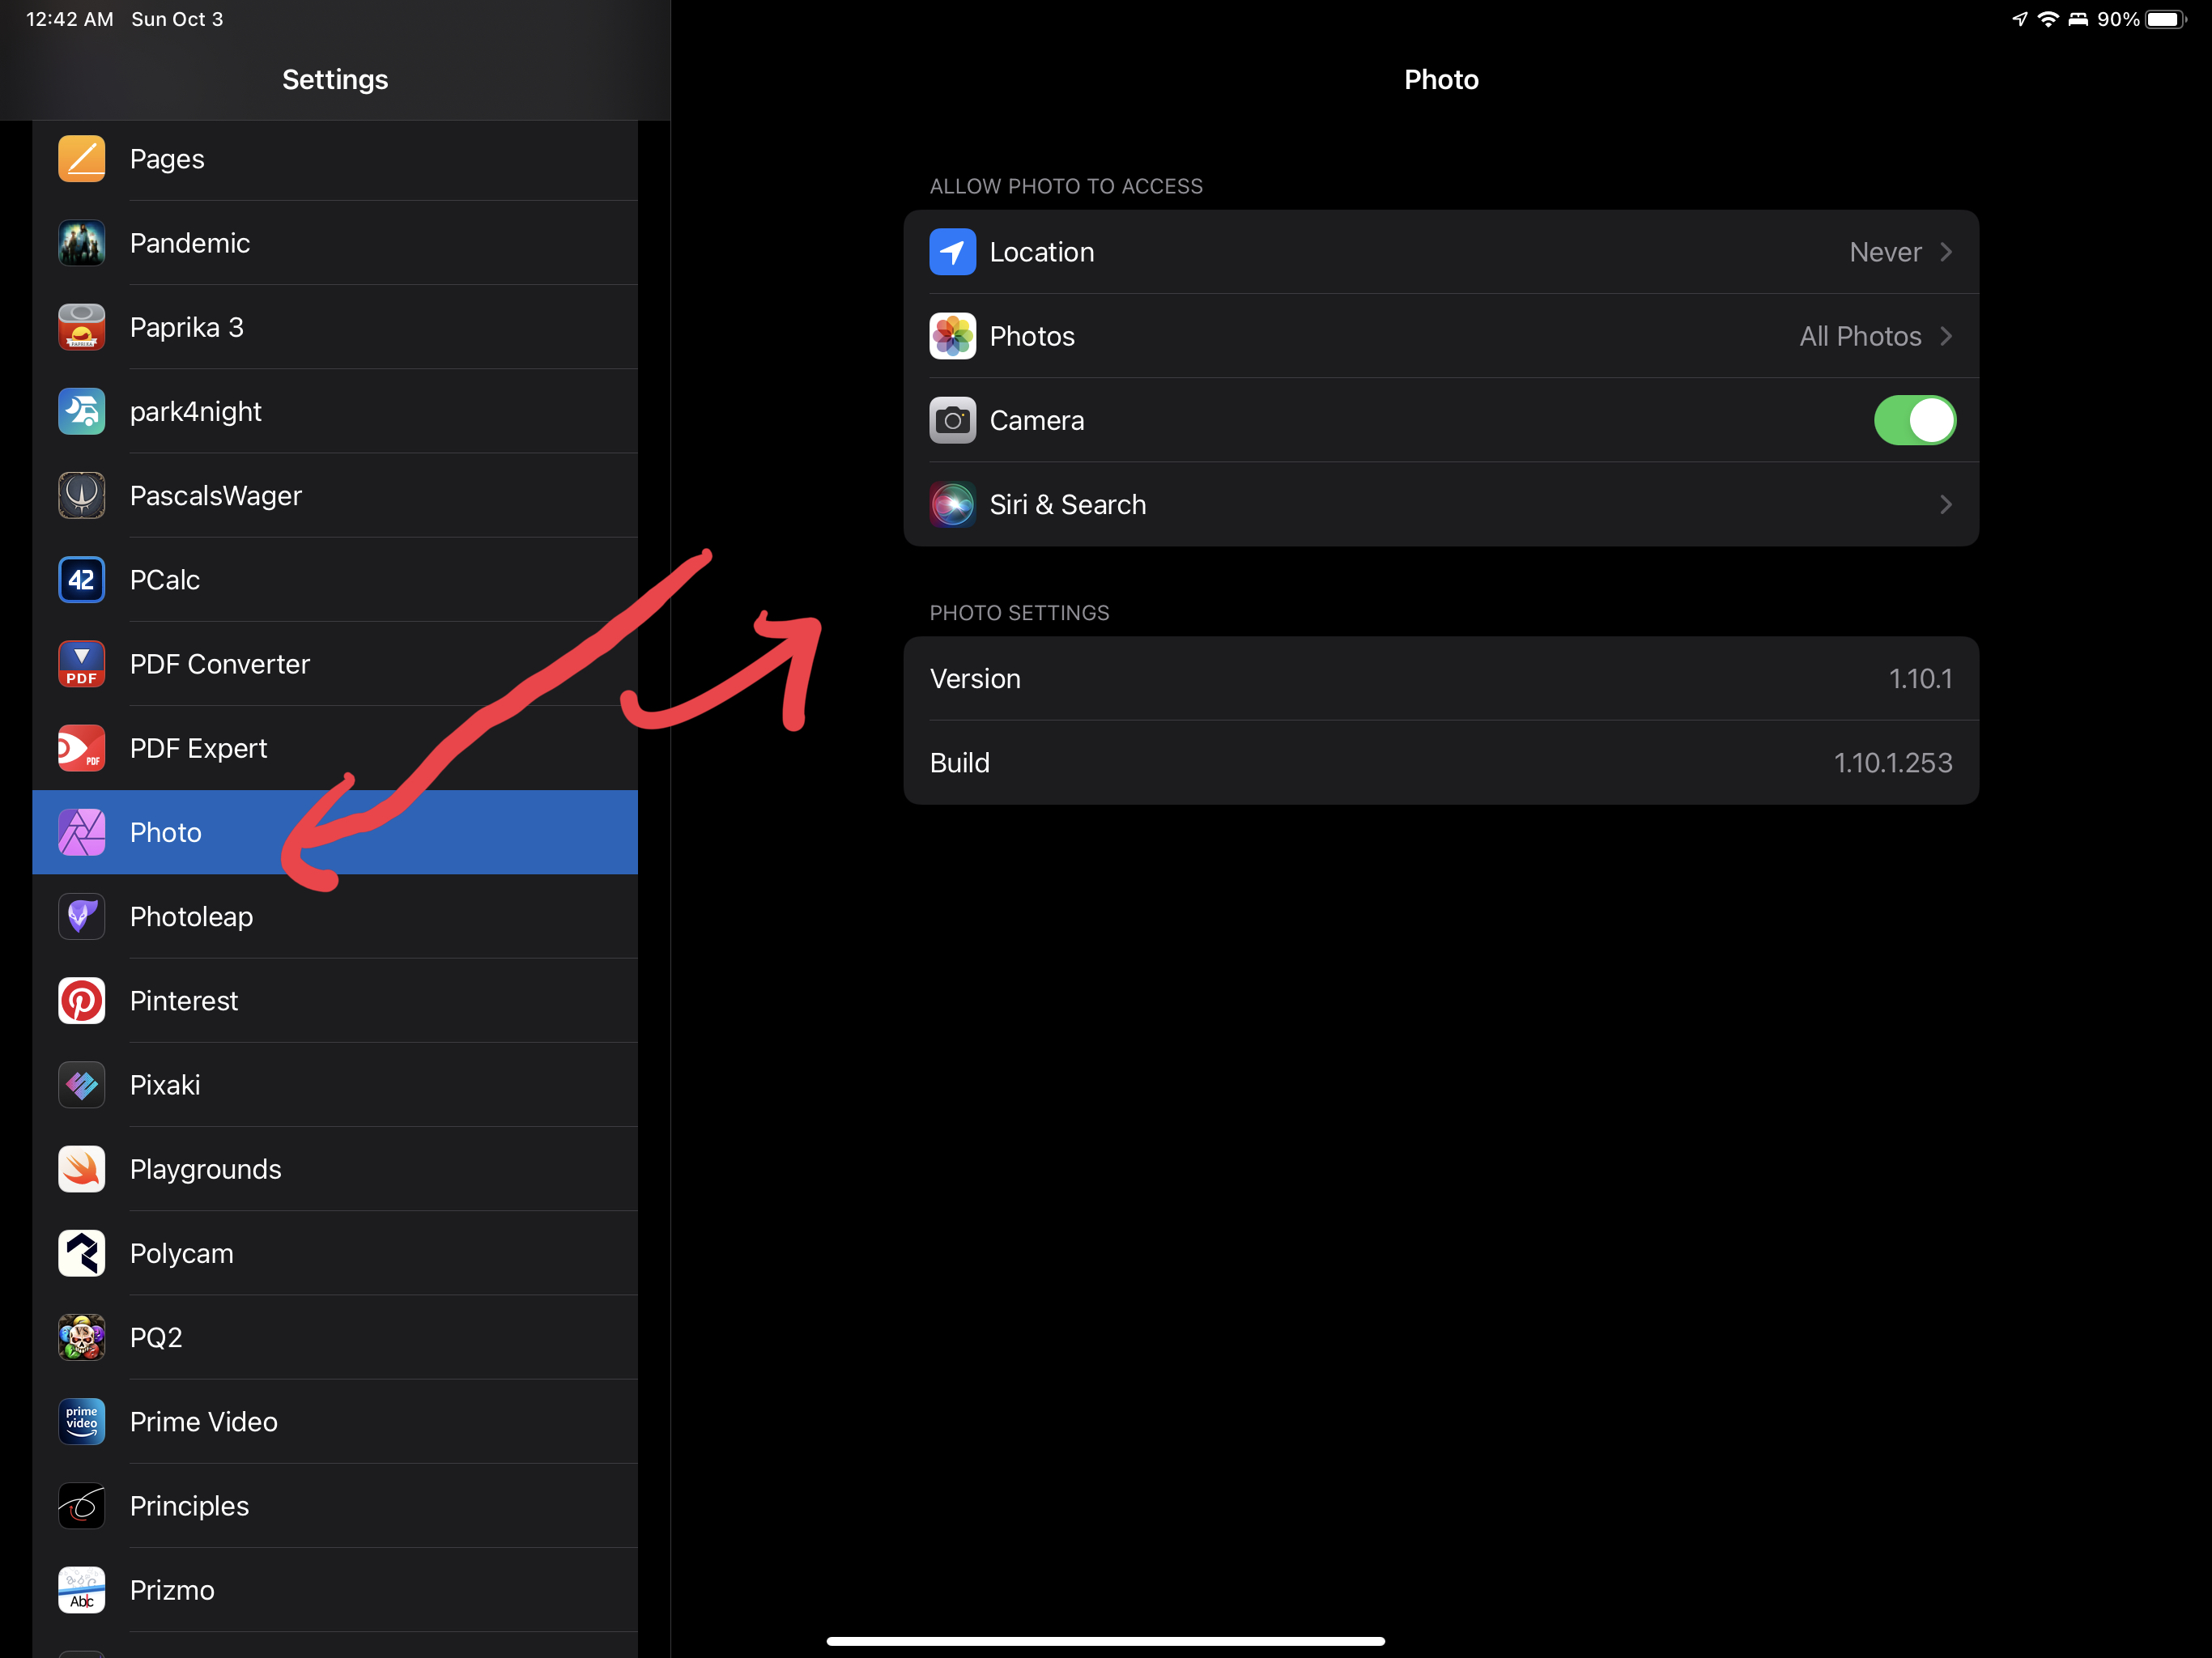
Not working for me. I have checked affinity photo settings, and noticed two finger tap & three finger tap options are no longer in there, if I recall correctly, they use to be there prior to 1.10.1? . Some issues I have stumbled upon: 1. Three finger tap no longer executes redo. Instead, the redo and undo buttons appear above screen when I three finger: 2. When I tap the on screen, undo & redo buttons - nothing happens: 3. I even disabled the toggle for “show redo, undo buttons” to see if this somehow brought back the three finger tap functionality, which it didn’t and the buttons still appeared above screen even though i disabled the toggle: 4. I even checked the iPad settings directly to see if serif placed the options in there (some games do that now) nothing is there: Is this a issue known? or did Serif remove the three finger tap redo feature outright for 1.10.1? Troubleshooting I have tried: closed out the app and re-launched rebooted my ipad running ipad os 15 running affinity photo 1.10.1
-
@NotMyFault Thanks! I did try the black & white adjustment and HSL adjustment. Did not work in this case. I was definitely not aware of the others, will check those out. Particularly appreciate the curves adjustment nugget. I’m rolling with that one first.
-
@Alfred Thanks for chiming in Alfred, your knowledge is always valued over here. I’m going to test again later - determined to figure this one out!
-
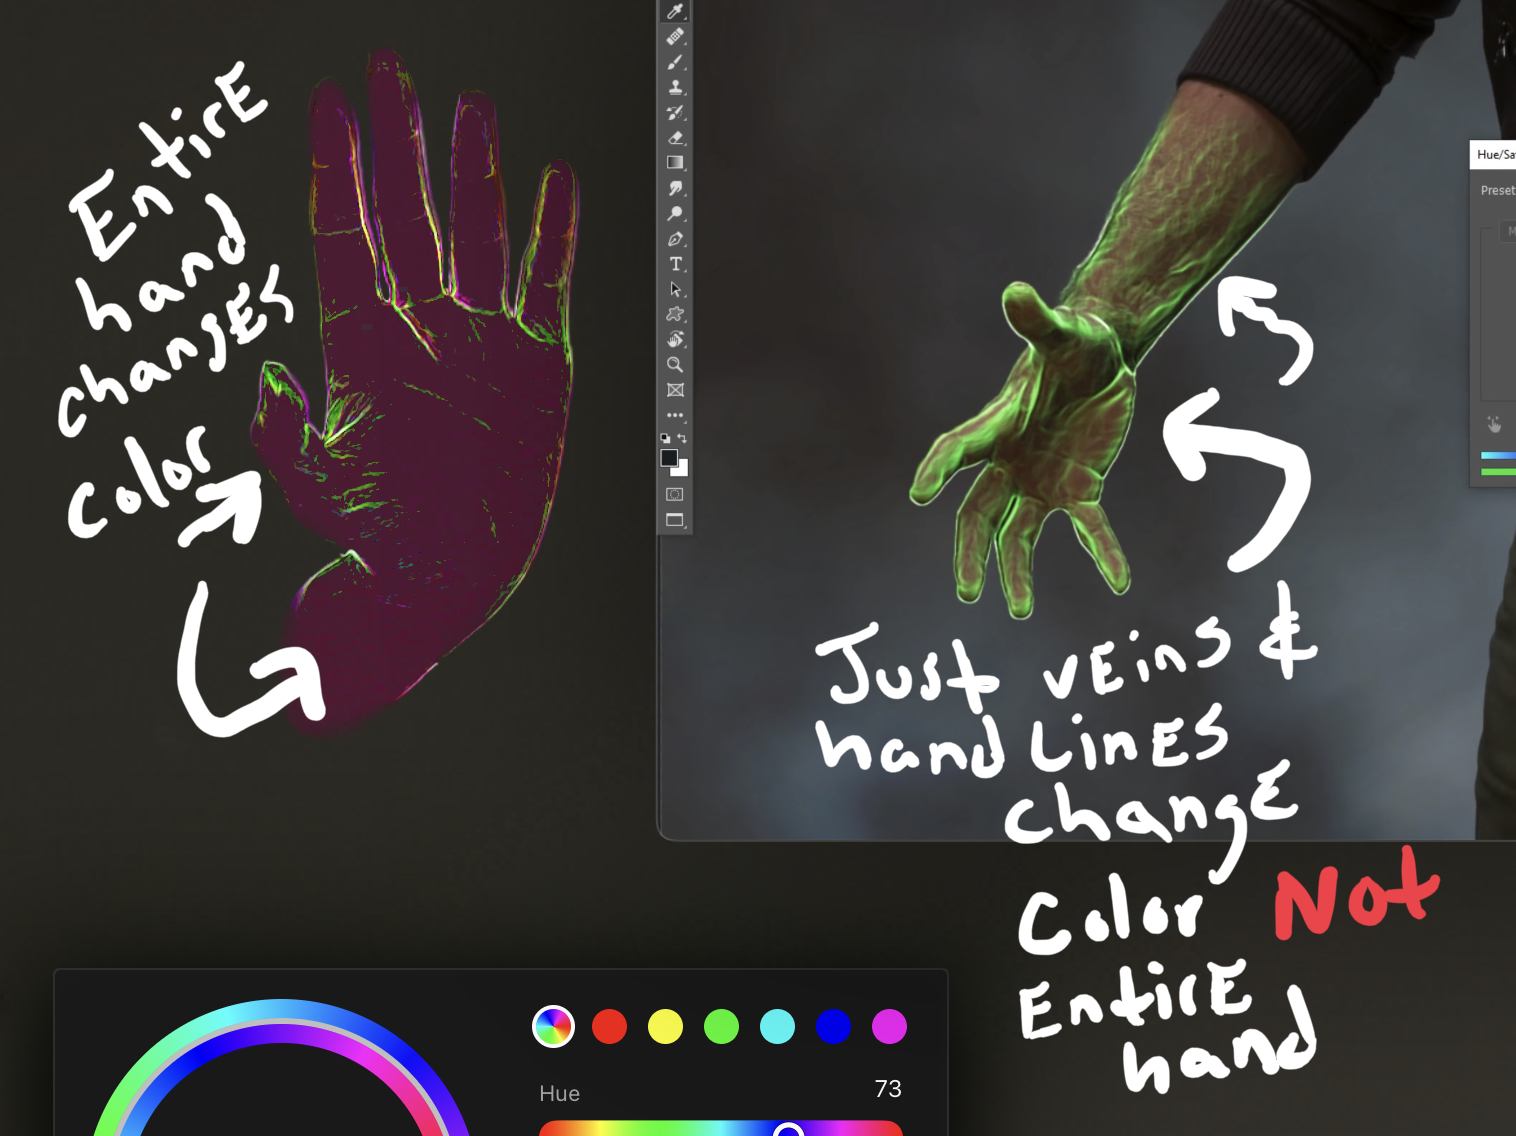
@Dan C Unfortunately… the advice you suggested and the stuff I experimented with, does not work, but before I get into that. I thought put out an in-depth on how I went about it another way and some stuff I came across, maybe this data will help the devs down the road or… maybe it’s nothing and it’s just my amateur card getting proud because I’ve been doing some stuff I deem cool with AP so now amateur section thinks he knows something! 😭 So… to semi achieve the goal… I had to go about producing the result in a different way. I set the detect edge layer to an add blend mode. and I then popped an HSL adjustment in there to punctuate the veins via giving it its own color (pretty much what Nemanja did in his video) but by me going with add blend mode, the following effect was produced: As you can see in the gif above, I’m grateful i’m closer to the objective, but this produces way too much visual disturbance - look at that mess up top 👀 Maybe because I had to choose add blend mode to show the veins. Photoshop seems to have a powerful pipeline, the way it goes about reading the pixels and determining which to include and which not to include once results of it’s blend mode has been executed, thus…. looking way more clean, then again, Nemanja did NOT choose add blend mode, he got away with screen blend mode, so could be the reason for my visual disturbance and not the same beautiful results I see below: WHY DIDN’T - SET DETECT EDGE LAYER TO SCREEN BLEND MODE WORK? I wish I knew! Then I wouldn’t have to go about dealing with all that visual disturbance I showed in the beginning of this post. I did follow through with the initial game plan: I duplicated the detect edge layer several times while it was set to screen mode while messing around with the opacity slider’s… did not produce the translucent gloss: Maybe because it’s iPad version of Affinity Photo and not desktop version iPad is inferior version of Affinity Photo? The results I kept getting with the afore mentioned tests: the veins & hand lines, were not getting the translucent gloss when I chose screen blend - instead … the entire hand was catching the effect I also experimented with other blend modes, to no avail (except for add blend mode) which I detailed in the opening of this post If I cannot get detect edges, to apply a translucent gloss over the veins & hand lines only, I won’t be able to directly affect those veins & hand lines later when I apply HSL adjustment to give them their own color like in the image below: Instead… I have a bad combo with detect edge + screen blend mode = entire hand gets affected. Which is what we don’t want. If this was street fighter, that combo would had cost me the match 🤯 The image below is what we don’t want, when applying HSL in this case. We only want to affect veins & hand lines Hopefully, what I expressed above makes sense to you or anybody else reading this post, when it comes to punctuating / exaggerating things in a group like veins, roots, ropes… etc. (stringy things) POSSIBLE SOLUTION - IF AFFINITY PHOTO FOR IPAD HAS IT (DESATURATE LAYER) When I watched the video again, I noticed Nemanja did three things which contributed to applying the translucent gloss: He desaturated the layer with the Glow Edge (in our case Detect Edge) The desaturated layer then turned black & white Nemanja then set that same layer on Screen Blend mode and this produced the translucent gloss effect covering the veins & hand lines I tried mimicking, but I’m stuck at step 2 - desaturate. I’ve searched for desaturate layer option but I’m failing to find it. I even looked into this thread and still cannot find it in the iPad: I saw the video in the thread linked above, where they went to the color tab and moved around the desaturate slider. I checked on ipad, I cannot find a slider in the color options for desaturate. Instead, I found a desaturate in the layer options, but nothing happens when I interact. I’m assuming dest means - desaturate: (see gif below) All that to say: would you happen to know, where I can go about finding the desaturating a layer button? I tried to desaturate via HSL adjustment - which has a saturate/desaturate, this doesn’t work Thank You!
-
@Dan C Thank you 😊 I appreciate the in-depth. I ran some tests… doesn’t allow me the exact ambient occlusion levels I’m aiming for, most likely iPad limitations. However.., yes this kind of gets me there and your guidance provided me a wider aspect, so I’m now experimenting with other avenues due to your insight. Thank you!
-
Specs: Affinity Photo 1.10.1 iPad Pro 2020 model, 12.9” iiPad OS 15 update & over 300gigs of HDD I’m following the tutorial linked below. Timestamped link, starts off exactly where he chooses the filter and proceeds to tweak its parameters. The filter is called Glowing Edges: The only filter I was able to find that produces a similar effect is Detect Edges Unfortunately, there are no sliders, for detect edges allowing me to decrease the dark look of detect edges and tweak it to be more in line like the image below, where hand looks as if wrapped in plastic translucent glove. I’m trying to achieve this look: (see red arrow below) Although, Affinity Photo iPad Detect Edges gives me all the hand details which is noticeable if you zoom in… however it’s also very dark: If you noticed, in the Nemanja Sekulic youtube video I linked above, Nemanja was able to tweak the parameters of the filter to get the effect to his liking. Unfortunately, affinity photo on ipad offers no way of doing this. This guy pretty much echoes my sentiment: My goal is to exaggerate the lines & veins of the hands, make them stand out, as if some sort ambient occlusion. What I truly get out of this study: I have been working a lot on hero like characters, which are usually muscular showing lots of veins. Nemanja‘s technique… has shown me there is a way to exaggerate all of the veins virtually instantly… when compared to me manually painting over with a brush to achieve the same look at sluggish pace. Any help would be appreciated. Thanks
-
iPad OS 15 dropped today, September 20, 2021 Apple made split screen front and center in this update, giving split screen and slide over, their own dedicated buttons. Respectfully Serif.. please get this up already. You have quite a few quality of life updates you can do until your next big core update. This is definitely one of those quality of life updates. Procreate Multitasking:
-
affinity photo Folded Space (Sci-Fi) creation
Affinity iPad Student posted a topic in Share your work
Still learning, mostly using these pieces for VR game design concepts. Created with Affinity Photo on iPad Pro (2020 12.9” model) beyond amazing app! My Creative Piece: The Originals:
-
Crop Presets on Ipad
Affinity iPad Student replied to Violinman's topic in Pre-V2 Archive of Affinity on iPad Questions
@Paul MuddittThat’s a genius idea! I’ll be adding that technique to my Affinity Kung Fu -
affinity designer "Squishy" - Designer Sample Artwork
Affinity iPad Student replied to ChristiduToit's topic in Share your work
@ChristiduToit Ah, i see what you. Since you made it in designer. I actually did mean .psd because I mostly use Affinity Photo. I was hoping i could I could open this file in AP for ipad and see it’s layers in there. Im not sure if I can open .afdesign in AP. I hope we can? That would be amazing! -
@DM1 Thanks, those are awesome. But I meant the actual 3D being done in the video, where he took that flat 2D brick wall image and made it 3D. Even pulling the bricks out of via extrude. I was not aware photoshop has this 3D capability. It literally shocked to me. 😳 I was curious if AP desktop version has this same 3D feature? For if it does -> I have high hopes of it being brought over, as a feature… for the iPad version of AP sometime during M1 iPad Pro release.
-
affinity designer "Squishy" - Designer Sample Artwork
Affinity iPad Student replied to ChristiduToit's topic in Share your work
Understood, well i do miss it! it’s a classic piece in my eyes. I wish i still had all its PSD files on my Affinity Photo iPad, so i could learn. That piece is a master study! -
I have never used desktop affinity, I literally, only own a iPad, so all my stuff is done on this platform. Now with M1 being introduced into the new upcoming ipad pro. I was hoping, that should the desktop version of AP offer the feature in the video below, then I have high hopes of it releasing on iPad Pro 2021. If AP desktop does not offer this feature, the beginner that I still am… whom is incrementally growing knowledge of this industry… is slowly coming to understand, why photoshop is superior (which I didn’t perceive it this way before, since AP was literally my first foray into photo manipulation) This is the feature I’m referring to: (Time Stamped directly -> 3D, Extrusions, Depth)
-
affinity designer "Squishy" - Designer Sample Artwork
Affinity iPad Student replied to ChristiduToit's topic in Share your work
This use to be in the Affinity iPad samples section. Why did serif remove it? It’s no longer available. -
affinity photo Furthering my Cloud Study
Affinity iPad Student replied to thedemiurgebard's topic in Share your work
Ha! That’s interesting. You found the likeliness between tree tops & clouds. I would had not thought of this on my own, but you demonstrating it… makes perfect sense. -
affinity photo A Cloud Study
Affinity iPad Student replied to thedemiurgebard's topic in Share your work
I love clouds, this is beautiful!