GarryP
-
Posts
14,682 -
Joined
-
Last visited
Everything posted by GarryP
-
 Without knowing exactly what you are trying to achieve it’s difficult for us to know how close you are to achieving it. Would you be able to give us an example of what you are trying to replicate? P.S. Where do you expect to use this style of button?
 -
If you have added an Effect to a layer (e.g. shadow) then that layer will get rasterised as the Effects themselves are raster effects. There’s probably not much you can do about this apart from, perhaps, adding the Effect(s) to duplicate layers behind those layer(s) you want to retain as vectors.
-
In addition to the advice given above, I think it’s worth noting that the text you put inside the bear shape may not flow as you expect it to. The text in the example image seems to be a list of names, which may be fine in some circumstances, but putting normal paragraphs of text into the shape may cause the flow of the text from word to word to be interrupted in unexpected ways. For example, consider the point at which the text reaches the legs. Should the text flow down one leg and the then the other (if so, in which order), or should it flow ‘across and between’ the legs? You may find that you have to split the text into different text frames to achieve the result you want.
-
Which Affinity application(s) do you have access to? The ‘best’ solution will depend on what you can use.
-
Can't change text
GarryP replied to Leisureworld's topic in Pre-V2 Archive of Desktop Questions (macOS and Windows)
If you have converted the text to curves then there may not be much you can do about it. If you have saved the History with the document then you might be able to go back to before the text was converted but, by doing so, you will also lose any edits – to that layer or others – that came after. The easiest solution may be to simply recreate the text again. -
You're welcome. Don't forget to come back and see if someone has posted a better solution.
- 3 replies
-
- 1
-

-
- perspective tool
- mesh warp tool
- (and 1 more)
-
There may be a better way but, once you apply the Crop, you can right-click the layer in the Layers Panel and choose “Rasterize”, then right-click again and choose “Merge Visible” to create a new fully cropped, rotated and ‘reset’ pixel layer to work on (and you have the original to go back to, just make that invisible to avoid confusion).
- 3 replies
-
- 1
-
-
- perspective tool
- mesh warp tool
- (and 1 more)
-
Vanishing Points like in PS
GarryP replied to Kruna's topic in Pre-V2 Archive of Desktop Questions (macOS and Windows)
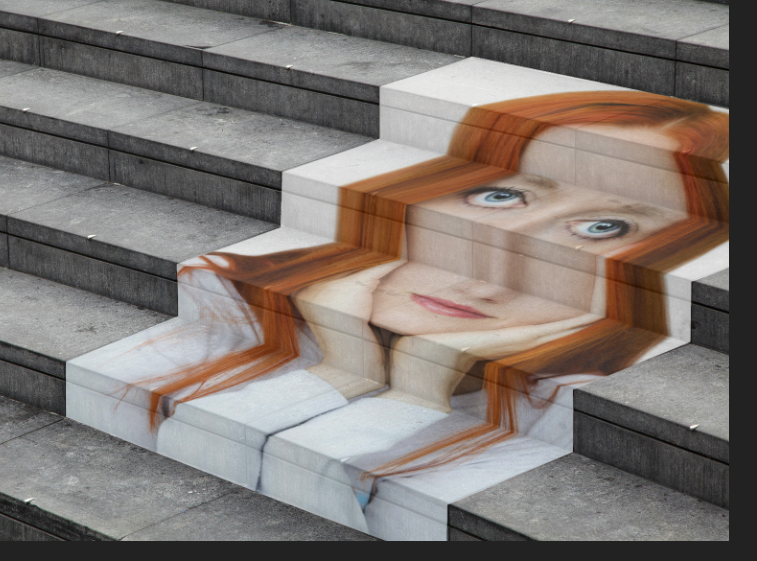
You can do the sort of thing in my attached example quite easily with the Mesh Warp Tool in Photo but to get good results you will have to be more careful with positioning the mesh than I was in my very quick mock-up (she's a bit 'out of proportion').
-
Sample pixel transparency
GarryP replied to Sam Burton's topic in Pre-V2 Archive of Desktop Questions (macOS and Windows)
Welcome to the forums. What are you trying to achieve by sampling the transparency of a single pixel? If you can give us more information about what you have and what you are trying to do then we can probably help you better. -
Can't change text
GarryP replied to Leisureworld's topic in Pre-V2 Archive of Desktop Questions (macOS and Windows)
Welcome to the forums. I suspect that your letters may have been converted to curves, but I cannot be sure without seeing your document. Can you either share the document or give us a full-screen screen-grab which shows your Layers Panel with one of your letters selected? -
Pixelated images
GarryP replied to Hbj's topic in Pre-V2 Archive of Desktop Questions (macOS and Windows)
Welcome to the forums. It’s difficult to tell what’s wrong from the photos. Is there some reason why you can’t get a ‘normal’ screen grab? On Windows 10 you can press Windows+PrtSc to get a screenshot which is saved in Pictures/Screenshots. The more information we have the better we can help. Are you sure you are opening the exact same file on both machines? How are you opening the file on your wife’s machine (in which application)? Are you opening the file or placing it in a document? What is the DPI of the document? Do you have Pixel View Mode switched on? If you can answer these questions there may be more later but that’s probably enough to get started with. -
The Geometry operations – mentioned in the link – are good for vectors but you can also hold ALT when you press the relevant Geometry button to make a Compound layer. When you have a Compound layer you can modify the child layers in a non-destructive way.
-
Thanks Sean P.
-
Ah yes, so it does. I think the Status Bar text may need to be altered slightly to make that more clear.
-
Fill in color of bird
GarryP replied to Bill S's topic in Pre-V2 Archive of Desktop Questions (macOS and Windows)
Bill S: You probably shouldn’t worry about how to replicate my very crude method. The other methods given are much, much better. -
I like Old Bruce’s technique. I keeps the pupil and teacher information separate while allowing the editing and printing/exporting of both either separately or together. Very neat.
-
It’s heartening to know that it’s not just me. I can get it to not happen by using a larger rotation, or by not resizing the layer, so what’s happening doesn’t seem consistent to me. It would be nice to get some confirmation either way from the team that it was or wasn’t a bug. (Basically I don’t want to call it a bug until I know that I’m not just doing something wrong.)
-
I’ve just tried to replicate what is in the video given by Gordon G and the fill colour of the shape I create is removed – as Gordon G says – on Windows 10 in Photo 1.8.3.641. See my attached video. I have tried to set the fill colour in different ways but I cannot get the fill colour to stay when the conversion to Shape Text is performed. I expected that the fill colour would be removed so I don’t know how it’s working differently in the other video. So which way should it work? Like it is in my video, or like it is in the other video? And why does it work differently? Am I, and Gordon G, missing something? 2020-05-22 08-39-41.mp4
-
Alfred: Just holding down ALT will allow you to move the layer while ignoring snapping, and just holding down CTRL will clone the layer while allowing snapping. Holding down both ALT and CTRL allows you to clone while also ignoring snapping.
-
Great. Yeah, the Serif staff are a friendly bunch.
-
Gordon G: Let us watch the video – give us the link, as previously requested – and we can see what you want to do. That way you don’t have to translate it for us, we can see it for ourselves.
-
G13RL: I didn’t mean to cause any offence in any way and didn’t realise that what I wrote would do so.
-
I don’t think I have ever used ALT for zooming but I might have done something ages ago that just made things work for me since and have forgotten it. Does it work okay for you now? Don’t worry about starting different threads for different issues; it helps people to find answers later. (The moderators will give you a friendly tap on the shoulder if you do something wrong.)
-
G13RL: Quite possibly, but I think it’s best to get the answer from the OP, rather than guessing, so we know what is actually required. No point giving instructions if we don’t know what we’re giving instructions for.
-
Would you be able to show us what one of your pages would look like in each version? (You can blur anything that you don’t want to be made public.) Once we can see what you are trying to do we might be able to help better.