Our response time is longer than usual currently. We're working to answer users as quickly as possible and thank you for your continued patience.


chriscaldwell
-
Posts
228 -
Joined
-
Last visited
-
 Alfred reacted to a post in a topic:
Weird artifact in image
Alfred reacted to a post in a topic:
Weird artifact in image
-
chriscaldwell reacted to a post in a topic:
Weird artifact in image
-
chriscaldwell reacted to a post in a topic:
Weird artifact in image
-
chriscaldwell reacted to a post in a topic:
Weird artifact in image
-
chriscaldwell reacted to a post in a topic:
Weird artifact in image
-
chriscaldwell reacted to a post in a topic:
Weird artifact in image
-
chriscaldwell reacted to a post in a topic:
Weird artifact in image
-
Weird artifact in image
chriscaldwell replied to chriscaldwell's topic in Affinity on Desktop Questions (macOS and Windows)
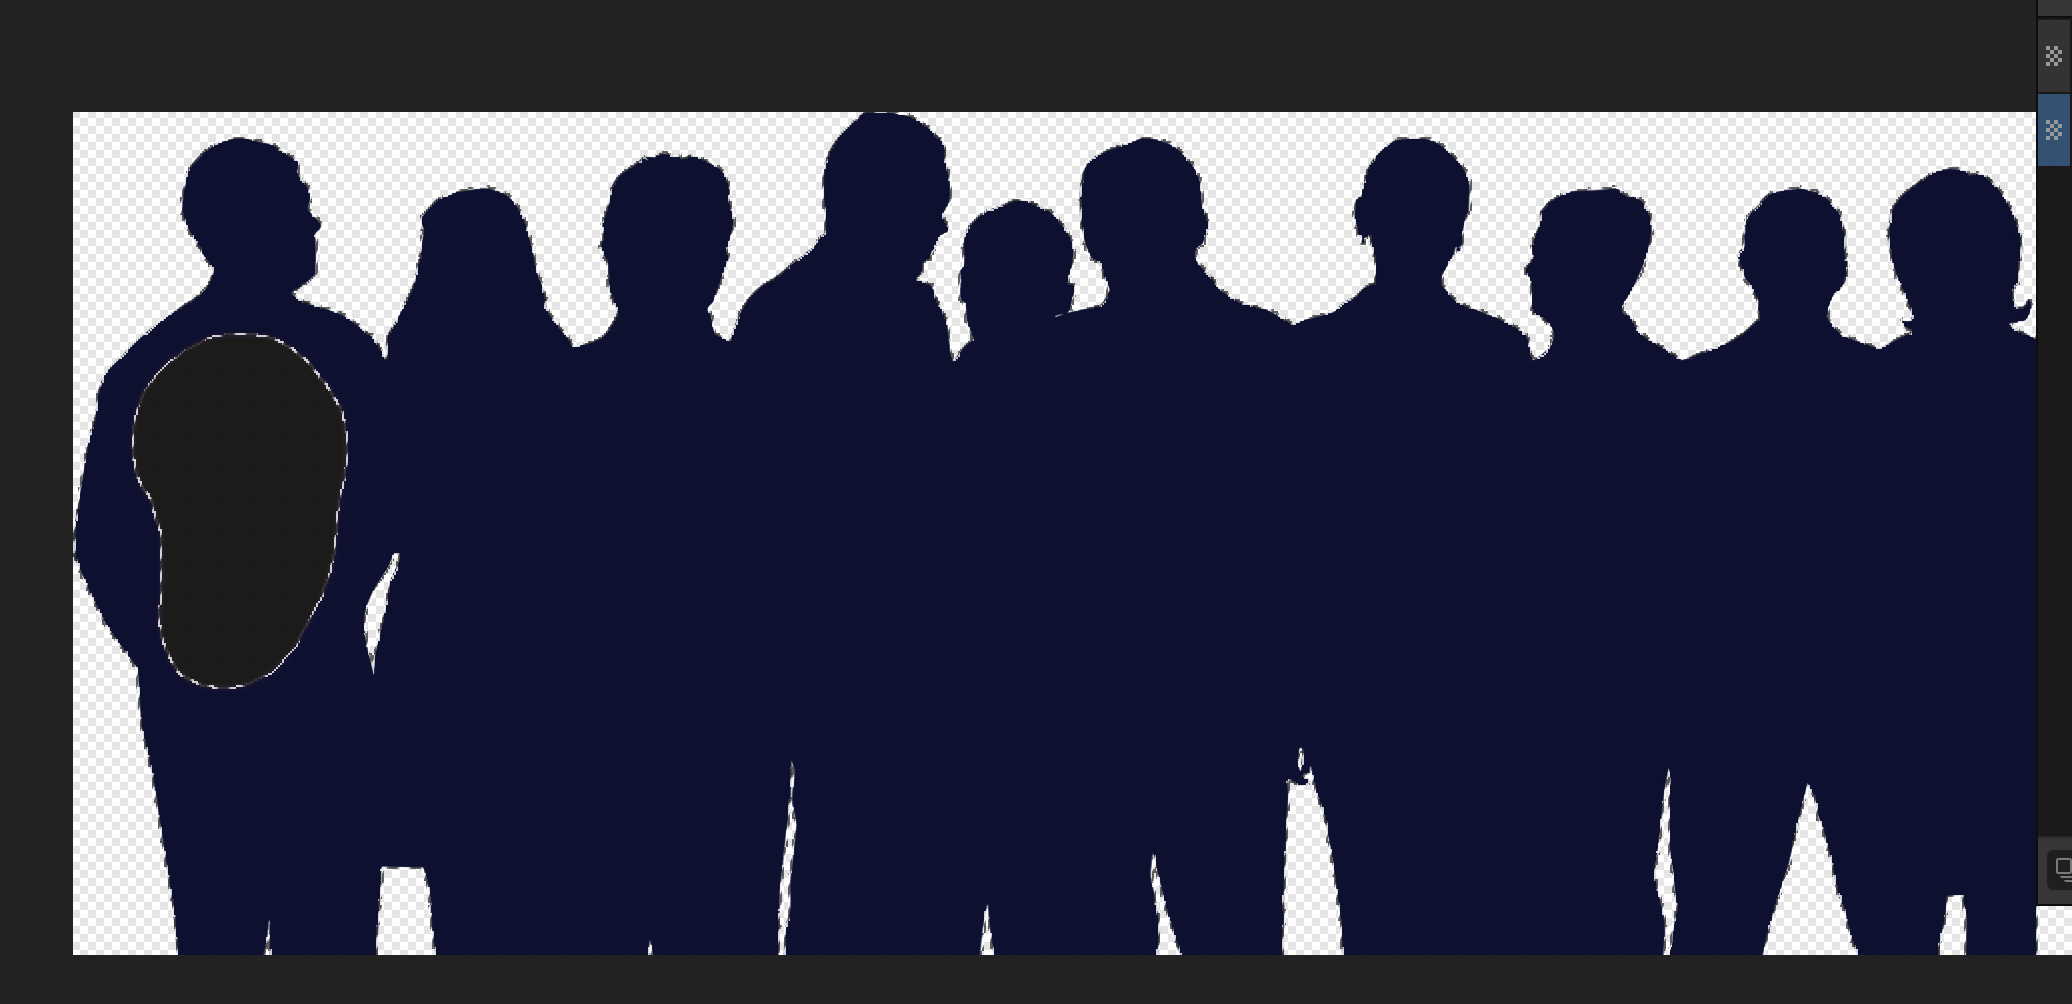
Thank you for solving the issue with color differences of dark blue and black. I took the original image (attached) and then selected the blue background and deleted it. Then, I selected the silhouette of people so that marching ants were around all the people. Then I chose Fill and selected #000000 for the color. I am having trouble with my display after spillage of water on my keyboard, and it appears very dark blue now looks like black so I missed this area. Thank you very much again. dreamstime_571804.tif -
PaulEC reacted to a post in a topic:
Printing a mockup of a vertically opening booklet
-
chriscaldwell reacted to a post in a topic:
Printing a mockup of a vertically opening booklet
-
chriscaldwell reacted to a post in a topic:
Printing a mockup of a vertically opening booklet
-
chriscaldwell reacted to a post in a topic:
Printing a mockup of a vertically opening booklet
-
Oufti reacted to a post in a topic:
Printing a mockup of a vertically opening booklet
-
Hello, I'm working on an image in Photo and have a strange problem. The image is simply a clipart .jpeg image, I used the flood select tool, filled with black, then flattened the image, Then. I placed it on a. white background and printed it, but an odd smudge appears on the leftmost figure. Also, even though I flattened the image, I noticed when attempting to select the image using the Flood select tool, this section where the smudge is gets marching ants around it? Can someone tell me what's going on here? Ive attached a screenshot showing where the ants appear, as well as the actual .jpeg. Thank you so much for any help. Chris

-
Thank you very much for taking the time to help Oufti and PaulEC! I was able to turn pages upside down following your helpful advice and have successfully printed a full-color multi-page mockup! Here are some additional steps that helped me to arrange everything properly to print: First, I made a model of the booklet in the size I wanted (a mini notepad size) by taking 8 blank sheets of printer paper and trimmed them to 90mm x 254mm (3.5 inches x 10 inches). I folded the sheets in half then stapled them in the center to make a blank booklet 90mm x 127 mm (3.5 x 5 inches). I flipped through each page and with a marker, wrote what should be each page. Then, I removed the staples from this model booklet, unfolded each sheet and laid out the Publisher 2 pages in the same order, noticing that I had to turn text and images on some of the pages upside down. Once the layout was complete, I exported as a PDF, set my laser printer to print on both sides, scaled to 100%, then printed everything, trimmed the sheets to size, folded and stapled, and Voila! A nice color mock-up. I also rounded the corners to complete the look. I'm sure there is an easier way, but in the end, it came out great, and I'm thrilled. Thank you again for your help! mockup-master-pdf-061824.pdf
-
Hello, I'm creating a vertical opening booklet in publisher 2. The client has requested a mockup. I thought I'd saddle stitch/staple bind the booklet after printing the pages, using duplex/double sided printing on my color printer. (Basically printing the spreads, then cutting them to size and folding them in half and stapling the sheets.) The goal is to have it look similar to a detectives notepad that opens vertically. What I cannot figure out is how to print this? I exported the booklet as a pdf, and folded, but the arrangement of sheets comes out that leaves some pages upside down. Seems like maybe some pages would have to be initially laid out in Publisher upside down so that when all the sheets are printed and folded it would be in proper sequence? Ugh. I am not sure how to lay this out for printing. Any help would be greatly appreciated. Thank you, Chris BB-3-Master.afpub
-
Brian_J reacted to a post in a topic:
Need help removing a background in Affinity Photo
-
Alfred reacted to a post in a topic:
Need help removing a background in Affinity Photo
-
chriscaldwell reacted to a post in a topic:
Need help removing a background in Affinity Photo
-
Thank you for the clarification! This was very helpful indeed.
-
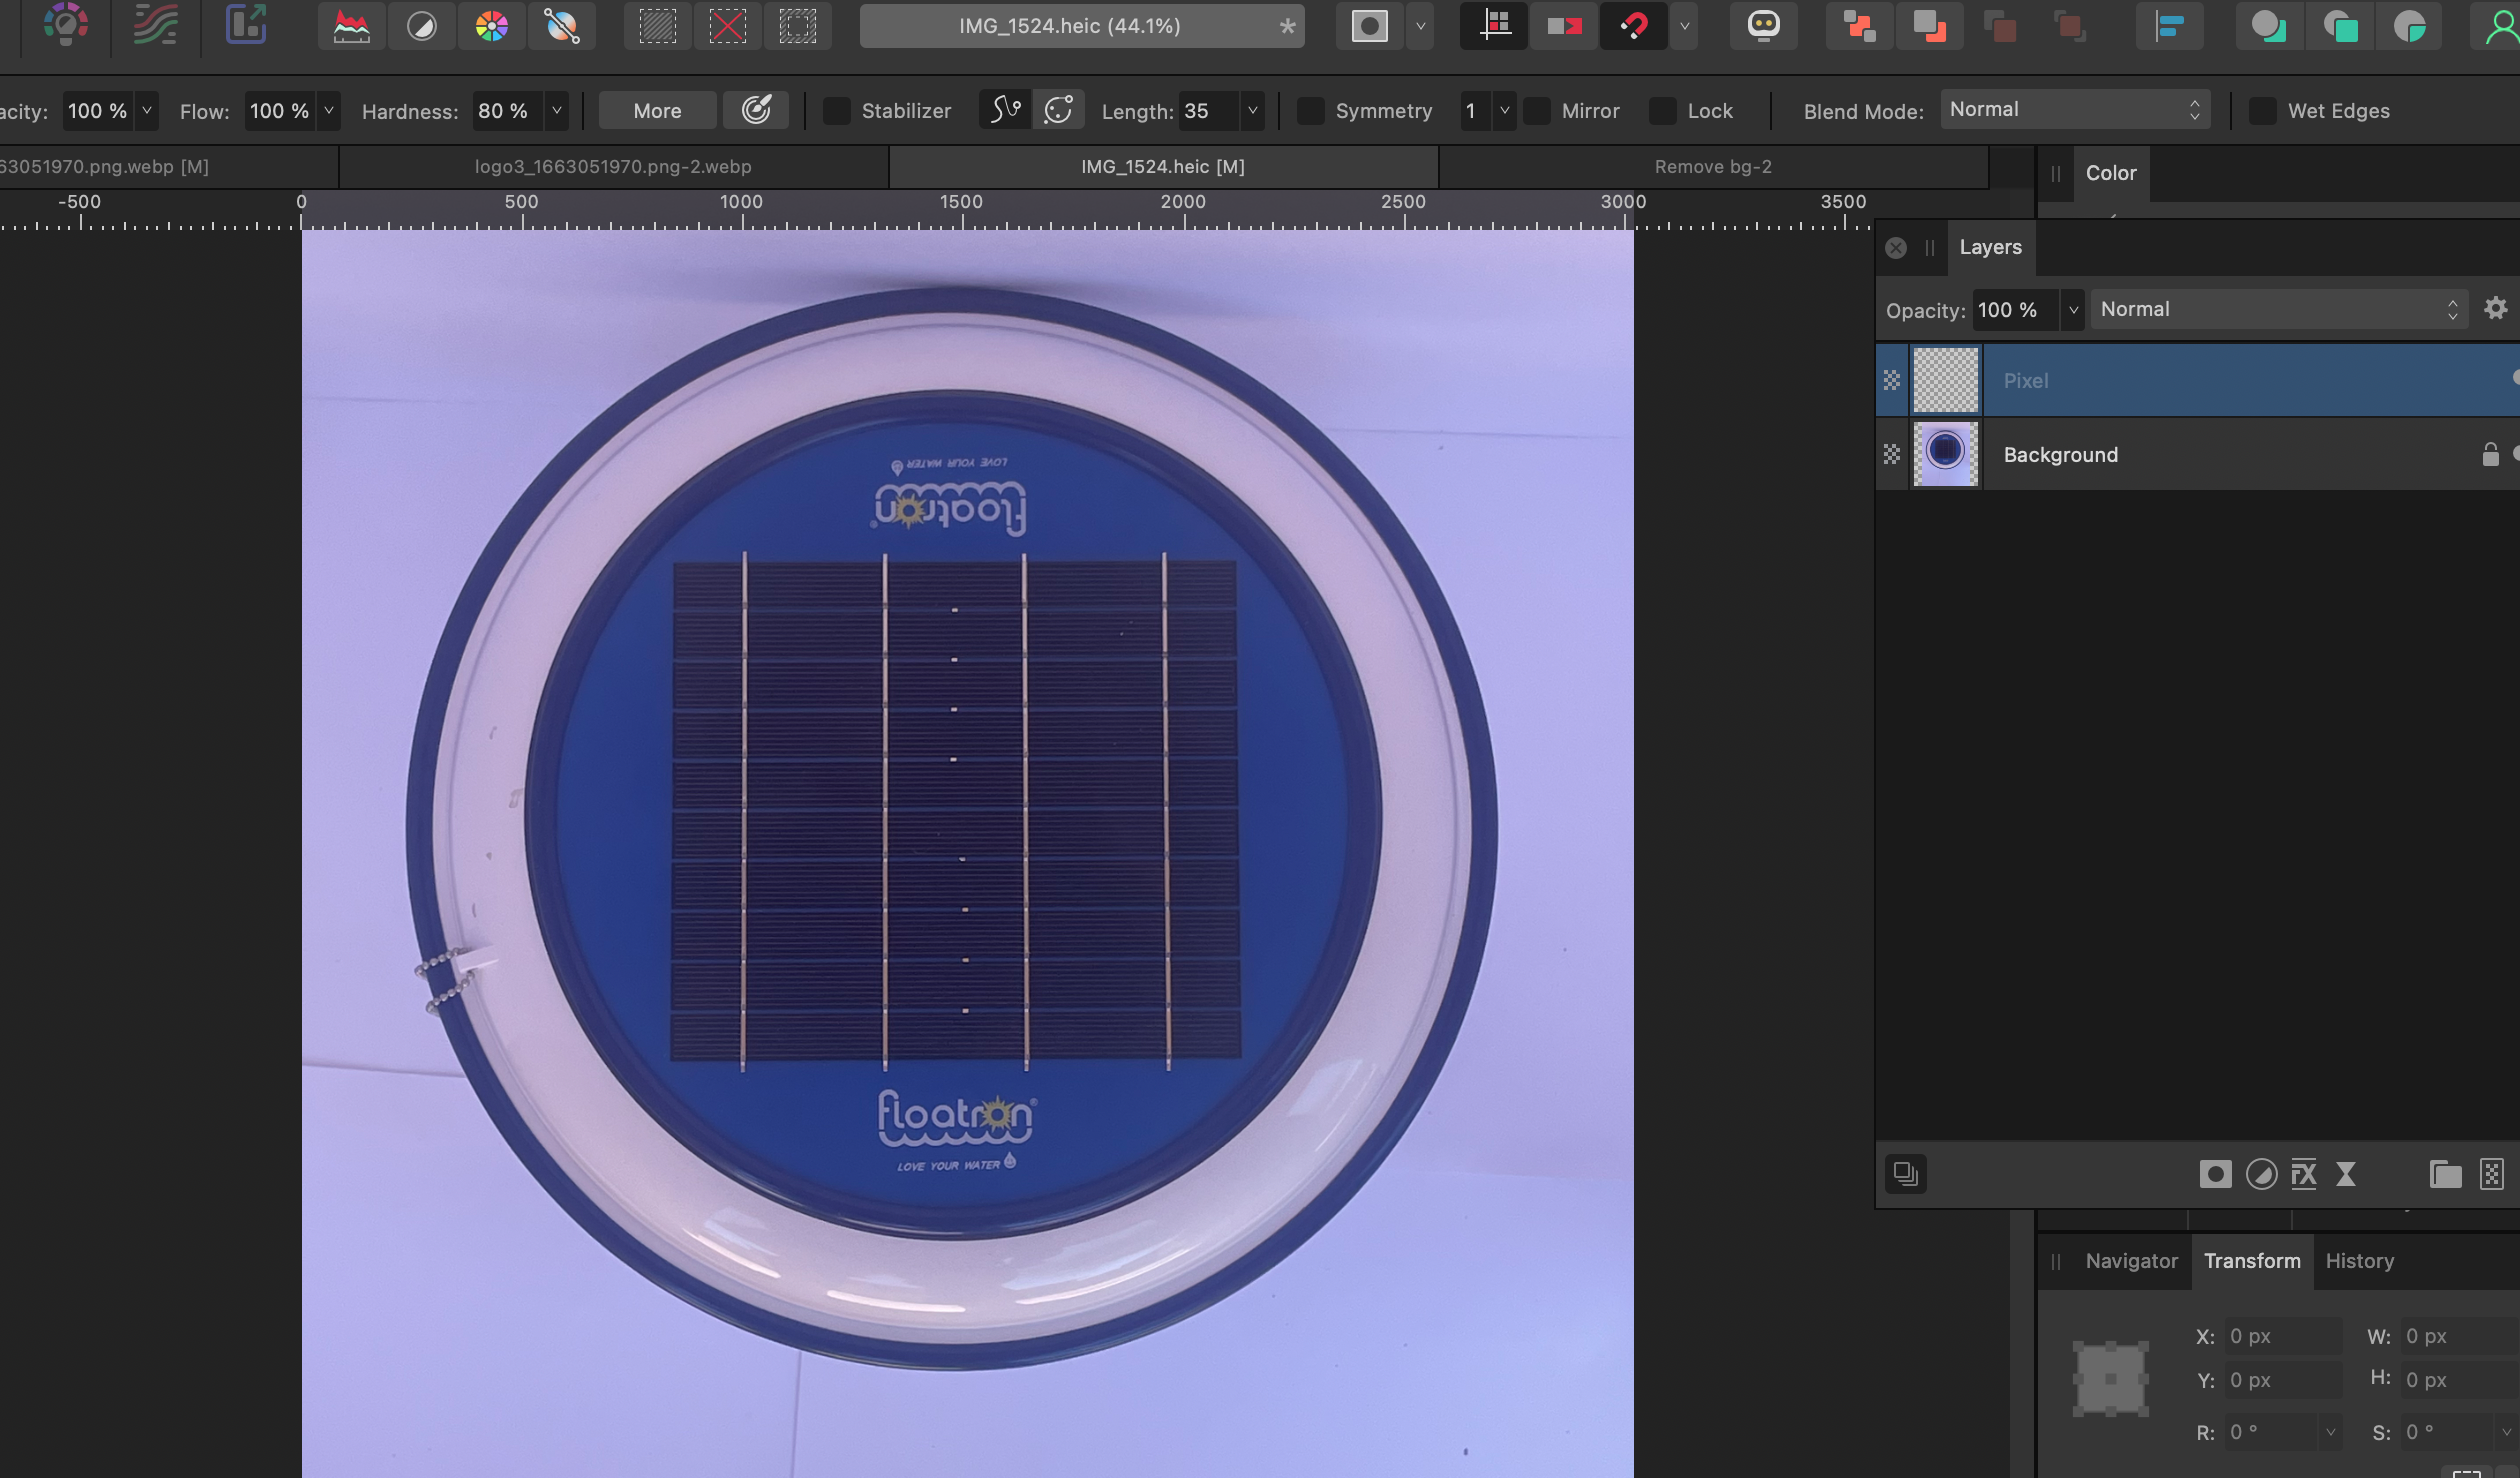
Brian_J, I'm trying to repeat your steps on the next image and must be missing something. 1. I have created an ellipse around the circular object. 2. I Control-clicked on the vector "ellipse" layer, but all I get is a dropdown menu and I'm assuming I'm supposed to choose rasterize? (BTW I'm on a Mac, so was wondering if Control-click might be different.) I click rasterize, and the pixel layer is blank. So not sure why I'm not getting a pixel selection around the object? Thank you, Chris
-
Hello firstdefence, I bought a large white tri-fold foam board, but can you expand on the cool red light? Why red? And is there a specific light for this purpose that you would recommend? Thank you!
-
Brian_J, this was brilliant! I never even considered using the shapes. Cannot thank you enough. I love this software and have learned another technique thanks to you!
-
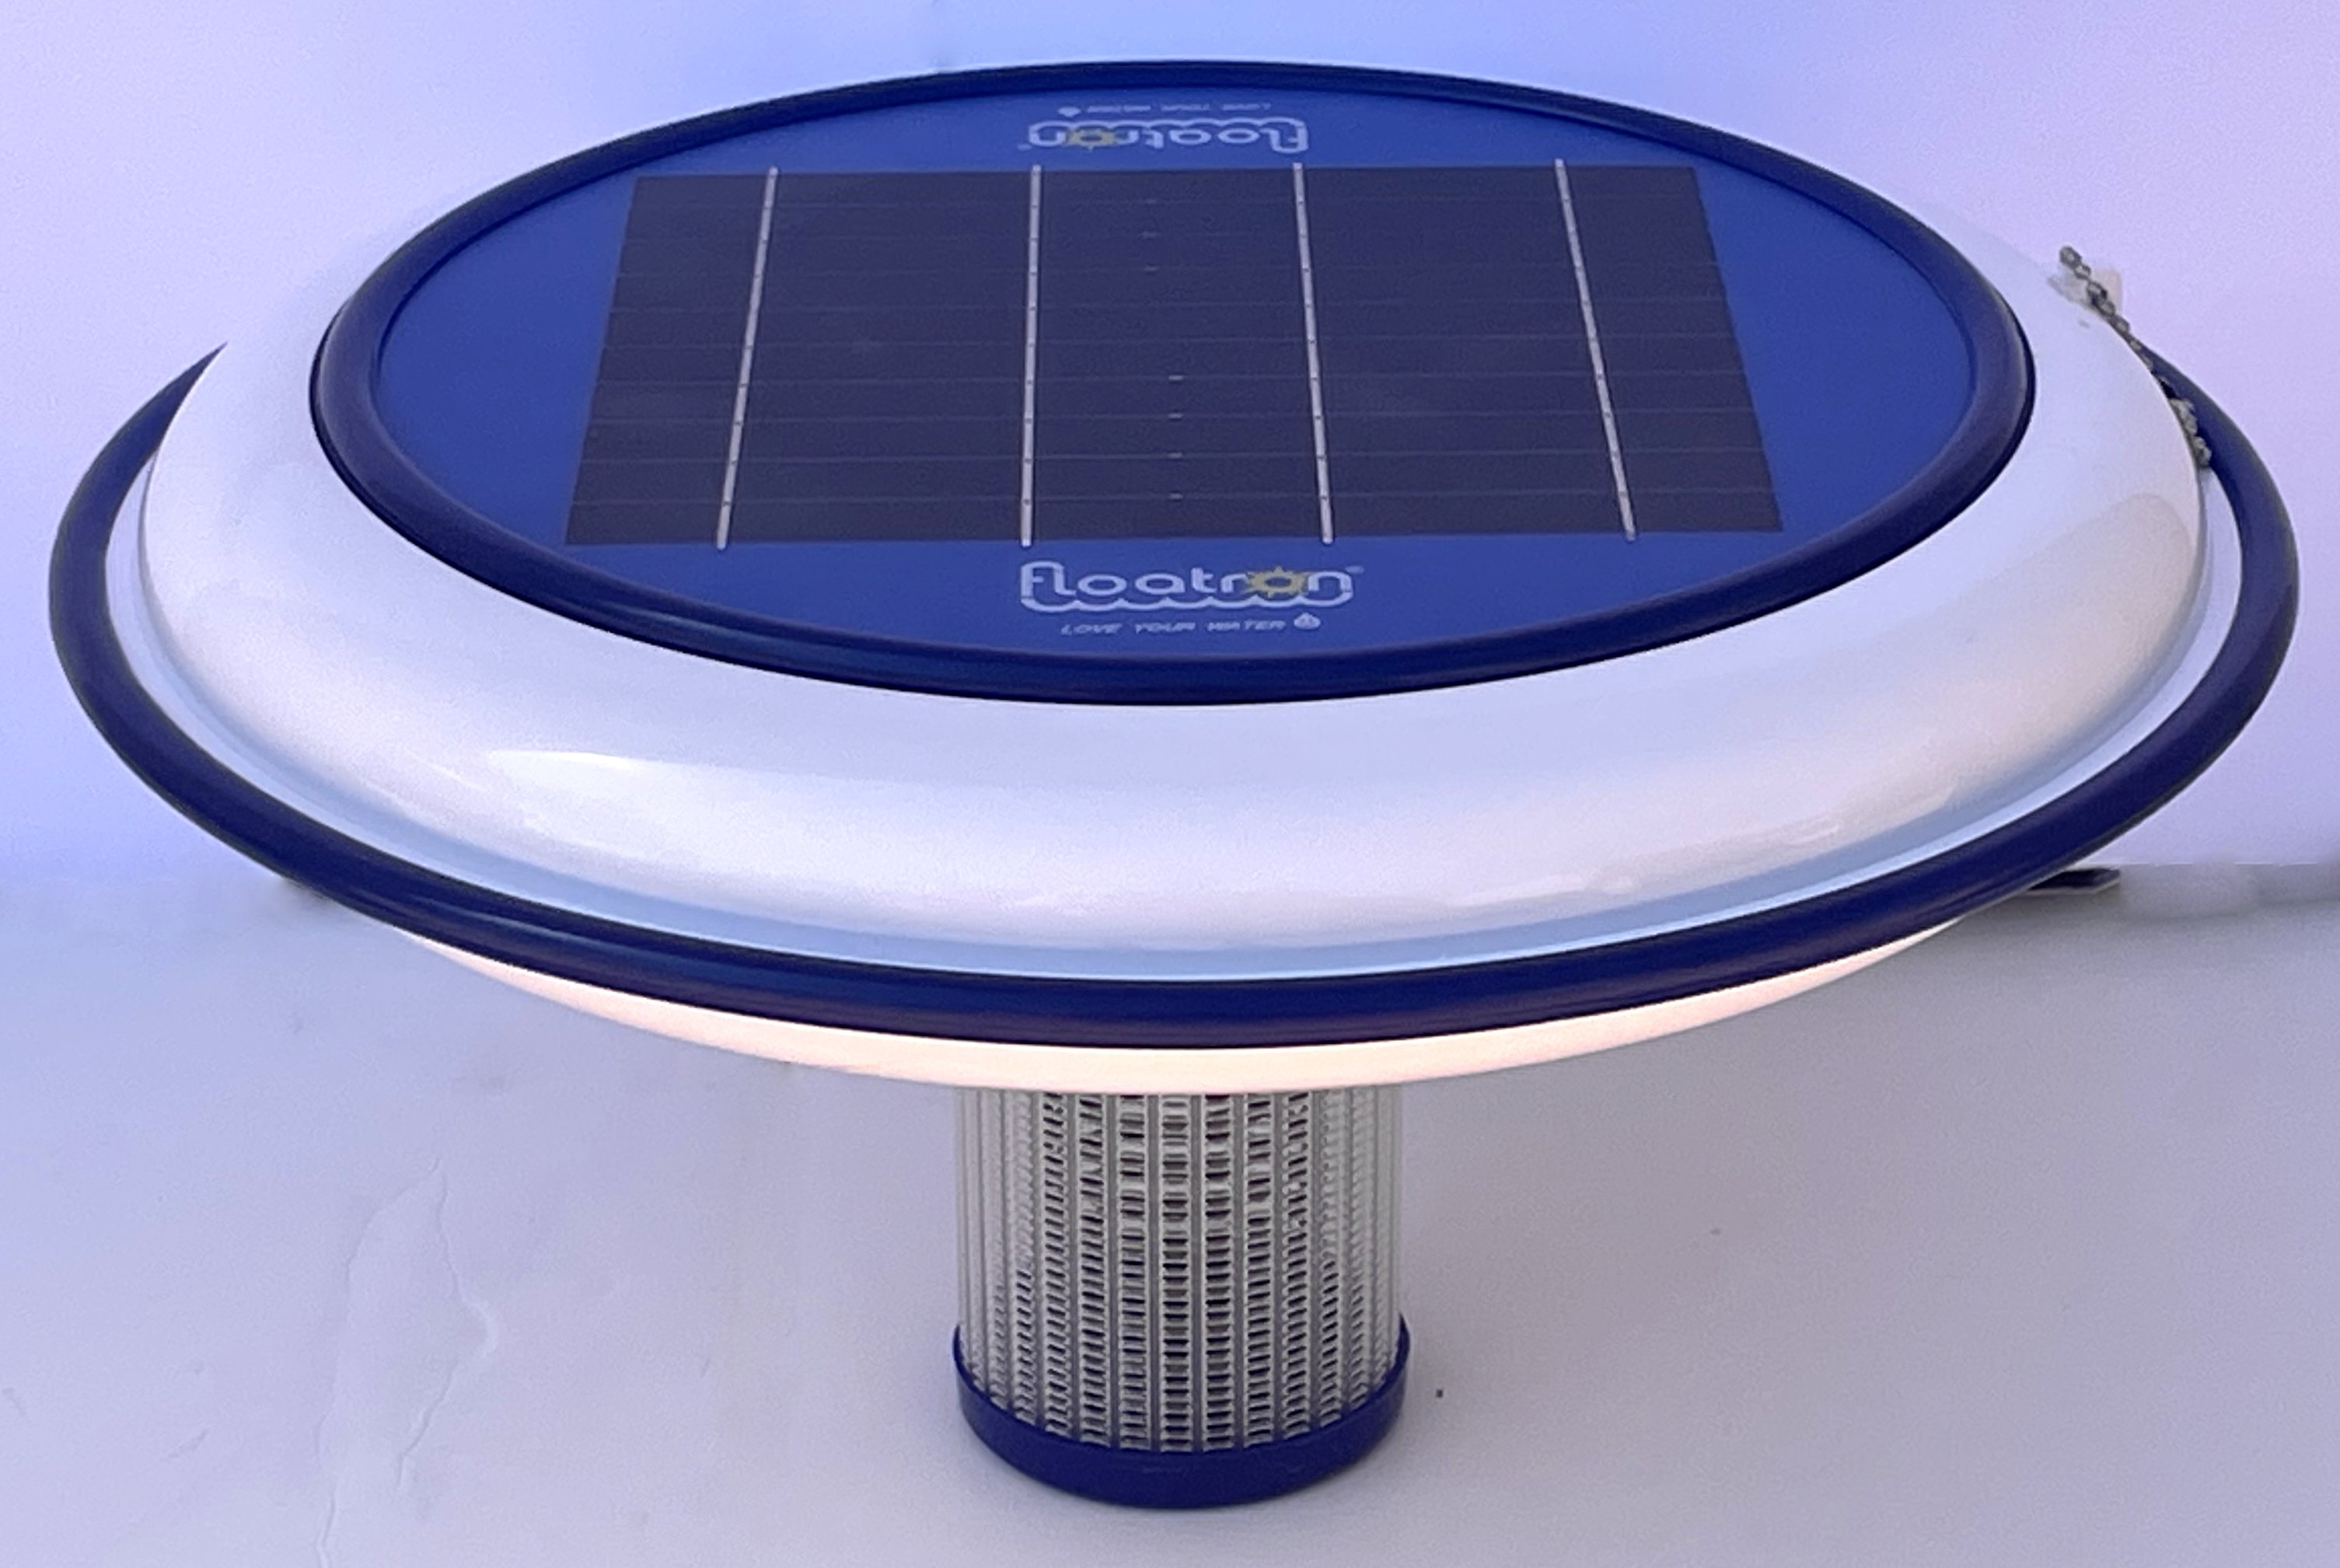
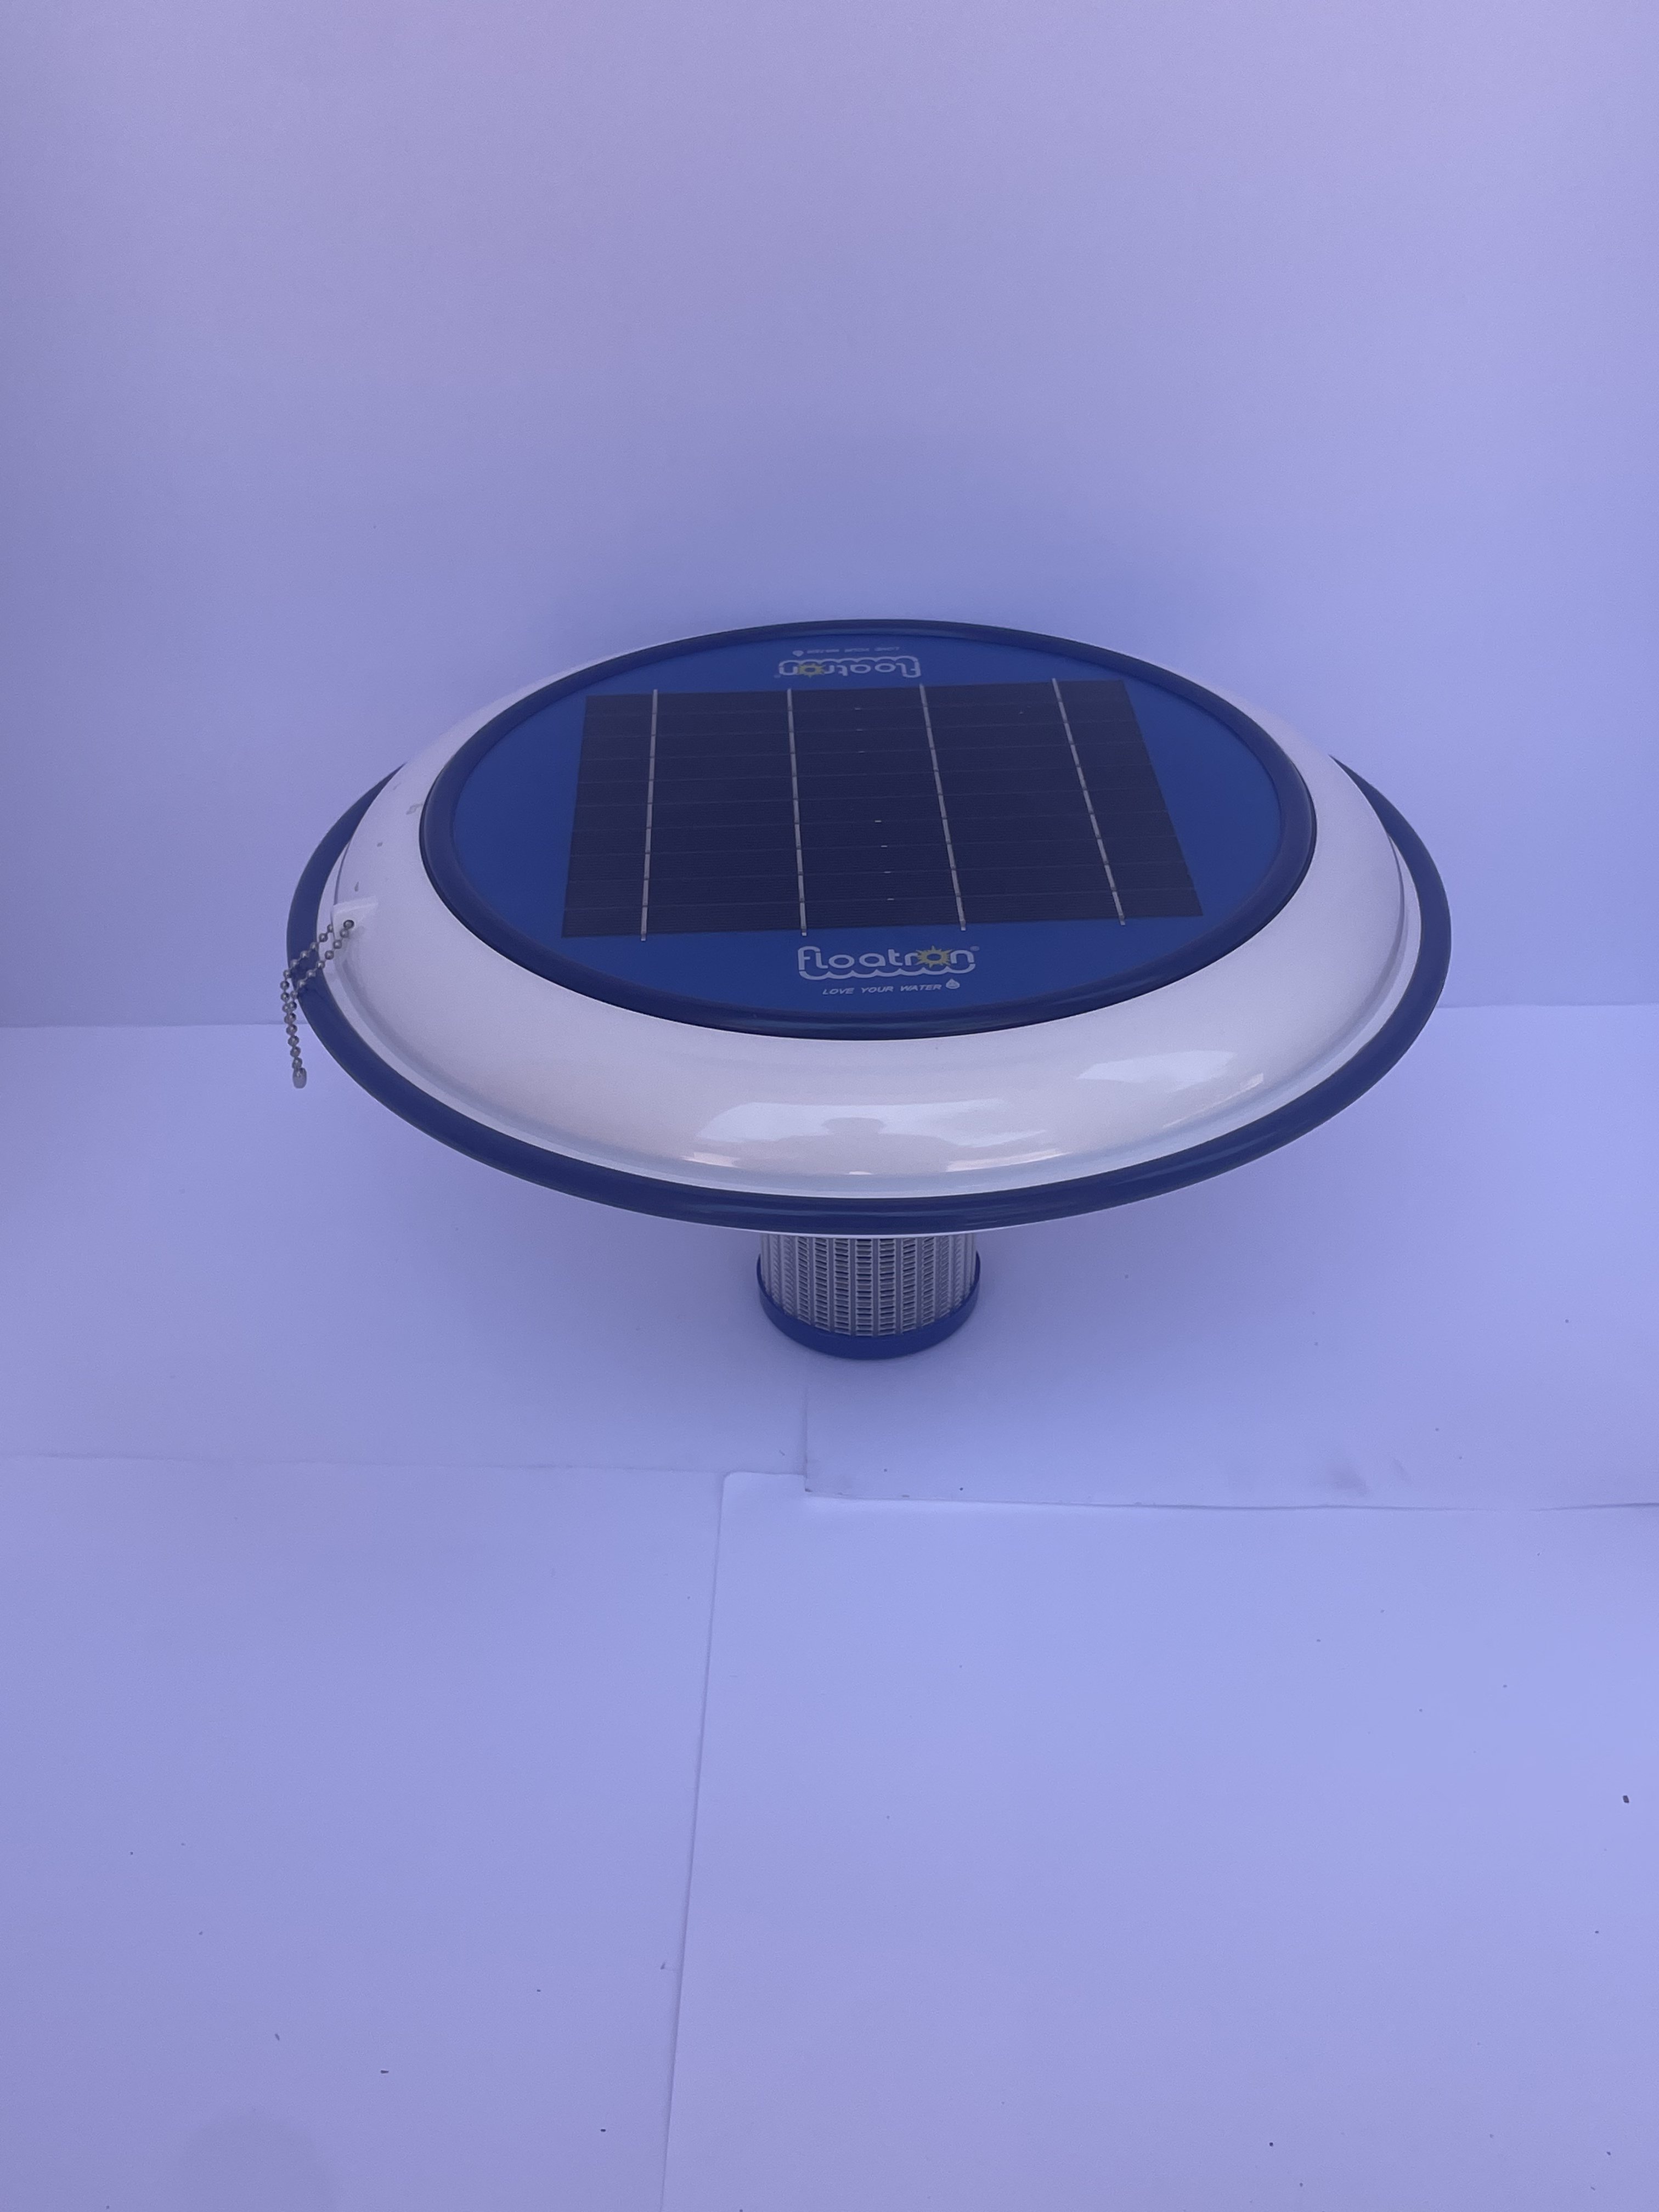
Hello, I have 2 photos that I need some assistance with removing the background. I've tried to use a tolerance of 5% with the selection brush and have tried Refine, but there's a portion of each photo that has a similar color as the object. If someone could help me with this, I'd be grateful. I have attached two photos of the object. Thank you so much for any help! Chris
-
Dan C reacted to a post in a topic:
Remove transparent grey/white checks on .eps image
-
 firstdefence reacted to a post in a topic:
Remove transparent grey/white checks on .eps image
firstdefence reacted to a post in a topic:
Remove transparent grey/white checks on .eps image
-
I just wanted to thank you all for commenting and especially to firstdefence for explaining how to remove the background. I always learn so much from you all.
-
Thank you, they are removed! Thanks again for the help. In the future, I'll remember to remove the images that I upload that are purchased.
-
I tried again, and this time it seems to have downloaded the images, thank you. I will save it with the instructions and try to recreate it here. Thank you again!
-
No problem. I understand. completely. I tried to download it, and as you can see in the screenshot, there is no hop image? What does "converted" mean?
-
thank you so much Joe and firstdefence. Absolutely brilliant. This is just great. Firstdefence, can you please send attach the file, so I can have it for reference? This is so helpful.
-
Hello, Can someone tell me to create the effect of looking at an item with the magnifying glass, so that a portion of it looks enlarged? Hope that makes sense. The two pics are attached, I want to make a portion of the hop so the illustration has the effect of magnifying. (There are two hop illustrations. Not sure which one will work best, so thought I'd attach both. ) Thank you so much for your help and guidance, Chris [MOD EDIT, ATTACHMENTS REMOVED]