

v_kyr
-
Posts
13,234 -
Joined
Posts posted by v_kyr
-
-
-
AFAI can see the iPad version doesn't support the creation of own reusable presets. There just "continiuous export" which probably is only remembered for the current editing session.
QuoteAbout continuous export
The Slices panel's Continuous Export and Export All features work in conjunction.
Slices checked for inclusion in exports are re-exported when the document's content changes, or when any slice is transformed or its options are changed.
 To set default export options:
- On the Slices panel, deselect any selected slices by swiping left or right on them. (Alternatively, tap a position in the document view that contains no slices.)
- Tap More.
- Tap the left/right navigation buttons to set the default graphic format. (Alternatively, tap the graphic format's name to select from a pop-up menu.)
The settings will be used when your next slice is created.
With a slice selected, you can change its export options to be different from that of other slices.
To set your export folder:
-
On the Slices panel, do one of the following:
- Tap Panel Preferences, then tap Choose Export Folder.
- Tap Export All or tap the Export button at the end of a slice's entry.
- Navigate to the required folder. (Tap its icon so you're viewing its contents.)
- Tap Open.
The export folder is remembered only for the current editing session.
-
1 hour ago, PaulEC said:
Which, of course, like everything generated by AI, is accurate and completely reliable! 😁
-
11 minutes ago, jmwellborn said:
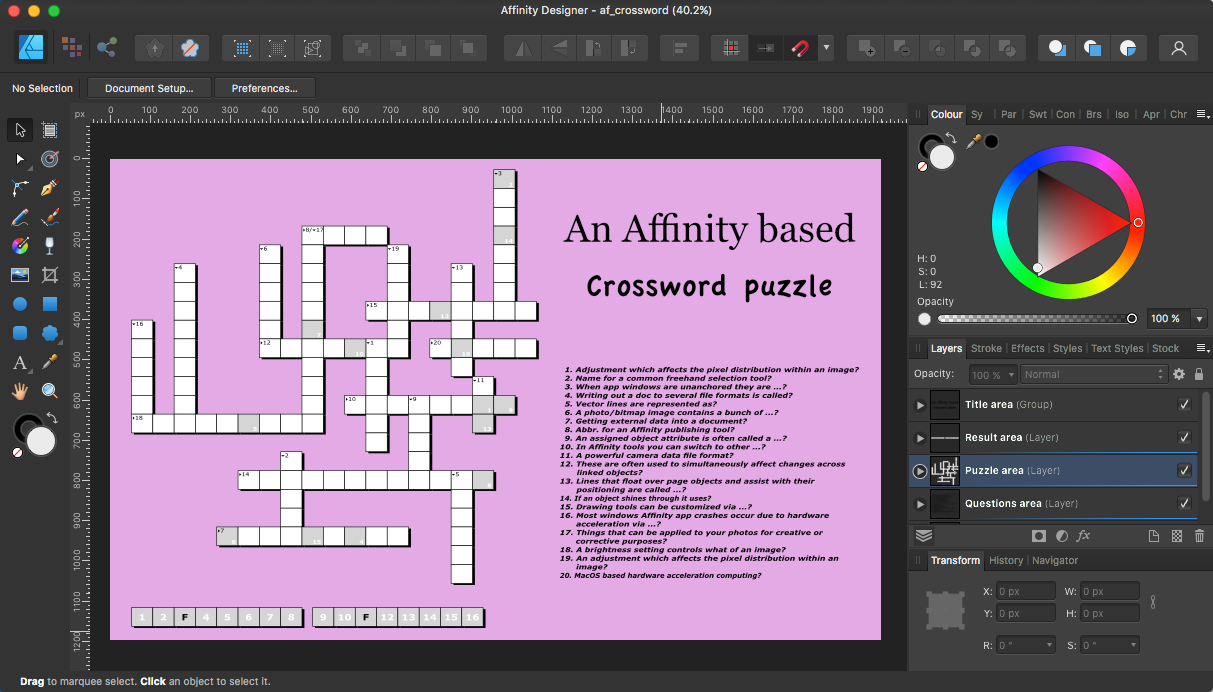
Pretty obvious, maybe, but not for me. Here is a rough stab. Undoubtedly wildly wrong! It was fun, anyway, for a cold, wintry day here in the "Sunny South."
Jip, that's what such crosswords are meant to be done for. You are pretty close to it, only the second solution text part doesn't match exatcly, but maybe my questions (and therefor finding the resulting words) in that one aren't the best, since I don't tend to be used to do/create such crosswords in english language.
Usually the solution should have been this one ...
-
7 hours ago, Old Bruce said:
The math becomes more difficult for elipses (non-circles) and kidney shapes. It is not non-trivial.
It's slightly more difficult/compicated for an ellipse etc., but still solvable by common math when using polar coordinates, where the angle is measured from the ellipse centre. Using parametric angles for an ellipse will give you only the correct result at theta = 90, 180, 270 and 360 degrees ...
... but using instead the polar form (coordinates) for an ellipse should give all the points on an ellipse outline.
The same applies to/for other shape forms here than circles or ellipses.
-
With a little bit of math for appropriate collide & intersection of objects, such a snapping mode could be added, so that objects/shapes could be positioned more exactly at their exact boundaries (a collision detection).
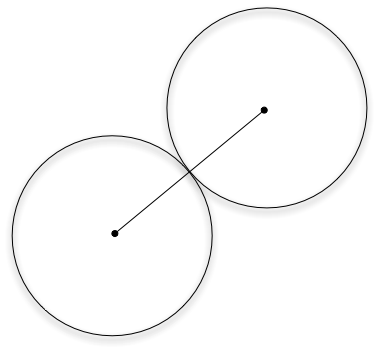
For two circles one would have to check whether the distance between their centers is exactly, less or greater (=, <, >) than the sum of their radiuses. For two circles just barely touching each other (visualization below), the length of a drawn line between the two centers (distance) will be sum of the two radiuses. So if the two circles intersect, the distance between their centers will be less than the sum of the radiuses, and if they don't intersect, it will be more than the sum. If they abutting exactly, the distance between their centers will be the sum of their radiuses.
-
-
-
However, if I have to deal with the need of very exact abutting object placements, I tend do such things instead Py scripting wise. Aka defining via math & plot libraries vector objects and there abutting absolute positionings in code and letting then the result be generated for in Affinity reusable SVG/PDF format. - So I doing things then more in a similary way as for example would be used here for circle/circular packing ...
I do the same (...script) when I have to deal with more complex and to be exact drawn & scalled gauge dials, protractors, clock dials ... and so on. Since it takes me personally less time to do that via coding, instead of then drawing all the finer grade complexity and dealing with all positionings here by hand in Affinity software. Further, the scripting code is here often also more flexible reusable/adaptable/changable for other tasks and drawing needs.
-
5 hours ago, EmFernandez said:
Exporting it every time just to preview... by definition is not a PREview.
The app (v1/v2) already has a page Preview Mode, but it's not in the sense of a full screen presentation mode here as it's well known from dedicated presentation software and the like.
-
Which OS do you use?
Saves Ok for me via Apub v1, maybe you try to reset/clear your app user data settings and give it then another try. Or check performance hardware acceleration settings (on Win disable OpenCL computing etc.).
-
I tend to open SVGs via "File -> Open..." or dragging them into the app and releasing them outside the canvas/doc area, so they are opened as their own docs instead. Then I copy/paste over selected layers from them over into to other docs, that way they are not treated as embedded docs.
Though some place/import directly, so as an unembedded file place option (Shift- or Ctrl-Drag etc. and a dedicated file menu option), would be useful and would make much sense to have here.
-
10 hours ago, Mark Oehlschlager said:
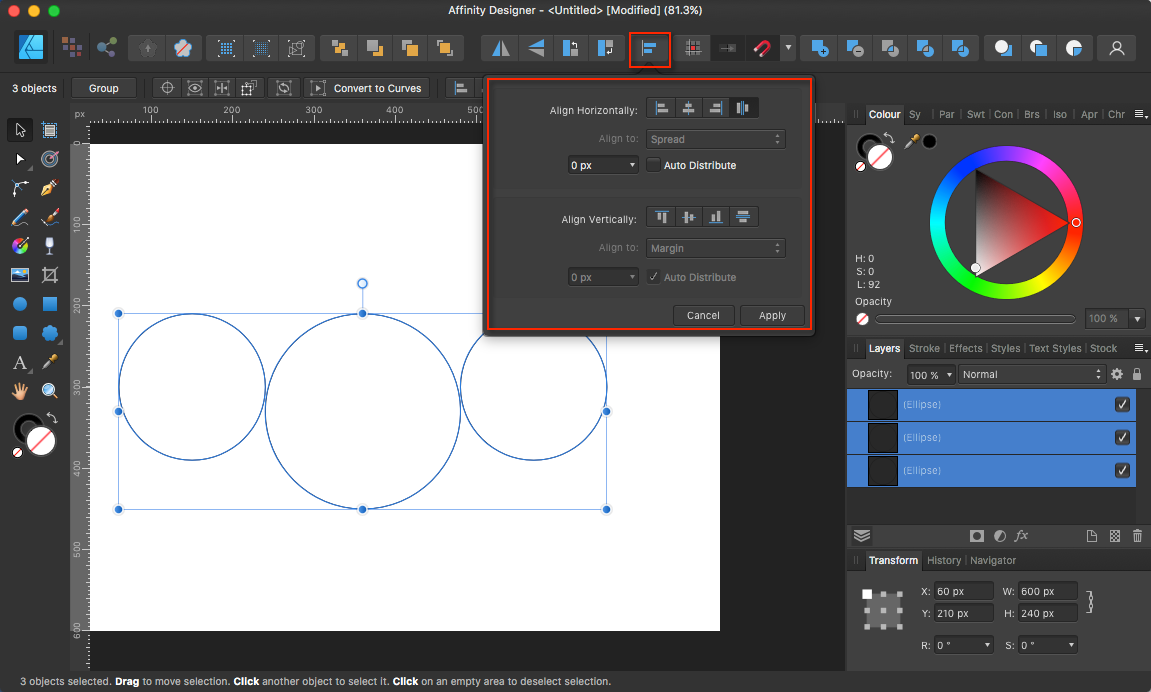
And then how does one achieve something like the arrangement below?
With anchor points, one can activate snapping to object geometry. But is there not something similar for butting shapes up against one another?
That's more challenging. - I would probably use some temporary guides/lines inbetween the circles, or a fine grade grid, as helpers, for snapping more exactly to certain outer circle positions then.
-
Edit -> Copy Merged (...then a paste) also doesn't work for just masks alone here.
-
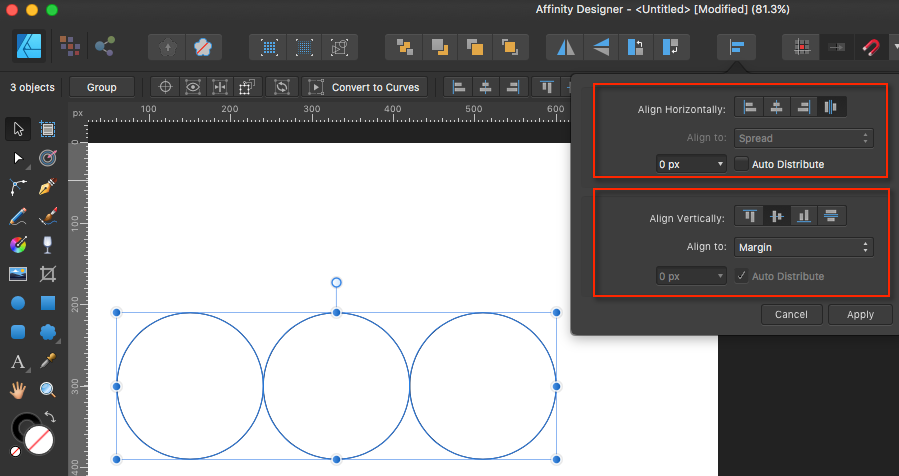
Try out such alignments ...
-
Some net references, look after the "simulate paper color" parts in those ...
- https://www.cambridgeincolour.com/tutorials/soft-proofing.htm
- Simulate rendering on colored paper without using soft proofing
- https://imagy.app/how-to-change-artboard-color-in-illustrator/#Frequently_Asked_Questions
- Color Management in Affinity Photo: The Ultimate Guide
- Soft Proofing in Lightroom, Photoshop & Other Software
- ...
- "simulate paper color"
... though the Affinity apps don't offer and have that "simulate paper color" setting/option in contrast to the Adobe apps. - So as already described above a filled rect has to be used in multiply blend mode to simulate the paper.
-
-
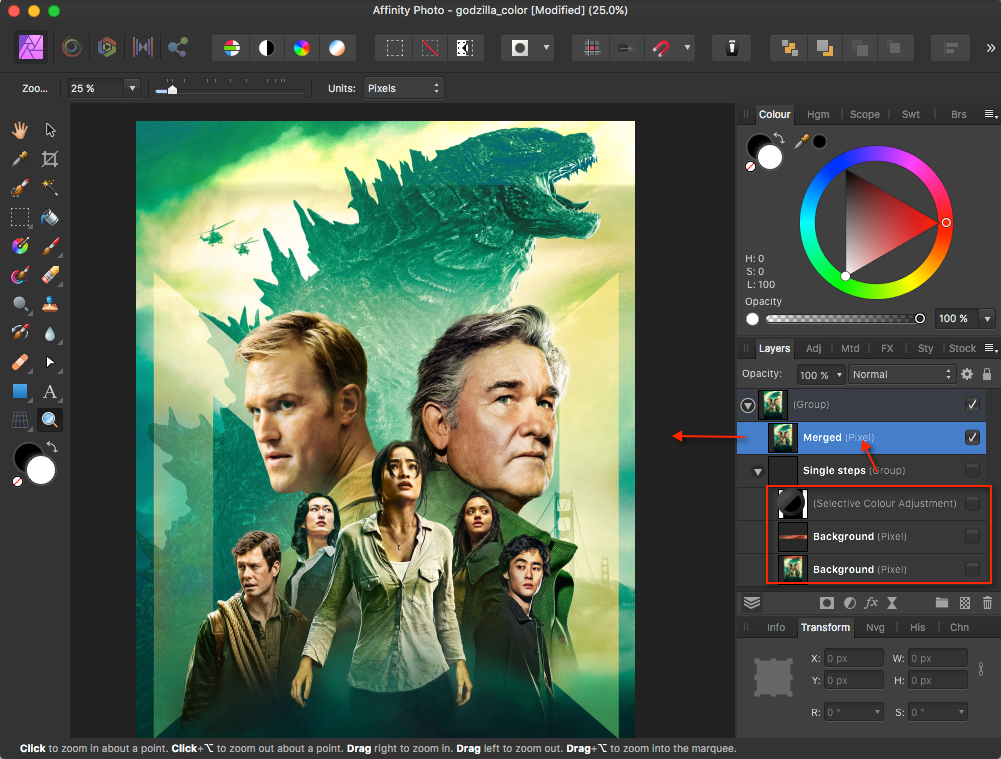
For (re)coloring of that top rectangular red highlight area back to the rest, one can try out to apply a selective color adjustment etc. to that area ..
... and then smooth the transition areas appropriately with the healing tools etc. - For the Godzilla head part try to apply what firstdefence made, or use your above approach.
-
1 hour ago, R C-R said:
I guess what is confusing me is that if ProRAW uses that standard, & even some iPhone cameras that do not support ProRAW do support the DNG file format, then support for what exactly has been added to this beta?
I always thought that support for the DNG format was all or nothing. Is that not true?
Well as ProRAW is Apple's way of generating (iOS wise supporting) their own tweaked iPhone DNG output specifically only for Pro/Max iPhone models, they for sure do apply some of their own custom image adjustment processings and/or profiles in DNG here. So things their software (like Apple Photos) can deal here with, but other software might not interpret it completely the same way (...similar as to by cam vendors placed things as/in specific Exif MakerNotes, which also not every software knows to make use of).
One of the above links I showed previously in this thread, aka the one which points to a reddit discussion, deals partly with this theme (ProRAW vs LR RAW).
-
2 hours ago, R C-R said:
... perhaps it would be less confusing to explicitly mention that support for the ProRAW RAW format is what has been added ... or do I still have that wrong?
Make yourself clear what the Apple ProRAW format is all about format wise.
Quote... ProRAW uses the industry standard digital negative (DNG) file format, so you can open ProRAW files with apps that are compatible with DNG files. For the best experience, however, use apps that are compatible with ProRAW files, like the Photos app on your iPhone with iOS 14.3 or later or on a Mac with macOS Big Sur 11.1 or later.
You can share the original unedited ProRAW photo, which has the .dng file extension. And if you edit the photo in the Photos app, you can also share the edited version, which has the .jpg file extension when shared. ...
Next look at the LibRaw website what iPhone models are listed to be supported there by their latest release lib version, as that's what APh will finally use for their Serif RAW engine.
-
2 hours ago, jont-131 said:
... they supplied the .svg as a CMYK file ...
1) For SVG versions 1.1 (what Affinity uses/should support), icc color profiles or device-cmyk would usually have to be used to deal with CMYK colors, but it's depricated, see therefor ...
- https://www.w3.org/TR/SVG11/color.html
- https://developer.mozilla.org/en-US/docs/Web/SVG/Attribute/color-profile
- ...
- https://de.onlineconvert.com/svg-to-cmyk
2) SVG 2.0 (either way not supported by Affinity software) added support for unmanaged colors allowing you to specify a CMYK color with an sRGB fallback:
- https://www.w3.org/TR/2012/WD-SVG2-20120828/color.html (see also unmanaged colors there)
Quote<circle fill="#CD853F device-cmyk(0.11, 0.48, 0.83, 0.00)"/>SVG 2.0 can also use
icc-named-color()to specify a spot color which would be defined in a linked ICC color profile.However I don't think Affinity and it's SVG v1.1 based parser & code generator will handle such SVG color space based transformations and instead will always deal with display RGB colors.
2 hours ago, jont-131 said:Importing the graphic into the badge design module of our browser-based event registration system, it previews fine in the image library and when placed on the page, however when I generate the .pdf file of the data-merged badge design, the logo fills with a solid black (on the .png) or a solid white (on the .svg). I have tried various .svg export formats, and even tried repeating the exercise in Photo 2.3.0 (just in case it was the new update) but still get the same results
What should the above in bold "when I generate the PDF file..." in contrast to "I've tried various SVG export formats" concrete mean here (?), aka which software is meant to generating a PDF file when you export as SVG?
2 hours ago, jont-131 said:Happy to discuss with Affinity Team but due to client and event confidentiality I can't share any of the screenshots on the forum. I hope this isn't a problem.
Then offer some own made simplified example file(s) for issue reproductions & testings, instead of the made for customer stuff.
-
-
41 minutes ago, allone said:
hello i am new to affinity. I have a red line around the text that i have written. it is not a spelling issue. i have obviously inadvertently done something but whenever i try a different text box the same issue appears. can anyone tell me what’s up? thank you.
It always helps to name and know the Affinity app (APh, ADe, APub) and OS your are concrete using. Also a full app window screenshot which shows possibly selected top button options, like enabled Snapping (for snapping candidates) in this case.
So my guess is, it's probably also for your text due to enabled snapping candidates, see therefor also ...
Further a simple websearch on/for the forum contents after ...
... will show you similar question threads with possible solution answers.
-
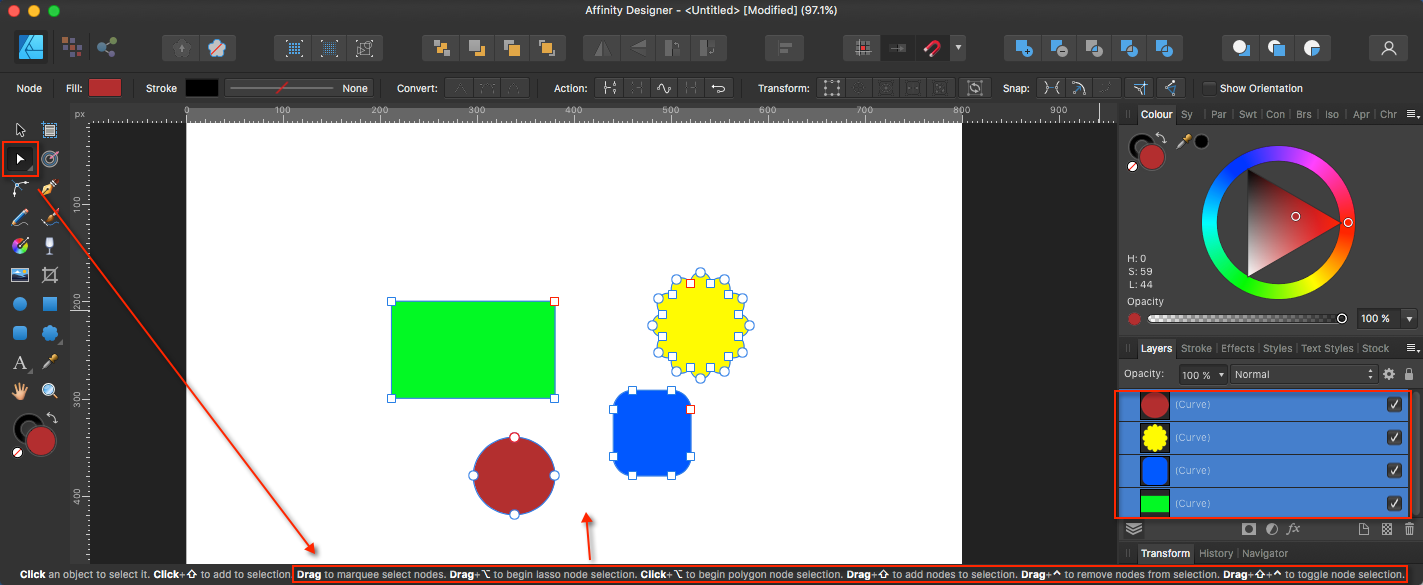
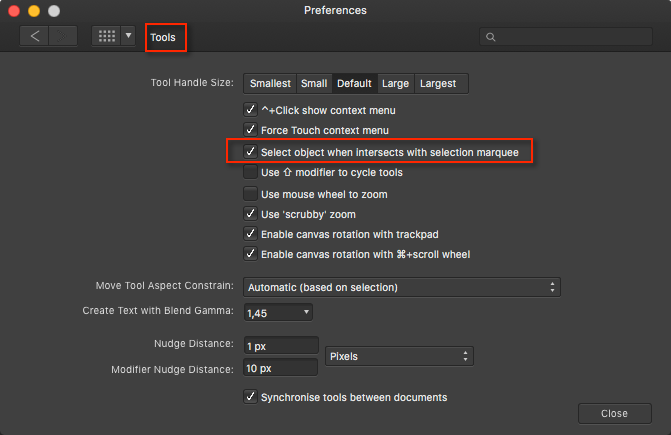
1 hour ago, eobet said:
But that's unusable for curves?
Also, it's infuriating how there's no exclusive modifier key for de-selecting, since the shift button toggle often toggles on things you don't want because the selection is so inaccurate (or "generous" if you want to do a positive spin on it). 😩
AFAIK such finer grade selections are only available on a nodes selection base (when using the Node tool for nodes selections), at least for ADe v1 ...
For common Move tool based curves selections there's just the common rectangle way with ...
... or via selecting curve layers via the layers panel. - Shift-Clicking for adding/removing curves from selections works Ok for me (as far as objects are big enough to be easily clicked on) and using Ctrl-/Cmd-D for dismissing selections.


How to apply a 'Radial' style transparency to a Rounded Rectangle?
in Affinity on Desktop Questions (macOS and Windows)
Posted
You have to adapt it slightly, aka redrag the handles accordingly (of transparancy or gradient tool), so it fits for a rounded rect. Further you can change it from radial to more suiting settings.