kaffeeundsalz
-
Posts
452 -
Joined
Everything posted by kaffeeundsalz
-
 There is no upgrade price but a time-limited 40 percent discount for all customers (new and v1 users). You can view the different pricing options at https://affinity.serif.com/en-us/affinity-pricing.
 -
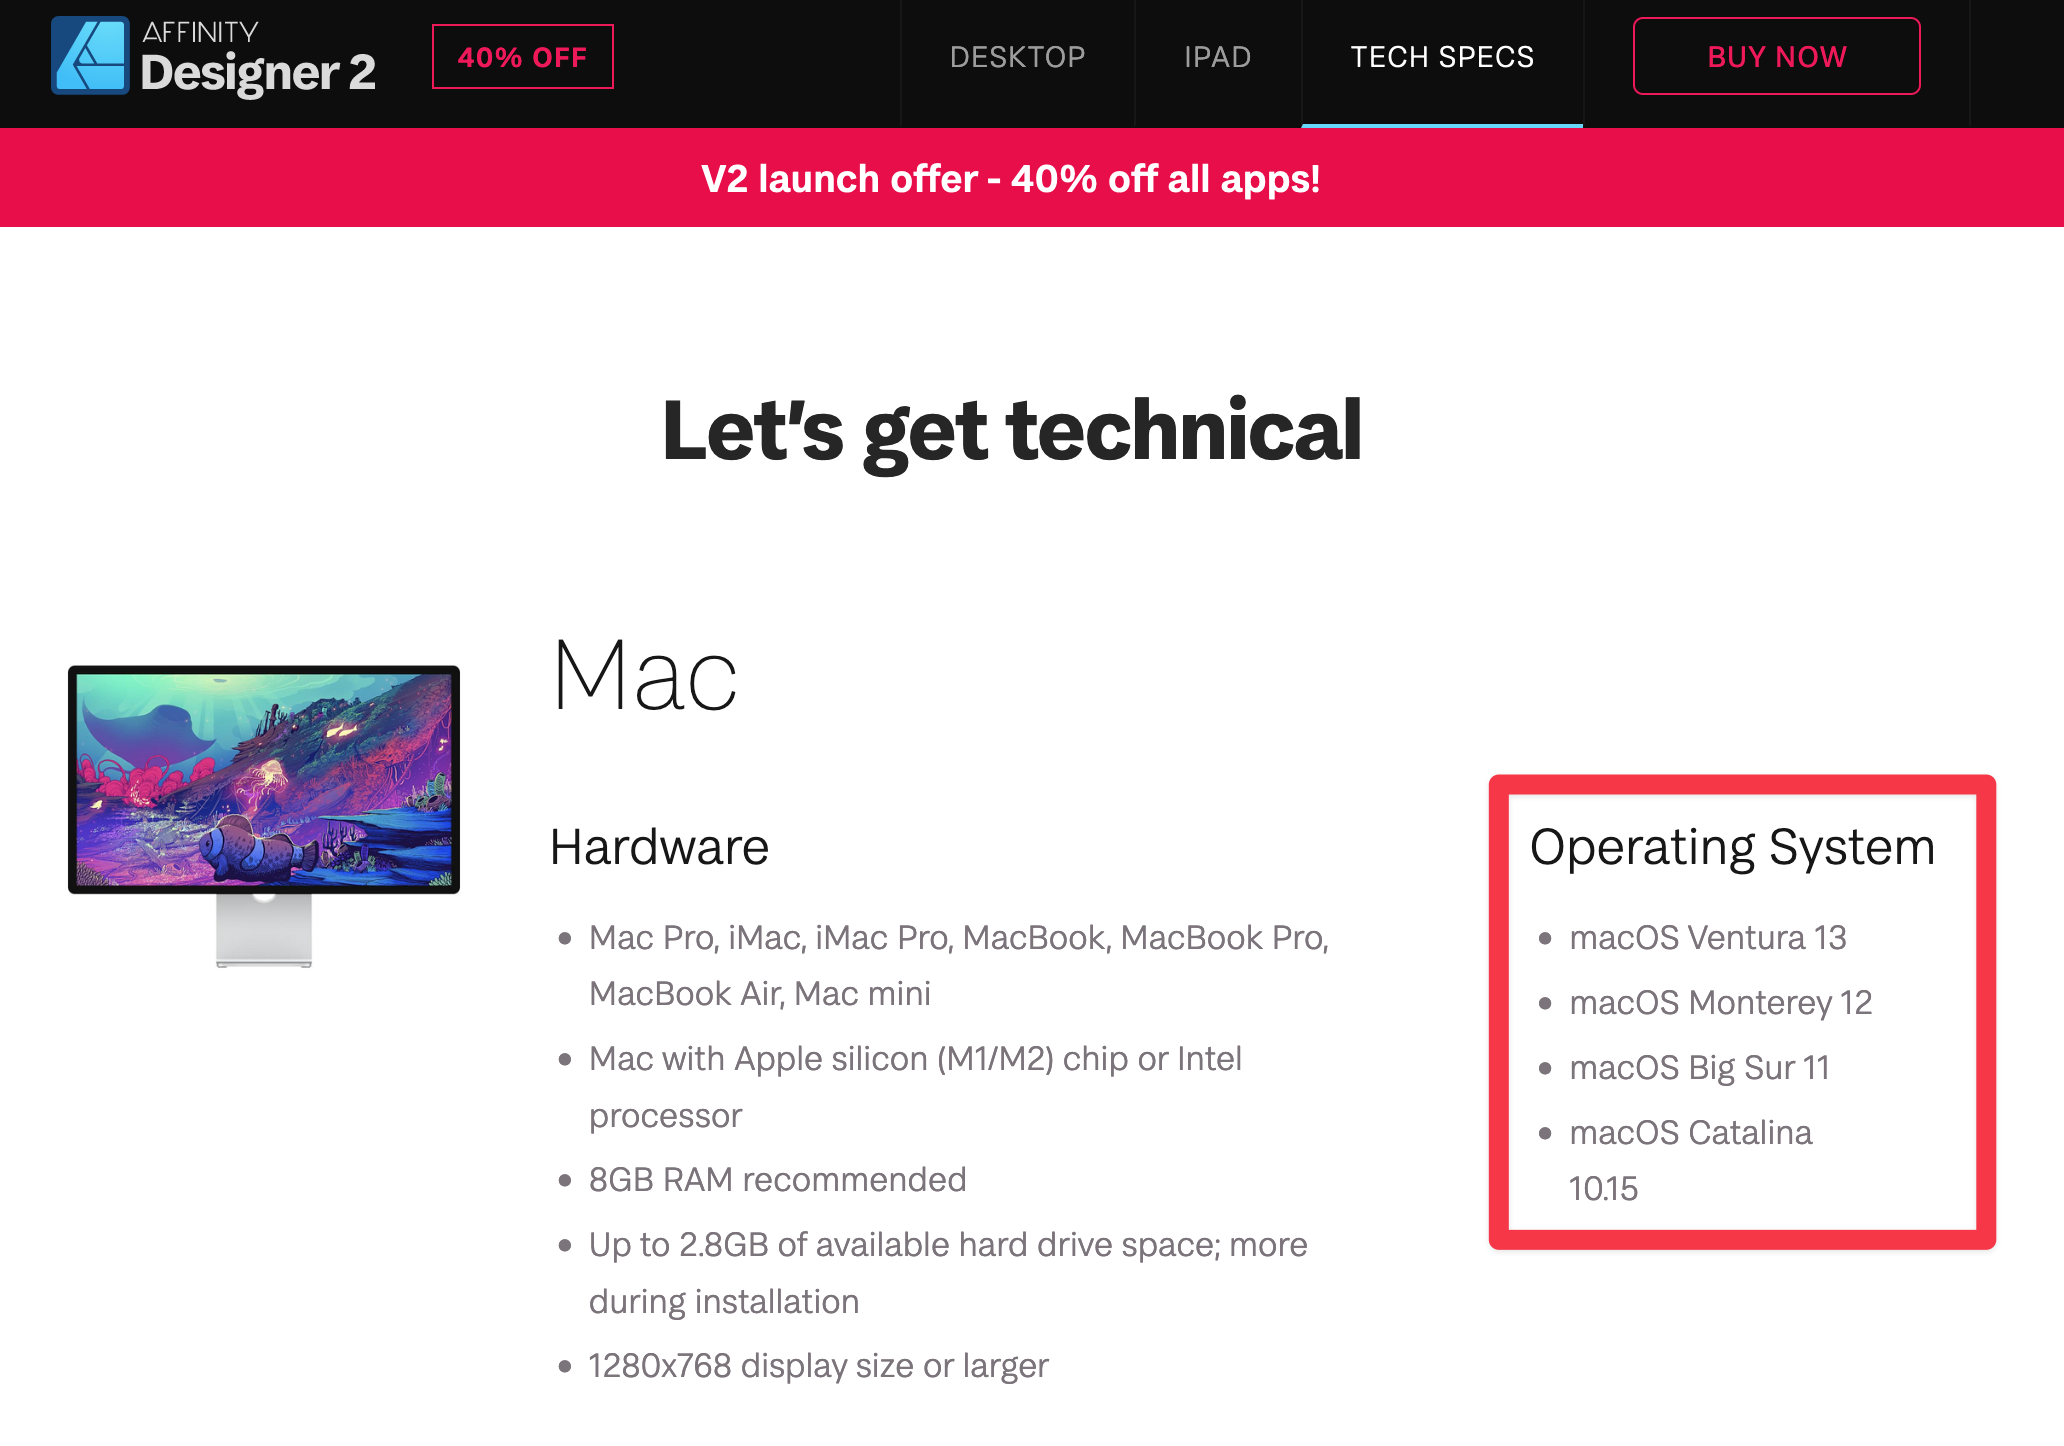
You won't find anybody using Affinity v2 with macOS 10.14.6 because the software simply doesn't run on this system. The Affinity website prominently lists the supported operating systems on the Tech Spec pages. macOS 10.14 Mojave is not in the list so it will not work.

-
No. Multiple curves can be combined to compound paths. This works non-destructively. Also, layer grouping and path geometry features are supported. As far as terminology is concerned, curve and path can mostly be used synonymously in this case, so you'll have to get used to it. No. Certain operations will result in vector layers to get rasterized, but Affinity supports both vector and pixel masks, and using a mask on a curve will not alter the curve layer's contents. No. Mask layers can be applied to an entire layer stack or to individual layers by nesting them. Layers above the mask are generally not affected. Wrong. You can paint on mask layers with the Paint Brush tool, and you can fill layers with the Flood Fill tool (among others). By the way, none of the features I mentioned here are in any way new to V2, so you could have gained the same functionality with V1. Because of this, I'm at a loss as to where your assumptions are coming from. Maybe you should just install the trial versions and actually use them.
-
Yes, I can relate to that. Buying directly from Serif saves them the 30 percent cut they'd normally have to pay to Apple. The cool thing about Affinity v2 is that we can have both because the universal license seems to work independently from where it has been purchased (again, that's just my experience with macOS, but as I understand the FAQ, it should be the same on other platforms). You get the ease of use and update handling convenience by installing the apps from the App Store, yet can fully support the developer by placing your license order in the Affinity Store.
-
No, nothing that could be considered "AI features" in the sense that Adobe/ON1 advertise their product functionality.
-
If you mean Astrophotography stacking and the Remove Background feature, both are present in version 2 of Affinity Photo. I generally don't think that Serif dropped any core functionality with the new suite, but if you have any specific feature in mind, I can check for you whether it's still available.
-
Photoshop actions cannot be used with Affinity Photo. You can import Photoshop brushes to Affinity Photo, but that was already possible in V1. Affinity Publisher can open or place InDesign Markup Language files (IDML) but not native Adobe InDesign files. This means that .indd files need to be converted to .idml first before they can be used with Affinity Publisher – again, that's nothing new and works the same way in Publisher 1.x. Concerning Adobe Illustrator: As with Affinity V1, AI is not available as an export format so you cannot save as .ai in any of the three applications. So it seems that really nothing has changed much with version 2 concerning your use case.
-
The software is correctly called "Clip Studio Paint" and might be the better option because as @2ddpainter said comes with animation. The point is that I would leave this decision to your daughter. In the end, she's the one who's going to work with the software, so she should choose the one that she thinks will best meet her requirements. Both the Affinity suite and Clip Studio Paint have trial versions available that your daughter should really check out and use for a while before you spend any money on a particular software package. After all, that's what trial versions are for.
-
At least for the macOS versions, I can confirm that this is not true. I downloaded all three Affinity apps from the Mac App Store, yet was able to activate them using the universal licence I purchased at the Affinity Store. There was never really any need for me to use the application bundles provided by Serif in the downloads section of their store.
-
Is AFFINITY dead?
kaffeeundsalz replied to J.T's topic in Pre-V2 Archive of Affinity on Desktop Questions (macOS and Windows)
I'm late to the party, but I have to say it: Silicon Graphics' Irix was, from my personal perspective, peak user interface design at the time. There's a reason SGI went bankrupt and I don't want to come to bad business decisions' defense. But just from an OS perspective, I think they should have never disappeared from the workstation landscape. Just imagine the Affinity suite running in a modern Irix environment … I simply can't stress enough how much I loved the Irix interface and how genuinely curious I am how the look and feel would have evolved if it wasn't for SGI's death. -
Please do such a test, post the export results here so we can compare them and throughly describe what exactly you think should convince us that the image quality is superior in other applications. You've taken the entire discussion this far, yet you never actually told us your definition of "better quality". Why?
-
Off topic: Most hardcore audiophiles don't give a damn about double-blind listening tests. They simply claim they can hear a difference.
-
Not only snapping overrides force pixel alignment, proportional scaling does, too. This means that if you have e.g. a rectangle at the size of 6x10 pixels and proportionally scale the shorter edge up to 7 pixels, the longer edge will scale to 11.7 pixels (rather than 12 pixels). There are probably more operations that undesirably introduce decimal places to pixel values, but this is a very common one to keep in mind.
-
Just uncheck Preferences > User Interface > Show Lines in points.
-
From the Affinity Designer product website at https://affinity.serif.com/en-us/designer/ :
-
I dare to doubt that very much. There already are a number of ways to desaturate layers, and Serif has no interest in precisely replicating Adobe Photoshop's behavior.
-
That's not how the Recolor adjustment works. If you need to apply specific color values, use Fill layers. They can be given precise color values. Then, use Blend Modes and Blend Ranges to control how the color affects your original image.
-
It's spam. @etiennepatierno is either a bot or a human fake account. He used the other post he made just for the purpose of linking to a poster template site.
-
If you use Overlay, you can see the background for sure because the overlay is semi-transparent. If even that doesn't make masked/unmaskes image parts apparent enough for you to see, I can't help you. You do need at least some kind of visual representation of a mask, otherwise you wouldn't have any clue about how it currently looks, right? The key to a good mask is of course to toggle between the preview modes as needed so you get a good overview of how your mask works under different conditions. For example, "Black Matte" lets you evaluate other aspects of your mask's quality than e.g. "Black and White" does and vice versa.
-
When you go into Quick Mask mode, you can use the Paint Brush tool to manipulate the current selection. As I wrote in my previous post, it doesn't work with mask layers. Quick Mask mode creates selections, not masks. To create a mask from a selection, add a new Mask layer while having an active selection. To load a mask as a selection, Cmd+Click the Mask layer in the layers panel (on Windows, it's Ctrl+Click i think).
-
Two things. First: There's also the Quick Mask mode ("Edit Selection as Layer") which basically lets you paint your selection with brushes while showing the same red overlay that you're used to from the Refine Selection dialog. Unfortunately, this works with selections only and not with existing masks, but you can load your mask as a selection and create a new one after painting. Also, what I told you in my first answer still holds: If you paint in just a bit from the background, the edges of the subject become clearly visible and you could work your way back until only the subject is selected. Second: Sometimes what counts with selections is credibility rather than accuracy. In some cases, it just doesn't matter whether you managed to follow the exact contour of, say, a person's clothing as long as your selection result looks natual. In other cases, hair selection is so difficult that it looks better to manually paint in some artifical strands of hair instead of trying to select them from the original photo. Don't try to be overly precise when what you got is already quite realistic.
-
I also don't understand your question, but I'll try to work through your post. Well, if you tried it, you should be able to tell for yourself. If the technique works for you, use it. If it doesn't, then don't. In theory, yes, but the workflow shown in the video is specifically tailored to image content where these automatic tools don't work reliably. This is thoroughly explained in the video, including the factors that make smart selection algorithms fail. Please watch the introduction. This is all specific to the very image you're trying to work on. You need soft brushes for blurry edges and hard brushes for sharp edges. And if you create an initial mask and paint back in too much, you can of course very clearly see which parts of the image belong to the foreground or to the background. But again, the video covers all of this in much detail, so I'm not entirely sure what your questions are. Again, I'm unsure if I got you right, but where this advice comes from probably is that in Affinity Photo, image content is treated differently depending on how you output the selection refinement. If Output is set to "New layer" or "New layer with mask", Photo applies additional processing to reduce color bleed from the background into the selection which makes these output options better suitable for cutting out or compositing. This is covered in more detail in the help files. It may sound repetitive, but the experience with all these techniques depends on the image content. With some images, they'll work. With some, they won't. It's always been that way.
-
But isn't this a bug then? Shouldn't a "Subset fonts" feature ensure to include all glyphs that are actually used in a document?
-
I think the confusion here comes from your assumption that the marching ants, i.e. the moving dotted line in your image, are an accurate visual representation of your selection. They're not. Pixels can be selected, not selected – and also partially selected, which means their selection involves some degree of transparency. But Affinity Photo will only show marching ants for areas where the selection has >50 percent opacity. That's why in your example it seems that the Eraser brush doesn't respect the limits of your selection. In reality, your selection area is simply larger than the marching ants suggest because it contains pixel that are selected with <=50 percent opacity. To get an accurate view of your selection, use the Quick Mask feature by pressing Q or do what @NotMyFault recommends in this post. You need a different selection to achieve what you want.
-
I assume with Stamp tool you mean the Clone Brush Tool because that's what you use in your screen recording. At least in your video, the reason why the Clone Brush doesn't work is because you have no active layer so Affinity Photo doesn't know what pixel information to use as a source (and target). You need to select the Background layer in the Layers panel first to get this working.