h_d
-
Posts
1,610 -
Joined
-
Last visited
Everything posted by h_d
-

Forum question - app?
h_d replied to Aussie iTV's topic in Pre-V2 Archive of Desktop Questions (macOS and Windows)
All I can tell you, having recently reached it, is that you get four blobs at 1000 posts. (Where has my life gone?) At some point (certainly on three blobs) you can customise your title on your profile page. The version of the website on my phone (iOS 14, Safari) has a different layout from the desktop version and works quite well, although it's not an app as such. -
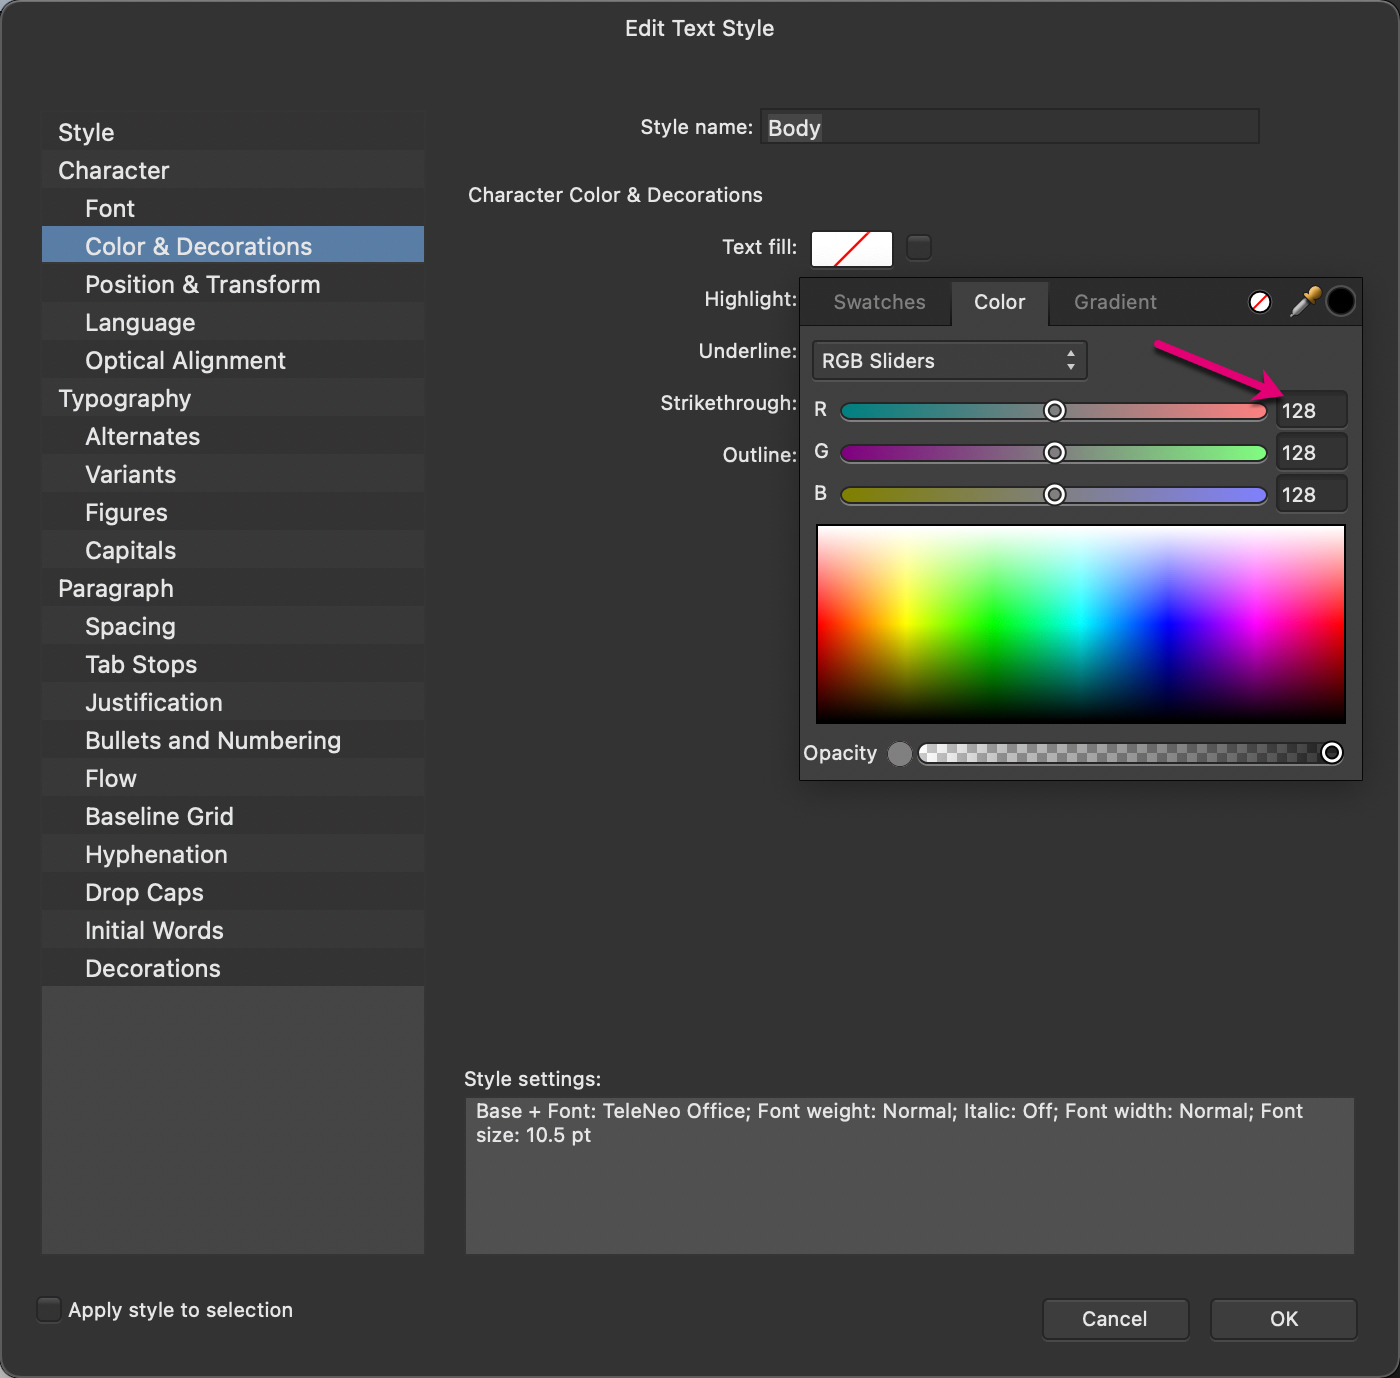
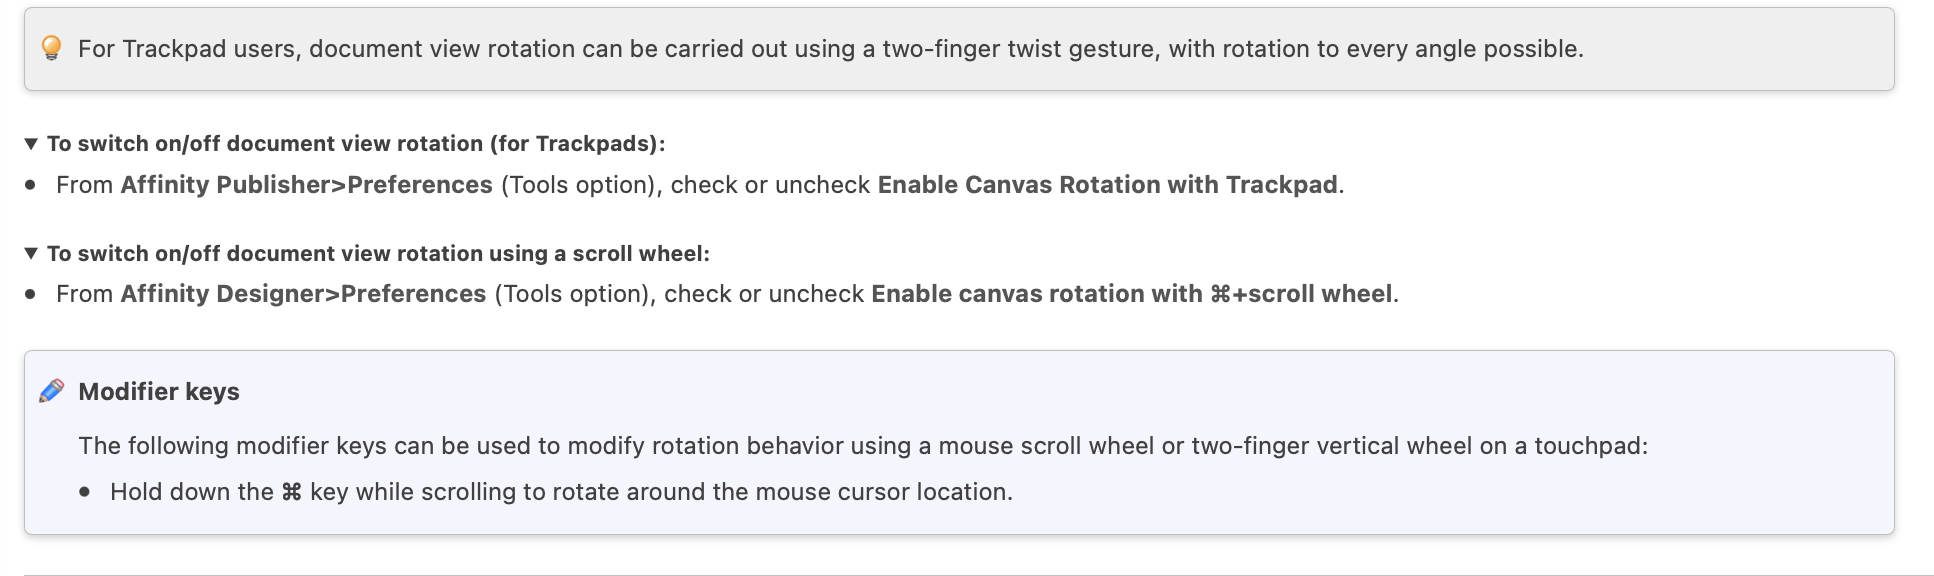
Hi, very minor thing but the help page for Rotate Document View (online and in-app) refers to Designer prefs not Publisher when describing rotation with the mouse wheel. Cheers, H

-
Pleasure - hope it works for you!
-
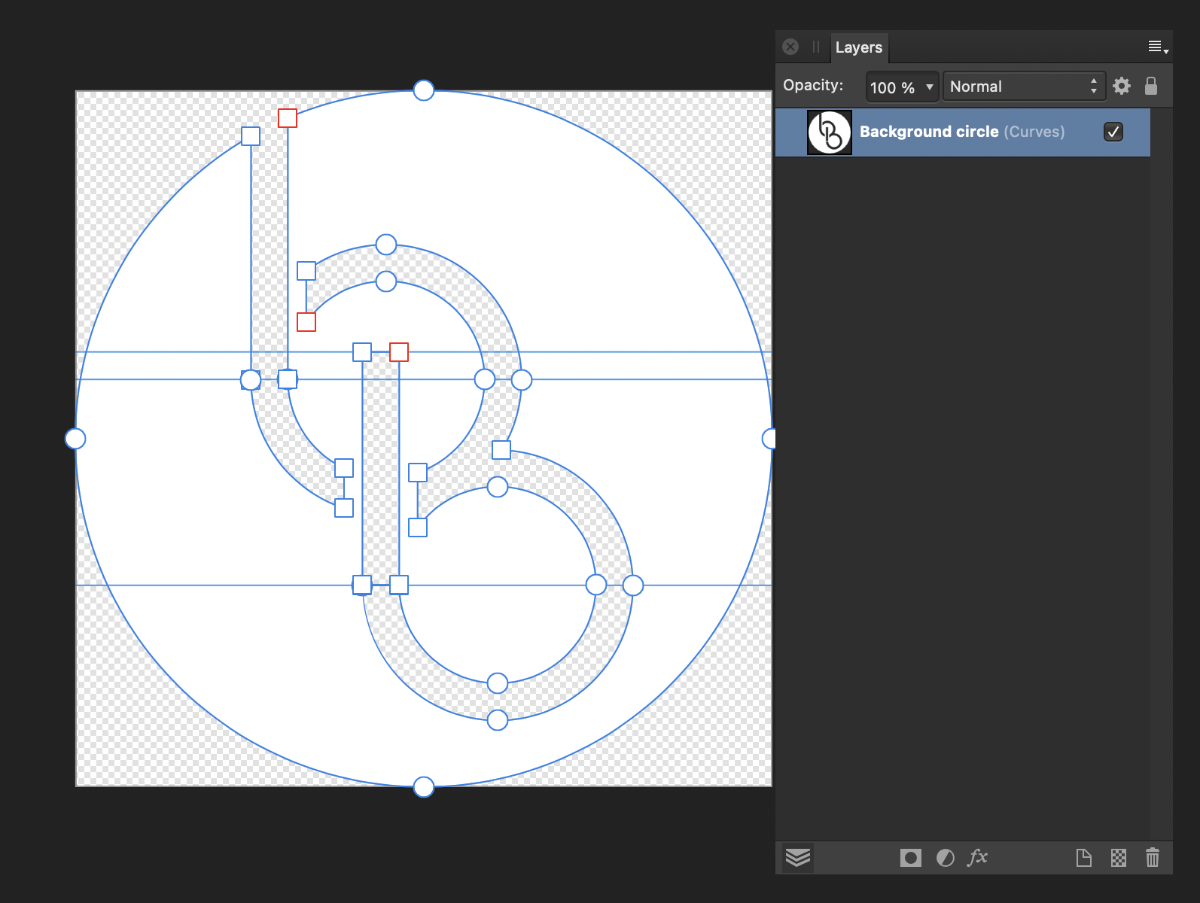
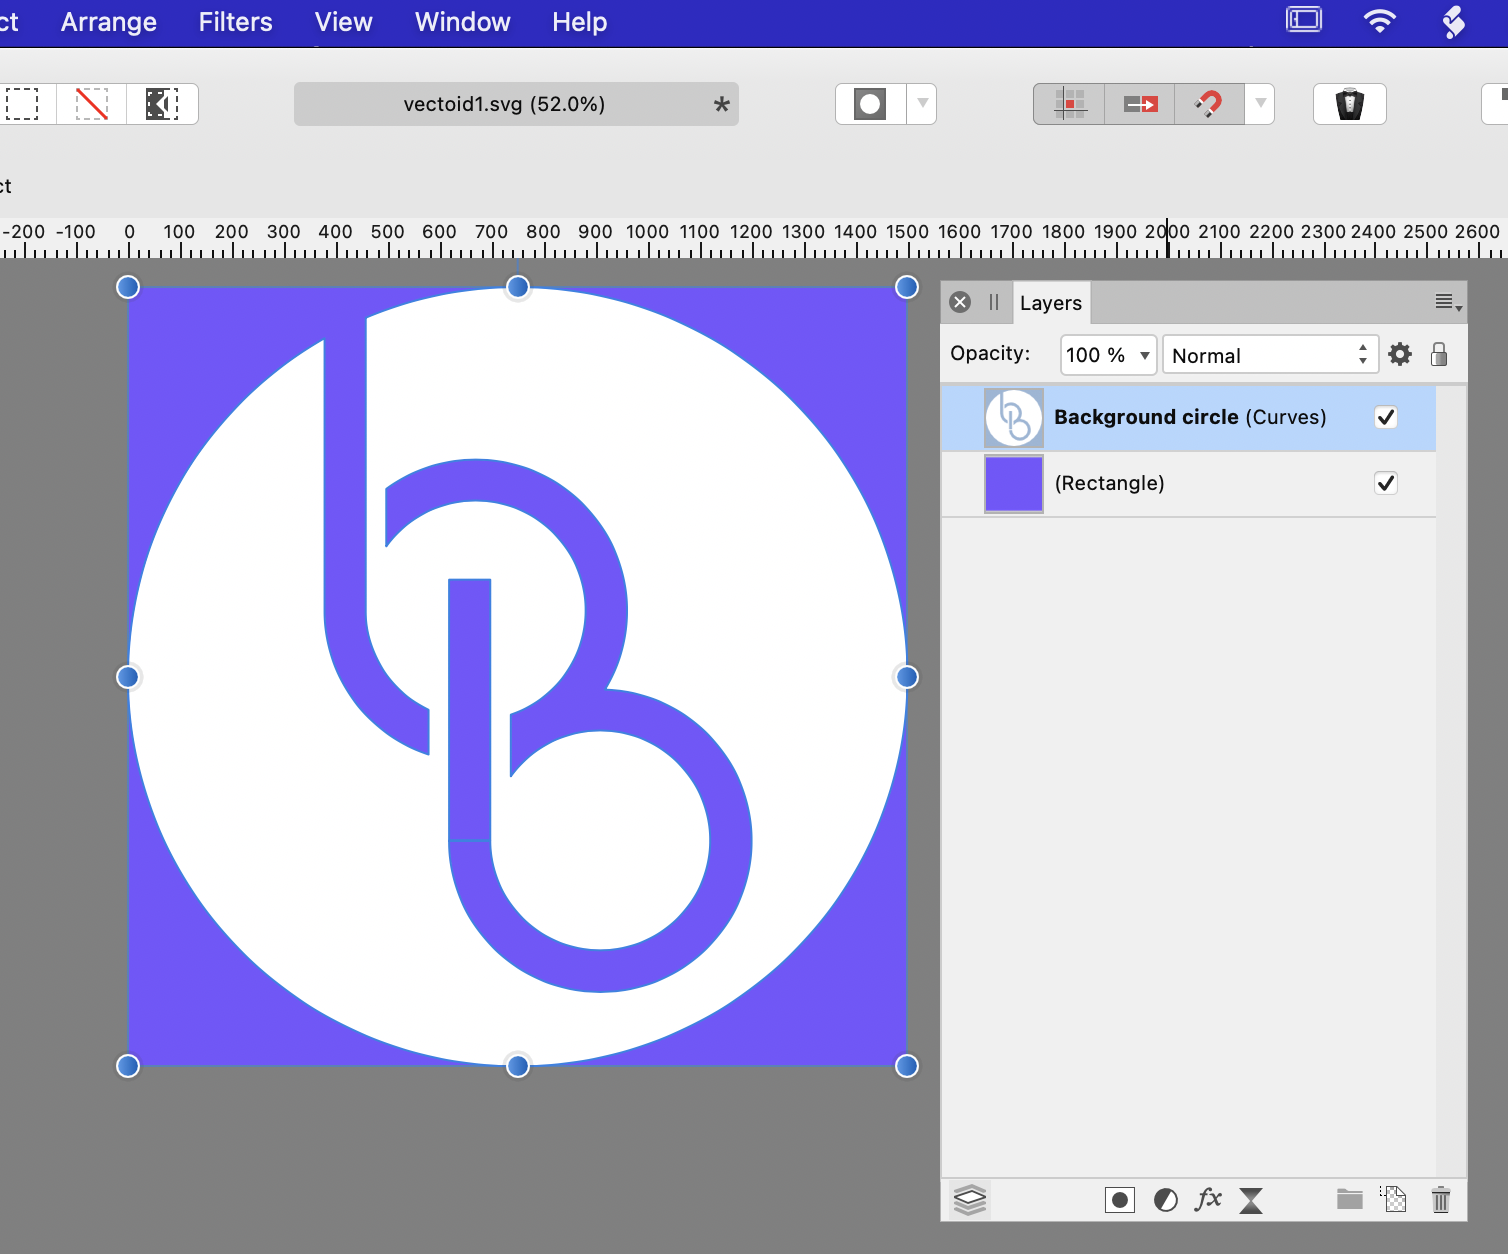
Here you go. In my original description I omitted one step - adding the smaller circles to the larger one after 'punching through' the circular holes. This step is included in the history of the attached file. converted bbc negative logo.afdesign
-
Hi Adam, There's no punch tool as such - it's simply the name I gave to the layers that I was using to 'punch through' the white shapes using Geometry - Subtract. Bear with me and I'll upload an .afdesigner file with the history saved so you can walk through it. TBH you could probably do the job in Publisher but the Geometry tools are a little bit more accessible. Cheers, H
-
How to save a RAW file as a JPG
h_d replied to John Kirk's topic in Pre-V2 Archive of Desktop Questions (macOS and Windows)
Hiya @John Kirk and welcome! You need to use Export from the File menu to create a .jpeg (or .tiff, .png, .pdf etc) from an Affinity Photo document. You can then either save the Affinity document as a separate file, or close it without saving. In both cases this will leave the original .raw file untouched. -
Some ideas (not a tutorial). Photo is definitely the right program to use for it. Start with a white fill layer and rasterise it. This will give you something akin to Bob's liquid white background. Use the Paint Mixer brush with different colours, sizes, shapes and strength settings. Experiment! Use muted colours - Bob paints with pigments, whereas Photo paints with light. Using the RYB setting for the Paint Mixer brush will help with blending. Auto Load Brush will also help. Clicking Clean Brush will make you feel like Bob whacking his brush on his bucket and spattering the film crew. The rest is just happy little accidents... and I'm not showing you mine 😆
-
coloring spaces within shapes
h_d replied to vik's topic in Pre-V2 Archive of Desktop Questions (macOS and Windows)
Hiya @vik and welcome! I'm not entirely sure what you mean - something like this perhaps? Changing the blend mode on the triangle in the Layers panel (here I've set it to Lighten) modifies the appearance of the underlying colour. But it's quite a limited effect, in that the resulting blend is dependent on the original colours) You could duplicate the triangle and choose a different blend mode on the top copy: but if you wanted anything more complex then tbh using masks is probably going to be your best bet.
-
... One of the problems with following Photoshop tutorials using Affinity Photo is that you have to be pretty familiar with both programs in order to understand the concepts - and the differences between them. Not saying it's not possible, it's just an added layer of complexity, which may not be ideal if you're of an impatient persuasion.
-
You will need to simplify your original significantly. I switched to Edit in Designer (not sure why you went into Publisher for the second attempt) and ungrouped. Then, I identified the individual layers by name: Background circle, Lower White Circle, Upper White Circle, Lower Punch Circe, Upper Punch Circle, Lower White rectangle, Lower Punch Rectangle, Upper White Rectangle, Upper punch rectangle. I changed the fill on the "Punch" shapes to something other than white and changed their blend mode to Normal to make them easier to see. I changed the fill mode on all the objects to Alternate (even-odd). Some were Winding (non-zero) which initially gave problems with the following steps. I dragged Lower Punch Circle down to immediately above Background iCrcle in the layer stack, selected both these layers and applied Geometry - Subtract I did the same with Upper Punch Circle and Background Circle. I dragged Lower White Rectangle down to immediately above Background Circle, select both layers and applied Geometry - Add I dragged Lower Punch Rectangle down to immediately above Background Circle, selected both layers and applied Geometry - Subtract Same process for Upper White Rectangle and Upper Punch Rectangle. This gave me a single Curves layer with transparency: I exported this to SVG (purple shape for contrast only.
-
If I have the Pen, Hand or Colour Picker tools selected, those options are greyed out. I haven't tested everything, but if I switch to almost any other tool (Move, Node, Clone Brush...), the Flips and Rotates are all available. Not sure if that's a bug or a feature.
-
The whole document is tilted
h_d replied to AHEA Ed's topic in Pre-V2 Archive of Desktop Questions (macOS and Windows)
With a trackpad (macOS) a two-finger twirling gesture (easier done than said, ) and command and drag. Not sure with a mouse but you there are options to turn it off in Preferences - Tools:
-
The whole document is tilted
h_d replied to AHEA Ed's topic in Pre-V2 Archive of Desktop Questions (macOS and Windows)
View menu - Reset Rotation should fix it.
-
Hiya @Adam Bennett and welcome! Yes - export in a format that supports transparency (such as .png). This is how a .png exported from your .afdesign file opens in Affinity Photo (transparent background enabled, the checkerboard is the transparent area):
-
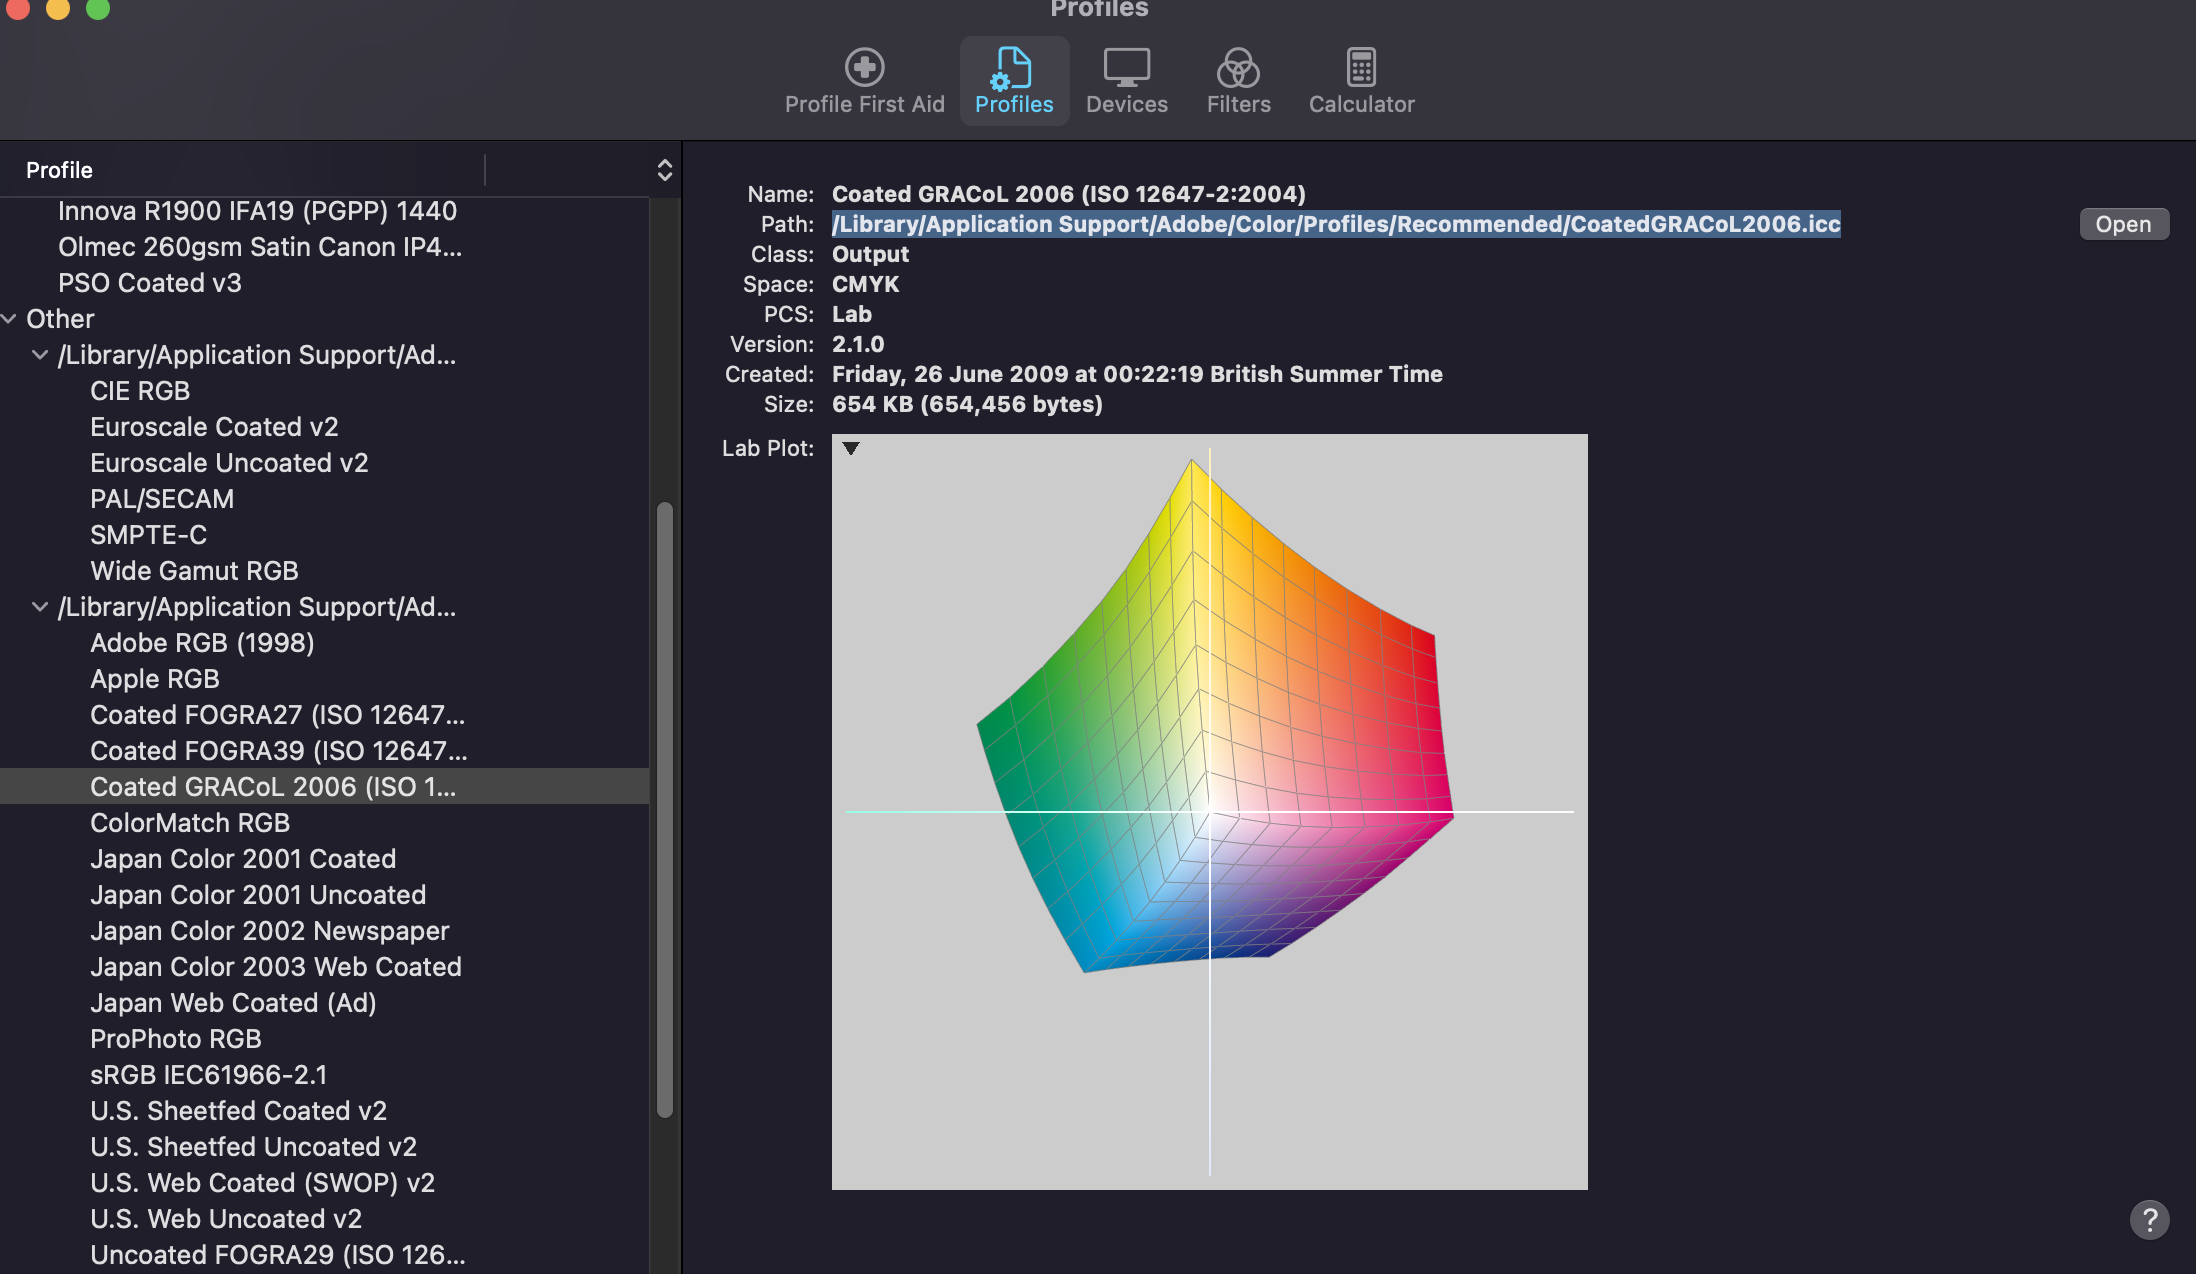
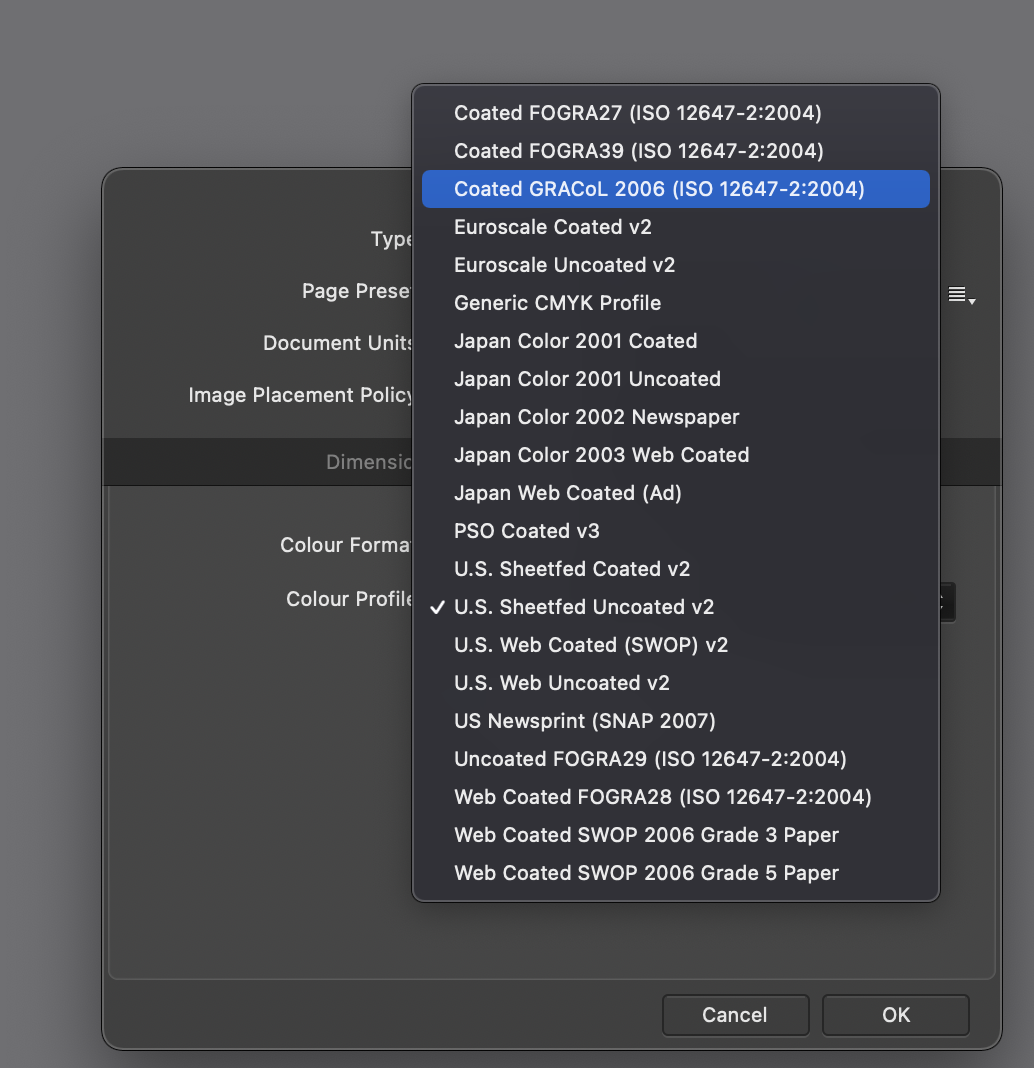
Hiyai @mnsbrh and welcome! I have that profile installed in /Library/Application Support/Adobe/Color/Profiles/Recommended And it's available in Affinity Designer: \ You might also want to try it in /System/Library/Colorsync/Profiles/ As I have a few .icc profiles in there that are also available to Designer. Hope it helps! H
-
spacing in text box
h_d replied to Mabel Lucy's topic in Pre-V2 Archive of Desktop Questions (macOS and Windows)
Just a guess, but... Is the original imported from a .pdf? If so, is that really a text box or is it a picture of the text (which would be uneditable using text tools)? To check this, select the object and look in your layers panel. If it says "image" or "pixel" then it's not editable text. Similarly, if it says "Group" in the Layers panel then it may be that the text has been converted to curves. In Affinity Designer that's very easy to do with an accidental Cmd-Return, but you don't say which program you're using. That command is also in the Layer menu in Publisher. Again, this would make the text uneditable. It may also be that the text box is part of a group, and the text remains editable but you're selecting the group, not the enclose text box. Without a screen grab of the layers panel, with any group expanded, it's hard to tell. Quickest way out is to delete the offending object and retype the whole thing... -
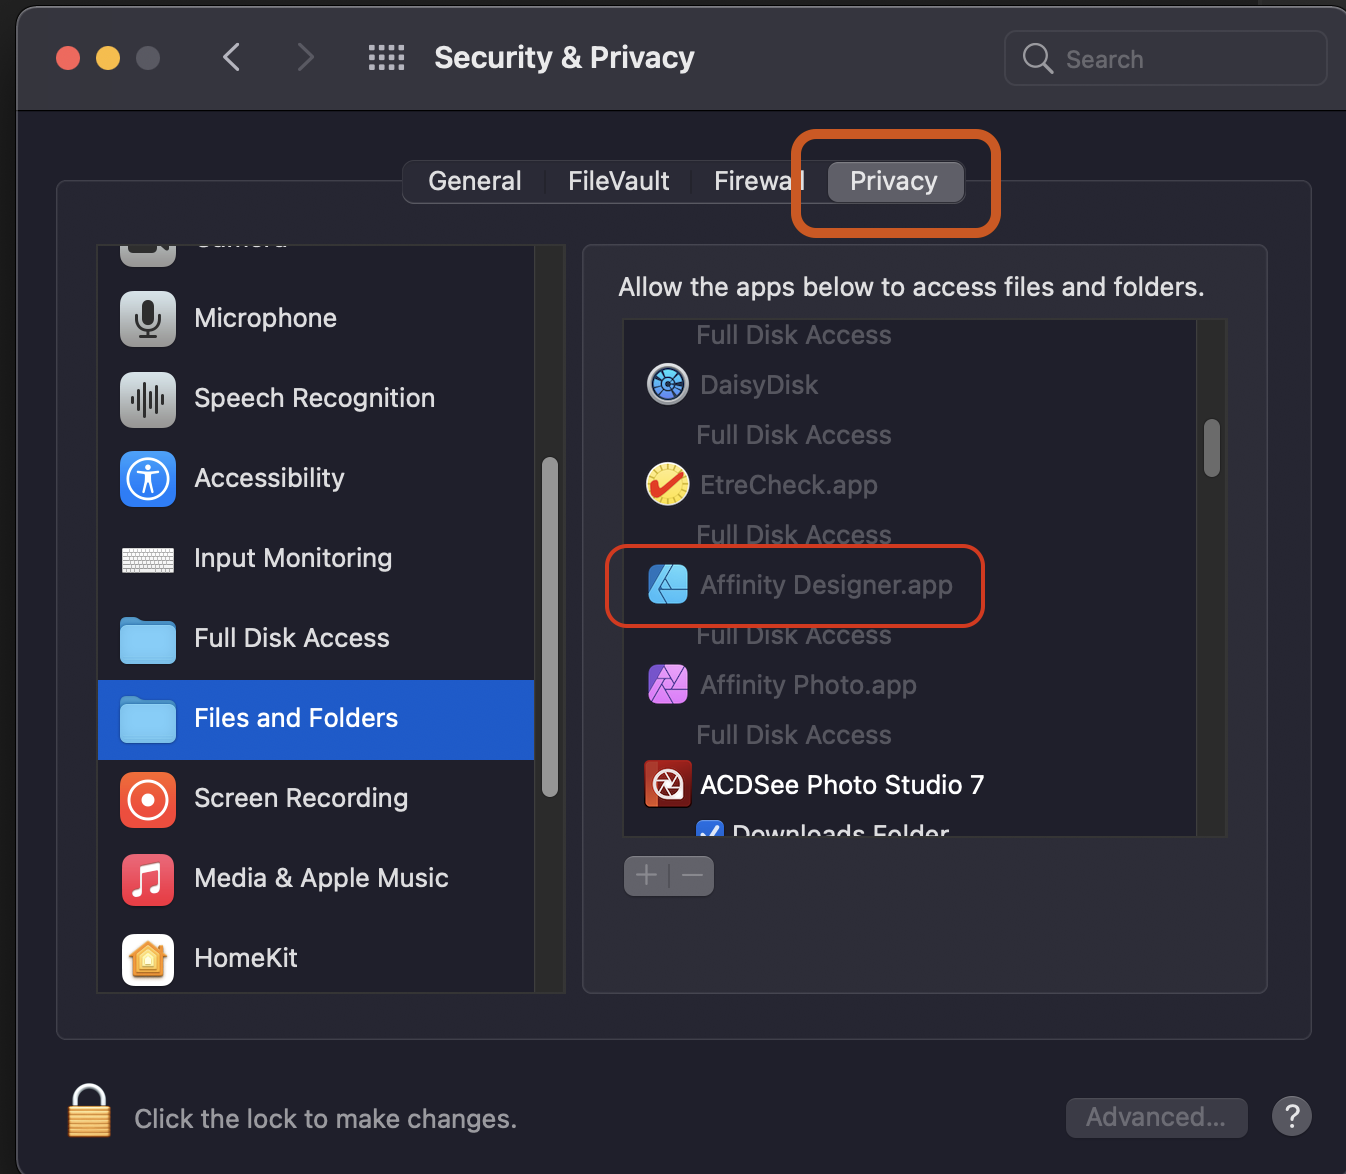
Salut @Fanny34 et sois la bienvenue aux Forums! En englais malheureusement... System Preferences - Security & Privacy Check that Designer has full disk access. (Vérifie que Designer dispose d'un accès complet au disque.)
-
@Labyrinth777 If you could post a screen grab it would help. We can't see what you are seeing so any suggestions are basically guesswork. Cheers, H
-
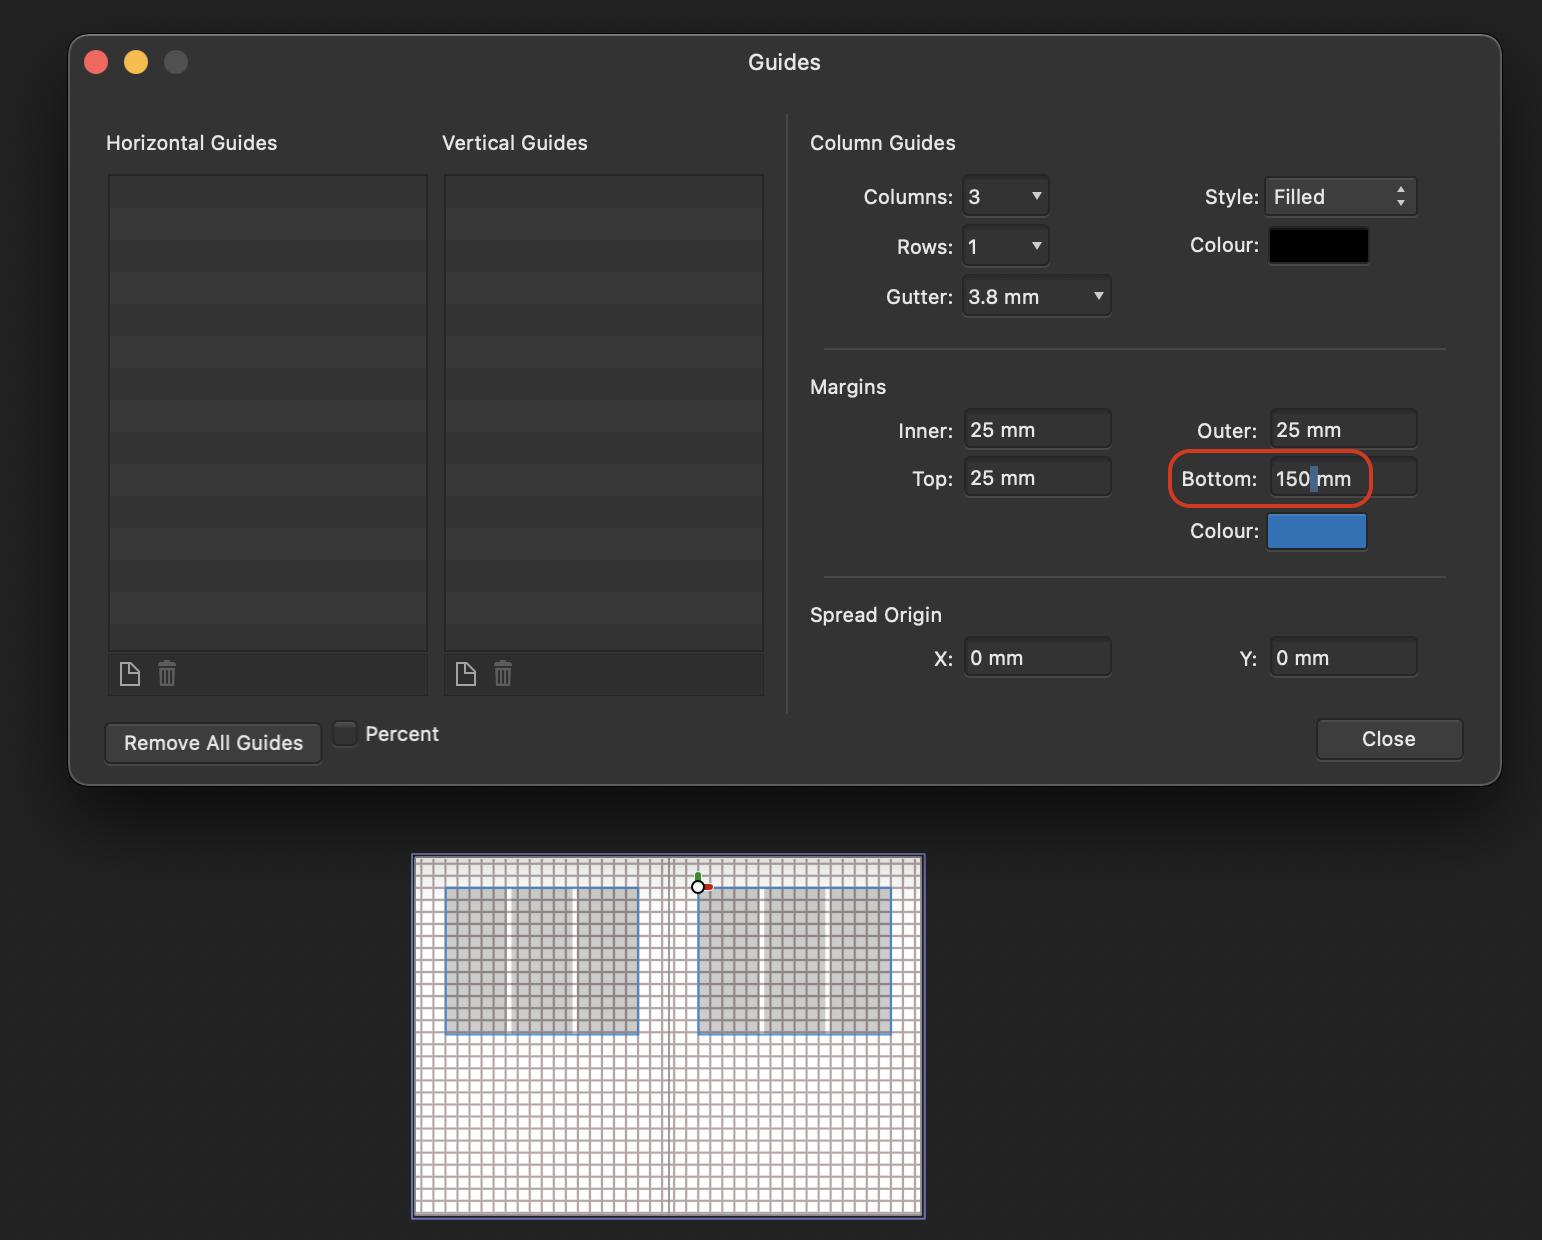
Hi @Sayre and welcome! It's your bottom margin setting. It looks to be around the same depth as the page, but it needs to be in a similar range to the other three margins. With similar settings I get exactly the same as you. To illustrate, here's a Guides setup with the bottom margin approximately half the depth of the page: The bottom margin is measured from the bottom of the page. Cheers, H
-
Object scaling
h_d replied to Andrew Michell's topic in Pre-V2 Archive of Desktop Questions (macOS and Windows)
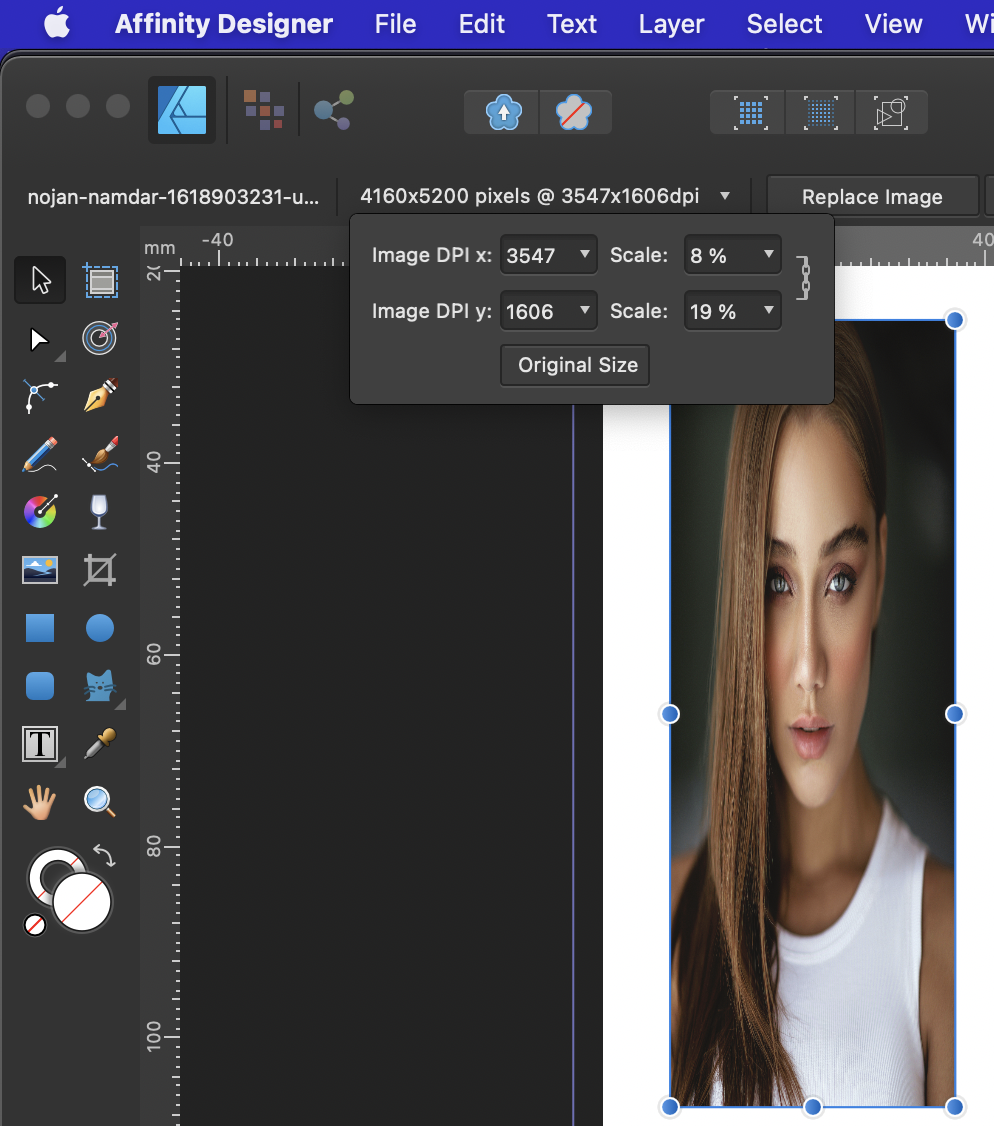
For placed images there's a field in the contextual menu that displays the percentage enlargement/reduction: If the image is distorted, the pop-up next to the image size displays further detail about the x and y scaling: This information is lost (or at least not displayed) if the image layer is rasterised. Not sure what would happen with 'vector logos', but a placed pdf has the same info in the contextual menu until rasterised. (Image from Unsplash.)
-
variable thickness of lines
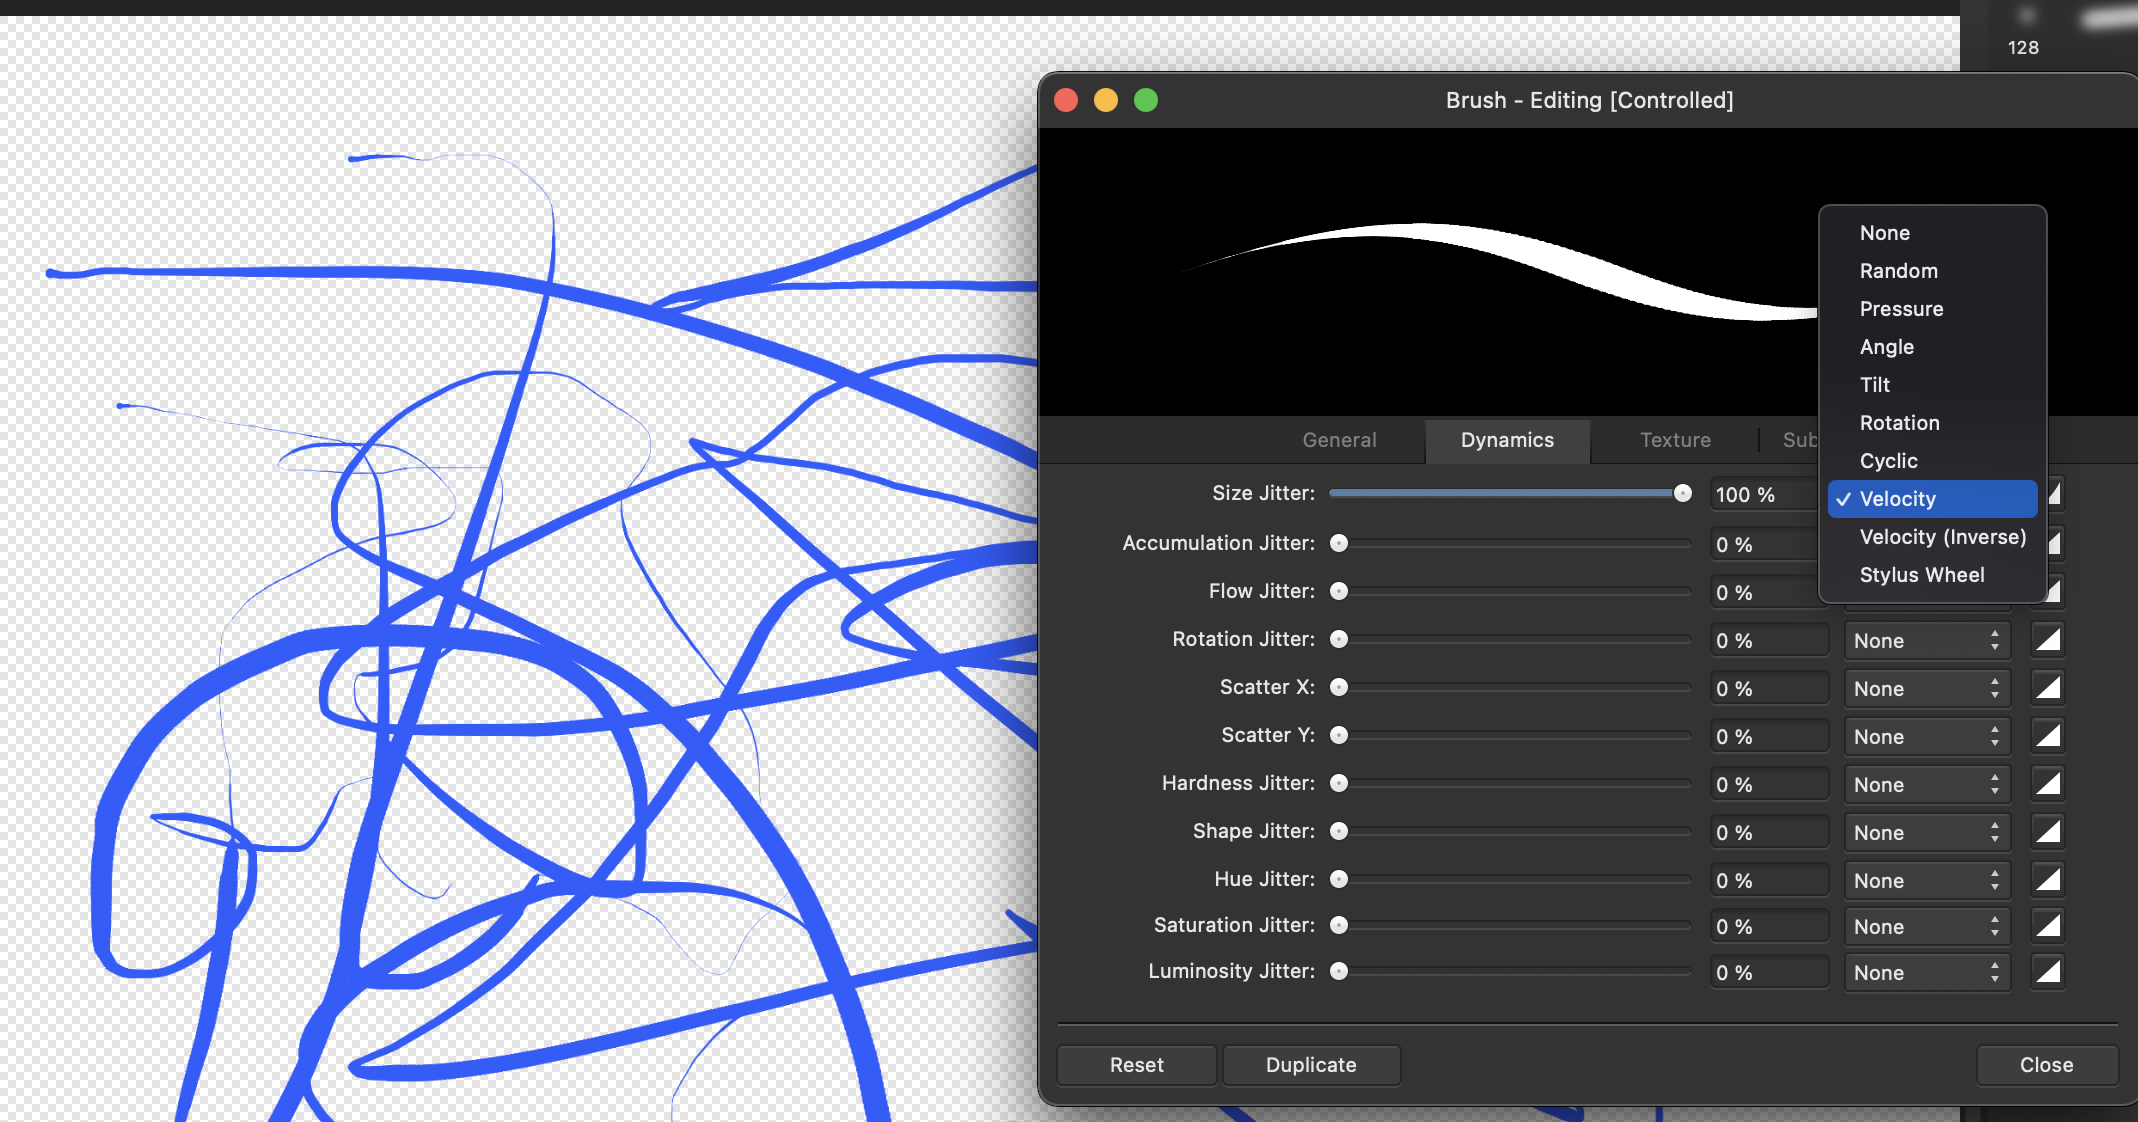
h_d replied to jasd's topic in Pre-V2 Archive of Desktop Questions (macOS and Windows)
Assuming you're using a raster brush (eg in Photo, or Designer's Pixel persona), another option is to increase the size jitter and link it to Velocity. The faster you move your mouse (or finger on a trackpad) the broader the stroke. Linking the size to pressure and using a drawing tablet is probably going to give better results though.
-
A message from Affinity Publisher
h_d replied to ronald618's topic in Pre-V2 Archive of Desktop Questions (macOS and Windows)
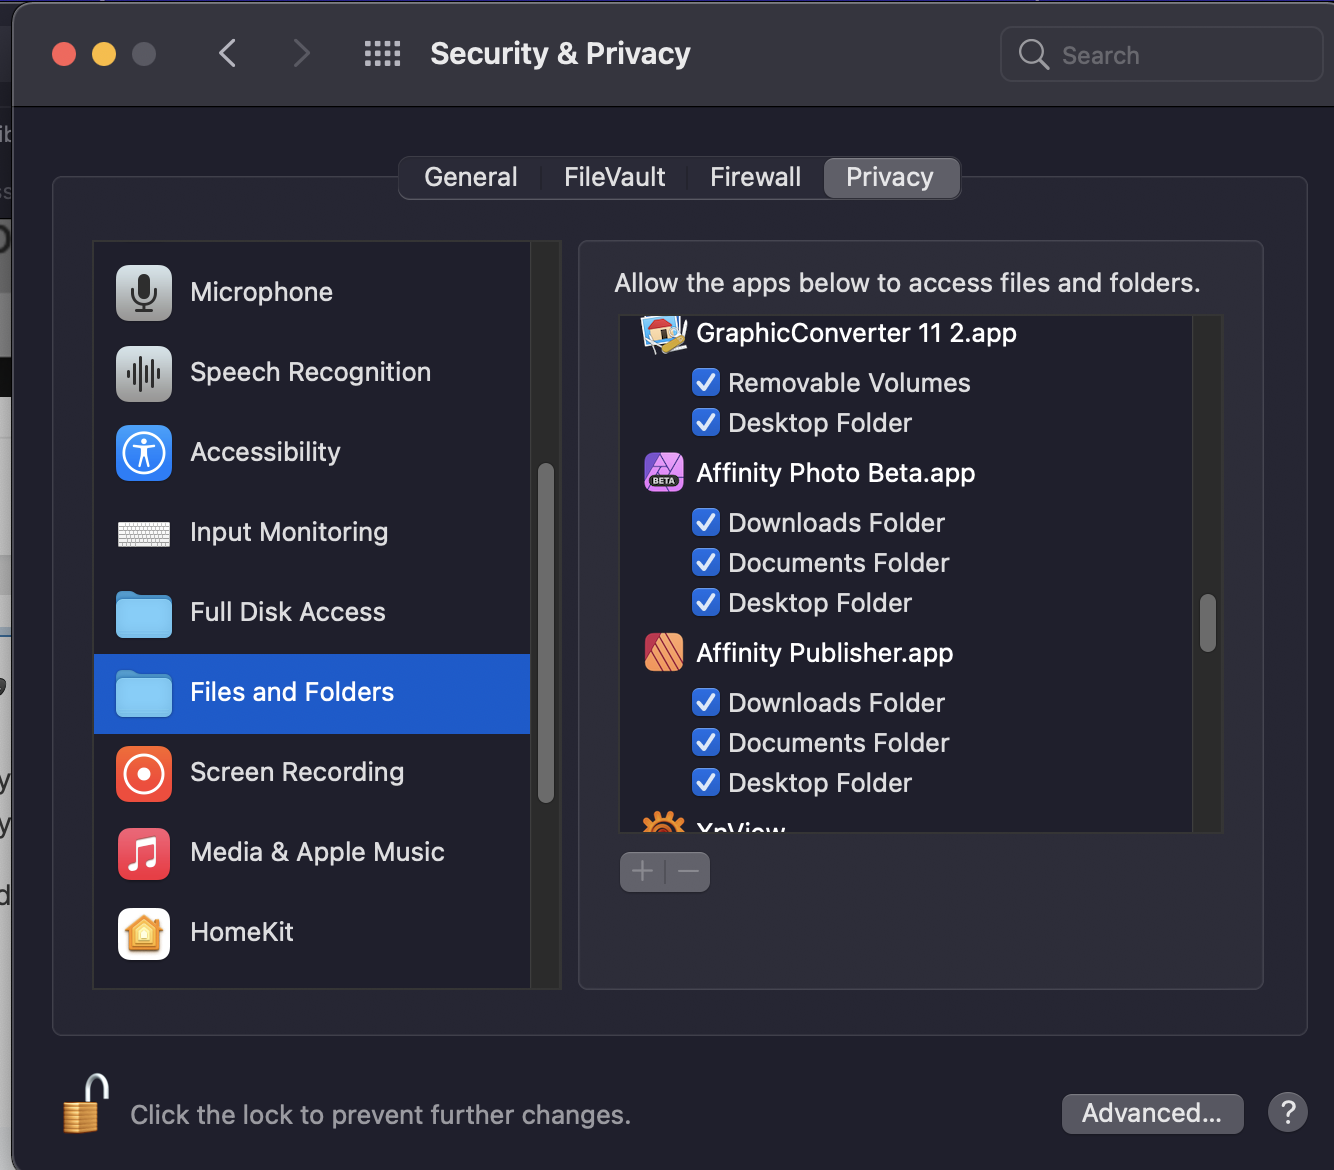
It's a standard macOS security alert which pops up quite frequently when you run an application for the first time. By clicking "Don't Allow" you're preventing Publisher from opening files on your desktop, and probably from importing them too. If at any point you decide that you do need Publisher to open/import from files on your desktop, go to System Preferences - Security & Privacy - Privacy. Click the lock to make changes, then click Files and Folders and grant Publisher whatever permissions you decide. Click the padlock again when you're done.
-
Absolutely not @MEB. My comment was just a rather feeble attempt at humour, which I should have remembered tends not to translate well over the internet. I've attached an .afphoto document with the history saved. The original isn't heavily pixelated and at anything up to 100% magnification the lines are quite smooth. I also reduced the size of the screen shot in the forum software which may have contributed to the smoothing. Anyway, it's not the effect @Gregory Dubus wanted in any case 😃 Best, H 1359488935_Originalimage.jpg.f3f9ab3af19520abf80bff7bd315f217.afphoto
-
Not me honest guv - I just saved down the image and applied the effects I described.