Hangman
-
Posts
10,857 -
Joined
-
Last visited
Everything posted by Hangman
-
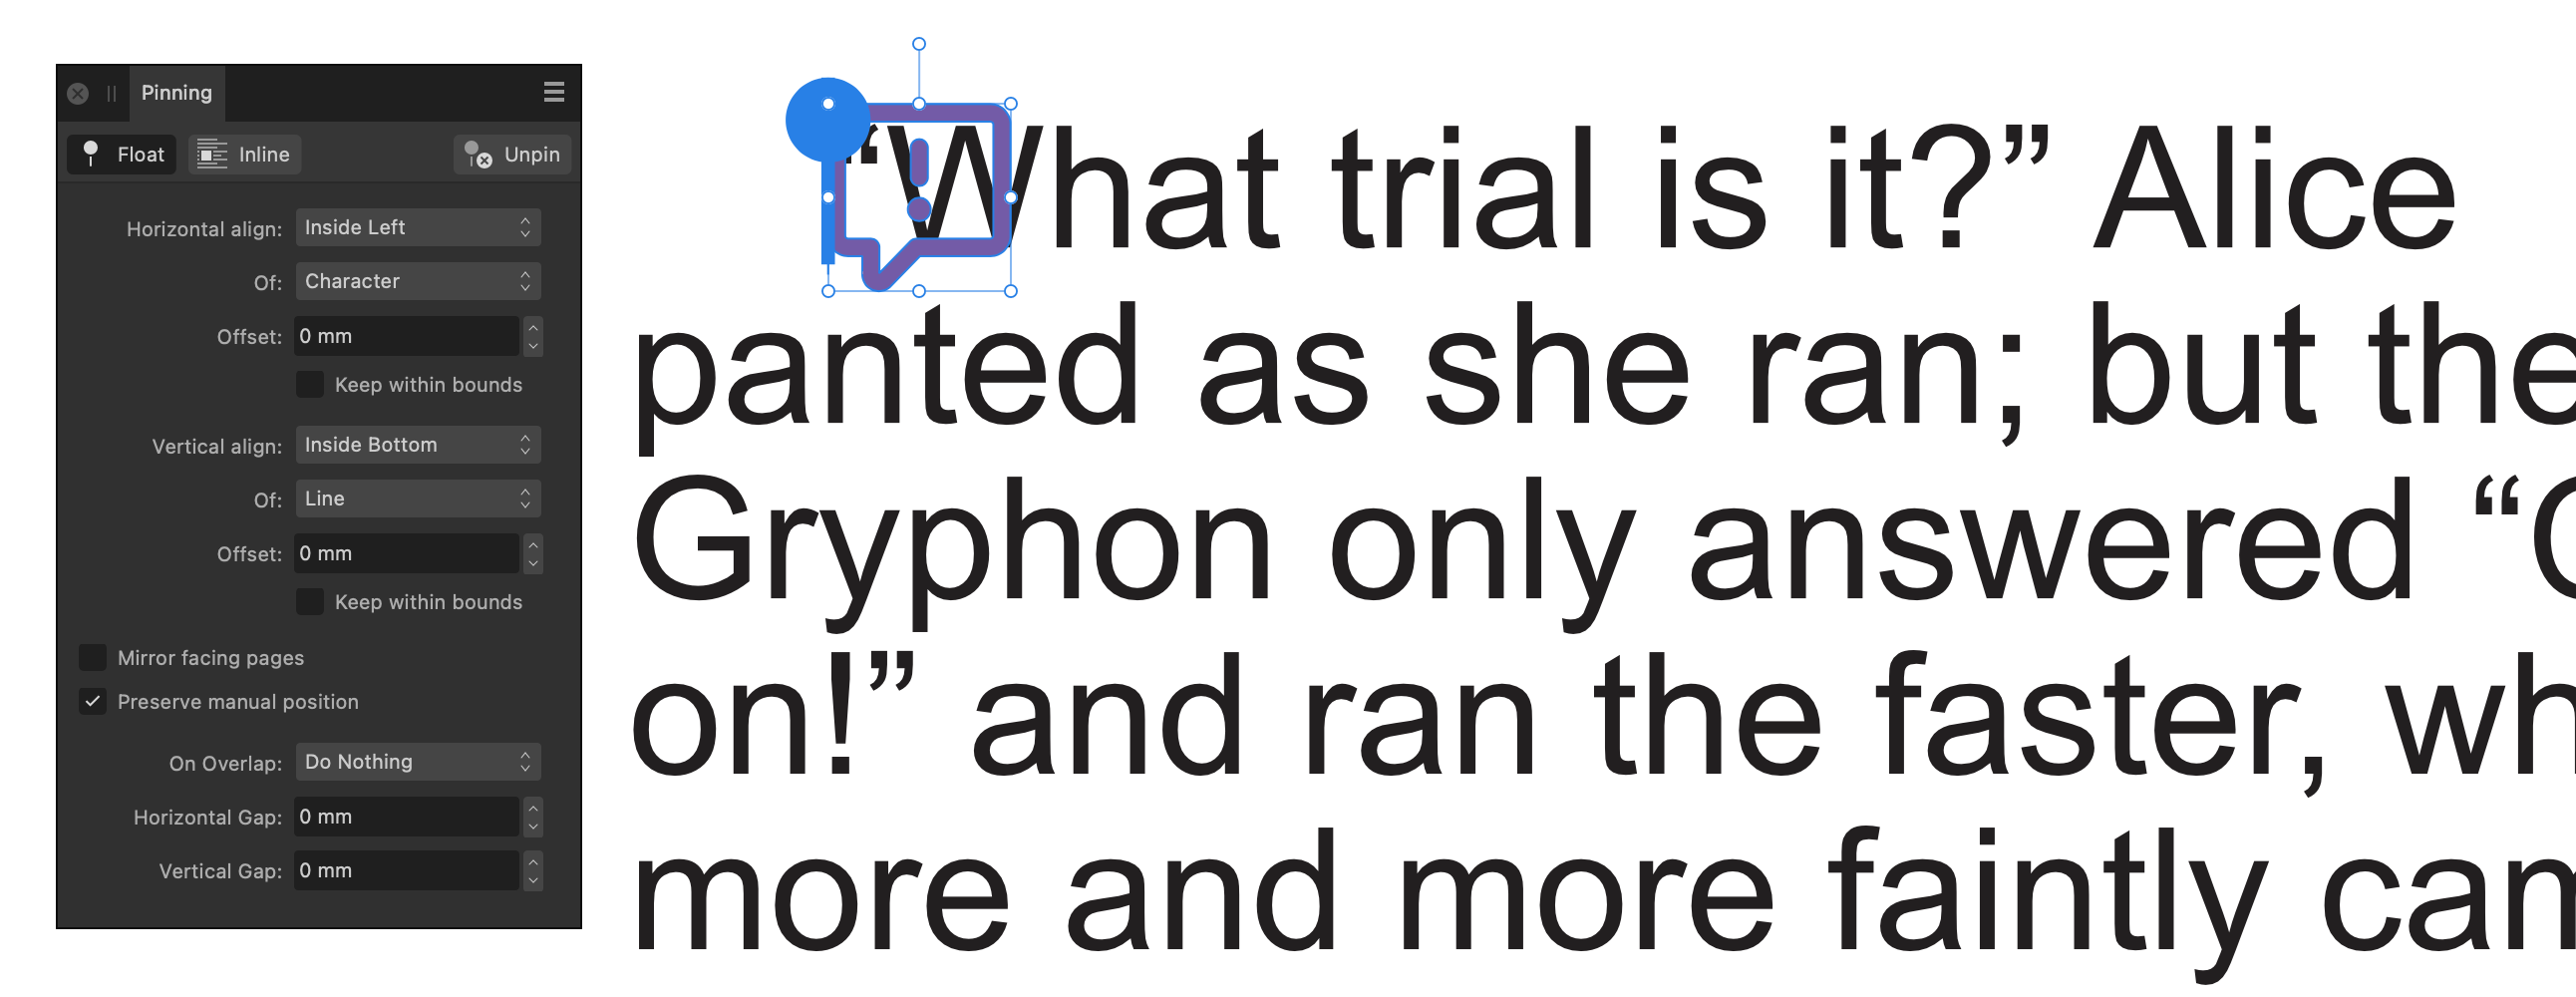
 Hi @Callum, Just to confirm you're referring to the OP's file here rather than my post? Are you able to confirm whether the 'Inside Left' and 'Outside Left' Horizontal Alignment settings for Pinned objects work the opposite way round on Windows and Mac or whether I'm just missing something here... To me it appears to be correct on Mac but incorrect on Windows...
 -
Data Merge Fails to Honour Pinned and Inline Data Merge Cells
Hangman replied to Hangman's topic in V2 Bugs found on macOS
Hi @stokerg, It does feel like a bug to me because when you run the Data Merge, none of the Merged data is aligned correctly... Many thanks for logging, I'll keep an eye on the thread for any updates... -
Apologies, my mistake, it is indeed already in the right forum...
-
It's not the same but perhaps a different way to achieve the same thing... Probably the best thing to do would be to add this as a feature request in the Feedback & Suggestions forum... https://forum.affinity.serif.com/index.php?/forum/122-feedback-for-the-affinity-v2-suite-of-products/
-
You can already achieve this by using an HSL Shift Adjustment Layer although it's not technically changing the source object colour... HSL Colour Shift.mp4
-
Hi @Rockbard and welcome to the forums, You could effectively achieve this by using shades of a Global Colour... Editing the Global colour will then change all instances of objects similarly using that colour...
-
Hi @stokerg, Perfect, many thanks...
-
Without seeing how you set the document up in the first place it's difficult to know... but if you create a new document and select B5 from the list, does it correctly set the document size to 176 mm x 250 mm?
-
If you go to File > Document Setup you can change the document dimensions in the Dimensions tab...
-
Hi @Mika Ritola and welcome to the forums, This is unfortunately a known bug logged under AF-354 which is still awaiting a fix...
-
Hi @Evette and welcome to the forums, Is your document RGB or CMYK? Do the objects added to your document use RGB or CMYK colours? Which PDF preset are you using to export your file? Can you upload a sample Affinity file that demonstrates the issue you're experiencing along with the PDF file exported from that document?
-
Hi @MWOO, Your canvas is only 5 mm x 7 mm which I think is the issue here...
-
Hi @nicolas7 and welcome to the forums, This is working as expected in v2.4.0 on macOS so unsure if there is a Windows specific issue... Pinning.mp4 The Horizontal alignment setting appears to be the wrong way around on Windows... On Mac, with the Horizontal Alignment set to the Inside Left of the Character with a 0 mm offset, this is what I see, which looks correct... For the pinned object to be set to the left of the pin, I have to set the horizontal alignment to the Outside Left of the Character...

-
Hi @MWOO, Could you upload your Affinity Designer document or even just a sample showing lines that demonstrate the issue you're seeing so we can take a closer look...
-
Exactly that, if Publisher were to add Data Links (.xlsx, .csv, .json, .txt, .rtf, .docx, HTML and so on) in addition to Data Merge that would be amazing...
-
FWIW, this appears to be a Windows only issue, holding Cmd or Ctrl and the Geometry Add icon on the Toolbar or Layer > Geometry > Add in the Designer menu doesn't create a Compound...
-
If you Group the four layers in the Layers Panel once you've opened the PDF in Publisher you can then rotate the PDF using the rotate handle for the Group after you've changed the orientation of your Publisher document... As @walt.farrell mentions, there is no editable text, the layers in your scanned PDF file are all Image layers... Your scanner will likely have an OCR feature but to be perfectly honest you'd probably be better off just creating the text yourself from scratch...
-
Export Vector with Transparent Background
Hangman replied to misshvincent's topic in Desktop Questions (macOS and Windows)
Hi @misshvincent and welcome to the forums, Your exported vector files should automatically have a transparent background, pdf files have a transparent background by default... To test, open up your exported PDF, SVG and EPS files back up in Designer and enable 'Transparent Background' in the Colour Tab of the Document Setup panel... You should see the logos are all sitting on the checkerboard background and you can add a solid fill on a layer below your logo... -
A minor cosmetic issue... when discussing the Fields panel the Publisher Help File reference is made to the Custom Field but the Custom Field is not shown in the screengrab for the Fields Panel...
-
You're completely right, hands up, my use of language was incorrect... I can be equally pedantry at times so I have no problem with anyone pointing out my errors, it caused no problems whatsoever and is now all the better for it. I was being a little tongue in cheek with my comment but in fact, it's very much appreciated, thank you...
-
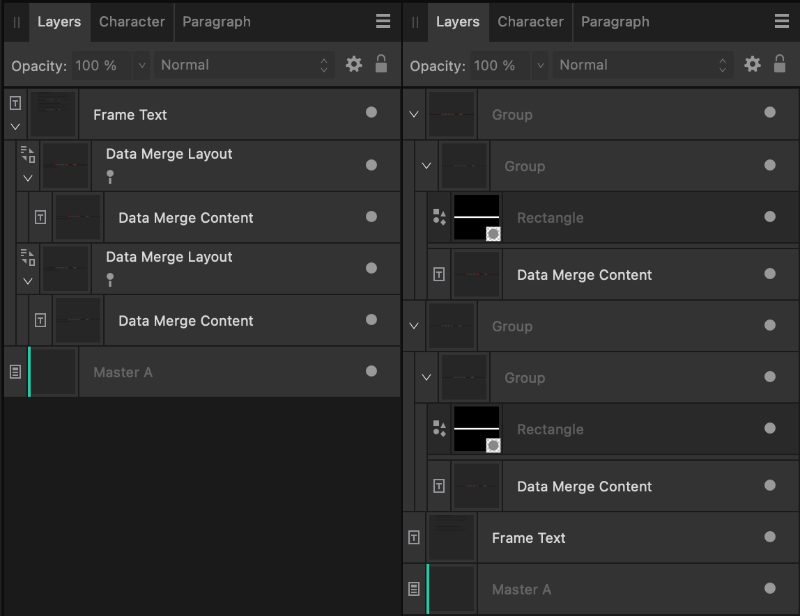
I'm unsure whether this is expected behaviour but when incorporating pinned or inline data merge cells in a text frame as part of a Publisher document, the merged file fails to maintain the pinned and/or inline cells subsequently resulting in merged data that is no longer inline with the main text... Source File Left | Merged File Right
-
Following making a pdf chaos has followed
Hangman replied to Rufus Reade's topic in V2 Bugs found on Windows
Did you try exporting your original Affinity file with Subset Fonts disabled in the export settings dialog? -
I'm pretty sure the original meaning was obvious but it's now updated to keep you happy...
-
Okay, good to know... so in that respect this is no different to the way Publisher works... I'd like to see an option in Publisher to link external data files (Excel, CSV, JSON etc.) which works in the same way as Linked Image files so setting 'Automatically update linked resources when modified externally' updates the spreadsheet data in the source document without the need to run a Data Merge at all though I realise that would be a somewhat more involved process than updating images but I don't think it's beyond the realms of possibility...
-
Just badly worded on my part... I meant don't delete the source Affinity Photo files as you may want to come back to them later but I've amended the post so it hopefully, reads a little better now, thanks for highlighting...