Hangman
-
Posts
5,795 -
Joined
-
Last visited
Everything posted by Hangman
-
 It seems that Boolean operations are a bit of an achilles heel for the affinity suite (hopefully an area that will be recified/improved in the v2.0 release), not sure why but they seem to be one area that have failed to be fixed over multiple releases despite widespread reporting of issues. The option/alt workaround is interesting and works well, why is that and what is the addition of option/alt actually doing that the standard boolean selection isn't and why is, whatever the option/alt workaround not the standard operation for boolean operations if it works as expected? Just curious?
 -
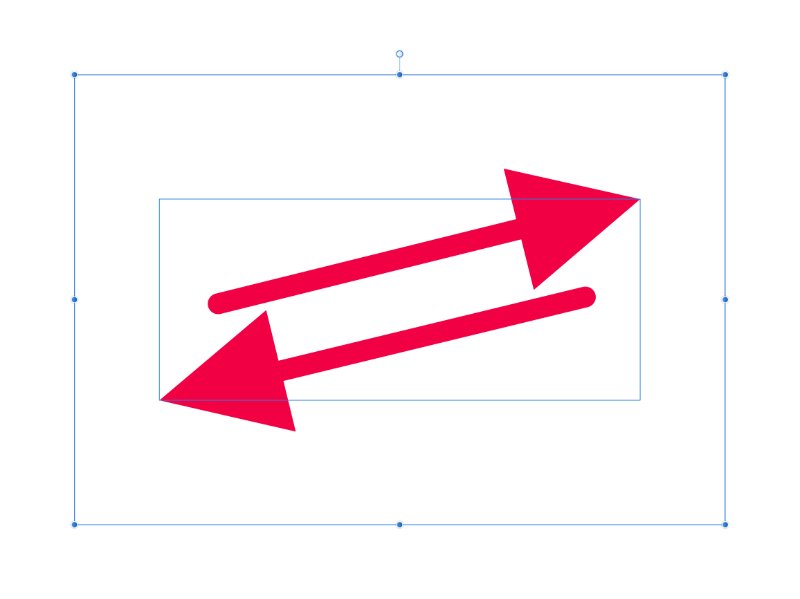
Simple example attached... One rectangle sized at 650px x 450px with a stroke of 0.1pt aligned to the inside of the rectangle. Contained within the rectangle on individual layers are the following: a set of two green lines without arrows a set of two red lines with end arrows set to 100% a set of two red lines with end arrows set to 150% a set of two red lines with end arrows set to 200% The bounding box for the lines/arrows is contained well within the bounding box of the rectangle in all cases. Selecting the 'Rectangle' Group, containing all the elements and then exporting the rectangle together with each individual set of lines/arrows as either a PNG, JPEG, GIF or TIFF file whilst setting the Area to 'Select without background' results in the following exported sizes: the rectange with the two green lines without arrows - exported graphic is 650px x 450px the rectange with the two red lines with end arrows set to 100% - exported graphic is 658px x 450px the rectange with the two red lines with end arrows set to 150% - exported graphic is 746px x 468px the rectange with the two red lines with end arrows set to 200% - exported graphic is 834px x 556px It appears that both adding and scaling end arrows is somehow increasing the bounding box for the lines with arrows so it is outside the bounding box for the rectangle (mathematically but not visually) which in turn is causing the exported graphics to be exported at the incorrect size. Since in each case bounding box for the lines/arrows is contained within the bounding box of the rectangle, all versions of the graphic should export to the same 650px x 450px size. Arrows Bug.afdesign

-
The issue seems to relate to the arrows in the graphics. Export Size When you export the first graphic (on the left), at the point where you choose 'Selection without background' the size for the selected exported graphic, prior to you scaling it is 328px x 230px which makes sense because the 1pt stroke on your grey rectangle is set as 'Stroke to outside' so when allowing for the 2pt additional width and height together with the 'rounding' of the non integer X and Y coordinates of the grey rectangle this size is correct. However, exporting your second graphic you'll note that when choosing 'Selection without background' the second graphic size is 360px x 230px (i.e. 32px wider) despite both grey rectangles being identically sized with their 1pt strokes set to 'Outside'. This is the cause of the difference in the exported sizes between the two graphics when you are scaling the width to 800px wide, i.e. the source aspect ratios when 'Selection without background' is selected is different despite the actual grey recatangles being identical in size. The cause appears to be the arrows, I'm assuming they've been created as lines with an Ending Arrow. When you uncheck the arrow layers for both graphics so they are no longer visible and repeat the exports, both graphics, when exported using the 'Selection without background' are identical in size and aspect ratio and therefore scale to the same size as well. When the arrows are visible, the greater the 'arrow' is scaled, the greater the width of the exported graphic, despite the arrow bounding boxes being contained within the grey rectangle. If you scale the arrows up, the exported graphic width increases. If you 'Expand Stroke' for both arrows the problem goes away and both graphics again export at the same size, so the issue appears to be related to 'arrow scaling' which I assume is a bug?
-
Adobe work being blacked out in Designer
Hangman replied to miaPSU's topic in V1 Bugs found on macOS
Hi MiaPSU, It looks as though the issue is realted to the graduations which feature in both the Illustrator created arrows. Can you upload the .ai file so we can take a look?- 4 replies
-
- 1
-

-
- blacked out
- color changes
- (and 1 more)
-
Not that it's a great help but for every mm the second artboard is offset from the first artboard in both axes, the nested graphic, regardless of what it is, is negatively offset by a factor of 10.948810 (or 10.94880973975937 to be more precise) in both the X and Y axes less the X/Y offset of the same graphic on the second artboard itself. Taking the sample file, the second artboard is positioned at 1,112.151994 mm on the X axis and the map graphic is positioned at 253.965999 mm on the X axis in relation to the second artboard itself. When the map and the non nested underlying rounded rectangle are grouped, the map is now positioned at minus 12,176.740584 mm Which equates to X = ((1,112.151994 mm x 10.948810) - 253.965999 mm) or an X position of minus 11,922.774874 mm If the second artboard sits directly on top of the first, then grouping the two items works as expected but offset the second artboard by any value in either or both axes and when the nested map is grouped with the underlying, non nested graphic, the X/Y offset factor is always the same, i.e. 10.948810 in both axes. Move the second artboard further to the right and then group the map and the underlying non nested rounded rectangle and the map is offset negatively even further but still by the same factor. It seems to be related to the map being nested, if you move the underlying rounded rectangle so it appears as part of the same nested group as the map then grouping the two together works as expected regardless of the position of the second artboard.
-
Locate in Document using Resouce Manager Issue
Hangman replied to Hangman's topic in V1 Bugs found on macOS
1) It is Locating, as in jumping to the relevant page and selecting the relevant graphic, so this is not an issue (apologies if I didn't make that part clear in my original post). 2) This is definitely an issue and certainly not expected behaviour but good to know it has already been reported as an issue/bug. 3) I'm not experiencing this issue however hard I try, maybe I'm missing something here? Re clicking Yes to update all files automatically, Walt pointed this out it a different post, personally I think this should also be an option in the Resourse Manager as well. resource_selection.mp4 -
I have to agree, to my 'logical' brain, I would have expected that functionality from within Resource Manager as well!
-
Thanks Walt, not entirely sure how I missed that, makes perfect sense now... blinkered vision me thinks 🙂
-
If you have a Publisher document containing Linked images/graphics and for whatever reason the images/graphics have been moved or their containing folder renamed, selecting a Missing image/graphic in the Resource Manager list and then clicking Locate in Document results in the first item in the Resource Manager list now becoming the Missing image/graphic selection, rather than the item originally selected making it very easy to inadvertently Replace the wrong graphic. This only happens when the currently viewed page in the Publisher document is not the Locate in Document page. resource_manager.mp4
-
Not sure if I'm missing something obvious but if I have a my Publisher document and a folder containing all the Linked images/graphics used within the Publisher document both contained within the same folder and then I decide at a later date (after creating my document) to simply rename the folder containing my images/graphics, resouce manager doesn't: Give me the option to Update, only the option to Replace Allow me to Update or Replace all images/graphics in one go When I Replace the first image, I would have expected Publisher to be intelligent enough to automatically recognise all the other now Missing images/graphics within the renamed folder because their file names have not changed and provide the option via a dialogue window to automatically ask if I want to update them. Currently you have to select each image/graphic individually and then select Replace which is painful in a document containing hundreds of images/graphics. Having the preference 'Automatically update linked resources when externally' ticked in the Genral preferences, obviously only applies if a graphic has been modified but doesn't accommodate a simple folder name change. I hope this is something that will be improved moving forward, unless it's already there and I've missed it.
-
I've seen numerous bug reports relating to issues with the Add Boolean function so this may well be something that the team are already aware off (apologies if that is the case), though Matt mentioned in March 2020 that "Boolean operations between two objects where one of them was rotated were already known and fixed" in 1.82. I'm still seeing an issue with rotated objects (specifically rectangles, i.e. the same is not true following the same procedure when using the ellipse tool)) and the Add Boolean operation which exists in 1.7.3 and 1.8.3. I've attached a short screen recording. When the second rectangle is rotated +90˚ the add function doesn't give the correct result when the Add Boolean is applied, yet when rotated -90˚ all works as expected. Converting both rectangles to curves prior to applying the Boolean Add operation makes no difference and neither does reversing the direction of the curve on the second rectangle after rotating +90˚. Boolean_Add_Operation.mp4 Add Boolean.afdesign
-
These were simply document palette's .afpalette files exported onto an internal hard drive from any of the apps. I just happened to rename one in the finder and then re-import it which is when I noticed that the imported palette maintained it's original name rather than the new name I'd given it. I guess it makes sense having the palette name embedded in the file as testing a .ase palette which doesn't, simply names the imported palette 'Colour Group 1' which results in renaming it anyway once imported. I was just curious as to why the format doesn't adopt the filename itself in a similar fashion to any other renamed file but then I don't know that much about the logic of colour palettes in that respect.
-
Just wondering if there is a logical reason why Affinity Software doesn't recognise the palette name if the palette is renamed in the finder on macOS. It seems that the palette name created with any Affinity software is embedded in the file itself and so subsequently isn't updated when changed in the finder which means it is only possible to change the name within Affinity software. No biggy but just curious to understand whether this is by design?
-
It would be great if it were possible to have multi-layer live perspective projection rather than only being able to apply a perspective grid to a single layer in an Affinity Photo file. Whilst it appears possible to add live projection perspective grids to different layers within the same file, when jumping between layers the perspective grid adjustment only adheres to the first layer it is applied to. Going back to subsequent layers where a grid adjustment has been applied results in the perspective adjustments being lost. This in effect means that if working/editing a 360 degree rotation image with say 36 or 72 individual photographs making up the rotation, the only way you can achieve this is to set up the respective number of Affinity Photo files rather than maintaining everything in a single document. I appreciate you could apply a perspective grid, add your graphic and merge the layers down and then repeat layer by layer, each time re-adding your graphic, but that seems very inefficient. What would be perfect would be the ability to set one or multiple live projection perspective grids per layer and then have a single embedded graphic sitting at the top of the layer stack, e.g. an Affinity Designer file and for the graphic to automatically adjust to the individual perspective grids applied to each layer once the relevant layer is made visible. The icing on the cake of course would be for Live Perspective Projections to remain live so you don't have to merge them down with the respective applied graphic prior to exporting. This way it would then be possible to simply swap out or have multiple graphics layers which when made visible in the layers panel are automatically applied to the rotating object, so if you have one rotating object which you wanted to apply a dozen different logo's to, you could set up the live perspective projection grids once for each of the 36 or 72 layers, embed all twelve logos at the top of the layer stack and then simply turn on the respective layer and the relevant logo for it to be applied to all layers below. Then the cherry on top would be if macro capabilities were expanded allowing the ability to make individually defined layers visible e.g. Layer one logo and layer two, first photo in the stack, export the file to a defined file format, size, resolution etc and then switch layer two off and layer three on, export and repeat for each layer in the file until all defined layers are exported. Hope these can be added as a feature requests...
-
Hi Walt, I could of course do that, though it sort of negates the idea of using Affinity Photo as my 'software of choice'. To be honest I think the majority of what I need to do with the files will 'likely' be compatible with how the relevant layers and effects work in Photoshop but until I've created the files and tested them I won't know for sure which was the reason for my original question. I guess my question really realted to how much it is possible to rely on the PSD export option within Photo for file compatibility and whilst I appreciate there is never going to be 100% compatibility between the two programs, in my mind I would like to understand where the real issues and incompatibilities lie so I know what I can and can't reasonably expect. The whole idea is really ideally 'not' to have to 'invest' or 'rent' Photoshop as it makes the move to Affinity Photo kind of redundant (although I do use it for other projects) but I do understand there is no one easy answer to my original question but maybe as a result of this project I can build my own list of incompatibilities and share with the forum.
-
Thanks to all for your feedback, it's pretty much what I anticipated but it's always good to receive clarification on a thought process. I agree that 'renting' photoshop for a month is the sensible solution to ensure complete compatibility, even if that does mean having to adjust the Affinity Photo generated PSD files in Photoshop in the process and I think, in this instance, is the approach I will adopt... Many thanks to all for taking the time to reply.
-
Apologies if this has been asked before... I'd like to know/understand, with the 1.8 versions of Affinity Photo and Affinity Designer, what the current incompatibilites are when exporting a file created entirely within either Affinity Photo or Affinity Designer in PSD format, e.g. are live filters lost and is text still not editable once the PSD file is opened in Photoshop and more importantly, what other limitations would someone opening an Affinity generated PSD file likely experience when attempting to edit the file in Pohotoshop. I don't have an Adobe subscription hence my question but I have a potential project that would require providing a client with editable PSD files and I would like to fully understand any issues I might encounter if exporting the PSD files from Photo or Designer so I can work around the issues and pre-empt any problems. A simply list of incompatibilites would be hugely helpful if anyone happens to know what these are.
-
Exactly the same here, for some unknown reason your curves are not working using Winding, but drawing them from scratch, no problem at all!
-
All working as expected here... are you able to upload your artwork or even just the two curves in question in their own document so we can take a closer look? curves.mp4
-
This is something I experience quite often. It seems to happen when there is 'heavy' graphic content in the file, as in lots of layers with complex layers or lots of effects added to layers. I'm running with 16Gb of RAM but still see the same thing from time to time. I've also experienced the situation where complete layers vanish from the layers panel leaving a blank space between layers. These can sometimes be recovered by colapsing the group and opening it again, so it very much sounds like a screen re-draw issue possibly combined with a memory issue. Maybe someone from the support team can provide more detail as to why this may be happening. It doesn't impact the file itself but obviously just leaves you with no instant thumbnails updates.
-
If your intention is to simply combine the two shapes into a single shape then just use 'Add' (from the geometry menu or the toolbar) rather than Merge Curves.
-
I'm not seeing the same issue, though I'm still using 1.7.3. Am I doing anything differently to you? isometric.mp4
-
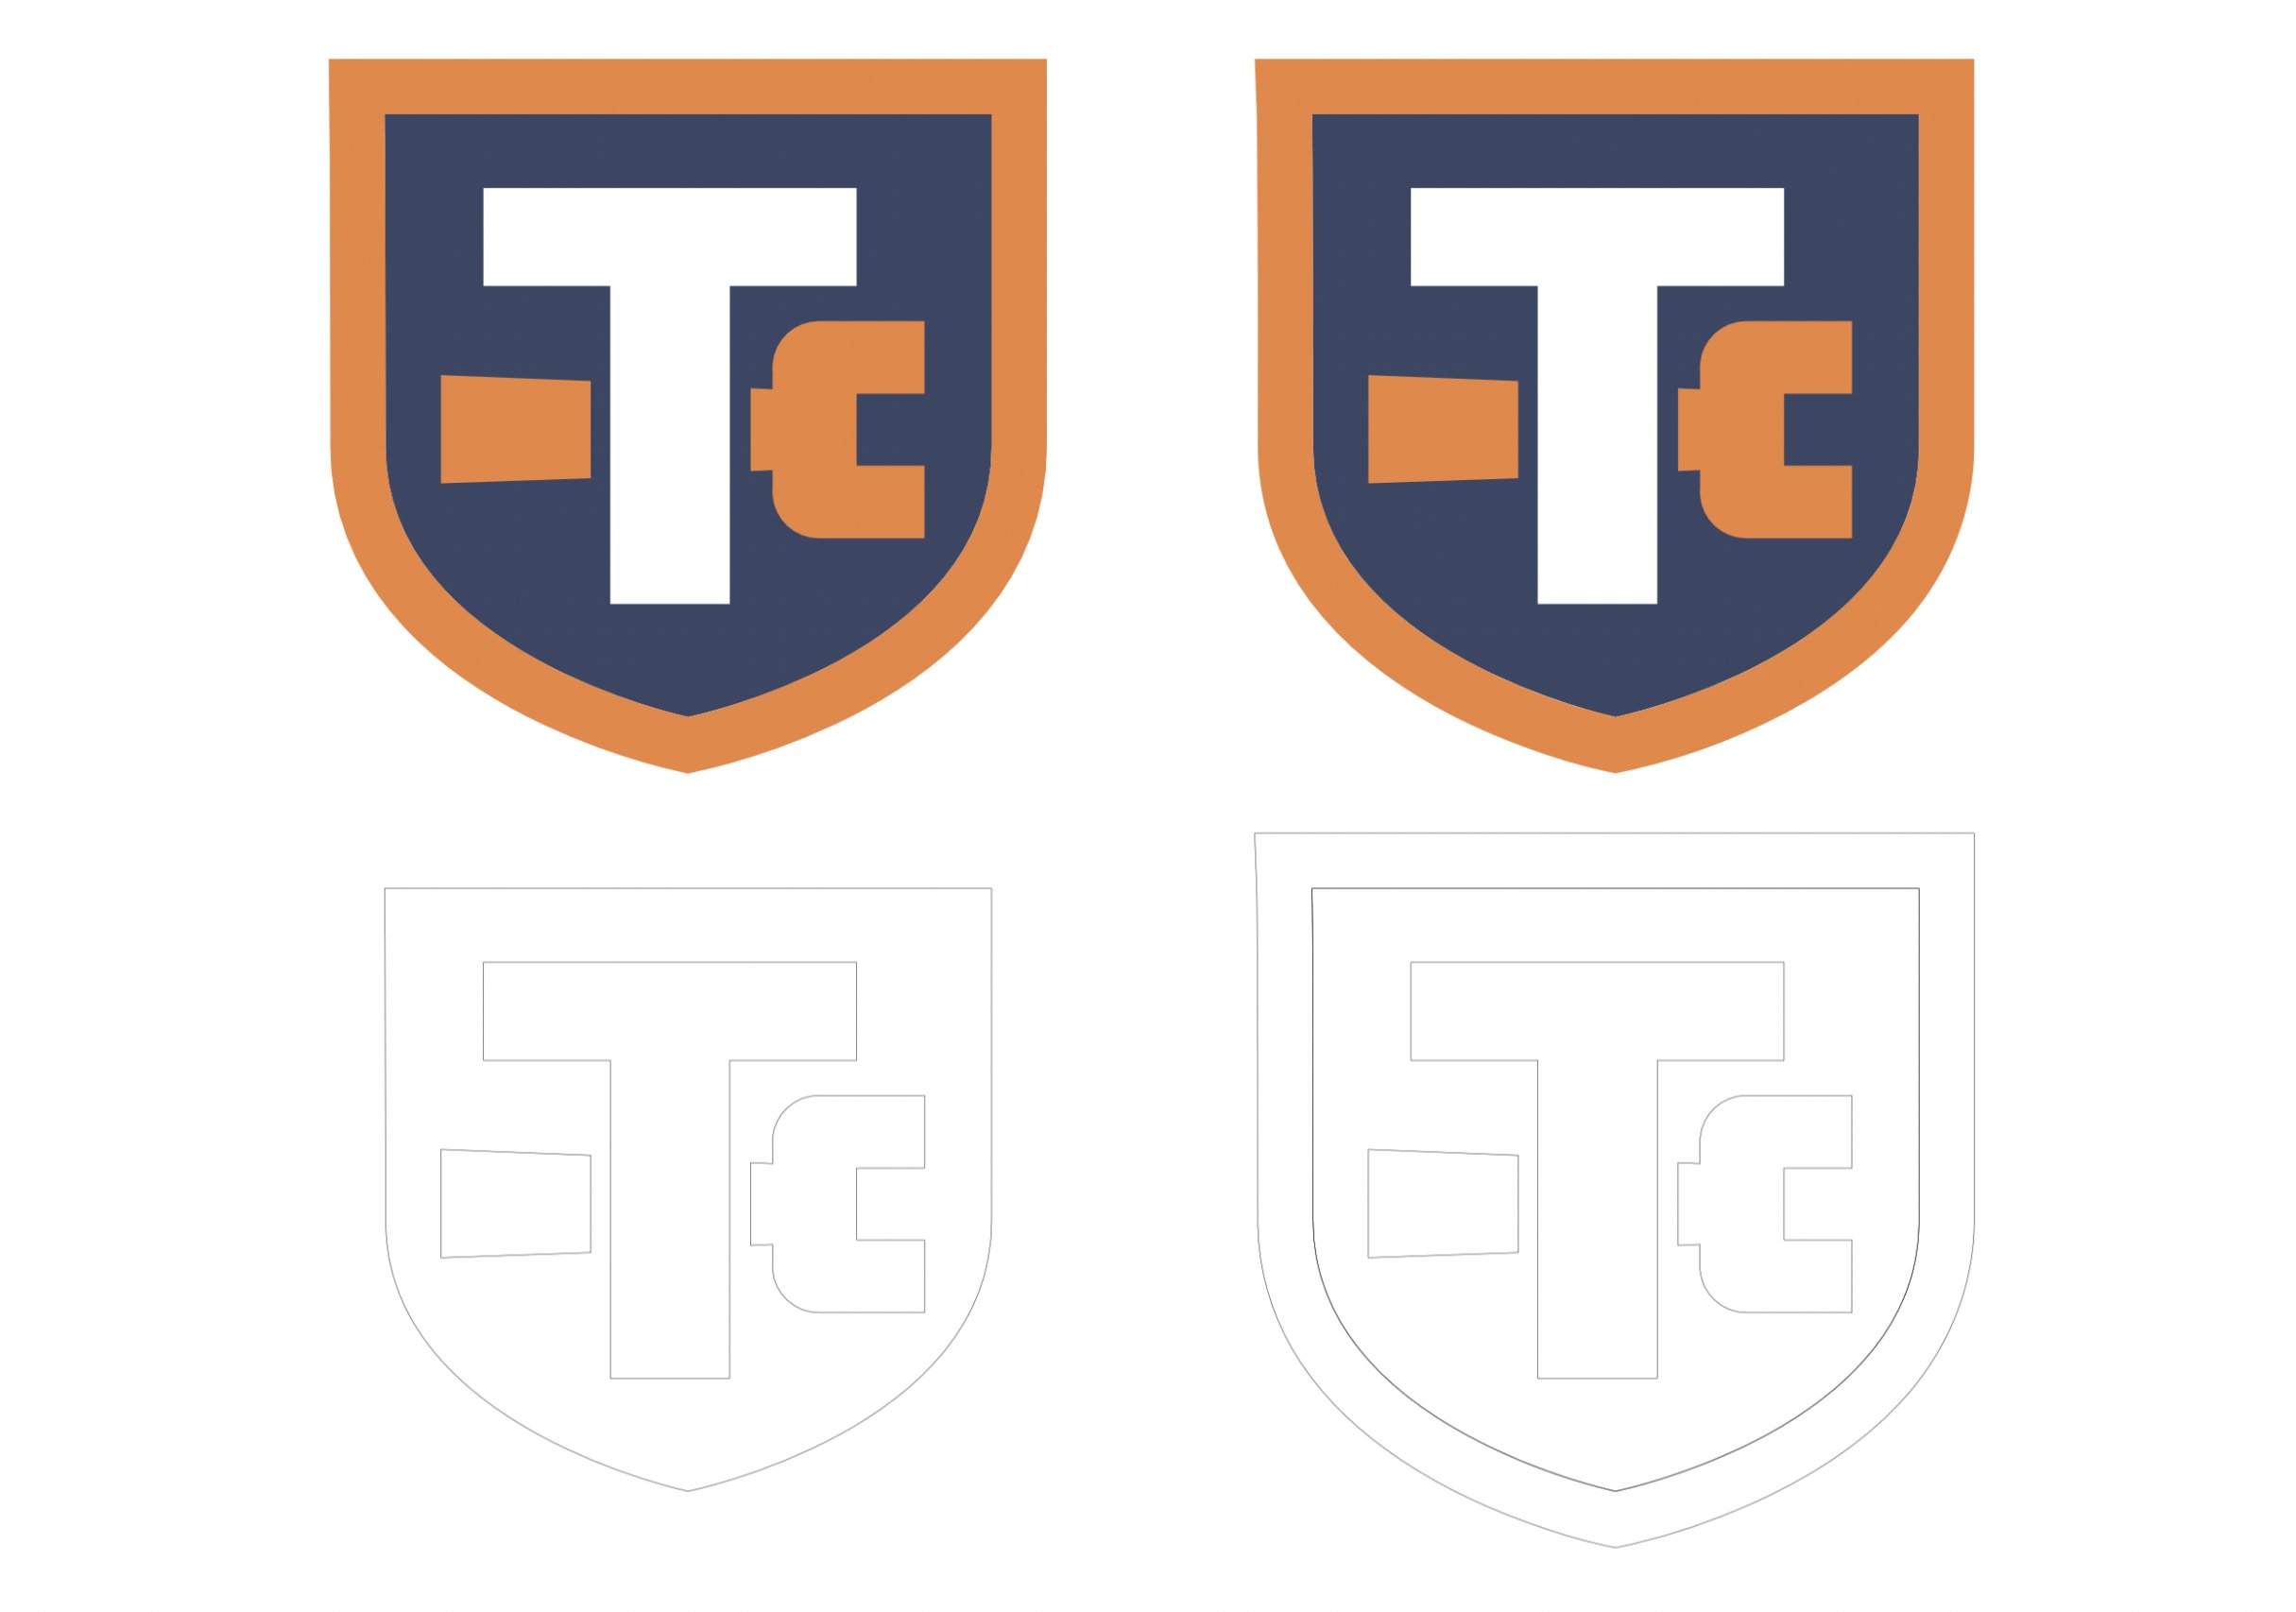
I'm unsure whether this has now been improved in 1.8.X as I'm still using 1.7.3. I took the same approach as you in that I created one half of the shape, duplicated it, flipped it horizontally, moved the second half to align with the first half. I then selected both halves in the layers panel and using the node tool again, selected the two top nodes where the two shapes meet and selected 'Join Curves' and then selected the second two nodes at the bottom and selected 'Close Curve'. In doing so you still end up with 'both' nodes at each junction which to my way of thinking is not right, I would expect selecting 'Join Curves' to leave just a single node and likewise when selecting 'Close Curve' to do the same. You can select and delete the extraneous nodes though for the purposes of what you are doing, when you then expand the stroke it should now work as expected. Maybe someone can add to this to confirm whether this has been improved in 1.8.X and the extraneous nodes no longer appear or if there is a better approach to achieving this? shield.mp4
-
Hi jeffreydevey, I would say that your main 'shield' shape isn't a properly 'closed' shape which is why you are seeing what you are seeing... shield.afdesign