barninga
-
Posts
468 -
Joined
-
Last visited

.thumb.jpg.2ac1b0424a6896c349d3d16eea40c7f3.jpg)


-
 nickbatz reacted to a post in a topic:
Affinity Photo: how to remove a coloured haze?
nickbatz reacted to a post in a topic:
Affinity Photo: how to remove a coloured haze?
-
Affinity Photo: how to remove a coloured haze?
barninga replied to barninga's topic in Desktop Questions (macOS and Windows)
@nickbatz yes, I get the point, after all it's what I've been doing so far along the years. I opened this topic to explore the availability of a one-click process. My guess was, if there is a haze filter that works well with white/grey haze, there could be a filter (or an automated process) that deals with coloured haze. It turns out that there are some solutions that can be auotmated (for example, dehazing the RGB channels and recompose them into the colour image) and are somehow effective. However, each shot has its own peculiarities and the best result can be achieved only by examining it carefully and applying the method that appears to be the best for that particular pic, or maybe more than one method. Thank you for your contribution! -
NotMyFault reacted to a post in a topic:
Affinity Photo: how to remove a coloured haze?
-
Affinity Photo: how to remove a coloured haze?
barninga replied to barninga's topic in Desktop Questions (macOS and Windows)
It turns out that the Filters->Astrophotography->RemoveBackground filter also can help. It allows to filter out R, G and B, with the ability to adjust black and grey. It is destructive, so duplicate the pixel layer before applying it. -
NotMyFault reacted to a post in a topic:
Affinity Photo: how to remove a coloured haze?
-
Affinity Photo: how to remove a coloured haze?
barninga replied to barninga's topic in Desktop Questions (macOS and Windows)
@NotMyFault the hue live mask seems to be a very good finding. Comparing the two images you provided, I maybe prefer the second one (magenta hue mask?), because it reveals quite a lot of detail and leave the smoke plumes almost intact. Personal taste, in the end: I just like them. What I am learning from this very interesting discussion, is that there are many ways to achieve similar results, starting from the same need. I think I will take note of all the suggestions here, because every single shot is different and maybe there's no way to standardize the process, in a way that the same process is good for any photograph and can be applied the same way. thank you for contribution. -
Affinity Photo: how to remove a coloured haze?
barninga replied to barninga's topic in Desktop Questions (macOS and Windows)
@user_0815 thank you for this interesting contribution. I tried it and it is actually simple and works well in neutralizing the blue haze. However, I could not find a way to give the blue tone back to the image. Turning the haze colour to white, in my idea, is useful to prepare the image for the haze filer. After eliminating the haze, I would like to go back to the original colours. -
user_0815 reacted to a post in a topic:
Affinity Photo: how to remove a coloured haze?
-
NotMyFault reacted to a post in a topic:
Affinity Photo: how to remove a coloured haze?
-
Affinity Photo: how to remove a coloured haze?
barninga replied to barninga's topic in Desktop Questions (macOS and Windows)
hey, thank you all for your time and suggestions! @user_0815 the result you achieved is impressive. since the haze looks white, the haze removal filter should be effective on the image you obtained. the drawback here is what you said, that a lot of work is required. I'd like to find a quick method, possibly semi-automatic, that can work on coloured haze like the haze filter works on white haze: a couple of clicks and voila. Anyway, for particular situations, your result is very interesting and useful. @stuck yes I know DeepPRIME, DxO PhotoLab is the raw developing software of my choice. I use it all the time, I would be lost without it. Their NR algorythms do an excellent job. However, there's a difference in the editing latitude that a raw file offers if taken at iso 4000 or iso 8000, so I always try to keep my iso setting as low as possible. @NotMyFault What you say about the non-uniformity of the haze is true, but not all the shots show this kind of feature. Most of the times it appears to be quite uniform. I never thought about using a polarizer, I'll take it into consideration. Not sure about its effectiveness though, as polarizers deal with polarized light (mainly, reflected light), while haze is diffused light and could be polarized in all directions, thus passing through a polarizer... In additions LED spots light could be polarized per se (I don't know), so a polarizer filter could darken the spotlights. I don't know, I shall experiment around. Interesting. That said, applying the haze removal filter to each single RGB channels is truly a brilliant idea. In a greyscale image, the haze is grey! I am currenlty looking at the file you posted and it seems you really did the trick. I am not searching for miracles, but just for a quick method to clean up hazed images a bit in order to recover some detail, and this seems to really work! I will apply it to some difficult images I have and see the results. Very promising! Yesterday night I achieved some interesting result with this simple method: 1) duplicate the image layer 2) on the new layer, apply the Blur->Average filter 3) change the blend mode to Subtract 4) set the Opacity to a suitable value (it looks like 50-70% is fine) 5) if needed, add some Brightness I just wanted to share this with you. Thank you again for your time and ideas! stefano -
Affinity Photo: how to remove a coloured haze?
barninga replied to barninga's topic in Desktop Questions (macOS and Windows)
yes. I have been shooting music for more than twenty years now, and in these years I found a solution or a workaround for most of them. I am just addressing some postprocessing opportunities right now. -
Affinity Photo: how to remove a coloured haze?
barninga replied to barninga's topic in Desktop Questions (macOS and Windows)
@Old Bruce well english is not my native language, so I sometimes lack the precise words to express a concept, I apologize. And, since this is the kind of photography I do all the time, I perfectly understand what you mean. I happened to switch to bw more than once, but in this particular case, colour was mandatory, and increasing the exposure, you know, means a longer shutter, or higher iso, or faster aperture. There are limitations, since modifying any of these three parameters brings consequences I found that closing the iris of the lens has a very positive impact on images: it retains plumes and gets rid of haze. however, you can't raise the iso beyond a certain value without introducing a noticeable noise, and you can't shoot with a slow shutter for obvious reasons. It's a challenging passion Thank you for your time and advice stefano -
Affinity Photo: how to remove a coloured haze?
barninga replied to barninga's topic in Desktop Questions (macOS and Windows)
@user_0815 thank you for your reply. the result you obtained is not exactly what I'd want, since the image has now a greenish cast. I downloaded it and tried to turn it to its original tones but i didn't succeed. however the "negate" idea sounds promising and is definitely worth some experimenting, which I'll do as soon as I have a bit of spare time. thank you stefano -
Affinity Photo: how to remove a coloured haze?
barninga replied to barninga's topic in Desktop Questions (macOS and Windows)
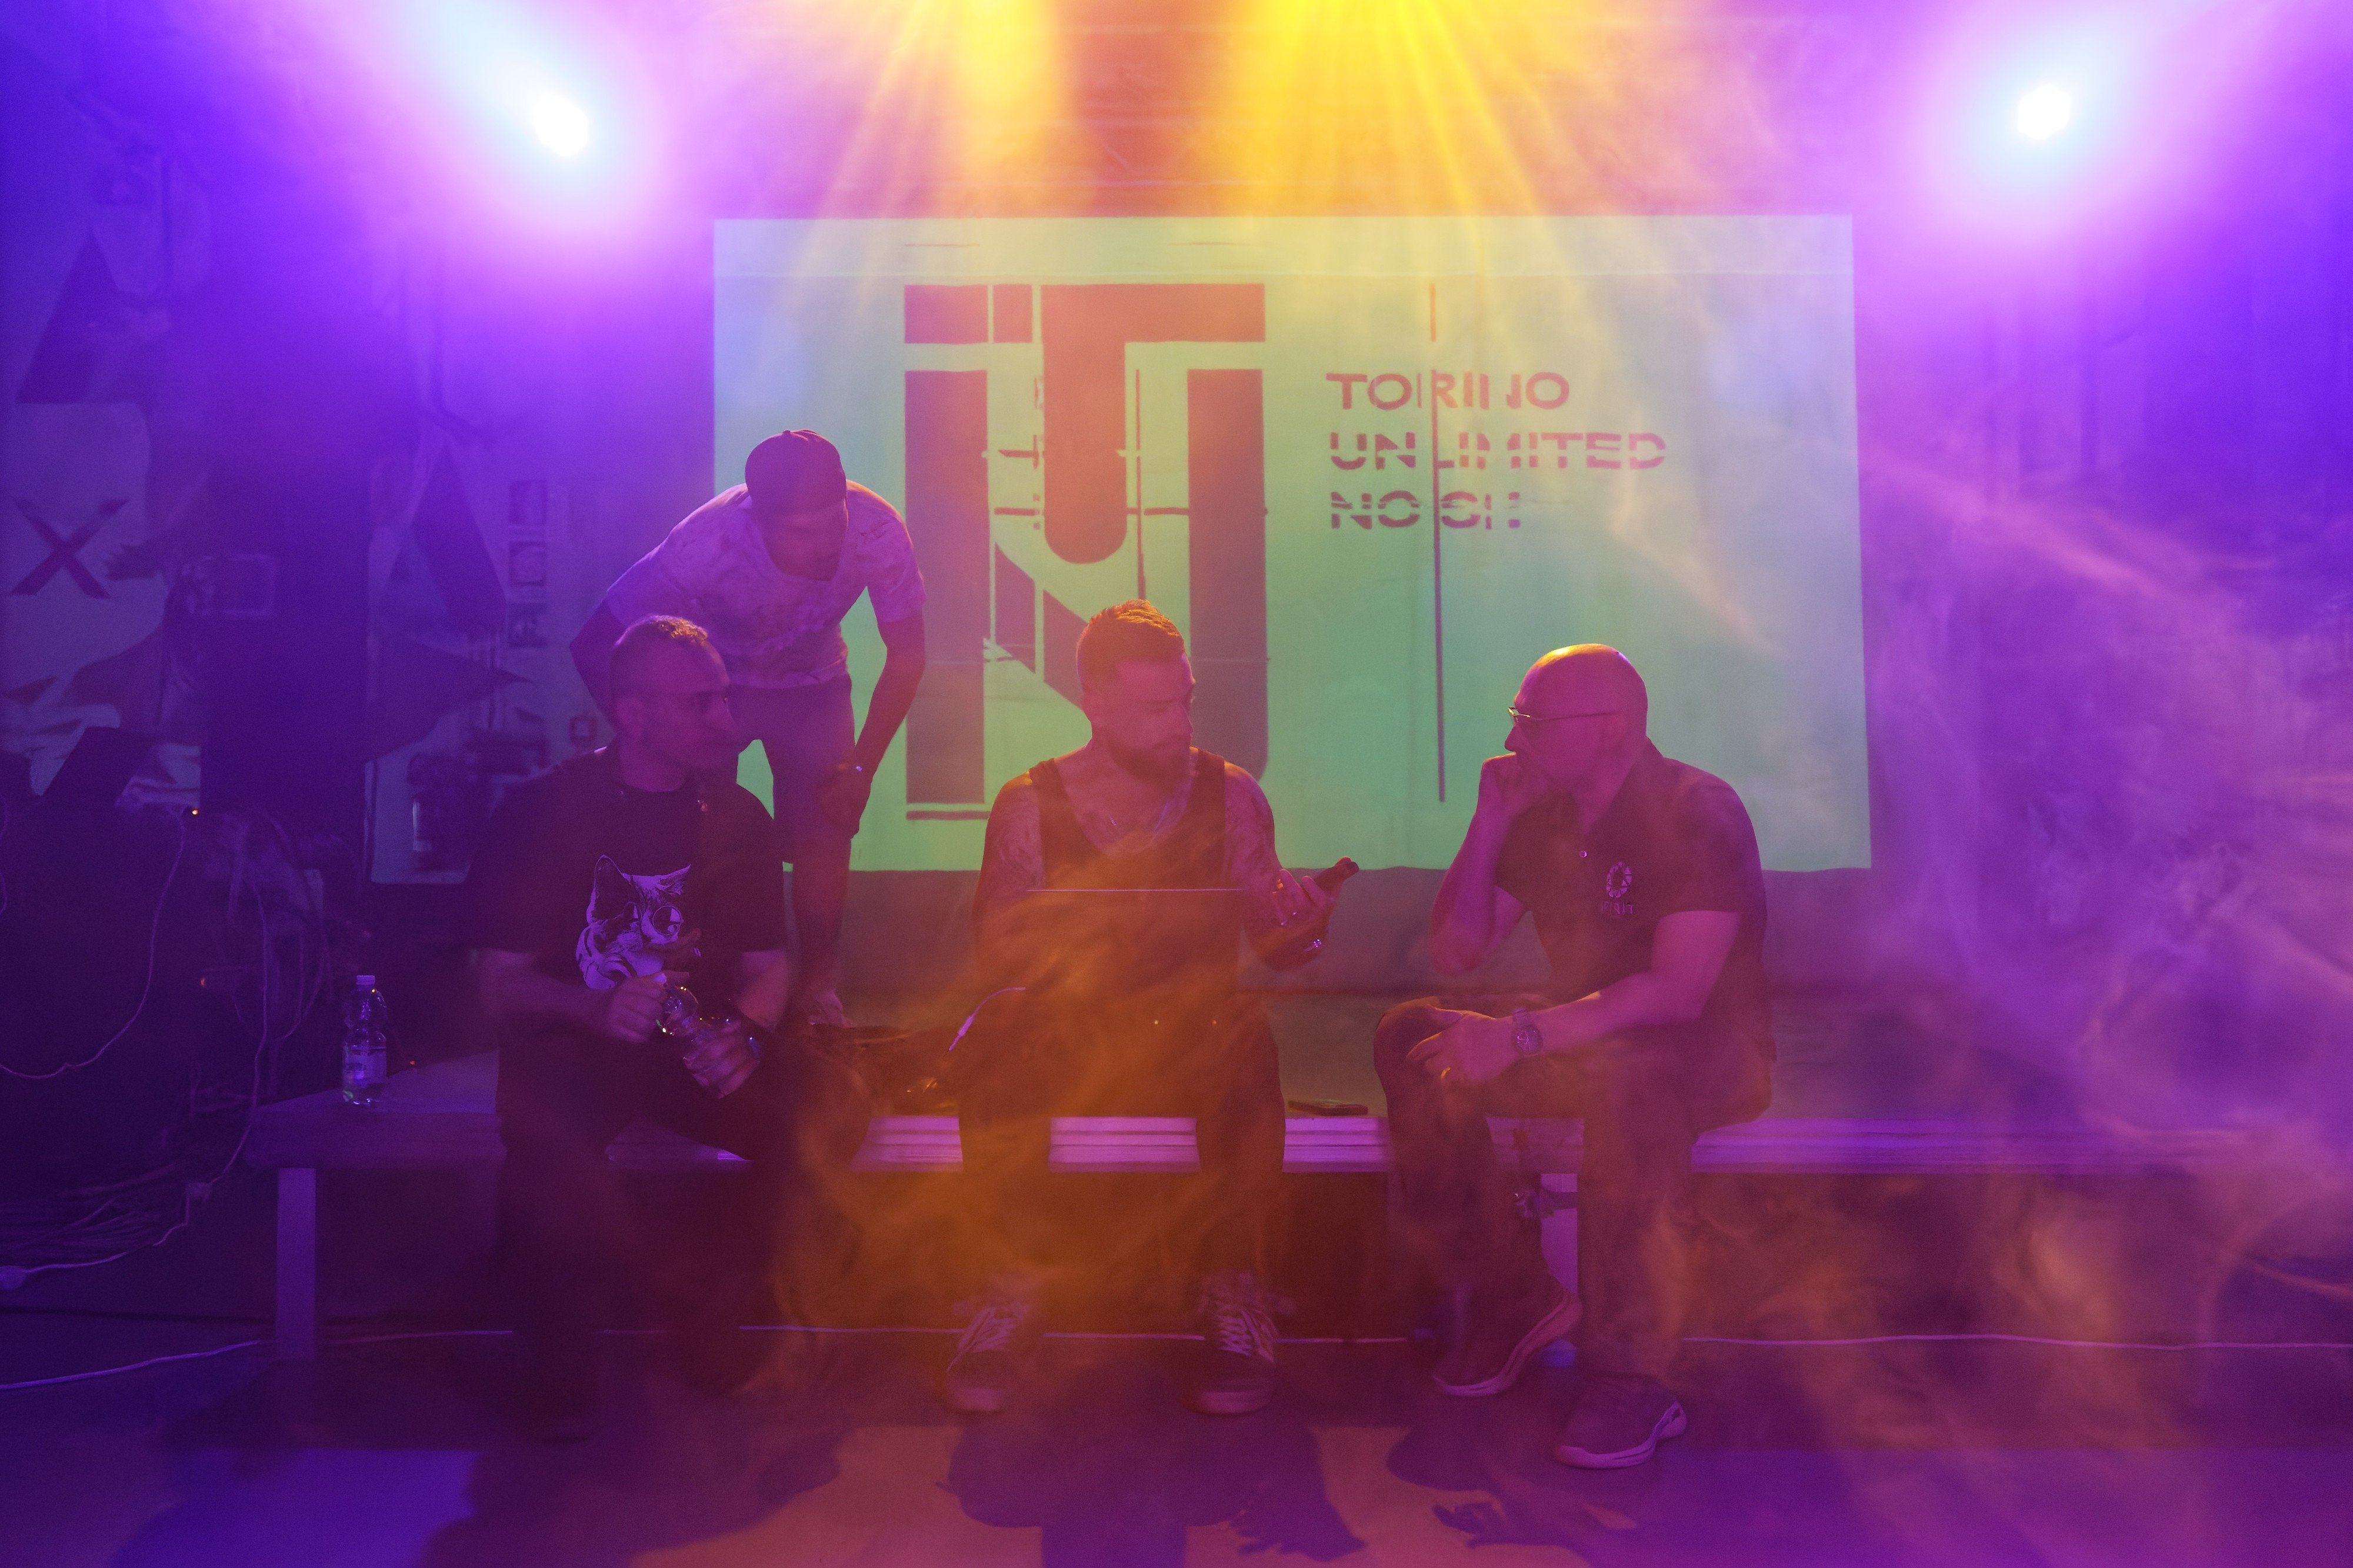
@Old Bruce thank you, that's interesting. but anyway, i'd say that the pic i posted above is a lucky case. what about this one? The haze is not plain here, but I don't expect to get rid of it at all: in the end, it adds something to the image. I'd be happy to reveal some details in the people. thank you, stefano
-
Affinity Photo: how to remove a coloured haze?
barninga replied to barninga's topic in Desktop Questions (macOS and Windows)
this is the result, just to clarify
-
Affinity Photo: how to remove a coloured haze?
barninga replied to barninga's topic in Desktop Questions (macOS and Windows)
@carl123 you're right, thank you for your reply. please find the image attached below. my goal is to remove, at least partially, the blue haze. The haze removal tool is ineffective, since the haze is not grey/white (I think). for this image, if I apply a curve adjustment lowering the blue channel midtone value, I obtain a darker image where part of the haze is gone. If I further apply a wb adjustment, experimenting with both warmth and tint, the colours get altered, but I can make the haze white-ish (with some yellow/green cast). At this point, I merge visible and then the haze removal filter does its job. Finally, I have to apply a curves adjustment where I boost the blue midtones, and a wb adjustment with warmth and tint both set in the opposite way, and I obtain an image where the colours are coherent with the source I attached, and the haze is gone.
-
hello all, I have problems in removing a coloured haze from photographs. AP's Haze Removal tool works well for landscape photography, where haze is usually grey-ish, but I found it ineffective when the haze is coloured. I happen to shoot at live concerts, where wide aperture is often mandatory due to light conditions: this apparently amplifies the interaction between the artificial smoke and the spotlights, often resulting in a sort of coloured glaze throughout the image. Under these conditions, the Haze Removal tool has no or little effect. The only way I found to clear this haze, at least partially, is to make it as white as possible by applying curves and white balance adjustments, then merging visible layers, then applying the haze removal tool, and finally applying the curves and white balance control again, but with opposite settings. Could anyone suggest a simpler (and possibly more effective) workflow? Thank you stefano
-
barninga reacted to a post in a topic:
Combine traditional mask with shape based mask - ELI5
-
I have to come back to this topic. After editing several photo groups of 60-70 images each, I've come to conclusion that Affinity Photo randomly happens to keep files open at filesystem level after closing them through the File menu. This seems to happen more frequently if several images are kept open in Affinity Photo during the editing activity. For example: - I have a bunch of, say, 70 photographs to edit - I open enad edit the first one, and keep it open after loading the second, and so on, until I have, say, six or seven images opened in Affinity Photo at the same time - While opening new images, I close the first ones, so I keep working with the last images opened at the same time - After editing the last image, I select File->Close All - I create a new batch job to create jpegs from the afphoto files During the batch job, it can happen that one ore more photographs cannot be opened and get a red X instead of the green checkmark. If I try to manually open those images, I get an error meaning that they are already open in another application (which only can be Affinity Photo itself). If I close Affinity Photo and relaunch it and repeat the batch job, all the images are handled regularly and get non red X. It looks like that, under certain conditions, Affinity Photo does not release the system resources taken by an open image; they are released only when Affinity Photo is closed and relaunched. For some reason, this seems to happen when keeping open several images at a time.
-
update 2: I had problems with the finder: external disks not released due to open files, where the application(s) using them had been closed; last file in a folder not displayed in column mode, and more funny things like these. I terminated the finder and after restarting it I had no more problems with Affinity Photo's batch job. So I suspect that the Finder was involved. I'll post more updates if I find more info. Thank you for your support.
-
update: as suggested, I checked for lock files in the afphoto files folder, just after closing the last afphoto file (result of editing a source tiff file). I found none. So I run the batch job (export to jpeg) after unchecking the parallel processing option. No errors. I repeated with parallel processing on: no errors again, but I can't say if this test is significant. No parallel processing is not an option, since it's way longer (my mac has 4 cores, so it takes approximately four times the time needed with parallel processing on). I'll update this thread with the results of my next operations.