Ralph Johann
-
Posts
31 -
Joined
-
Last visited
-
 Affinity_Pro reacted to a post in a topic:
Please add Pressure Sensitivity Control for Opacity in the Brush Settings (Affinity Photo)
Affinity_Pro reacted to a post in a topic:
Please add Pressure Sensitivity Control for Opacity in the Brush Settings (Affinity Photo)
-
c1c3c11 reacted to a post in a topic:
Please add Pressure Sensitivity Control for Opacity in the Brush Settings (Affinity Photo)
-
danlei reacted to a post in a topic:
How to show red overlay when masking
-
danlei reacted to a post in a topic:
How to show red overlay when masking
-
danlei reacted to a post in a topic:
How to show red overlay when masking
-
danlei reacted to a post in a topic:
How to show red overlay when masking
-
danlei reacted to a post in a topic:
How to show red overlay when masking
-
If you click on the checkbox, you will see your original mask that you can revise, but it is quite limiting because you cannot select a brush, you can only change the brush size. I rarely work with hard brush edges when masking, so the feature is relatively useless for me.
-
Ralph Johann reacted to a post in a topic:
Feature request/suggestion: make Clone Brush default to Current Layer and Below
-
 loukash reacted to a post in a topic:
How to show red overlay when masking
loukash reacted to a post in a topic:
How to show red overlay when masking
-
That's correct when you right-click on the mask symbol. If u right-click the layer right from the mask symbol (the blue area) then you get the other drop down menu.
-
Looks the same on my Computer, but how does that help me ?
-
I'm sorry I don't get it ?!? Is there a video for that as well ? But honestly, revising masks in black & white is maybe 5% of my work with masks. If the right-click "edit mask" would give back a transparent red layer to work on, everything would be fine.
-
Does it work with layer masks as well ? I'm usually painting on my layer masks with soft brushing tools. My masks contain every opacity from 0 - 100%, which means they are not just black&white. See attachement. If I add another mask on top of the first one, it affects the whole image and I often have to adjust the masks underneath again which means quick masking tools are very important for me. I'm a professinal photographer and worked with lots of retouchers, they all work this way and I learned from them.

-
Ralph Johann reacted to a post in a topic:
Adding mask layer directly to adjustment layer - not possible in V2?
-
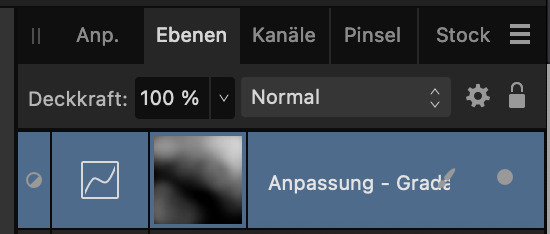
The edit mask shows a black and white mask and not a red overlay. Example: I want to revise a mask for a person's eyes. In this case, I need to see what I'm working on, which I can't see in a black and white only display. If you apply "command-click" to a existing mask then the selection appears. Now click on the mask icon in the menu bar then you have the red masking I'm talking about. I can edit this mask now, but the actual mask of the layer remains untouched.
-
But it's the program I think they want to compete with. I don't know how intensively you retouch your images, but masking tools are one of the most important basic functions for professionals. Revising masks is a regular part of the retouching process and for that you need the red overlay. But maybe APV2 is meant to be a pure amateur software which I don't think so.
-
That's exactly what I mean! Turning the red overlay of an existing mask on and off with one click is a basic Photoshop feature. And you can directly post-process the selected mask in either mode. In APV2, if you right-click on the mask, you only have the option to refine the mask, but I want to edit the mask by myself, not have APV2 refine it for me. That's a big difference.
-
Ralph Johann reacted to a post in a topic:
How to show red overlay when masking
-
jimh12345 reacted to a post in a topic:
How to show red overlay when masking
-
eeviac reacted to a post in a topic:
How to show red overlay when masking
-
Thanx Debra, I watched an instructional video on layer states. Unfortunately, it is not what I am looking for. Most importantly for me, grouping puts the layers in one group for clarity and does not change the image by grouping it. The blend mode says "passthrough" but that's actually not a correct description of what the group does. I have photos with 60+ layers, and it is easy to keep track of all the layers when they are grouped by task. In the RETOUCH group are my retouch layers with the retouch color corrections, in the BACKGROUND group is the actual background I want to use, including the associated adjustment layers, and so on. In APV2, I can't group them because it's mostly a mix of pixel and adjustment layers. It also happens from time to time that I have to rework a mask because it wasn't worked out quite cleanly. With groups, it's easier to narrow down the layers to find the mask that needs to be touched up than it is to search and scroll through all the individual layers of the photo. APV2 makes work in this regard cumbersome and confusing.
-
Wow, just tried it and it worked. I added a fill layer which came in white colour directly and changed to multiply blend mode. Abracadabra 🎩🧙♂️ Thanx ! Nice workaround for something that should already work like this
-
Grouping is a pain in APV2. 1. You can't group just one layer (i.e. when you want to start a new group). You can only group 2 layers and more (was different in V1) 2. Adding a mask to a group results with a mask layer above the group instead of adding it as a mask for the group (I think that was different in V1 as well) 3. When you close the group you can't even see if a mask belongs to it. Why not showing the mask right next to the folder icon as it is with any adjustment layer. This is very inconsistent and confusing Any thoughts for that ?
-
Ok, understand what you're talking about, but honestly even retouching layers (pixel layers) can be part of my look. I just tried the following. Grouping only the adjustment layers, then grouping only the pixel layers and after that grouping both groups in another group. Then it worked. Really ?!?!? What kind of workflow is that when i have to group everything separately to put it in one group again at the end. My layers often contain alternating pixel and adjustment layers and so I have to put every pixel layer and the adjustment layers inbetween in single groups first before I group them alltogether ? Come on, that's ridiculous. Grouping should just put layers together in one folder to arrange everything more clearly and shouldn't affect the whole picture. That's pretty unlogical...
-
Hey there, several times I faced this problem when grouping layers and I don't know why this is happening. When I work on a picture and have a nice look, I want to group it so I can switch it on/off to try other versions. When I group layers it happened several times that my look is gone once it's in the group. The problem is not all the groups make so obvious changes like in the video, so I already missed several times that my group didn't have any effect anymore. That's very annoying because I always have to check if the grouping works correctly or not. Not very helpful for my workflow... Thoughts anyone ? Group_behaviour.m4v
-
Masked Groups in V2 Photo
Ralph Johann replied to rangerpaul's topic in Desktop Questions (macOS and Windows)
I like the video, but it's actually for V1. I wish it would still work like this 😖 First thing is that AP V2 doesn't put one layer automatically in a group anymore, it must be two minimum, don't ask me why 🤭 When I start working and I know my next layers will be in one group I usually start grouping the first layer and work on in this group. AP V2 allows grouping only if there's more than one layer (video1). I'm using group masks quite often and don't understand why APV2 doesn't add the mask to the group anymore. Instead it creates a new layer as mask layer which I manually have to add to the group. Can someone explain me why they changed that really useful feature ?!? I also dont understand why the mask symbol isn't shown right next to the group symbol as it is in Photoshop. Masks for adjustments layers always appear next right to the layer symbol and the mask for the group is a layer underneath the mask. That always leads to misunderstandings, because the mask layer is also on the same line with all the other masks, it would help if it would be more or less inserted as the other layers just to make it obvious that it's the layer mask. And hen the group is closed I can't even see if it's masked or not. Any suggestions ? MASK_Grouping1.m4v MASK_Grouping2.m4v -
+1