Ralph Johann
-
Posts
31 -
Joined
-
Last visited
Everything posted by Ralph Johann
-
If you click on the checkbox, you will see your original mask that you can revise, but it is quite limiting because you cannot select a brush, you can only change the brush size. I rarely work with hard brush edges when masking, so the feature is relatively useless for me.
-
That's correct when you right-click on the mask symbol. If u right-click the layer right from the mask symbol (the blue area) then you get the other drop down menu.
-
Looks the same on my Computer, but how does that help me ?
-
I'm sorry I don't get it ?!? Is there a video for that as well ? But honestly, revising masks in black & white is maybe 5% of my work with masks. If the right-click "edit mask" would give back a transparent red layer to work on, everything would be fine.
-
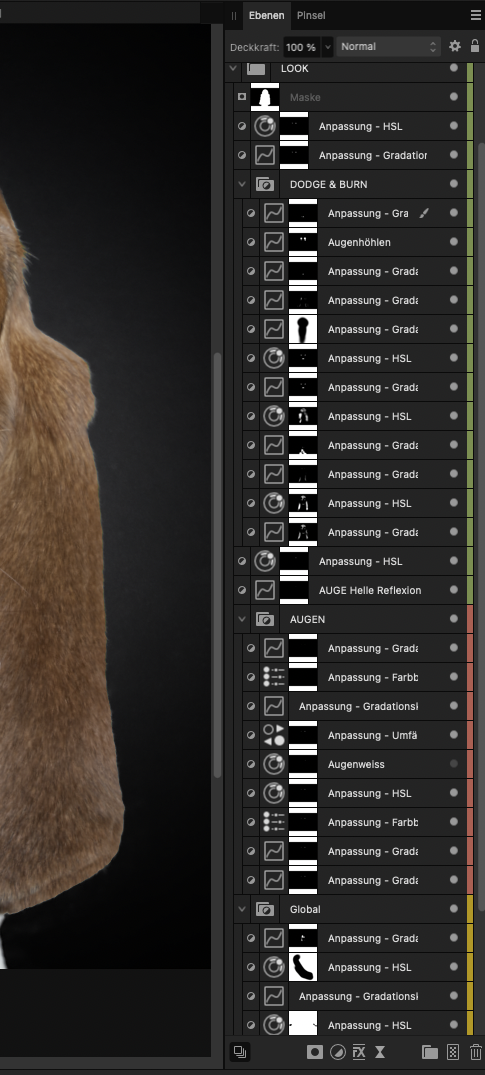
Does it work with layer masks as well ? I'm usually painting on my layer masks with soft brushing tools. My masks contain every opacity from 0 - 100%, which means they are not just black&white. See attachement. If I add another mask on top of the first one, it affects the whole image and I often have to adjust the masks underneath again which means quick masking tools are very important for me. I'm a professinal photographer and worked with lots of retouchers, they all work this way and I learned from them.

-
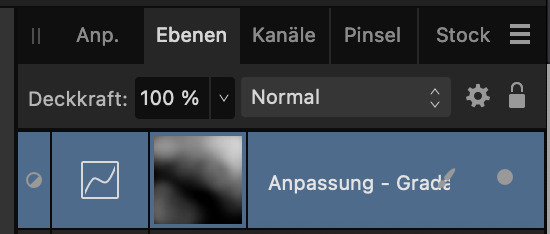
The edit mask shows a black and white mask and not a red overlay. Example: I want to revise a mask for a person's eyes. In this case, I need to see what I'm working on, which I can't see in a black and white only display. If you apply "command-click" to a existing mask then the selection appears. Now click on the mask icon in the menu bar then you have the red masking I'm talking about. I can edit this mask now, but the actual mask of the layer remains untouched.
-
But it's the program I think they want to compete with. I don't know how intensively you retouch your images, but masking tools are one of the most important basic functions for professionals. Revising masks is a regular part of the retouching process and for that you need the red overlay. But maybe APV2 is meant to be a pure amateur software which I don't think so.
-
That's exactly what I mean! Turning the red overlay of an existing mask on and off with one click is a basic Photoshop feature. And you can directly post-process the selected mask in either mode. In APV2, if you right-click on the mask, you only have the option to refine the mask, but I want to edit the mask by myself, not have APV2 refine it for me. That's a big difference.
-
Thanx Debra, I watched an instructional video on layer states. Unfortunately, it is not what I am looking for. Most importantly for me, grouping puts the layers in one group for clarity and does not change the image by grouping it. The blend mode says "passthrough" but that's actually not a correct description of what the group does. I have photos with 60+ layers, and it is easy to keep track of all the layers when they are grouped by task. In the RETOUCH group are my retouch layers with the retouch color corrections, in the BACKGROUND group is the actual background I want to use, including the associated adjustment layers, and so on. In APV2, I can't group them because it's mostly a mix of pixel and adjustment layers. It also happens from time to time that I have to rework a mask because it wasn't worked out quite cleanly. With groups, it's easier to narrow down the layers to find the mask that needs to be touched up than it is to search and scroll through all the individual layers of the photo. APV2 makes work in this regard cumbersome and confusing.
-
Wow, just tried it and it worked. I added a fill layer which came in white colour directly and changed to multiply blend mode. Abracadabra 🎩🧙♂️ Thanx ! Nice workaround for something that should already work like this
-
Grouping is a pain in APV2. 1. You can't group just one layer (i.e. when you want to start a new group). You can only group 2 layers and more (was different in V1) 2. Adding a mask to a group results with a mask layer above the group instead of adding it as a mask for the group (I think that was different in V1 as well) 3. When you close the group you can't even see if a mask belongs to it. Why not showing the mask right next to the folder icon as it is with any adjustment layer. This is very inconsistent and confusing Any thoughts for that ?
-
Ok, understand what you're talking about, but honestly even retouching layers (pixel layers) can be part of my look. I just tried the following. Grouping only the adjustment layers, then grouping only the pixel layers and after that grouping both groups in another group. Then it worked. Really ?!?!? What kind of workflow is that when i have to group everything separately to put it in one group again at the end. My layers often contain alternating pixel and adjustment layers and so I have to put every pixel layer and the adjustment layers inbetween in single groups first before I group them alltogether ? Come on, that's ridiculous. Grouping should just put layers together in one folder to arrange everything more clearly and shouldn't affect the whole picture. That's pretty unlogical...
-
Hey there, several times I faced this problem when grouping layers and I don't know why this is happening. When I work on a picture and have a nice look, I want to group it so I can switch it on/off to try other versions. When I group layers it happened several times that my look is gone once it's in the group. The problem is not all the groups make so obvious changes like in the video, so I already missed several times that my group didn't have any effect anymore. That's very annoying because I always have to check if the grouping works correctly or not. Not very helpful for my workflow... Thoughts anyone ? Group_behaviour.m4v
-
Masked Groups in V2 Photo
Ralph Johann replied to rangerpaul's topic in Desktop Questions (macOS and Windows)
I like the video, but it's actually for V1. I wish it would still work like this 😖 First thing is that AP V2 doesn't put one layer automatically in a group anymore, it must be two minimum, don't ask me why 🤭 When I start working and I know my next layers will be in one group I usually start grouping the first layer and work on in this group. AP V2 allows grouping only if there's more than one layer (video1). I'm using group masks quite often and don't understand why APV2 doesn't add the mask to the group anymore. Instead it creates a new layer as mask layer which I manually have to add to the group. Can someone explain me why they changed that really useful feature ?!? I also dont understand why the mask symbol isn't shown right next to the group symbol as it is in Photoshop. Masks for adjustments layers always appear next right to the layer symbol and the mask for the group is a layer underneath the mask. That always leads to misunderstandings, because the mask layer is also on the same line with all the other masks, it would help if it would be more or less inserted as the other layers just to make it obvious that it's the layer mask. And hen the group is closed I can't even see if it's masked or not. Any suggestions ? MASK_Grouping1.m4v MASK_Grouping2.m4v -
+1
-
Double click does not start macro
Ralph Johann replied to annamilano's topic in V2 Bugs found on macOS
Same problem here with my Macbook Pro 2016, Big Sur, AP2, Intuos Pro PTH-651, Apple BT Mouse. The macro starts normally when I use the trackpad. With the Apple BT Mouse it sometimes works, but not really predictably. Sometimes the macro runs multiple times. With the Wacom tablet, the pen click does not start the macro at all. So far, that's the only function I've found that doesn't work with either the tablet or the mouse correctly. Otherwise, the Wacom tablet works pretty well with AP, but for a good workflow, this bug is pretty annoying. Would be great if it could be fixed in the near future, since the problem is known for years. Batch processing would be very useful as well... -
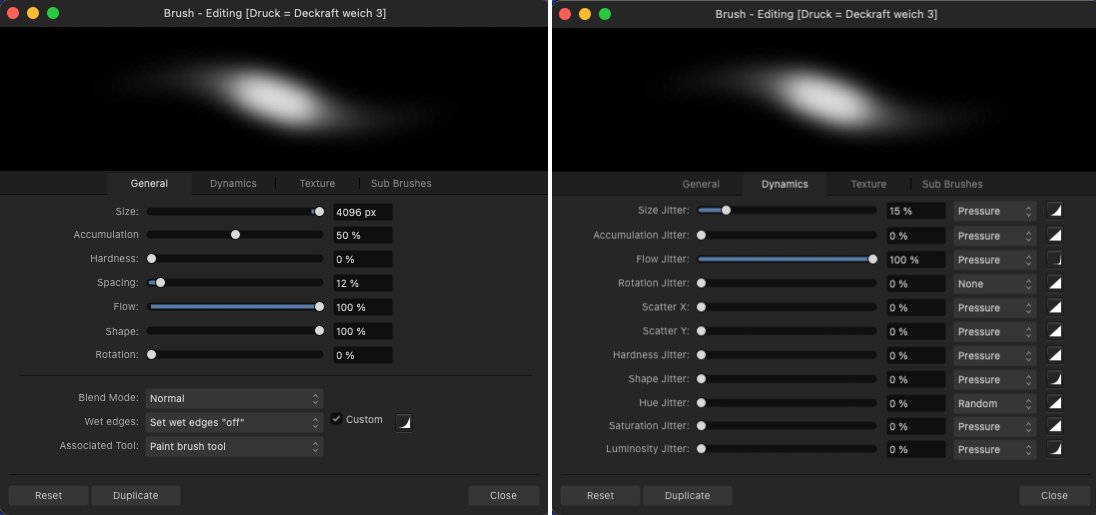
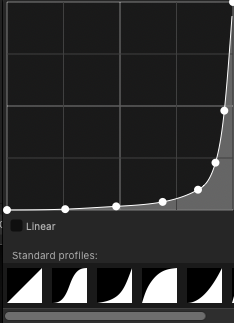
Hey Peter, great idea to see the name of the brushes without hovering 👍 I agree very much. Thanx for your workaround for the pressure sensitive brushes. I tried it, but for my work I have settings that work slightly better for me. Feel free to try my settings, maybe you can use them as well. If you like them give me a short reply. I actually added your brush to my list. In the settings I changed the dynamics as well. Description in the attachemants. Cheers
-
Happy new Year to everyone here at first 🍀 My question is already answered with this post but very unsatisfactory. So I more write to express my dissatisfaction about the masking problem here. I started working with AP intensely and with youtube-tutorials for 3 month now. It's really a great software but it has some lacks that make it hard to work professional with it. Most important for me is a good function of the masking. I'm a professional photographer and I worked with lots of different post producers worldwide. And all of them work with overlay masks in most of the layers. I'm used to that in PS too, but wanted to make a cut with Adobe because of the subscrition system, to give another company a chance and to recommend AP to other photographers, Photo assistants and students that just don't really need an Adobe subscription. I suppose most people underestimate what it means to work for demanding clients. Just to give you an impression of how many layers can be in one picture I added an example. I have photo composings with more than 70 Layers and sure you have to make corrrections afterwards regularly if some masking has to be adjusted. Workarounds with even more layers at the end are very contra productive then. Colored overlay layer masks above the background are a basic requirement for me and any professional. Until now I just thought I couldn't find the function, but now I found out it's just not implemented, so please Affinity put in on your list with high priority. Just as an addition it's pretty impossible to make a good pressure sensitive brush with AP. Most professionals work with tablets and there are so many parameters you can change in AP for a single brush but opacity with pressure is unfortunately not part of it. This for me is the second thing which really would be great to add to AP2. Hope to see this 2 functions no too far in the future...
-
Thanx again Walt. It was in Automatic mode and didn't show any grid, so I had to chage to manual. Is there any way to choose values that show for example the third lines which would be great for the composition of the photos ? If I write values in pixels the grid is different on any different picture size.
-
@Old Bruce : Your information was absolutely correct, but without Walt's Info where to find the settings I was lost what to do. Next time maybe a bit more detailed would be fantastic. Thanx for helping me out 👍
-
Thanx guys, got it ! I didn't know that I have to put in own values in "grid and achses". In V1 the grid was shown automatically without changing any settings before. Great forum by the way, very helpful people, short answering times 🙂 I will probably be back soon with some more questions. BTW : is there any chance to change between actual preview and "original" (before/after) for example in the layer unsharp mask to compare the actual sharpness with the original ? That would be very helpful in many layer settings. The only way I found is changing the opacity back and forth from 0 to 100 which i a pain. Other Topic I know but maybe you can help.
-
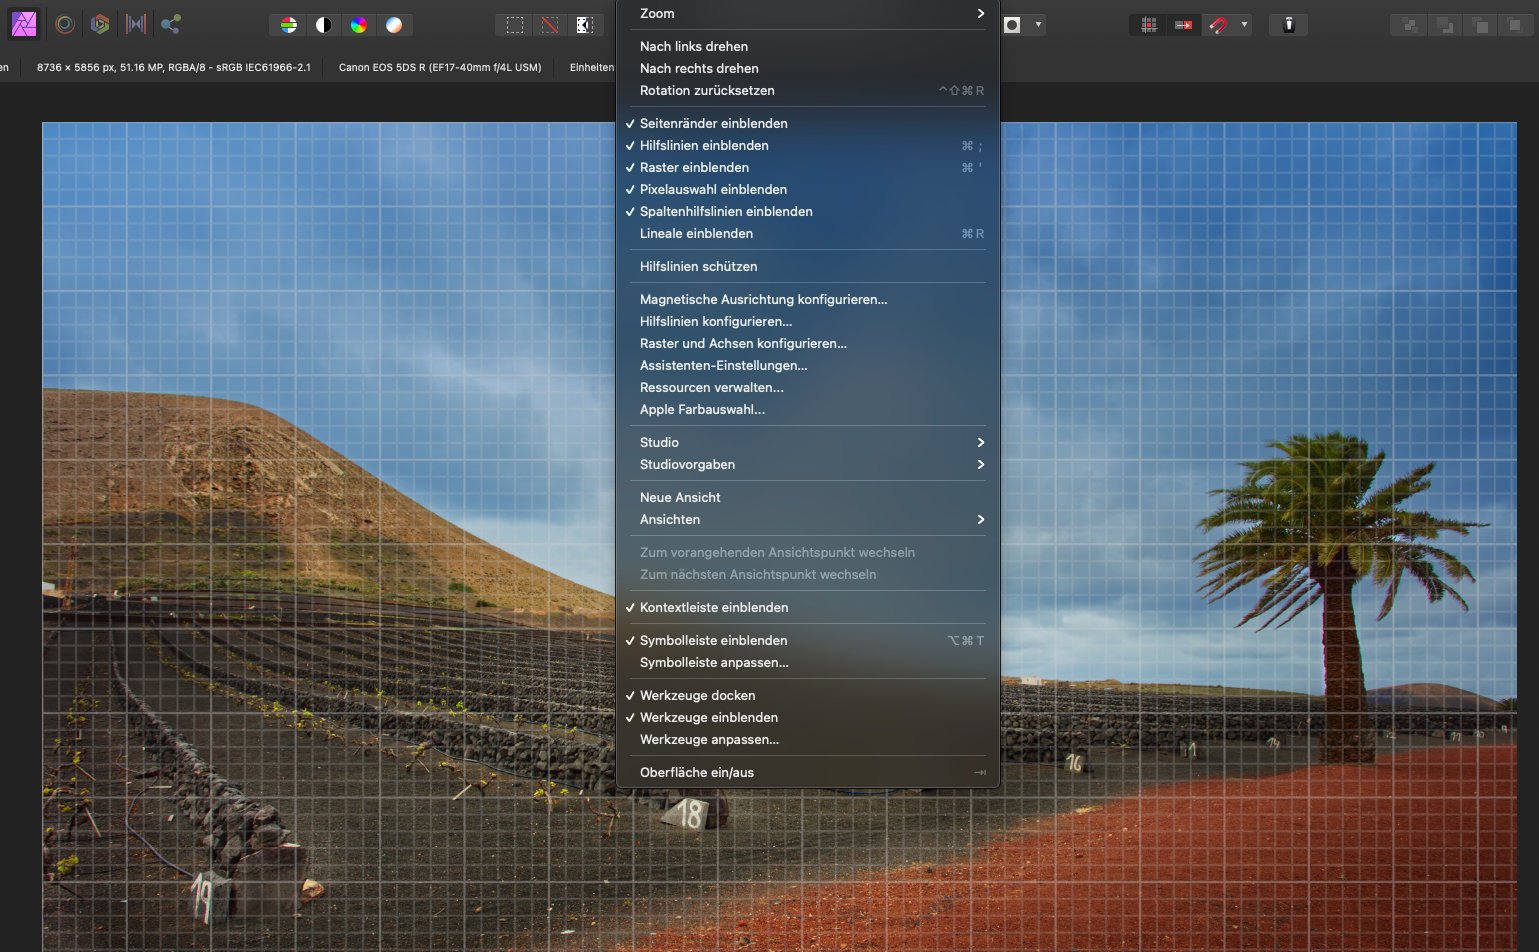
Thanx Bruce but I don't get it ?!? Usually when I check "show grid" Affinity Photo showes a grid all over my photo with horizontal and vertical lines. I think you are talking about the grid that shows single pixels or is it the same grid you are talking about. If yes where can I change the setting of 1 pixel to another value. Here's the same picture with grid in AP V1
-
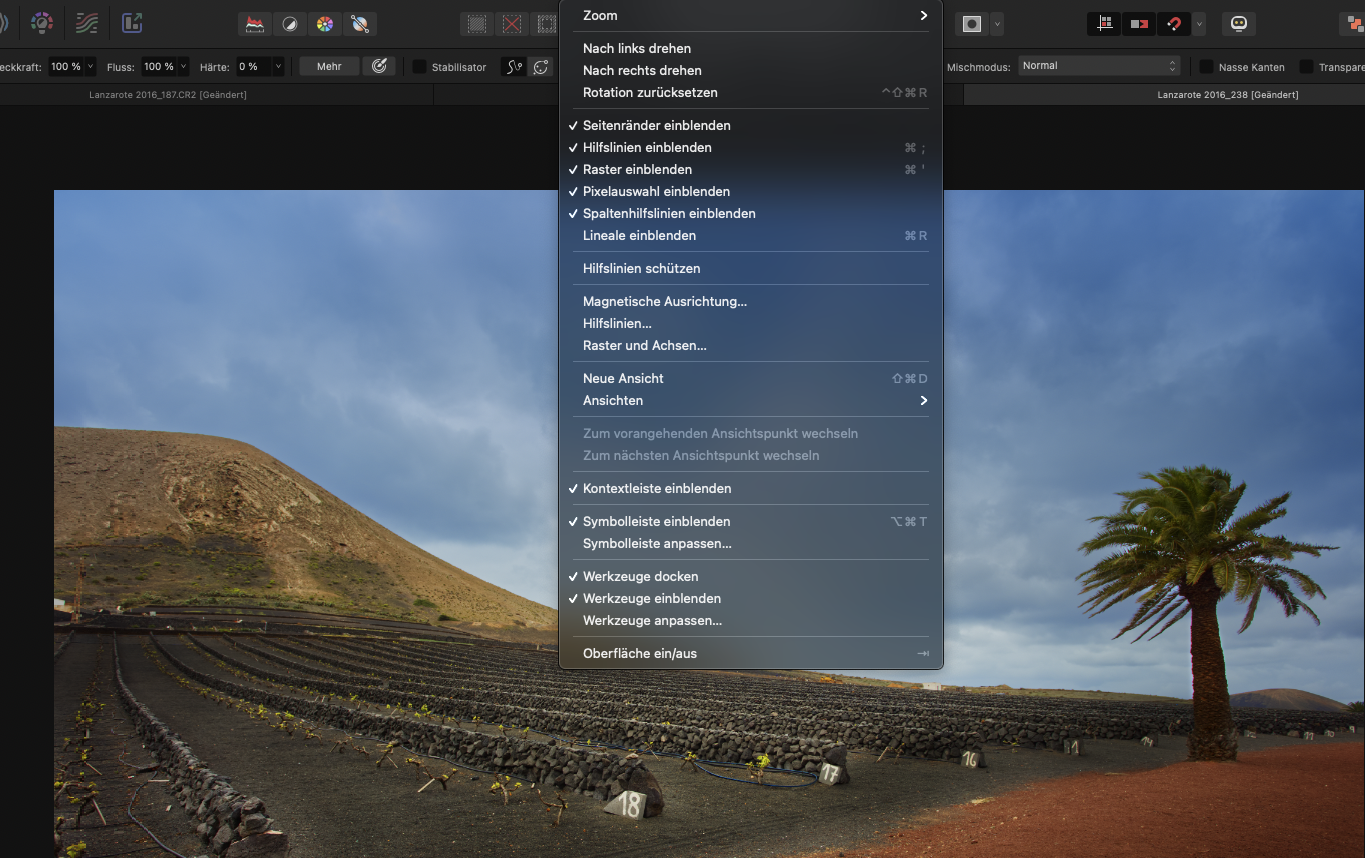
While working with Affinity Phto V2 I'm running in one problem after the other. While grid worked in V1 it doesn't in V2. Show grid has no effect... Any thoughts ?
-
Actually it's the setting I miss most since I'm coming from Photoshop. It's pretty impossible to generate a pressure sensitive brush for smooth transitions that works in solid colors like blue sky oder studio paper backgrounds.
-
Hey Carl, I just tried it out. Pushing the HSL window from my EIZO to the Macbook Pro monitor brings it back to normal. Thanx for your input