smadell
-
Posts
1,309 -
Joined
-
Last visited
Everything posted by smadell
-
I love this! Simple, clean, fast… Kudos to you, @M1000
-
 Obviously, it makes no sense at all to spend that sort of money for Capture One if you’re not going to use it consistently. Inside of Affinity Photo, the solution offered by @NathanC (above), based on the Olivio Sarikas tutorial, makes the most sense. As time goes forward, you’re obviously shooting raw. You should practice doing some raw developing to maximize the potential in your images. Use AP or anything you like; raw will seem like a no-brainer after you get used to it.
 -
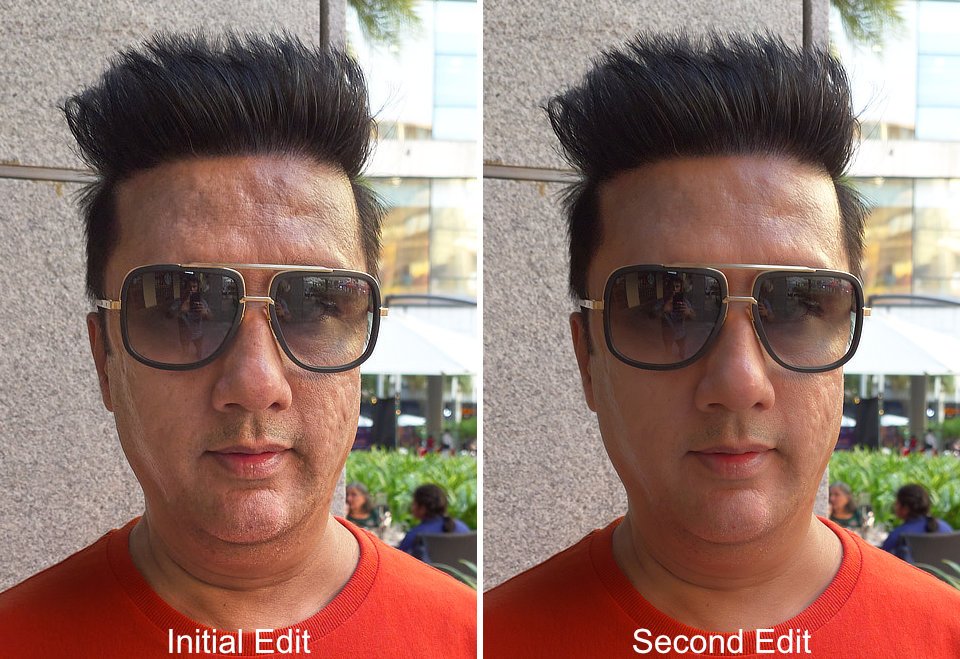
The reason the acne scars, etc. are so prominent in the Capture One output is (to be honest…) because I was in a rush. I masked the face into a new layer, and only adjusted shadows and highlights. I went back to that and added a luminosity mask to that layer (to target the blacks and shadows) and, instead of fiddling with shadows and highlights I simply added brightness (but only to the shadows, thanks to the luminosity masking). I also used the "Skin Tone" section of the Color Editor to make the lightness and hue of the facial colors more uniform. Here's a side by side after taking a bit more time with it.

-
Capture One is separate software. It”s generally pretty highly regarded, but quite pricey. It positions itself largely as a Lightroom competitor, and has a Catalogue function (which I don’t use). I usually use Capture One to develop my raw files, export them as TIFF’s (as an intermediate) and then open the TIFF files in Affinity for final work.
-
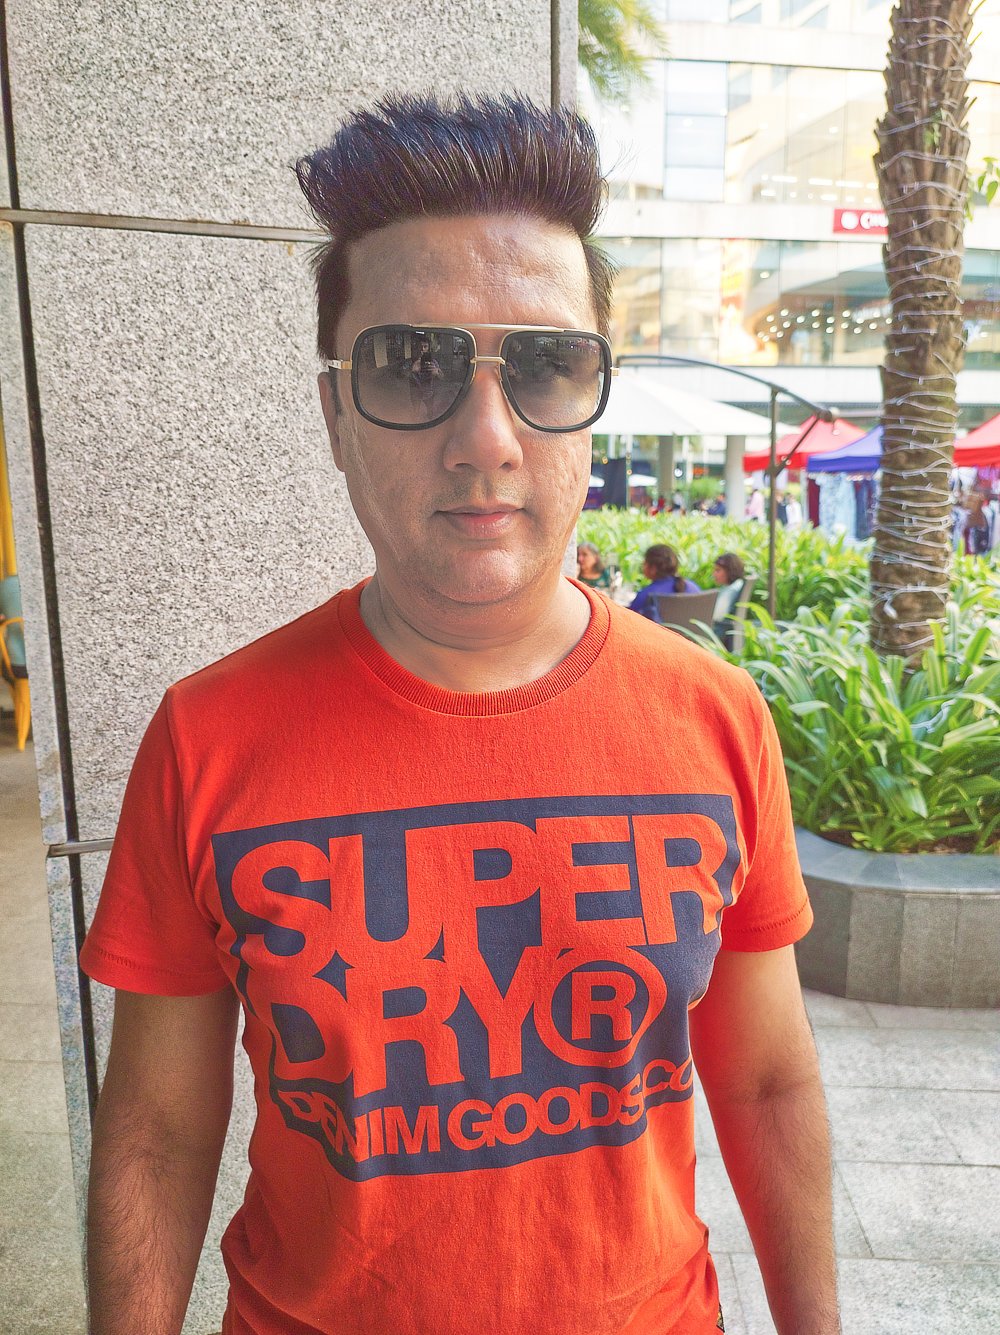
I actually agree with you, @augustya. Maybe I am just not very good with Affinity Photo's Develop persona, or maybe it's just not as good as I'd like. Anyway, I opened your DNG into Capture One (version 21) and was able to export the following after about 4 minutes of work. To my eye, far more natural. Capture One is my raw processor of choice, and I find it exceedingly easy to get far better results. (And I love Affinity Photo, and finish all of my work using it. I just don't like its raw capabilities).
-
I took this as a challenge! But, I have to say up front – the best place to correct the lighting is before you develop it from a raw file! Afterward, you're fighting a (generally) losing battle. Also, as a sort-of disclaimer, I don't particularly care for Affinity Photo's Develop persona, as I think it makes the shadows and highlights far too "gray" when they are adjusted. That having been said, I'm including a couple of screenshots and the final .afphoto file. I opened your DNG file into Affinity's Develop persona. My goal was simply to develop the file into something fairly flat and lifeless, but with less contrast to the highlights and shadows in the face. Here's a screenshot of my settings (in the Basic and Tone Curves panels): And here's the final result, after some editing in the Photo persona: I've attached the .afphoto file for you. Note that there are 2 HSL layers – one is masked to just the face (where I lightened and desaturated) and the other is masked to include everything else (where I increased saturation somewhat). smadell edit.afphoto
-
Nice that the book resurfaced! I'm glad you enjoyed it, @jbeertsen.
-
No problem, señor. A fun exercise!
-
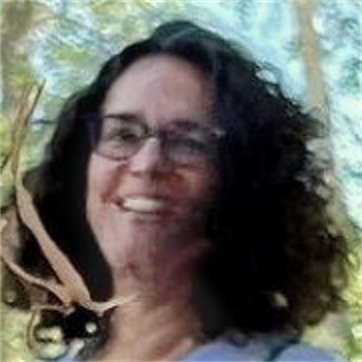
If I'm interpreting your comment correctly, I'm fairly sure the "splotch" is a combination of her dark hair and some fairly intense shadow. I've amended my edit by adding a Dodge & Burn layer (a 50% grey fill with blend mode Soft Light) and used this layer to lighten up the splotch. Painting on that layer (with a soft brush set to 100% opacity and 1% flow) using White didn't give me a result I liked. So, I sampled one of the lighter areas of her face, and even lightened that a little in the Color panel, and then "dodged" using that color. Here's a zoomed in JPG of her face, along with the amended .afphoto file. Kristin_WIllimason Edit 2.afphoto
-
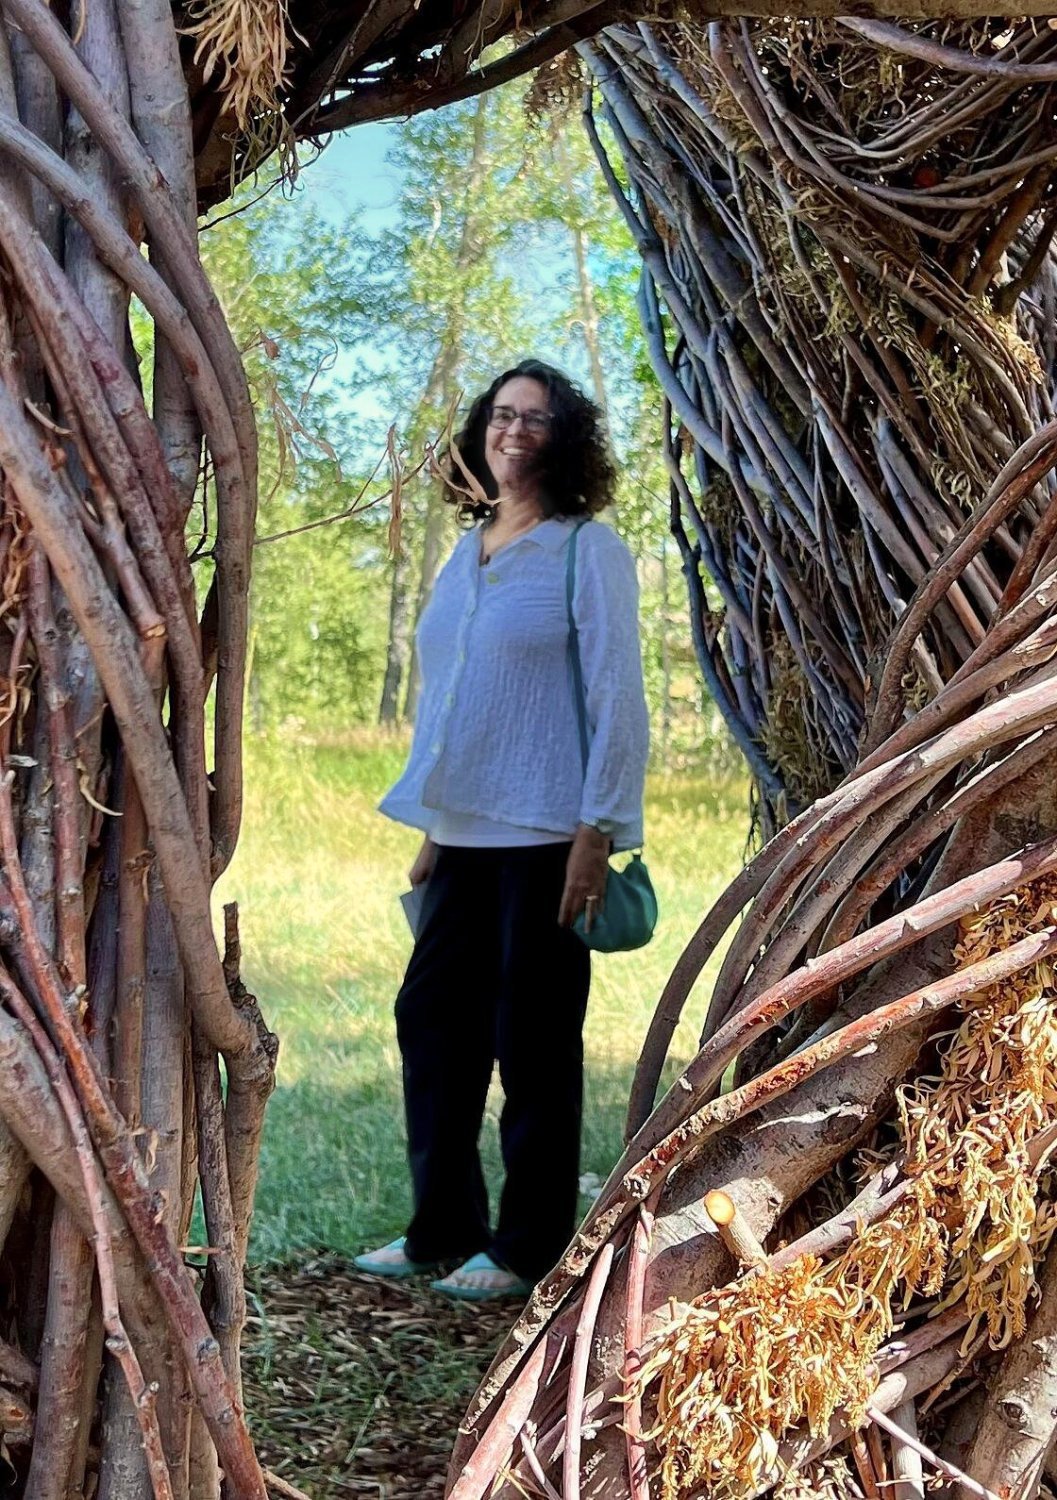
I'm attaching a suggested solution. (1) The background (behind the tree branches) is a bit too blue and too saturated; (2) The face needs lightening. To do the former, I used a White Balance and a Vibrance adjustment, masked to include only those areas behind the tree branch framing. To lighten the face, I used a Curves adjustment (rather than Brightness/Contrast) because it is a bit more subtle and customizable. Like the suggestion made by @Granddaddy, I inverted the adjustment and used a white paint brush to paint over only the face. Here's a JPG (below) and the .afphoto file (attached). Kristin_WIllimason Edit.afphoto
-
RAW Output
smadell replied to CharlesG's topic in Pre-V2 Archive of Desktop Questions (macOS and Windows)
Also, if I’m not mistaken, you can leave the document in ROMM and set sRGB as the profile inside of the Soft Proofing adjustment. -
RAW Output
smadell replied to CharlesG's topic in Pre-V2 Archive of Desktop Questions (macOS and Windows)
Absolutely, @CharlesG. Edit in a wide color space (I always edit in ProPhoto, which is basically the same as ROMM) and convert at the end to sRGB. You can convert when you do the Export. -
AI picture generators urgently required
smadell replied to drstreit's topic in Feedback for the Affinity V2 Suite of Products
A couple of facts remain. (1) The staff at Serif is limited, and they must set priorities as to what, if any, additional features need to be included; and (2) the lure of AI will entice a bunch of people, but many (perhaps the majority) will have no use for it. I would rather see Serif avoid wasting time on niche projects and spend more time on a more universally-needed project like creating an API for more advanced plug-in availability. If and when Serif opens up an API for others to create, for example, additional studio-like panels then someone will create an AI plug-in for Affinity Photo. Probably a whole bunch of someones. Serif has already said that they are at work putting Javascript and an API into the Affinity suite, but that it will take time. "Be patient" was their advice, and I am sure they mean it. That having been said, though, opening up the application to outside coders will create a much more fertile environment for plug-ins and other add-ons. These may only satisfy a small number of users, but they might be considered deal-breakers for those users who feel they need them. The availability of AI artwork within Photo is, I believe, one such niche market. -
Help with a macro
smadell replied to blurpderp's topic in Pre-V2 Archive of Desktop Questions (macOS and Windows)
Of the 4 steps you mentioned, all but the 2nd one can be done with a simple Batch Job. As to step 2, when you say “add an image to the afphoto doc” is it the same image each time? If so, that could be coded into a macro, which itself could be incorporated into the Batch. The order of things would be important, too, especially if the size of the original image(s) and the added image were not the same, or at least consistent. -
AI picture generators urgently required
smadell replied to drstreit's topic in Feedback for the Affinity V2 Suite of Products
This one’s for you, @Old Bruce. No AI needed. In fact, no “I” at all!
-
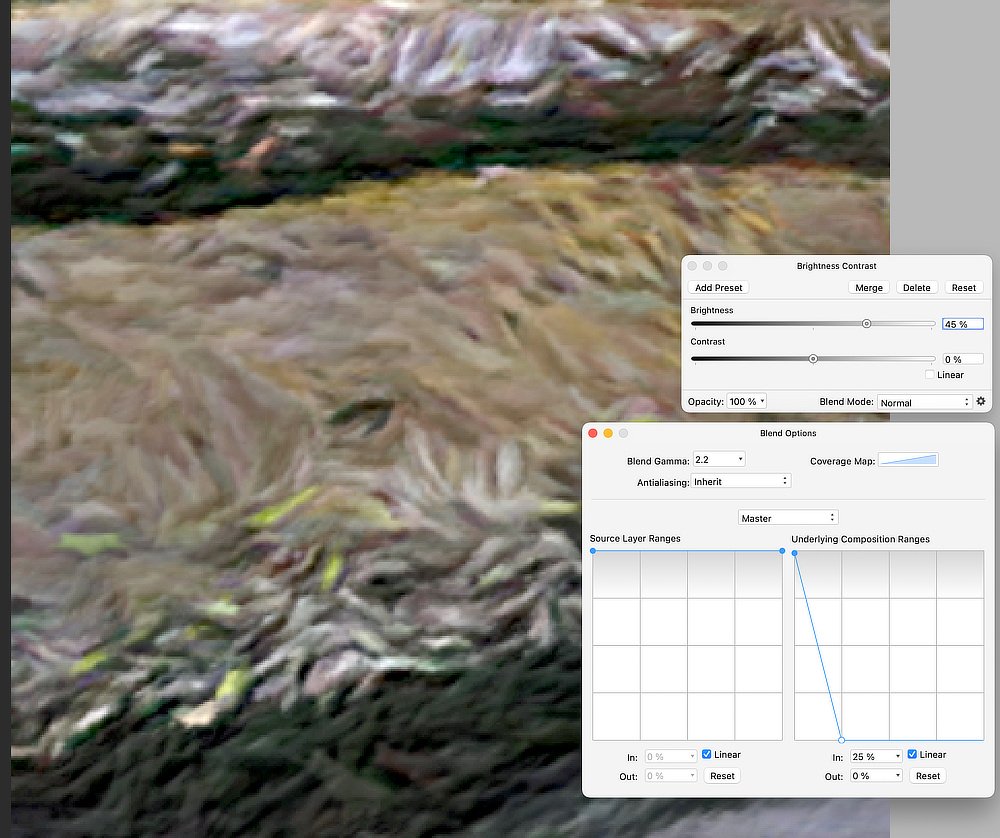
Two fairly easy suggestions. The first one is to use a Curves adjustment. The second one is to use a Brightness and Contrast adjustment, along with Blend Options. Curves: Brightness & Contrast / Blend Options
-
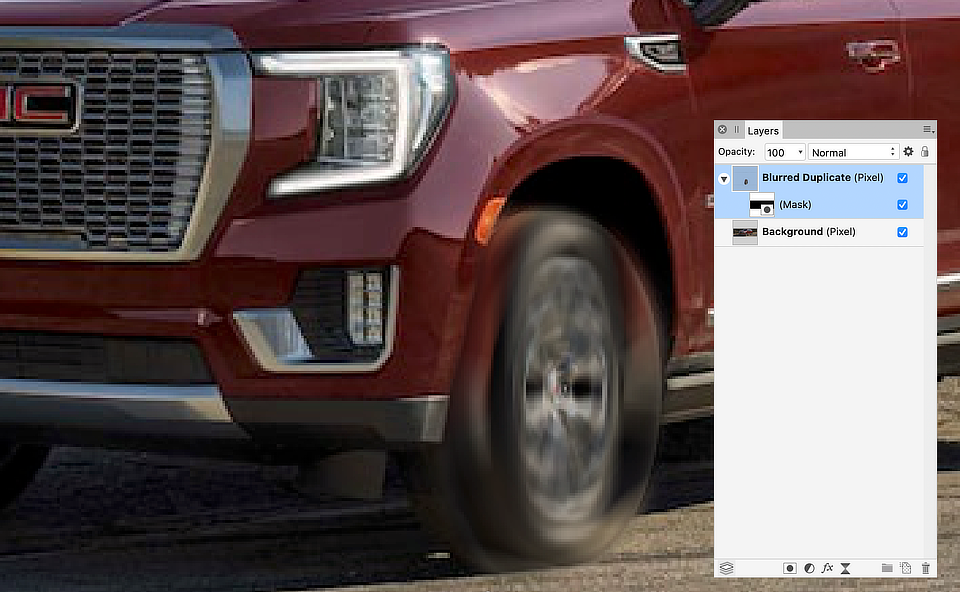
Here's an alternative. Not perfect, but it does allow you to re-shape the radial blur. (1) I started with a photo, similar to the one you used. (2) I duplicated the photo, and applied a radial blur, centered on the middle of the tire. (3) I clicked the "Merge" button, making the radial blur a destructive edit, albeit on a separate layer. (4) Since the radial blur is now a part of the pixel layer, I can choose the Move tool and "squeeze" the blurred layer inward, so that the shape of the blurred tire matches the elliptical shape of the original. (5) Now, it's just a matter of applying a mask to the blurred duplicate layer, so that only the tire remains, and the rest of the non-blurry original is seen. (1) The original (2,3) The blurred, duplicate layer (4) Squeezing the blurred layer inward (5) The blurred layer, masked to reveal only the tire.
-
@Old Bruce - when the OP said he wanted to stitch images, I assumed he was talking about creating panoramas. On the other hand, I know what they say about “when you assume…”
-
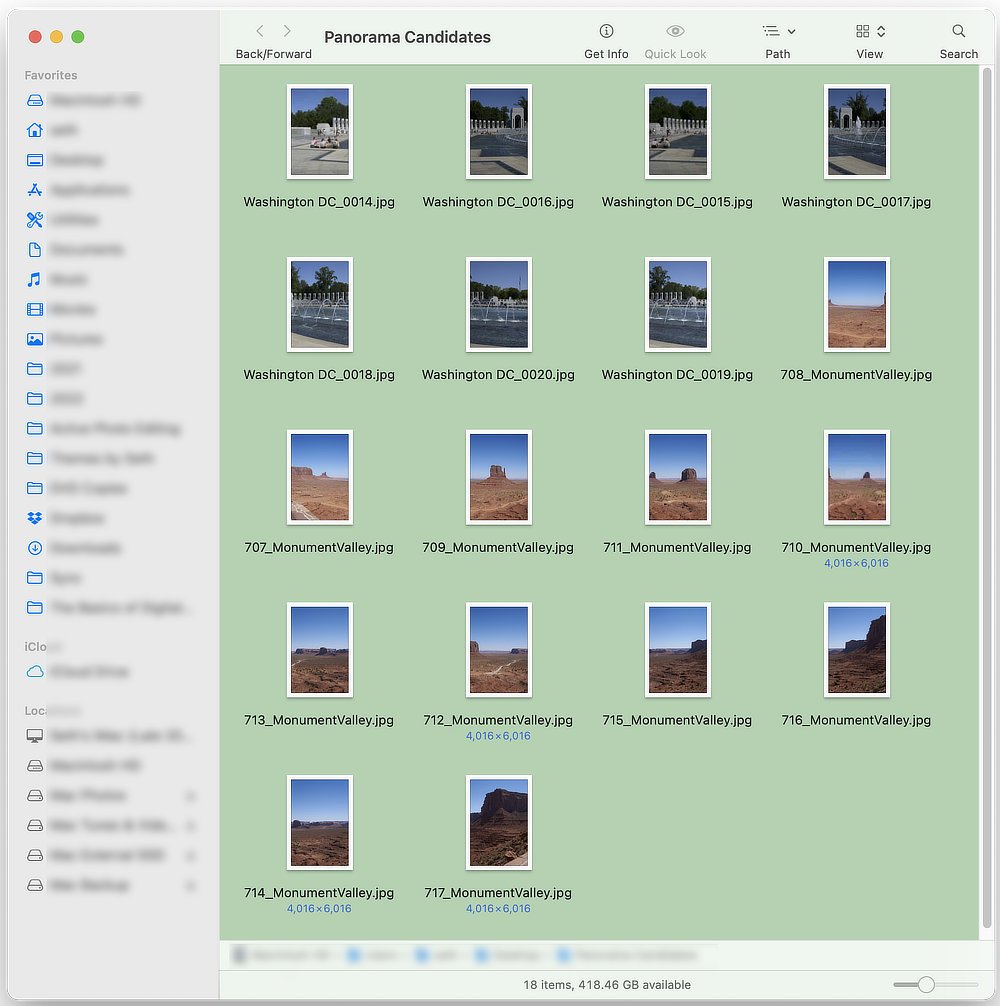
Absolutely, it does. From the File menu, choose New Panorama… and you'll be able to choose whatever images you think are candidates for stitching. I've got a folder called "Panorama Candidates" which contains 18 individual images that could come together into panoramas. Add them to the dialog box that opens and click the Stitch Panorama button. In this video (below) I've chosen all 18 candidate images, and Affinity Photo has created 2 panoramas from them. They open as separate documents once I hit OK. Two Panoramas.mp4
-
editing in affinity
smadell replied to BUNMIO's topic in Pre-V2 Archive of Desktop Questions (macOS and Windows)
Is there a layer selected in the Layers panel? There needs to be. Are you working on an Image layer? If so, you need to Rasterize it. -
To answer your other questions - here’s a good video by Dave Straker about using the HSL adjustment. And here is a video from Serif about Blend Ranges. https://affinity.serif.com/en-gb/tutorials/photo/desktop/video/342752528/
-
My answer to you regarding use of Quick Masking only had to do with the method you went on to describe. There are many (better) ways to accomplish what you seem to be trying to do. The first one that comes to mind is an HSL adjustment. Add an HSL adjustment layer above your photo, click the red circle, then click the “Picker” botton on the HSL panel. Use the picker to choose the color (on the photo itself) that you’re aiming to modify. The hue, saturation, and luminance can all be adjusted, and will be confined to the red you have chosen. If there are reds getting altered in other parts of your photo, and you don’t want this, click on the adjustment layer (in the Layers panel) and then paint in black on the areas you want to supress the adjustment; since the adjustment layer has a built-in mask the painted black effectively masks the adjustment from showing up in that area. Also important, after using the picker tool to select the color you eant to modify, you can change the range of the color and the feathering of the color by moving the 4 little circles around the color wheel inside the HSL panel. There should be a good James Ritson video about this that you can watch on the Serif website. It’s way easier tounderstand if you see it happen in a video!
-
document repair
smadell replied to vpkumar's topic in Pre-V2 Archive of Desktop Questions (macOS and Windows)
Thank you, @vpkumar - I'm glad this helped. -
Never having used Photoshop, I’m not sure how its QuickMask works. But, in Affinity Photo the red overlay in QuickMask indicates areas that are not selected. Painting with white on the QuickMask will remove the red overlay, indicating that these areas have been selected; painting with black will remove the selection. You can also use the Selection Brush along with QuickMask, which will select and snap to edges as well. Also, if you make a selection and then activate QuickMask, the area already selected will show up without the red overlay; you can modify it inside of QuickMask, as above. When you toggle the QuickMask off, the areas that were shown without the red overlay are the ones that are selected. Except for the question of whether red overlays indicate the selected area or the UNselected area, it sounds like the Affinity Photo QuickMask works exactly as you are hoping it will.
-
document repair
smadell replied to vpkumar's topic in Pre-V2 Archive of Desktop Questions (macOS and Windows)
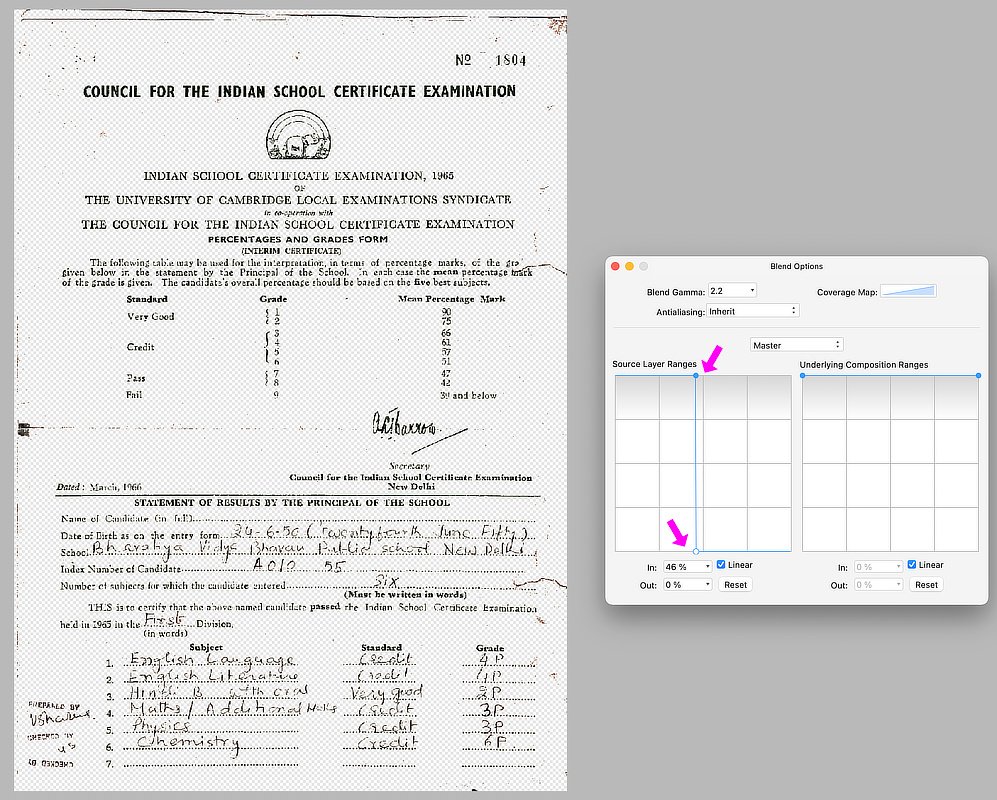
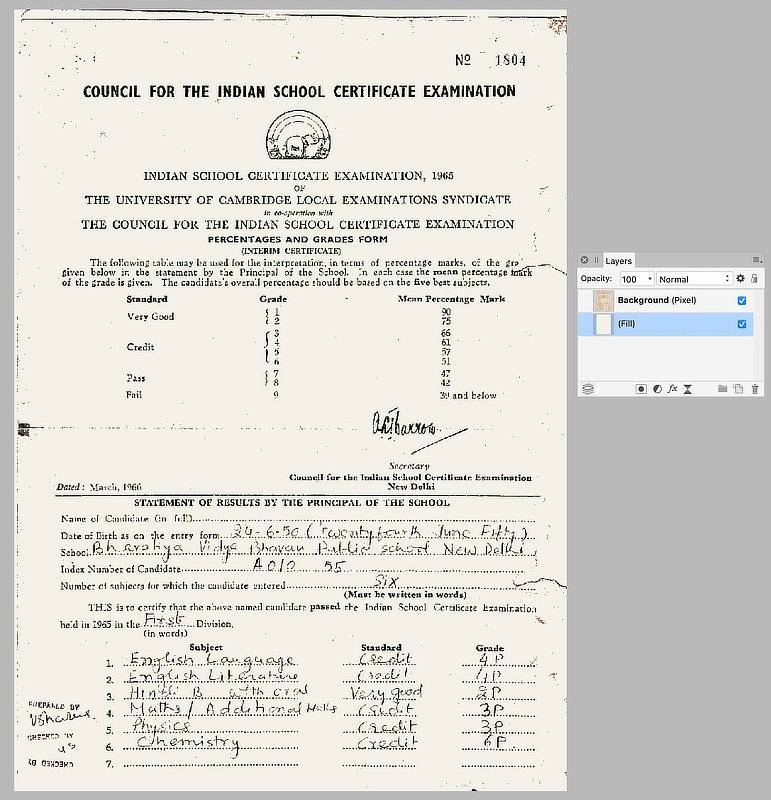
This should be a very, very straightforward problem for at least 75% of the way. Very conveniently, your document has black ink on a colored background. As I understand it, you want to work on the background (only) by selecting it. The easy way to get you most of the way there is to use Blend Ranges. Open the document into a layer (called "Background") and immediately click the gear icon at the top of the Layers panel. What you want to do is to show only the blacks and hide everything else. The first screenshot (below) shows you how I've done this. Next, i just put a Fill layer below the "Background" layer so that there is something with the desired color back there. You could use a paper texture, or just about anything you like. Now, you just have some clean-up to do on the "Background" layer (getting rid of the of the errant marks) and filling in some of the missing text, dots, and so forth. Getting to this point, though, should take no more than a few minutes, at most.

.jpg.5f633808cecb89adeae86ec859aff03b.jpg)
.jpg.5b0c79f24075c7d3cae583e4d96bda76.jpg)