

Lem3
-
Posts
157 -
Joined
-
Last visited
Posts posted by Lem3
-
-
6 hours ago, Pšenda said:
So you have to request it as significant improvement (in the suggestions section). For me, selecting the Move tool before doing the transformation is a natural and logical step, so I have no problem with it at all.
P.S. As is often the case - Help would need to be supplemented, because the current description of Power duplicate does not mention the need for the Move/Transformation tool in any way, and it can be quite confusing for many users.
Yep, color me confused, I assure you that happens often! I followed the instructions in the Help and it didn't work. I'll accept this as a deficiency in the Help file, but I'd prefer it worked as stated:
Create
Duplicate
Activate Move tool (it's actually more logical to me to click on Move here), transform in any way possible (drag, transform panel, etc.)
Duplicate as required -
7 hours ago, Pšenda said:
You must select Move Tool before duplication starting - Move Tool. select object/layer, Duplicate, Transform, Duplicate.
That may work, except the Help says Duplicate, Activate the Move Tool, Drag.
-
2 hours ago, R C-R said:
Wouldn't it be just as natural & perhaps even more logical to do the transform in the panel with that name?
I ran into this issue when I needed to visually align the first duplicate with an existing object on the canvas. It would not be natural or logical to try to do that using the Transform panel.
-
I'm convinced Power Duplication is broken, at least in Photo.
-
For Windows, there is Users > username > AppData > Roaming > Affinity > Photo > 1.0 > Workspaces > Photo > Shortcuts.xml
I created a new shortcut for Open Folder in Explorer (Ctrl-Shift-Alt-X) and found this stanza was added to that file:
<Item type="Command" command="Serif.Affinity.Commands.OpenFolderInExplorerCommand, Serif.Affinity, Version=1.10.5.1342, Culture=neutral, PublicKeyToken=null" key="X" modifierKeys="Alt, Control, Shift" />
It's left as an exercise for the user to extract that into a more user friendly format.
-
We have two more systems with this problem (total of 4). The two mentioned above are desksides, this report has one deskside and one laptop. Specifications are the same for both:
Windows 10 Pro, 21H1, 19043.1766.On one deskside I replaced the wireless keyboard/mouse combination with wired versions, the failure continued. Anything else I should try?
-
I should note "Jill Wolcott" is not the OP with the "not responding" problem running Designer.
-
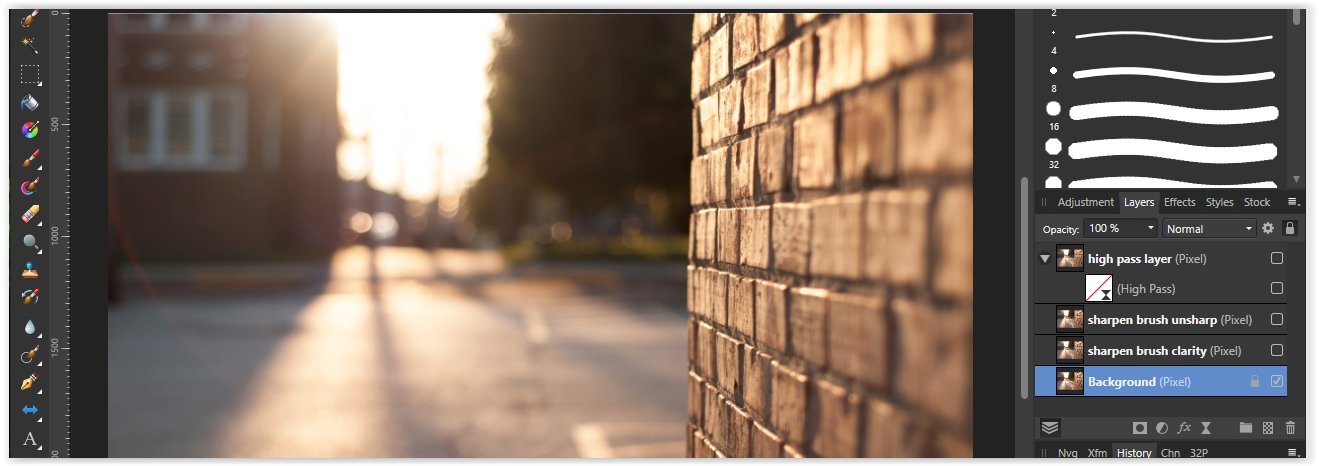
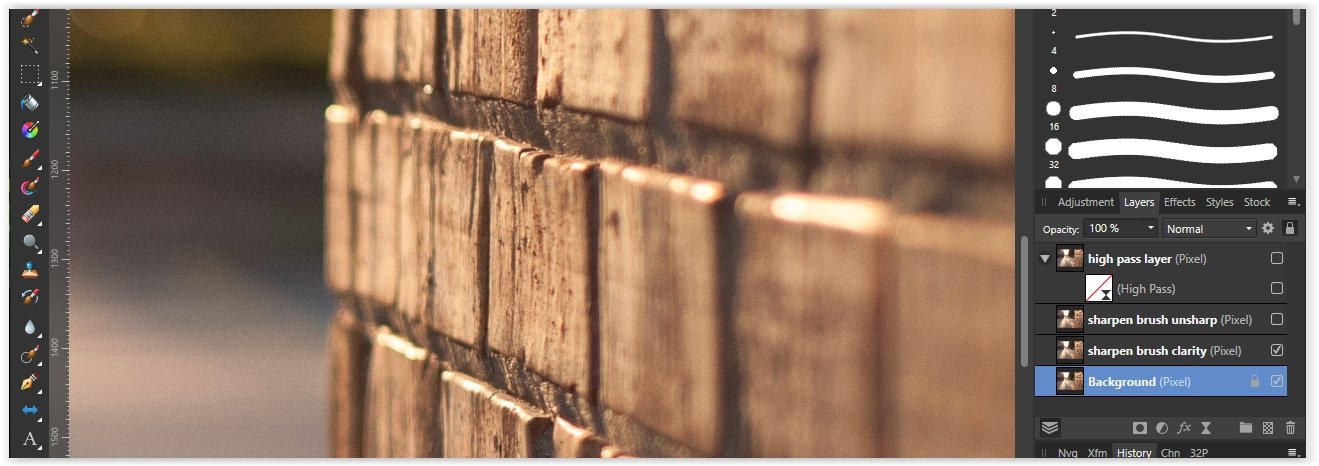
I am attaching an afphoto document showing the two methods of applying the Sharpen Brush. There are three layers, first the original and then:
- Using the Photoshop method: Button down, drag back and forth 10 times, button up. Even at 100% I see little, if any change.
- Using what is apparently the Photo method: Button down, drag, button up (repeat 10 times). The effect is pronounced at 2-3 repetitions, waaaay overdone at 10.
I don't use this method for sharpening (I think other methods are better) but Down-Drag-Up seems to be the Affinity designed way for the Sharpen Brush to work.
-
On my system, the Photoshop way of using the brush doesn't work:
Left Button Down
Drag, Drag, Drag,... until you're happy with the result
Left Button UpThe method required here is (Hardware Acceleration on):
Left Button Down
Drag
Left Button Up
[Repeat that sequence until you're happy] -
Affinity Photo 1.10.5.1342
Windows 10 Pro, 21H1, build 19043.1766I have the same issue on a second system:
AP 1.10.5.1342 (beta)
Windows 10 Pro, 21H2, build 19044.1766 -
According to this entry from way back being able to use the spacebar to pan the image while making a freehand selection was broken but fixed. However it isn't working for me. Should it be?
-
My go-to tool for chasing down BSOD events is WhoCrashed:
-
Sounds like this problem?
-
4 hours ago, jimh12345 said:
I used to be a developer and we never liked having to add code to support old standards - that's not the best use of our time, and it can be tough to get right. But I'm pretty sure AP will hear from other photographers with "legacy" IPTC. If there were only some migration tool that would rewrite IPTC in the new format. Are any of the big image-editing programs scriptable - or able to read some command-line parameters for "load" and "save"? If so I could - with care - update all my files.
Do you "speak" php? There are built-in functions to read and write IPTC data, although it's not clear which format(s) it requires. An example of iptcparse() in action:
-
I would think this should work for any running program:
Start Affinity Photo, then open Task Manager.
Click the ">" next to "Affinity Photo (2)"
Right click on sub-item "Affinity Photo"
Click on either context menu item "Open File Location" or "Properties" -
If you have a selection active, the tool will only operate on pixels contained within the selection. Press Ctrl-D to remove the selection.
-
For an eye, make the selection, copy to a new layer with Ctrl-J, then menu item Arrange -> Flip Horizontal.
-
3 hours ago, jimh12345 said:
Well that would come close, probably close enough, but doesn't let me tune the selection like I did with HSL. I'd like to use the selection I already have.
HSL allows you to target a set of colors, but it isn't making a selection in the "marching ants" around a set of pixels sense.
-
Select -> Select Sampled Color ?
-
11 minutes ago, JimmyJack said:
So, on a PC, in a vector drawing program, there's no way to add a point while drawing? One literally has to switch tools?? That's hilarious!! 🤣😂
Ctrl-Click (in the Pen Tool) used to add a node. But, as explained in the link above, an "update" to the Node Tool had the unintended consequence of breaking that.
-
If you press Ctrl (temporarily switches to the Node Tool) and notice the options at the bottom of the window one is "Drag + Shift to add nodes to selection" But this doesn't work as per this conversation:
The only way to add a node to a curve is to switch to the Node Tool (you can use the shortcut) and click where you want the new node.
-
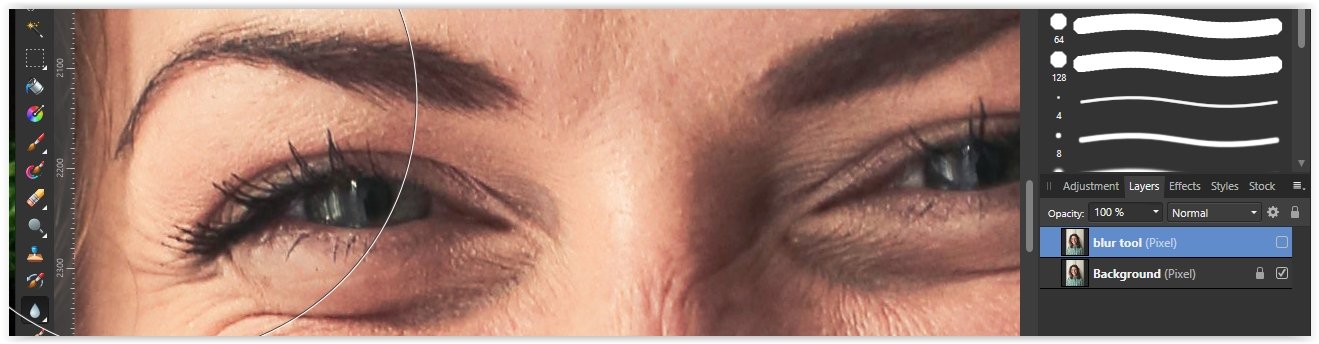
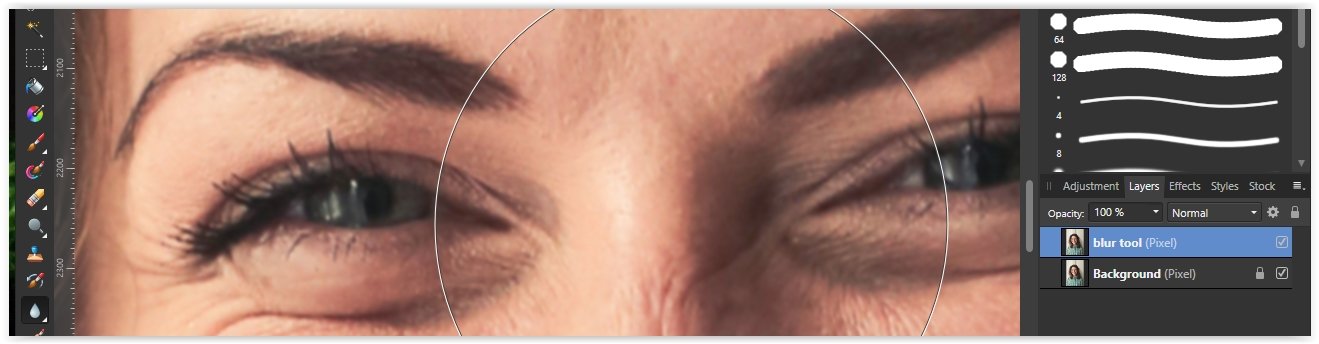
I occasionally use the Blur brush. As shown above, it works, though the effect is subtle. I always sharpen with the Live Filter layer, so this is my first attempt at the Sharpen brush and I can't get it to work either. I am attaching screenshots of
- The full image I'm using
- Image zoomed, no sharpening
- The image after vigorous use of the Sharpen brush in Clarity mode. Opacity/Flow/Hardness are always 100%.
- The image after the Sharpen brush in Unsharp mode.
- To prove I'm not crazy, the image with a High Pass Live Filter applied.
I can see no difference between the original and either of the results with the Sharpen brush tool.

-
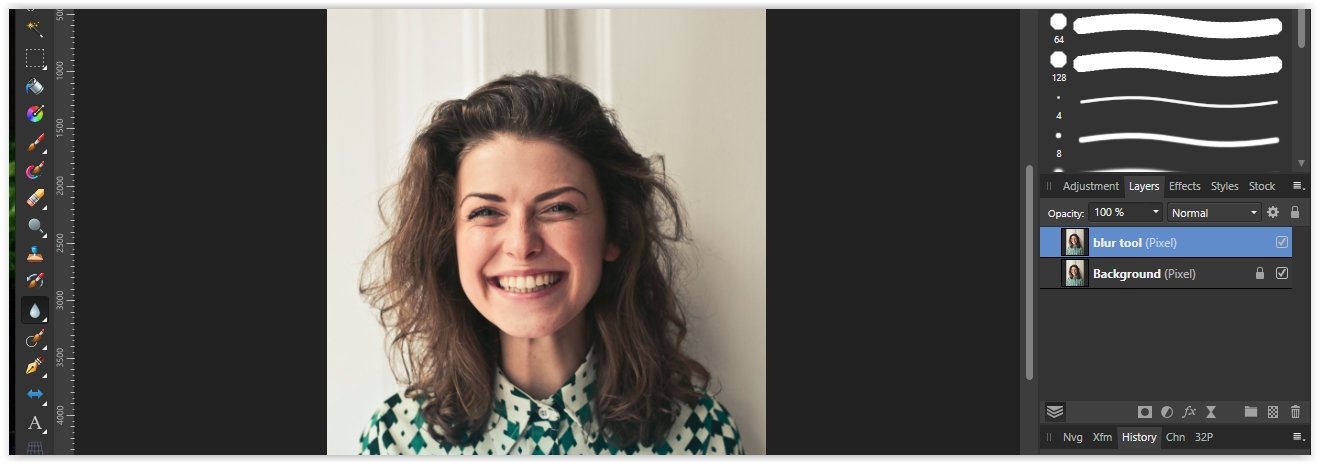
The blur tool works for me, but I find seeing its effect depends on the size of the image and the zoom level. The "blur" images show what I achieved with about 15 strokes of the brush (set to 100% opacity/flow/hardness). If you zoom out to about 12% (from 100%) you'd think nothing had changed. Image size is 3840 x 5760 px.
-
On 2/24/2022 at 6:11 PM, cutout3 said:
I open the image in afphoto. From there I usually save it in either JEPG or PNG (depending), and then if I want it save to afpho, "Save As" to afphoto.
So you
- Open using the menu File -> Open... Not "Open With" from Explorer or by dragging into the AP window.
- You create a JPG or PNG file using File -> Export...
- Then save the afpho file with File -> Save As...


AP 2.1.0.1730 mask variants not working
in [ARCHIVE] 2.5, 2.4, 2.3, 2.2 & 2.1 Other New Bugs and Issues in the Betas
Posted
As per the Release Notes:
Adjusted mask behaviour
From customer feedback the drop down menu when hitting the mask button in layers panel has been removed, and logic for how the assistant determines if a mask should be added as a new layer or a child altered.