lukejanicke
-
Posts
30 -
Joined
-
Last visited
-
 Ferdinando Traversa reacted to a post in a topic:
Text frame auto height and width
Ferdinando Traversa reacted to a post in a topic:
Text frame auto height and width
-

LaTeX typesetting plugin in Designer
lukejanicke replied to Adrian_M's topic in Feedback for Affinity Designer V1 on Desktop
Update: I now regularly make equations in Word, export as EPS, and place in Affinity Designer. They place as curves, so no more editing. But you then have full control over sizing/style etc. Then I usually copy and paste straight back into Word (e.g. a test paper that needs figures) and skip the whole expert from Affinity step. Remarkably, the font sizes stay consistent! -
 Patrick Connor reacted to a post in a topic:
No symbol panel in 1.7.0.249 (Mac)
Patrick Connor reacted to a post in a topic:
No symbol panel in 1.7.0.249 (Mac)
-
walt.farrell reacted to a post in a topic:
No symbol panel in 1.7.0.249 (Mac)
-
No symbol panel in 1.7.0.249 (Mac)
lukejanicke replied to OleR's topic in [ARCHIVE] Publisher beta on macOS threads
Yes. But for now it only works that way as an initialiser. You can’t change those style decisions and re-apply them across the document. Re-applying Master Pages to child Pages will reset the style AND content of text frames that are defined on the Master Page. I only lost 20 minutes of work before I discovered this the hard way, and I won’t make that mistake again. Patrick, that’s great to hear. In the meantime, I think I can work with Master Pages and Text Styles to get the end product I want. -
No symbol panel in 1.7.0.249 (Mac)
lukejanicke replied to OleR's topic in [ARCHIVE] Publisher beta on macOS threads
The help files are pretty clear now. Master Pages are meant for design elements that are common across pages, and not for designing template-like placeholders for controlling styles across different Pages’ content. They’re not like Master Slides in PowerPoint. I don’t have any experience with Adobe ID or other publishing applications (unless you count Word), but it definitely seems like the original intention was there. -
No symbol panel in 1.7.0.249 (Mac)
lukejanicke replied to OleR's topic in [ARCHIVE] Publisher beta on macOS threads
Oh dear. Came looking for how to apply new styles from Master Pages without replacing content on Pages. It looks like the Symbols Panel is gone completely. It shows up in Designer Persona, but not in Publisher Persona. Can anyone confirm? -
lukejanicke changed their profile photo
-
Hide context menu
lukejanicke replied to shushustorm's topic in Feedback for Affinity Designer V1 on iPad
Came looking for an answer for this, and then stumbled on the answer by accident. Tap the top right icon to hide the UI twice quickly. The context menu hides with the rest of the UI. -
Vector Brush Tool sometimes uses fill color
lukejanicke replied to lukejanicke's topic in Pre-V2 Archive of iPad Questions
Good to know. Thank you! -
lukejanicke reacted to a post in a topic:
Vector Brush Tool sometimes uses fill color
-
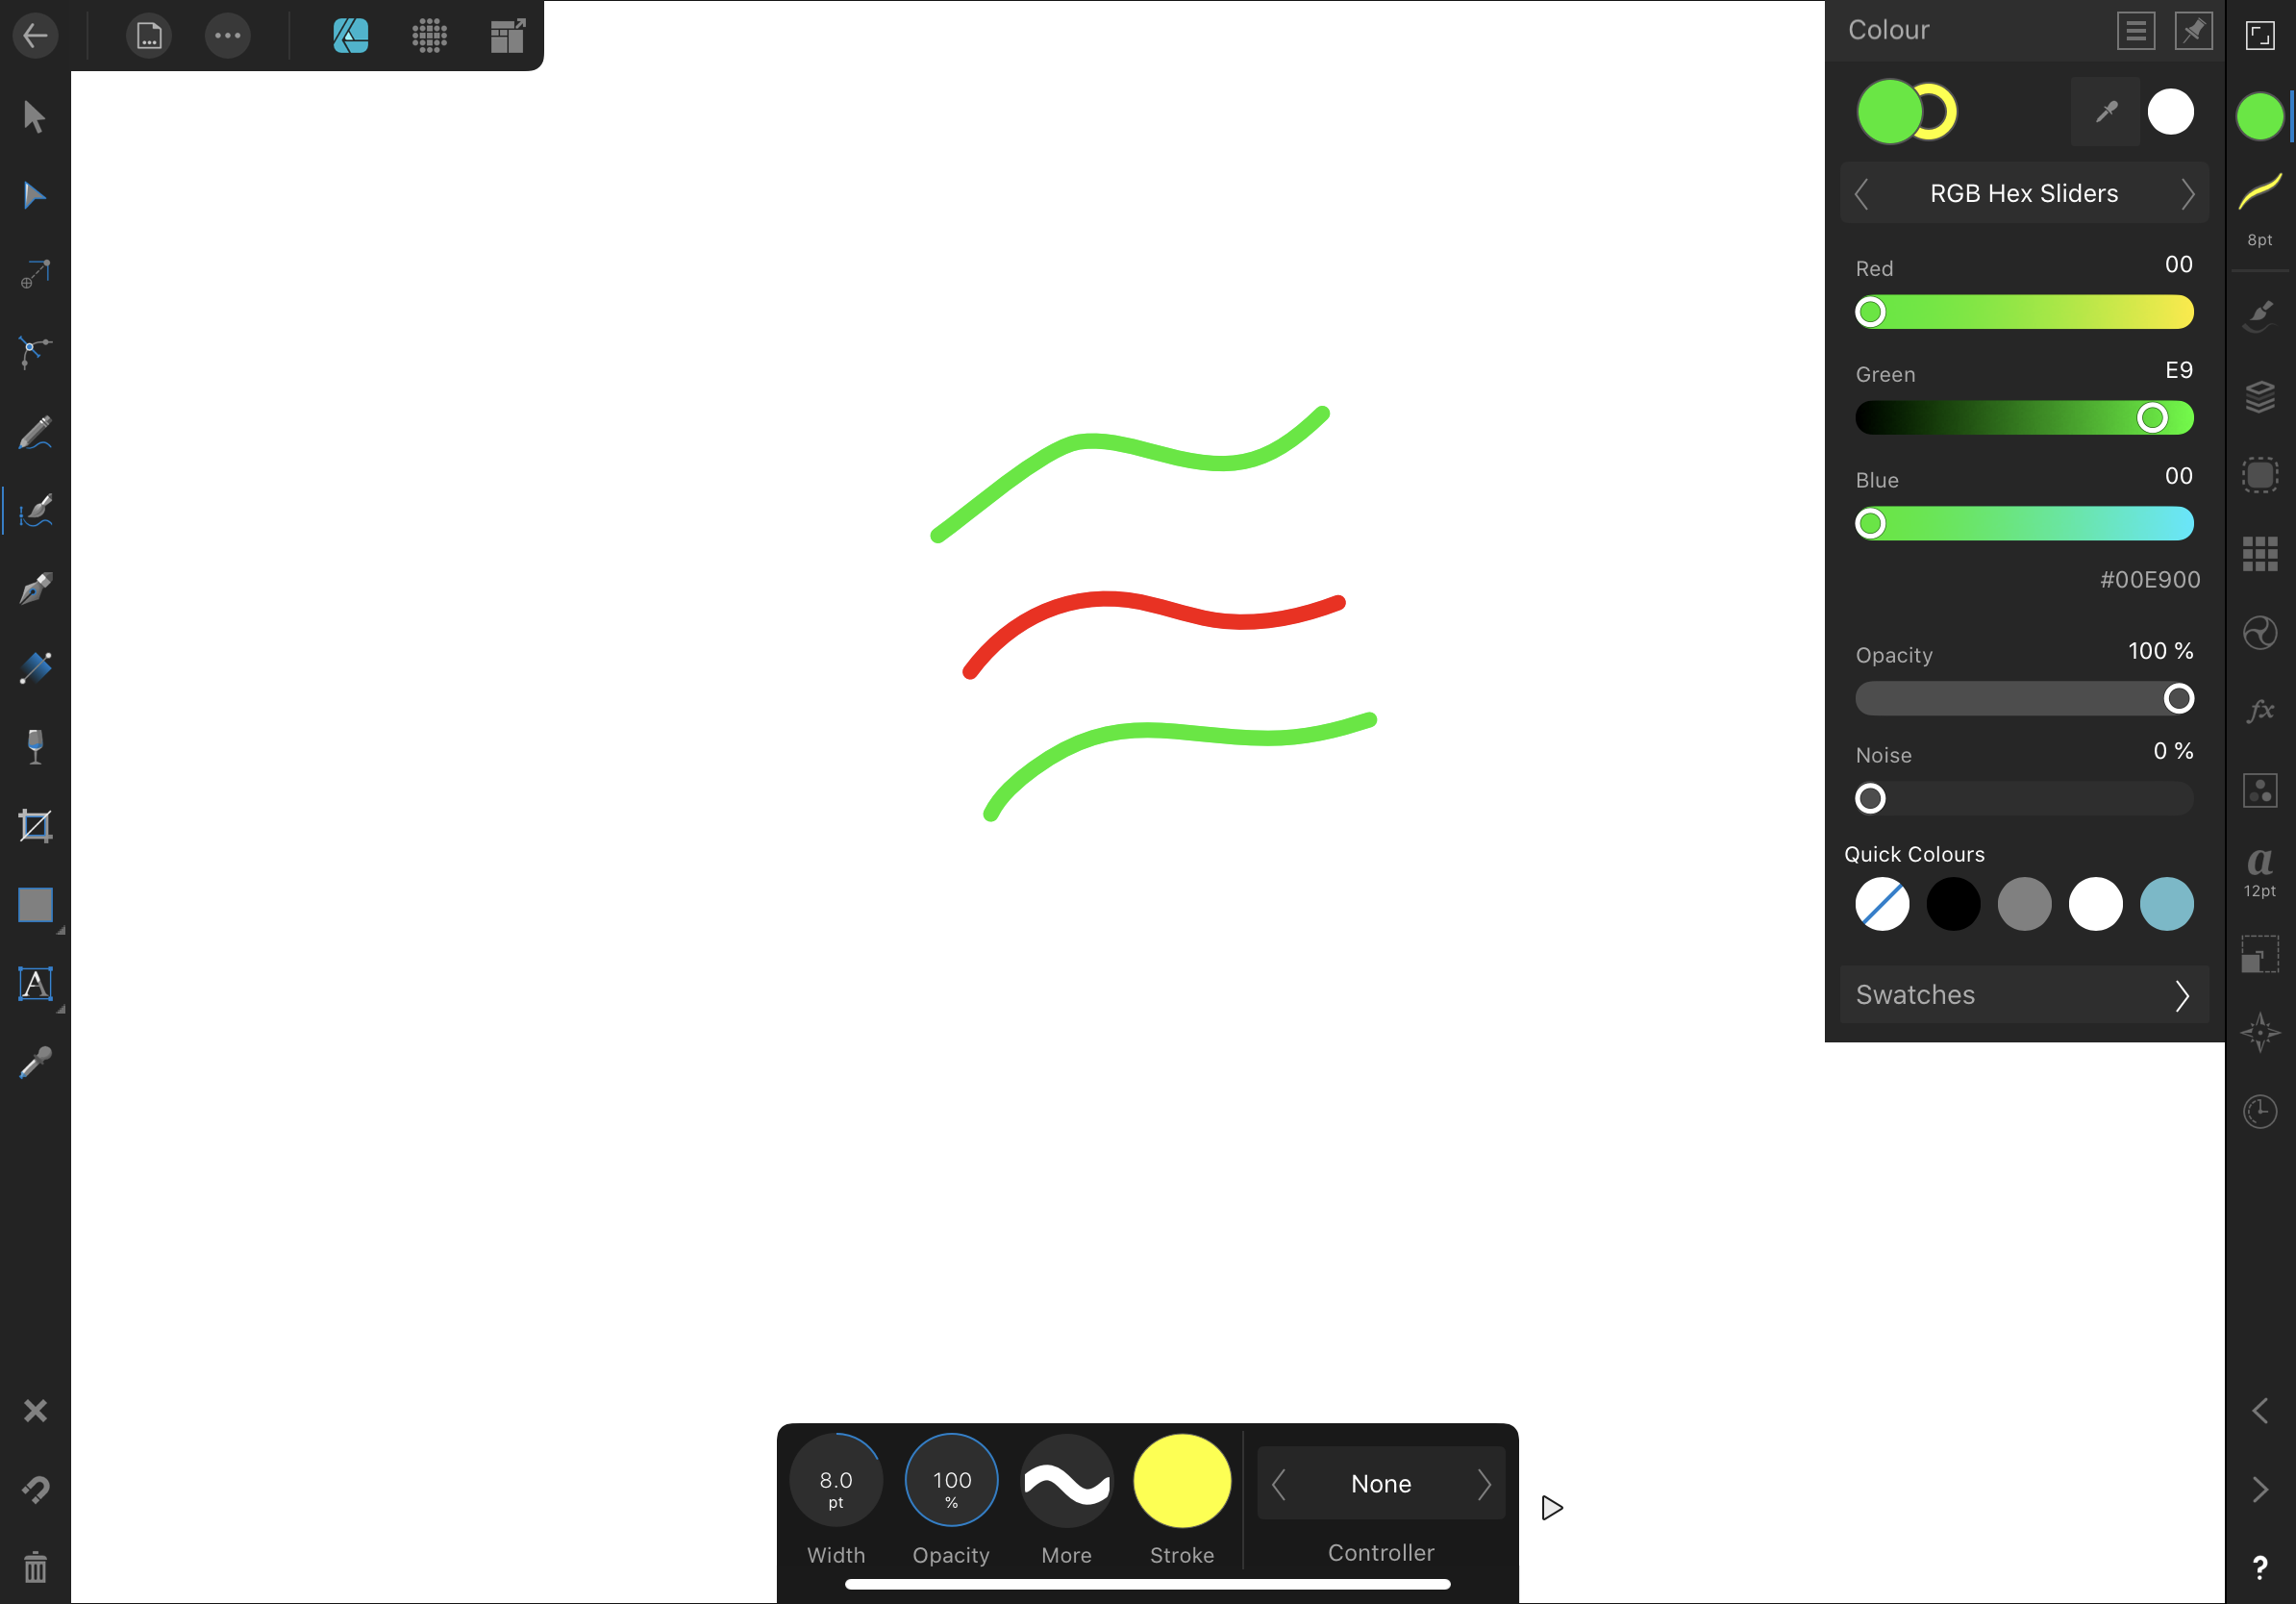
I just noticed that the Vector Brush Tool uses the stroke color or the fill color depending on which is selected on the colour panel. If the fill colour is selected, then the Vector Brush Tool uses that color, even if you change the stroke color from the context menu at the bottom of the screen. This is unexpected behaviour. The Vector Brush Tool should always use the stroke colour, right? In this screenshot, the top line was drawn with the the green fill colour selected. The second line was drawn with a red stroke color selected. The third line was drawn after changing the stroke color to yellow from the context menu but then also selecting the green fill colour from the color panel. The colours should be (from top to bottom): red, red, yellow. At least the behaviour is predictable so it’s easy to work around. I’m using Affinity Designer for iPad 1.7.2.6 on an iPad Pro 11" with iPadOS 13 public beta 6. I’ve only just started using Affinity Designer, so I’m not sure whether iPadOS beta is part of the problem.

-
Pšenda reacted to a post in a topic:
Still problems with Corners Expanding Stroke AD 1.6 B11
-
slice tool snap to grid?
lukejanicke replied to SLowmo75's topic in Pre-V2 Archive of Desktop Questions (macOS and Windows)
What I do... Use a rectangle with no colour for line or fill. Group it with the elements you want sliced. Make slice from the group. Export. Unfortunately, I don’t think this will help if you have stuff that span across your intended slices. -
lukejanicke reacted to a post in a topic:
Font size in SVG
-
Font size in SVG
lukejanicke replied to lukejanicke's topic in Pre-V2 Archive of Desktop Questions (macOS and Windows)
Solved! I should have noticed that ratio. I thought I had tried changing DPI but then I noticed that even if the document’s DPI is set to 96, the SVG export DPI is automatically set to 72 at first. When I set the document DPI to 96 and also set the SVG export DPI to 96, then the text in the exported image is 12pt/16px on the webpage, same size at the HTML 12py/16px text. Thanks! -
Font size in SVG
lukejanicke replied to lukejanicke's topic in Pre-V2 Archive of Desktop Questions (macOS and Windows)
Last post on this issue and then I’ll wait to see what others think. My interim solution is to use size 16 pt font in Affinity Designer. It will export as 16 px, which matches the HTML where it will be embedded. -
Font size in SVG
lukejanicke replied to lukejanicke's topic in Pre-V2 Archive of Desktop Questions (macOS and Windows)
When I change the Document Units in Document Setup… from from pixels to points, 400px by 300px becomes 400pt by 300pt automatically. But the image doesn’t get bigger or smaller, which supports the conclusion that 12pt and 12px are the same in Affinity when exporting to SVG. -
Font size in SVG
lukejanicke replied to lukejanicke's topic in Pre-V2 Archive of Desktop Questions (macOS and Windows)
When I manually change 12px in the exported SVG file to 12pt, the text in the SVG is displayed bigger than originally designed in Affinity. This will be a problem for designing figures. -
Font size in SVG
lukejanicke replied to lukejanicke's topic in Pre-V2 Archive of Desktop Questions (macOS and Windows)
I notice that 12pt in CSS is reported at 16px in Developer Tools (in Safari). That seems relevant. -
Font size in SVG
lukejanicke replied to lukejanicke's topic in Pre-V2 Archive of Desktop Questions (macOS and Windows)
I tested PDF and Affinity Designer exports 12 pt to the same size as a Word document does to PDF. -
Font size in SVG
lukejanicke replied to lukejanicke's topic in Pre-V2 Archive of Desktop Questions (macOS and Windows)
Okay, so I just noticed that the exported SVG gets font-size:12px, and I think that should be 12 point not 12 pixels. Does this mean that when you choose 12 pt in Affinity Designer, you’re really choosing 12 px?