lukejanicke
-
Posts
30 -
Joined
-
Last visited
Everything posted by lukejanicke
-

LaTeX typesetting plugin in Designer
lukejanicke replied to Adrian_M's topic in Feedback for Affinity Designer V1 on Desktop
Update: I now regularly make equations in Word, export as EPS, and place in Affinity Designer. They place as curves, so no more editing. But you then have full control over sizing/style etc. Then I usually copy and paste straight back into Word (e.g. a test paper that needs figures) and skip the whole expert from Affinity step. Remarkably, the font sizes stay consistent! -
No symbol panel in 1.7.0.249 (Mac)
lukejanicke replied to OleR's topic in [ARCHIVE] Publisher beta on macOS threads
Yes. But for now it only works that way as an initialiser. You can’t change those style decisions and re-apply them across the document. Re-applying Master Pages to child Pages will reset the style AND content of text frames that are defined on the Master Page. I only lost 20 minutes of work before I discovered this the hard way, and I won’t make that mistake again. Patrick, that’s great to hear. In the meantime, I think I can work with Master Pages and Text Styles to get the end product I want. -
No symbol panel in 1.7.0.249 (Mac)
lukejanicke replied to OleR's topic in [ARCHIVE] Publisher beta on macOS threads
The help files are pretty clear now. Master Pages are meant for design elements that are common across pages, and not for designing template-like placeholders for controlling styles across different Pages’ content. They’re not like Master Slides in PowerPoint. I don’t have any experience with Adobe ID or other publishing applications (unless you count Word), but it definitely seems like the original intention was there. -
No symbol panel in 1.7.0.249 (Mac)
lukejanicke replied to OleR's topic in [ARCHIVE] Publisher beta on macOS threads
Oh dear. Came looking for how to apply new styles from Master Pages without replacing content on Pages. It looks like the Symbols Panel is gone completely. It shows up in Designer Persona, but not in Publisher Persona. Can anyone confirm? -
Hide context menu
lukejanicke replied to shushustorm's topic in Feedback for Affinity Designer V1 on iPad
Came looking for an answer for this, and then stumbled on the answer by accident. Tap the top right icon to hide the UI twice quickly. The context menu hides with the rest of the UI. -
Good to know. Thank you!
-
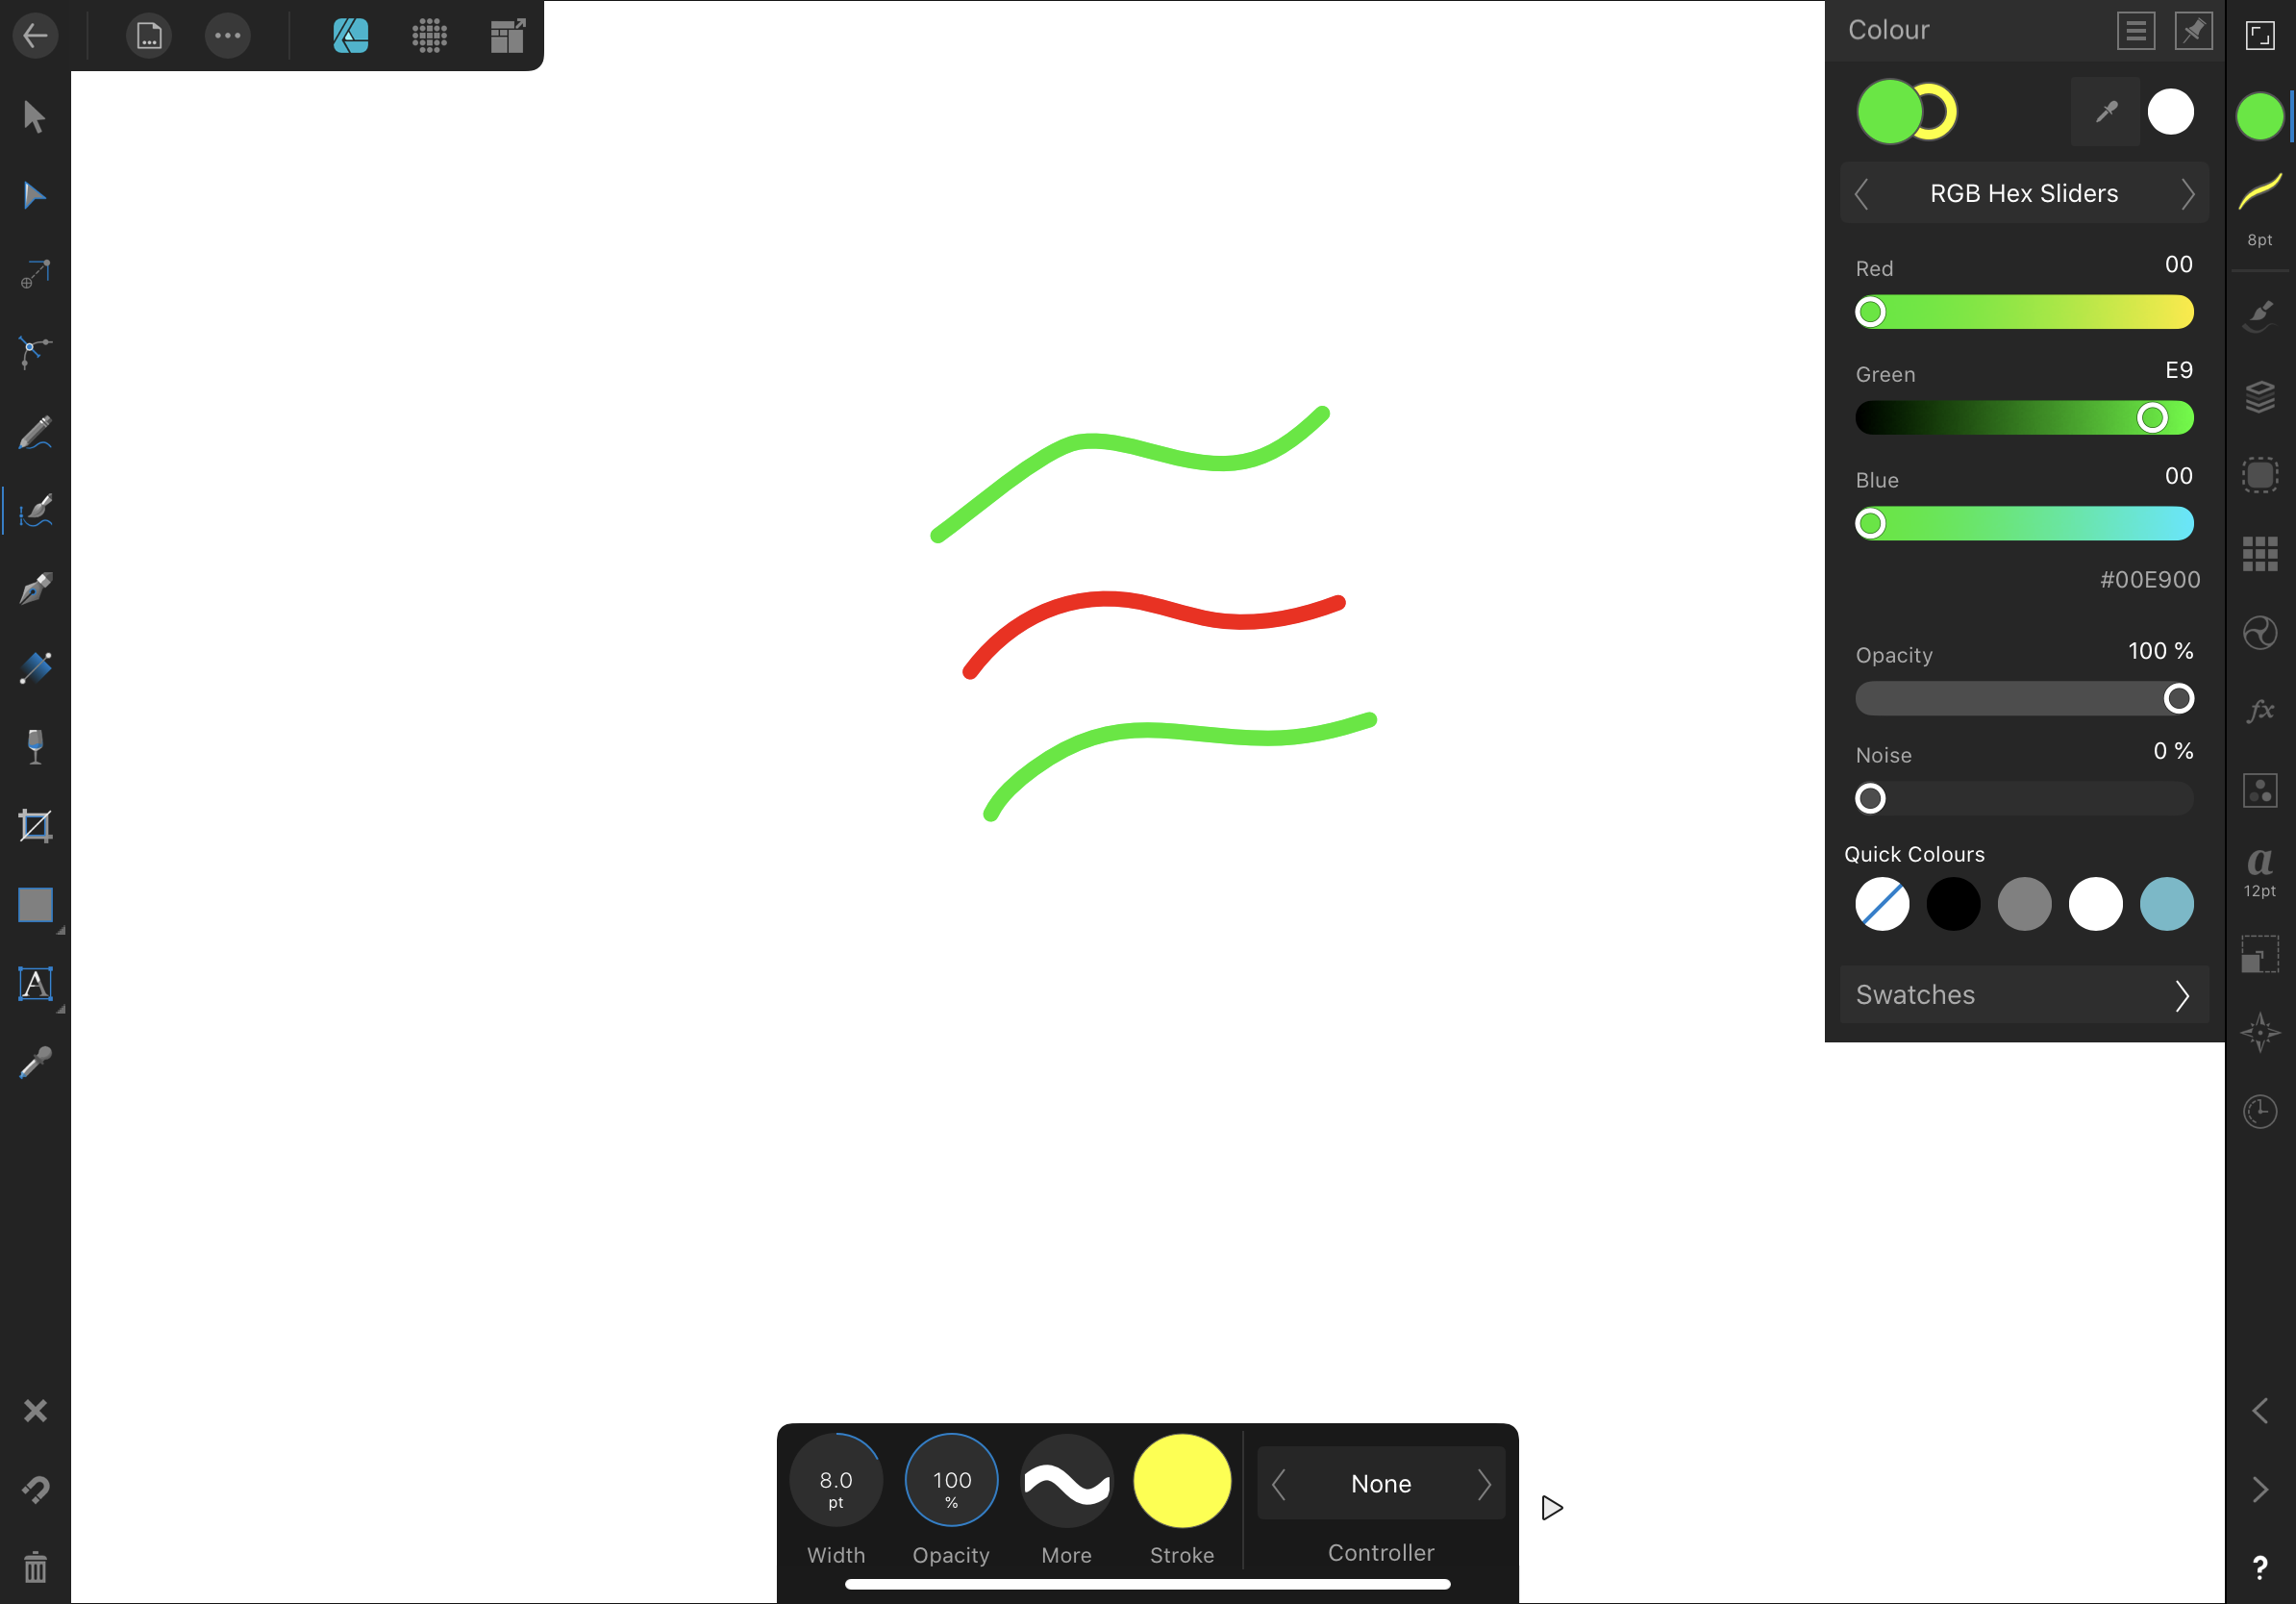
I just noticed that the Vector Brush Tool uses the stroke color or the fill color depending on which is selected on the colour panel. If the fill colour is selected, then the Vector Brush Tool uses that color, even if you change the stroke color from the context menu at the bottom of the screen. This is unexpected behaviour. The Vector Brush Tool should always use the stroke colour, right? In this screenshot, the top line was drawn with the the green fill colour selected. The second line was drawn with a red stroke color selected. The third line was drawn after changing the stroke color to yellow from the context menu but then also selecting the green fill colour from the color panel. The colours should be (from top to bottom): red, red, yellow. At least the behaviour is predictable so it’s easy to work around. I’m using Affinity Designer for iPad 1.7.2.6 on an iPad Pro 11" with iPadOS 13 public beta 6. I’ve only just started using Affinity Designer, so I’m not sure whether iPadOS beta is part of the problem.

-
What I do... Use a rectangle with no colour for line or fill. Group it with the elements you want sliced. Make slice from the group. Export. Unfortunately, I don’t think this will help if you have stuff that span across your intended slices.
-
Solved! I should have noticed that ratio. I thought I had tried changing DPI but then I noticed that even if the document’s DPI is set to 96, the SVG export DPI is automatically set to 72 at first. When I set the document DPI to 96 and also set the SVG export DPI to 96, then the text in the exported image is 12pt/16px on the webpage, same size at the HTML 12py/16px text. Thanks!
-
Last post on this issue and then I’ll wait to see what others think. My interim solution is to use size 16 pt font in Affinity Designer. It will export as 16 px, which matches the HTML where it will be embedded.
-
When I change the Document Units in Document Setup… from from pixels to points, 400px by 300px becomes 400pt by 300pt automatically. But the image doesn’t get bigger or smaller, which supports the conclusion that 12pt and 12px are the same in Affinity when exporting to SVG.
-
When I manually change 12px in the exported SVG file to 12pt, the text in the SVG is displayed bigger than originally designed in Affinity. This will be a problem for designing figures.
-
I notice that 12pt in CSS is reported at 16px in Developer Tools (in Safari). That seems relevant.
-
I tested PDF and Affinity Designer exports 12 pt to the same size as a Word document does to PDF.
-
Okay, so I just noticed that the exported SVG gets font-size:12px, and I think that should be 12 point not 12 pixels. Does this mean that when you choose 12 pt in Affinity Designer, you’re really choosing 12 px?
-
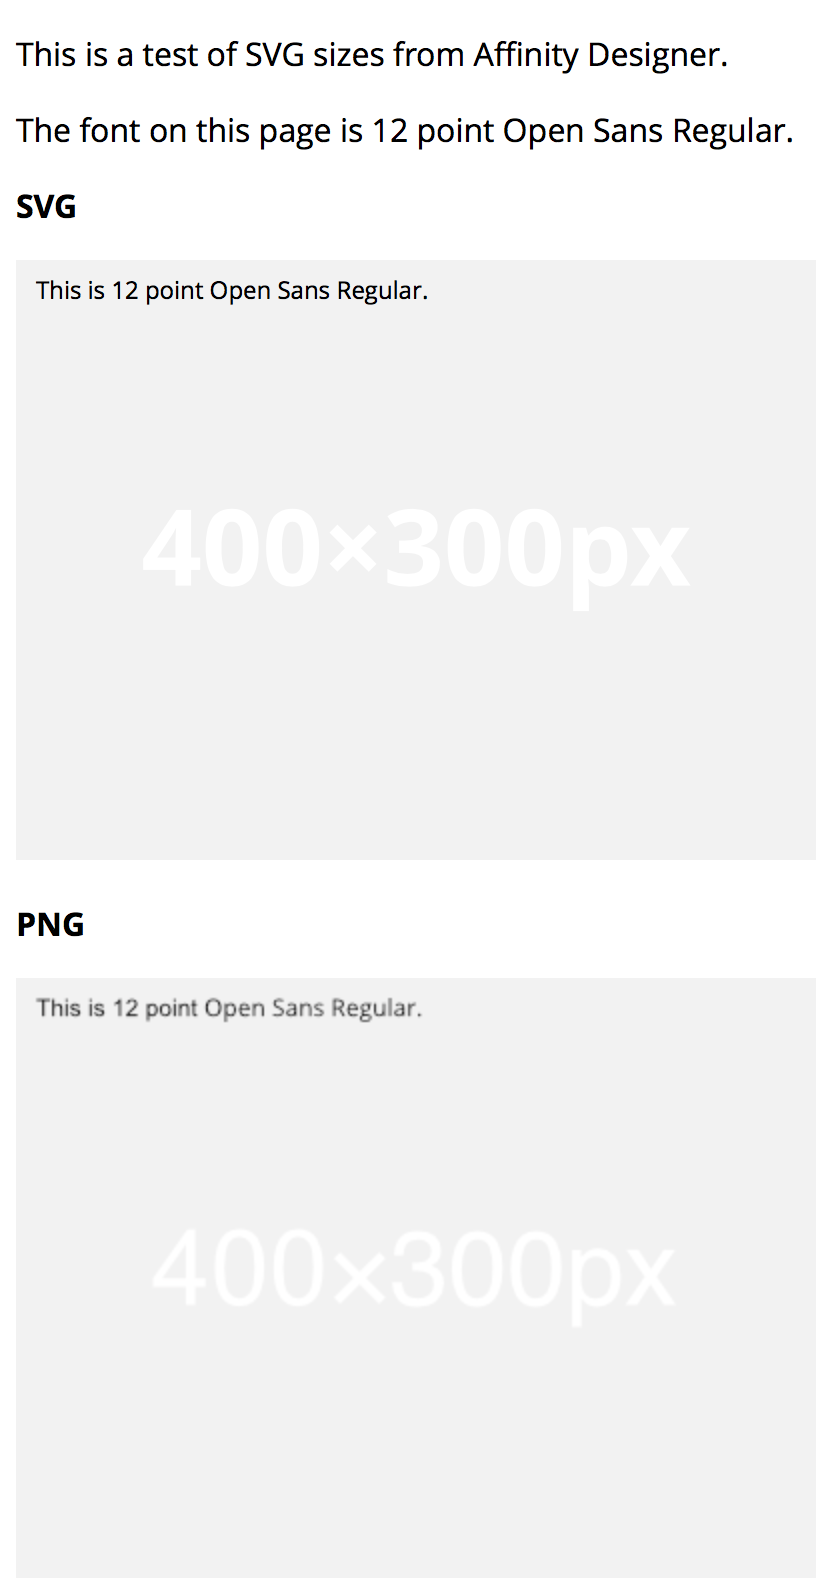
I am aiming to export SVG files with 12 point text (in Affinity) where that text is the same size as the 12 point text in the HTML where the SVG is embedded. As you can see, the text in the SVG and PNG is smaller that the text in the HTML above it. The HTML <!DOCTYPE html> <html lang="en" dir="ltr"> <head> <meta charset="utf-8"> <title>Test</title> <style media="screen"> * { font-size: 12pt; font-family: "Open Sans"; } </style> </head> <body> <p>This is a test of SVG sizes from Affinity Designer.</p> <p>The font on this page is 12 point Open Sans Regular.</p> <p><strong>SVG</strong></p> <p><object type="image/svg+xml" data="1.svg">Your browser does not support SVG.</object></p> <p><strong>PNG</strong></p> <p><img src="1.png" alt=""></p> </body> </html> The SVG <?xml version="1.0" encoding="UTF-8" standalone="no"?> <!DOCTYPE svg PUBLIC "-//W3C//DTD SVG 1.1//EN" "http://www.w3.org/Graphics/SVG/1.1/DTD/svg11.dtd"> <svg width="400px" height="300px" version="1.1" xmlns="http://www.w3.org/2000/svg" xmlns:xlink="http://www.w3.org/1999/xlink" xml:space="preserve" xmlns:serif="http://www.serif.com/" style="fill-rule:evenodd;clip-rule:evenodd;stroke-linejoin:round;stroke-miterlimit:1.41421;"> <rect x="0" y="0" width="400" height="300" style="fill:#f2f2f2;"/> <text x="10px" y="19.117px" style="font-family:'OpenSans-Regular', 'Open Sans', sans-serif;font-size:12px;">This is 12 point Open Sans Regular.</text> <text x="62.674px" y="162.808px" style="font-family:'OpenSans-Bold', 'Open Sans', sans-serif;font-weight:700;font-size:52.831px;fill:#fff;">400×300px</text> </svg>
-
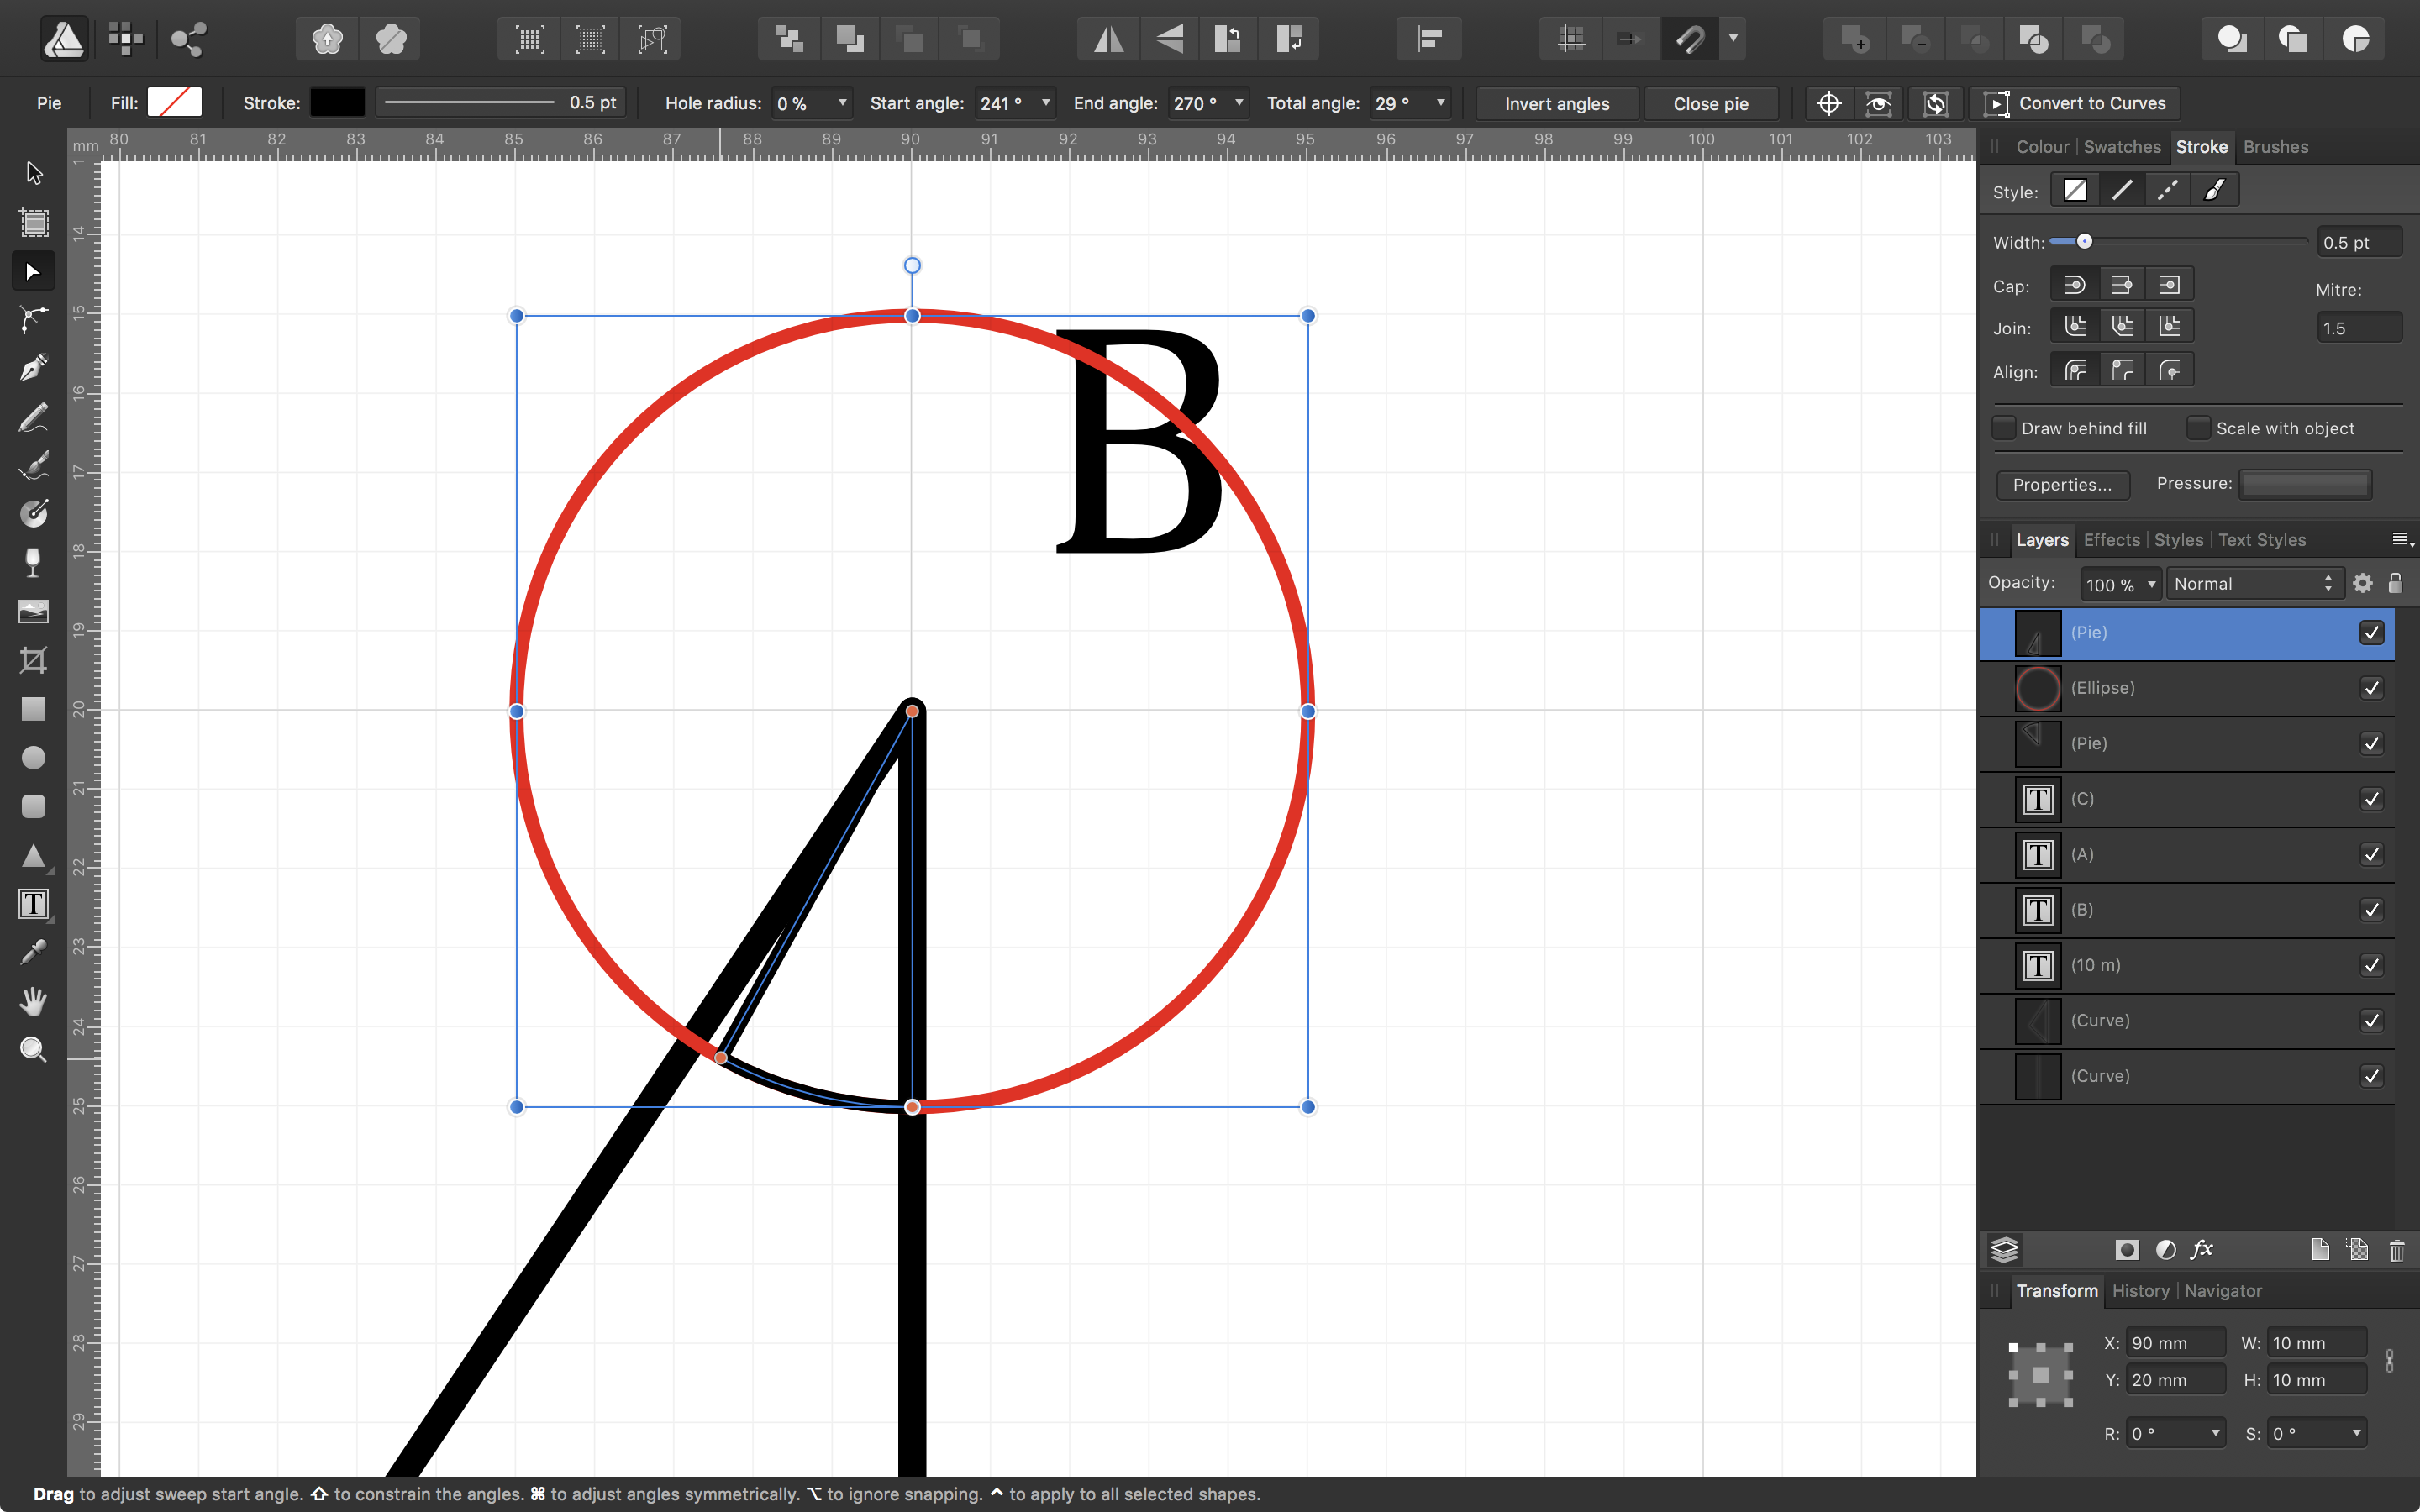
To further supplement @A_B_C’s excellent answer(s), if you want the bevel to activate at exactly 90° (or less), you need to set the Mitre to exactly the square root of 2, which is approximately 1.4142135624. If you enter ‘sqrt(2)’, Affinity will calculate the square root of 2 for you, but only to 3 decimal places, which means it rounds down to 1.414. At that value, the Bevel actually kicks in at 90°—squares get Bevel corners. If you want the Bevel to kick only when the inside angle is less than 90°, just bump 1.414 up to 1.415. Now anything less than square gets a Bevel. Of course, this is only if you want the strict result of Bevel for angles less than 90°. The default value of 1.5 means Bevel will kick in when the angle is less than about 84°. Finally, if you want no Bevel, which is why I came here, you just have to set a Mitre that you know will never be exceeded. Try the dimensions of your canvas, at least than it won’t matter if there is a Bevel. Feature Request? Option to turn Bevel off completely. With this feature, I don’t have to think about entering a big enough Mitre, I just click a button and I get sharp corners guaranteed.
-
Thanks! That was perfect for my needs. @gdenby Good to know! As a mathematician, I would love numeric access to those parameters.
-
Definitely, definitely need vector hatch fills. Workarounds are fine for now but custom defined vector fill patterns (with some predefined typical hatch and thatch patterns shipped with the app) would be useful for both technical and creative drawers. Lines get the dash feature. A simple hatch/thatch fill feature would look like that. An ultimate flexible feature would be to create custom fill patterns, like you do for brushes or symbols.
-
Oh, just noticed similarly, you can’t snap to other objects when rotating either. Only to multiples of 15 degrees.
-
Pie tool is great when I know the angle I want. But sometimes I want to snap to a line, like measuring out the angle between two intersecting lines when I don’t know the angle between those two lines. The pie tool node only snaps to common angles. It doesn’t snap to paths when you cross them. Even if you place another shape with a corner at exactly the intersection of the air and the pine, the pie node doesn’t pick it up. Is there any technique I am missing?
-
MEB and RCR, you both solved my problem: Frame Text Tool, autosized, then also use there bottom middle anchor point for exact numeric control over position. My use case is numbers on mathematics axes.
-
LaTeX typesetting plugin in Designer
lukejanicke replied to Adrian_M's topic in Feedback for Affinity Designer V1 on Desktop
@Medical Officer Bones Good tool that! I don’t currently use Visual Math Editor in any of my work flows so I hadn’t tested it. It renders equations in the browser using MathJax and exports equations as MathML, PDF or SVG. Of those three, you can only File > Place… the SVG files into Affinity Designer. As with .EPS files, the SVG file gets placed as a group of individual curves for each character, which might come in handy. You could apply different colours and styles to different parts of the equation. As with the other methods we have so far, you don’t have any control over the font/typeface. Worth noting that MathJax uses a range of fonts, including STIX General. -
Text frame auto height and width
lukejanicke replied to Noob's topic in Older Feedback & Suggestion Posts
I just arrived so not sure if the below is new since the OP. Using the Artistic Text Tool the text box is always tight around the text and you can use ENTER for multiple lines. Using the Text Frame Tool you can double click the bottom middle and right middle control dots. Make sure you resize the textbook to be bigger than the text, then double clicking will snap it back tight around the text. If you want wrapped text, you first have to manually break the lines using ENTER, then the right middle control dot will double click to the longest of your lines. Again, make sure you first resize the textbook larger than the text, or it might resize down to the next longest line, causing some more wrapping on the longest line(s). -
LaTeX typesetting plugin in Designer
lukejanicke replied to Adrian_M's topic in Feedback for Affinity Designer V1 on Desktop
If you export .EPS from Ipe, you can File > Place… it in Affinity Designer. See attached screenshot. Since you already have have TeX, you can install and use Ipe. Also get the graph ipelet (plugin) for plotting functions. http://ipe.otfried.org https://github.com/otfried/ipe https://github.com/otfried/ipelets https://github.com/otfried/ipelets/tree/master/graph My current TeX/LaTeX/Ipe setup doesn’t let me use other TeX math packages, but there’s probably a way to set that up and it seems you already have tools for getting the LaTeX that you want into PDF. So, just try exporting to .EPS from whatever you’re using. Then you can drop it in Affinity.