
mykee
-
Posts
371 -
Joined
-
Last visited
Posts posted by mykee
-
-
Bug have in 903 build. I tested with and without Open CL. With this export was fast, without was 4 minutes on my PC with buggy layer on, and image size get bigger without OpenCL. Link is same, there is 903 project and results too.
-
Huh! That's interesting! I didn't use thumbnails in history, but included, maybe help for you...
-
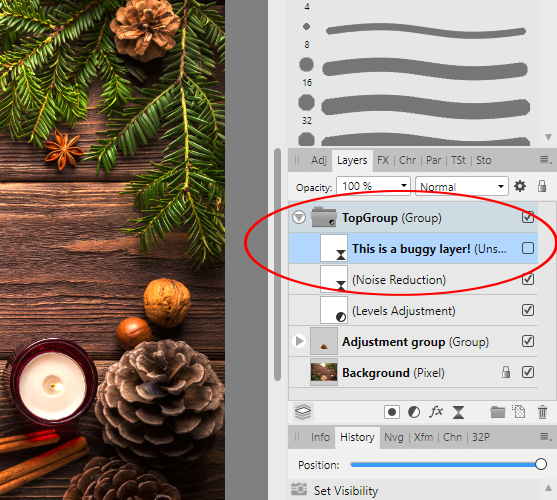
I tested with RC1 (version 900) and bug is there. But I found what generate this bug!
I have an Unsharp Mask layer in a Group, and if I turned off this, then generated image will perfect! If turn on this layer, then JPEG export will buggy.
Drive link is same with projects and samples: https://1drv.ms/u/s!Ar9GB-v89284gs0nuOICX591tkedCQ?e=67x372

-
Thanks for help, and I hope this will improvement in future, because area over hair need more transparent for perfect working.
-
I have many EPS file too, and convert to SVG (1.0 or 1.1 versions from Illustrator), to PDF (1.4 - 1.8 versions) or open with Inkscape was not helped.
I waiting a solution for this problem.
-
@Gabe thank you, I uploaded, and project includes original picture and cutted version as new layer.
-
Hi @Gabe,
Can I send this project as private? Photo is commercial licensed what I used.
-
Tested with build 885, and problem is there (link is same for samples).
I waiting fixes before final version will release.
-
Hello,
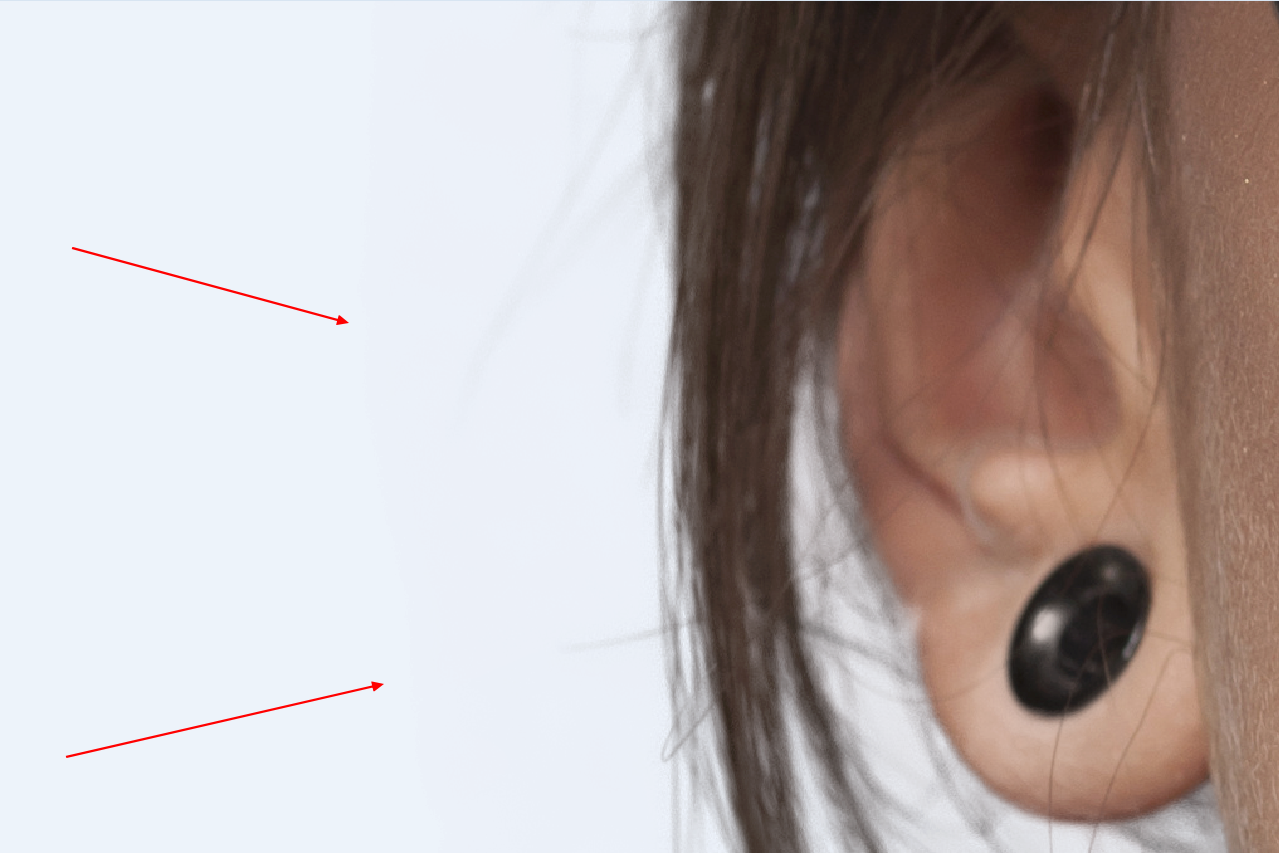
I use Refine after image selection, and selected Matte on image. In preview see very nice output. Cutted image send to a New Image. After PNG save I see a border around image when I zoom to this what leaved Matte area. Cuttted image is not clear on hair.
Please fix this, because this area will show on print.
Here is this image as PNG, if need:
-
Hi all,
I have a book, and fill textboxes with autoflow. But newer pages have vertical align middle.
How can I select all textboxes on selected pages and apply vertical align to top? If selected text with CTRL+A not helped, and align applied to active textbox only.
-
-
Sorry guys, I have latest driver, and generated with this "pixelate" image. I have Radeon RX 460. This will be a cascaded Live filters problem. I mixed with groups, masks too, with simple trees have no problem, or I use software based render (no GPU), but without acceleration I get 100% CPU load with this project.
-
This bug release in 876 too.
Link same is for 876 project, hardware acceleration is enabled.
-
5 minutes ago, Patrick Connor said:
by habit or because you use applications that do not support .jpeg?
I use *.jpg from 25 years (from DOS and Win 3.1)... Just this, no else. Same format with two extension type. I use shorter version always.
-
Quote
Default extension is first in the list (i.e. *.jpeg, *.tiff).
Why is *.jpeg extension by default on export? I use *.jpg extension for images on everywhere, and from now is very uncomfortable for me. Need change on every export of this extension
I'm sad!
-
Very interesting. I used standard live filters and adjustments (Unsharp mask, Noise Reduction, Levels), and a few curves for example, but groupped and used mask too on group. Maybe it's too hard for export?
-
Hello,
I have a project with many filters, and when I try export this to JPG, then will show a square(s) at random position on JPEG on every export (without any change).
Here is my test project with same filters and items, and three results. If I turn off OpenCL support on my Radeon RX 460 card, then square will no show.
This bug there is under 864 and 869 versions too!
Please check this!
-
Just a question: how can I use Pattern layers? I get a with and height parameters, but nowhere select image or anything.
Tried place an image, rasterized, select an area, and used Layer -> New Pattern Layer From Selection, but this too much steps. I have many pattern, and I don't know how can I use its.
Ok, I used Gradient tool, and there is Bitmap on Type list
Fantastic addon like Live Liquify layer too! Great thanks!
-
Hello,
I have a problem with mask from selection: if have bleed, then mask no expanded to bleed area. Just test these steps:
- create a new project with bleed (ex. 5mm)
- change to Photo Persona
- place an image what run over bleed (be biggest)
- duplicate image
- select a part of top image with Flood select tool
- click on Refine
- select Output to Mask
- change layer mode on top Image and see bleed area! If select mask, then will see mask end at bleed.
This big problem for press, because bleed is a cutting area. I can't change mask.
I found a workaround:
select area on image, but do no press Refine, just select Layer tab -> Mask Layer on top image. If use Refine, bleed will cutted from mask!!!
These tools have problem with bleed too:
- Marquee Tools (all, select any area with bleed, and after selection cropped at bleed)
- Crop tool (by default not select bleed area)
Please fix these in 1.9 if possible!
-
I have Intel HD 4000 graphic card, but this version closed if running benchmark. Previous version can detected this GPU, and test runned without problem.
Card name missing below OpenCL option. In previous version was there.
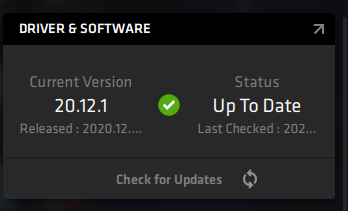
Operating system: Windows 10 64-bit, 19042.610
Intel driver: latest (10.18.10.5146)
DirectX: DirectX 11.1
OpenCL: OpenCL 1.2
You modified GPU requirements to higher level from previous version? 🙄 Under 820 version was worked...
-
Yes, it's great trick, because barcode no use any ICC profile, and when open, Affinity will assign a profile, and after barcode copy will this profile move with this. I used place before, and program no assigned profile to barcode, and converted to other color.
Great thanks for tricks, I will use your steps!
-
@Dazmondo77 Thanks for great help, and I will believe for Affinity, and need plus steps if I use a barcode:
- open code (as embedded or not)
- assign to same color profile as cover
- after PDF export will check in Photo too.
@Joachim_L Thanks, and I think JCP is convert CMYK value from RGB (as said Dazmondo), because under RGB working perfect. I make barcodes here, this online tool can make 0,0,0,100 CMYK barcode to EPS: https://www.free-barcode-generator.net/isbn/
-
19 minutes ago, Dazmondo77 said:
Do you mean 0,0,0,100??? - If I was having these problems, i'd open the liked eps and convert to curves and copy paste into the actual artwork and make solid black, although assign should work as expected - have you checked the values in Acrobat?
Thanks, I fixed, 0,0,0,100 is correct of course.
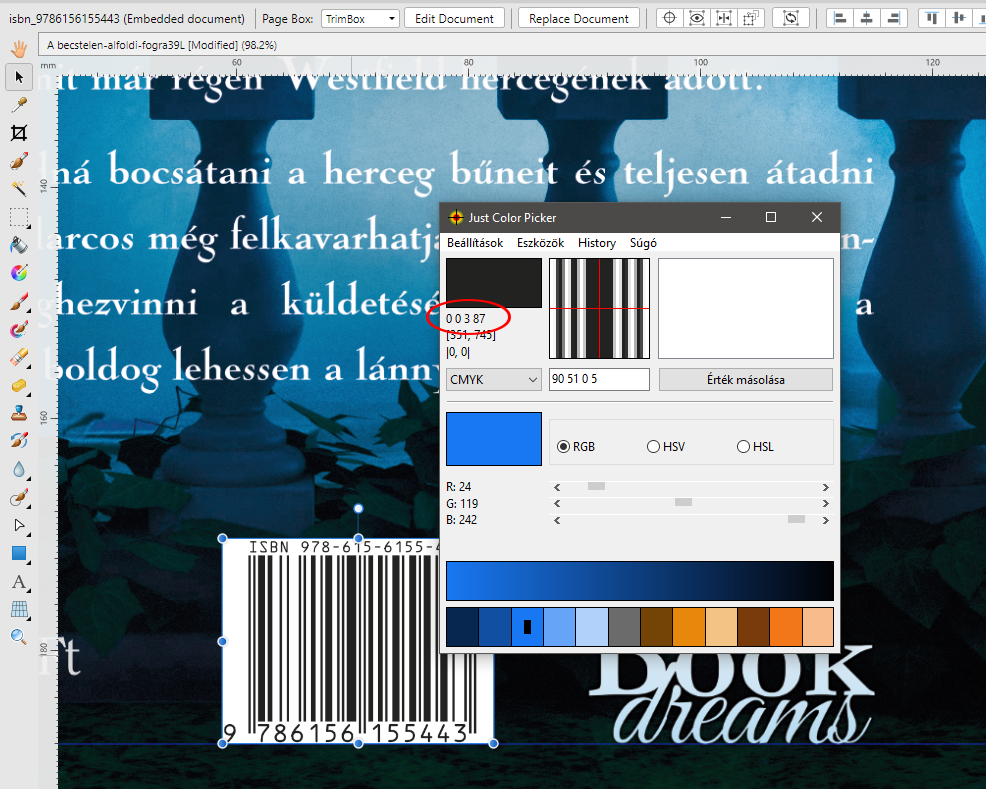
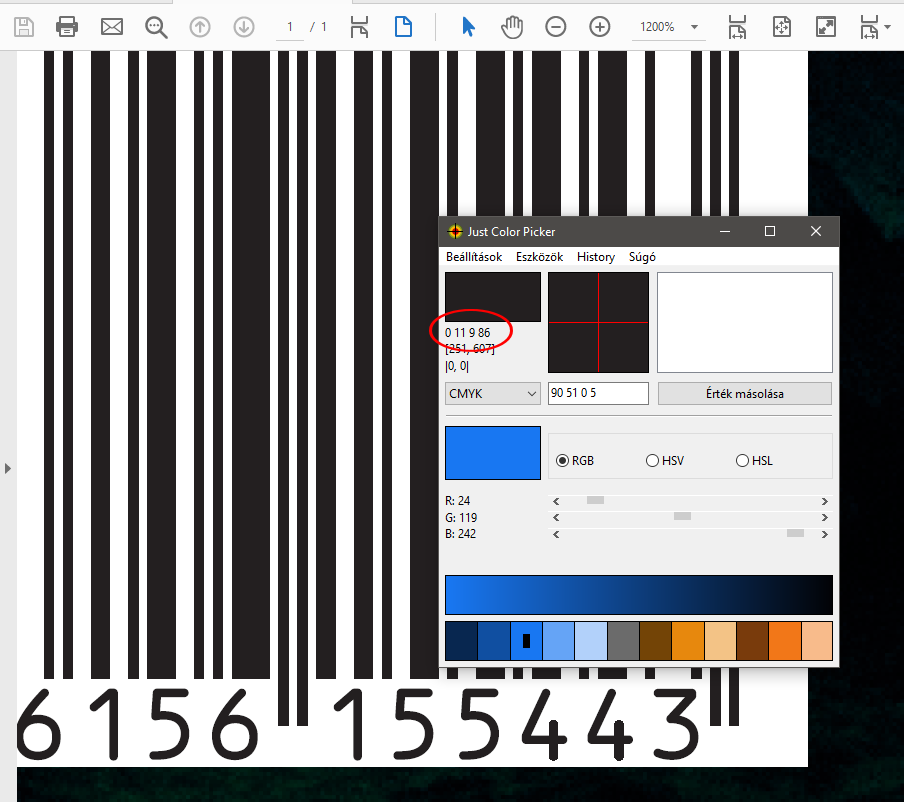
I didn't check in Acrobat, but press can, and call me, this barcode not include K value only with 100. And tried open embedded file (then I get curves), assigned to ICC profile, close that, and after export checked picker... But Affinity picker give back different value as Just Color Picker... What is correct?
-
Hi all,
I have a problem with color profile, and need a tip for printing.
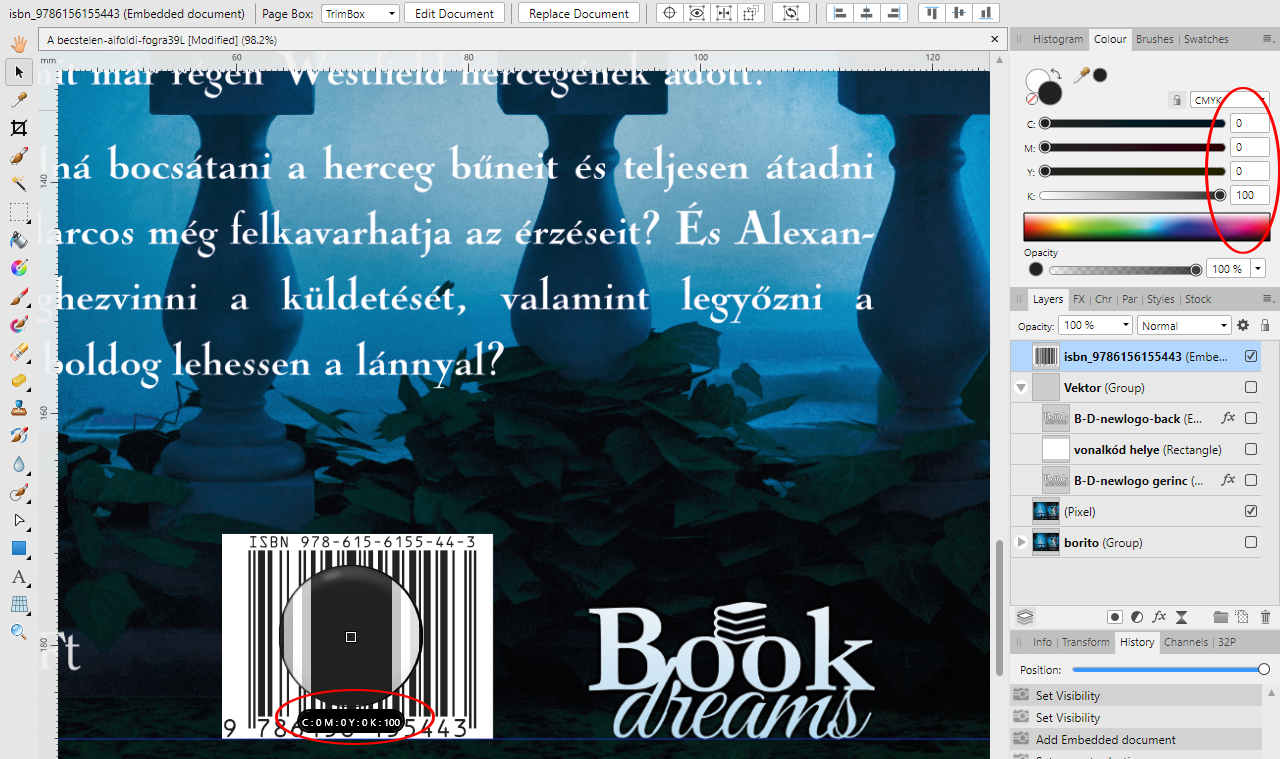
I have a project with ISO Coated v2 ECI 300 or Coated_Fogra39L_VIGC_300 color profile and a CMYK barcode in EPS format. This is a book cover and for printing need barcode in 0,0,0,255 black, and without embed ICC profile.
When I insert barcode to project, automatically converted lower black, but these profiles include full K support.
If I open barcode with double click, and assign (not convert) to correct ICC profile, then I get correct values (with strokes?).
I tested this value with Just Color Picker in CMYK pick, but I get different value:
And after PDF export get a new value again:
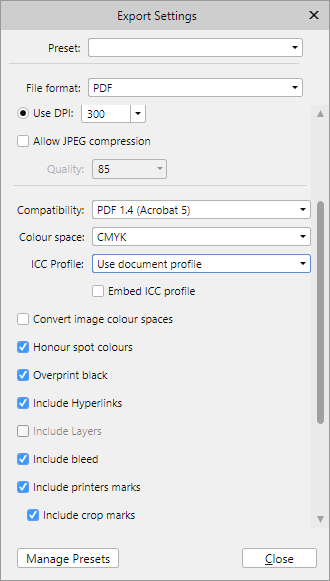
Here is my PDF export settings, and I tried "Convert image color spaces" option turned on or off, but no helped.
How can I set PDF export for leave barcode in original 0,0,0,100 format?
If open my PDF in Affinity Photo, then Affinity picker see 0,0,0,100 in barcode... Is this correct? (I haven't Adobe Acrobat Pro for checking.)


Change textbox font size when goes to group
in [ARCHIVE] Photo beta on Windows threads
Posted
Dear developers,
I found a problem, here is steps:
Please fix this bug!
Here is my project with history:
https://1drv.ms/u/s!Ar9GB-v89284gtd35PFy58BCsil1Aw?e=eSXGfh
Before group:
After grouped: