AaplMike
-
Posts
38 -
Joined
-
Last visited
Everything posted by AaplMike
-
Well...that was easy. Awesome!
-
Hello. Every time I launch, the stroke and fill default to no stroke some light gray fill. I NEVER use these values and always have to end up changing them to my preferred values. How to I CHANGE the default values for strokes and fills so I don't have to constantly change them? Thanks.
-
 Hey all. I'm working on huge mechanical drawings where I need to make measurements of different elements. Unforntunately, Designer is SUPER SLOW at even the most basic tasks of scrolling and selecting. Since the drawing is imported from PDF, it's not really grouped so that I can turn off unnecessarily large parts within the drawing. Will hiding parts with empty boxes help? If not, what can I do? It's taking 45 seconds to redraw the canvas after I zoom or scroll. Thanks,
 -
How do you undo an accidental canvas rotate? It doesn't have an Undo. Never mind...found it: Reset Rotation under View menu
-
Same issue here. I use line segments as crop marks and also rely on them for measurements, but they are all tied to the document origin instead of ruler. I'm using rectangles for now, but I'm hoping this will be resolved quickly. Thanks.
-
Thanks, Bruce. Unfortunately, line segments are the easiest way to do this work. I see that other shapes do so correctly. Do you know when this reported?
-
Hello. I've placed the zero point of the rulers at the corner of a group in hopes of recording offsets from that zero point to objects within the group. placing a new object at the 100,100 point shows it's position as 285,59, which is the left edge of the document. I need to measure FROM the ruler zero point, which is how it should work. Is there a setting I'm missing?
-
Hello, all. How does one go about changing the defaults for new documents? All my documents start with a stroke of zero and fill of RGB(235,235,235), so I end up having to change every object I create.
-
Well that was easy. Thanks! Unfortunately the change doesn't "stick". If I reset the rotation, then deselect and re-select the object, it's bounding box is rotated again.
-
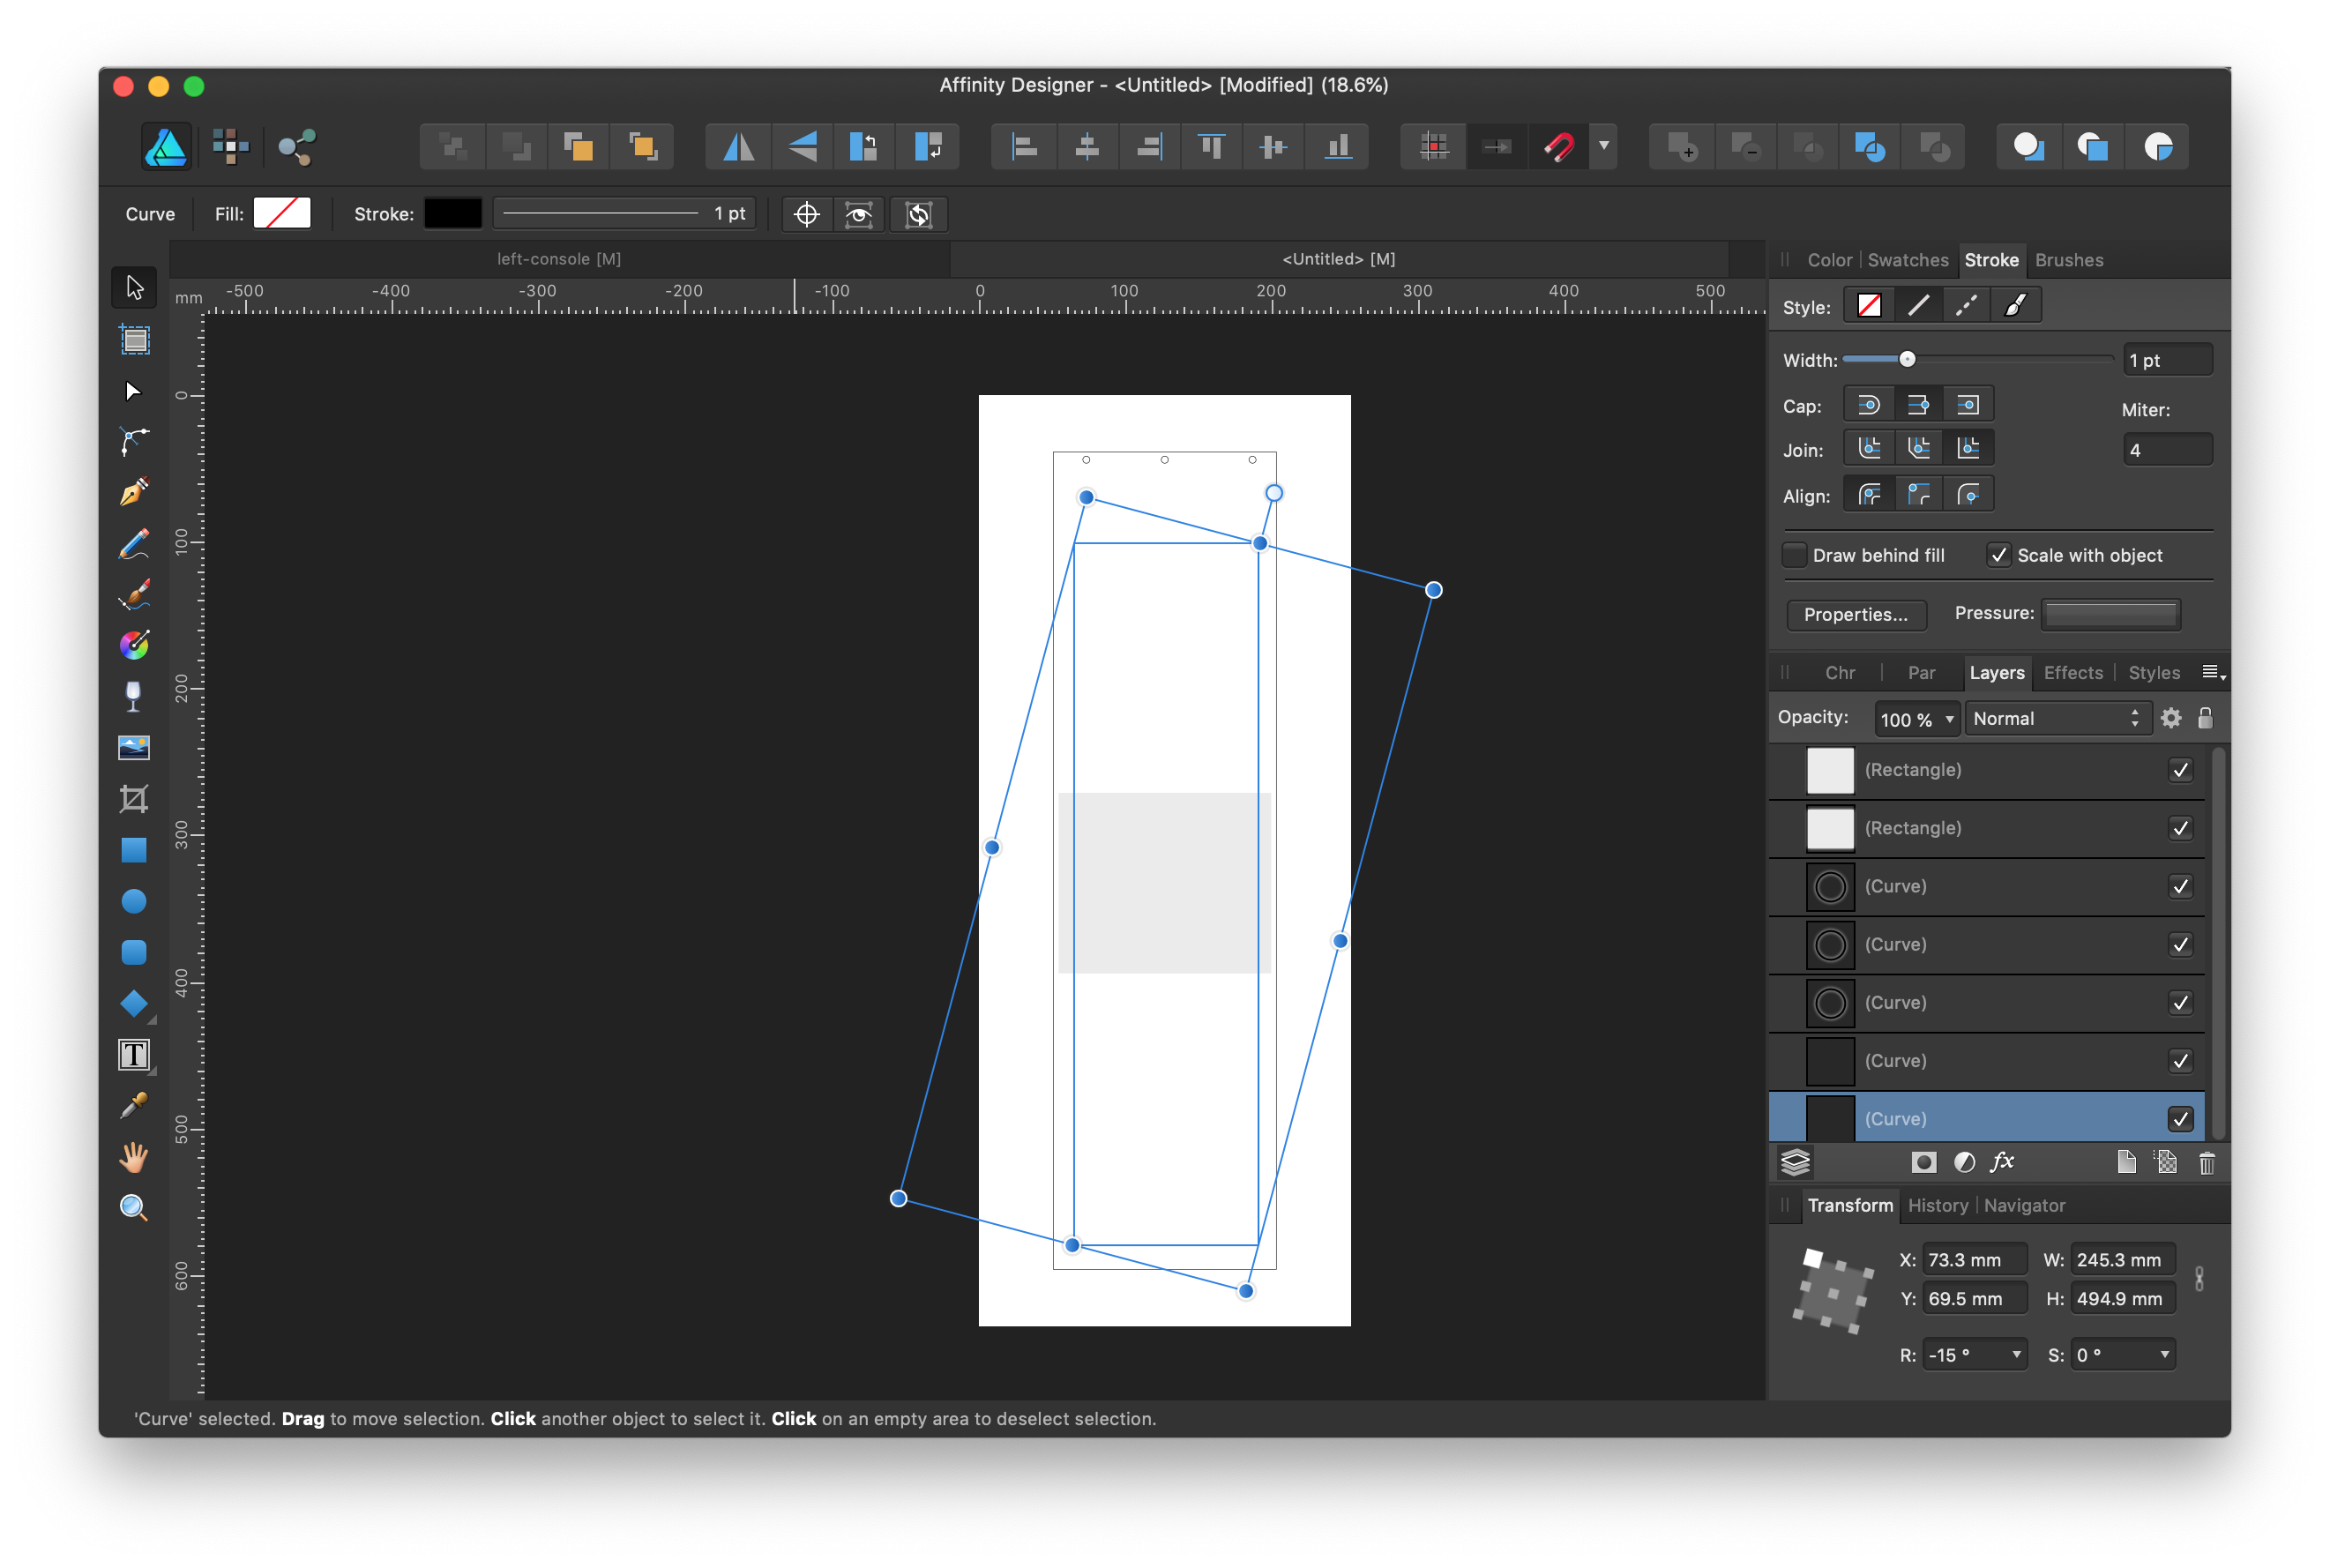
Hey all. I have imported a rectangle that was rotated 15°. When I paste it in to my doc and rotate it -15° to make the rectangle parallel to the guides, the object retains a rotated selection rectangle. Not generally a problem except the size of the rect includes the rotated bounding box, which makes the numbers incorrect. Any way to remove/reset the objects bounds after rotating? Version: 1.6.1 Mac

-
Thanks, First. I was hoping there would be a built-in function, like in FreeHand or Illustrator, but this works fine.
-
It's fairly frustrating that DXF isn't supported. Please consider prioritizing it's inclusion.
-
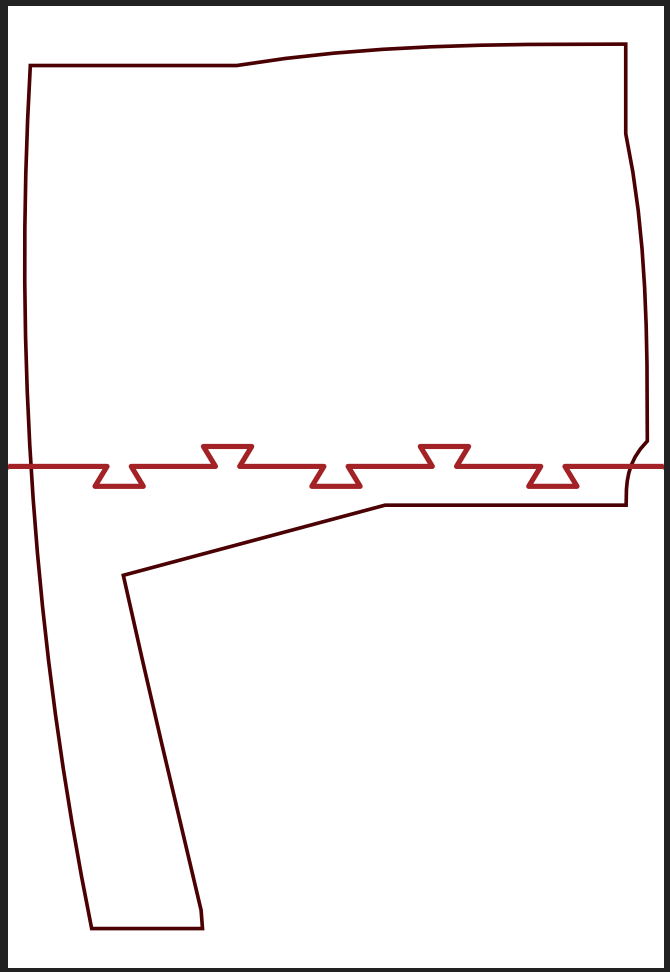
I have an object I need to cut on my laser CNC, but it's too large, so I decided to create a keyed divider line which I'd like to use to break the object into 2 separate objects, which I can cut independently then join together to use as a pattern. It's not readily evident to me whether Designer has that capability. Can anyone shed some light? Think of a circle you wish to split into 2 using a curved line as an illustration. Thanks.
-
Hey all.. Playing around with Publisher. I'm trying to figure out how to auto-flow text a la Quark Xpress, where you can paste a large amount of text into a master frame and have it create additional linked frames on new pages until all the text is layed out. Is there such functionality yet in Publisher? I have at least 100 pages worth of text I'd like to quickly get into Publisher. Thanks.
-
I still think the ability to set strokes as Overprint would be very useful (if it's not already in there like overprinting colors is) For example, we print a lot of vinyl, and a small trap on overlying colours makes it a LOT easier to register the vinyl pieces...even if we'd manually have to add a stroke and set it to overprint. #mikec
-
Hey all. I didn't see an easy way to do this so I'll post here. It would be nice (if non-extant) to have a way to convert from Artistic Text to Frame Text. Unless I'm missing something, I sometimes make Artistic Text inadvertently then want to stretch the object out to the edges of it's enclosing object in order to apply text centering. Being Artistic Text, it just stretches the text out instead. Then I have to copy the text, delete the object, create a new Frame Text object, then paste in the text. I may be just missing something obvious...it seems like this functionality should be there. Thanks, #mikec
-
I found the Reset Rotation on the popup to at least undo the document rotation (wasn't listed under the Undo menu). So at least I can continue working. Still think the 3 things I mentioned earlier should get some consideration.
-
I accidentally made a rotate gesture on my trackpad and now the whole document has been rotated, and I can't find any place to change the rotation back. I can't say whether this is madness or genius, but I've never seen another layout app allow you to rotate the whole document page around. Regardless, there needs to be a clearly defined way to set the page's rotation back to zero. It's not in history (bad thing), there is no indicator on any of the standard tool pallettes showing you waht the current value for "whole page rotation" is (bad thing), and there is no rotation snap so you can at least get back to a constrained value (bad thing) How do I undo this rotation so I can get back to work?
-
This is a much-missed feature I relied heavily on in FreeHand and Illustrator. You could pull out the zero-point for the ruler and snap it onto an element in your drawing, making that point the zero point for all rulers. It makes measuring so much easier than doing the math, especially when an element ends up on an untypical point on the ruler. Thanks!
-
Hello. :) I'd like to pitch in a feature request that the Artistic Text tool react to modifier keys with the additional behavior of changing the tracking/letter spacing of a text block. Currently pulling a right or left handle changes the character's width, with shift it changes scale and control some kind of stretch-rotate thing. :) I often find it necessary to increase the tracking of a block to fit a particular design, and unless I'm missing something, the only way to accomplish that is by playing with direct value entry. To have the ability to <modifier key>-drag a right/left center handle out to a guide or snap point while seeing the tracking change dynamically would help tons. Thanks!
-
Affinity Designer Customer Beta (1.3.5.1)
AaplMike replied to MattP's topic in [ARCHIVE] Designer beta on macOS threads
I've noticed a HUGE decrease in printing time for both new art and art from previous versions. Thanks for addressing this! -
I miss FreeHand. :( Used it daily in my job back in the 90s.
-
Working on product identity/labeling/packaging for Gaia, xoxo product line. I'm REALLY grateful for Affinity this week!
-
I agree this should be a feature in Affinity. There are many applications in the Mac space that include the ability to make minor shifts in page position when printing. Label printing apps use this extensively, for example. Different printers and drivers work differently, and for small design runs where I work & turn or work & tumble, it's be a HUGE help to have this ability in the Print dialog box. The devs can extend the Print Panel fairly easily by adding an accessory view (with locationOfPrintRect: and addAccessoryView:), which would allow one to add left/right shifts of the page at the point/mm level.
-
Thanks, um, Moderator. :) Actually I figured out what I need to do, but I may have not explained it well. Let's say all the objects are on Layer1. I have a different layer called Layer2. On Layer1 I have a fairly complex label made with about 60 elements. One of those elements is a rectangle which represents the die line. I've duplicated this label to lay it up on a letter-sized sheet. Now there are 15 of them. When I print, the die lines show on the printout. Obviously not good for when I take the art in to have it printed on the label stock itself. The die lines were only guide lines used during design, and shouldn't be printed in the finished output. To hide them, I could select each and delete it, or change the stroke to None, or move them to the back of the page behind a large white rectangle. All workable, but not the best way. Instead what I'm used to is moving them to their own layer so that I can simply disable the layer when I go to print for film. What I can't find in the interface is "Move the selected objects to Another Layer". This is something I'm familiar with in other layout apps. Is there a way to do that in Affinity? I did find that if I selected all the die line rectangles and Cut them, then I could select the other Layer and Paste them in, and they paste into that layer. So, that works, but it might be better to have a way to leave the elements on the page and just assign them to another layer. Am I missing the way to do that, or should this become a feature request instead? :) Thanks! #mikec