
StuartRc
-
Posts
2,072 -
Joined
Everything posted by StuartRc
-
Many thanks! I had not thought of using them in this way...Looks good I will have a play!😀
-
Hi I built the Pattern Swatch File in 2.04. (creating swatches from pattern fills dragged from the Asset Panel to the Fill Swatch on the Context Bar). By having them in the Swatches Panel was just too easy!. There has been more work on the process in 2.1 as you can see here. You should be able to import the file as a Palette!
-
Dinosaur Pattern Swatches Playing around with the Version 2 options of creating Palette fills by dragging assets to the Fill Swatch.. Nice!.. much easier Dinosaur Palette.zip
-
affinity designer Infected & Comic Book Toolkit
StuartRc replied to StuartRc's topic in Share your work
Palette Assets 01 Added the first set of Palette Assets Reorganised Palettes by name and created .PNG image import sets so colours can be combined 1. 'Graphite' for drawing with inking with dark colours and combining high contrast colours 2. Re-edited Untamed Palettes (Originals were simply sampled image versions). However this method can result in a mix of similar colours. Streamlined and selected 48 manually from each set to get better variation and remove similar colours a. Untamed Originals b. Untamed Mushroom Forest c. Untamed Chili Trees
- 51 replies
-
- 1
-

-
- affinity 2.0
- inking
- (and 3 more)
-
Hi has @walt.farrell has pointed out these are older raster brushes. I have not really maintained these as they were sort of replaced with PB 28: Ink Stipple. In response to the question; Even if they were 'vector' brushes the results would still be raster as the vector brushes are not 'true'. I am not sure what you are trying to achieve but for these type of brushes can I suggest you use download and use PB 31 'base Texture Toolkit' This set works much better and has much greater flexibility. If you are looking for dot vectors you could also try 'Seamless Pattern Overlays'. These are assets (mostly different configuration of dots!) built for the new drag | drop option where you can add assets as bitmaps to the fill. However they are actually vector. So you can pull them onto the page and edit. The Dot patterns are contained within a rectangle so they should; I say should! snap together to form dot patterns. You can also use the 'Quick Grid feature' to layout shape patterns. Sometimes I paint dot patterns using a raster brush and copy the .jpg | SVG to Inkscape to make use of the tracing tool. If you do this avoid using the simplify (Control + L) applied to the result as it can convert all the curve nodes to cusp nodes!. I created some overlay vectors this way for the Comic Book Toolkit but it's not finished yet! In the same way! There is an old set to supplement the old inkBrush brushes here or here That has a small collection of vector grunge that you can manipulate on the page. Hope this helps!
-
affinity designer Infected & Comic Book Toolkit
StuartRc replied to StuartRc's topic in Share your work
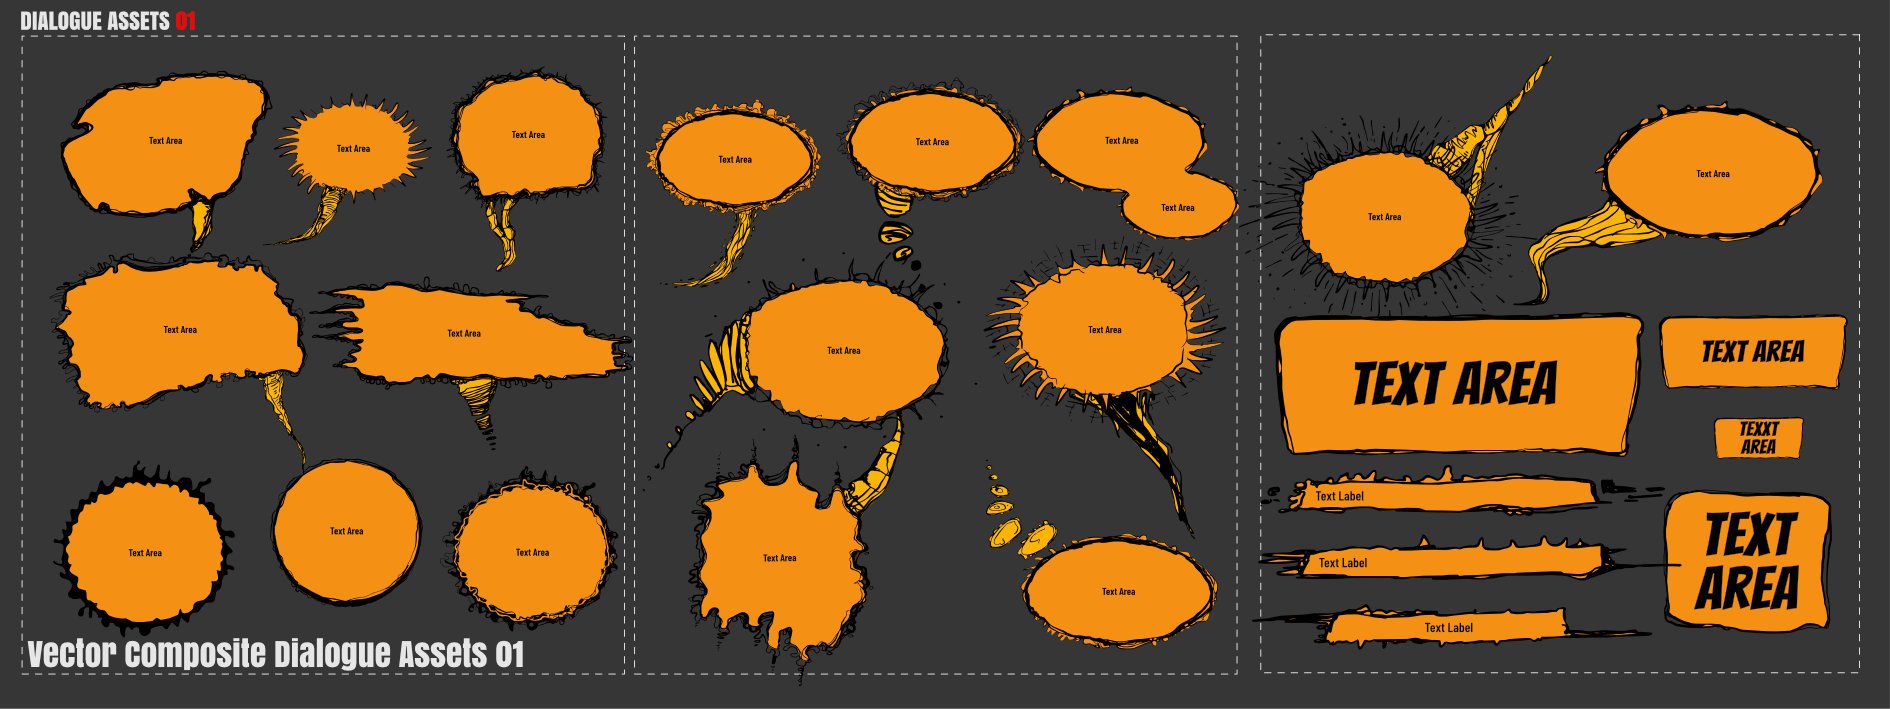
Dialogue Compound Assets Part I Speech Assets Part I 01 Speech Assets Part I 02
- 51 replies
-
- 1
-
-
- affinity 2.0
- inking
- (and 3 more)
-
Thanks!...This set should be very flexible even thought there are only 20 brushes. There are a lot of possible combinations!
-
affinity designer Infected & Comic Book Toolkit
StuartRc replied to StuartRc's topic in Share your work
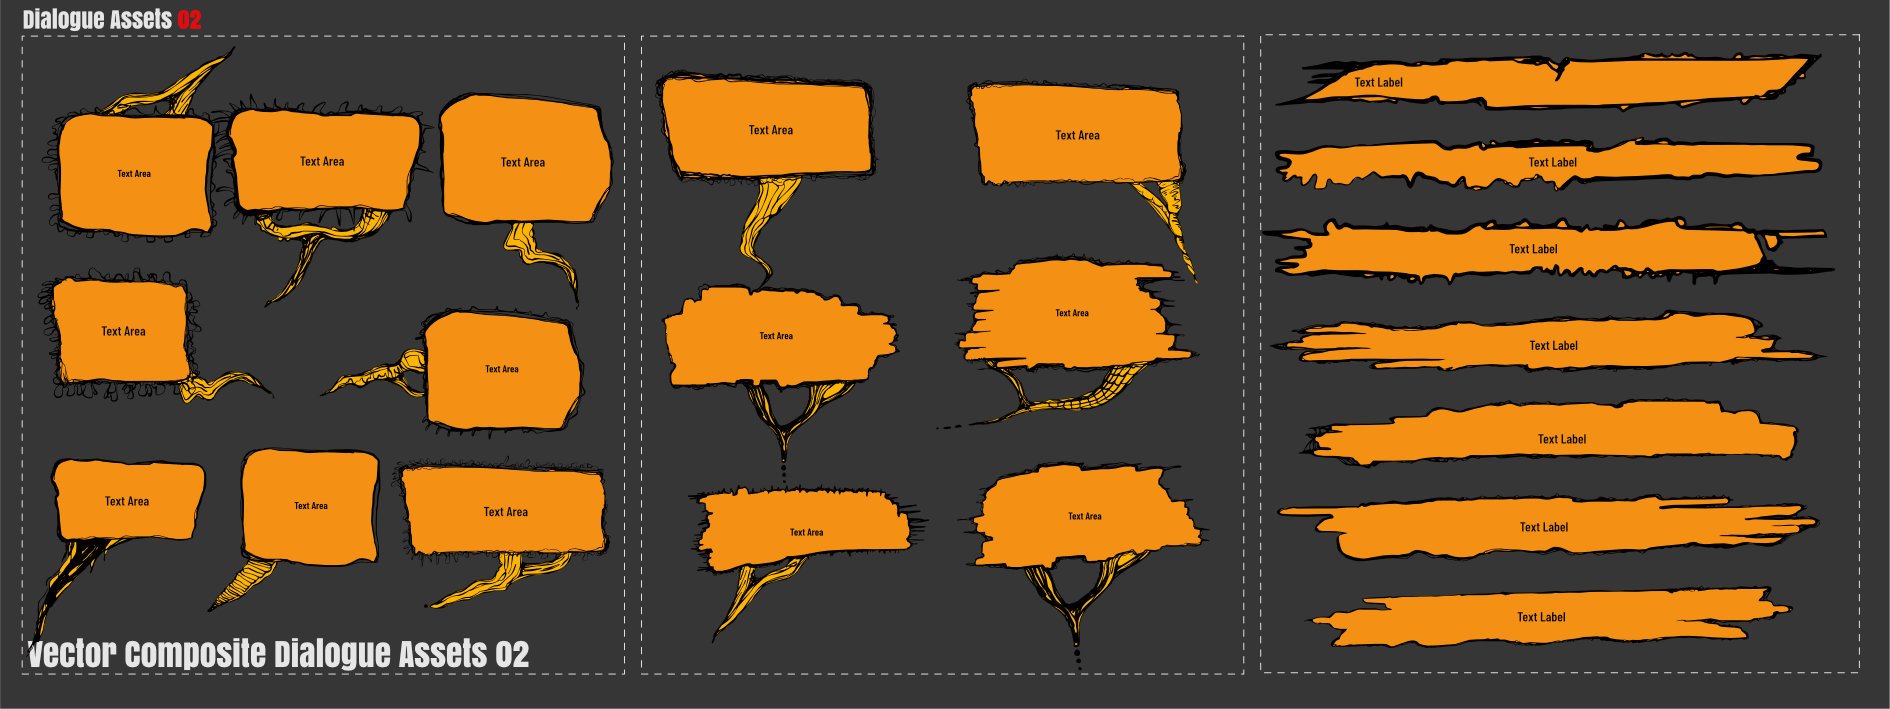
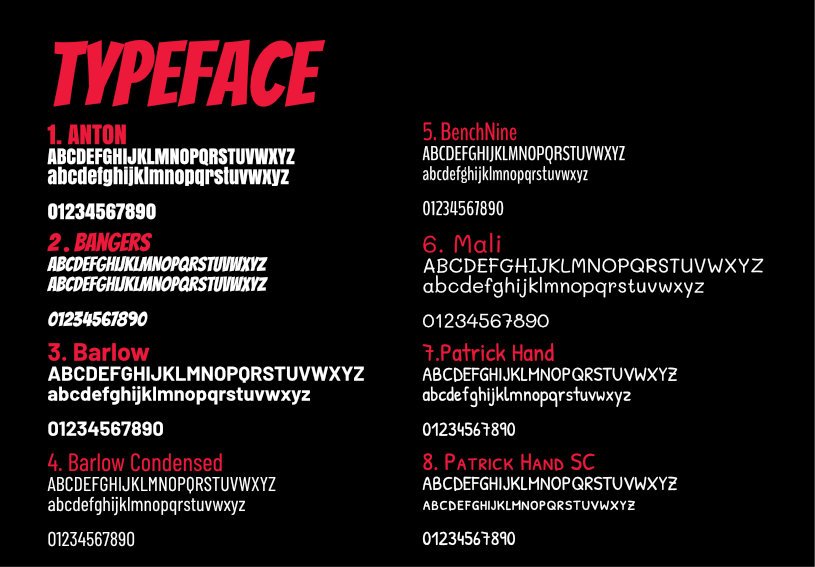
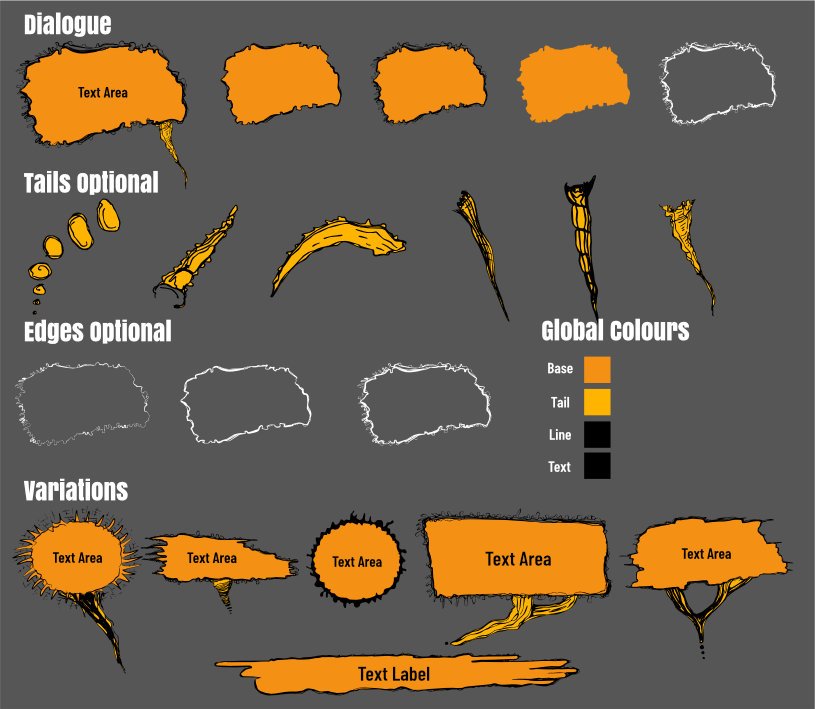
Dialogue and Type Assets Collection (W.I.P) Assets and Toolkits for Dialogue and Labelling structure Wanted to make this part of the template just as flexible as the page template itself! 1. Decide on the typefaces and create the associated styles 2. Make all the structural elements | objects flexible and easily exchanged between alternative assets 3. Use Global Colours for quick editing and apply to each vector separately 4. Introduce some degree of scale, where the text elements can scale independent of the text box (Affinity does not have 'flex' type so needed to add optional styles to the sheet!) 5. Allow for the repositioning of vector objects inside asset without affecting text 6. Build a collection of scalable assets 7. Build a Toolkit that allows for flexibility of assets: NB Need to add additional 'Text Dialogue' layer to imported templates Need to Update Global Colours in associated templates Type Used these (taken from Google Fonts to available!) Stylesheet for all 3 apps Sample Asset Toolkit and Completed single asset Wanted to make this really flexible so assets built for any particular grouped asset could be exchanged for any other There are almost 50 of these now! Tried to keep it simple with: Bubble Area | Tail Area + Base shape and Edge shape for each. Text Contained in Bubble so can re-position the tail separately (+scale) Global Colours Text Styles Sample Page Test A4 page with Mask Overlay text over mask in this case. Scale assets and recolour 'globally'
- 51 replies
-
- 1
-
-
- affinity 2.0
- inking
- (and 3 more)
-
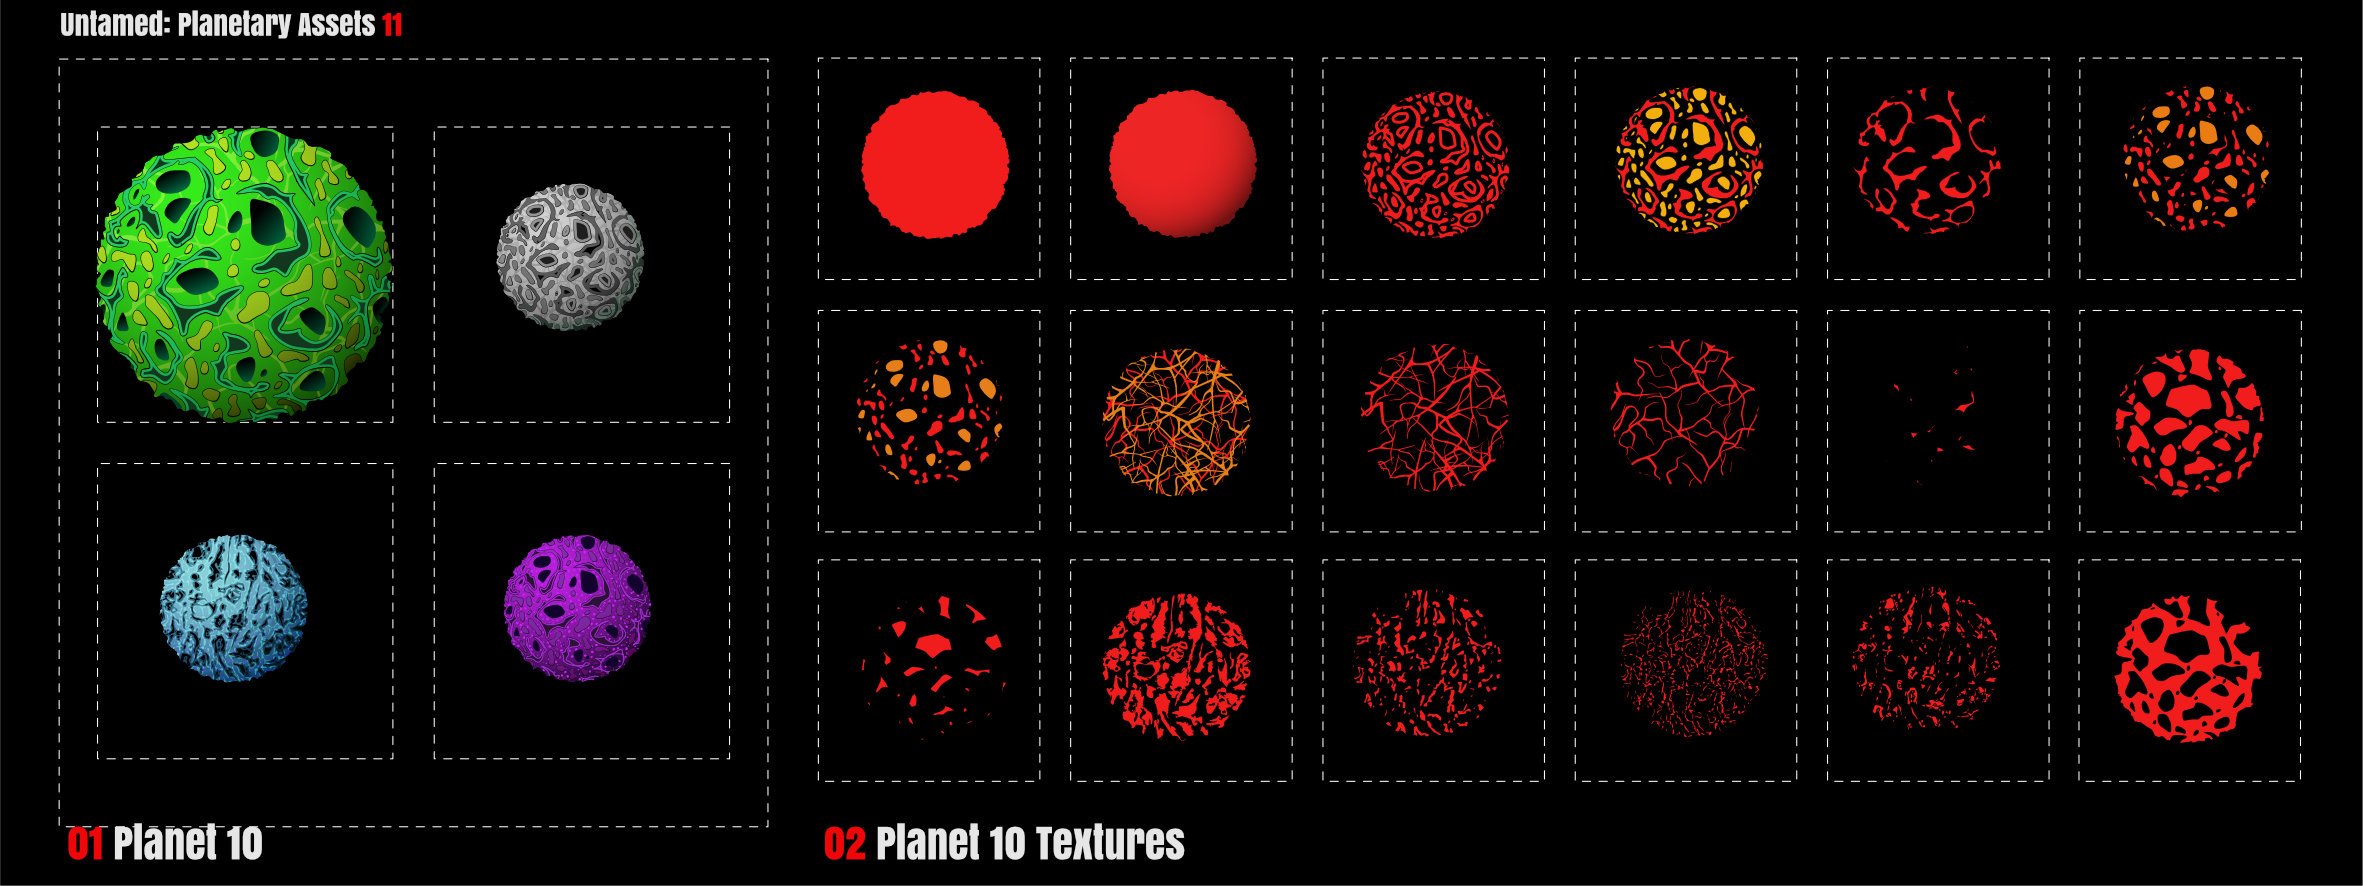
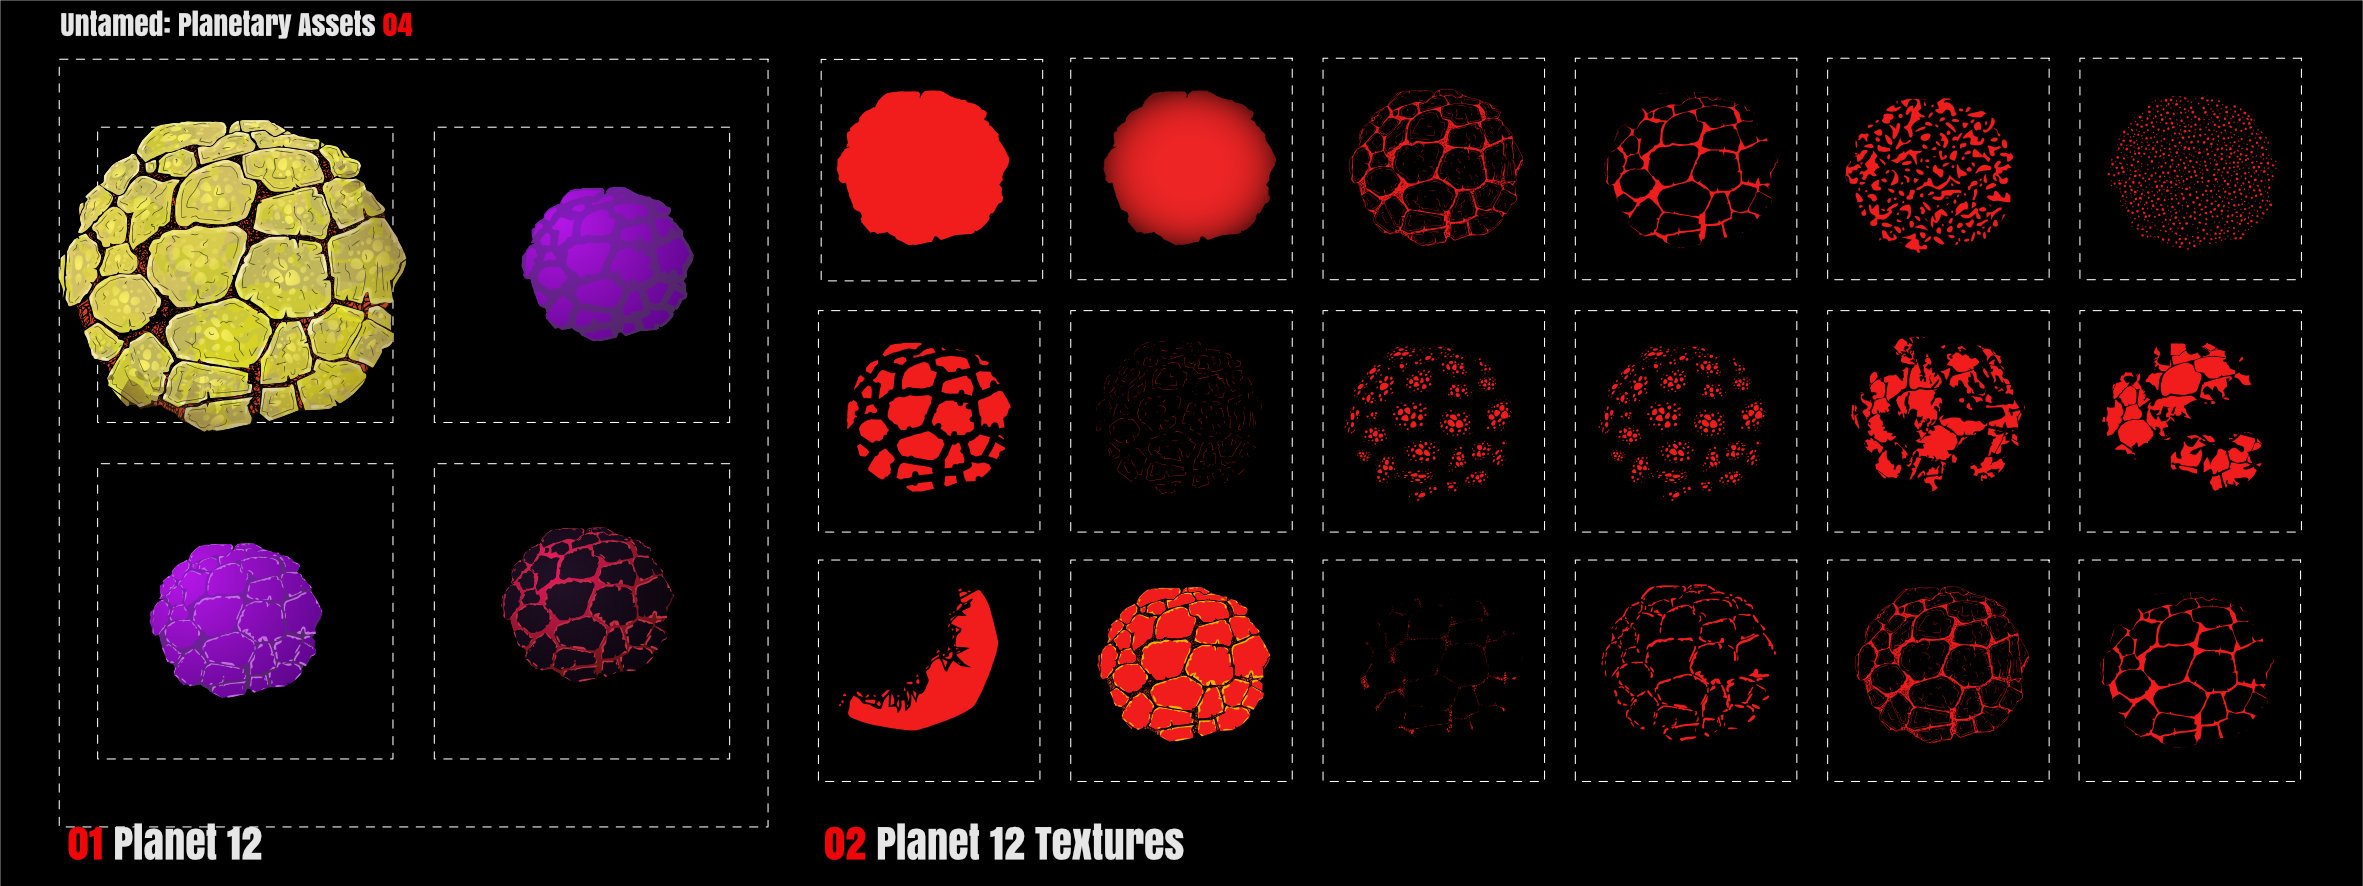
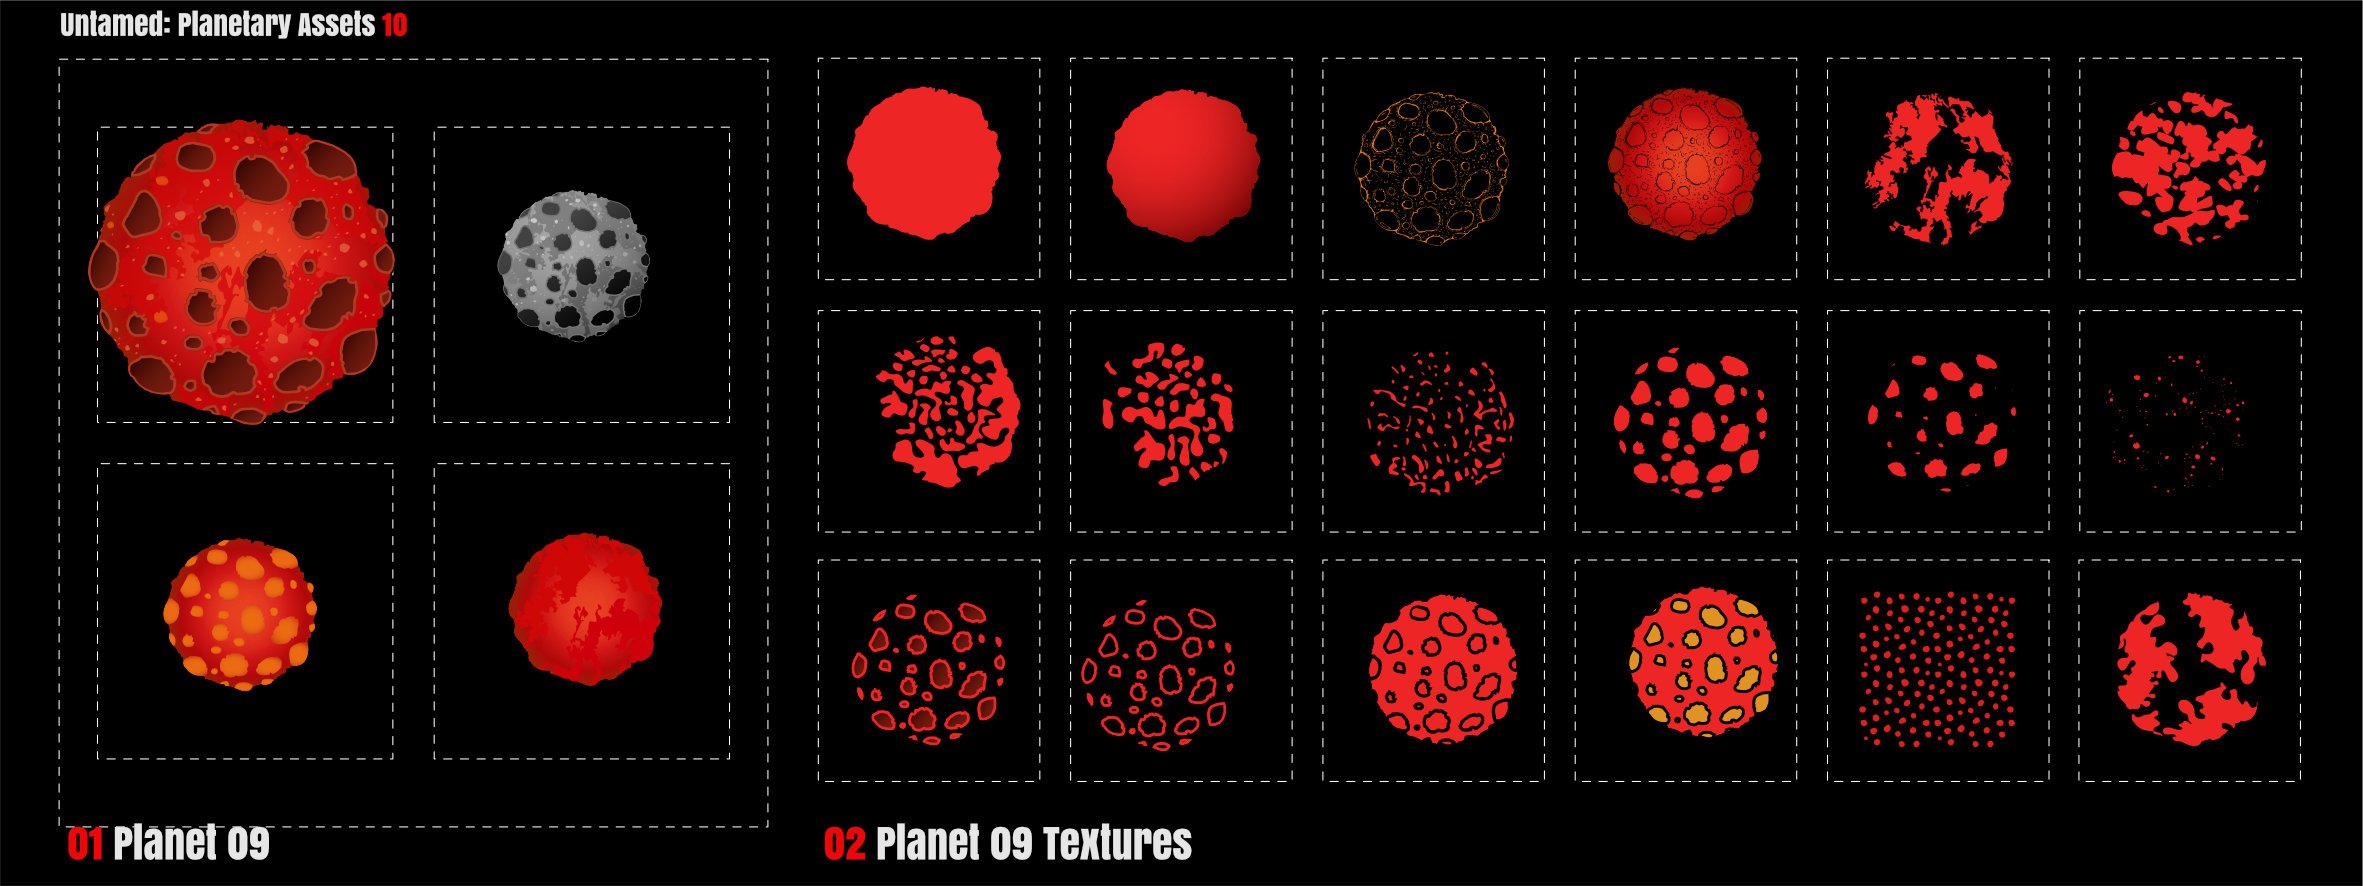
Planet Toolkit 04 P10 P11 P12
-
Hi It is basically just an assembled layered file in Designer that contains a grid to layout to guide the painted sample shapes (raster) and where all other files are assembled together. The Nozzle shape layer (vector) are just copied from the 'Vector Nozzle sheets' which is basically a 400 x 400 repeated grid separate file; with tested nozzles (20 on a sheet I believe..no point doing one at a time!)... and placed inside circles (White for Brush | Red for sub-brush) The Brush names are taken from the Mineral List on Wikipedia (luckily have not exhausted them yet!) There is a sample layer where the final brushes are just painted for testing. To get the effect I just layer a series of shaded colours..just repeating the process for each brush, (Sometimes adjusting with layer adjustments) The Base Texture Patterns are also all vector (Symbol layer stacks for variation!) and extracted from another 20x 20 grid based file then scaled for effect to be incorporated into the sample sheet above. transform and scale separately on context bar helps with this! Sometimes they are aligned on a separate file as they can be complex (AD slows down sometimes!) The 'Extras' are just imported .png's from a Base Texture Export folder (Some of these are large). For these brushes all are just exported .png. Base textures from all V2 brushes are available to each brush...there are lots and lots (1000's probably!) and are all vector! Hope this helps
-
Updated Toolkit Added 10 additional .png files to reflect the collection of seamless pattern overlays here So now 25 additional .png options Updated the file collection and removed old .zip file so need to download it again!
-
No Problem they are fun to play around with. Will be much more powerful when combined with vector Flood Fill in 2.1
-
affinity designer Infected & Comic Book Toolkit
StuartRc replied to StuartRc's topic in Share your work
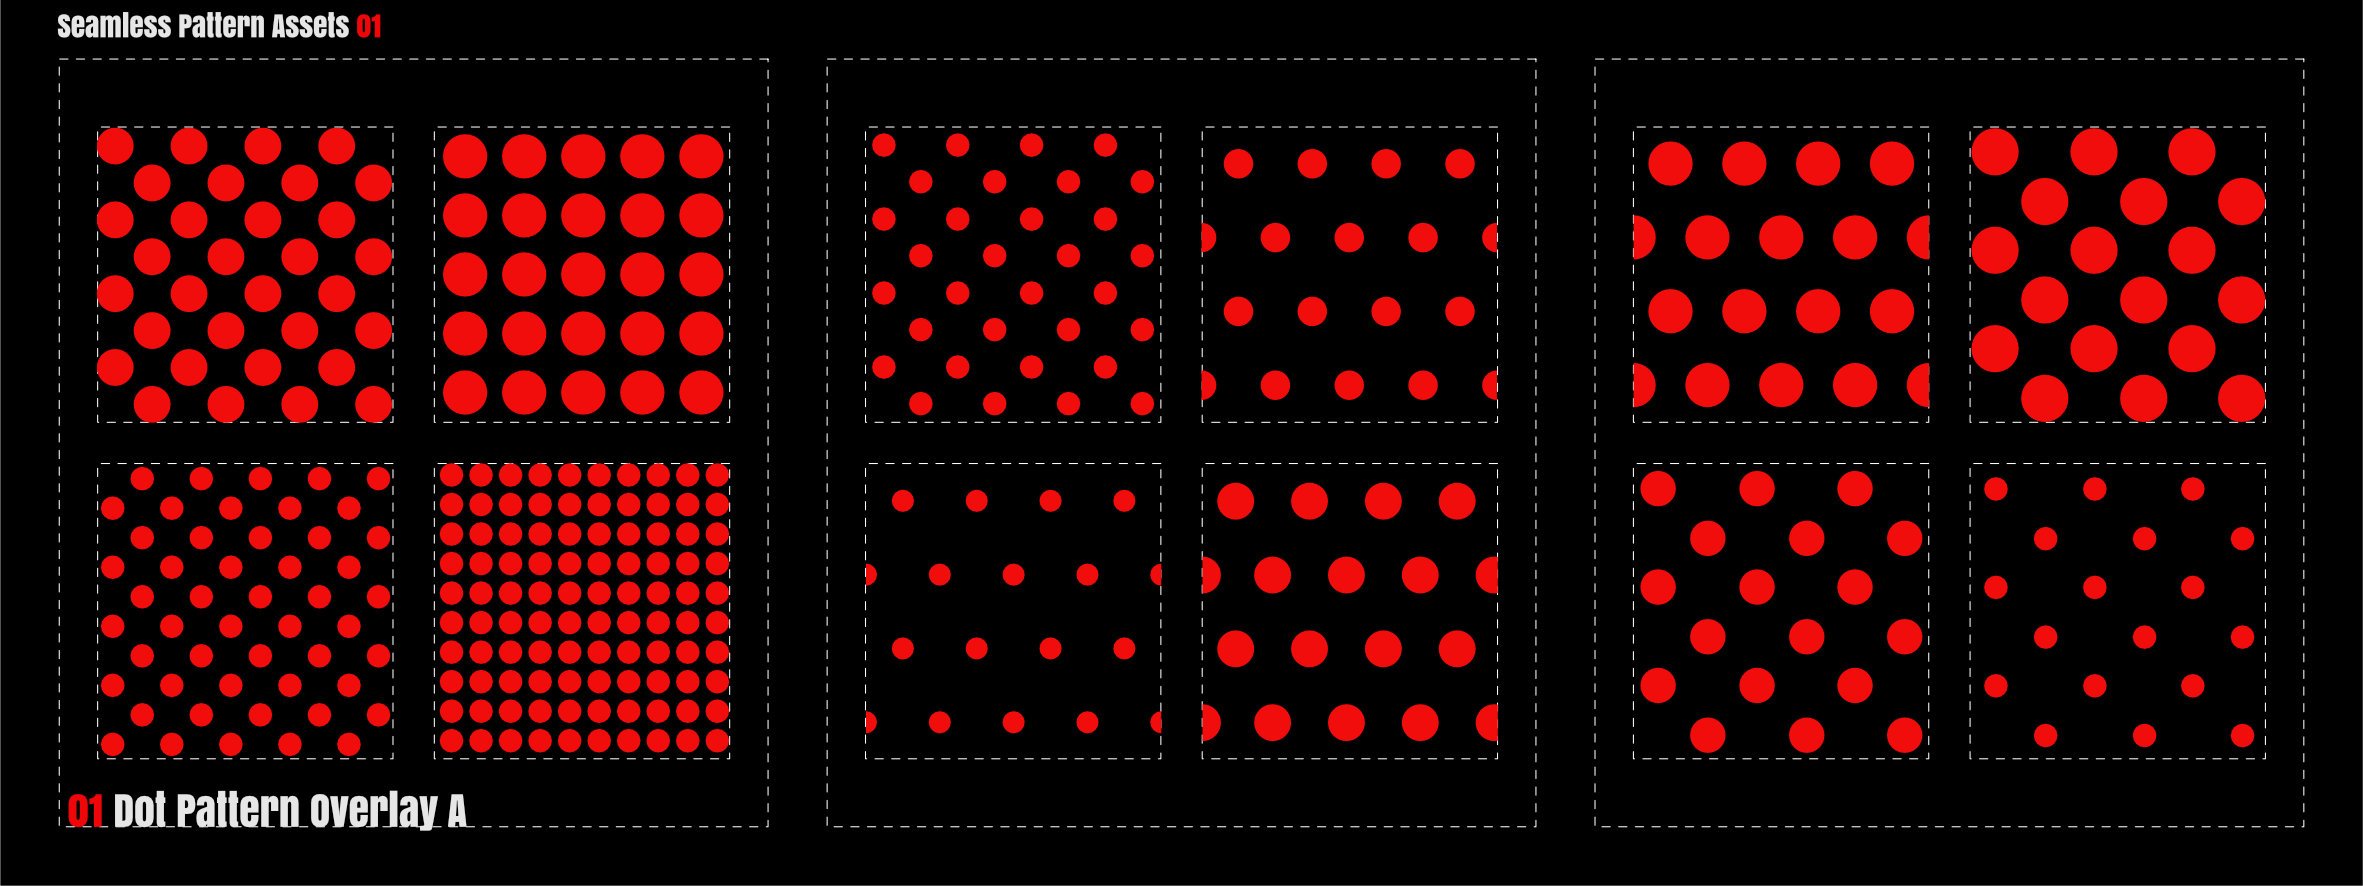
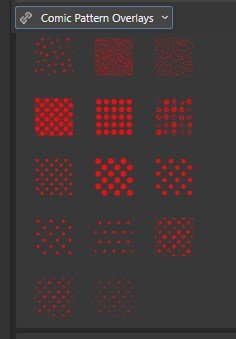
Seamless Pattern Overlays Added a basic set of seamless patterns to Resources for use with the new Asset >Fill Swatch feature here Updated PB 31 to reflect this with 10 additional 'dot' .png files (@pruus)- 51 replies
-
- 1
-
-
- affinity 2.0
- inking
- (and 3 more)
-
Seamless Style
StuartRc replied to pioneer's topic in Affinity on Desktop Questions (macOS and Windows)
Here you go......Set of Seamless Dot Assets -
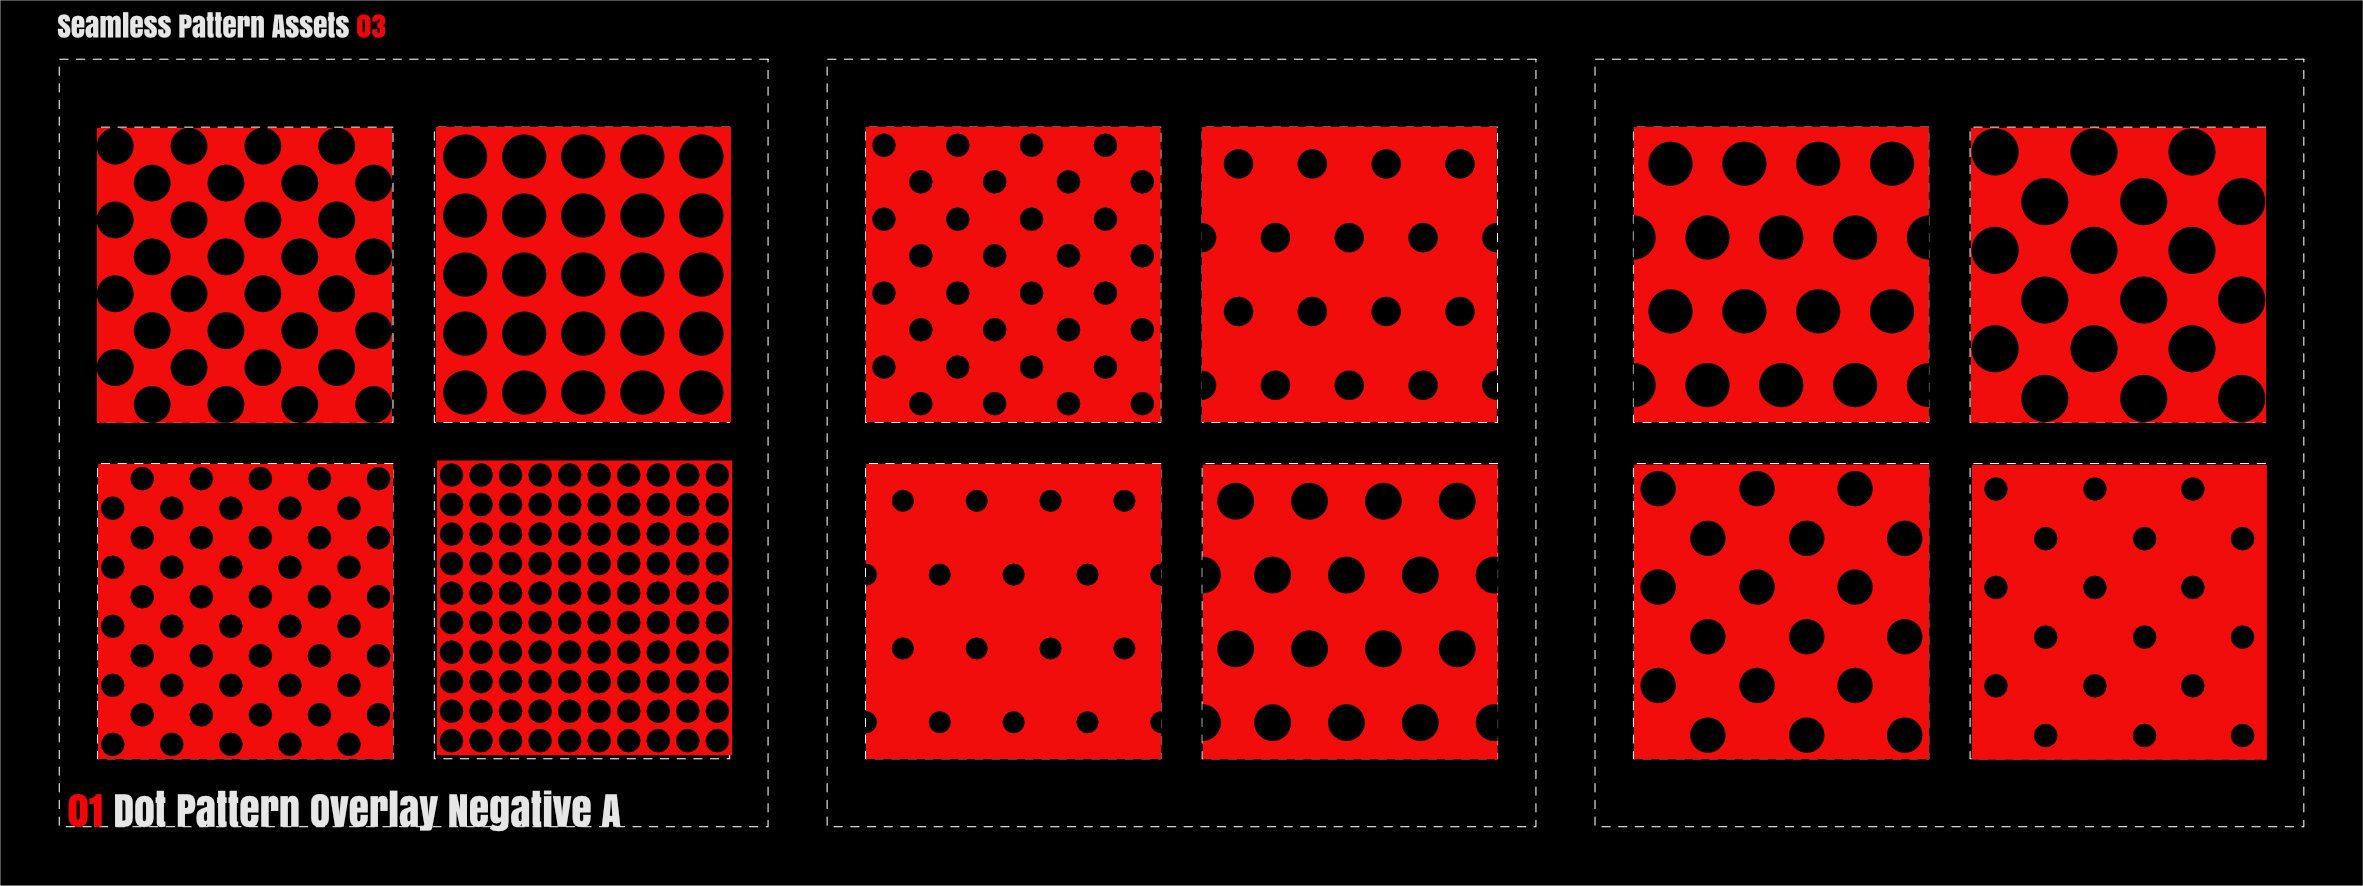
Seamless Pattern Overlays Extracted, Modified and extended a set of Pattern Overlay Assets. (Part of the Comic Book Toolkit) Built to make use of the new AD 2.0 feature of being able to drag images | Vectors from the Asset Panel and onto the Fill Swatch (Good for grunge artwork and vintage effects!) Assets Content 1. Set of Positive Dot patterns (scalable using Fill Tool) 2. Set of Negative Dot Patterns (scalable using the Fill Tool) Use 1. Select your vector object 2. Drag Asset to Fill Swatch on context bar 3. Adjust with Fill Tool Or you could just use the vectors If need to change colour -drag out and recolour objects | Create new sub-category and add as required.. can be added to swatches (no need for Styles) Or Use adjustments to recolour and effects with Transparency and Layer Settings Samples as below: Positive Negative Seamless Dot Pattern Overlays.zip
-
I never made all the brush sets available for download. Any that are are located in the links to resources section. There are lots! Still have some work to do on V2 updates but most of the texture brushes available from V1 Should import fine. New Distance option in dynamics affects Inking and Paint Brushes Project Brush Sets: PB 01 Hungry PB 02 Crazy Tree PB 03 Big-T PB 04 Ammonite PB 06 Poison Inkers PB 07 Ink PB 08 Organics PB 09 Grunge PB 10 Leaf PB 11 Camouflage and Paint PB 14 Organic Pattern PB 15 Textured Pencils PB 19 Inker and Inker Toolkit PB 20 Patterns PB 23 Dinosaur Styles Patterns and Brushes PB 28 Ink Stipple PB 31 Base Texture Toolkit
- 108 replies
-
- 1
-
-
- nozzles
- raster brush
- (and 6 more)
-
Seamless Style
StuartRc replied to pioneer's topic in Affinity on Desktop Questions (macOS and Windows)
Hi Still working on the Comic toolkit so have not uploaded any resources for it! However I will pull out the basic dots and add it to resources.... -
Seamless Style
StuartRc replied to pioneer's topic in Affinity on Desktop Questions (macOS and Windows)
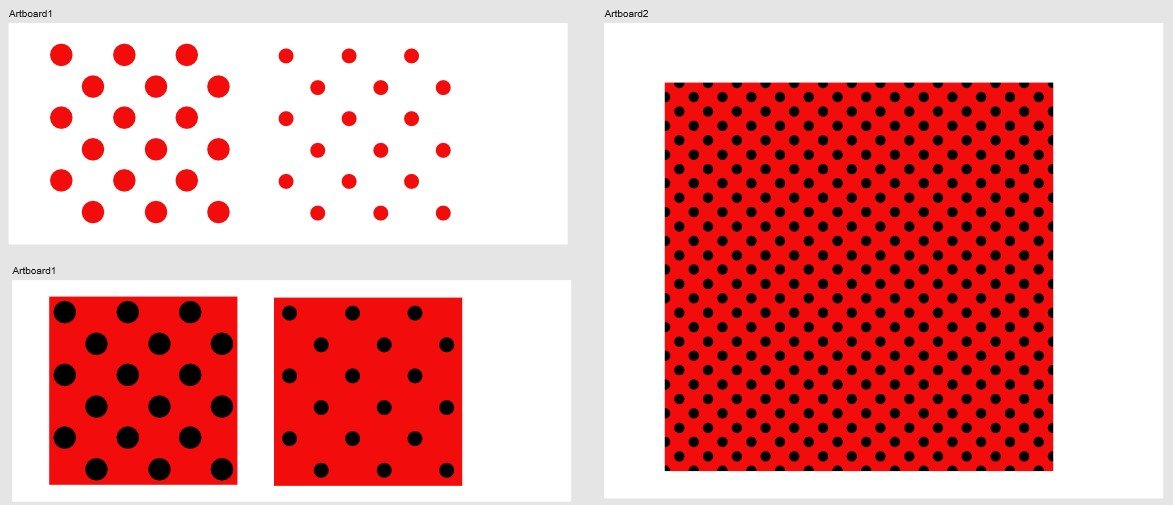
A bit vague...Sorry! I worked on some of these as grunge comic overlays. The originals are on artboard 01. I just recoloured the base container to red. Export as PNG. In the assets are the 4 files. Just drag the asset to the fill swatch on the context bar and rescale using fill tool on selected rectangle on artboard 3 The containing rectangle controls the scale | seamless; The pattern the effect...good for vintage comic overlays. The originals are here Dots.afassets dots.afdesign
-
Seamless Style
StuartRc replied to pioneer's topic in Affinity on Desktop Questions (macOS and Windows)
Hi Create a seamless pattern using a container rectangle for the dots. Then you can also make use of the asset to fill and scaling options -
hi Separate Mask above + Gaussian Blur on FX You could move the curve onto a separate layer above (px painting below). Apply FX (Gaussian blur xx value) Then Mask to below Painting on the px layer will create a false edge blend
-
Hi I keep meaning to add some explanation to the templates in the original thread. It was just a template experiment to start with...but I keep picking at it to add extra features | options. The assets and page layouts were built in Publisher originally!... Sketching templates are from AD. It is just that assets are visible across all apps now that the confusion has arisen. I agree that the layout should be processed in Publisher. This was always the intention. However while building the template structures I realised that the whole process would require options to sketch | create and edit across all apps. A real advantage in Affinity as not only is the format the same; with later updates assets and brushes could be 'interchanged'. The Publisher 'Master Template' carries Styles | Assets (Panels Masks | Tiers | Txt Boxes | Grunge Vector Overlays) | Speech Bubbles | Colour Swatches [Global]) Personally most of my drawings are created in Designer but rather than just create something and place on the Publisher Page as you would 'normally' do inside a picture frame. You could have much more flexibility working between apps and by creating Panels | Masks | Tiers | as vectors (Assets) a lot of page options are automatically introduced...It is then just a matter of converting the panel vectors to a picture frame and placing the graphics. OR AD pages Or PDF OR Photo should you choose to do so. In the Video I just used the supplementary sketching templates from AD to demonstrate a few options in reply to the original question. The 'working' template in Publisher is here It is not finished yet as there are a number of functions | options I would like to add. Especially to the assets. The idea was for any page to be significantly different using assets and templates to create the variation. Changing the page sizes will be another issue to face...
-
Hi It is really all about masking! and how the layers are organised. Drawing beneath is pretty simple to set up! Ignore some of the complexity in the little movie but concentrate on how the layers are organised 1. Top Layer has a mask (which is the solid with holes [punched out using tier panel assets]) ...Which are still stored as a separate layer! 2. The imported template has 2 layers a. Vector b. Raster (Where you can draw!) 3. Next is tier or panel storage (Not necessary but useful to have for any edits you need to make) 4. background Solid. Notes 1. Draw on the Raster layer. You can see that the ink colour is set to black. But the scribbles are orange or blue or black. In Clip Paint you can set a colour for a layer.. useful... So whatever you draw with whatever brush it will always be set to a single colour...You can do this in Affinity by setting the FX of a drawing layer to 'Colour Overlay' and picking a colour. You can have >1 so switching between colours is a checkbox nothing more! 2. Lock the 'overlay mask'...not the layer itself. make it vector and save as asset then you can have several in one document .... or you can change it! 3. You can fill in the gaps (Holes with fill holes)..but you need to be in 'Vector Persona' or 'Divide' or 'Separate Curves' 4. You could be really efficient and set the underlying panels to be slightly larger than the cutters in the mask..It's not vital but may be useful for printing 5. You can change the colour of the mask... 6. To get more elaborate you can drag the drawing layer inside a panel and sketch inside the panel. Then the drawing is a bit more independent. Hope this helps process.mp4
-
List UpdateBrushesProject Brush 08 OrganicsUpdated to Affinity 2.0; Added set C as INK Brushes; Created Ink Base Set to access all seamless patterns in the set Project Brush 17 Concept BrushesUpdated to Affinity 2.0; Added base Texture Brushes with access to all Concept Patterns (or any other seamless pattern) Project Brush 28 Ink StippleUpdated to Affinity 2.0; Project Brush 32 Comic Toolkits Added Comic Concept Penciller 10 erasers and 20 ink solids for Blue line sketching Assets Untamed Project a. Added Planetary Toolkit for sky backgrounds (W.I.P). Planet 01 and Planet 02 Added to resources Comic Book Toolkit a. Grunge Vector Page Borders A4 b. Large Grunge Vector pattern Overlays
-
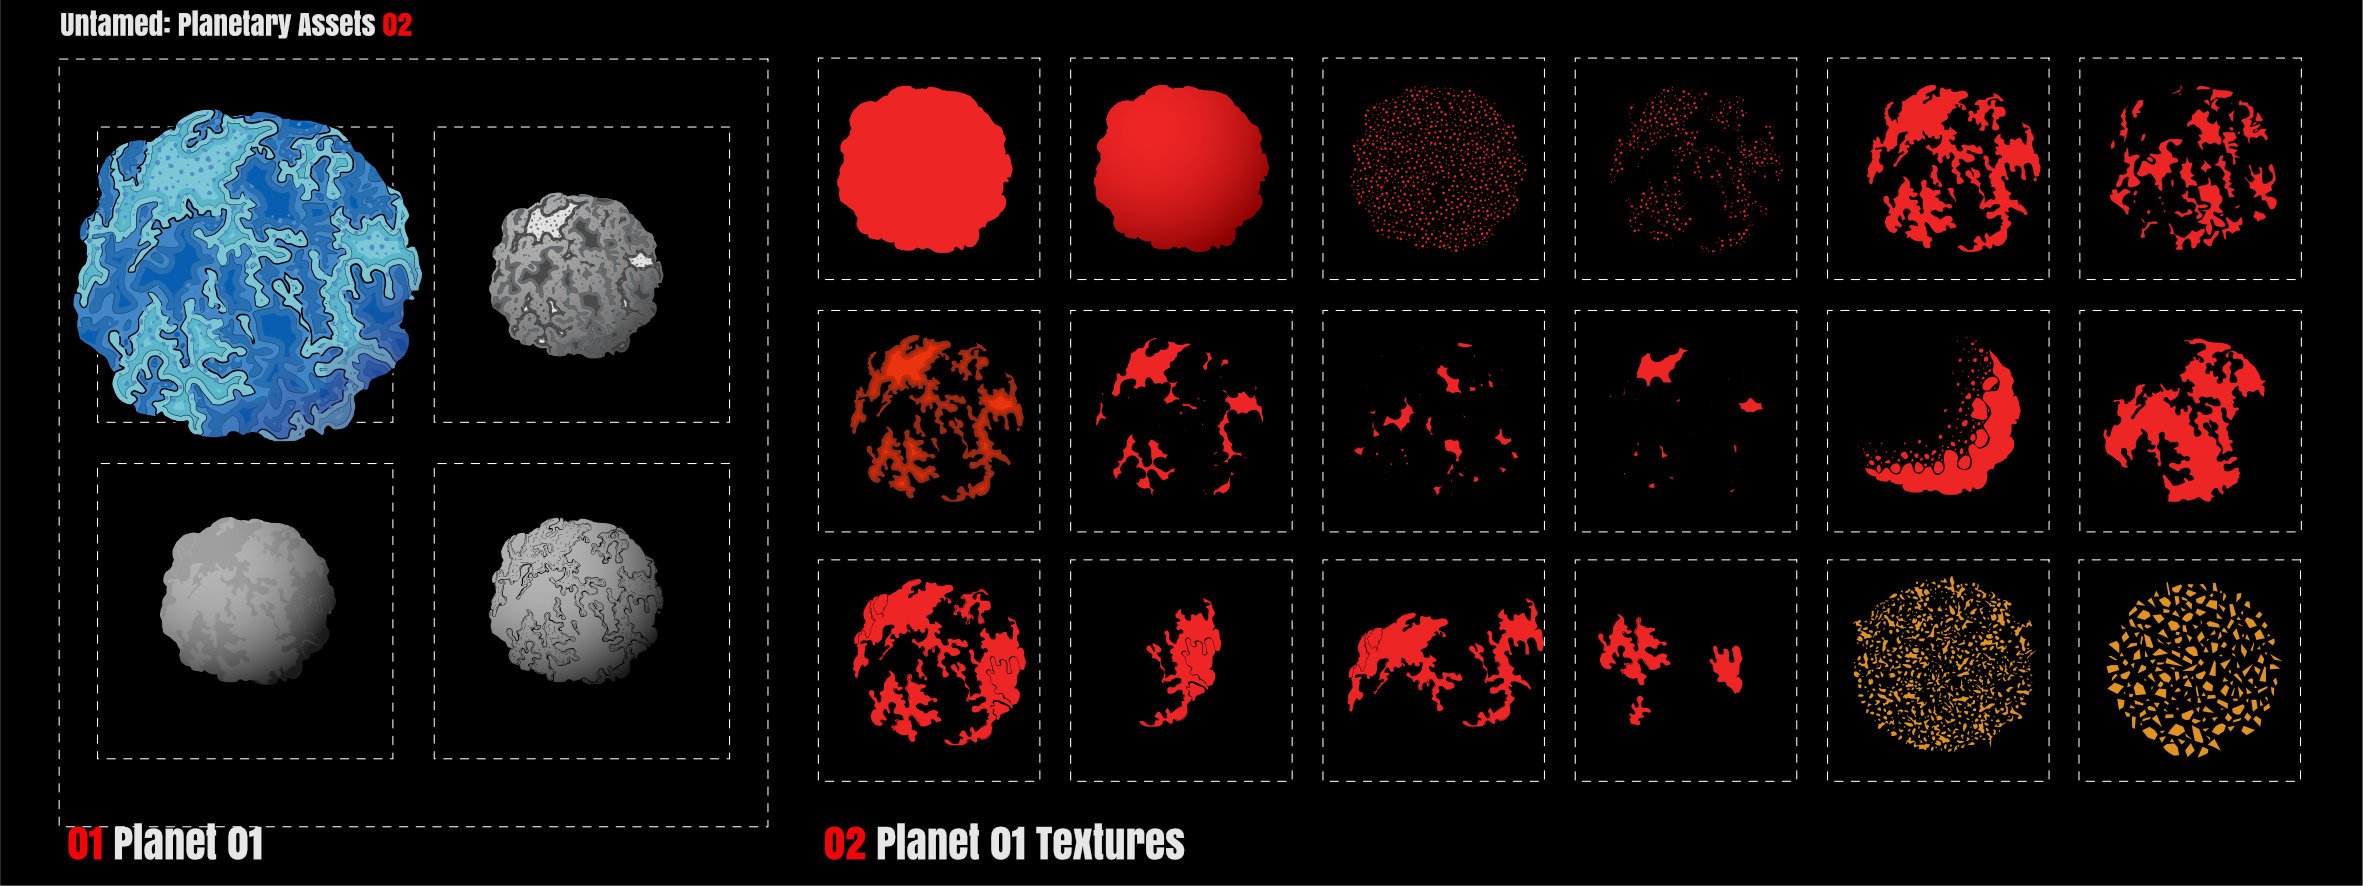
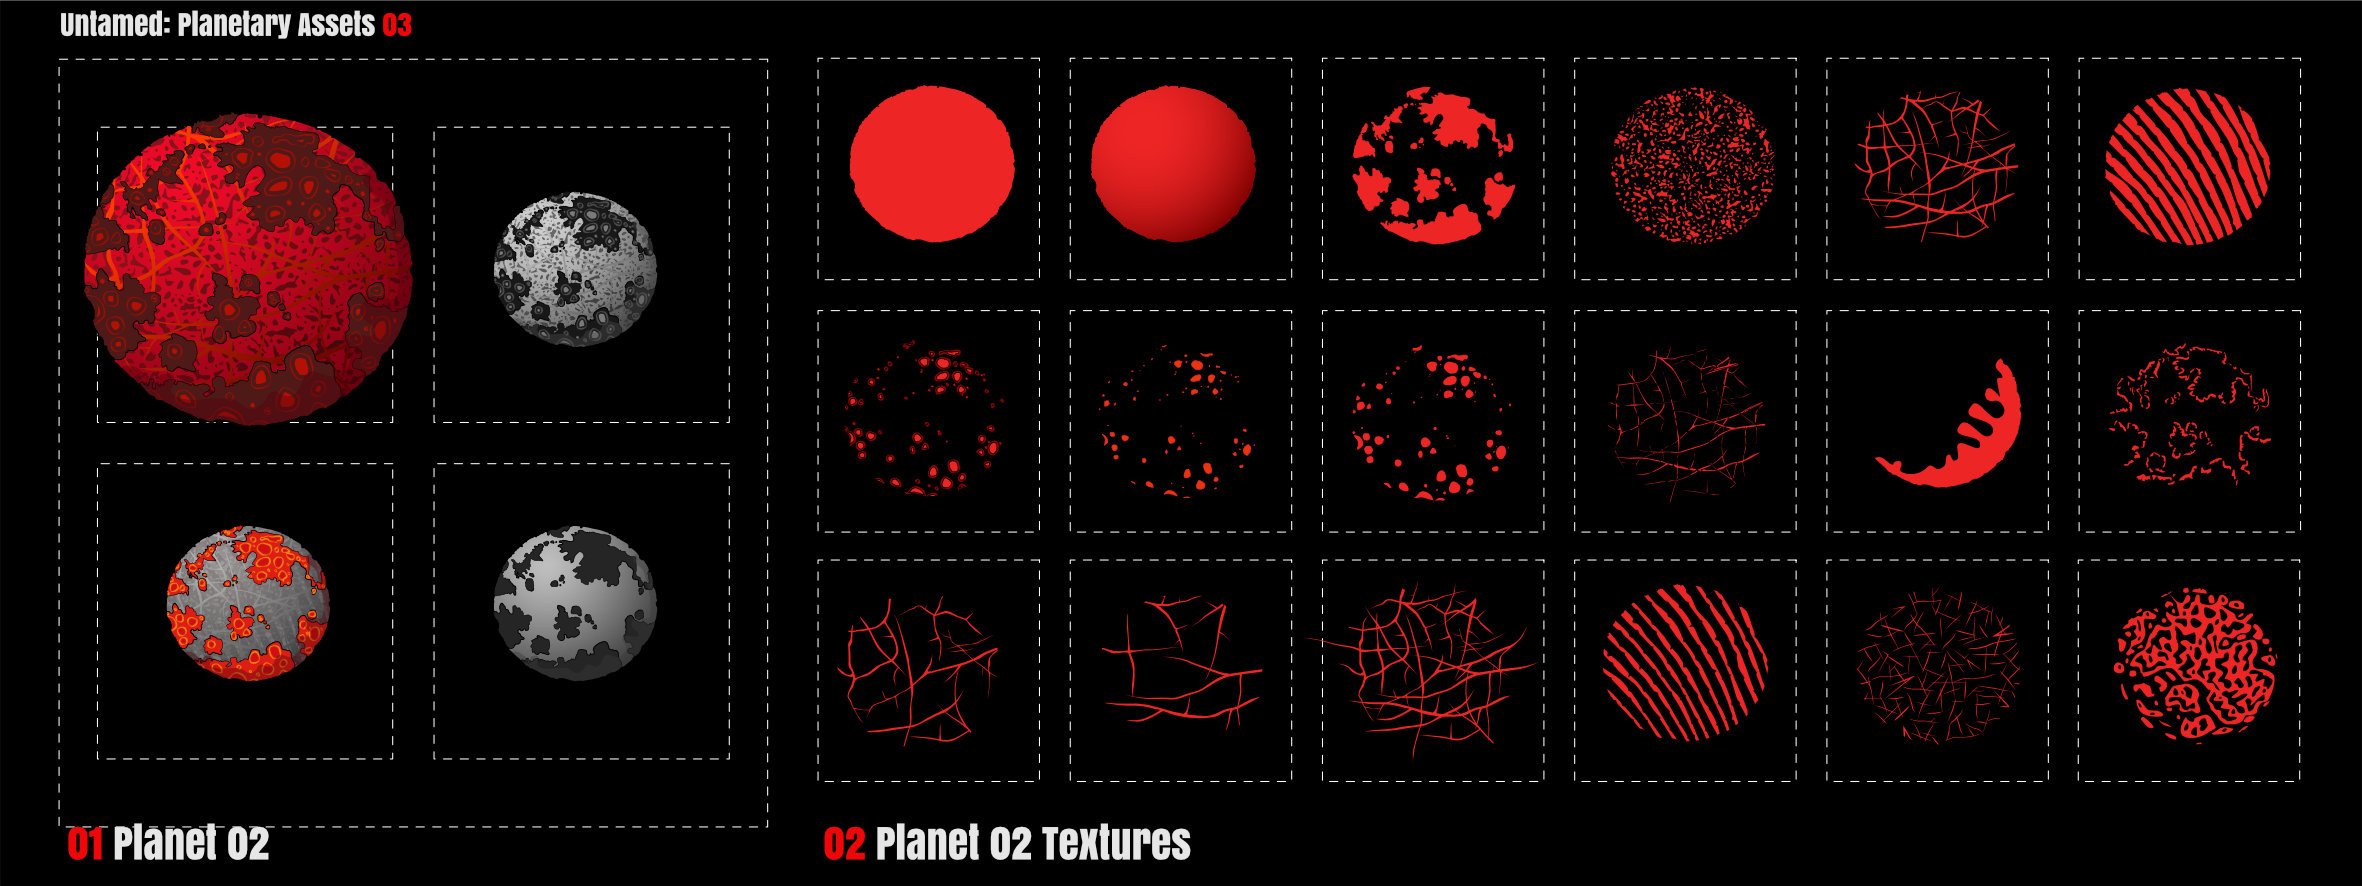
Planetary Toolkit A Collection of Vector Planets For Untamed backgrounds Added 2 planet Asset categories from the Planetary Asset Collection constructed for the Untamed Project. The full set contains 15 Planets All vector with layer stacking of textures to create variety Found the New tools extremely useful (Knife and Vector Warp) makes editing much quicker! Asset Planetary Planet 01: 1 Complete version | 3 Greyscale (Adjustment layer edits) | 15 optional textures and patterns mostly wrapped in container shapes Planet 02: 1 Complete version | 2 Greyscale (Adjustment layer edits) | 1 mixed Colour | 15 optional textures and patterns mostly wrapped in container shape Sample Sheets P1 P2 Assets File Planetary.zip
-
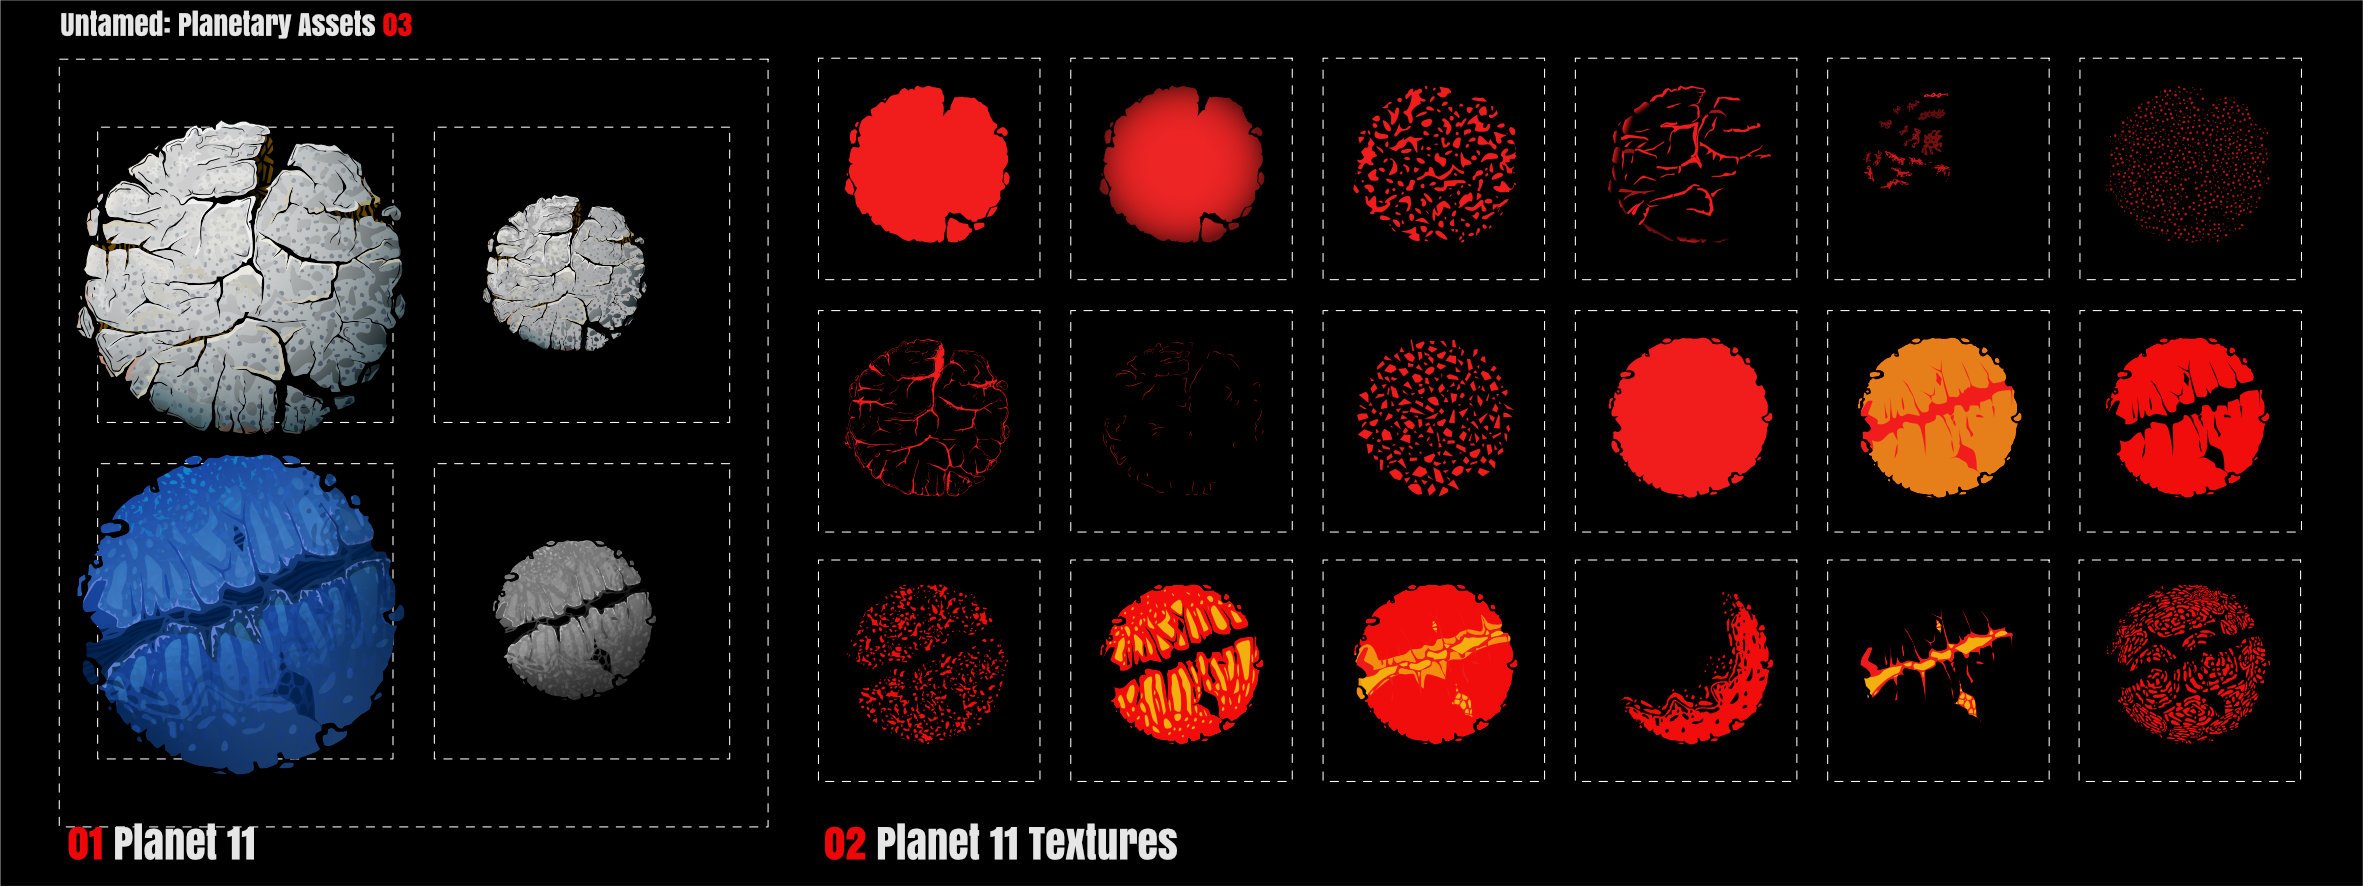
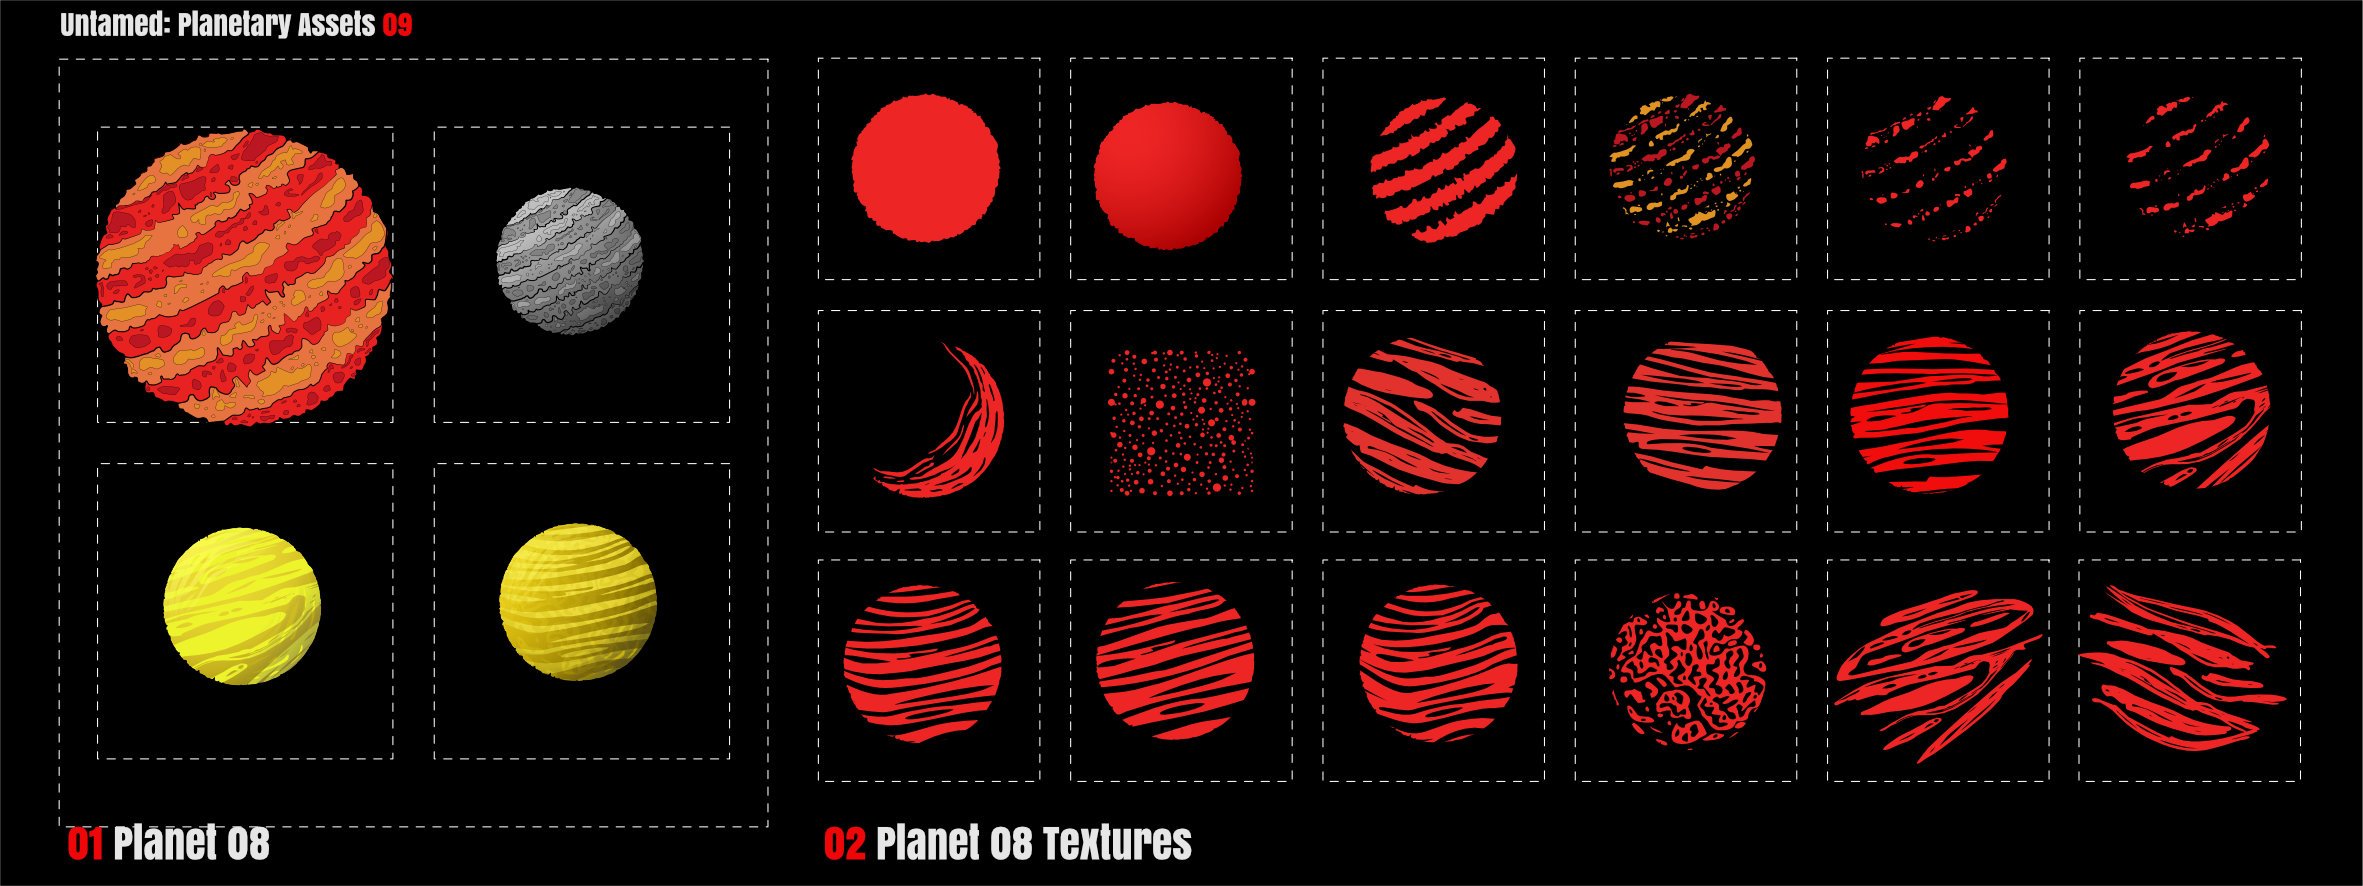
Planet Toolkit 03 P8 P9