h_d
-
Posts
1,623 -
Joined
-
Last visited
Everything posted by h_d
-

Price list in Affinity Publisher
h_d replied to LSW's topic in Desktop Questions (macOS and Windows)
Only if you export from Numbers to .xlsx, .csv or .tsv. Plain .numbers files can't be used as data sources. -
AP2 not installing NIK4 suite properly
h_d replied to Ajay's topic in Desktop Questions (macOS and Windows)
I believe the word 'Requires' should read 'Requires Global'. (There's something a bit buggy about the Settings interface: on my machine running Ventura, paths aren't shown completely unless you hover over them.) The following is from the Help for Using Plugins (which needs updating as it still refers to Settings as "Preferences"): To allow access to supporting plugin files: From the Photoshop Plugins tab, under the Plugin support folders box, click Authorise Global. The folder dialog will default to root ("Macintosh HD"). You can click Authorise here and access to support files will be applied recursively, or you can specify a particular directory that contains the support files. Press Close. Once I'd done that and restarted Photo v2, Color Efex Pro 4 and Analog Efex Pro 2 went green and are now available in my Filters-Plugins menu. -
How to add numbers in the table affinity publisher
h_d replied to Vdvm's topic in Desktop Questions (macOS and Windows)
You can also File > Place an .xlsx spreadsheet in a Publisher document. It will be placed as a table, but the values will be 'baked in': as Walt says, it can't be used to perform calculations within Publisher. -
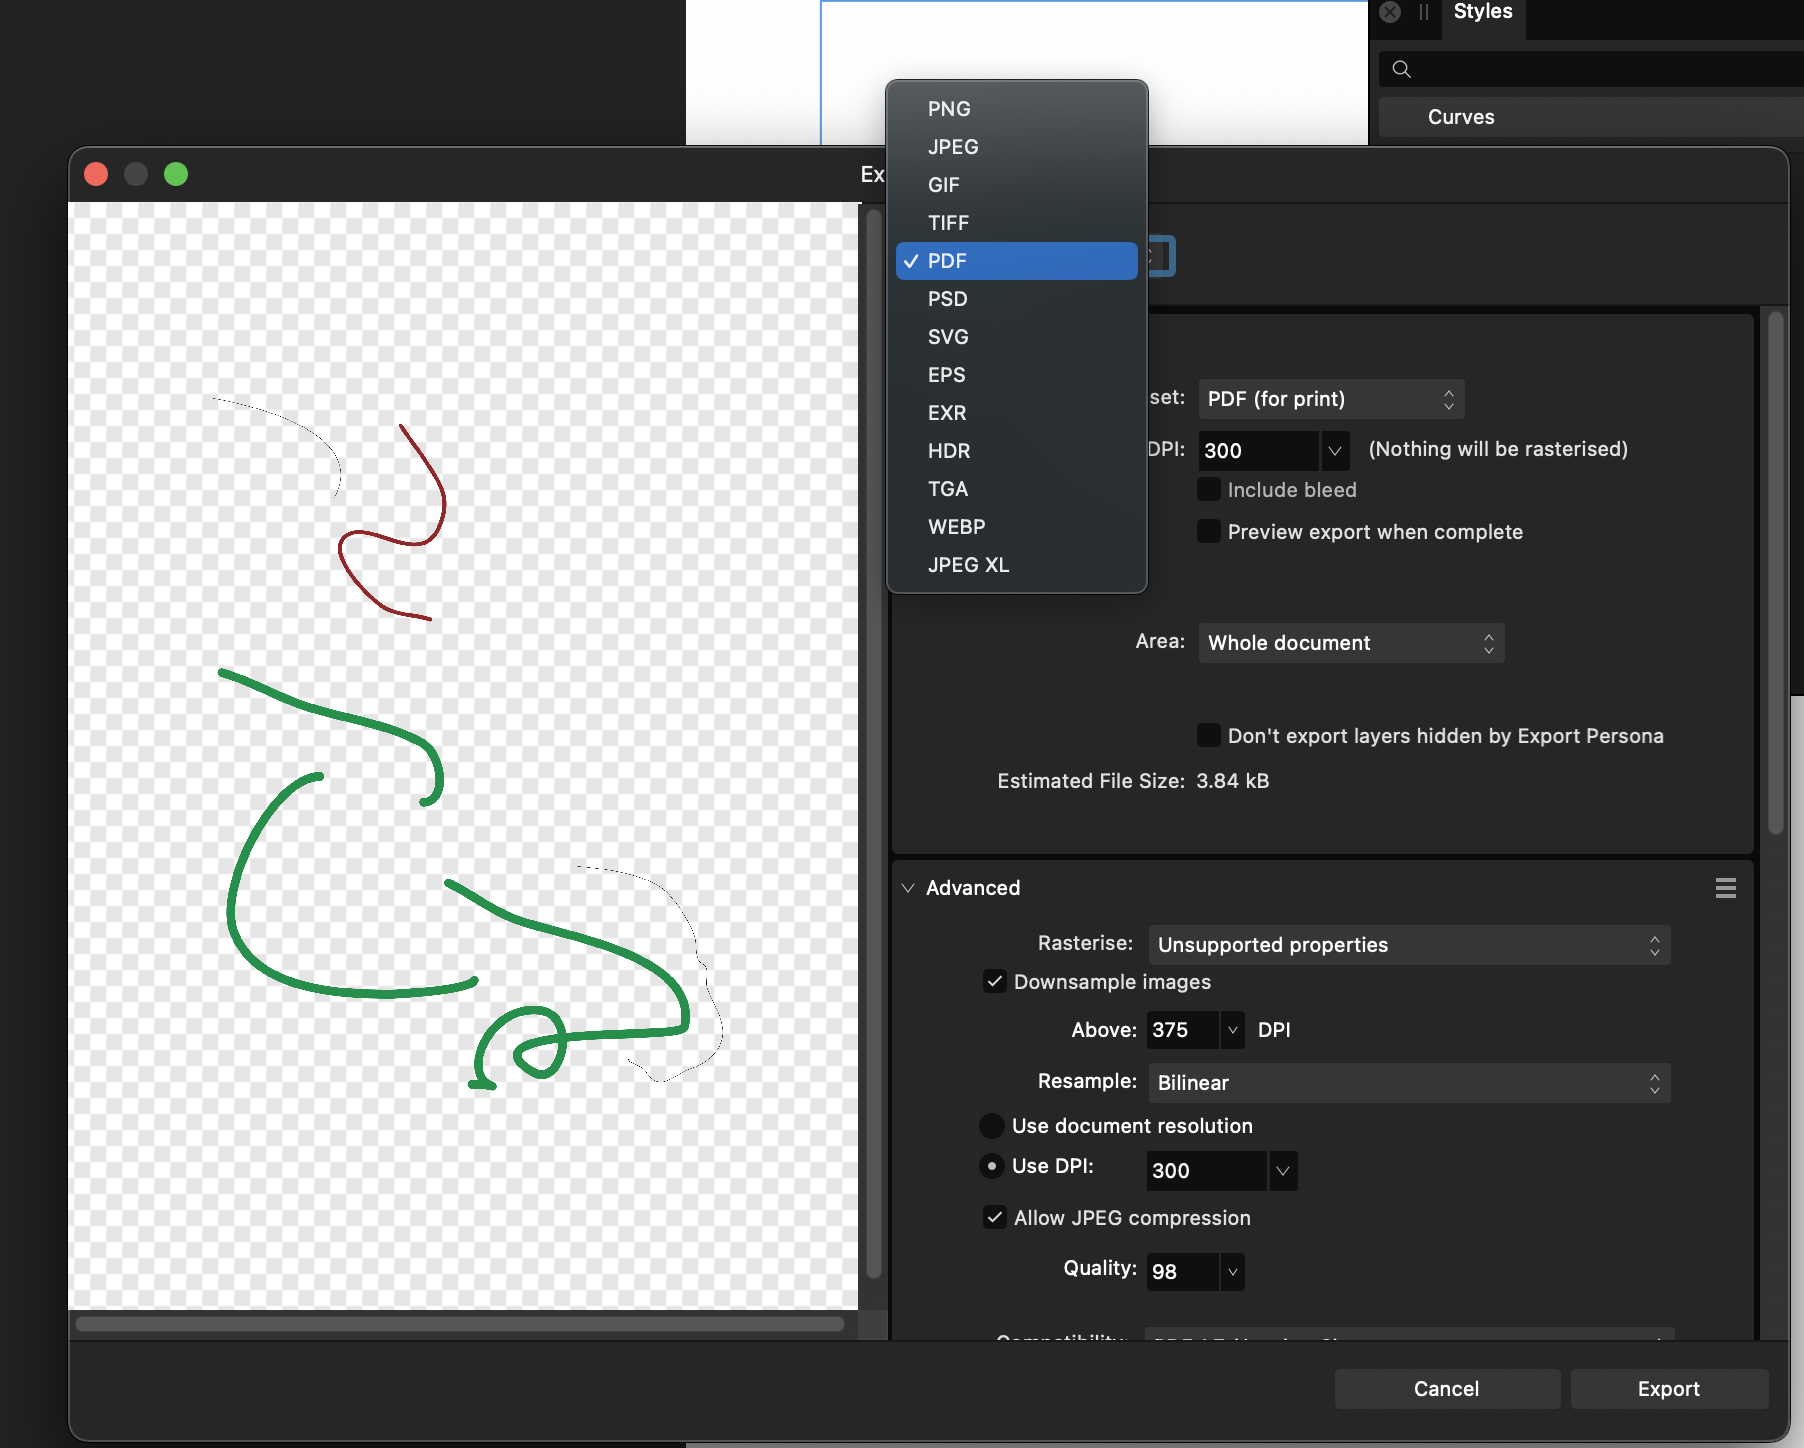
Why does V2 not allow me to export as a PDF?
h_d replied to Adrian Collett's topic in Desktop Questions (macOS and Windows)
My eyes are bleeding... -
How to access Apple color palate?
h_d replied to EWCBHC's topic in Desktop Questions (macOS and Windows)
Maybe so, although they don't offer a lot of creative dimensions...
-
How to access Apple color palate?
h_d replied to EWCBHC's topic in Desktop Questions (macOS and Windows)
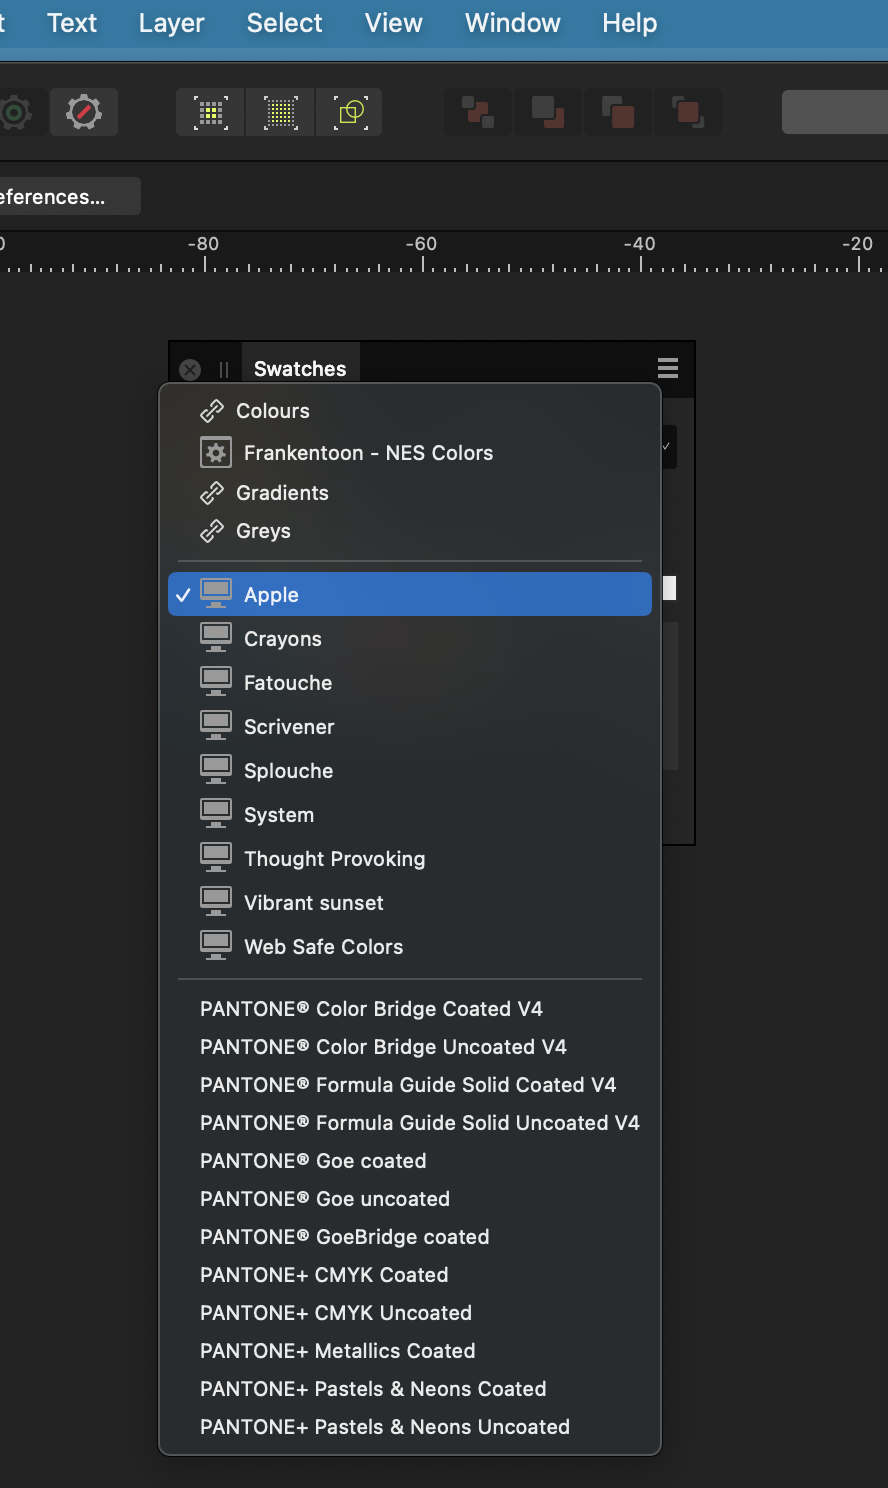
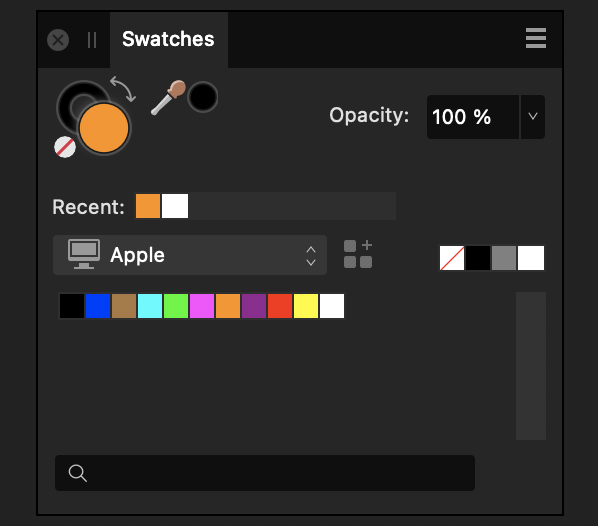
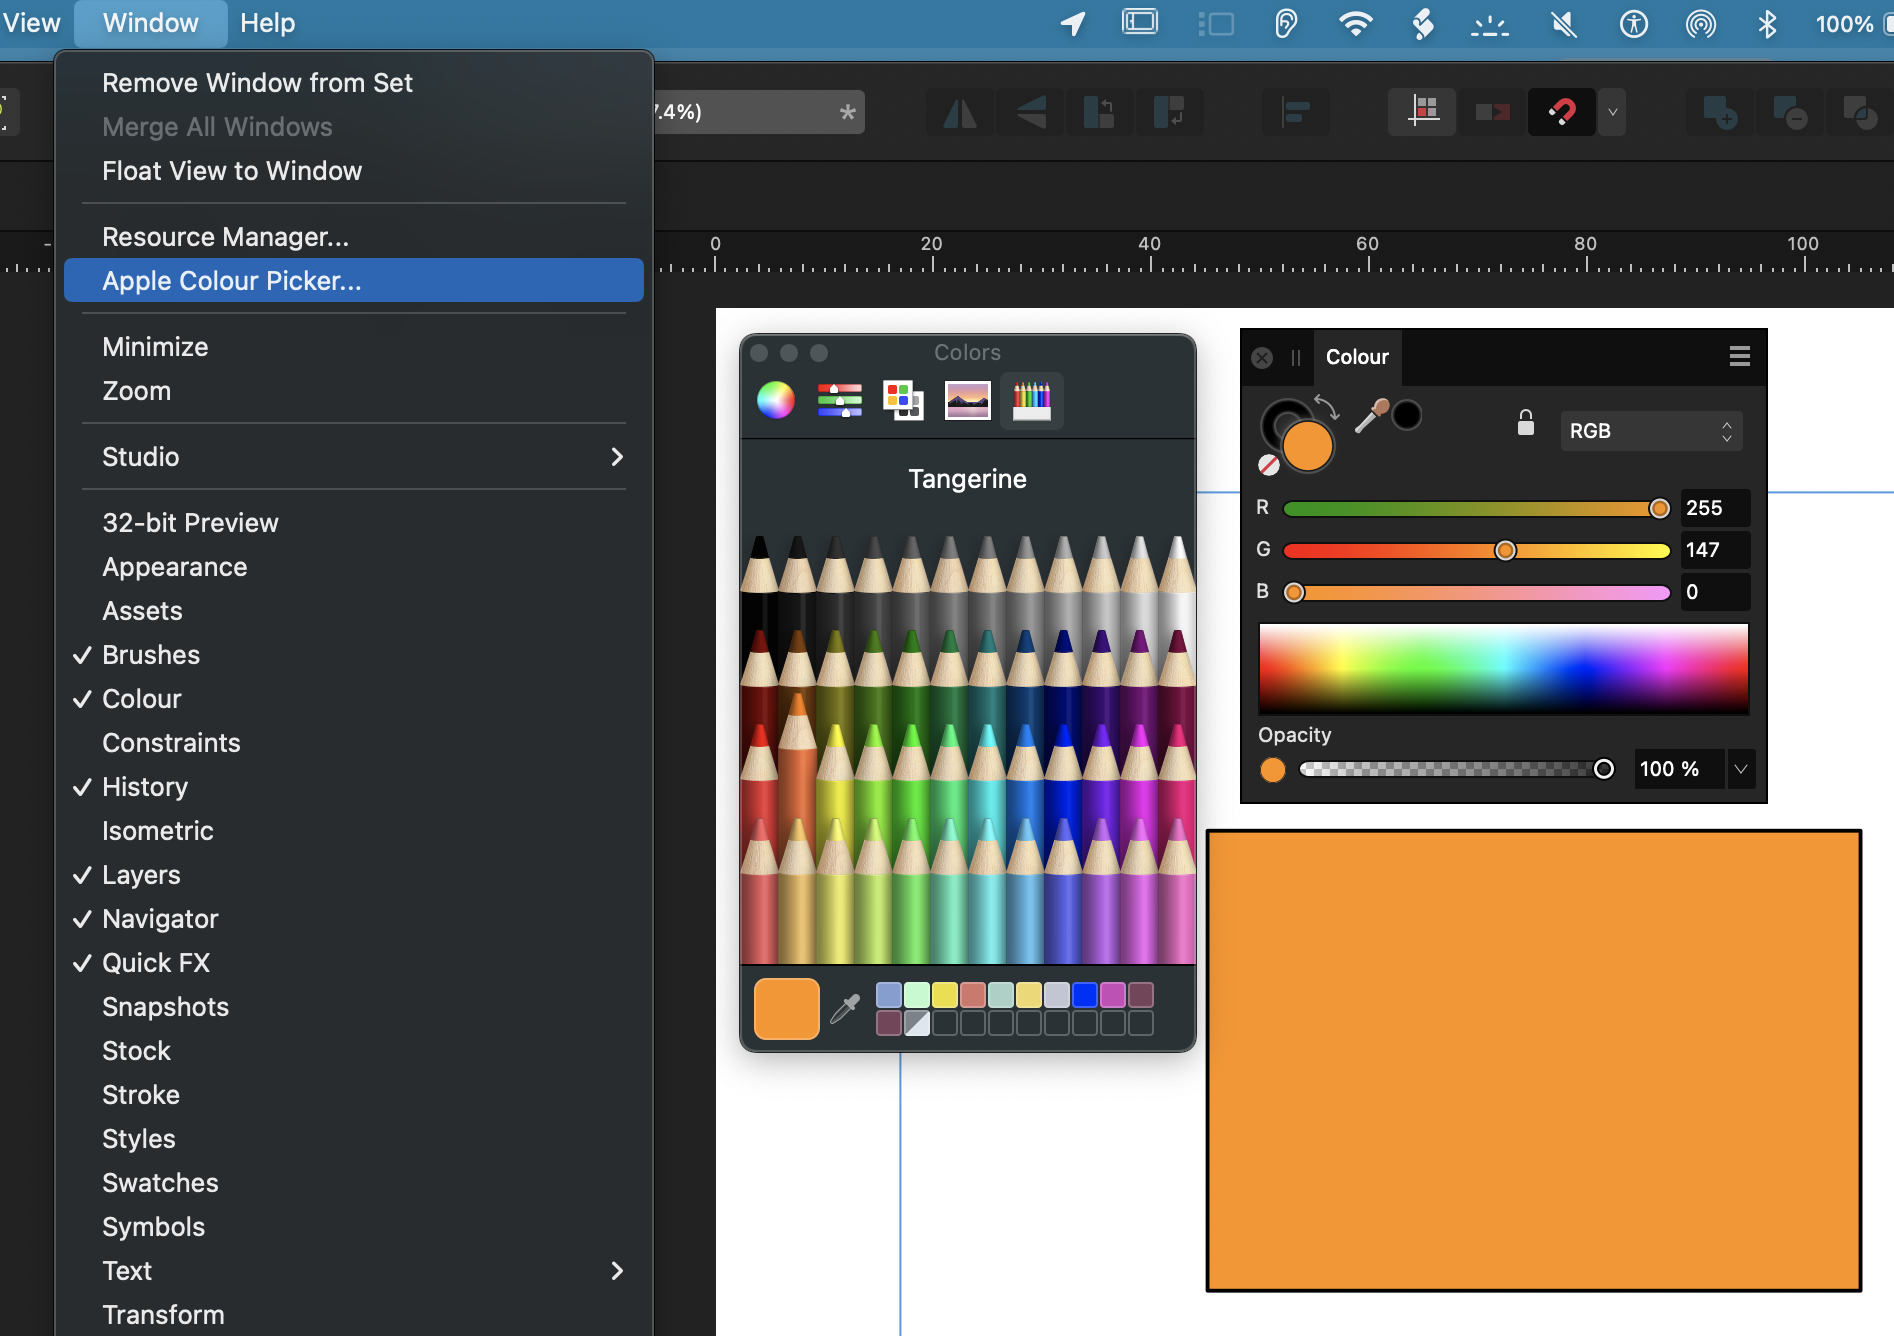
Please don't type in all caps, it's like SHOUTING. Which Apple Colour Palette were you looking for?: (Affinity Designer v2, macOS Ventura)
-
(This is what I like about these forums.)
-
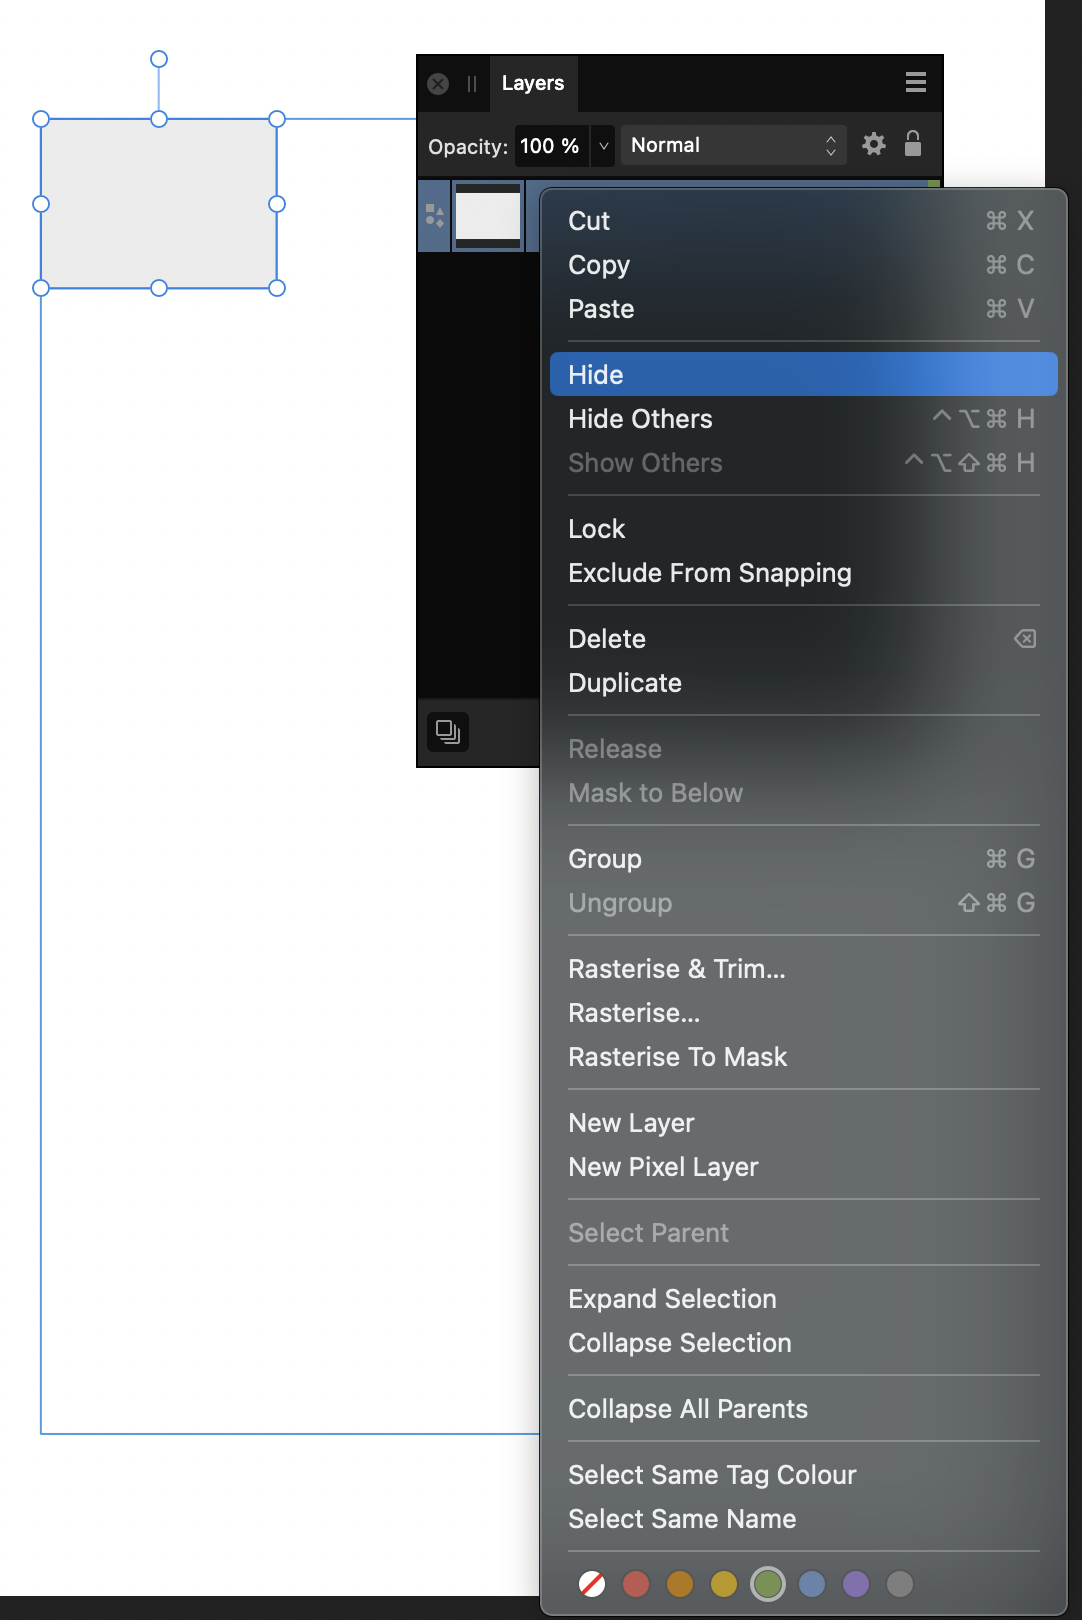
Ahhh sneaky. There was me assuming a Rectangle was its own Layer in Designer. (I guess I'm more used to Photo...) Now I understand, hope the OP does too.
-
Don't get that - could you screenshot?
-
Why does V2 not allow me to export as a PDF?
h_d replied to Adrian Collett's topic in Desktop Questions (macOS and Windows)
Then the forum to post in is this one -
Salut! According to the macOS Help for Layer Colours (Designer v2): I may be missing something but this doesn't seem to work for me (macOS Ventura, Designer 2.0). ctrl-clicking a layer in the Layers panel does not display a Properties option, and choosing a layer colour from the splodges at the bottom does not change the colour of the wireframe, paths, nodes or handles of objects on the selected layer: So as far as I can see it should work, but it doesn't.
-
Why does V2 not allow me to export as a PDF?
h_d replied to Adrian Collett's topic in Desktop Questions (macOS and Windows)
Yup, that's always been a problem with the entire Affinity suite interface. I'm so used to it that I'm instinctively aware of its existence, but for new users and those with visual difficulties it must be quite hard to spot. -
Ability to assign shortcut to node types
h_d replied to François R's topic in Feedback for the Affinity V2 Suite of Products
Seems like a good idea. You could post this in the Feedback and Suggestions section of the forum. -
Or create a new text frame, then Text > Text Wrap > ignore Text Wraps .
-
Why does V2 not allow me to export as a PDF?
h_d replied to Adrian Collett's topic in Desktop Questions (macOS and Windows)
From which application? Using which operating system? What happens if you click the button at the top of the Export dialog: If you can upload a screen shot of your own Export dialog it would probably help others to understand.
-
Not sure if I'm misunderstanding your point 1) , but here goes... Display the Styles panel (Window - Styles in V2) and click the "Hamburger". For ease of organisation, create a new category, call it (eg) Curves. Draw a thick red line with no fill, then click the Hamburger again and choose Add Style from Selection. (Alternatively Ctrl-click (macOS) on the line itself and choose Create Style). Now Ctrl-click (macOS) on the red swatch and rename it to Thick Red. Draw a thin green line, repeat You now have two styles. Draw a rectangle - it will pick up your defaults (possibly the standard 1pt black rule with a grey fill). Click on your Thick Red and the rectangle will pick up the no fill and the thick red line. Screen Recording 2022-12-08 at 20.21.40.mp4 I switched thick and thin above, but the idea is the same. Pretty sure this is how it works in v1 too. Point 2) you can sort of achieve with Symbols but not I think with Styles. This is definitely possible with v1 as well, but it may not be exactly what you want. 3) Select the tool, then press the esc key. I haven't really experimented with the Style Picker yet. I have to agree that the finer details of point 4) don't currently seem achievable. Hope that some of this helps!
-
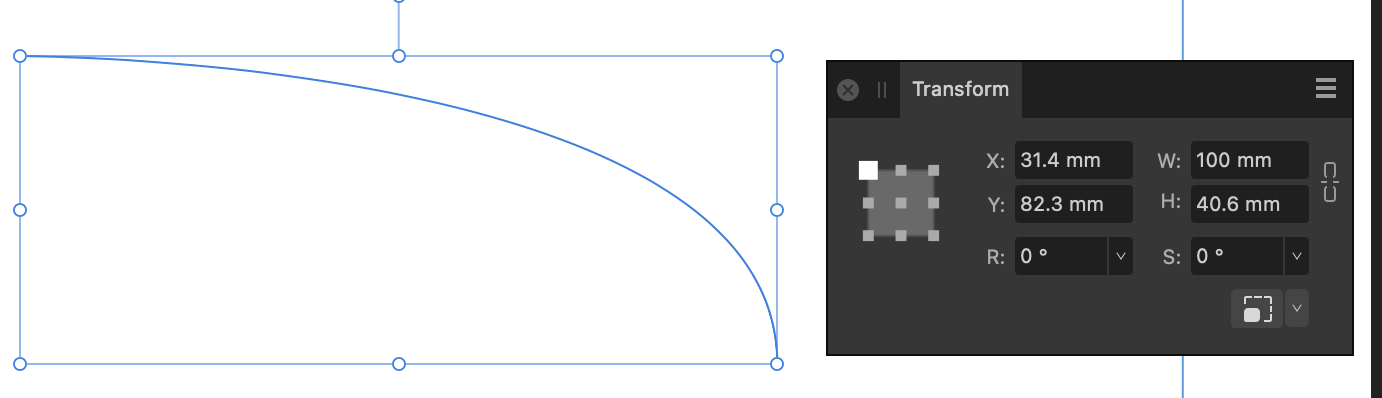
Hi @Marc L. I believe that in French, "L" stands for both "Largeur" and "Longueur" (Width and Length)? If I follow your example in the UK English version, I see this in the Transformation Panel: W is the width of the bounding box. I'm not great at geometry, but I'm pretty certain that the resulting line is more than 100mm long. Seems like a misleading interface issue in the French version - maybe should be "La" and "Lo" for clarity?
-
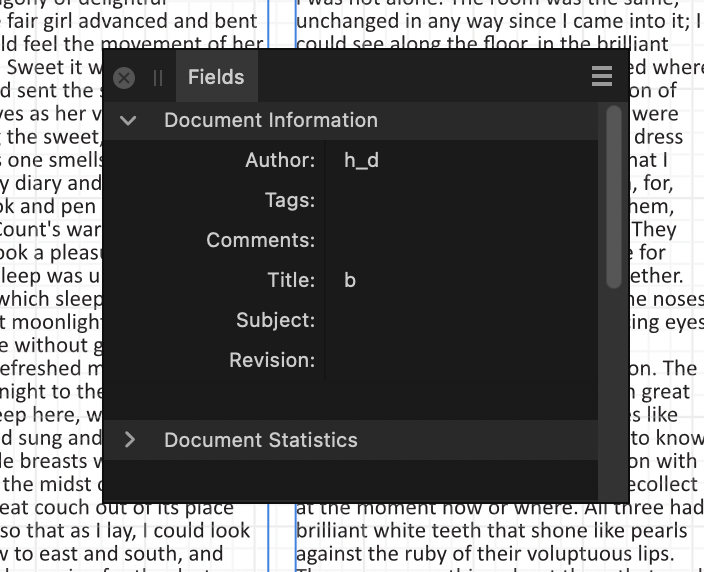
How to edit file information?
h_d replied to pbvcity's topic in Desktop Questions (macOS and Windows)
Hi @pbvcity and welcome! It's because the Title isn't necessarily the same as the file name. In Affinity Publisher v2, pull down the Window menu and go to References - Fields: Change the Title under Document Information. In Affinity Photo v2, it's Window > Metadata > then the File popup: There doesn't seem to be any direct way to set the title in Designer 2, which frankly is a bit pants. (Forgive me if I'm wrong about this.) However, if you have Photo 2 then you can switch into it from Designer (via File - Edit in Photo), set the title in Photo, then switch back to Designer (via File - Edit in Designer), export the pdf from Designer and its title will be the one you set in Photo. (All of these are from the macOS versions, but I would imagine Windows is identical in this respect.)
-
New to the Affinity Family with tons of questions
h_d replied to DeanK's topic in Desktop Questions (macOS and Windows)
Affinity Revolution have some good stuff too. -
Mac Space Bar Stopped Working in Affinity
h_d replied to Lineguage's topic in Desktop Questions (macOS and Windows)
Does the space bar work correctly in other, non-Affinity apps? If not, and you're using one of a number of specific laptop models, then you might be eligible for Apple's keyboard replacement program. About a year ago I had problems with characters repeating or not appearing on my MBP 15" and the keyboard was replaced quickly and free of charge by an authorised service provider. Probably not the most likely explanation, but you never know... -
Hi @Old eagle and welcome! A .dmg is a disk image - a 'virtual' disk that is unmounted every time you restart your Mac. After you've opened it and before you launch the v2 applications, you need to drag the application icon to your Applications folder: affinity.mp4 That's the meaning of the arrow in the .dmg window, although I have seen it presented more clearly. After you've dragged and dropped, the applications will be permanently available and you can delete the original .dmg files from your Downloads folder. (There's no need to delete your Version 1's unless you're short of disk space.)
-
Hi @TomiBB and welcome. If you have a different question to the original 6-year-old post, it's better to create a new thread. You don't say which program you're using, or which OS. So all I can tell you is that on macOS, in Affinity Designer, Photo and Publisher v2, selecting the Node tool and dragging over a curve with shift and control held down will toggle the node selection. I don't know what the combination is on Windows: the control key has slightly different functions. There's a tooltip at the bottom of the screen: So you can indeed invert node selection.
-
Entirely up to you. You don't have to remove v1 - it and v2 will run quite happily together.
-
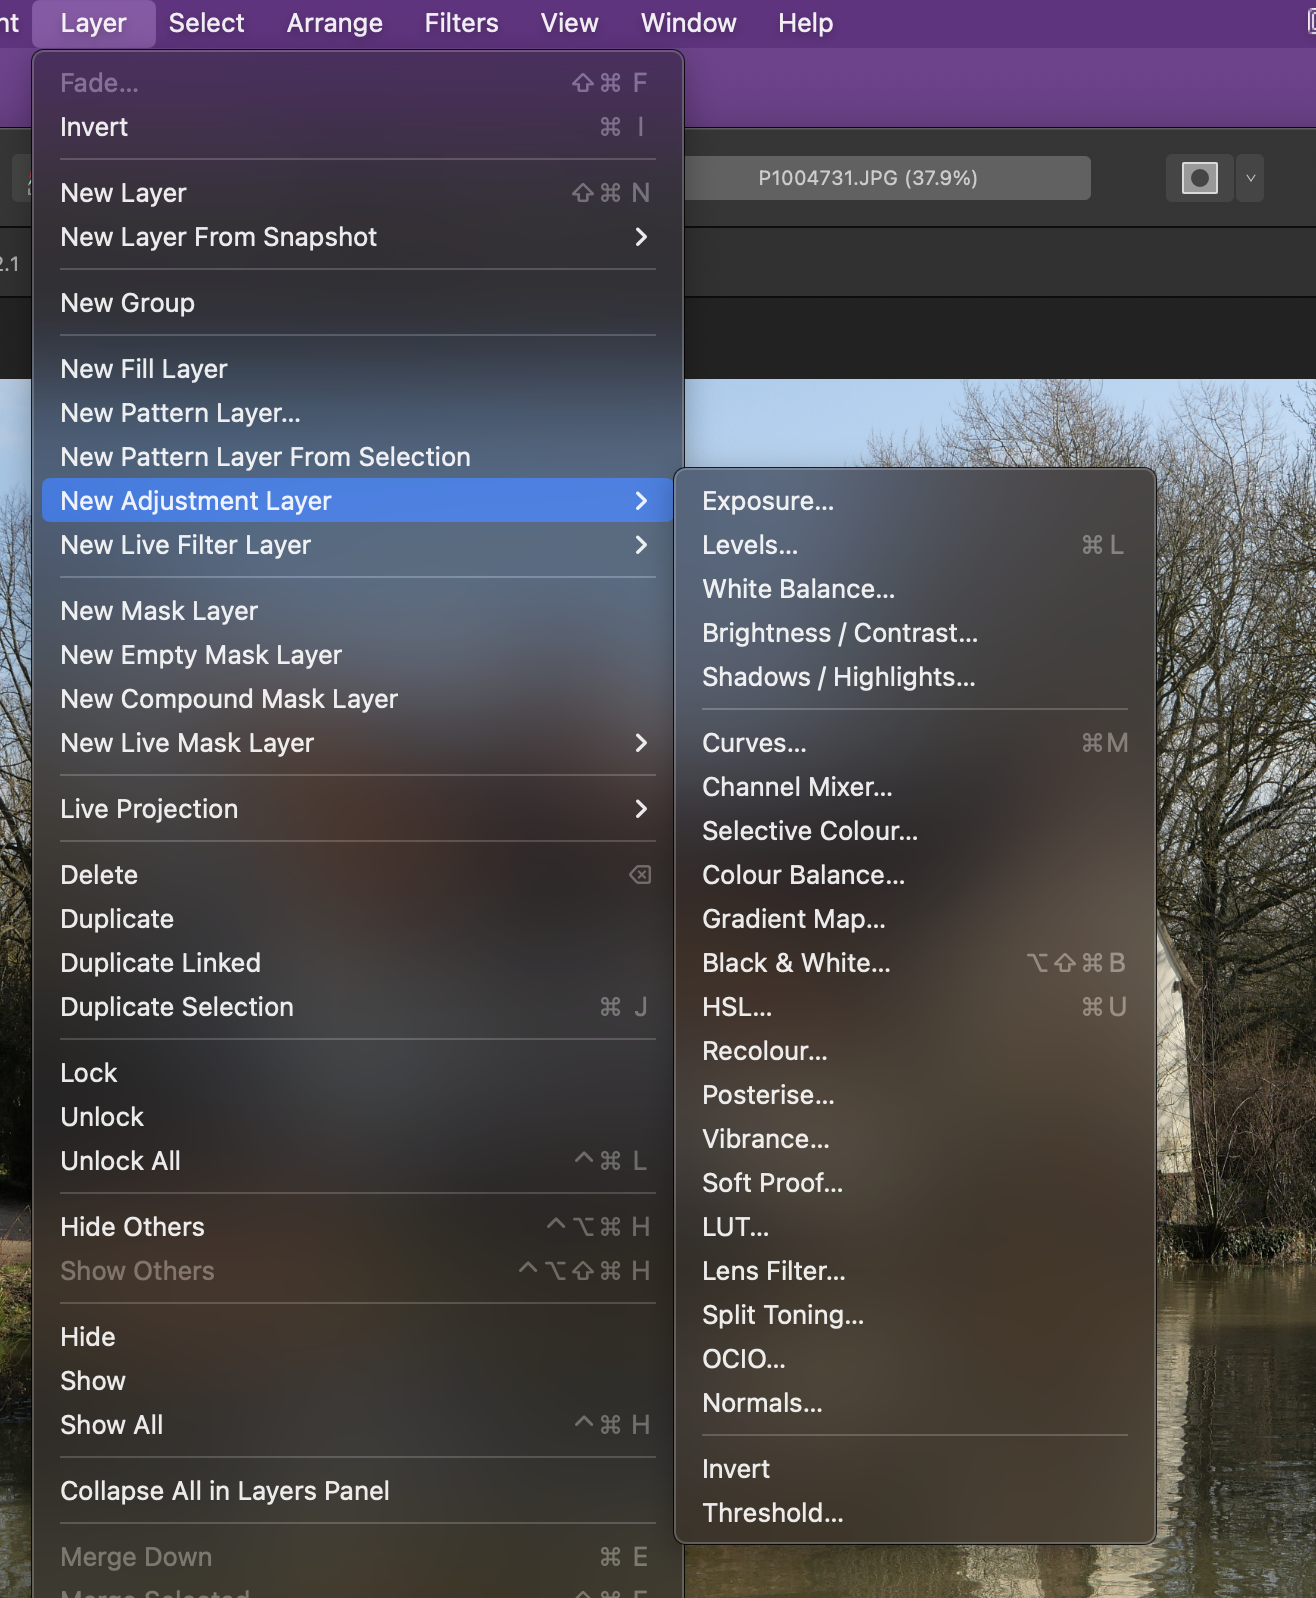
Layer - New Adjustment Layer is a good place to start: Also checkout Layer - New Live Filter Layer: All of these are non-destructive.
-
Why use Develop Persona at all for this workflow? Use Photo Persona, save your image as an .afphoto document with all adjustments/filters included, then export to .jpg when you want to show it to your client. You can open the .afphoto document months later and modify the adjustments and filters, then export to .jpg again.