Nikhail
-
Posts
9 -
Joined
-
Last visited
-
 KRYoung reacted to a post in a topic:
Reflected Skyline (Versions 1 & 2)
KRYoung reacted to a post in a topic:
Reflected Skyline (Versions 1 & 2)
-
KRYoung reacted to a post in a topic:
Wine Cellar
-
 SrPx reacted to a post in a topic:
Fashionista Lookbooks (Mockups)
SrPx reacted to a post in a topic:
Fashionista Lookbooks (Mockups)
-
Alan Ralph reacted to a post in a topic:
Wine Cellar
-
affinity publisher Fashionista Lookbooks (Mockups)
Nikhail replied to Nikhail's topic in Share your work
Thanks a lot, Danny. Appreciate it. -
dannyg9 reacted to a post in a topic:
Fashionista Lookbooks (Mockups)
-
Mithferion reacted to a post in a topic:
The Whittler (Versions 1 & 2)
-
Mithferion reacted to a post in a topic:
Fashionista Lookbooks (Mockups)
-
Mithferion reacted to a post in a topic:
Wine Cellar
-
P. Tate reacted to a post in a topic:
Wine Cellar
-
StuartRc reacted to a post in a topic:
Wine Cellar
-
This isometric illustration project was probably one of the most difficult I've ever worked on but absolutely worth all the effort in the end. Big shout out to Kevin House for taking the time to provide the walk-through and resources to get it completed 💪

-
- 10
-
-
- affinity suite
- illustration
- (and 6 more)
-
Nikhail reacted to a post in a topic:
Rocket (with warp mesh example)
-
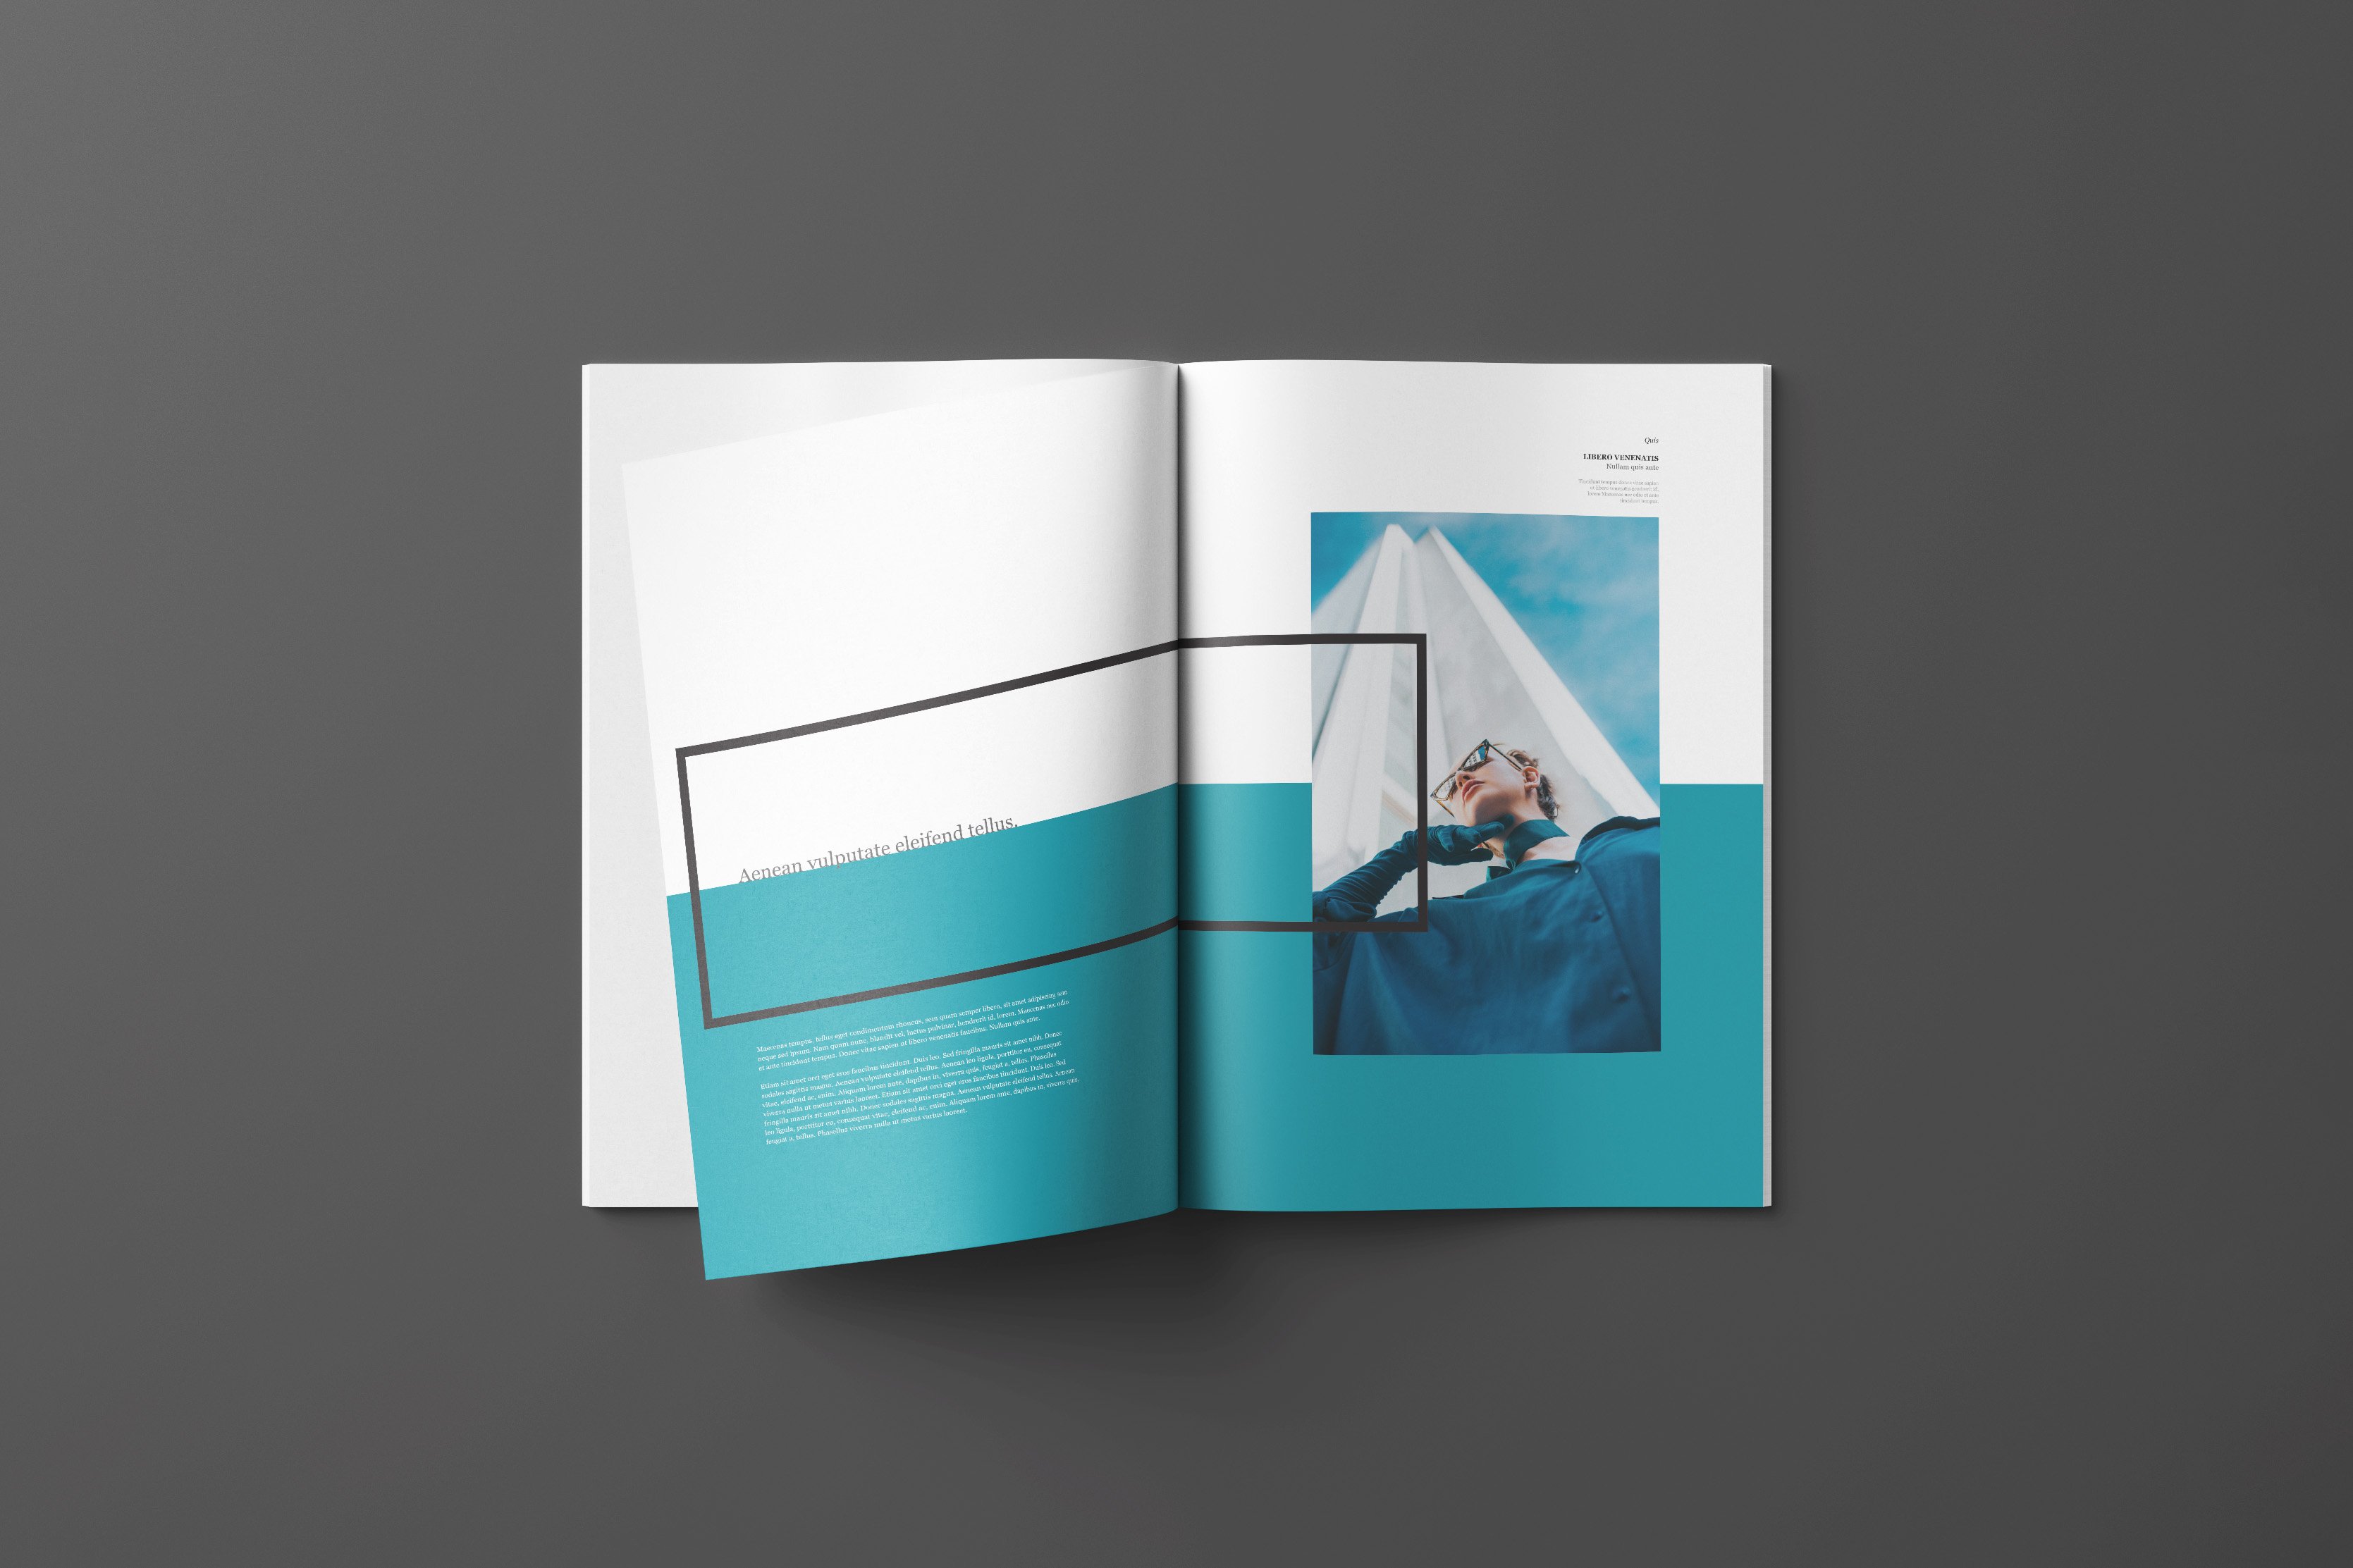
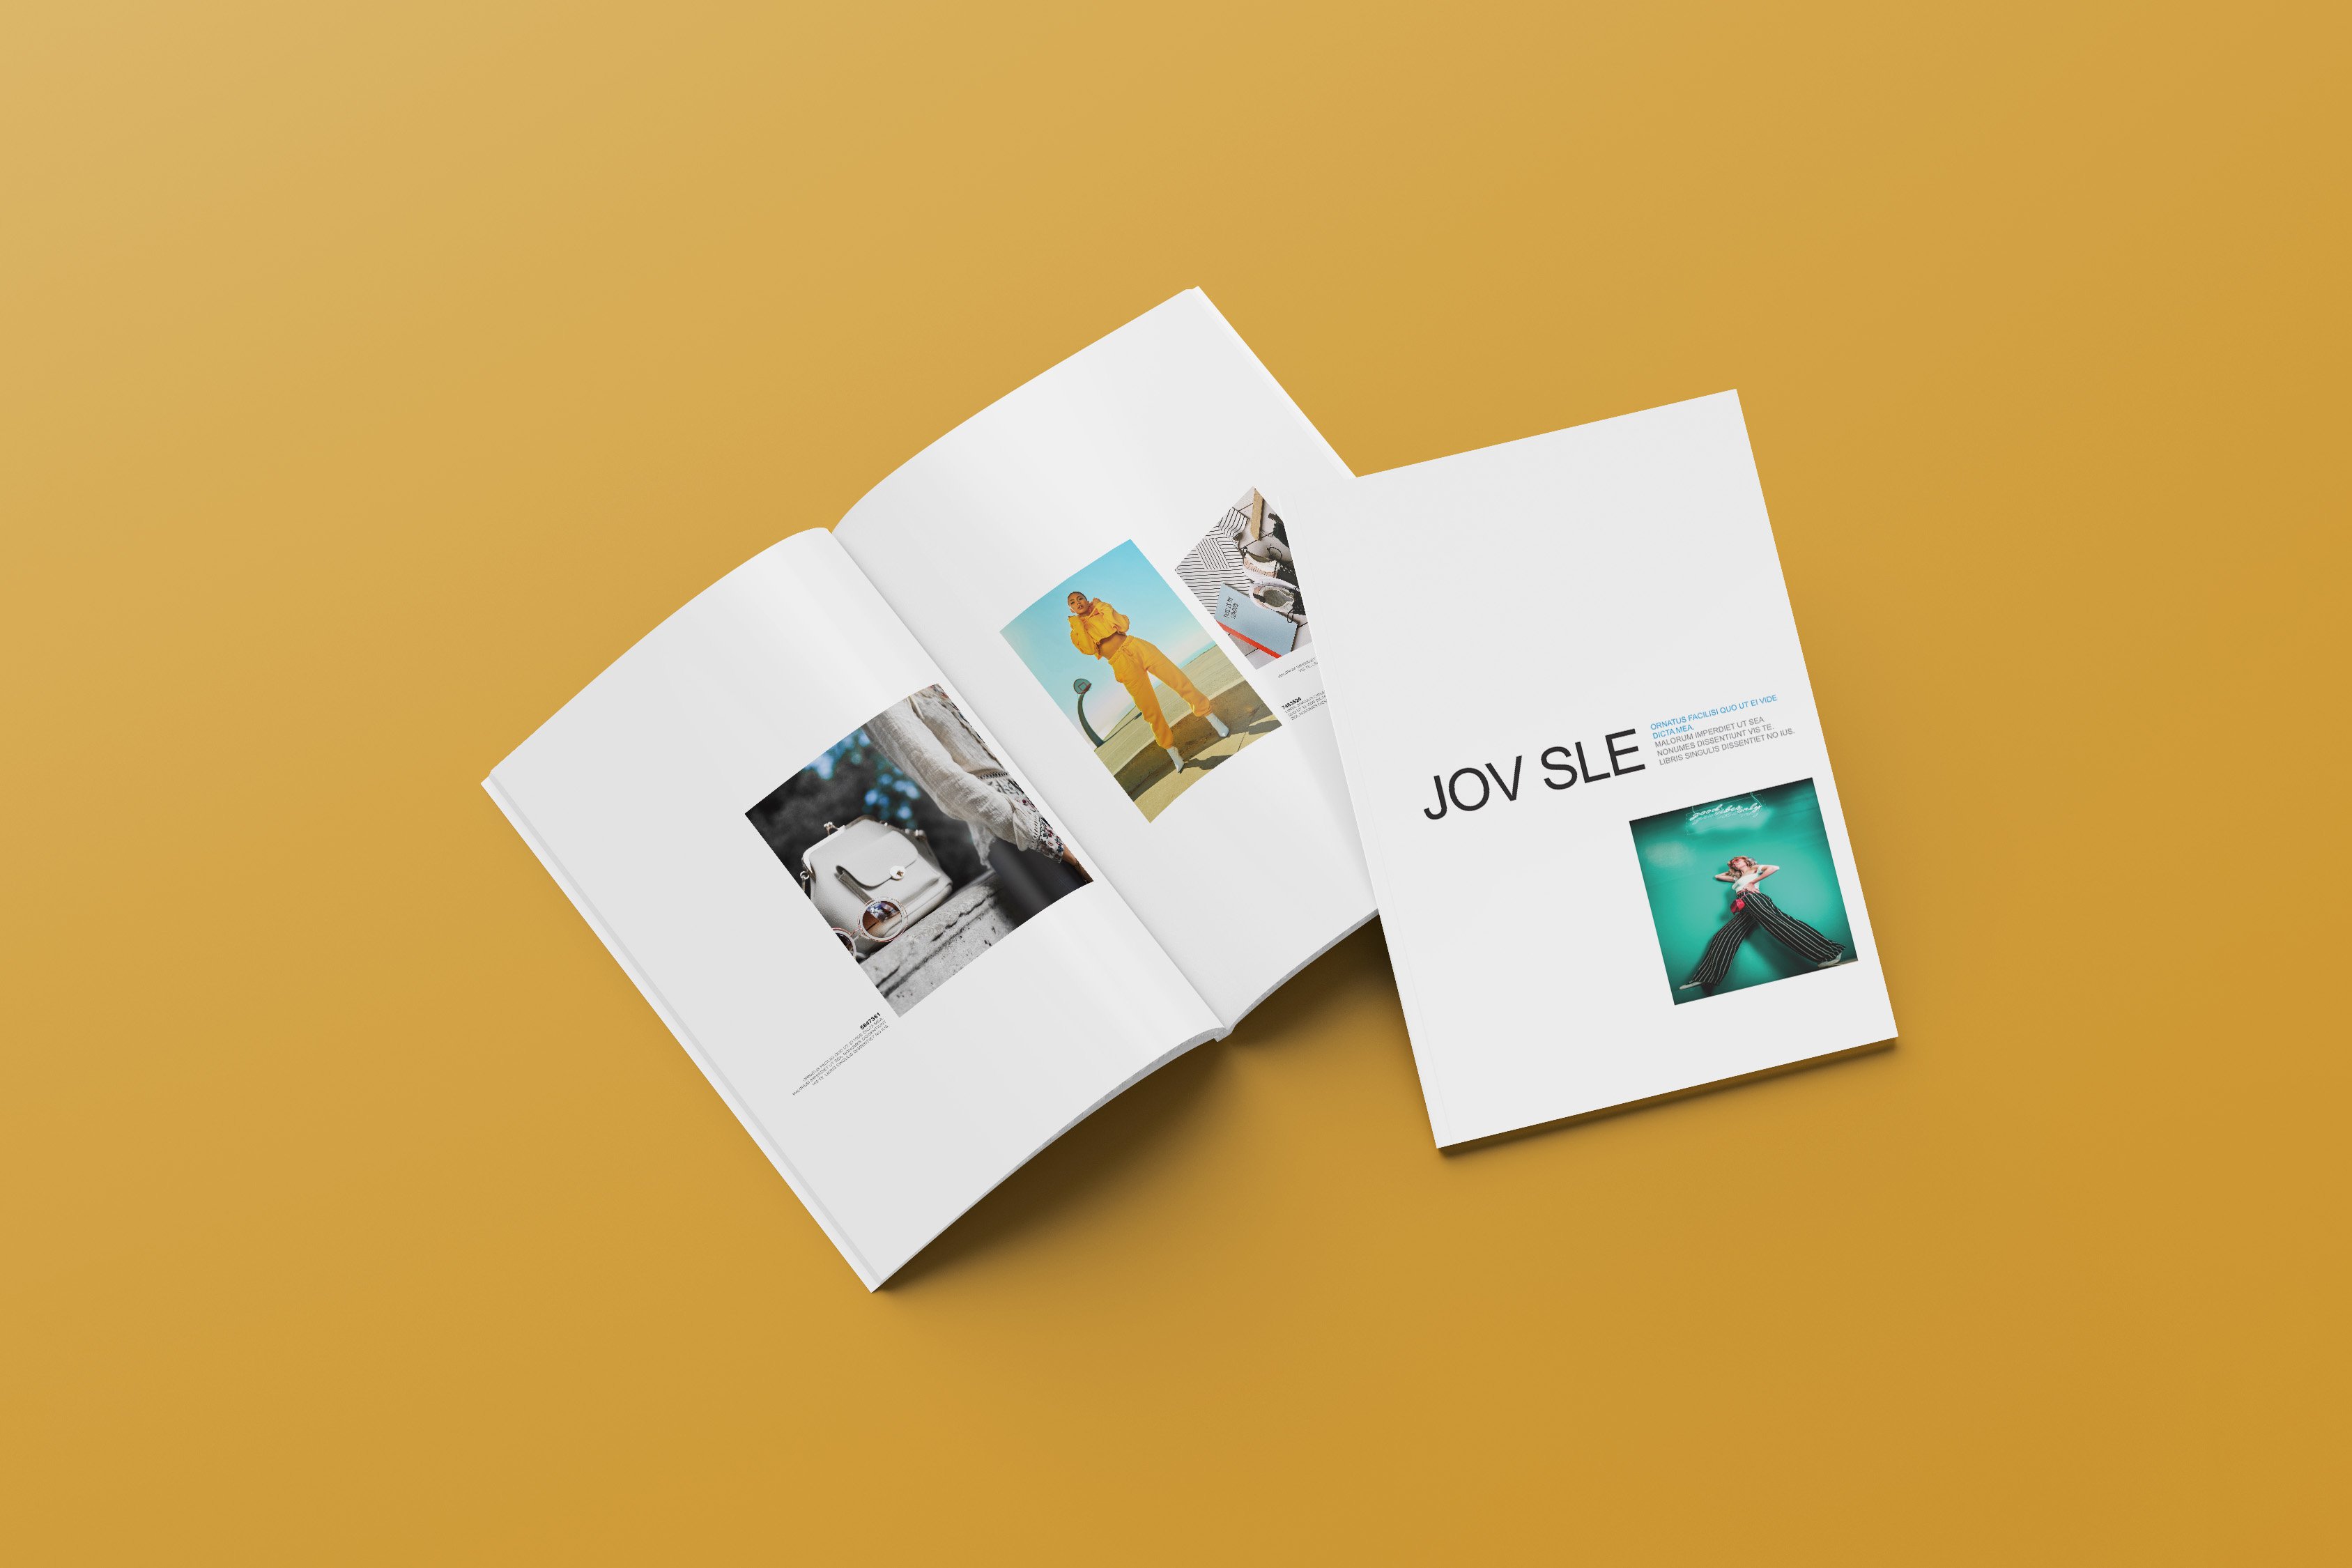
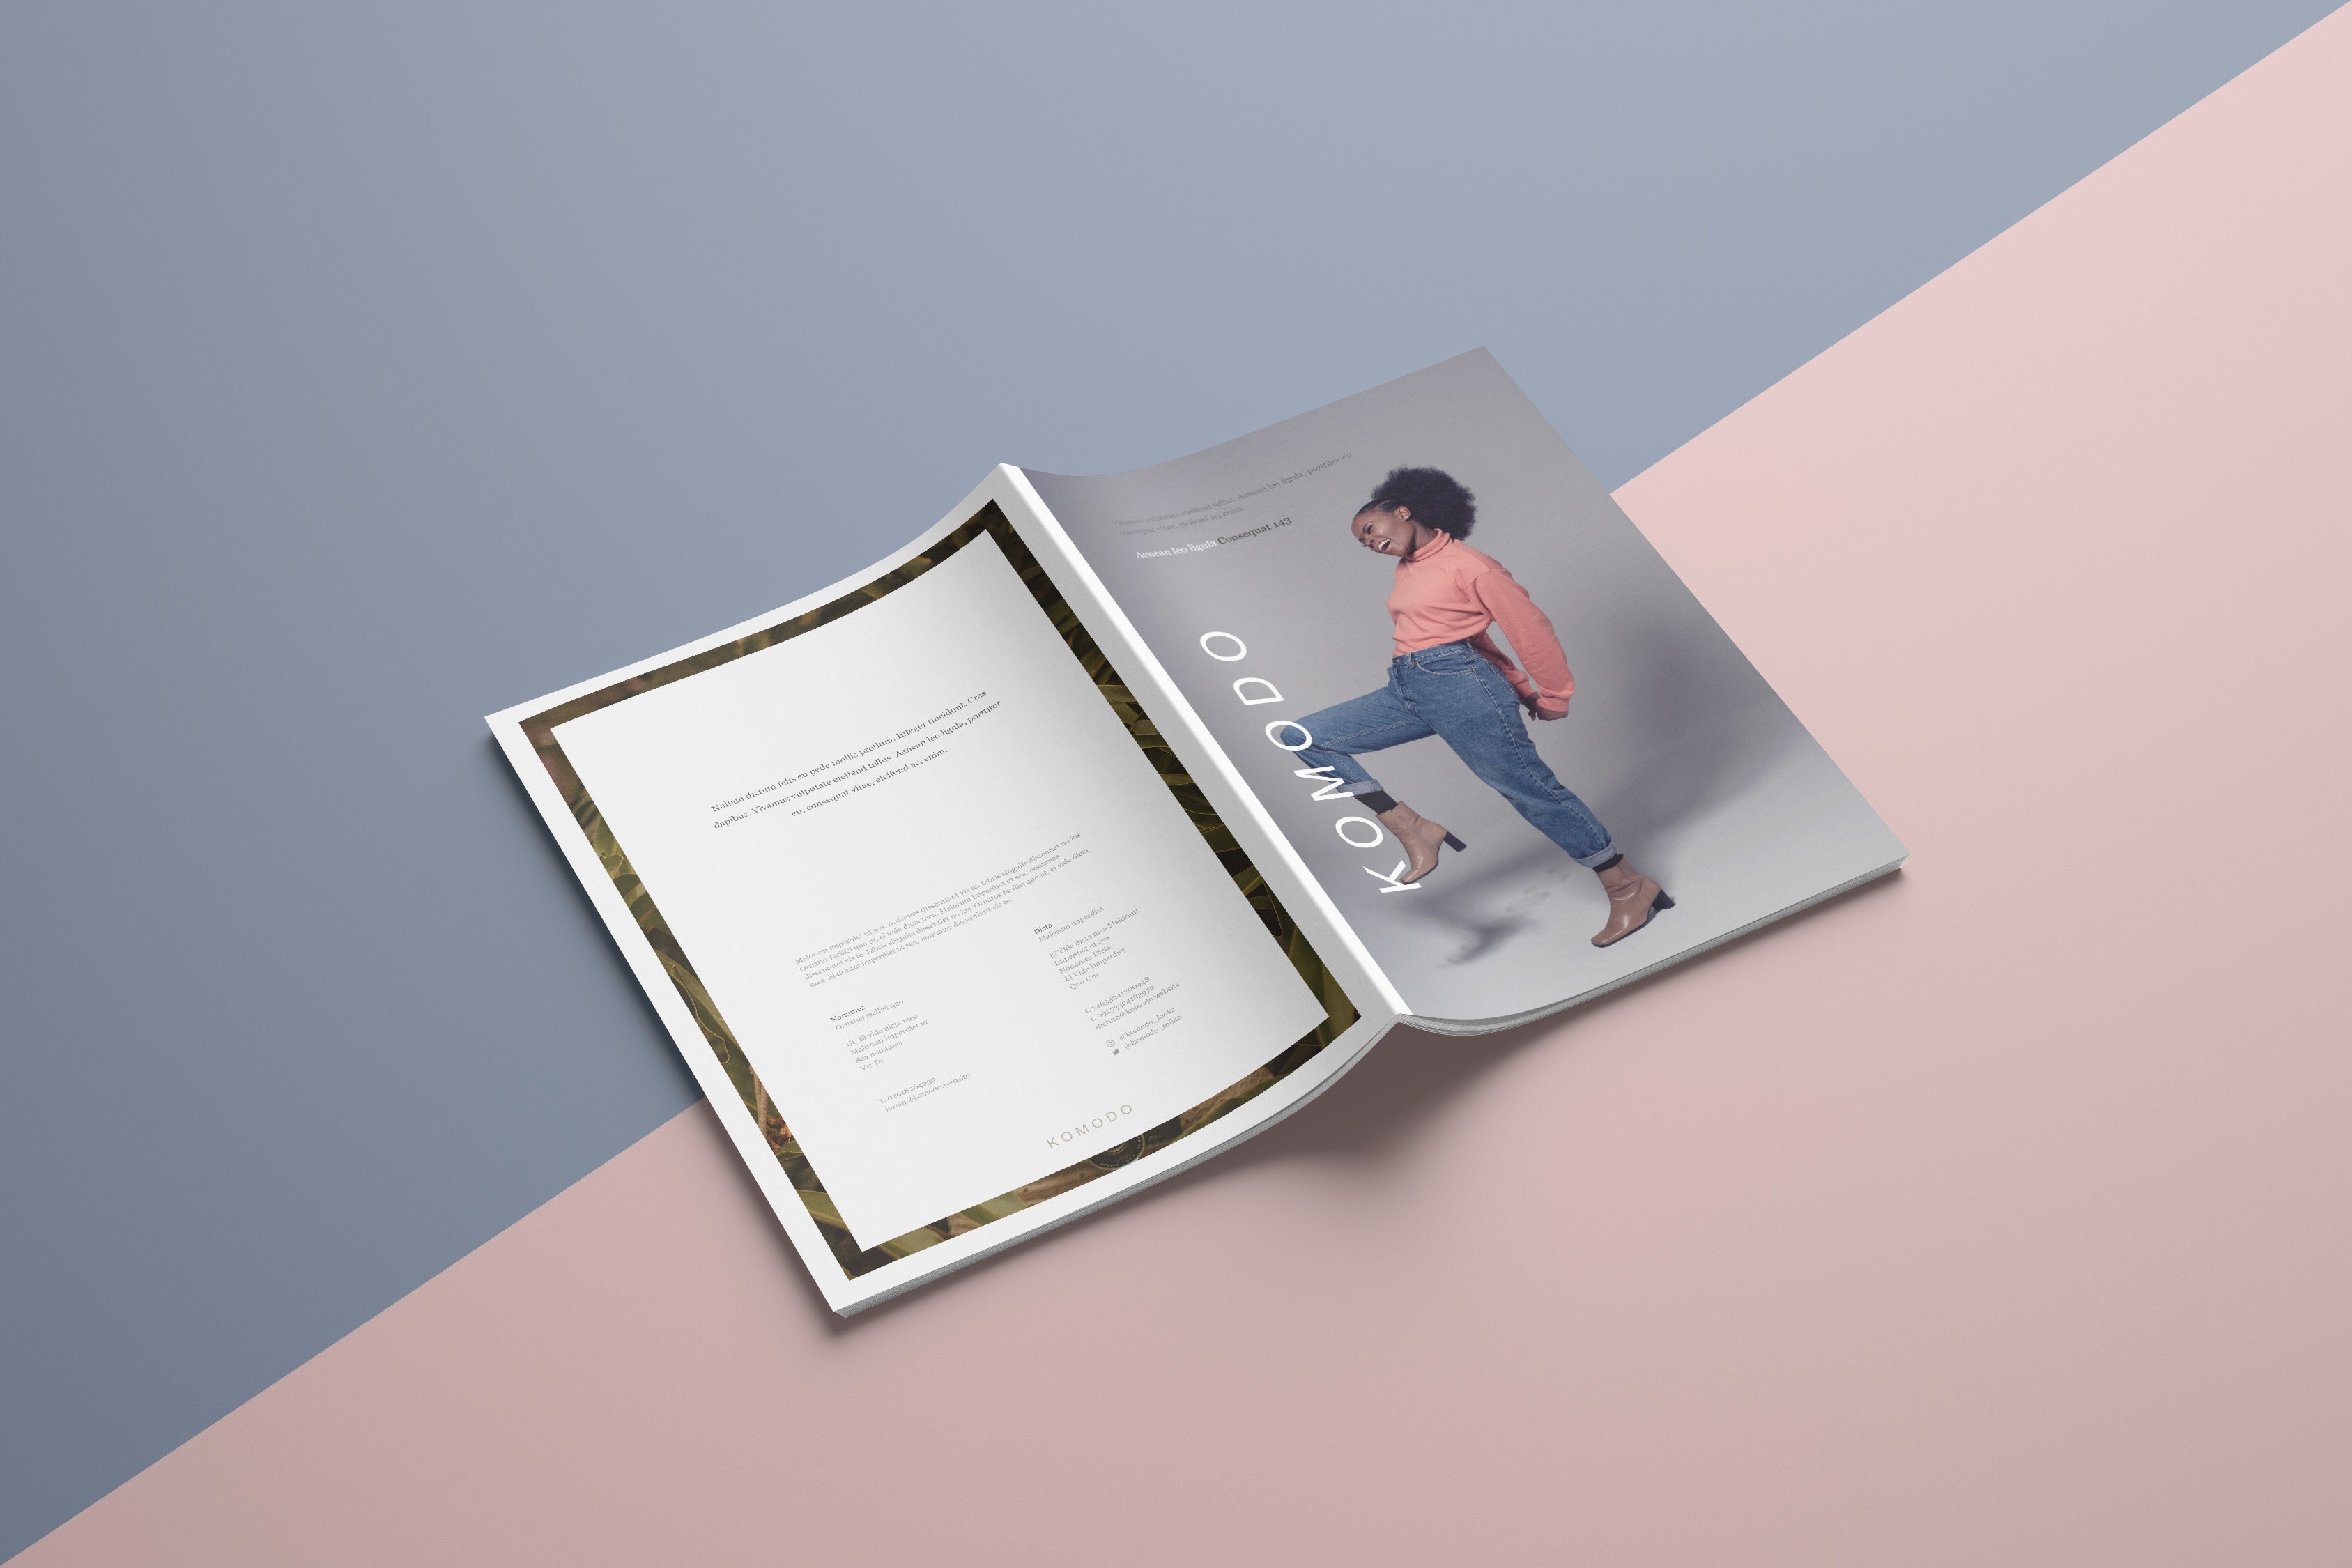
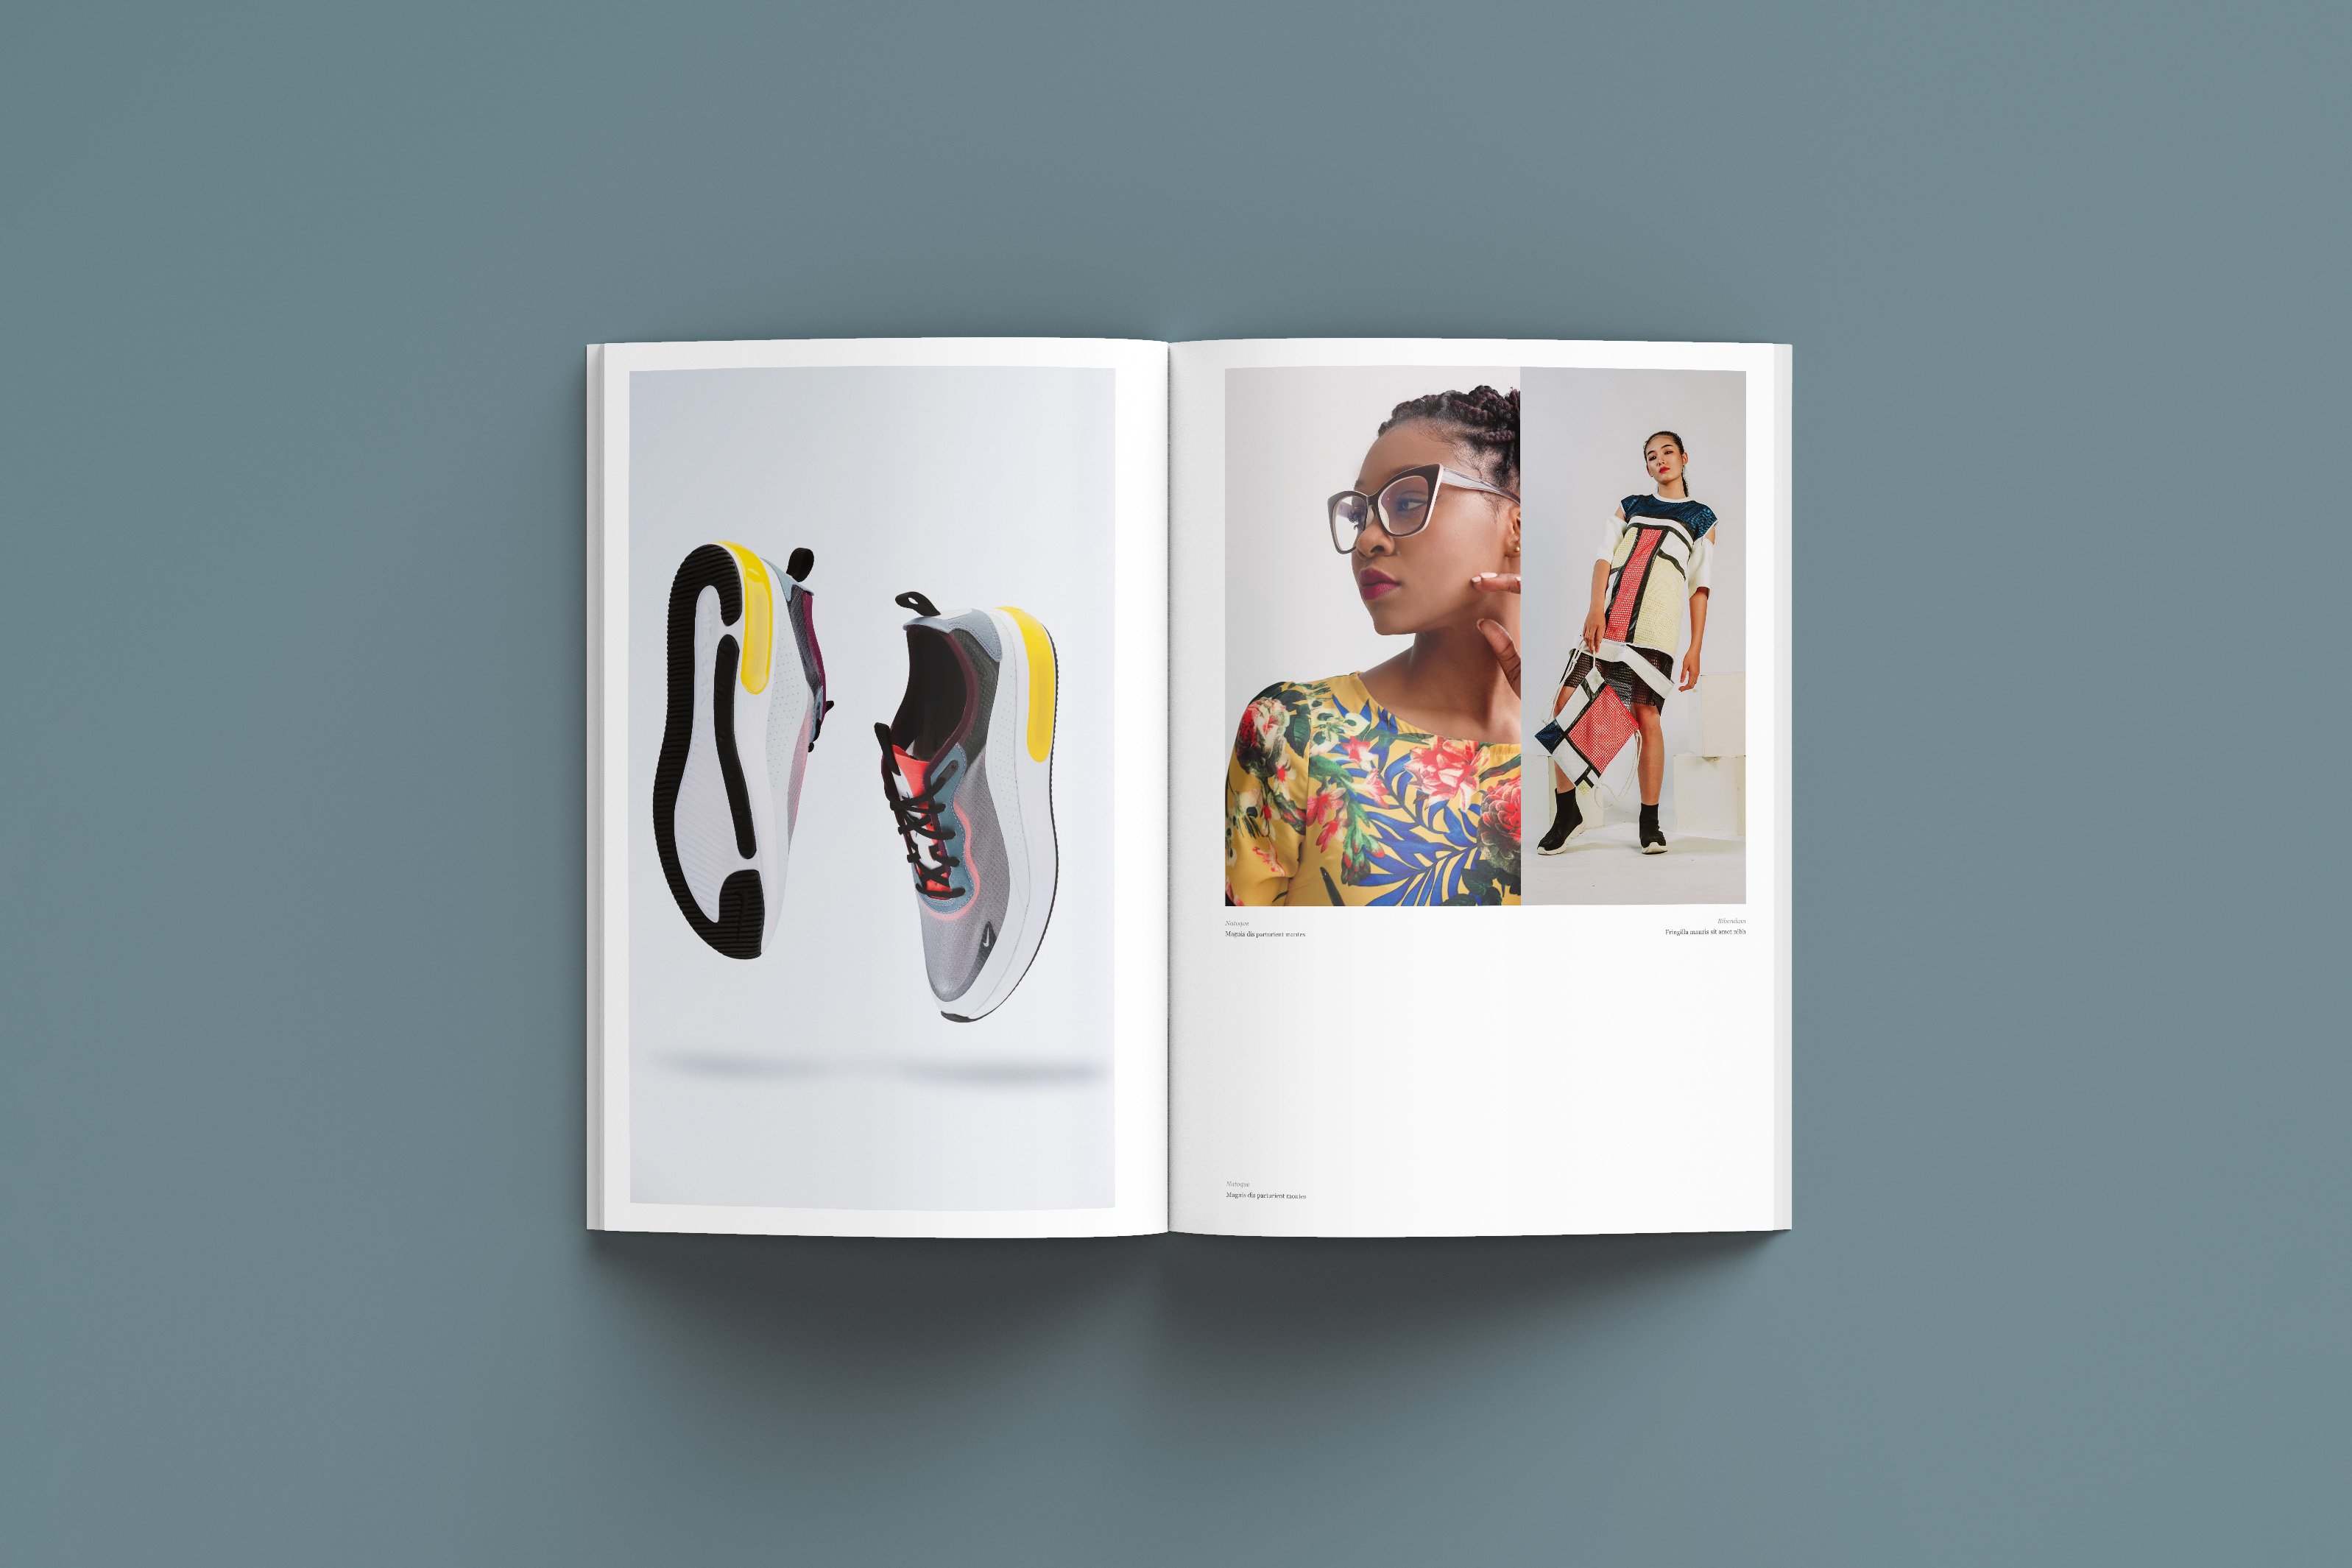
These are some projects done in Affinity Publisher, but took it just a step further to see what they'd look like placed into mockups. The three projects are "Aurelie", "Jovan" and "Komodo". Affinity's built-in stock images feature really helped, especially with the amount of iterations I had to make. "Aurelie" "Jovan" "Komodo" "Komodo" View 2 All the books together
- 2 replies
-
- 5
-
-
-
- affinity suite
- affinity v1
- (and 6 more)
-
affinity designer Reflected Skyline (Versions 1 & 2)
Nikhail replied to Nikhail's topic in Share your work
Right. That's a shame though. They're really useful. Still hope something can work out down the line but it is what it is. -
affinity designer Reflected Skyline (Versions 1 & 2)
Nikhail replied to Nikhail's topic in Share your work
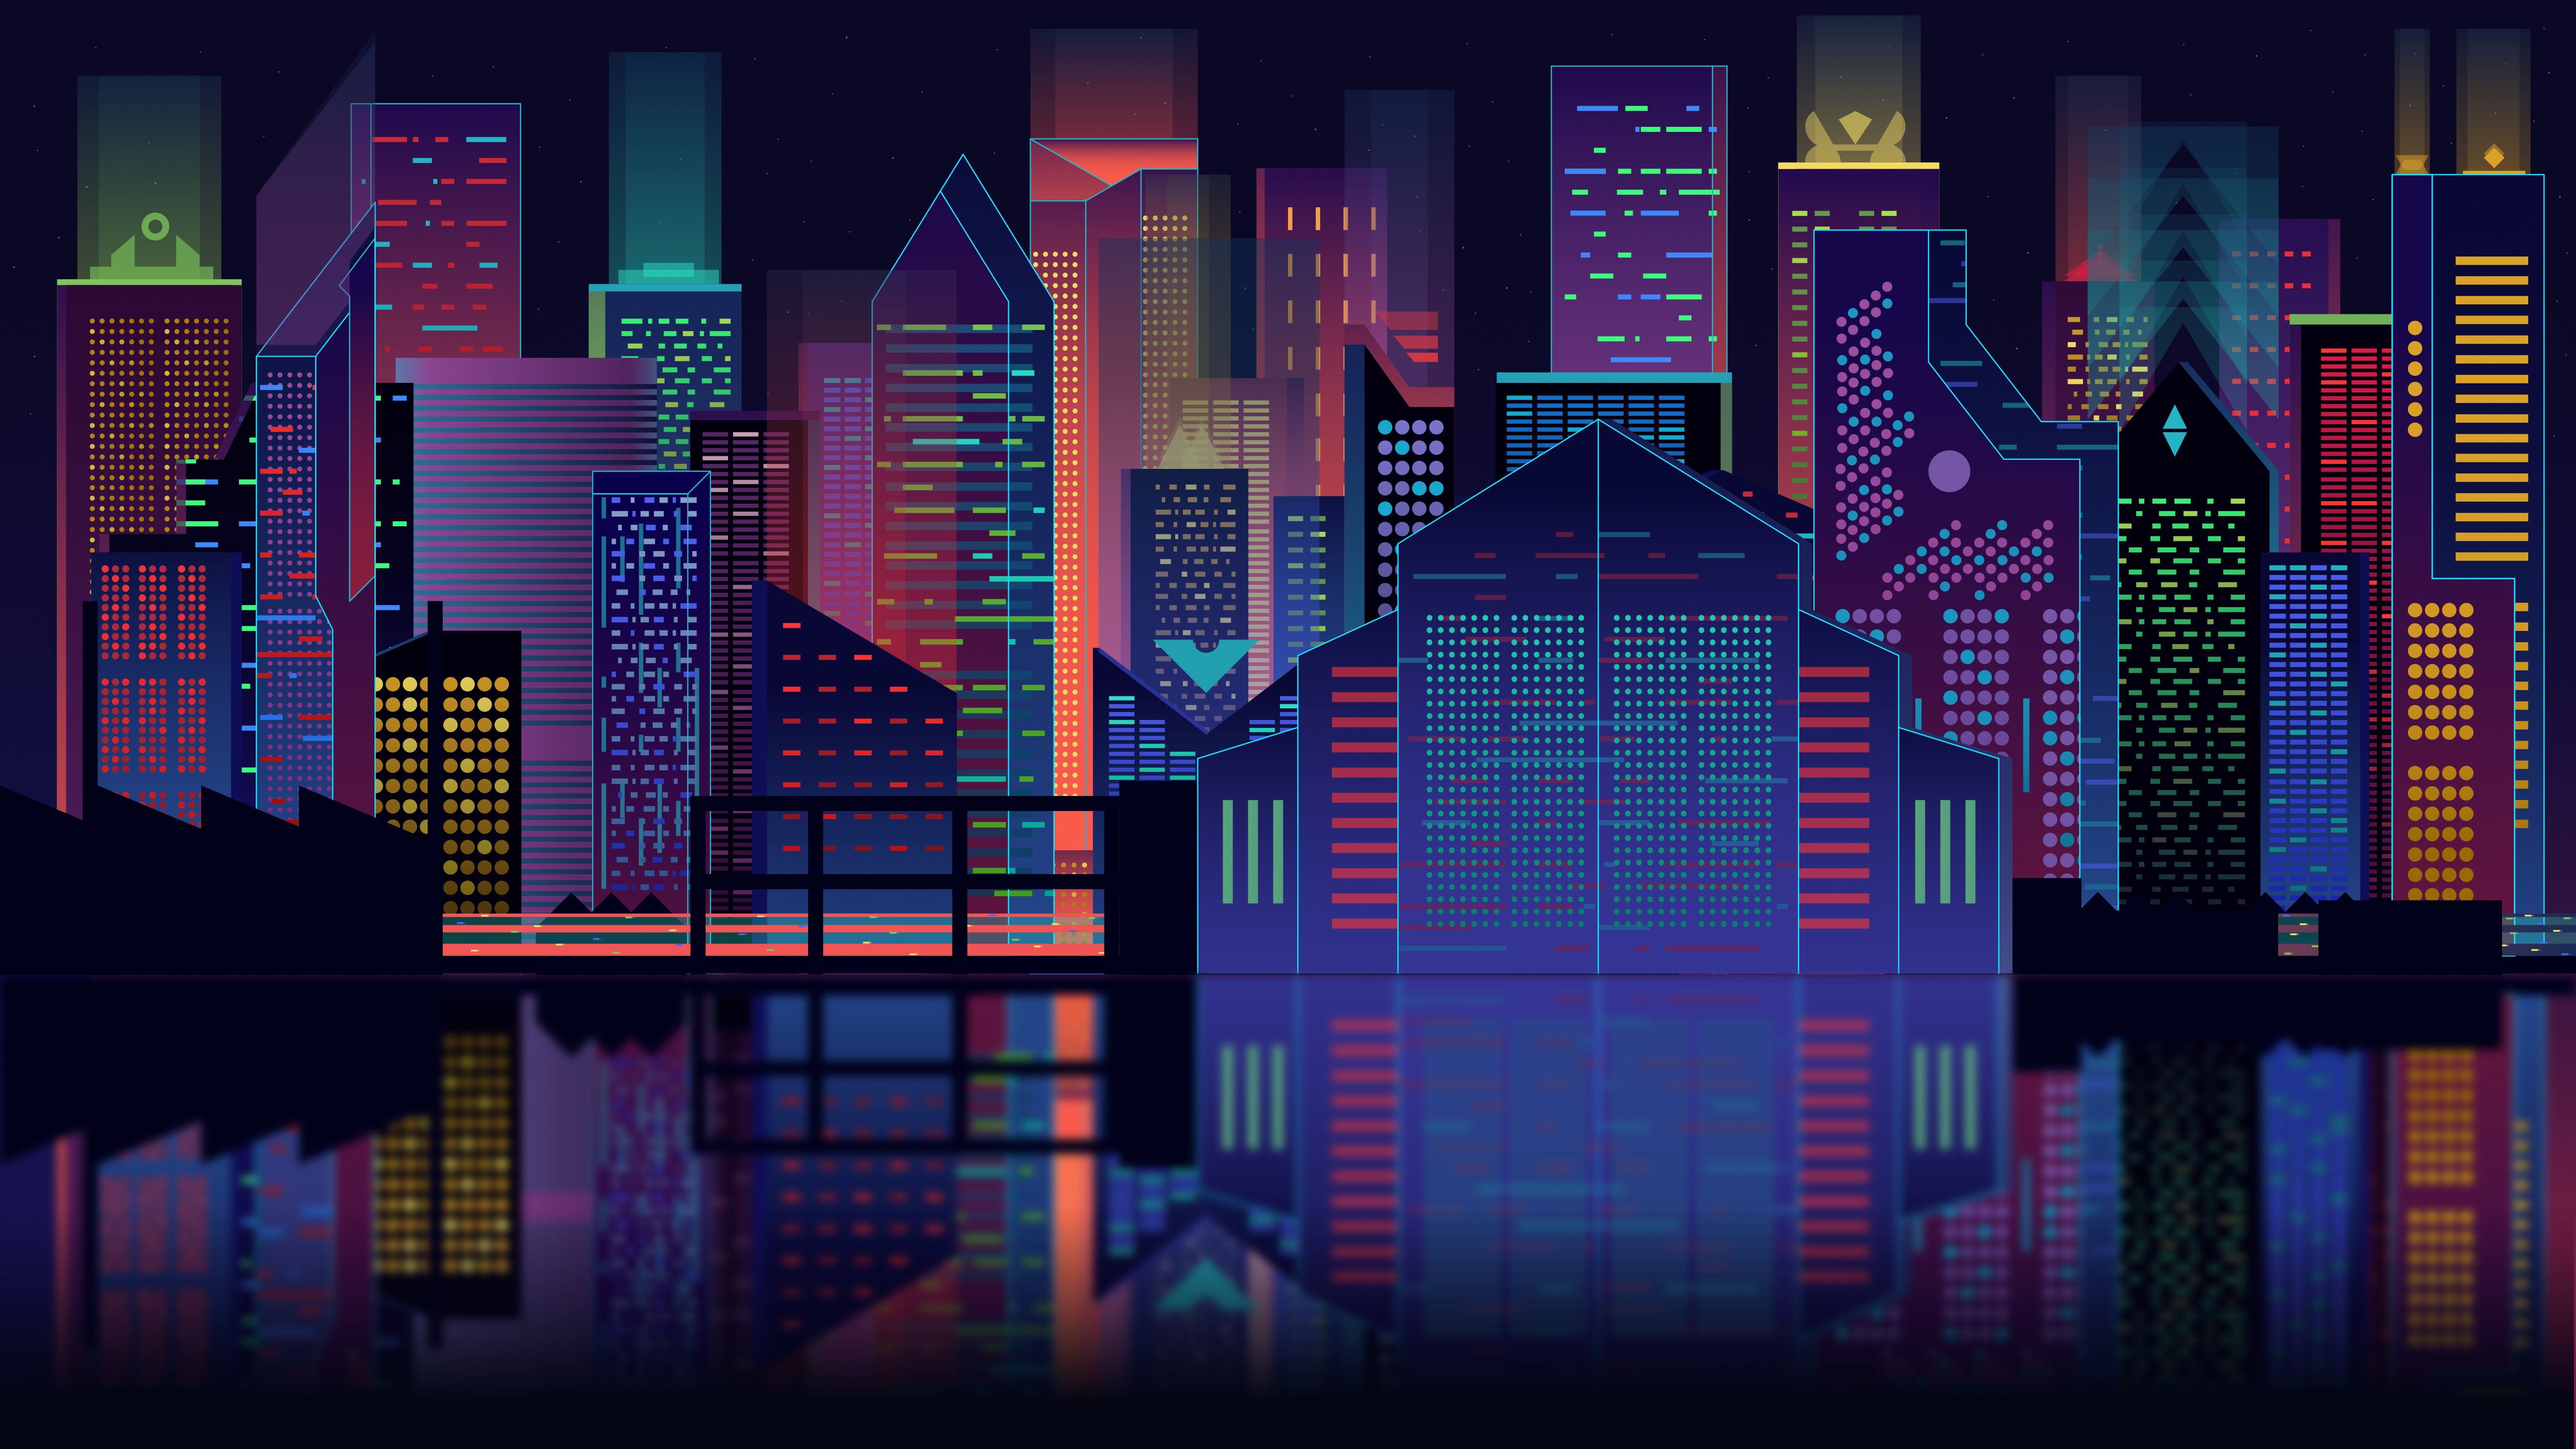
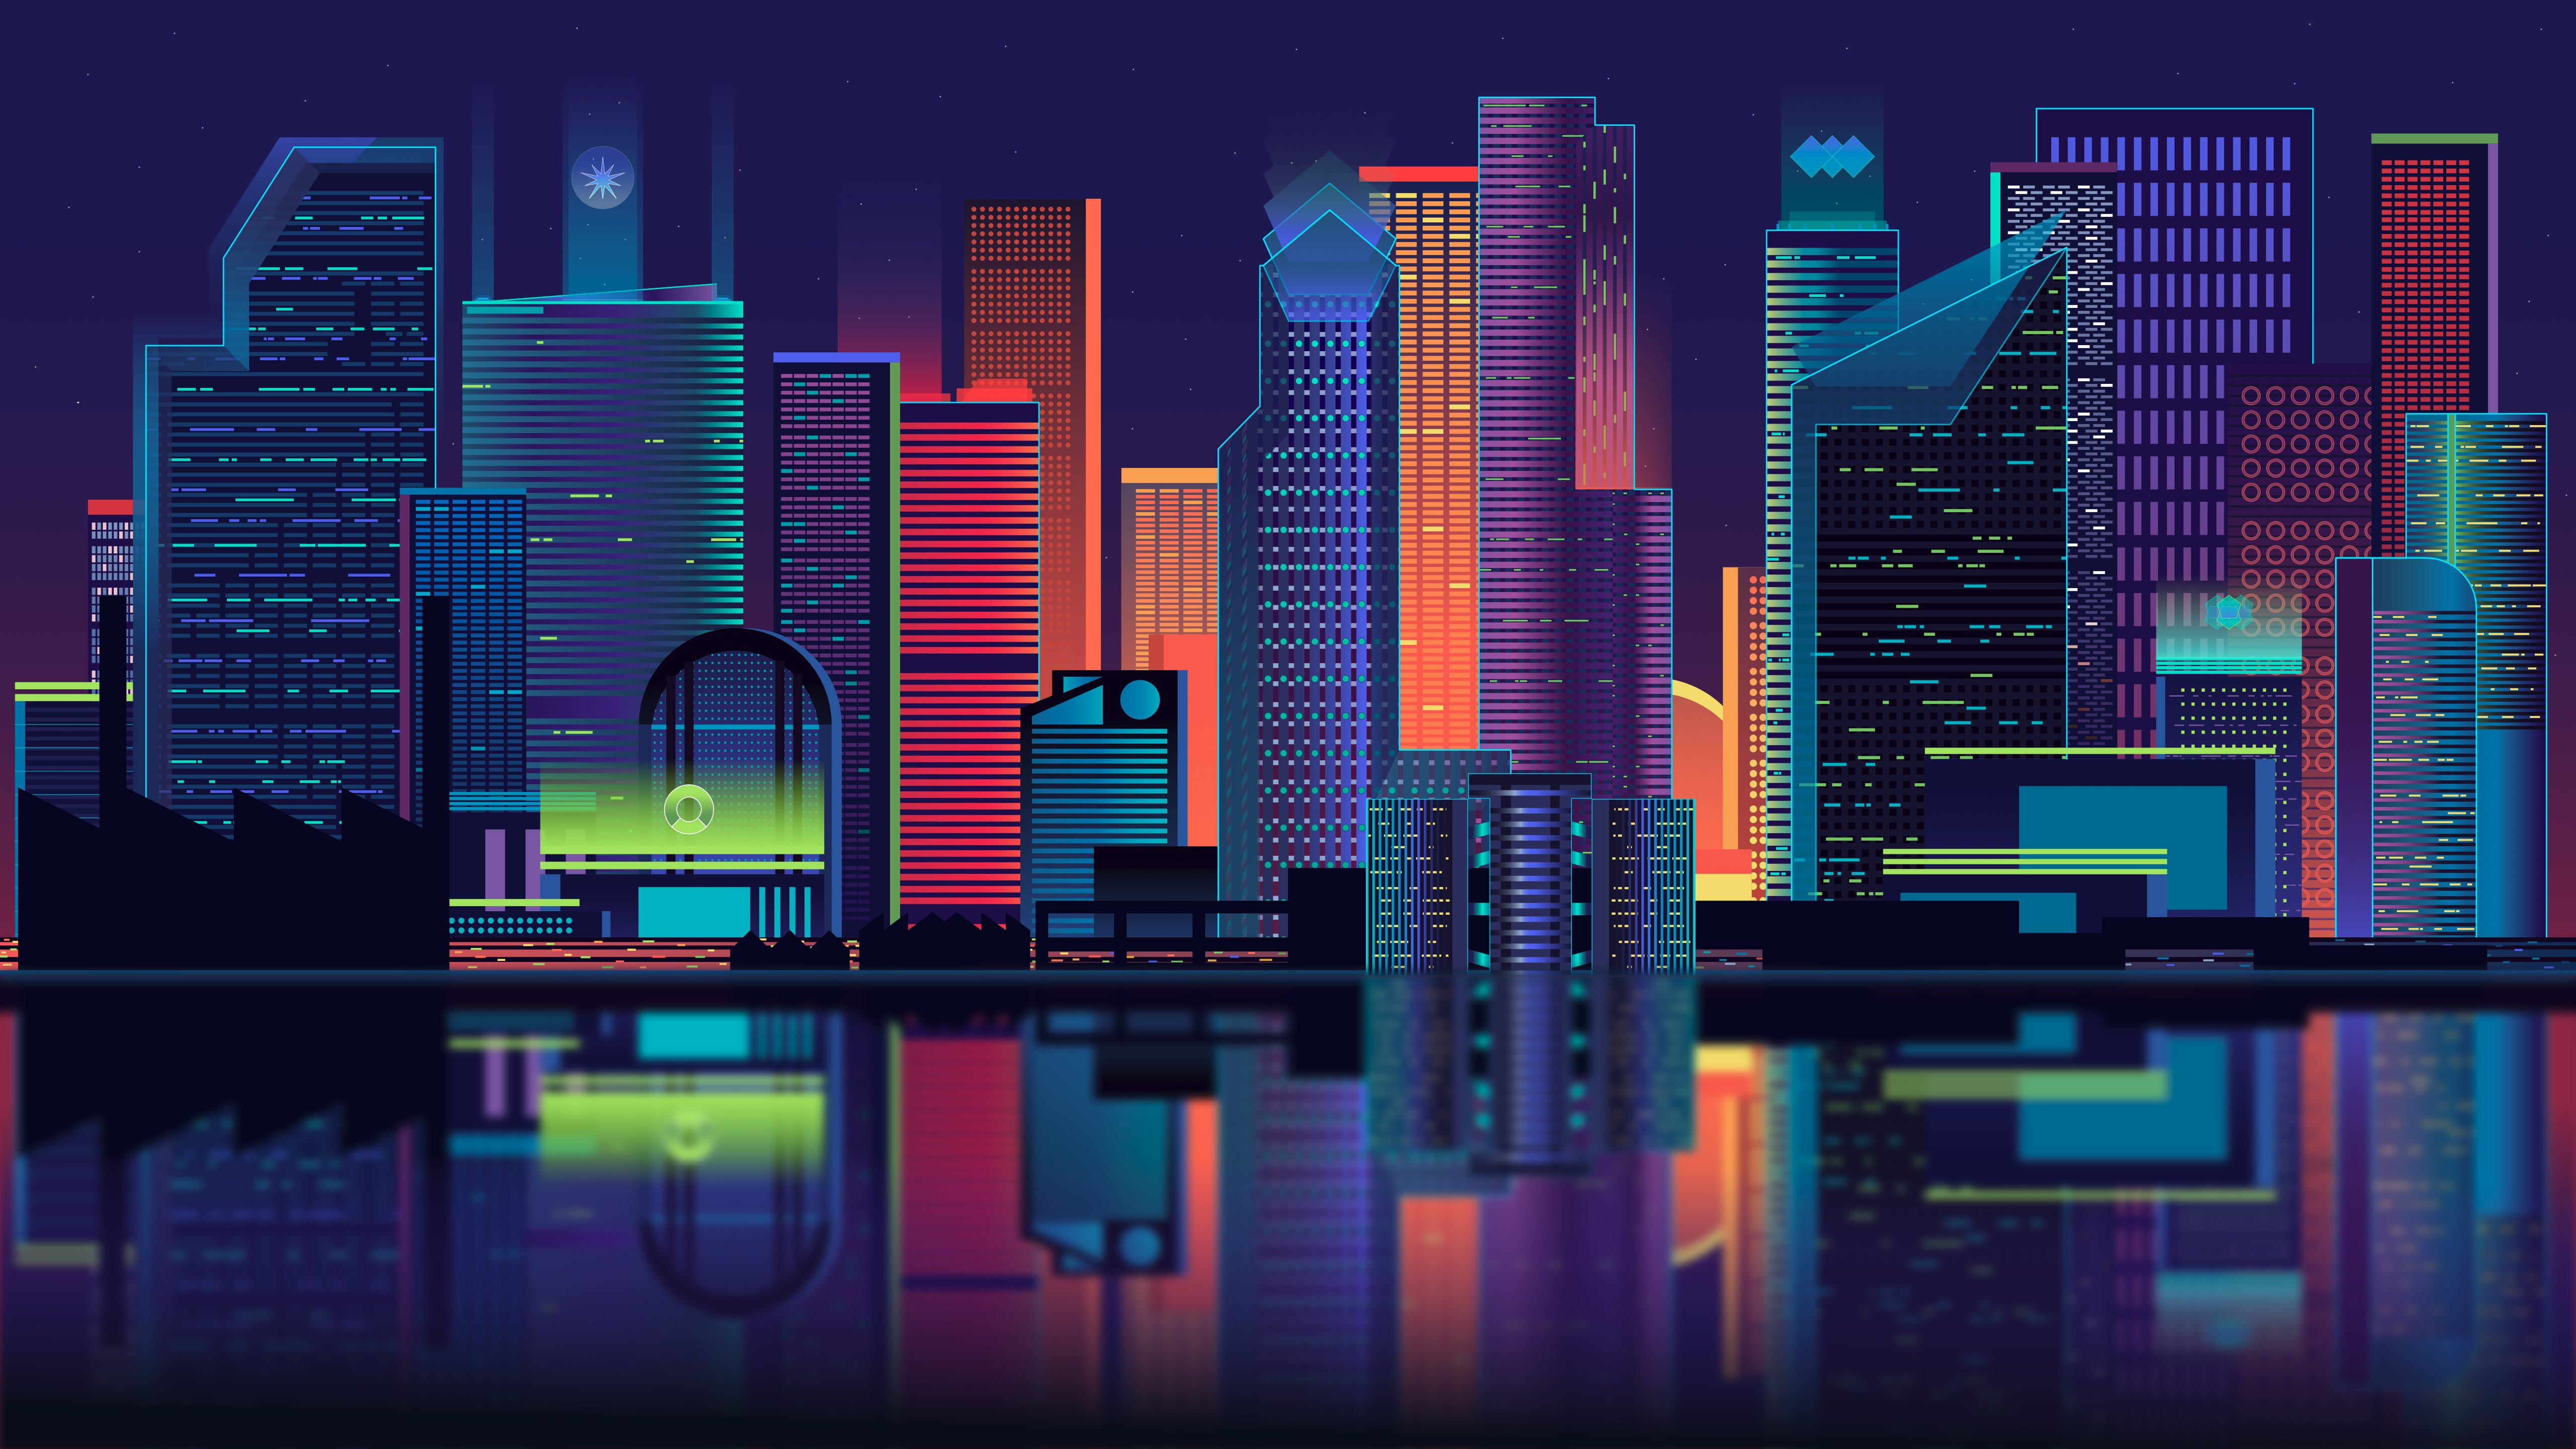
Hey, Garry. Wow, that's so much simpler. Thanks for sharing that. Here are the steps according to the workbook: Reflection Base On the Layers Panel, create a new layer called Reflection base above the top-level Roof highlight layer. For a dark foreground base, draw a black rectangle (HSL 255,95,5) covering the whole lower half of the page, with its top edge just touching the bottom of the foreground buildings. Making the reflection On the Layers Panel, select the following layers, keeping the cmd ⌘ key (Mac) or ctrl key (Win) pressed: Front Building Foreground scrapers Midground scrapers Background scrapers 2. Duplicate the selection (Edit > Duplicate) then group it. 3. On the Toolbar, select Flip Vertical, then drag the group down so a reflection is formed. Use the shift key (⇧) while dragging to constrain vertically. 4. Create a new layer called Reflection above the Front building layer and drag the group into it. 5. In the reflection group, select the Front Building layer and drag downwards to align with the bases of the other reflected shapes. 6. The entire reflection group can then be moved up to be closer to the main scene. 7. To give the reflection a realistic diffuse look, use the Effects Panel to apply a Gaussian Blur of 7.8 px to the group. For the reflection tail off, draw a dark rectangle across the lower half of the reflection and apply a gradient from HSL 230,81,4 to 0% Opacity. I wish Affinity would do more workbooks about every three years or so with new projects every time. One day? I love the video tutorials but I'm more a book guy 😅 -
Nikhail reacted to a post in a topic:
Reflected Skyline (Versions 1 & 2)
-
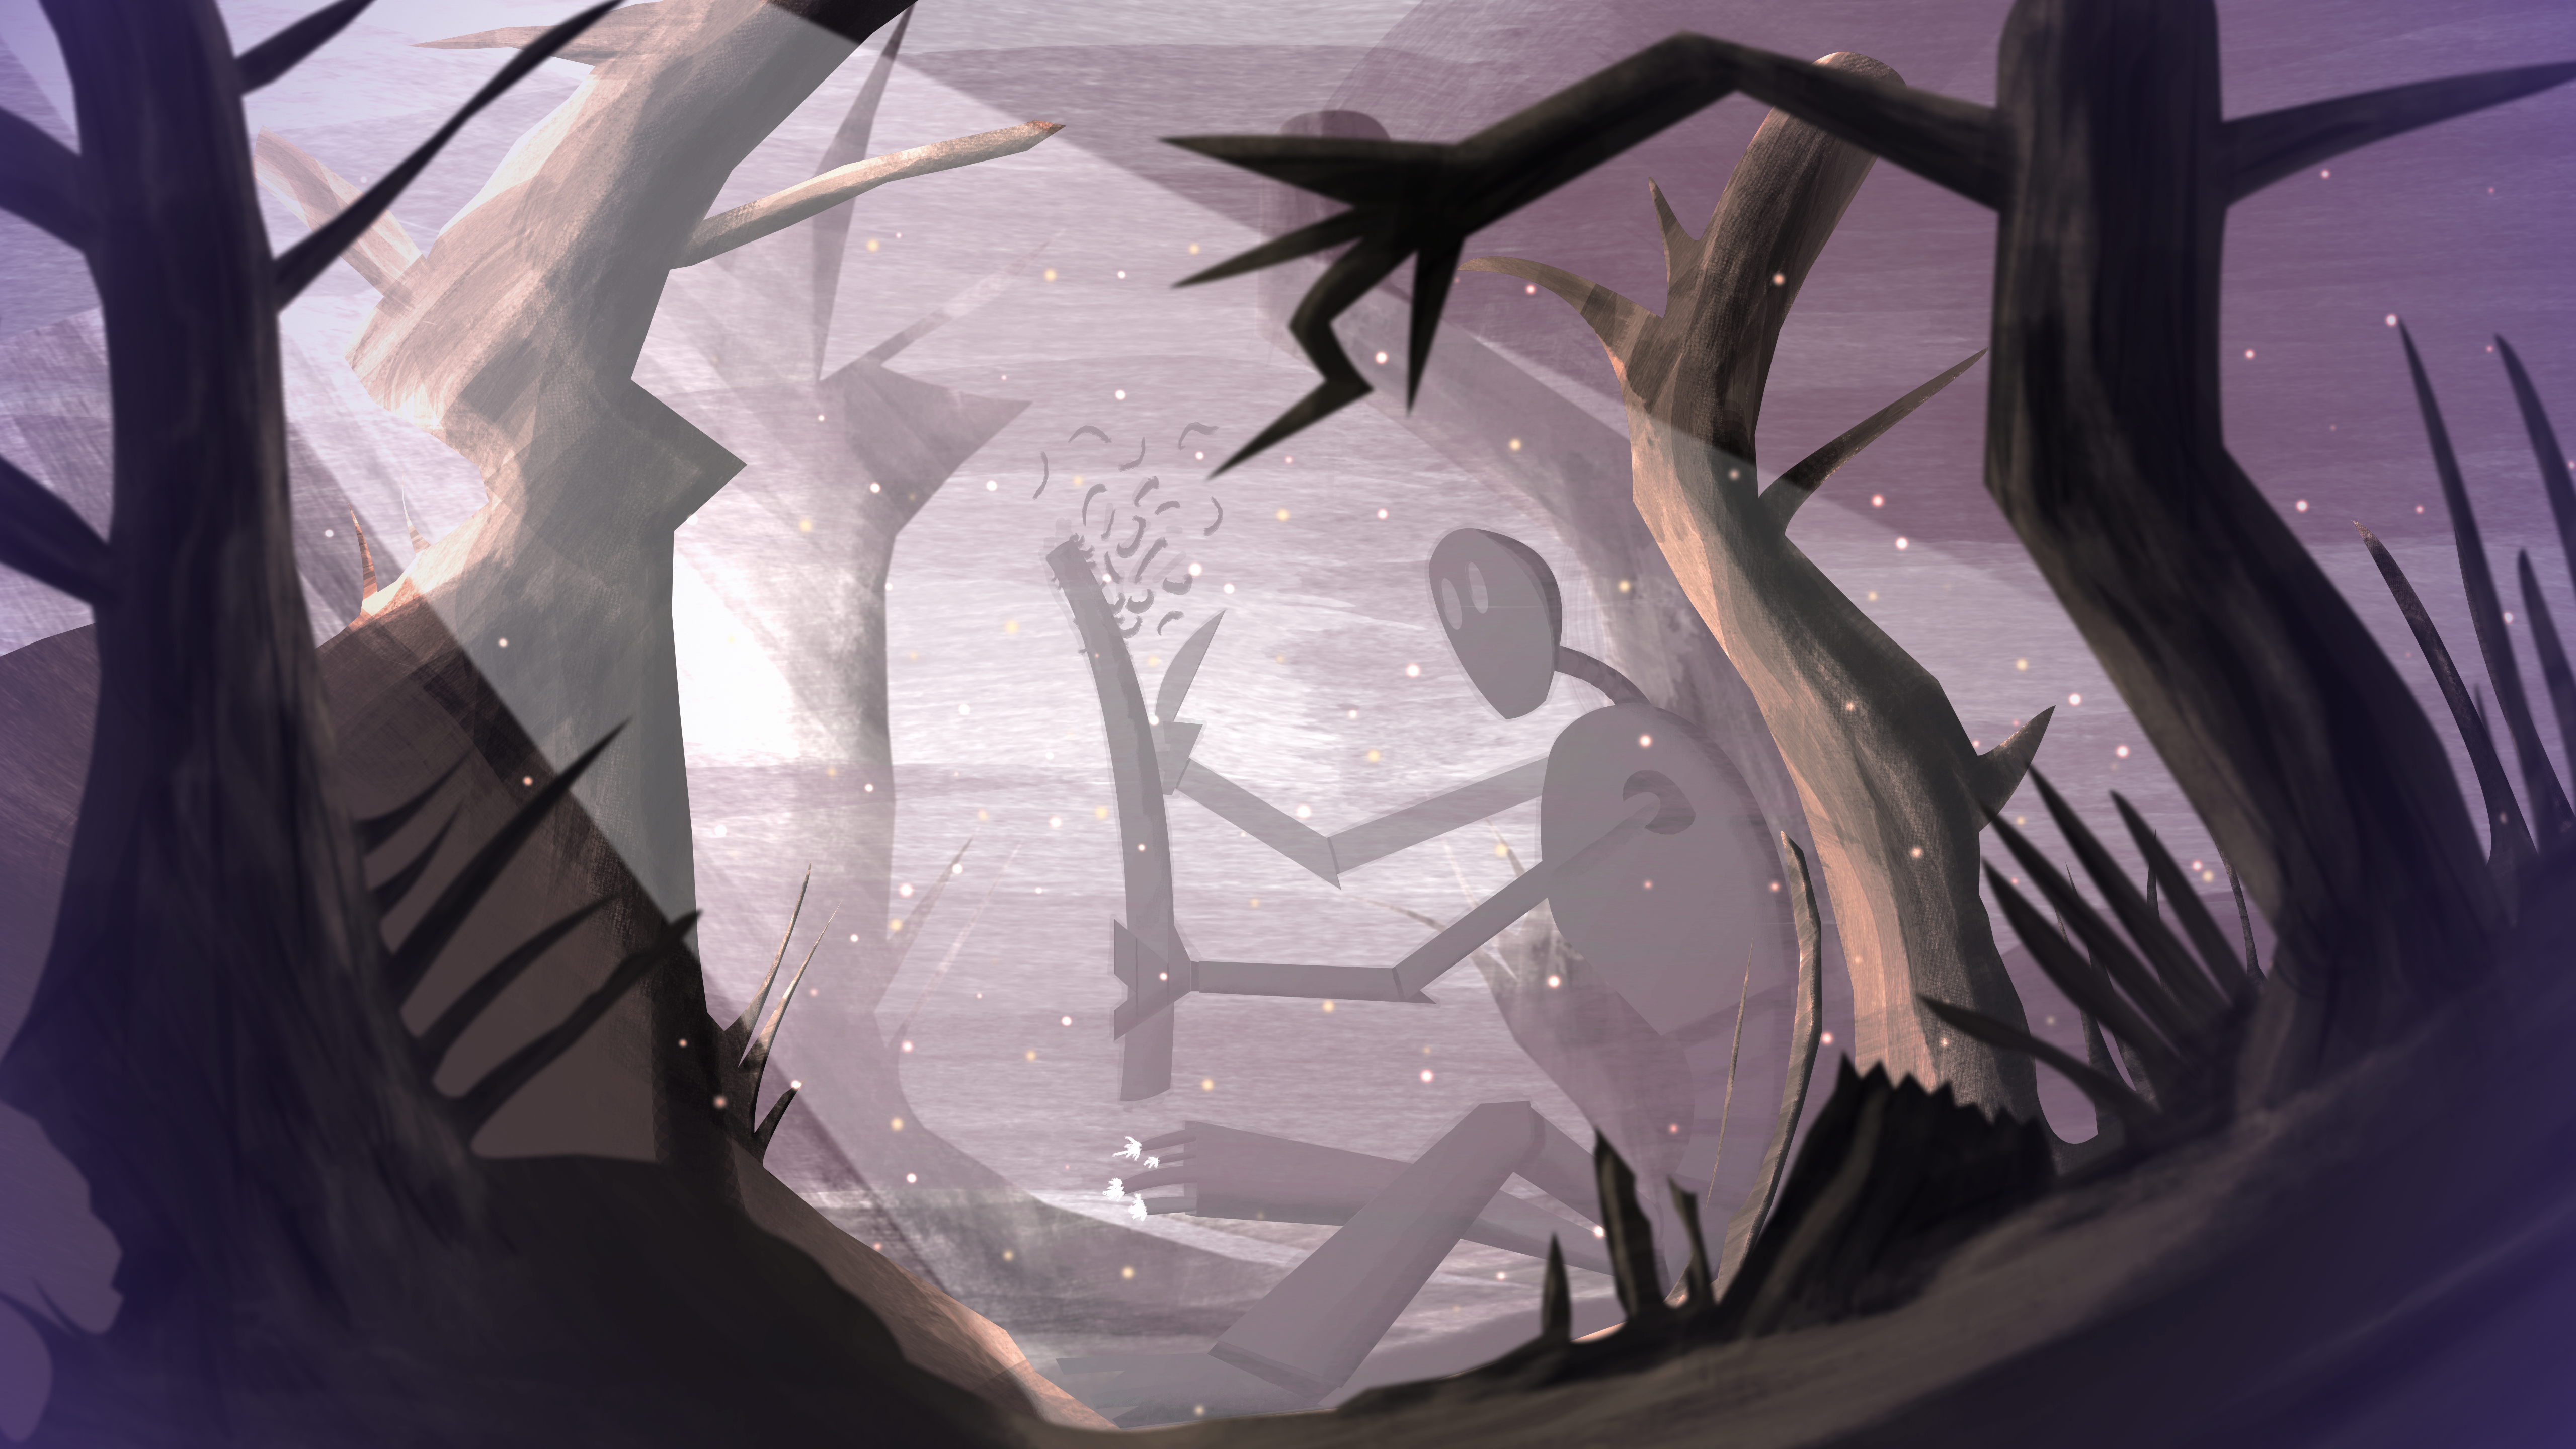
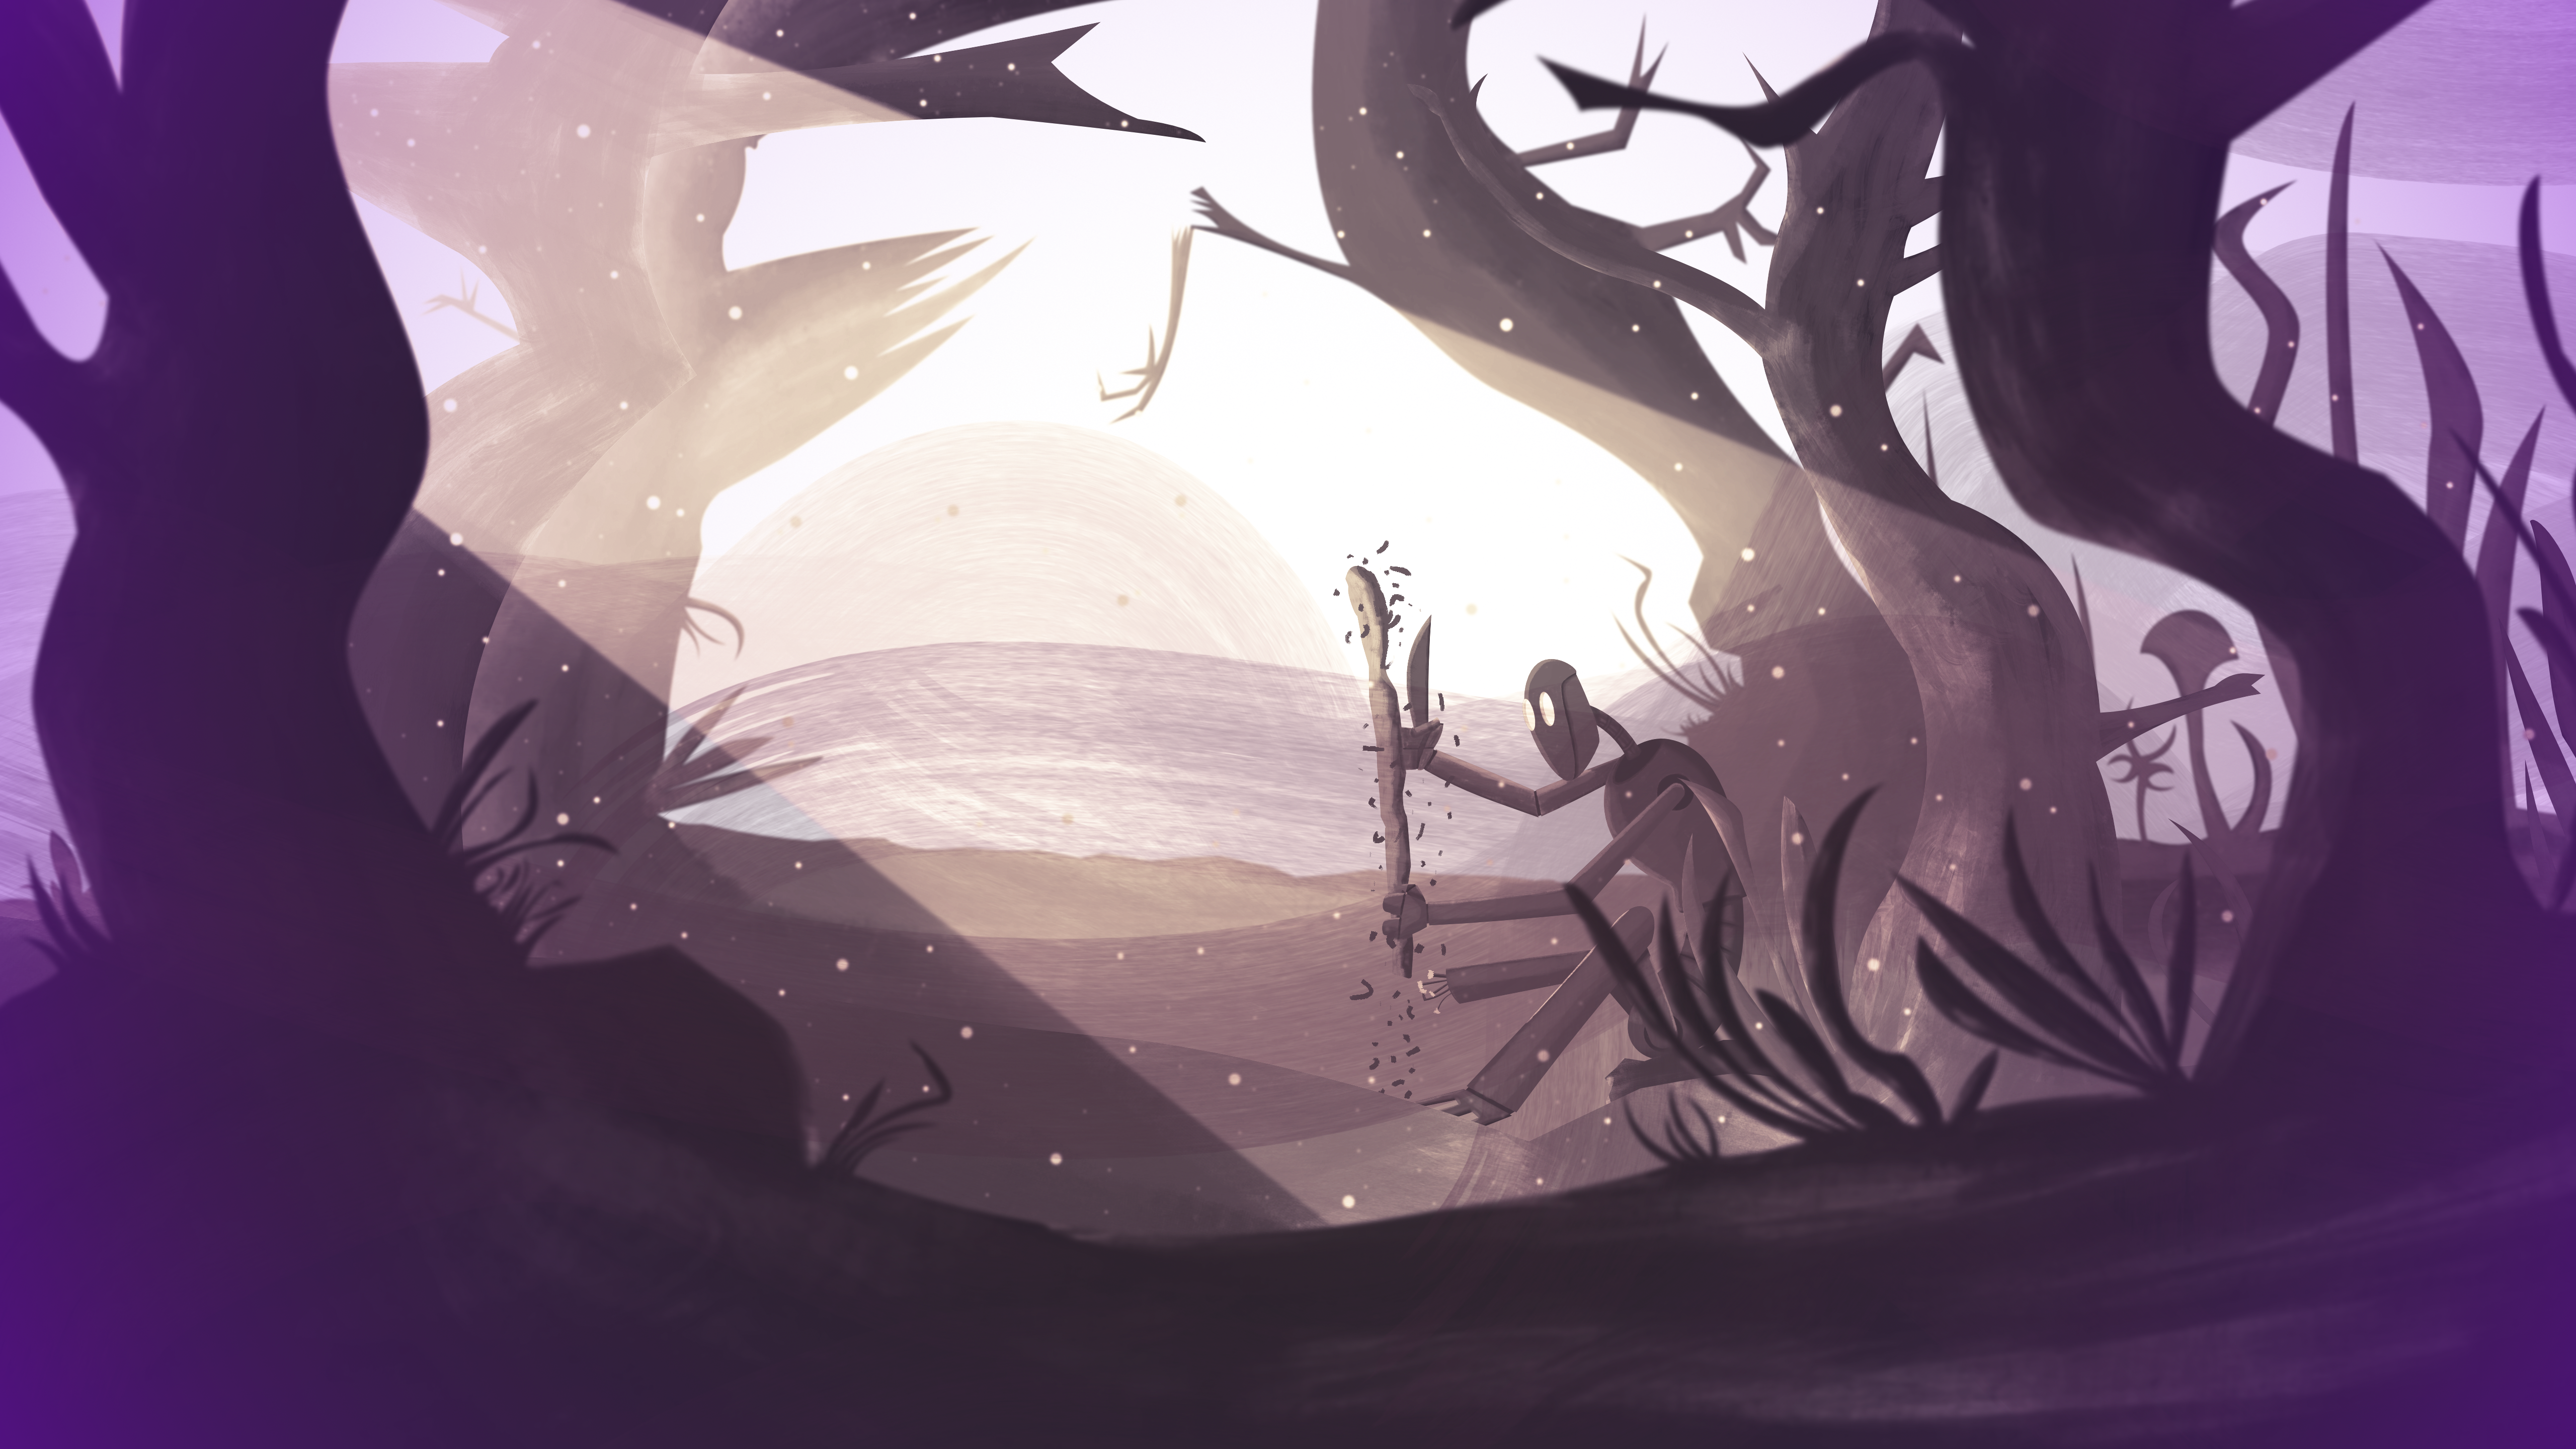
Here are my two attempts at "The Whittler" illustration project from the Affinity Designer Workbook. I forgot to mention in my "Reflected Skyline" post is that every upload that contains two images from the workbooks are years apart. The V1s were done on a low-budget laptop I had since college which still works to this day! The V2s were completed on a much better system. I must admit that I could've put a bit more effort into V2, especially with the robot's neck but hopefully that'll be done if I ever decide to tackle it again V1: V2:
-
- 6
-
-
- affinity v1
- affinity designer workbook
- (and 7 more)
-
affinity designer Reflected Skyline (Versions 1 & 2)
Nikhail replied to Nikhail's topic in Share your work
Thanks a lot Garry. I think the pink-ish lines were left out because of the way I did the buildings. Wasn't too sure how to fit those in but I'm sure there was a way. The small rectangle in V1 is out of place for sure. I re-opened the project and realised it was just something thrown in there XD -
Nikhail reacted to a post in a topic:
Some Firework assets
-
affinity designer Reflected Skyline (Versions 1 & 2)
Nikhail replied to Nikhail's topic in Share your work
Ah, okay. Thanks so much. I never knew you could add that in lol. Will definitely check it out if I ever get around to doing a V3 ;D -
Nikhail reacted to a post in a topic:
Reflected Skyline (Versions 1 & 2)
-
Nikhail reacted to a post in a topic:
Reflected Skyline (Versions 1 & 2)
-
Here are my two attempts at the "Reflected Skyline" illustration project from the Affinity Designer Workbook. Hope you guys enjoy! Any feedback is much appreciated V1: V2:
- 8 replies
-
- 7
-
-
- affinity v1
- affinity v2
- (and 7 more)