Graphical Chris
-
Posts
50 -
Joined
-
Last visited
-
Yep, still Slooooooow. I kicked off a 2000 record job and left it over night. Came back in the morning and it still had a quarter to go (Took 16 hours and still didn't finish). So I had to kill the process and move it back to Adobe. Adobe Indesign does it literally within seconds. I can't afford to use this tool in a production environment, it isn't viable. The version as of writing this is the latest version of 2.6.2.
-
 JariH reacted to a post in a topic:
Mesh gradient (again)
JariH reacted to a post in a topic:
Mesh gradient (again)
-
Anyway to tell what font is a variable font?
-
I am trying to access the Variable font support editing feature which was a new feature added to v2.5 in May 2024. Instructions are: On desktop, click the Font Variations button on the context toolbar (or on the Character Panel) The trouble is the Variations button is greyed out and there is no variations selection under the Charater panel. I have tried selecting Art text and Paragraph text and also highlighted the character glyphs themselves, but this button remains subbornly greyed out. Can someone please clarify how I can access this feature? Is it dependant on the font itself or should you be able to perform this feature on any font?
-
GrooveBird reacted to a post in a topic:
Mesh gradient (again)
-
walt.farrell reacted to a post in a topic:
Affinity Publisher V2 - Constantly Crashing
-
Affinity Publisher V2 - Constantly Crashing
Graphical Chris replied to APPLIOrg's topic in V2 Bugs found on macOS
I found the fix which was the same fix that someone mentioned here and it was to "reset the studio". -
Affinity Publisher V2 - Constantly Crashing
Graphical Chris replied to APPLIOrg's topic in V2 Bugs found on macOS
But the forum rules state not to start more topics on one that has already been added. -
Affinity Publisher V2 - Constantly Crashing
Graphical Chris replied to APPLIOrg's topic in V2 Bugs found on macOS
I have had the occasional crash, but since I have upgraded to version 2.5.5, it now crashes every day, especially if I have more than 1 file open. -
Hi Lacerto, thank you, this worked. Hi Walt.Ferrell, I am interested in understanding your method. So when you hit the edit button, it essentially opens the image as a new document and when you change its colour space, it wants to save the image, so you can choose to save it over the top of the original linked file, correct? - this is why you say it can't be embedded. So if you save it over the top of the original file, Publisher will then need a refresh for the linked files.
-
But can someone answer the original question instead of spooling information after information about how procedures should be done. There are way too many reasons to tell someone their way is the correct way - the correct procedure has nothing to do with my question - there is no correct procedure as it all comes down to machinery, workflow, and a whole host of other variables. And if someone wants to do it the wrong way, so be it. I just want to know if the program can do a certain function for me. So, is there any way to select just one image inside of Publisher 2 and convert it to CMYK - regardless of whatever anyone thinks is right or wrong, can this be done?
-
 mopperle reacted to a post in a topic:
Importing PDF into Publisher 2.5.3 produces strange characters for text
mopperle reacted to a post in a topic:
Importing PDF into Publisher 2.5.3 produces strange characters for text
-
iBacio reacted to a post in a topic:
Importing PDF into Publisher 2.5.3 produces strange characters for text
-
Oufti reacted to a post in a topic:
Importing PDF into Publisher 2.5.3 produces strange characters for text
-
No, it's one word, according to your posted comic. Now have you solved my PDF problem, Thomaso?
-
Westerwälder reacted to a post in a topic:
Importing PDF into Publisher 2.5.3 produces strange characters for text
-
 R C-R reacted to a post in a topic:
Importing PDF into Publisher 2.5.3 produces strange characters for text
R C-R reacted to a post in a topic:
Importing PDF into Publisher 2.5.3 produces strange characters for text
-
That's right attack someone over posting terminology they have used all their life and never considered it to be wrong. Instead of helping politel, just turn this forum into a bashing forum. Wow, what a horrible community on this forum, never experienced such nasty people people.
-
walt.farrell reacted to a post in a topic:
Importing PDF into Publisher 2.5.3 produces strange characters for text
-
Symantics, big deal. This is not part of the post Thomaso.
-
Well in all the years I have worked with graphics software, import means to open a foreign file into the application and not its native file. Whereas place, means to put a file, object or graphic into an already open native file. That is how Adobe has been defining it for years, and Serif with their PagePlus etc. And because I have these terms locked in my head, I will probably always say that - but I will try and remember when typing in these forums to display as much info as possible. The trouble is, whenever I write in these forums I am also on a tight deadline - hard to think when you've got clients breathing down your necks with no understanding of graphical work.
-
To MikeW, Thank you for trying to help me. I have gone back to the client and asked for the actual Illustrator file. We'll see what happens next. But I think, it appears that the PDF is definately the problem and not Affinity. So case closed with Affinity.
-
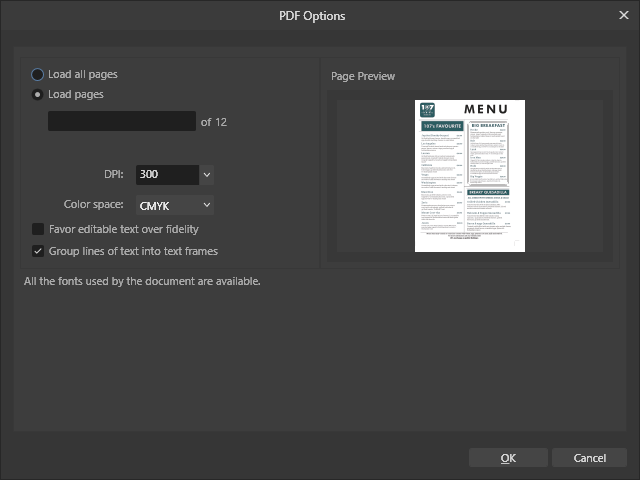
To Will.Farrell, I imported it, not placed it. Placing it would mean dropping it onto a newly created page and that doesn't allow you to edit the contents, correct? I opened it and the get the following window: I have all required fonts installed, so it doesn't ask for font substitutions and there isn't much else you can do with this window but to select how the text is grouped or performs and I have tried all various selections from this window. I think the PDF has errors in its meta coding as when I try to drag it into the latest Adobe Indesign, it says it can't import it due to an "Undefined Error". So even Adobe is having issues opening it and it came from an Adobe application.