Allsop Posted May 23, 2017 Share Posted May 23, 2017 When I open any photo in Affinity I get an image as shown here with what I can only call, for want of a better description, "corrupted edges”. Why should this be and how can I avoid this? Nany thanks. Quote It is all part of the rich tapestry of life. Link to comment Share on other sites More sharing options...
Allsop Posted May 23, 2017 Author Share Posted May 23, 2017 Sorry that there are two photos posted, my mistake! if you click on one of them of them you will get a better view of what I mean. Quote It is all part of the rich tapestry of life. Link to comment Share on other sites More sharing options...
JFisher Posted May 24, 2017 Share Posted May 24, 2017 Hi Allsop :)What camera are you using? You can check the supported list here. You can use the Lens panel in the Develop Persona to remove distortions, you may find this tutorial helpful. Allsop 1 Quote Link to comment Share on other sites More sharing options...
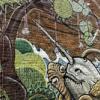
Staff James Ritson Posted May 24, 2017 Staff Share Posted May 24, 2017 Hey Allsop, is it a Canon Powershot or another type of bridge camera by chance? These generally have cropping/correction instructions written into the exif data (I presume you're shooting raw?) in order to discard the edges of the frame, which as you can see are unusable. At the moment Photo doesn't read or use these instructions, so it just processes the entire image frame. There are some ways around this: Coming from a glass-half-full perspective, because Photo isn't discarding any pixel data, you can at least determine exactly how much to crop out. For example, you might want to crop out just some of the edge detail, then use inpainting to try and replace the remaining unusable detail. As Jack has mentioned, in the Develop Persona (when you first open the raw) you can move across to the Lens panel and use Scale to scale the image up and gradually remove the unusable areas. If you're on Mac, you can switch across to Apple's Core Image Raw engine rather than SerifLabs, and this will automatically crop into the image so you'll never see the unusable areas. To do this, in the Develop Persona, click the tuxedo icon on the top toolbar, and change RAW Engine to Apple (Core Image RAW). Hope that helps! (Apologies for the bolding, just wanted to highlight key areas of the UI) JFisher and Allsop 2 Quote Product Expert (Affinity Photo) & Product Expert Team Leader @JamesR_Affinity for tutorial sneak peeks and more Official Affinity Photo tutorials Link to comment Share on other sites More sharing options...
Allsop Posted May 24, 2017 Author Share Posted May 24, 2017 Thanks guys I have gone the tuxedo route as suggested by James and changed the RAW engine and all now seems well :) The particular camera I used here was a Samsung Lumix pocket camera, not my normal Canon 80D so I guess that that was the problem. Much obliged for your rapid assistance. Quote It is all part of the rich tapestry of life. Link to comment Share on other sites More sharing options...
Recommended Posts
Join the conversation
You can post now and register later. If you have an account, sign in now to post with your account.
Note: Your post will require moderator approval before it will be visible.