Search the Community
Showing results for tags 'composite'.
-
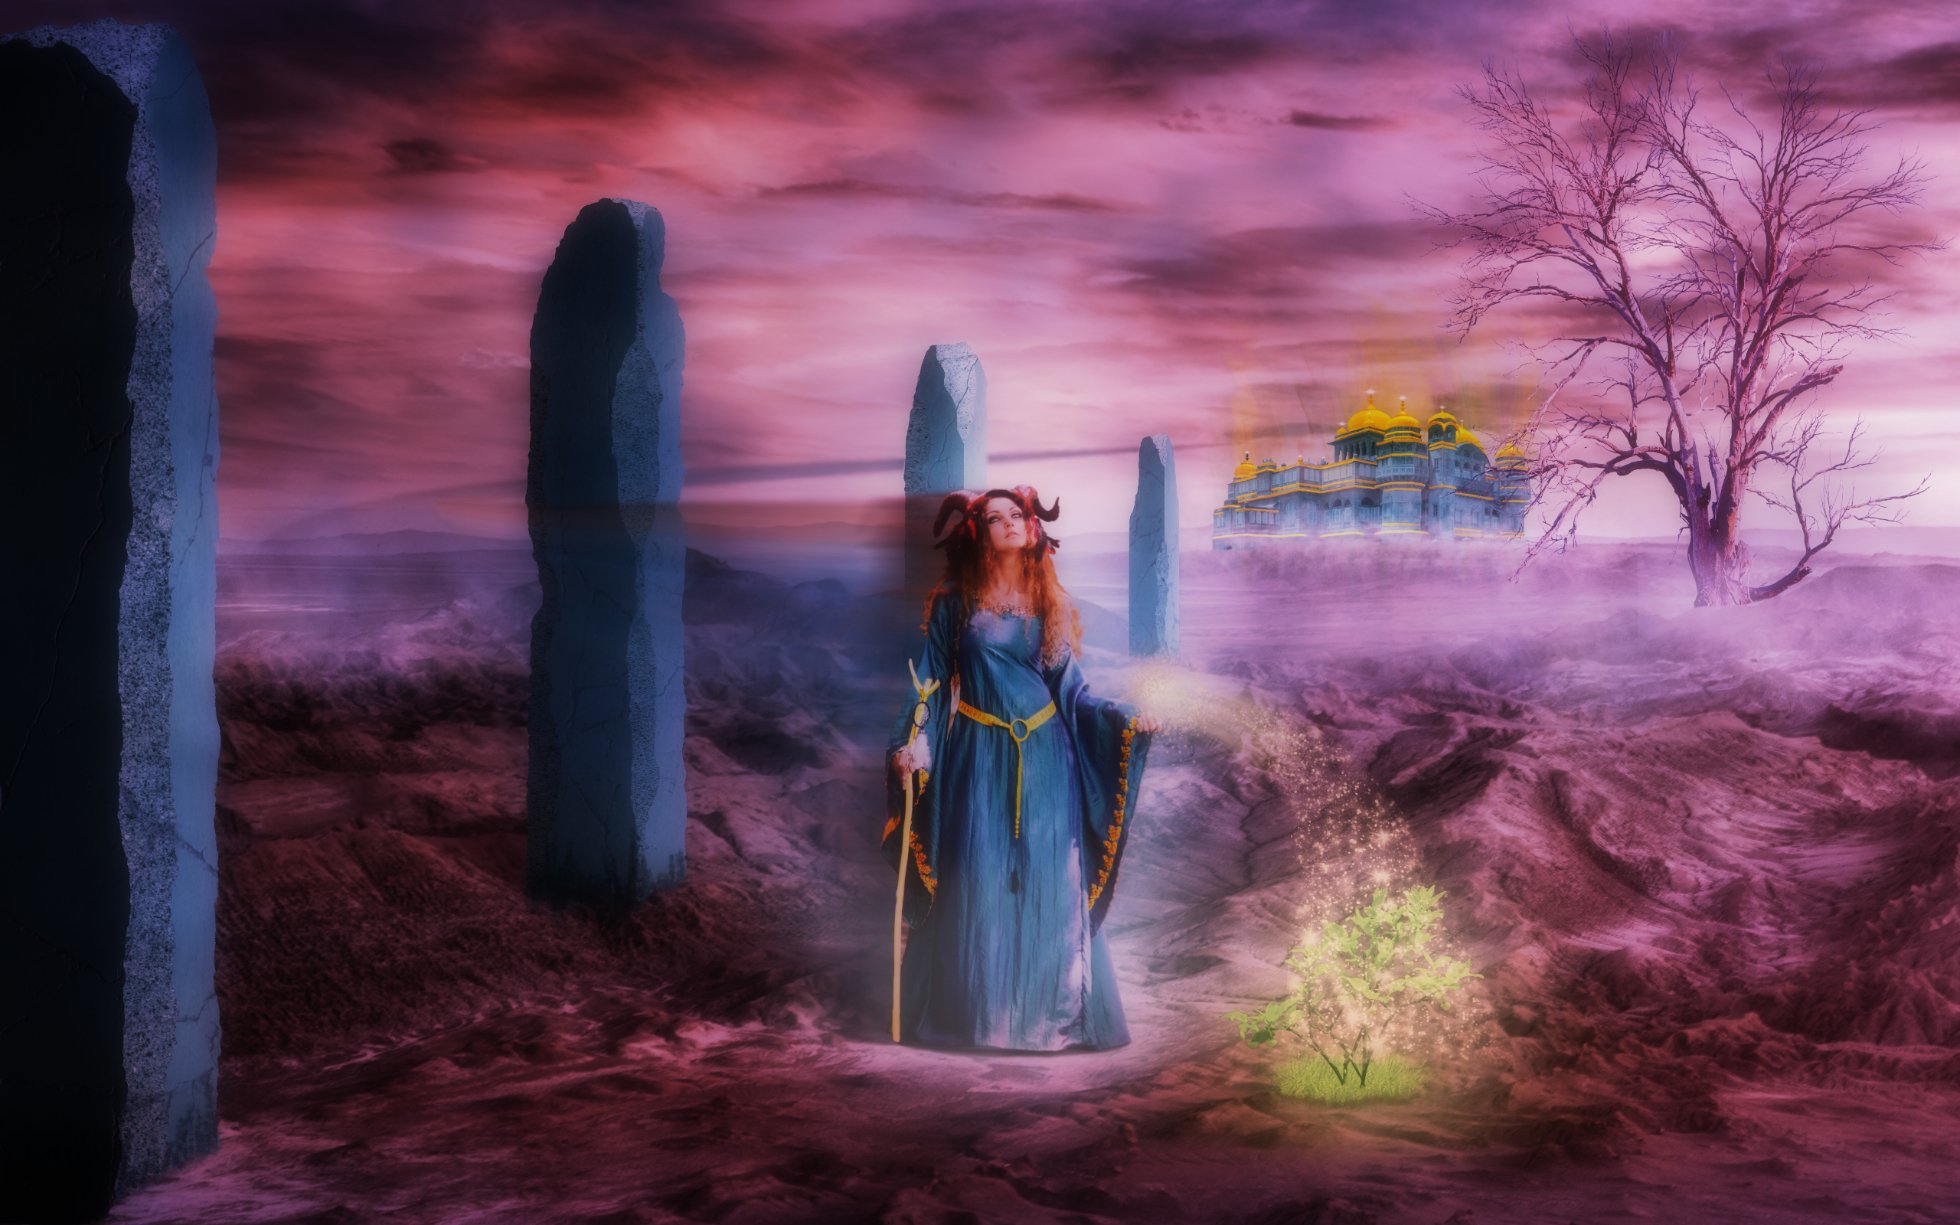
All photo's sourced at Unsplash. Ancient pillars created using shapes and textures. Colour scheme courtesy of my brain.

-

affinity photo Indigo, Joanna, and the Coven of Doom
AffinityJules posted a topic in Share your work
Just for the fun of it. All photos courtesy of Unsplash.
-
What a grand title for such a simple picture concept! All photo's sourced at Unsplash. Visualisation created using Affinity Photo.
-
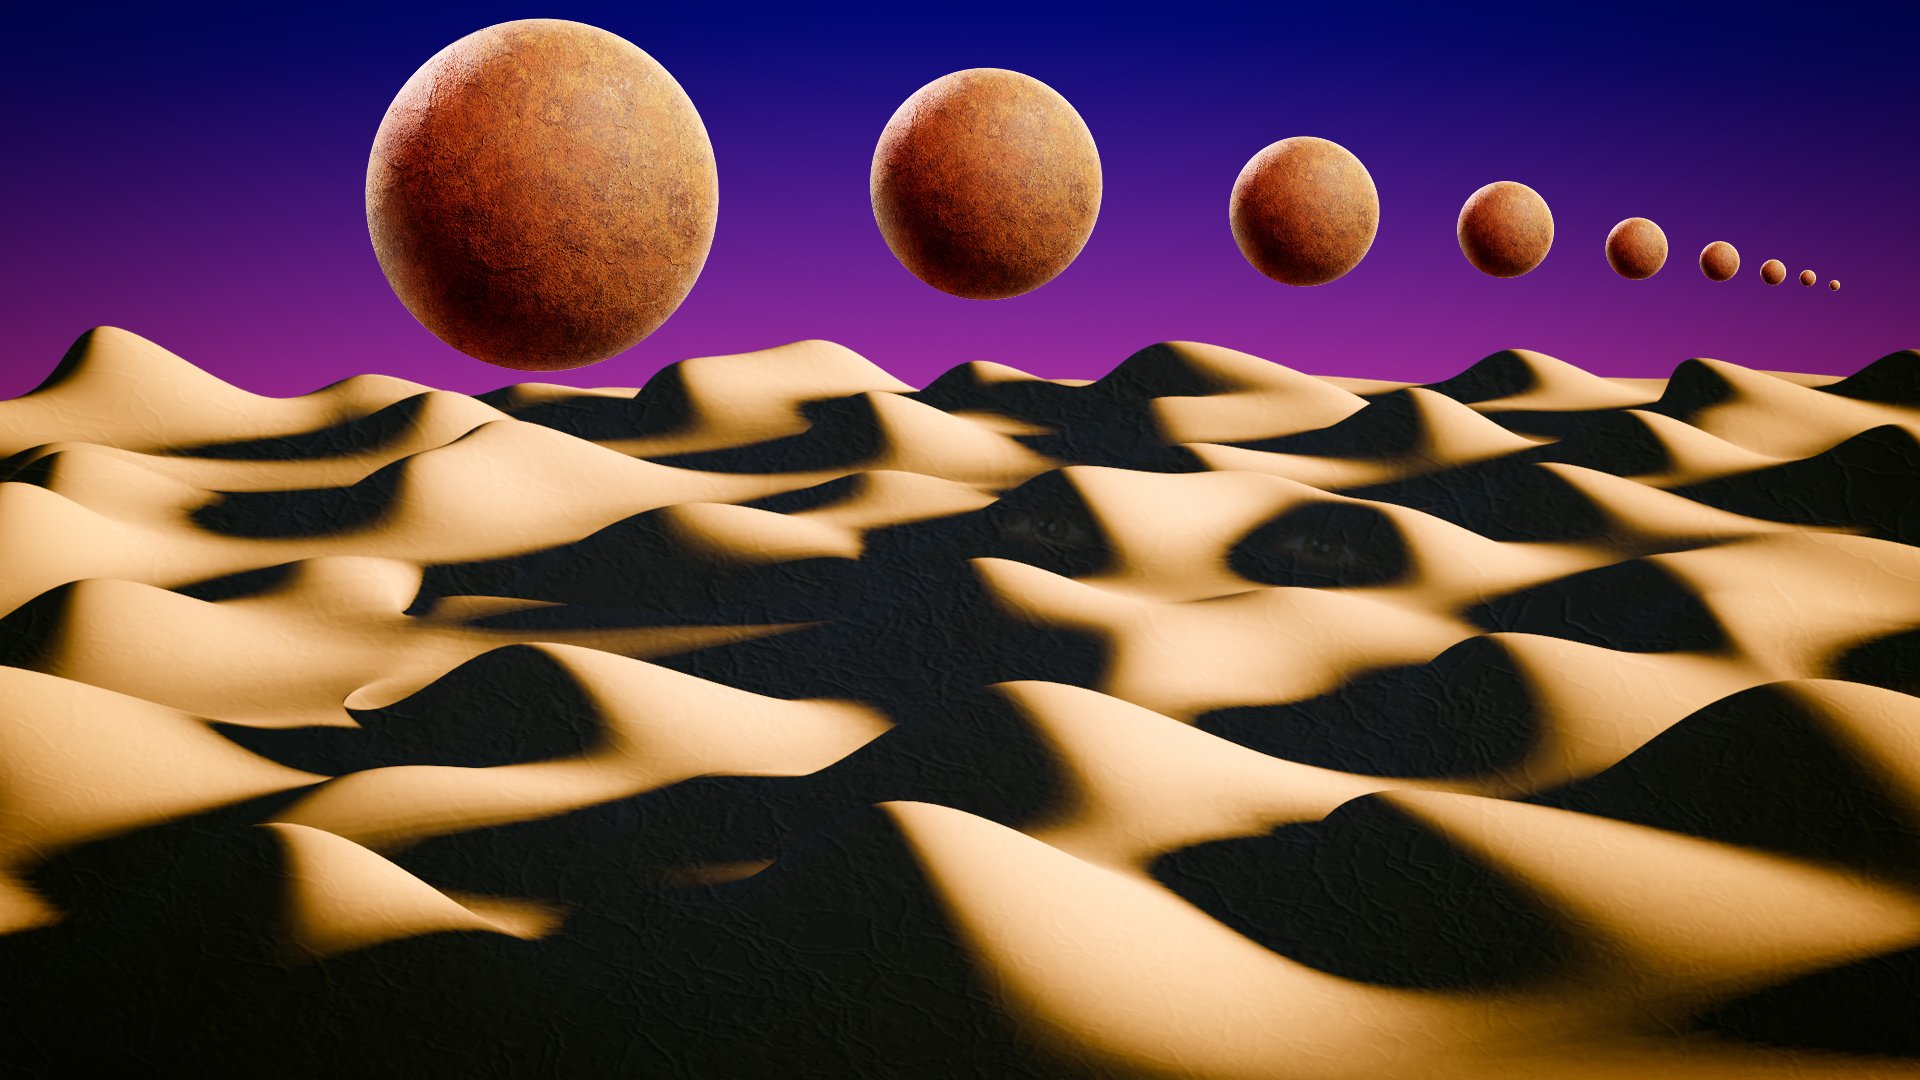
I'm trying to get my arms around Blender 3D, which is what I used to create the sand dunes in the attached image. I am confused and completely overwhelmed by Blender, navigation, render passes, etc. The desert isn't overly convincing, but it's the best I could do with my newbie, rudimentary skills (or perhaps I should say, the lack thereof). I brought exported desert scene into Affinity Photo, where I did the rest of the work. Haha, anyway, I thought I'd post this and see if anyone has any sage advice on coming up to speed with Blender.
-
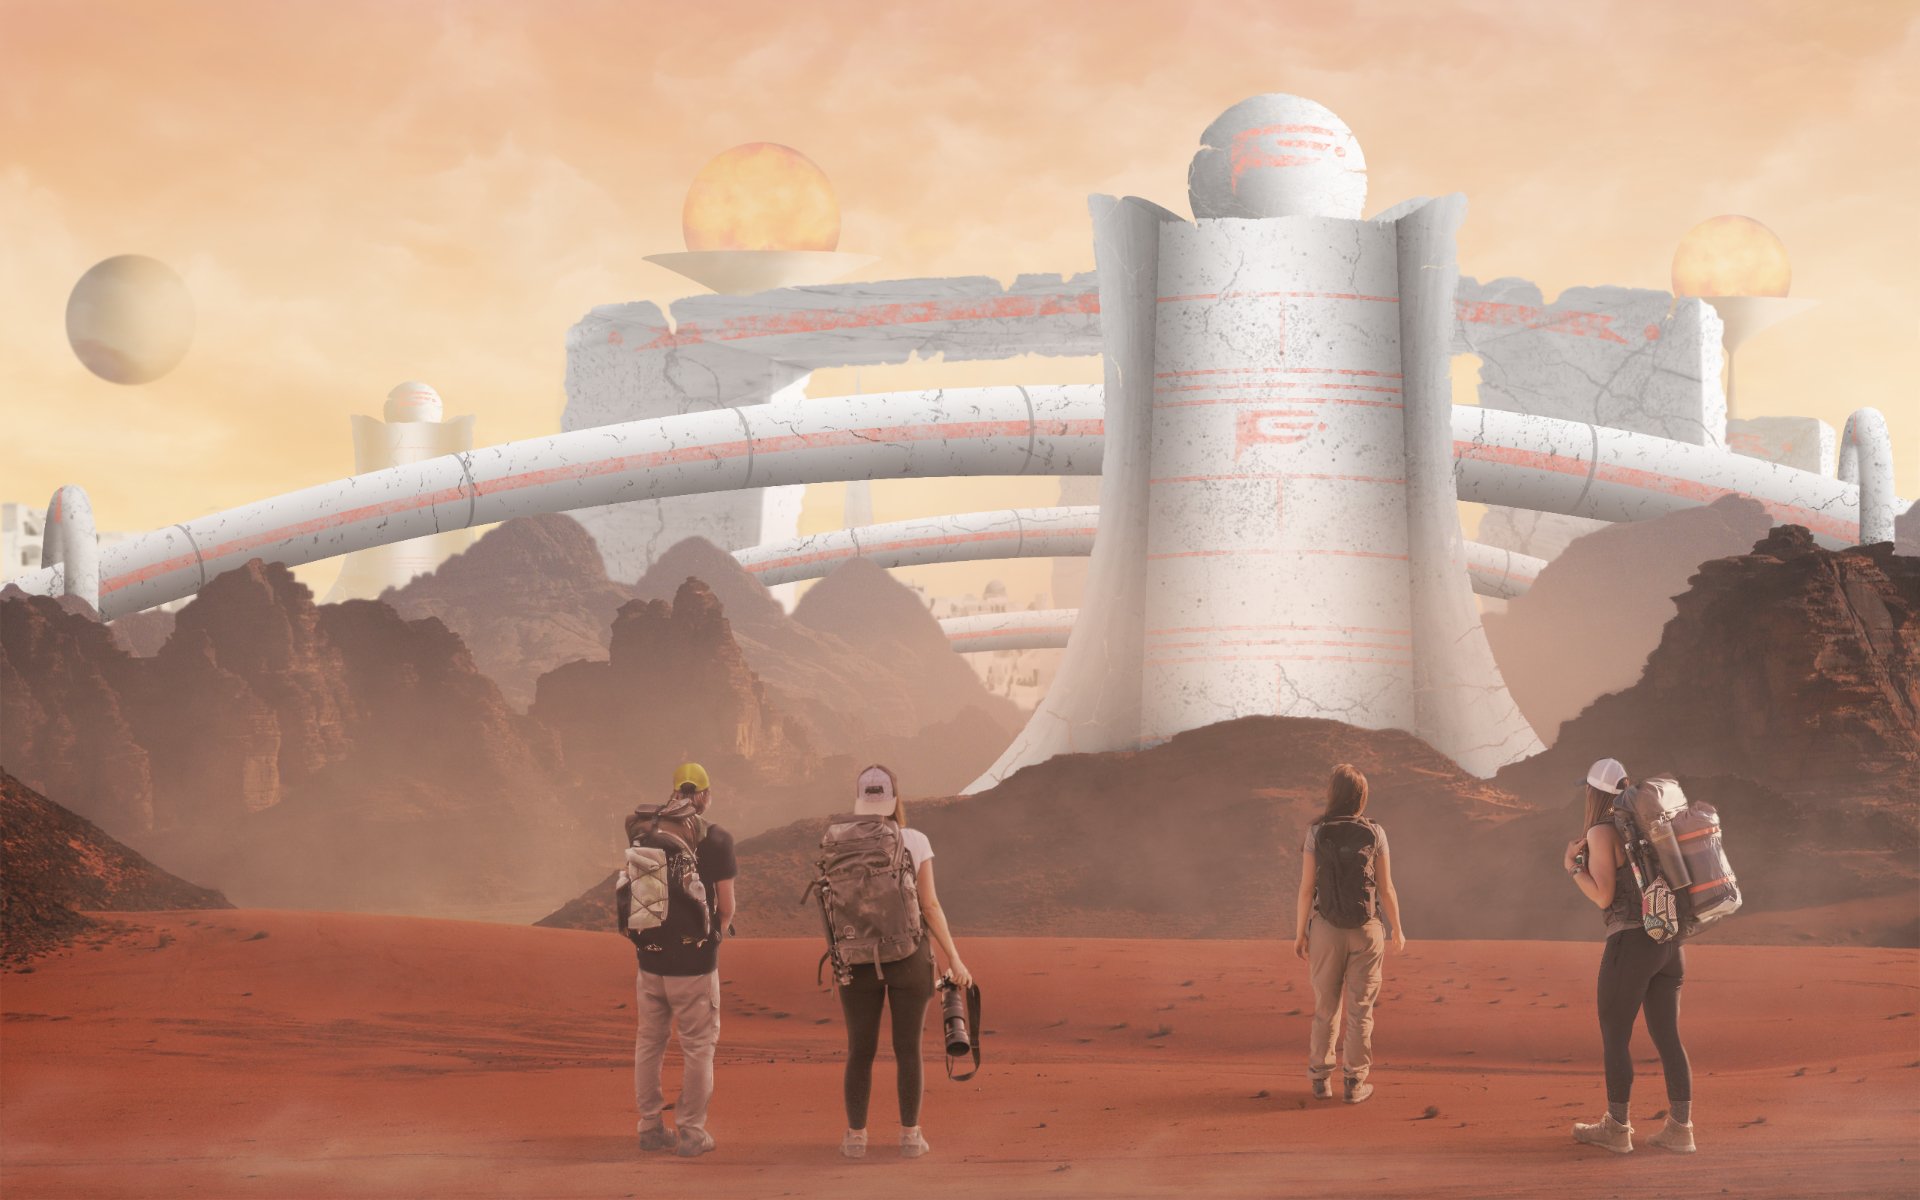
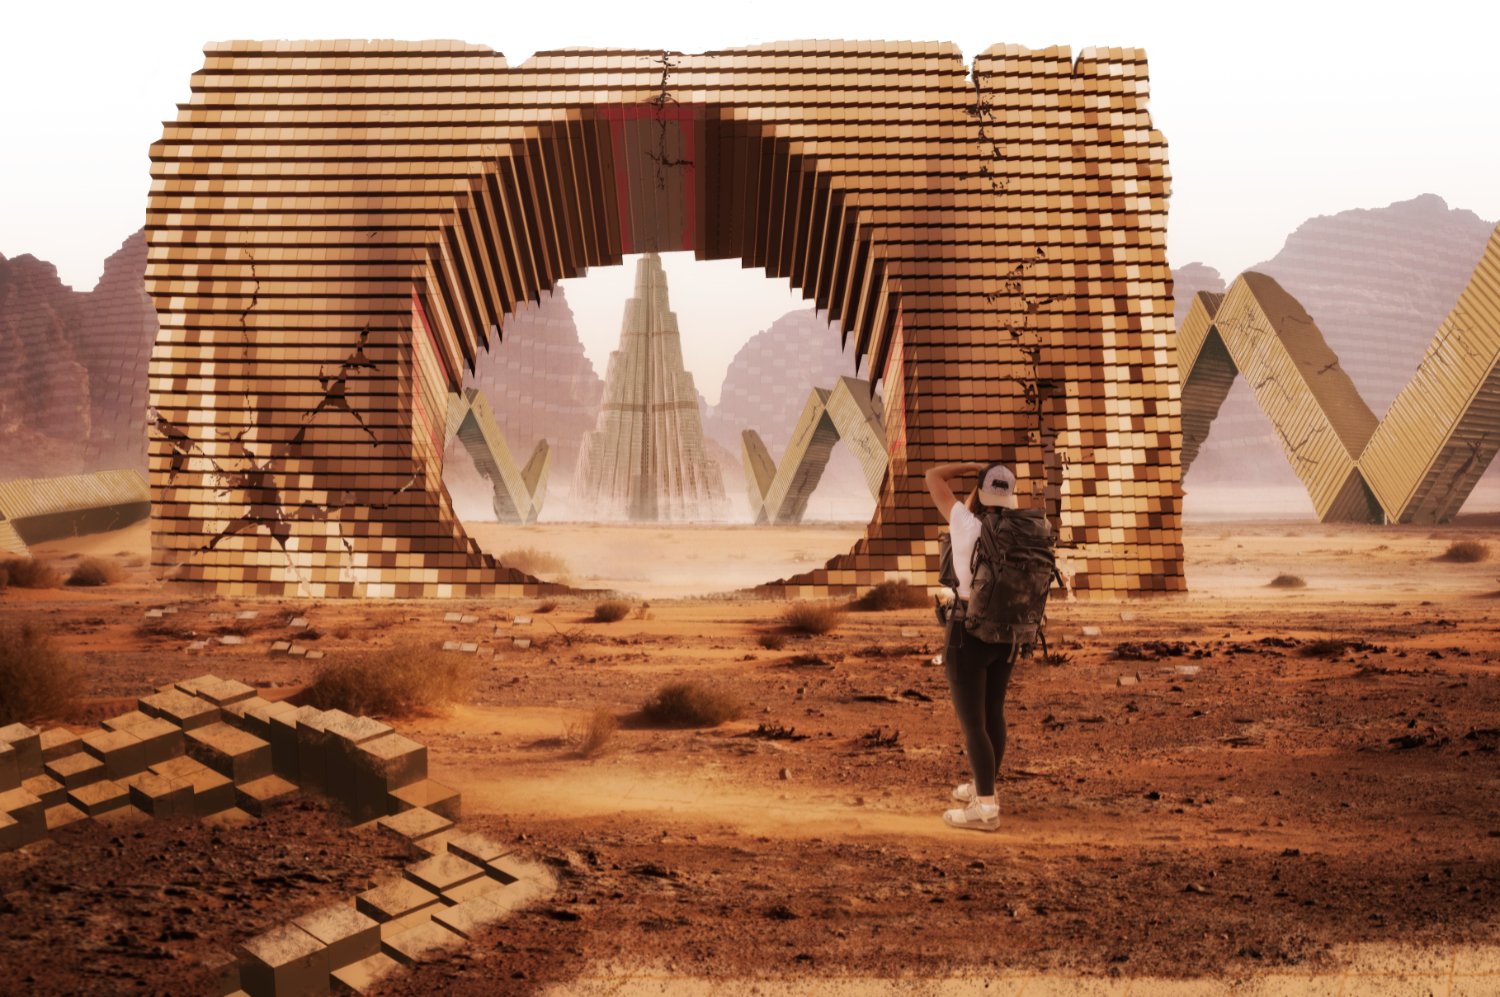
....Swirling sands, driven by gentle winds slowly clear to reveal a Metropolis. The research team stop to take a moment and absorb the magnificent sight ahead of them.
-
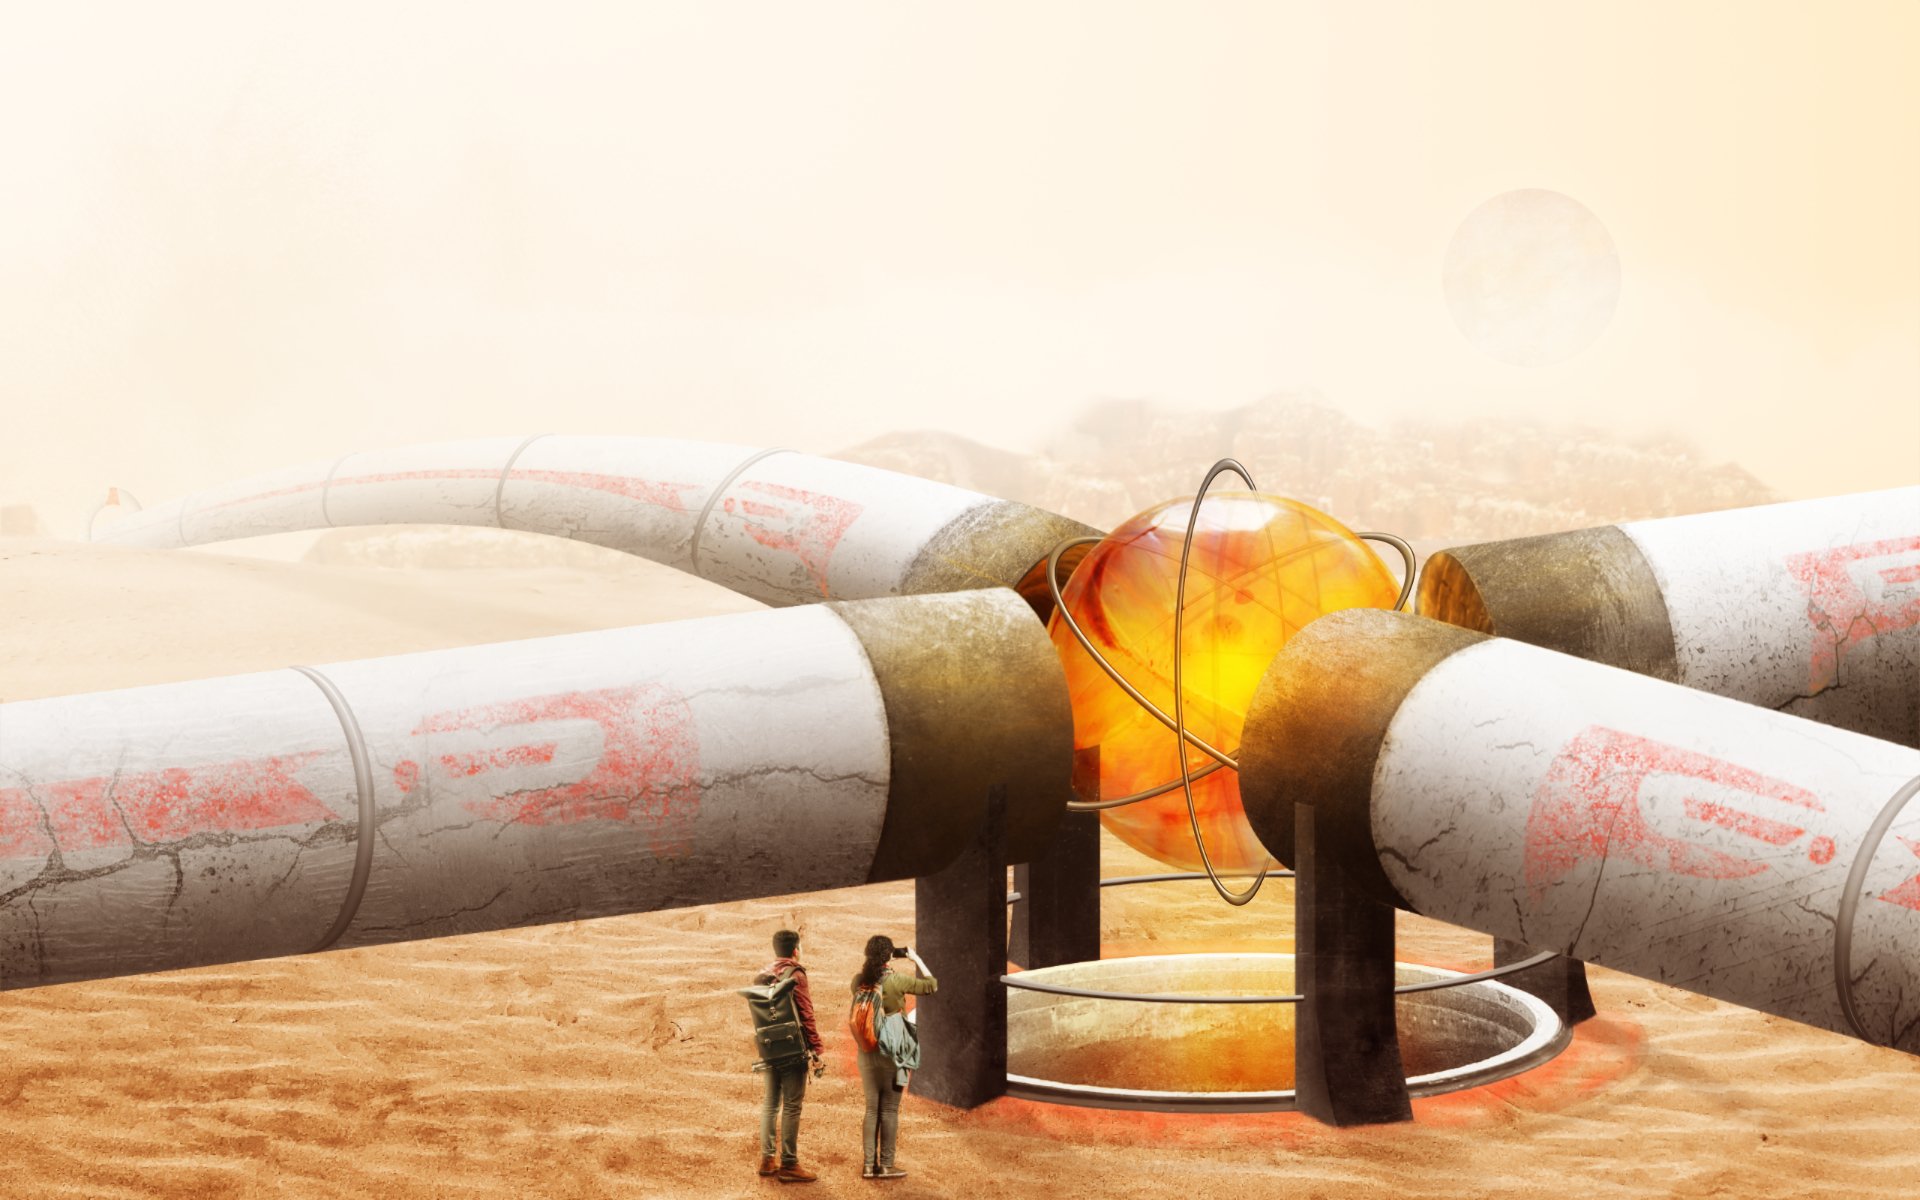
.....Discovery by the research team of an energy sphere which they have coined, "The Power Marble." Apart from 4 base photographs, desert sands, distant rock structure, tourists, well hole, all concept designs created entirely within Affinity Photo using shapes and texture samples.
-
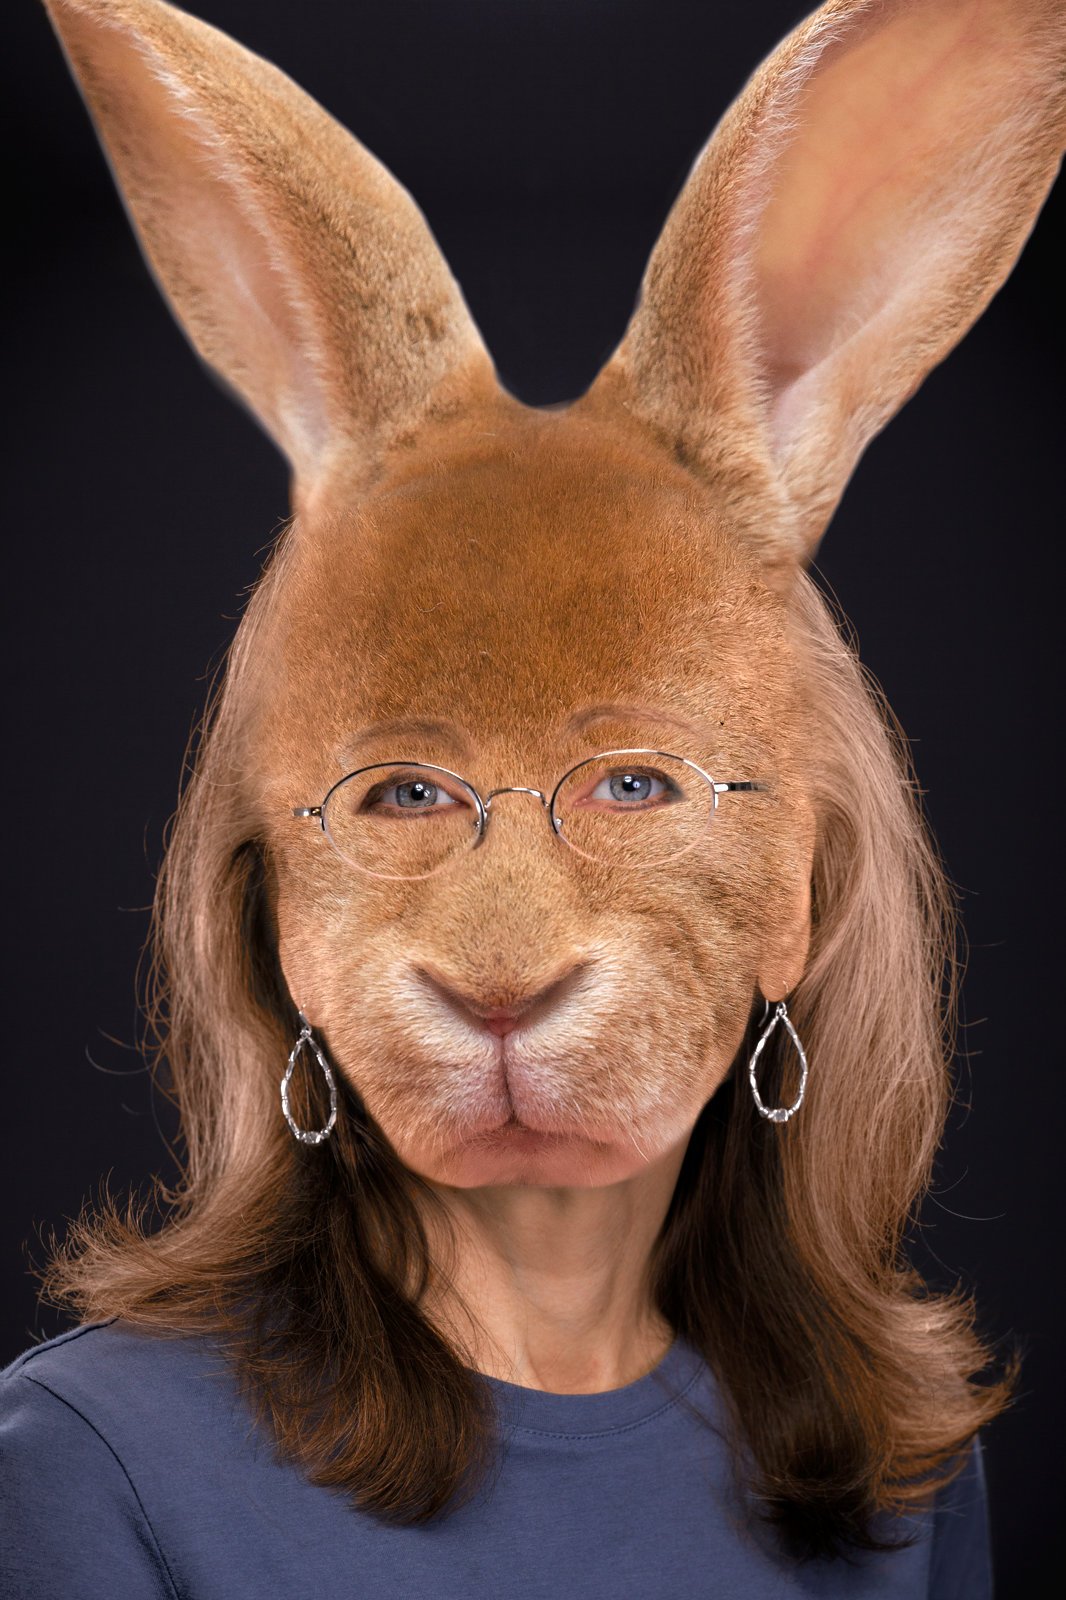
My wife is a RABBIT FANATIC. She even calls herself "RabbitMom". Over the years, she's begun to take on some of the attributes of her pets. Here's the proof!! 🤪
-
This, by rights, should've been picture 4 in the series, but due to a major computer malfunction I lost the version (3) I was working on. Hey-ho. # I don't trust technology.
-
- 3
-

-
- metra prime
- sci-fi
- (and 2 more)
-
 Is it possible to take multiple photos of a large vertical area (like a building elevation or a large mural)and stitch them together in Affinity photo to create one large image?
 -

affinity photo ADDICTED TO COMPOSITE ART & AFFINITY PHOTO
zypher69 posted a topic in Share your work
Affinity Photo is a joy to use and allows me to create composite art that helps me stay sane during these uncertain times.
-
Image concept entirely created with Photo.
-
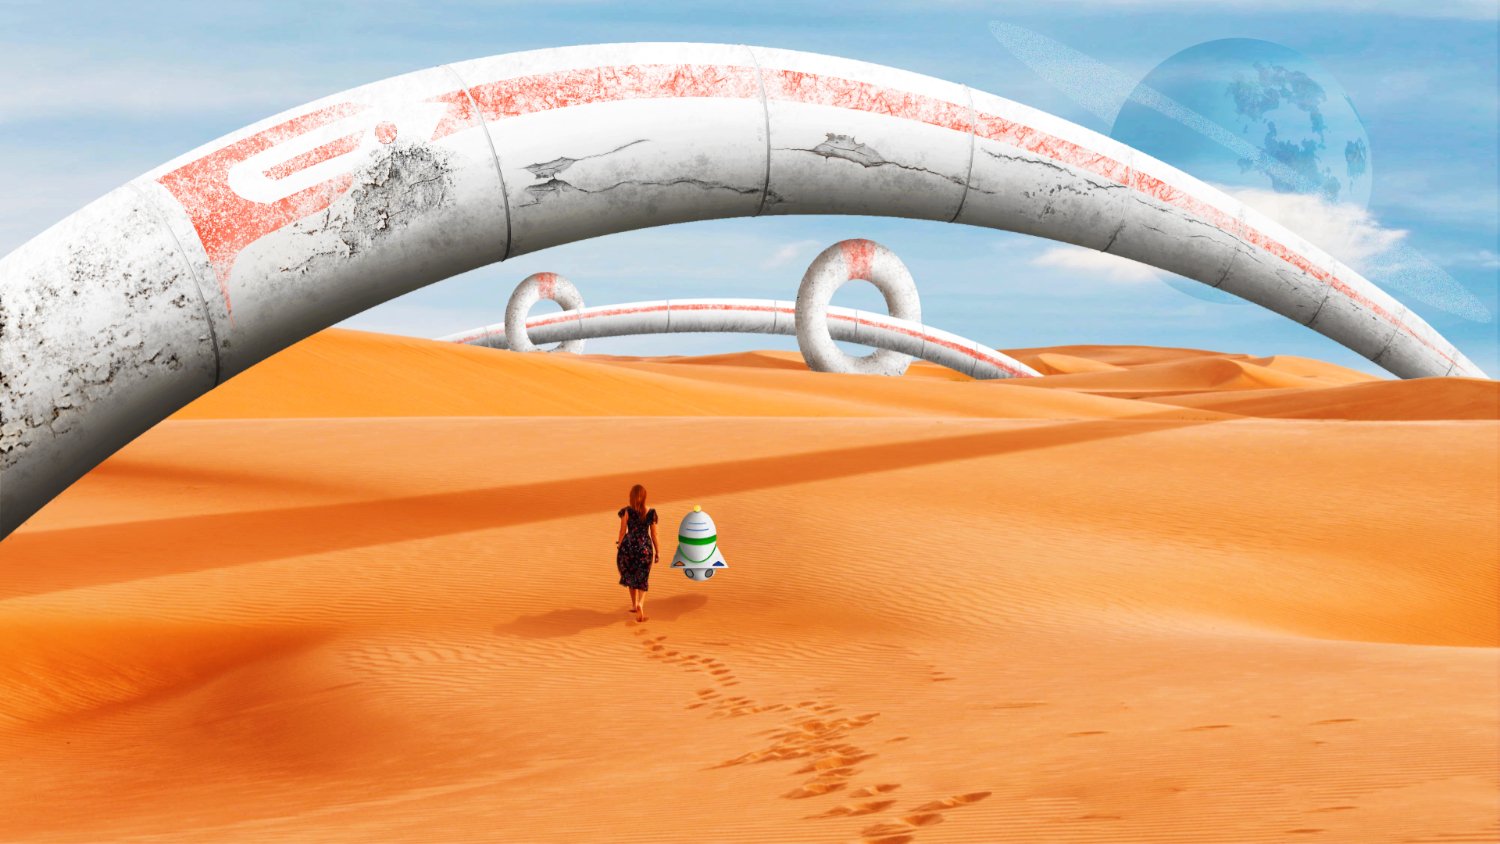
Source photo (desert and woman) from unsplash. All structures created in Affinity Photo with shapes, textures, and an assortment of brushes. Planet built using Luna Cell (unfortunately Affinity does not support this plugin).
-
- 1
-
-
- fantasy
- metra prime
- (and 1 more)
-
Affinity Photo V2 with a little help from GMIC plugin.
-
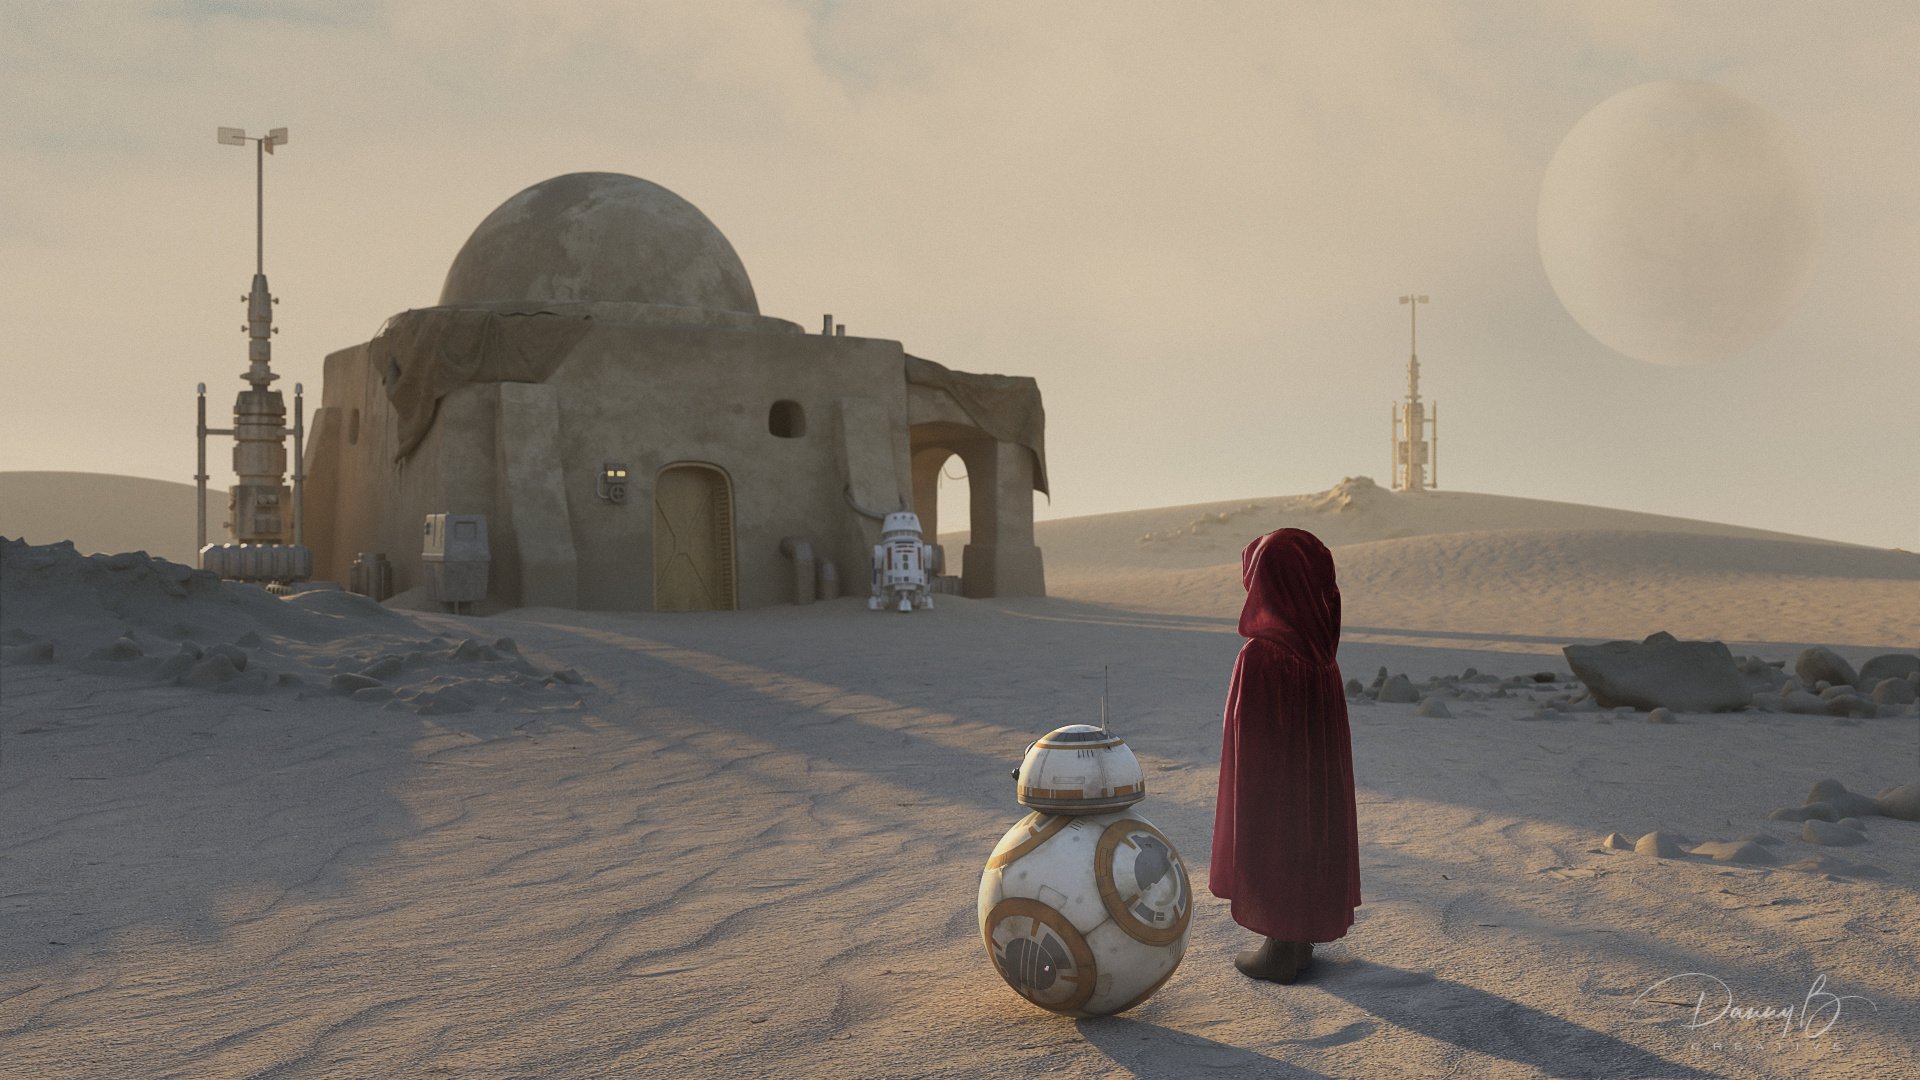
Fun little Star Wars themed project. 3D work done in Blender. Photography was done in studio, processed in AP. Composited in AP.
- 11 replies
-
- 22
-
-
- photo manipulation
- 3d
- (and 4 more)
-
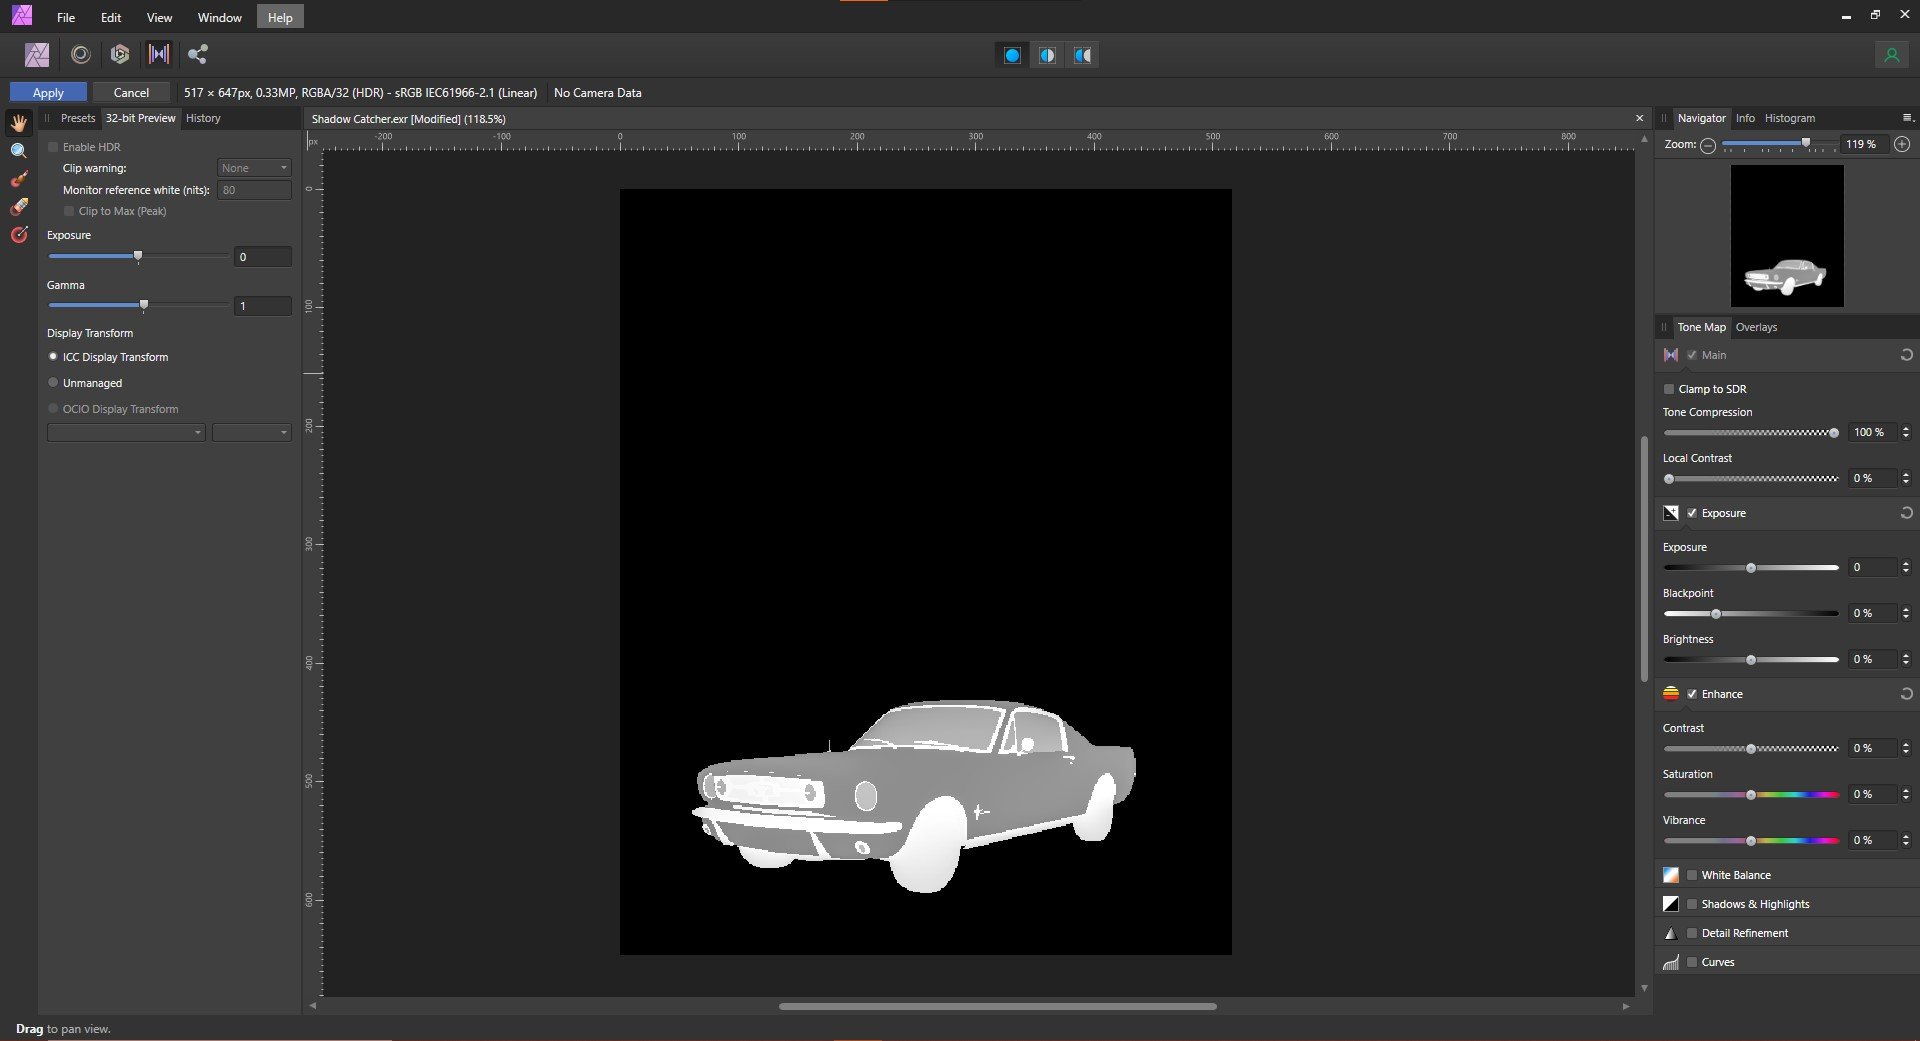
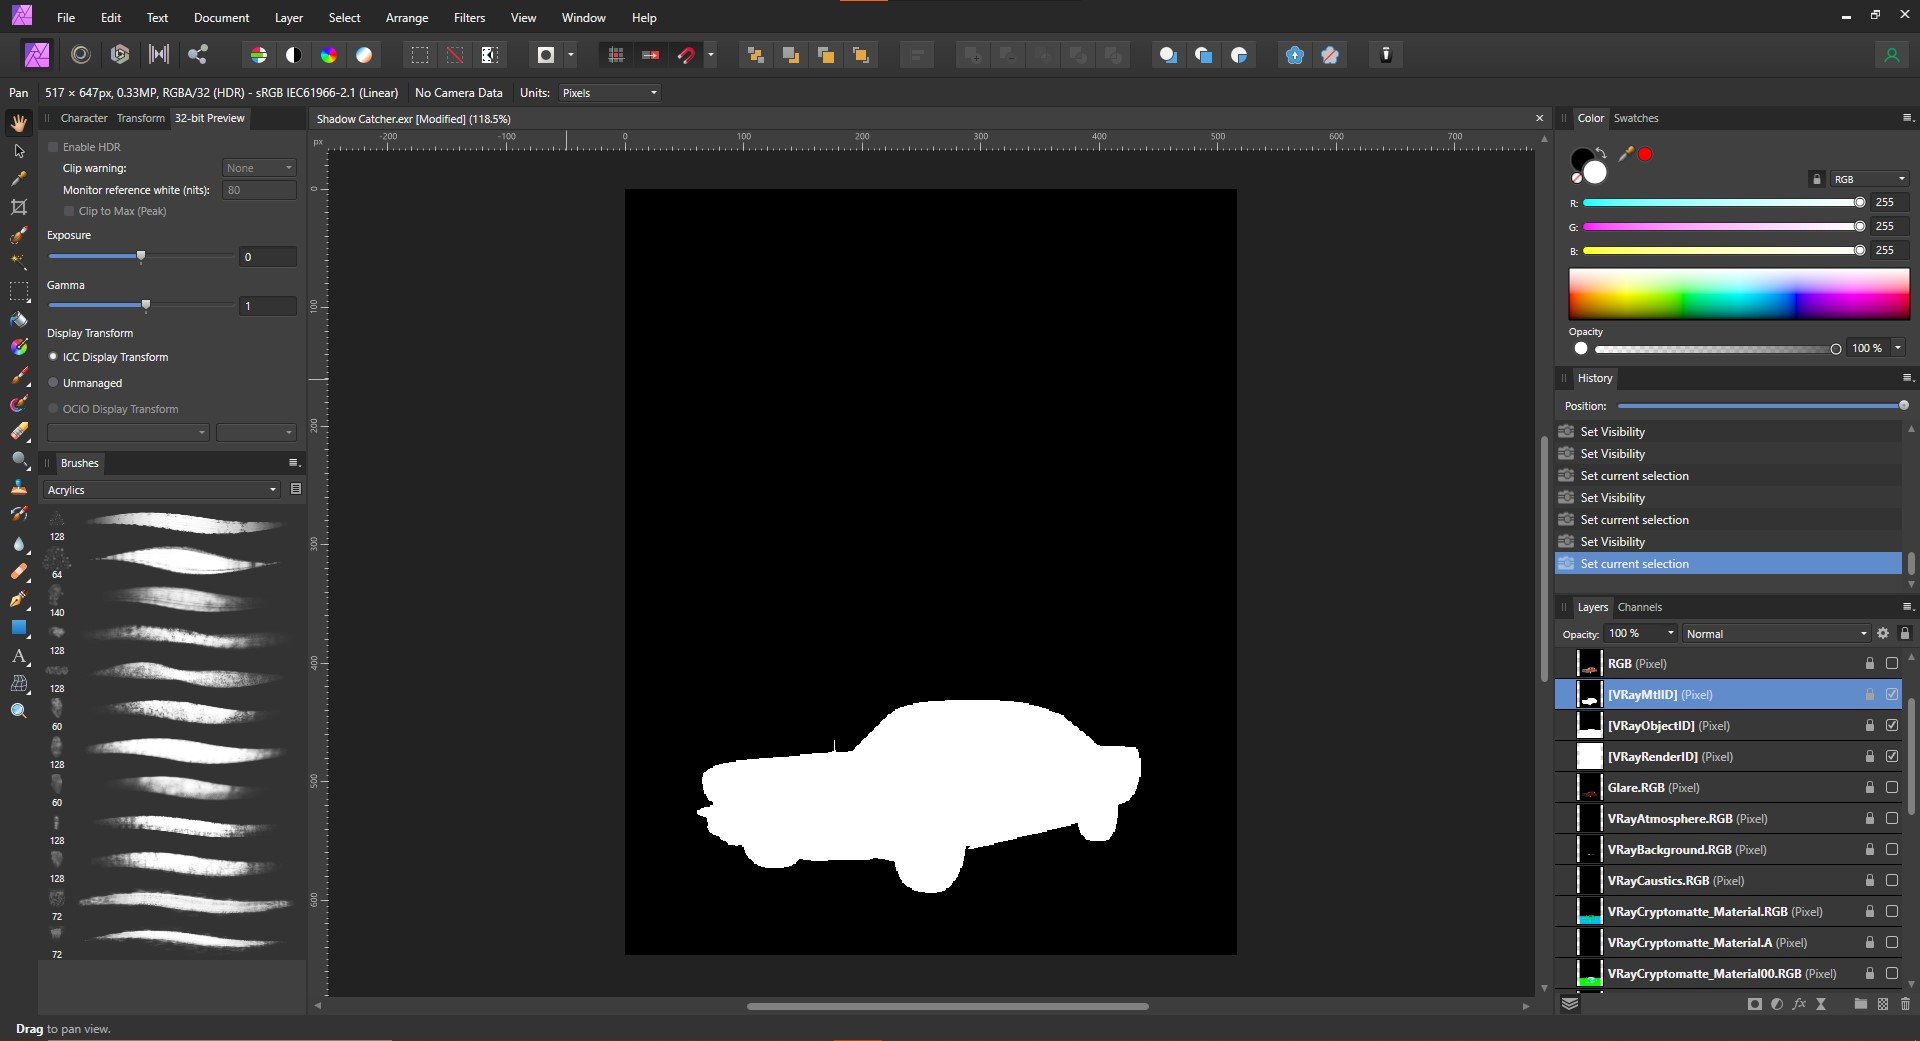
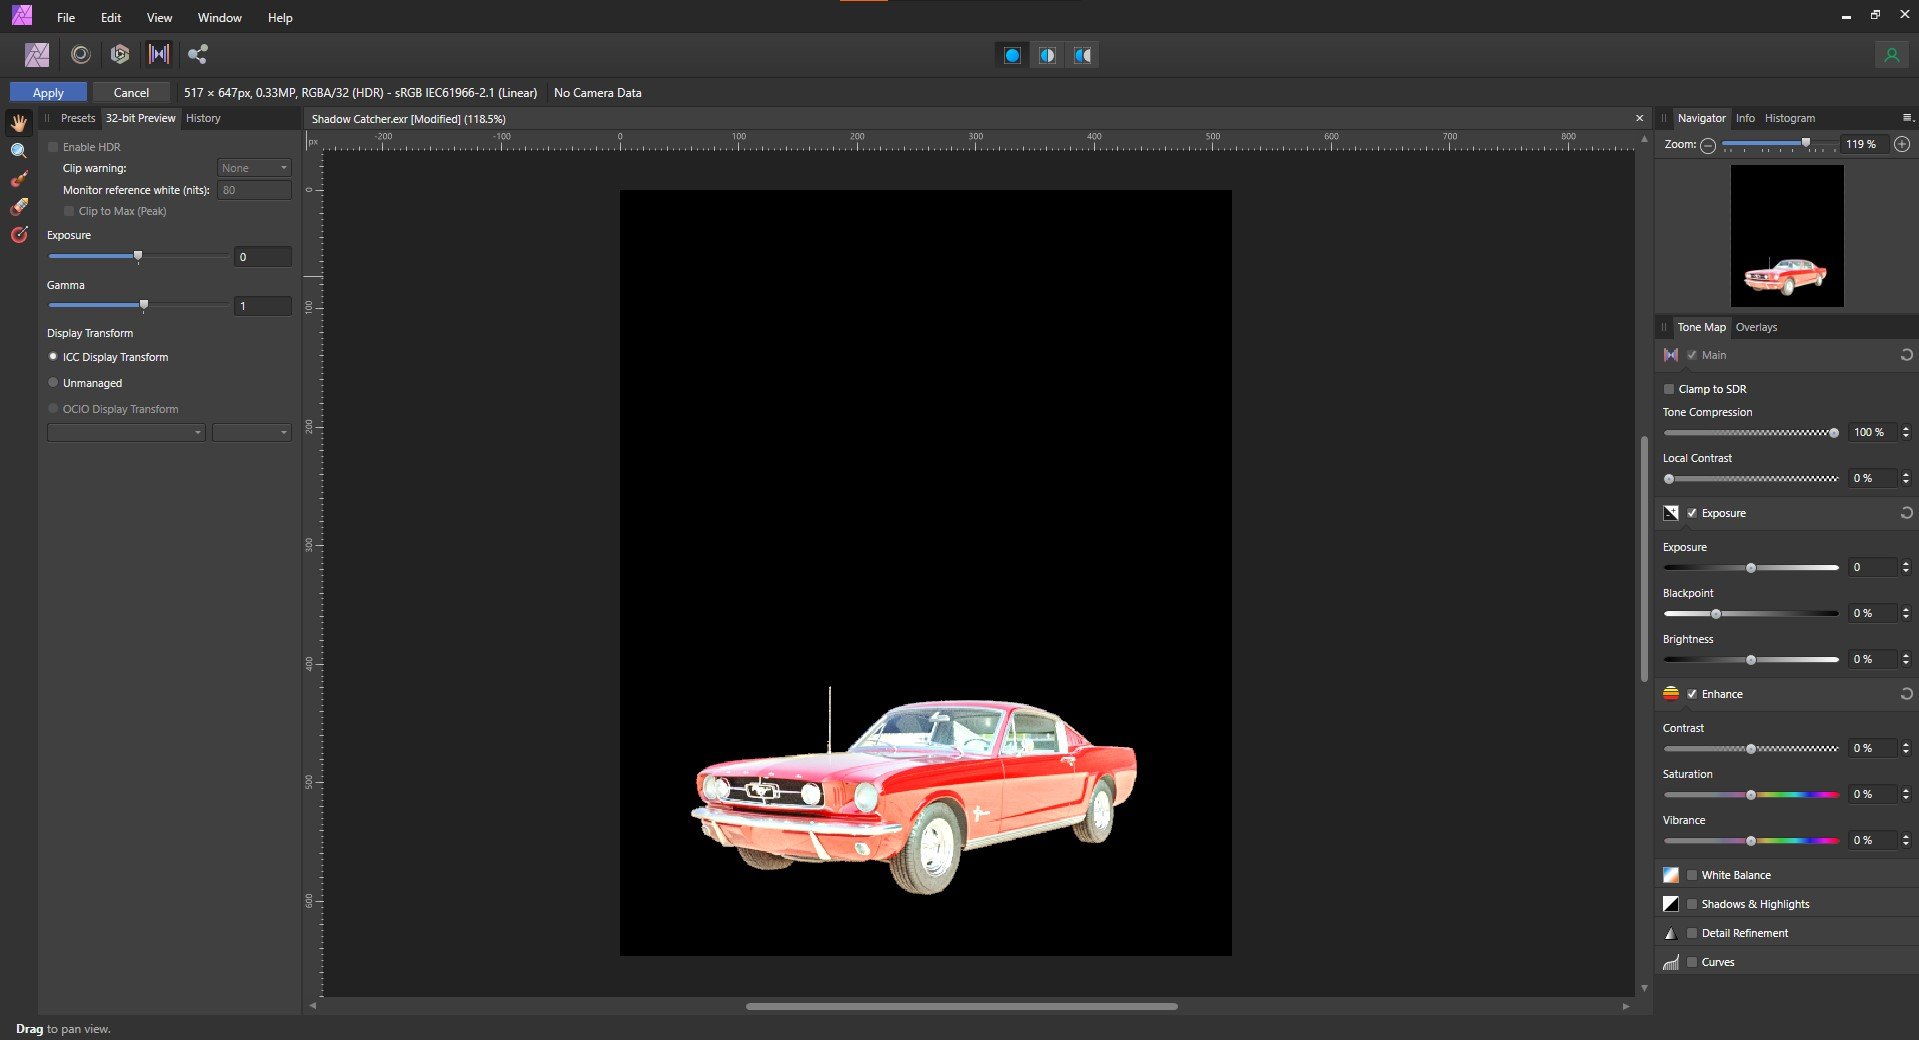
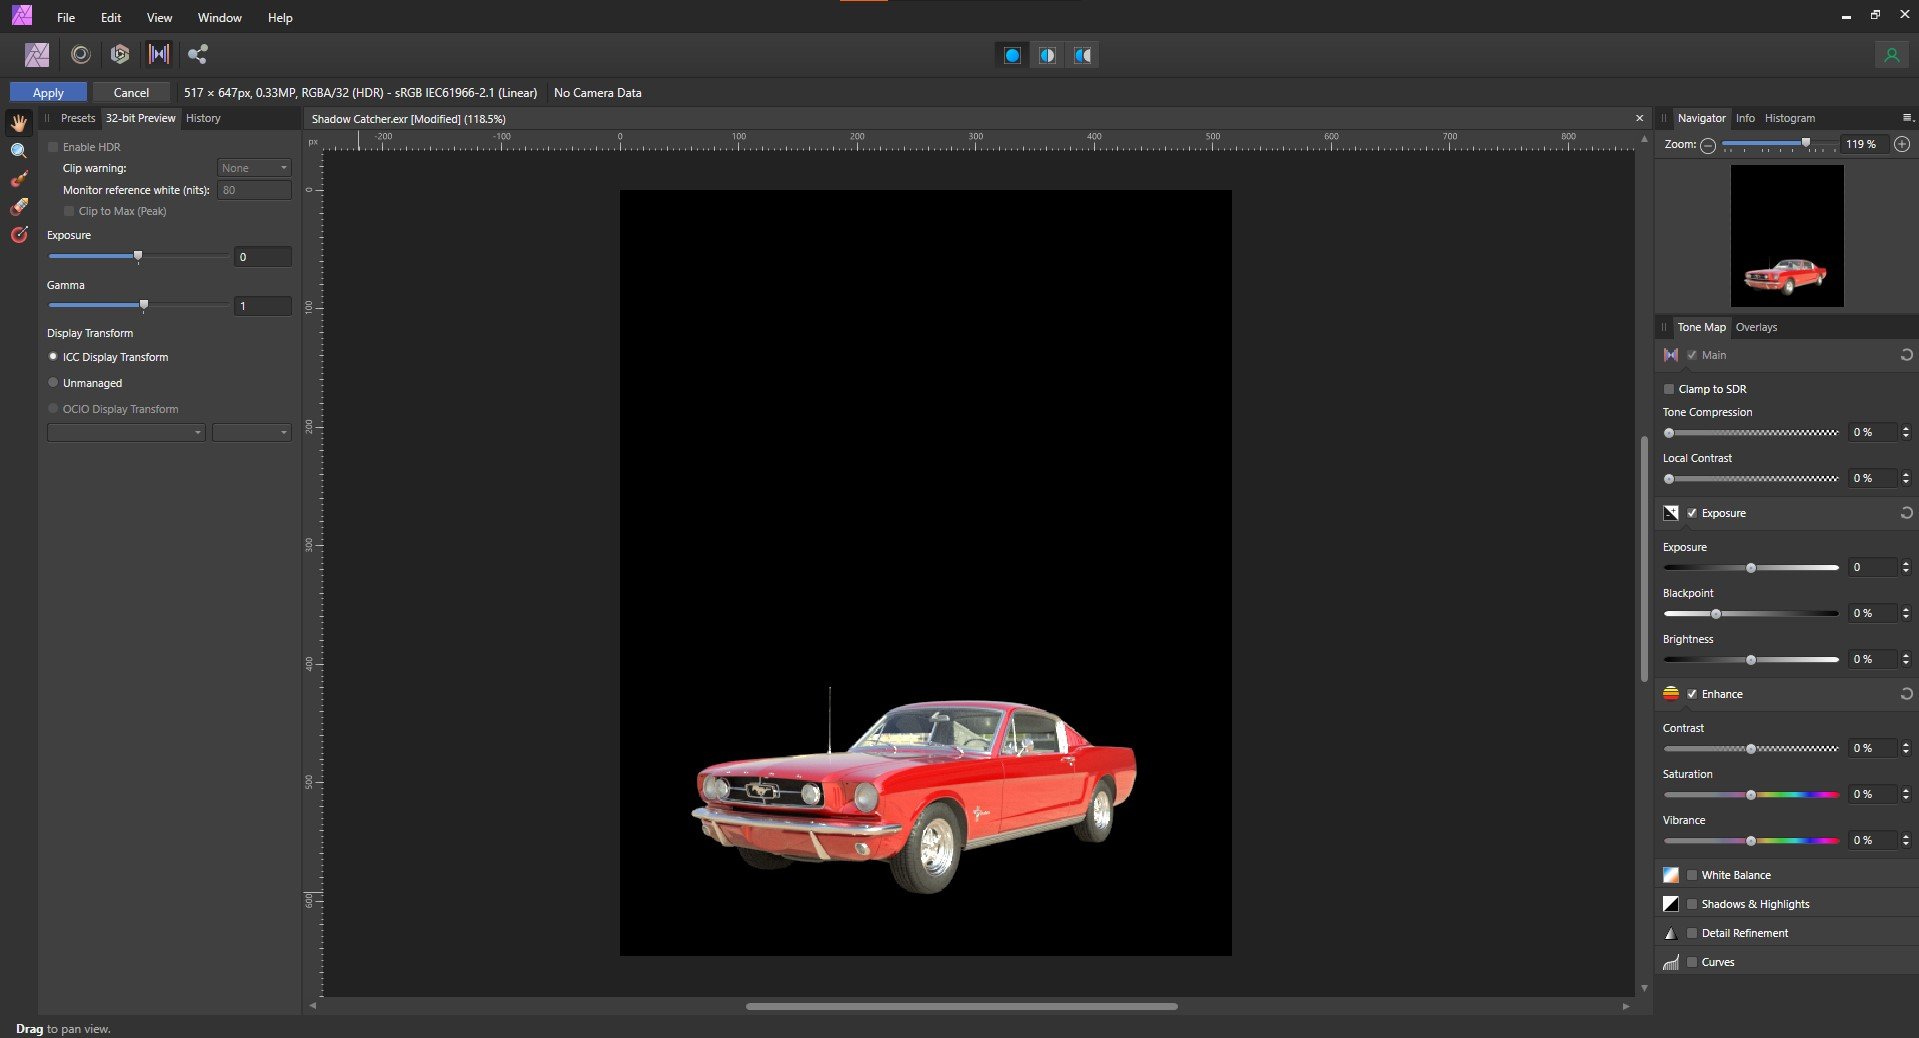
 Hi there, recently im trying to use an EXR saved from V-Ray 5.2 and there's something wrong when oppening it, my ID channels (renderID, MaterialID, ObjectId) appears pure white, but theres some info in the channels, if I use tone compreesion or exposure it brings back some information color but only on Greyscale, another thing is that when using composite and try to use the tone compression persona in another channels instead of compress highlights it increases the gamma. Here you can find the file in EXR, the Id channels how are supposed to be and some examples of what im reffering to Shadow Catcher.exr Shadow Catcher.VRayMtlID.tif Shadow Catcher.VRayObjectID.tif Shadow Catcher.VRayRenderID.tif
-
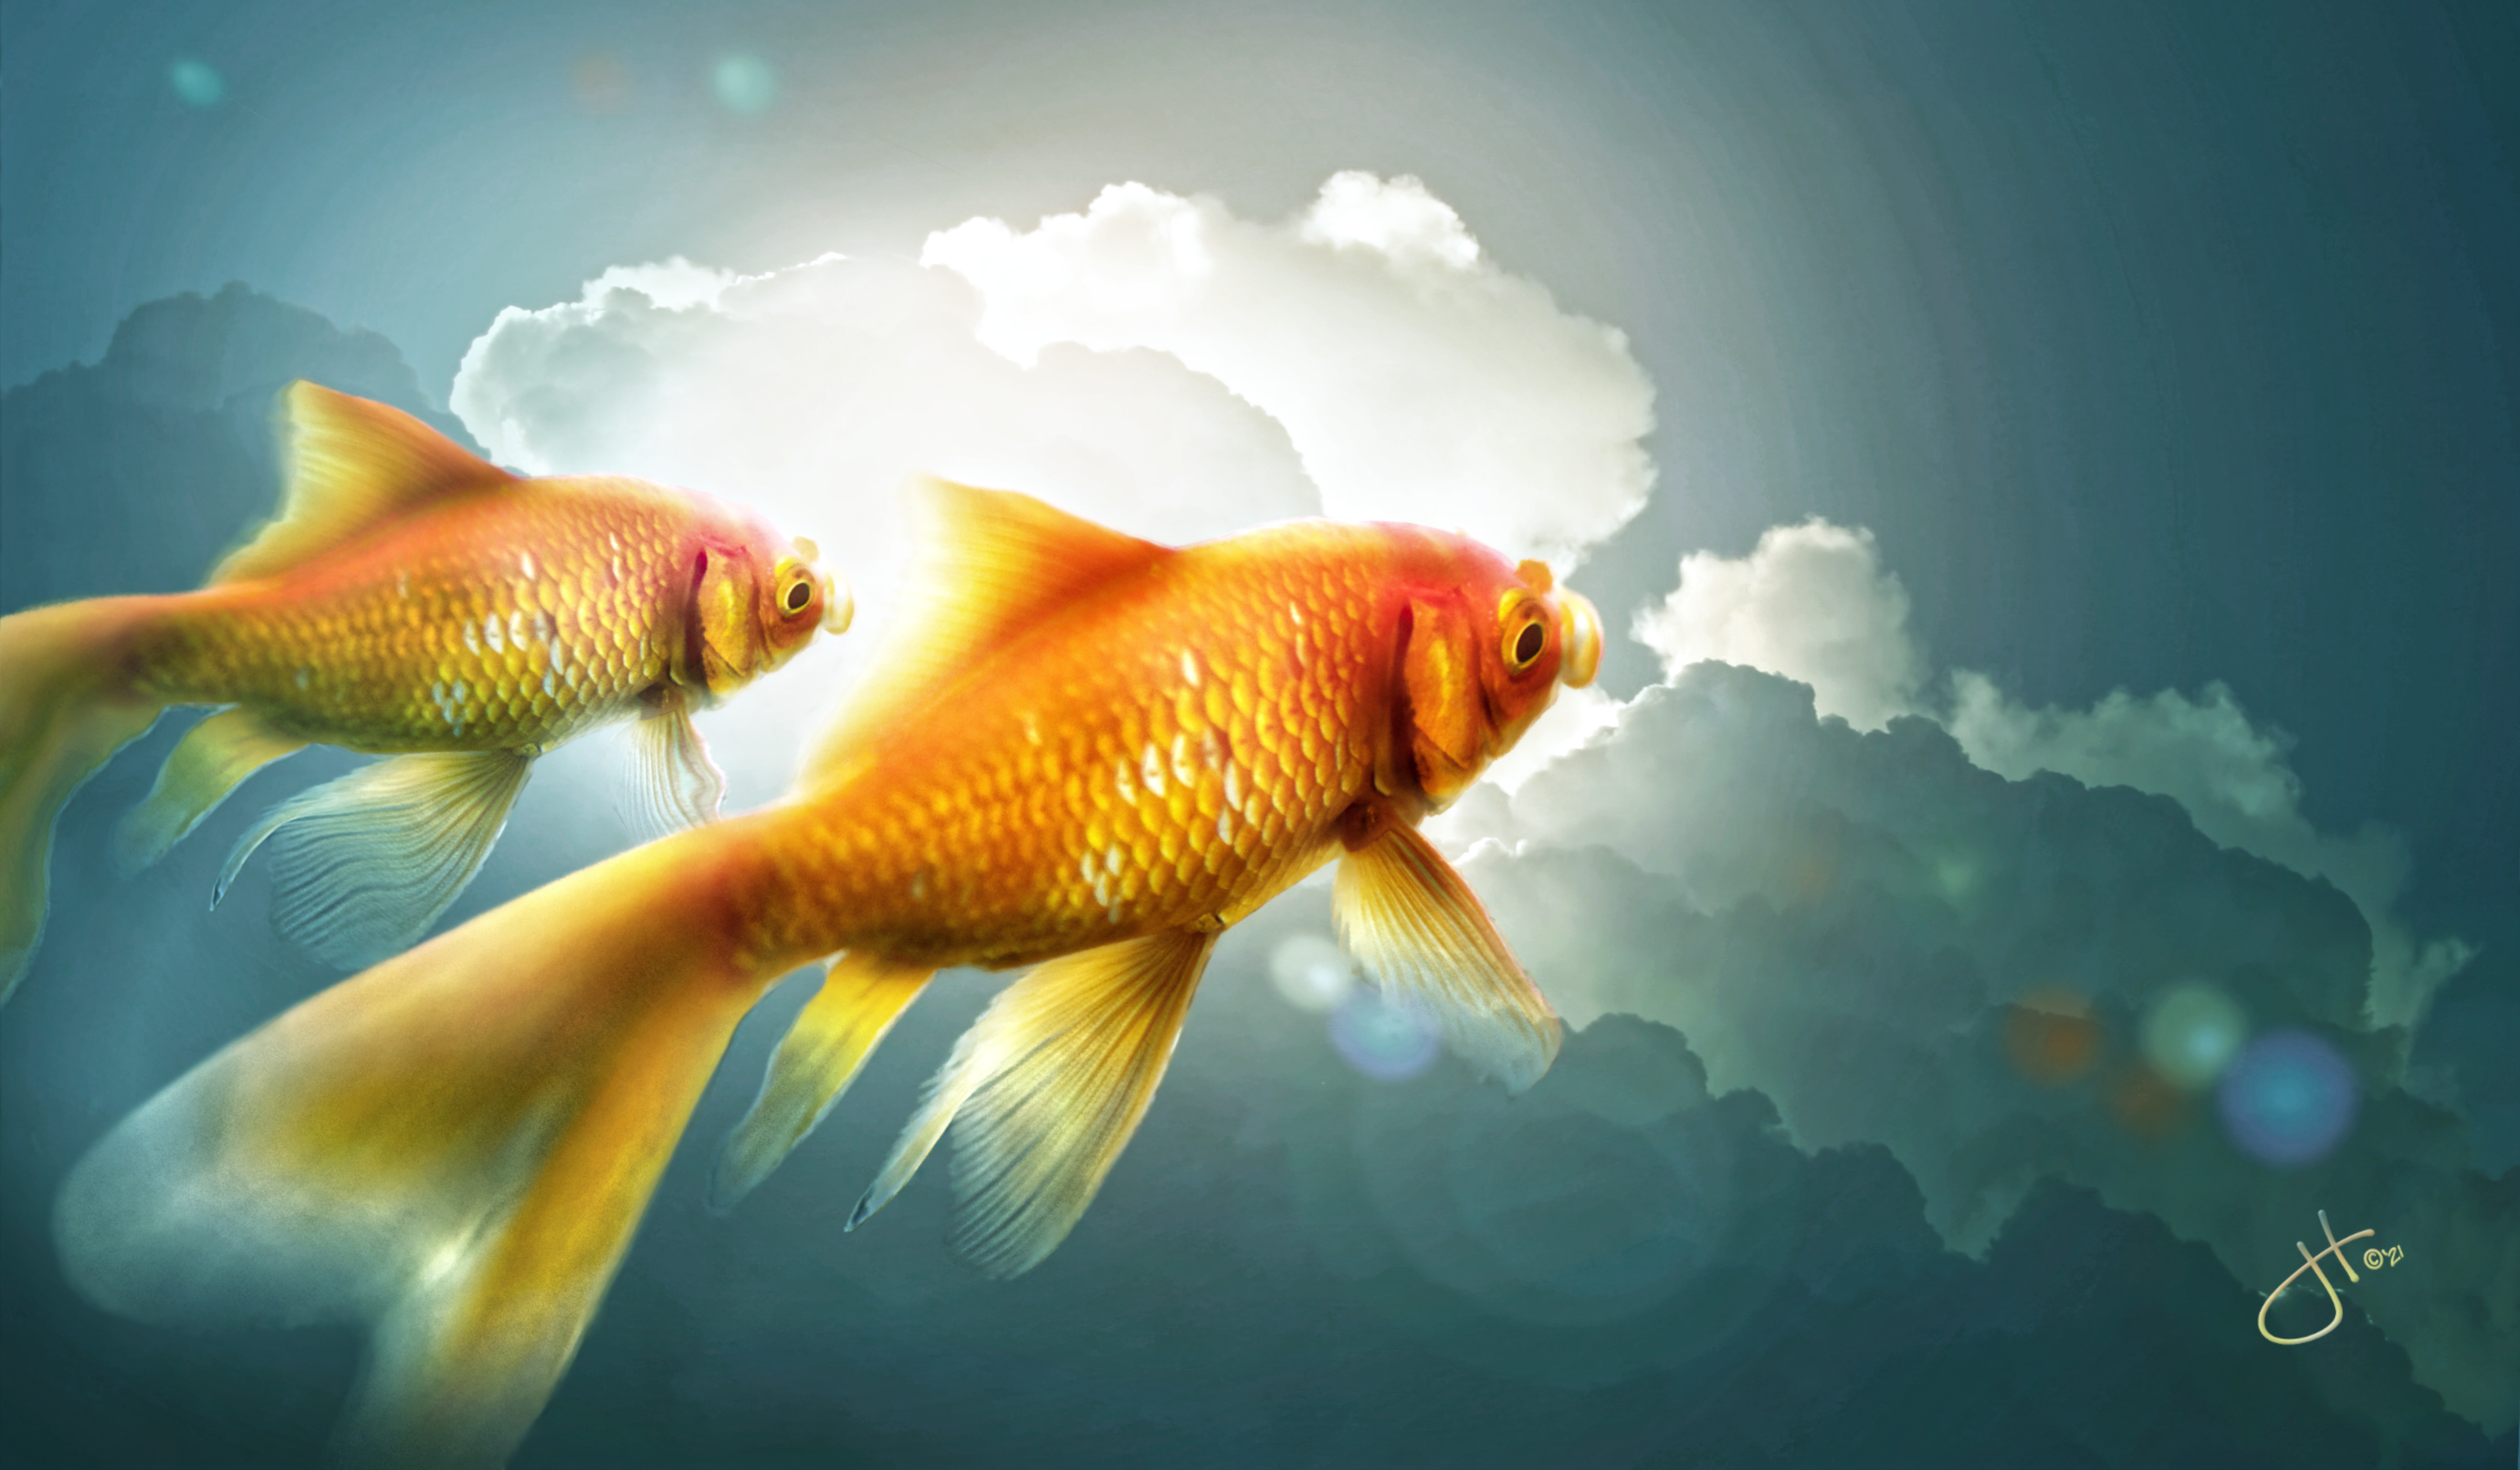
‘Did go...wherever I did go.‘ Just a fun Composite Artwork....in Affinity Photo. ‘Fishful Thinking’- by Jason Hanson/StudioJason
-
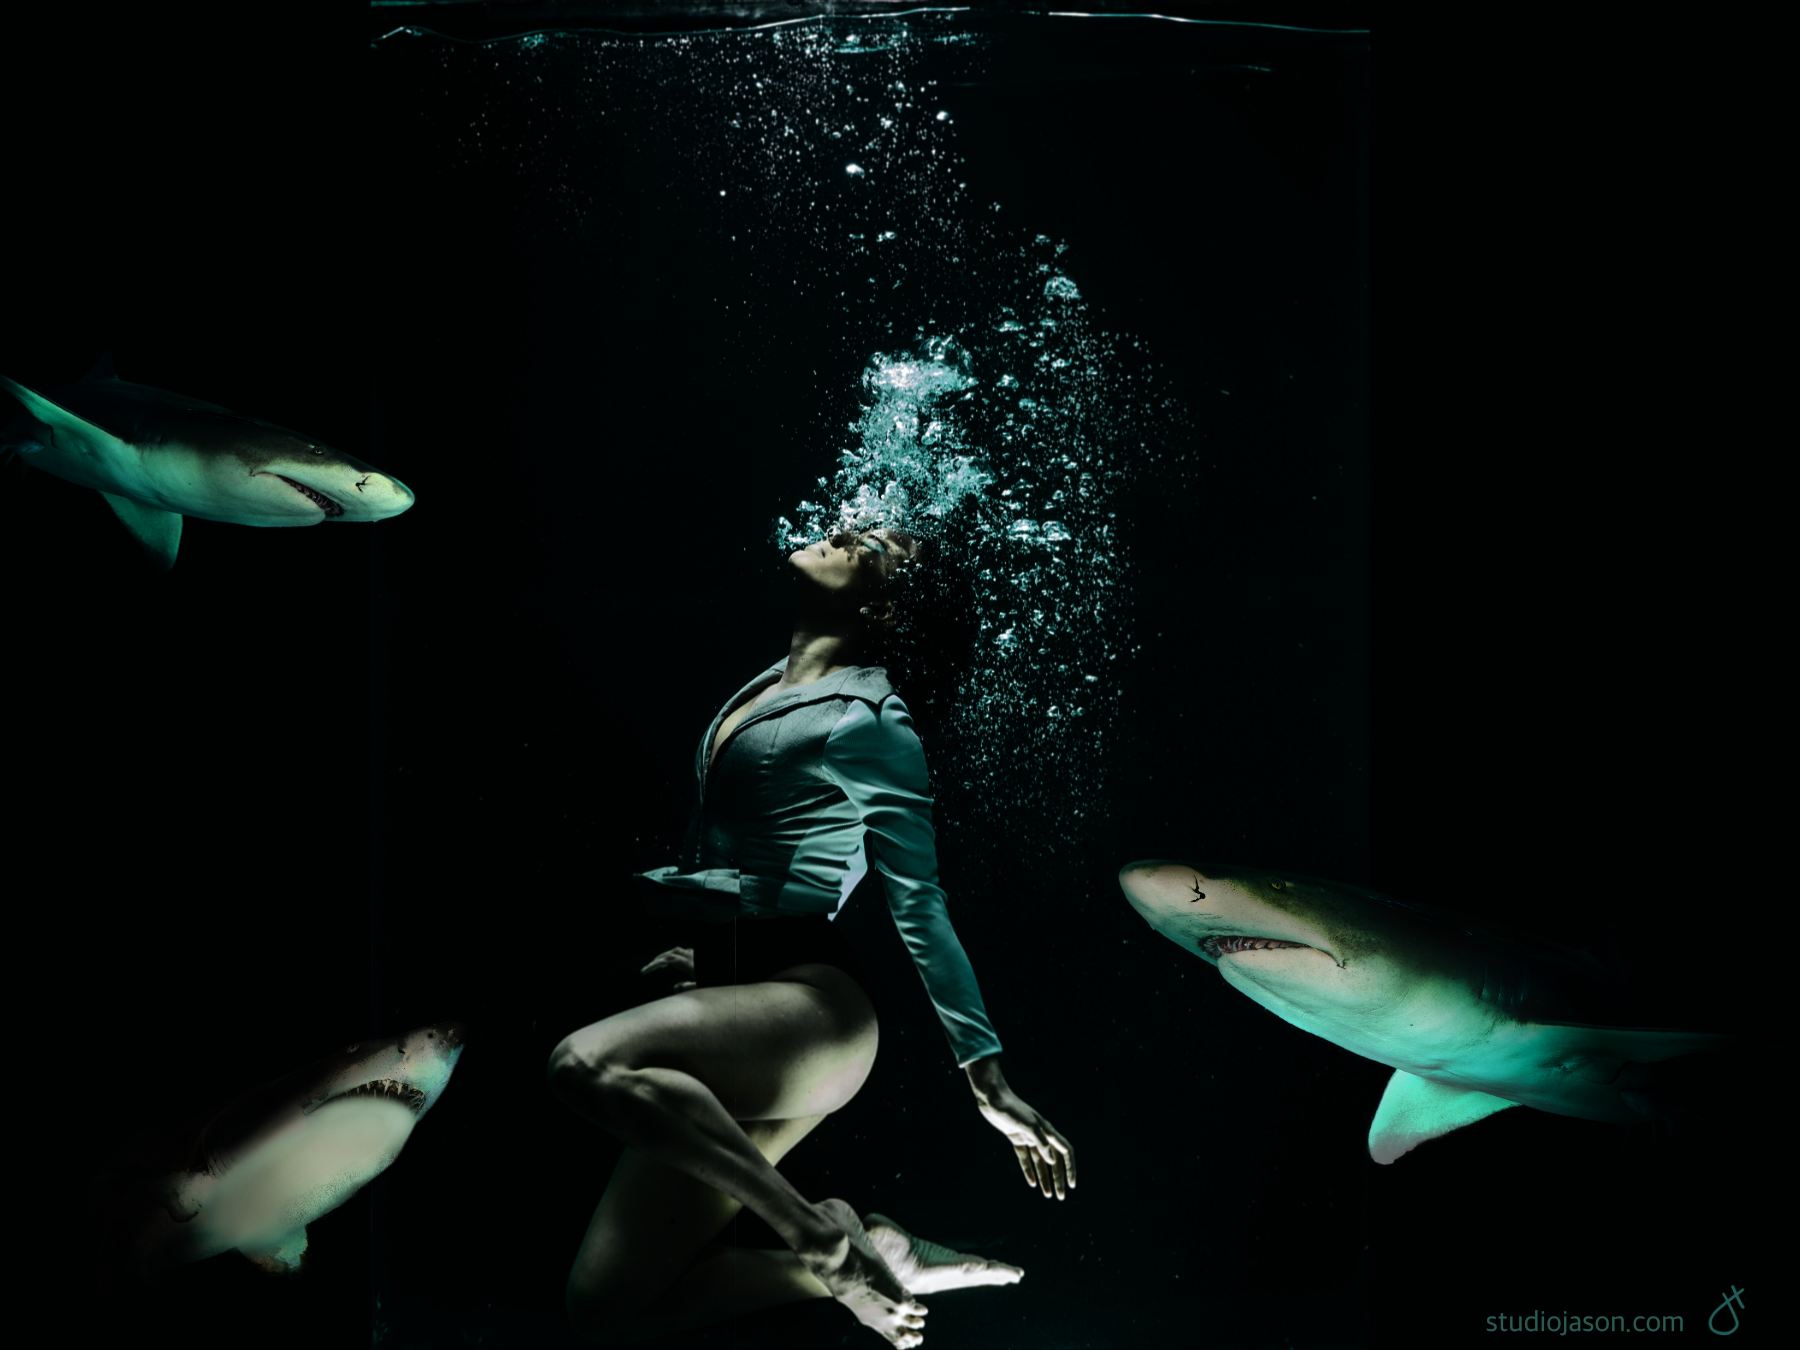
 Did some final polishing of a Composite Artwork...like it much better now. Affinity Photo/iPad Pro.
-
Um pouco das minhas composições de hobby. Virus_2.afphoto
-

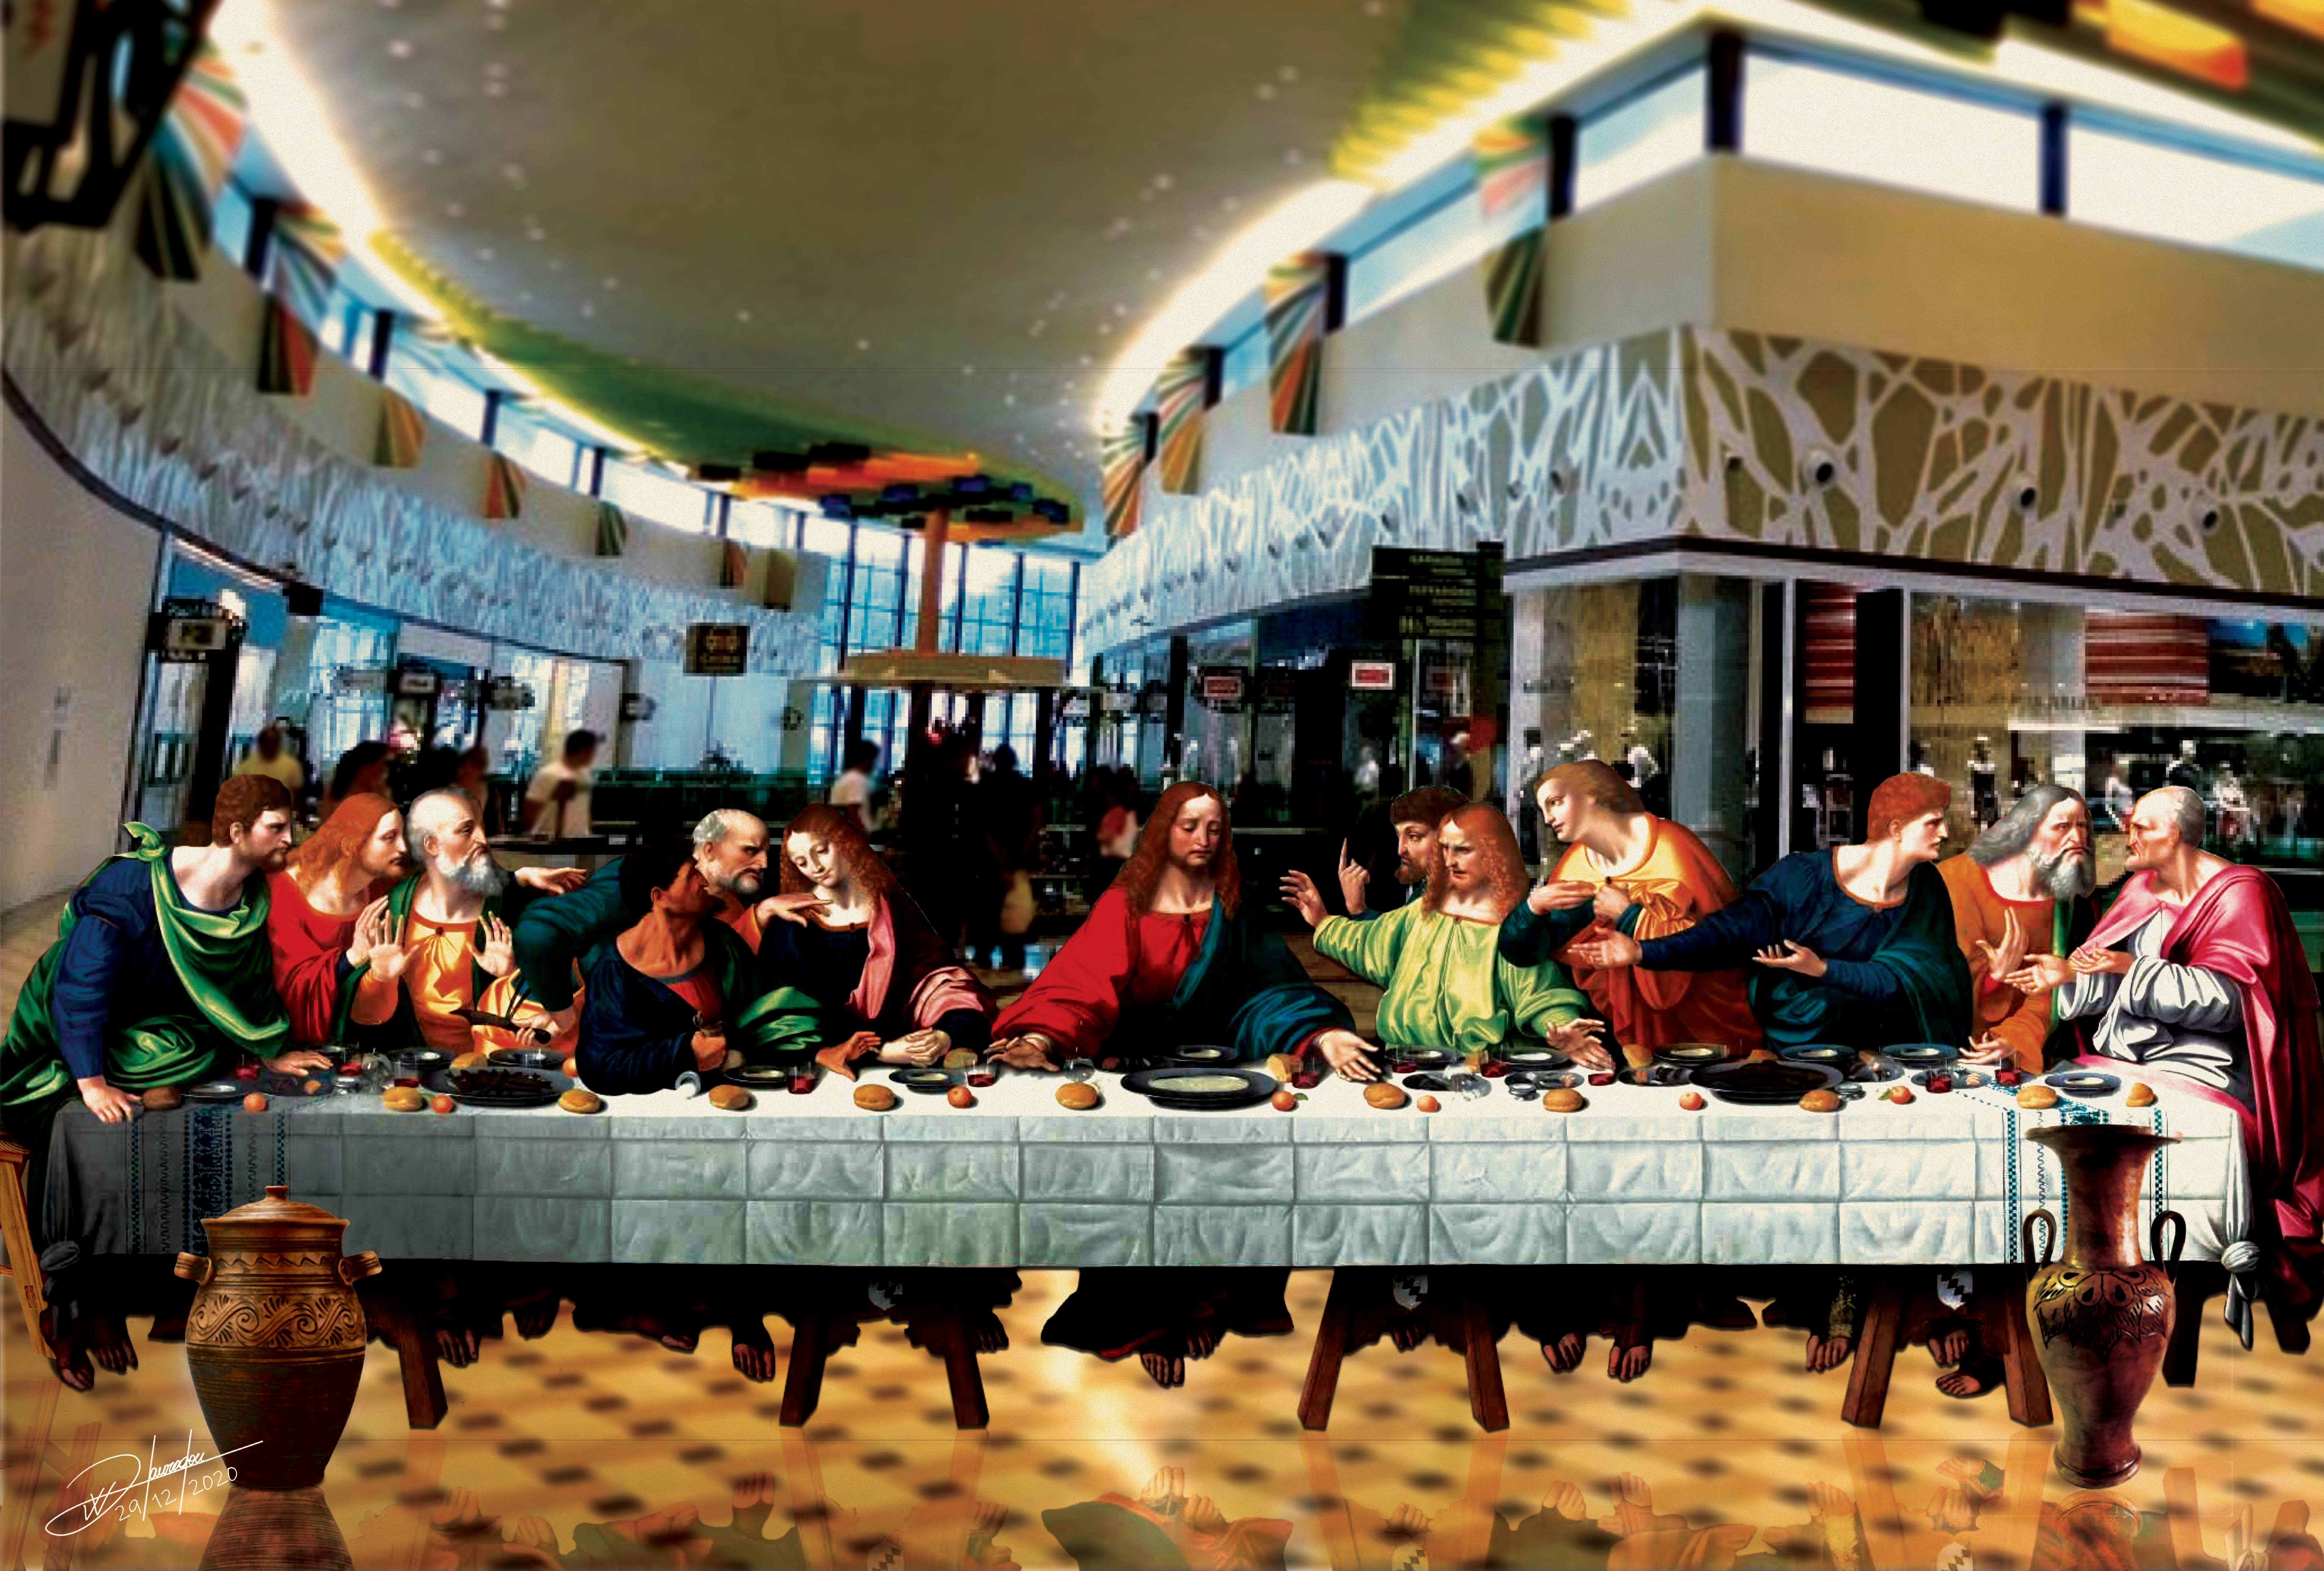
affinity photo Those mittens! I've jumped on the bandwagon.
Kasper-V posted a topic in Share your work
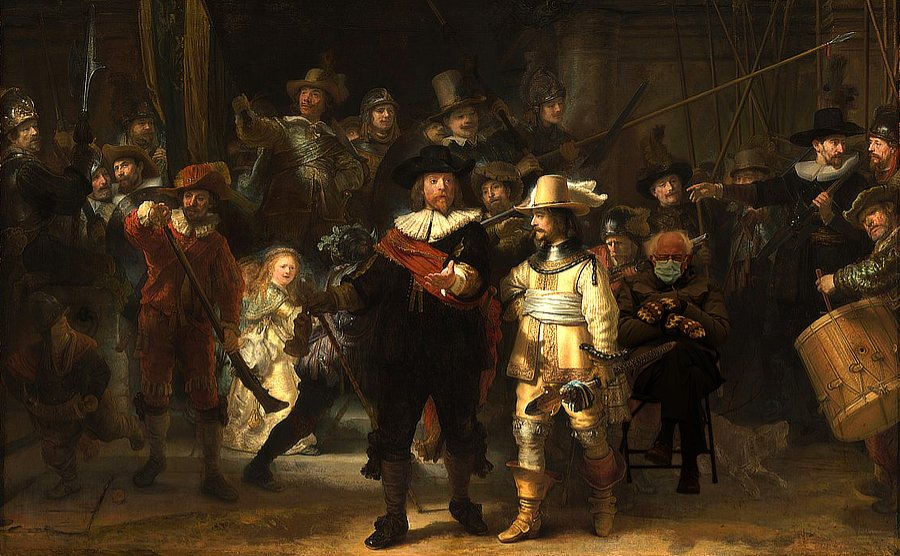
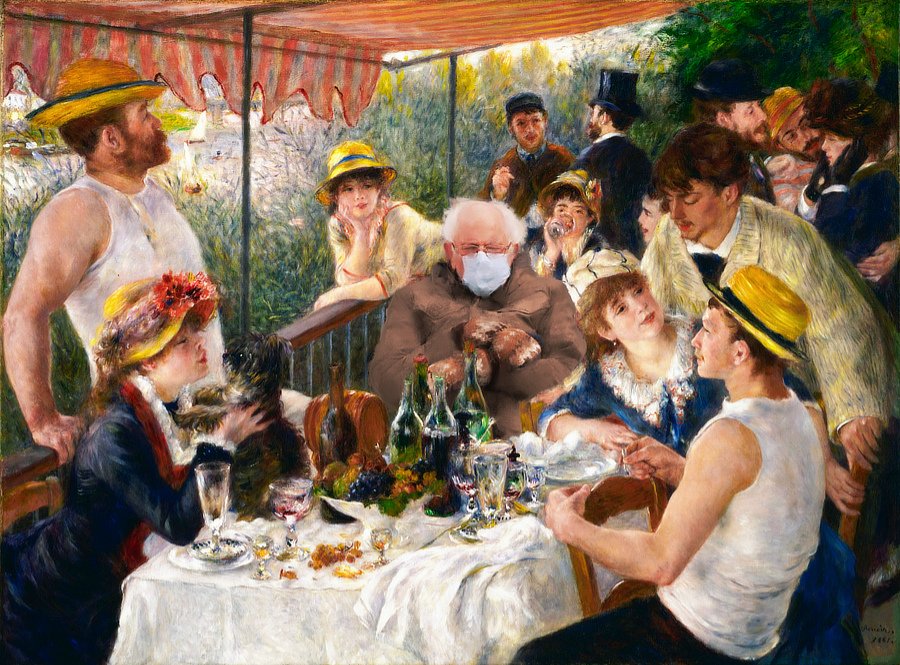
Utterly apolitical, I promise! I'm not even from the US, so I have no axe to grind. As everyone on the interweb seems to be popping Bernie Sanders into humorous settings, I thought I'd have a go myself. I looked for the largest photos I could find, as it's much easier to work at the larger size -- and the mistakes are less obvious when I save the jpeg at a much smaller size (I hope!). OK, the first one is The Night Watch by Rembrandt (but you know that).I found a copy of Mr Sanders' photo online and selected out the figure and the chair. After some trial and error, I thought this was the best position to place him, but I had to flip the image to make the perspective of the chair to match. Fortunately he's fairly symmetrical, so it's not obvious. I made a slight Curves adjustment to get the contrast more or less right. Then I selected a section from the costumes of the figures in the background, upper left , applied an Average blur to it and laid it over the Mr S layer, set the blend mode to Overlay, and dialled down the opacity till the colours looked right. Finally I made a selection with the Pen tool and used that for a mask to put him behind the chap in front.I ought to have removed that dog, I suppose -- or moved it back a little so it doesn't look as if it's under the chair. And this is Luncheon of the Boating Party by Renoir.I used the same original image I'd extracted for the previous pic and masked out parts of the Renoir to out him behind the table. Then I Cloned in some background to remove the chap who was originally sitting there -- a little bit of his head and shoulders was still visible. I made the same adjustments as before, including the colour overlay (from the big fellow's arm on the left) to try and match the skin tones.Now here's the clever part! I made a copy of the Bernie layer and its adjustments and rasterised it. (This way I still had the group intact if I made a mess of it.) I opened the Paint Mixer brush and selected the Impressionist Oil 01 brush, set the foreground colour to none, and painted brush strokes over the raster Bernie, making sure I had Auto Load Brush on and clicking Clean Brush frequently. In this way I made the texture match the rest of the painting and not look like a photograph. I didn't need to do this with the Rembrandt, as his style is photographic.
-
 I have not been able to find any information in help files or video tutorials of how to make a composite image from separate RGB layers. I've done this in PS but can't seem to find a way to do this with affinity. I've imported my RGB Astronomy images into a layered RGB image and filled each layer with color in the channels section. I just cannot figure out to whit's end how to combine them into a composite so I can finish processing the images. Flatten or merge don't seem to work. Can anyone point me in the right direction?
 -
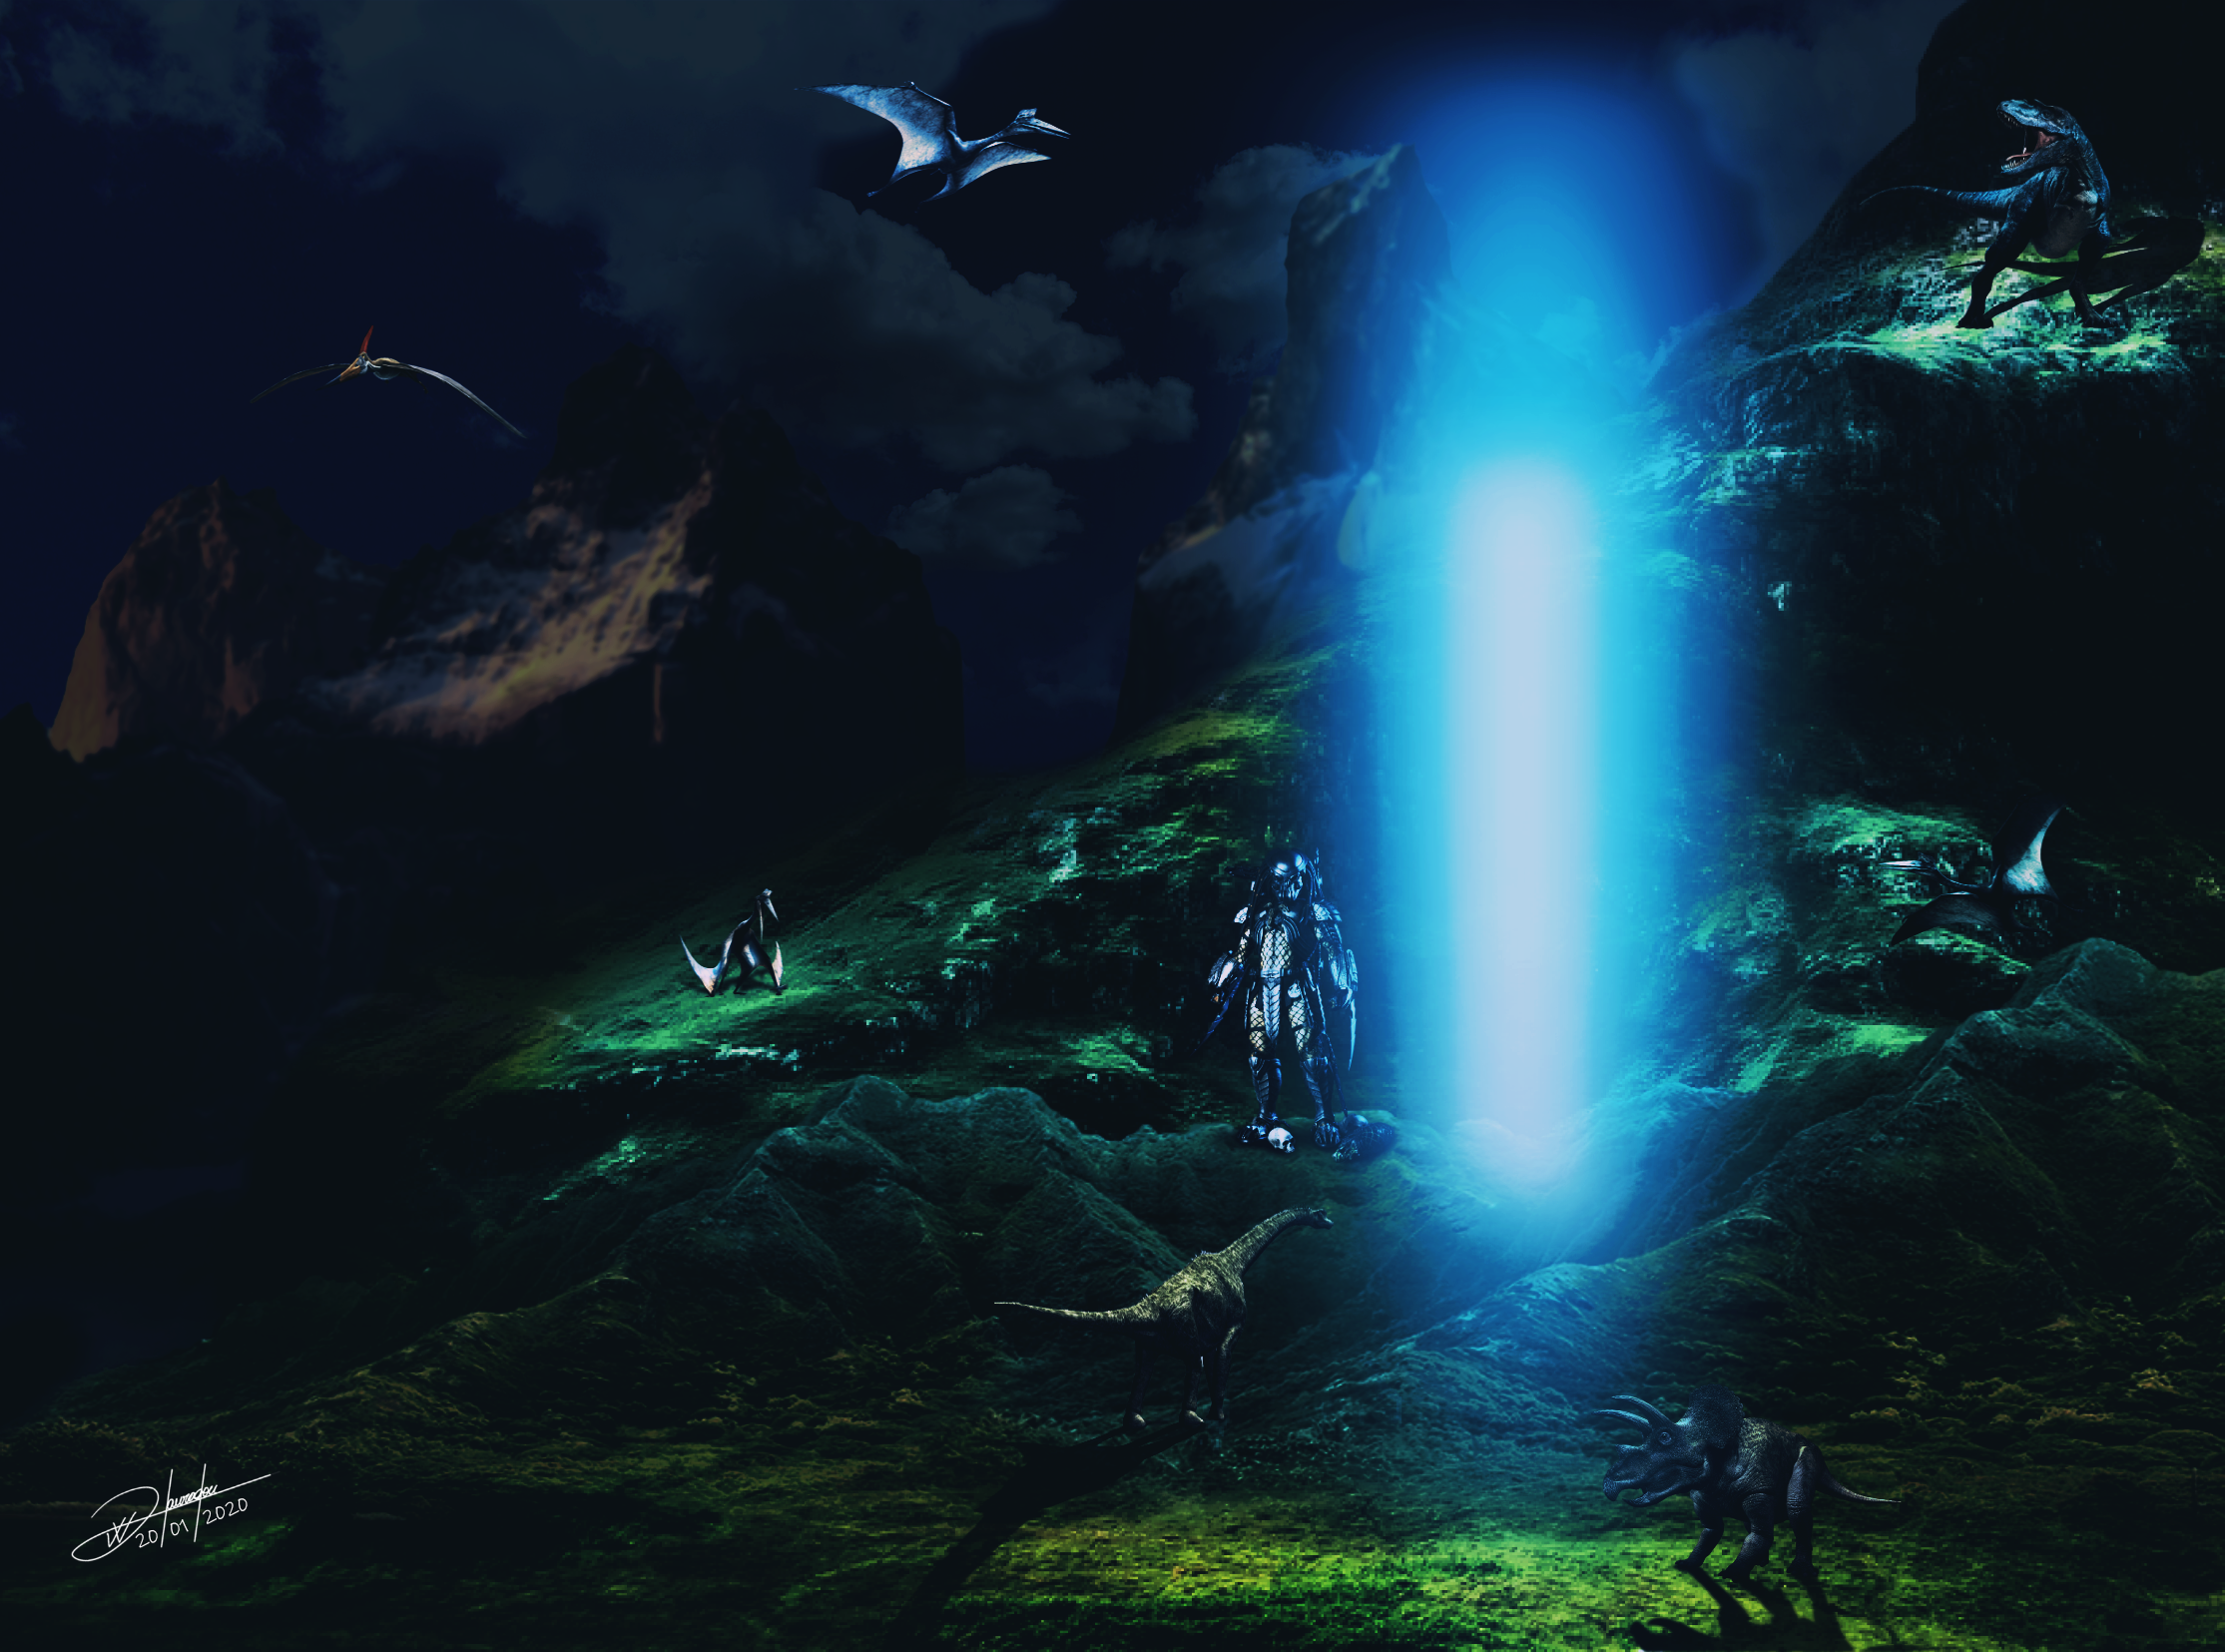
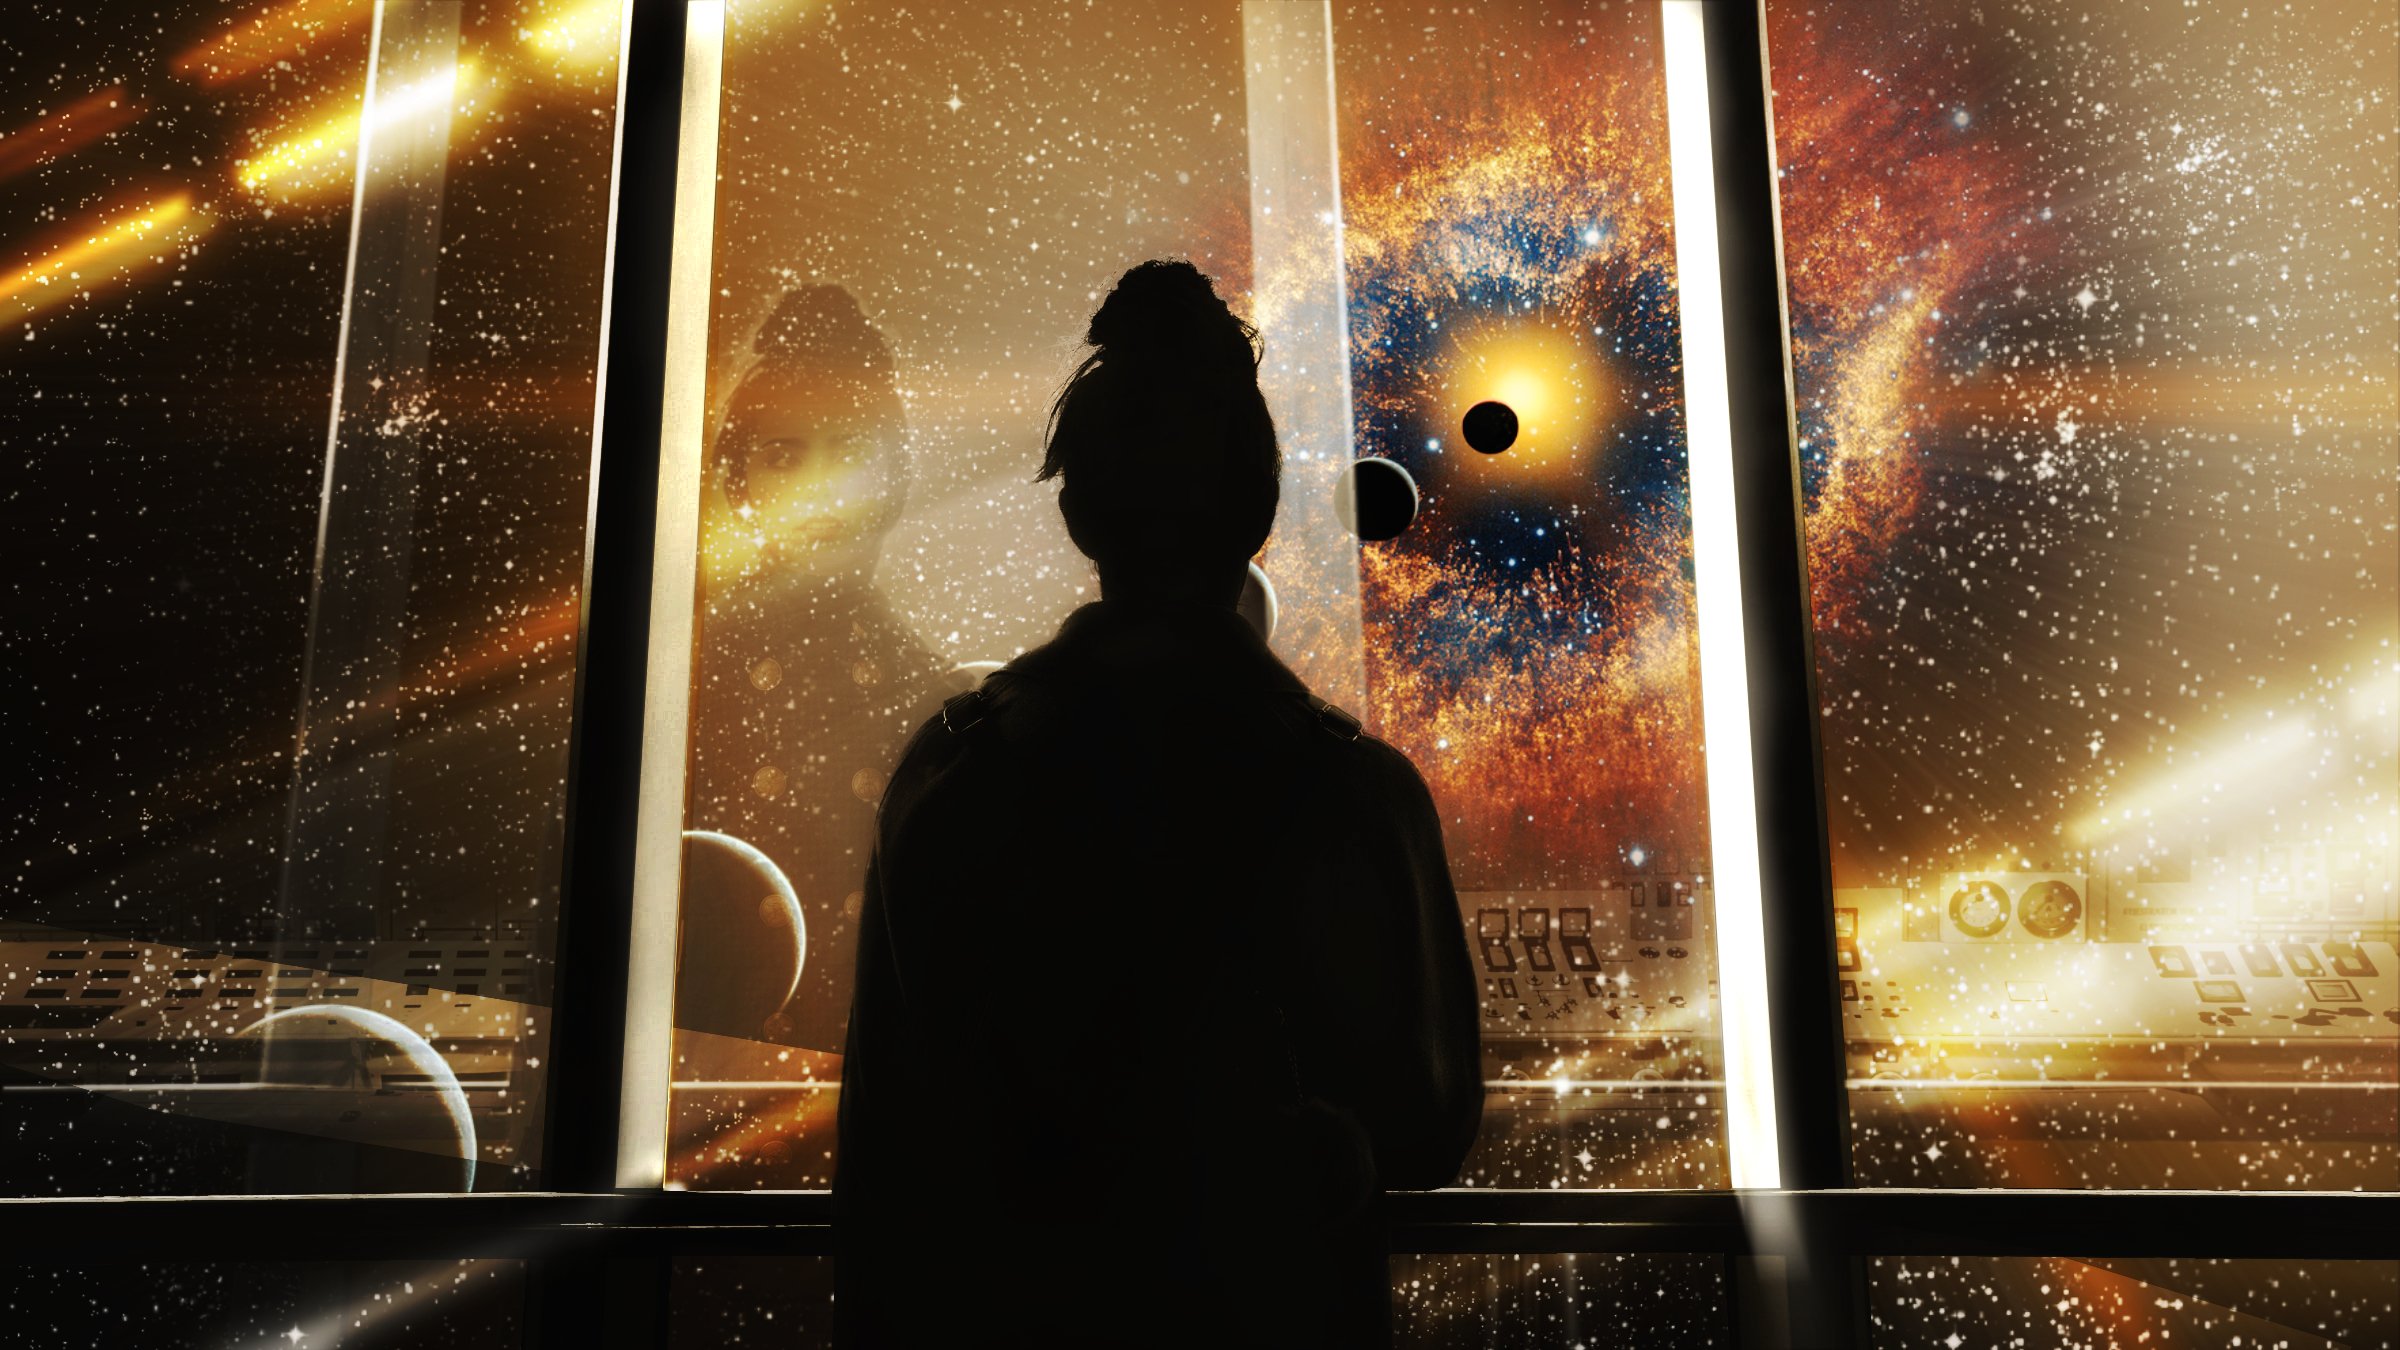
Once again I delve into the realms of fantasy and science fiction. All photographs sourced at Unsplash, special effects supplied by me and Affinity Photo. The main portal structure did not exist so I had a go at creating one in a perceived 3D space - I think I did ok. As for page turning - that's something I have never tried before until now, I actually held up a piece of paper and bent one edge over and copied it as best I could.
-
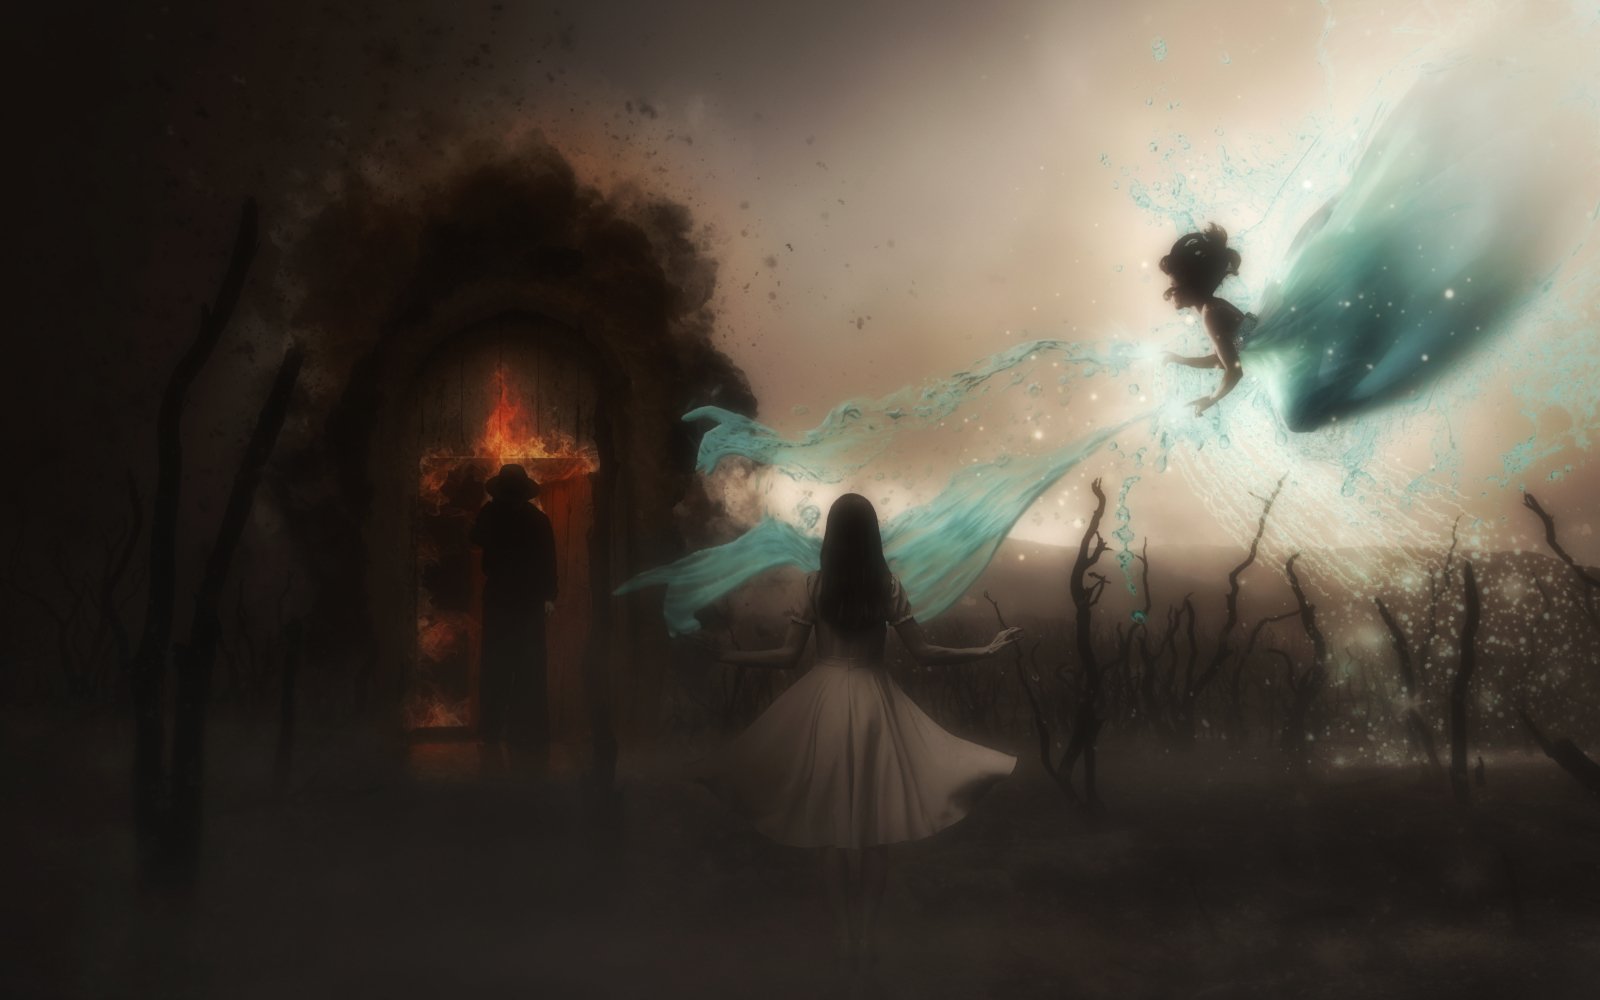
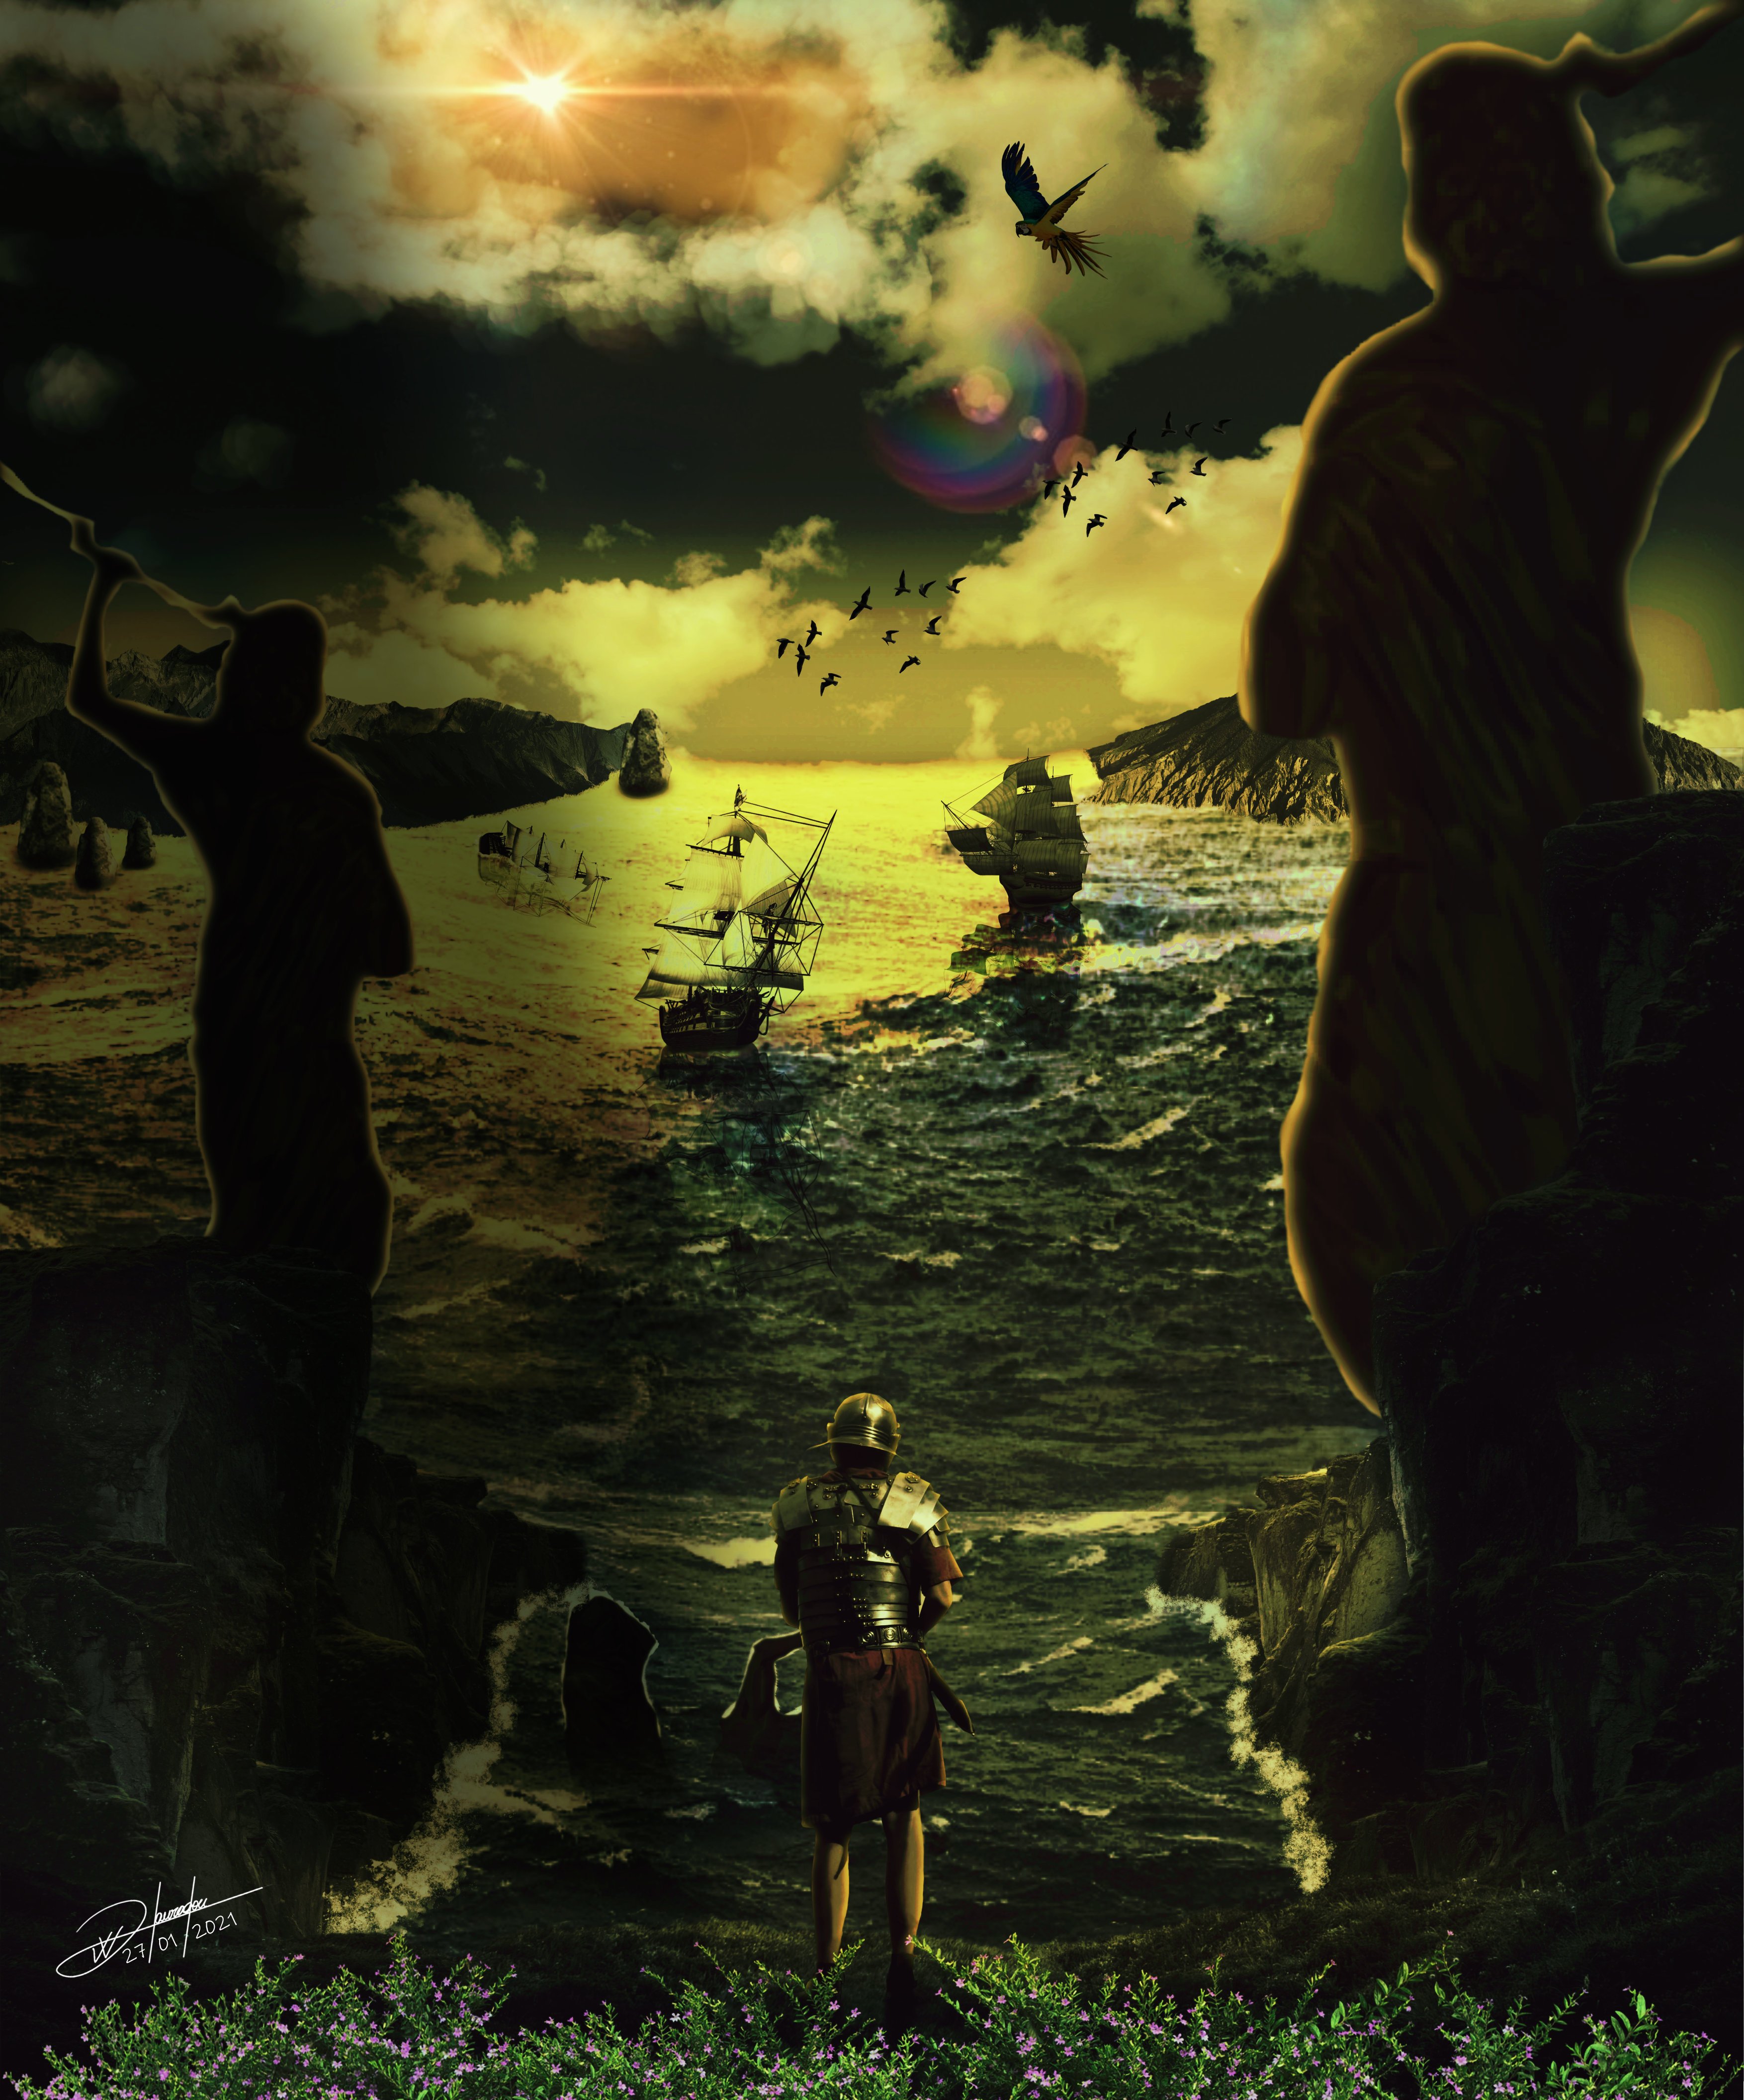
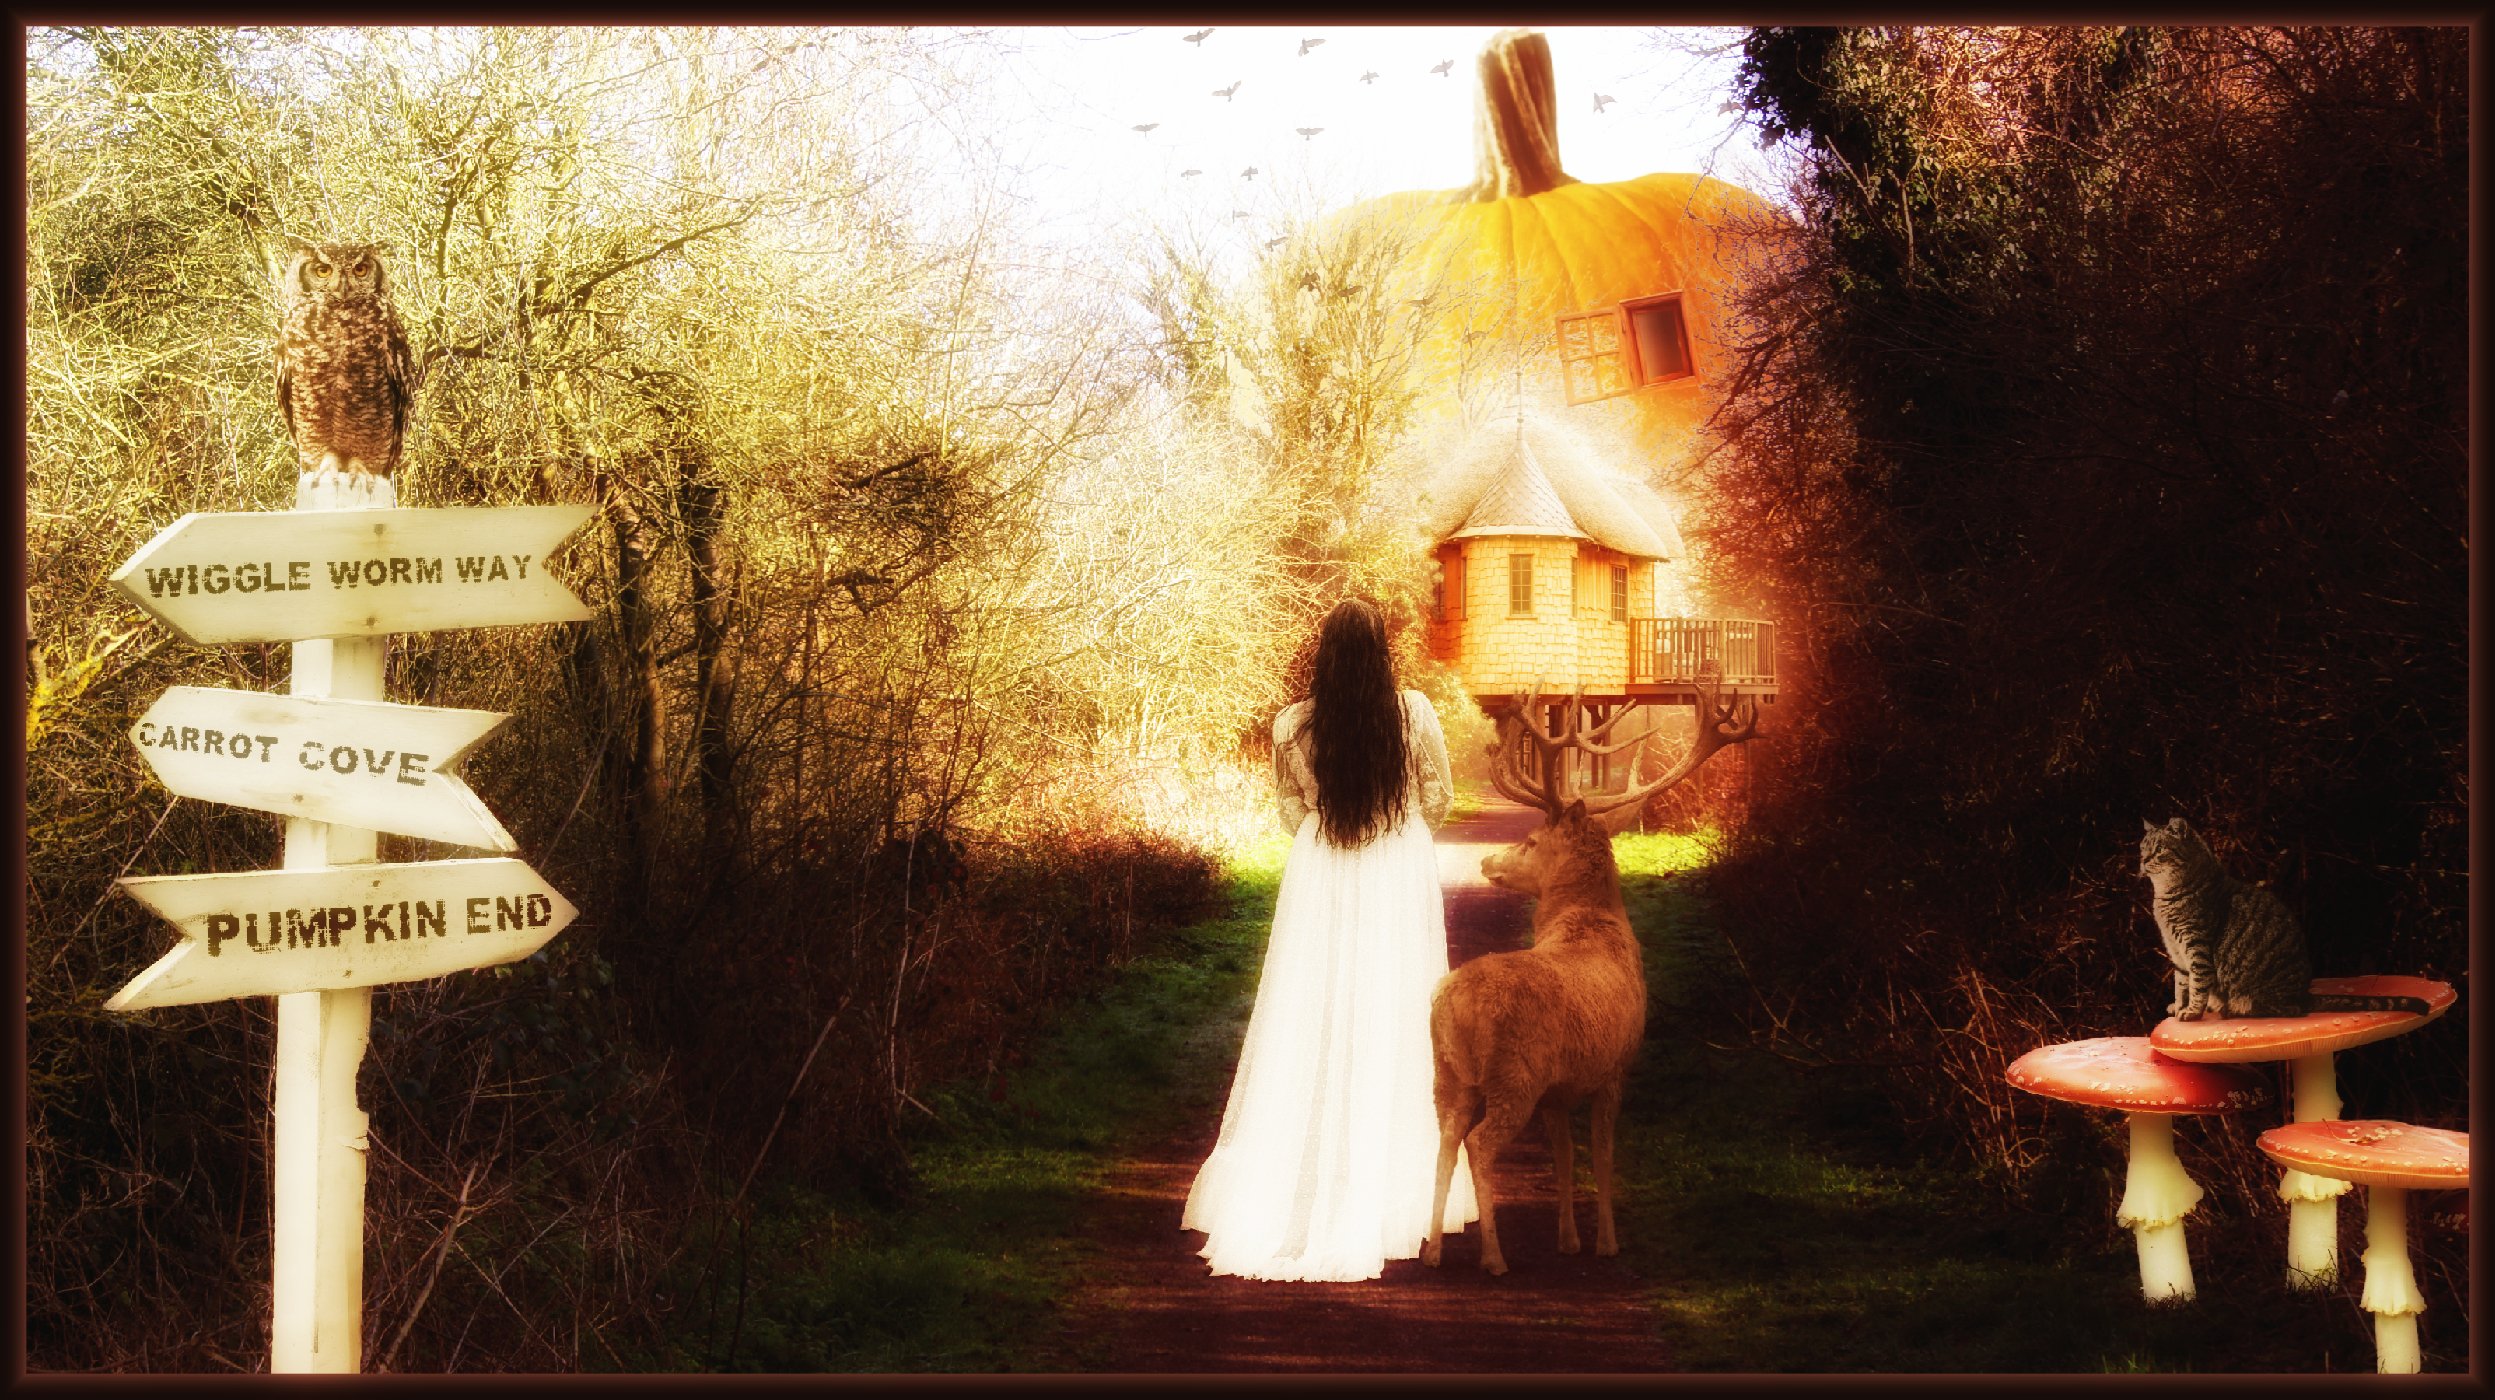
The base picture came from one of my many nature walks, and with a bit of imagination I tried to create a fairy tale type picture. Yes I know. . .I'm out there! 😀
-
 Hi, I am looking for advice on how to properly set up my canvas in Affinity Photo for print. I have only created composites for use across web and digital content - never print. Few things to know: - I do not use my own photos, only royalty free imagery from sites like Pixaby. So I never begin with a set “background”. - I would like to set up my canvas for large prints (i.e 24x36, 16x20, etc). However, is there a way to set up these sizes that is scalable so that I have the option to print it much smaller if I wanted, without distorting the image? - I’m not certain how DPI, pixel size, and resizing come into play when dealing with print. Any advice is much appreciated - thank you!
 -
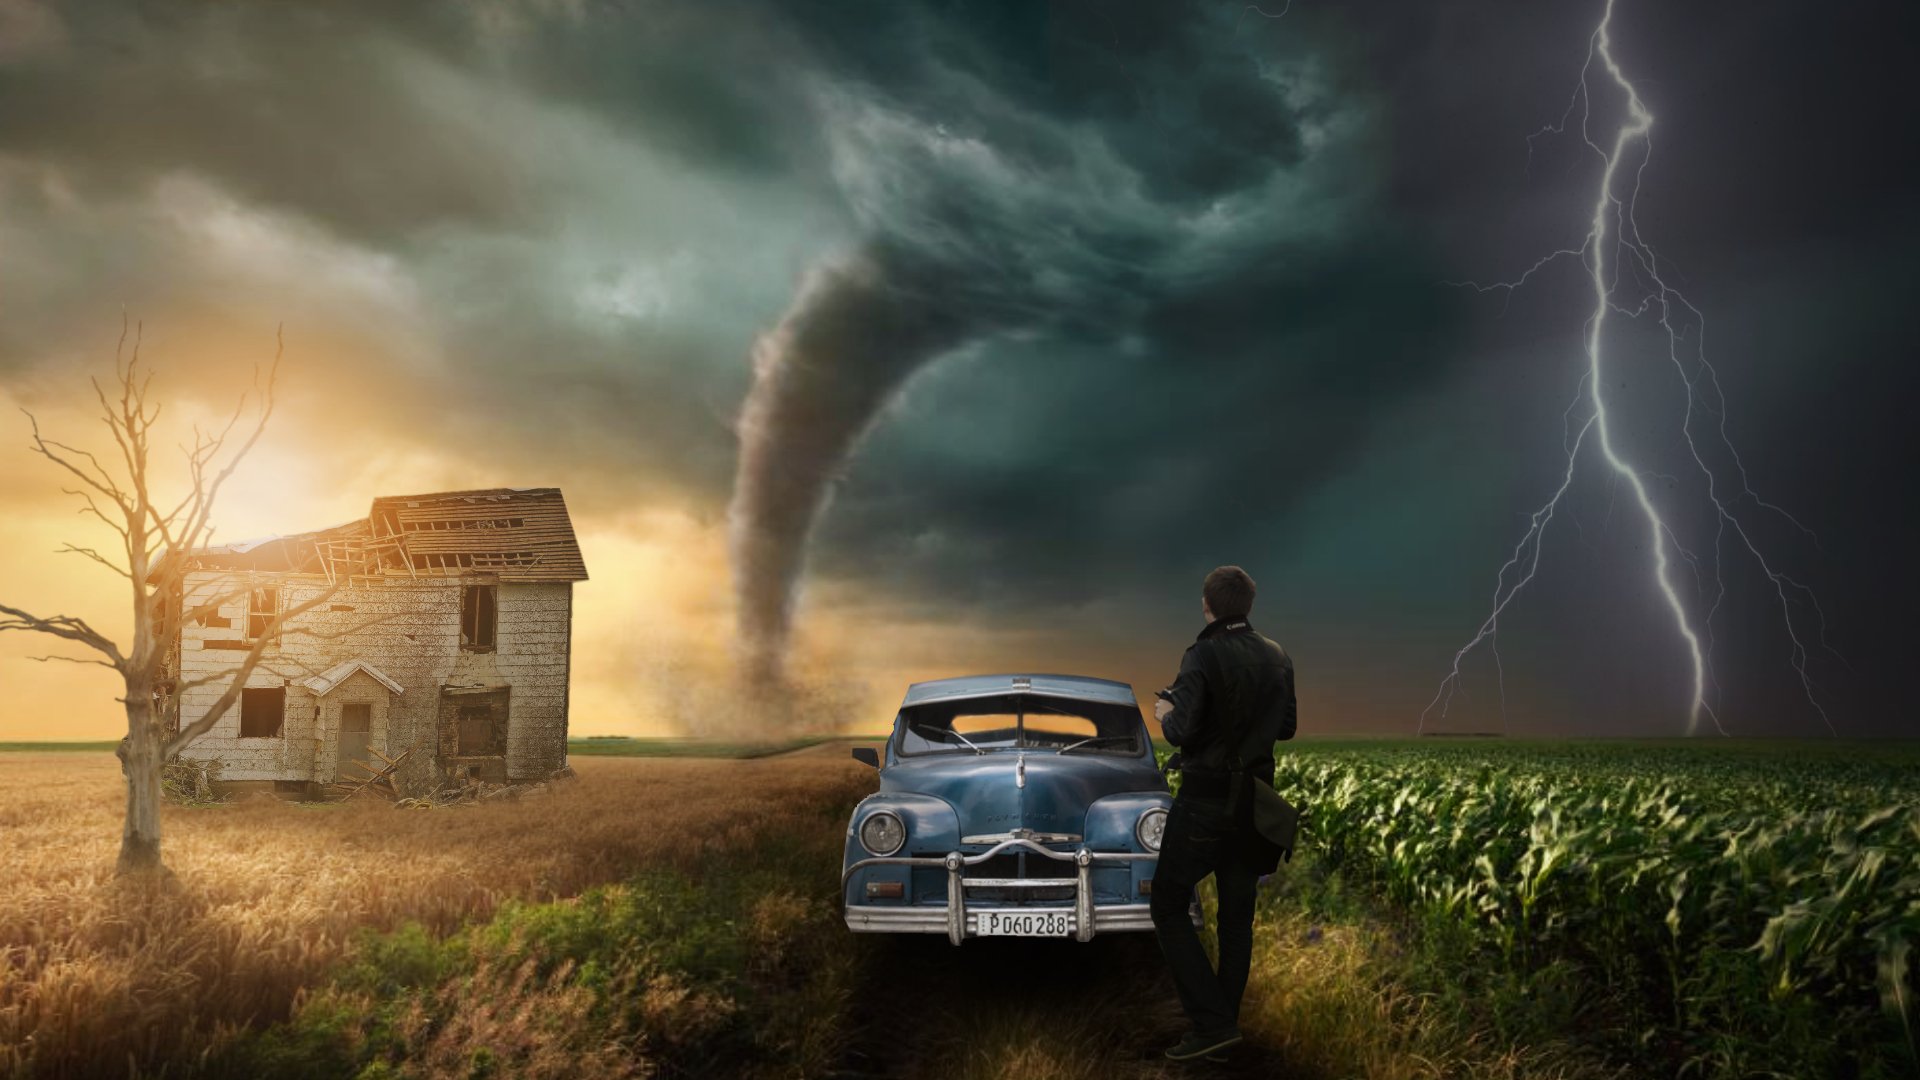
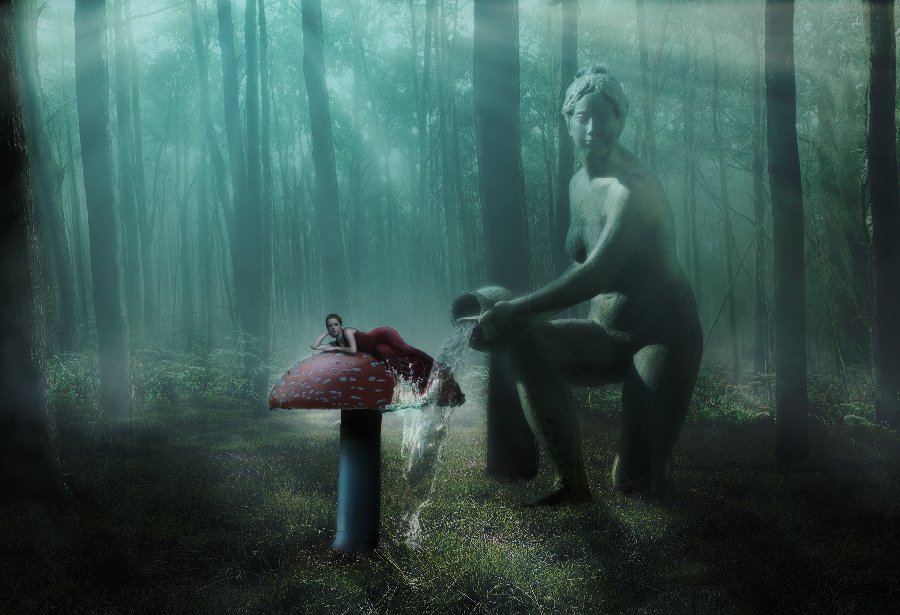
Apart from a couple of my own photos I sourced Unsplash for essential elements.
-
Another exquisite doodling from my imagination.