Search the Community
Showing results for tags 'pdf'.
-
 I checked the specs of this new version of Publisher. There are many nice features in there. What seems to be missing is the export of a tagged and accessible PDF (PDF/UA). Also I don't see how I could publish a digital book (EPUB3) with this app. I really hoped for some competition for Adobe InDesign which is capable of such output. Even Word produces such accessible PDFs and EPUB (with WordToEpub plugin). With the output of Publisher still focused on print only I don't have many reasons to use it. All digital documents for governmental institutions and, within a few years in the EU, for many commercial companies as well, need to be accessible. Besides, I don't want to exclude anyone from using my documents. I don't mind if I need to do some extra work with a tool like Adobe Acrobat for PDF or Sigil, Calibre, Ace by Daisy for EPUB3, but now I need Word, InDesign or some other app to create the document or book when I really would have liked to use Affinity Publisher.
- 37 replies
-
- 9
-

-
- affinity publisher
- accessiblity
- (and 4 more)
-
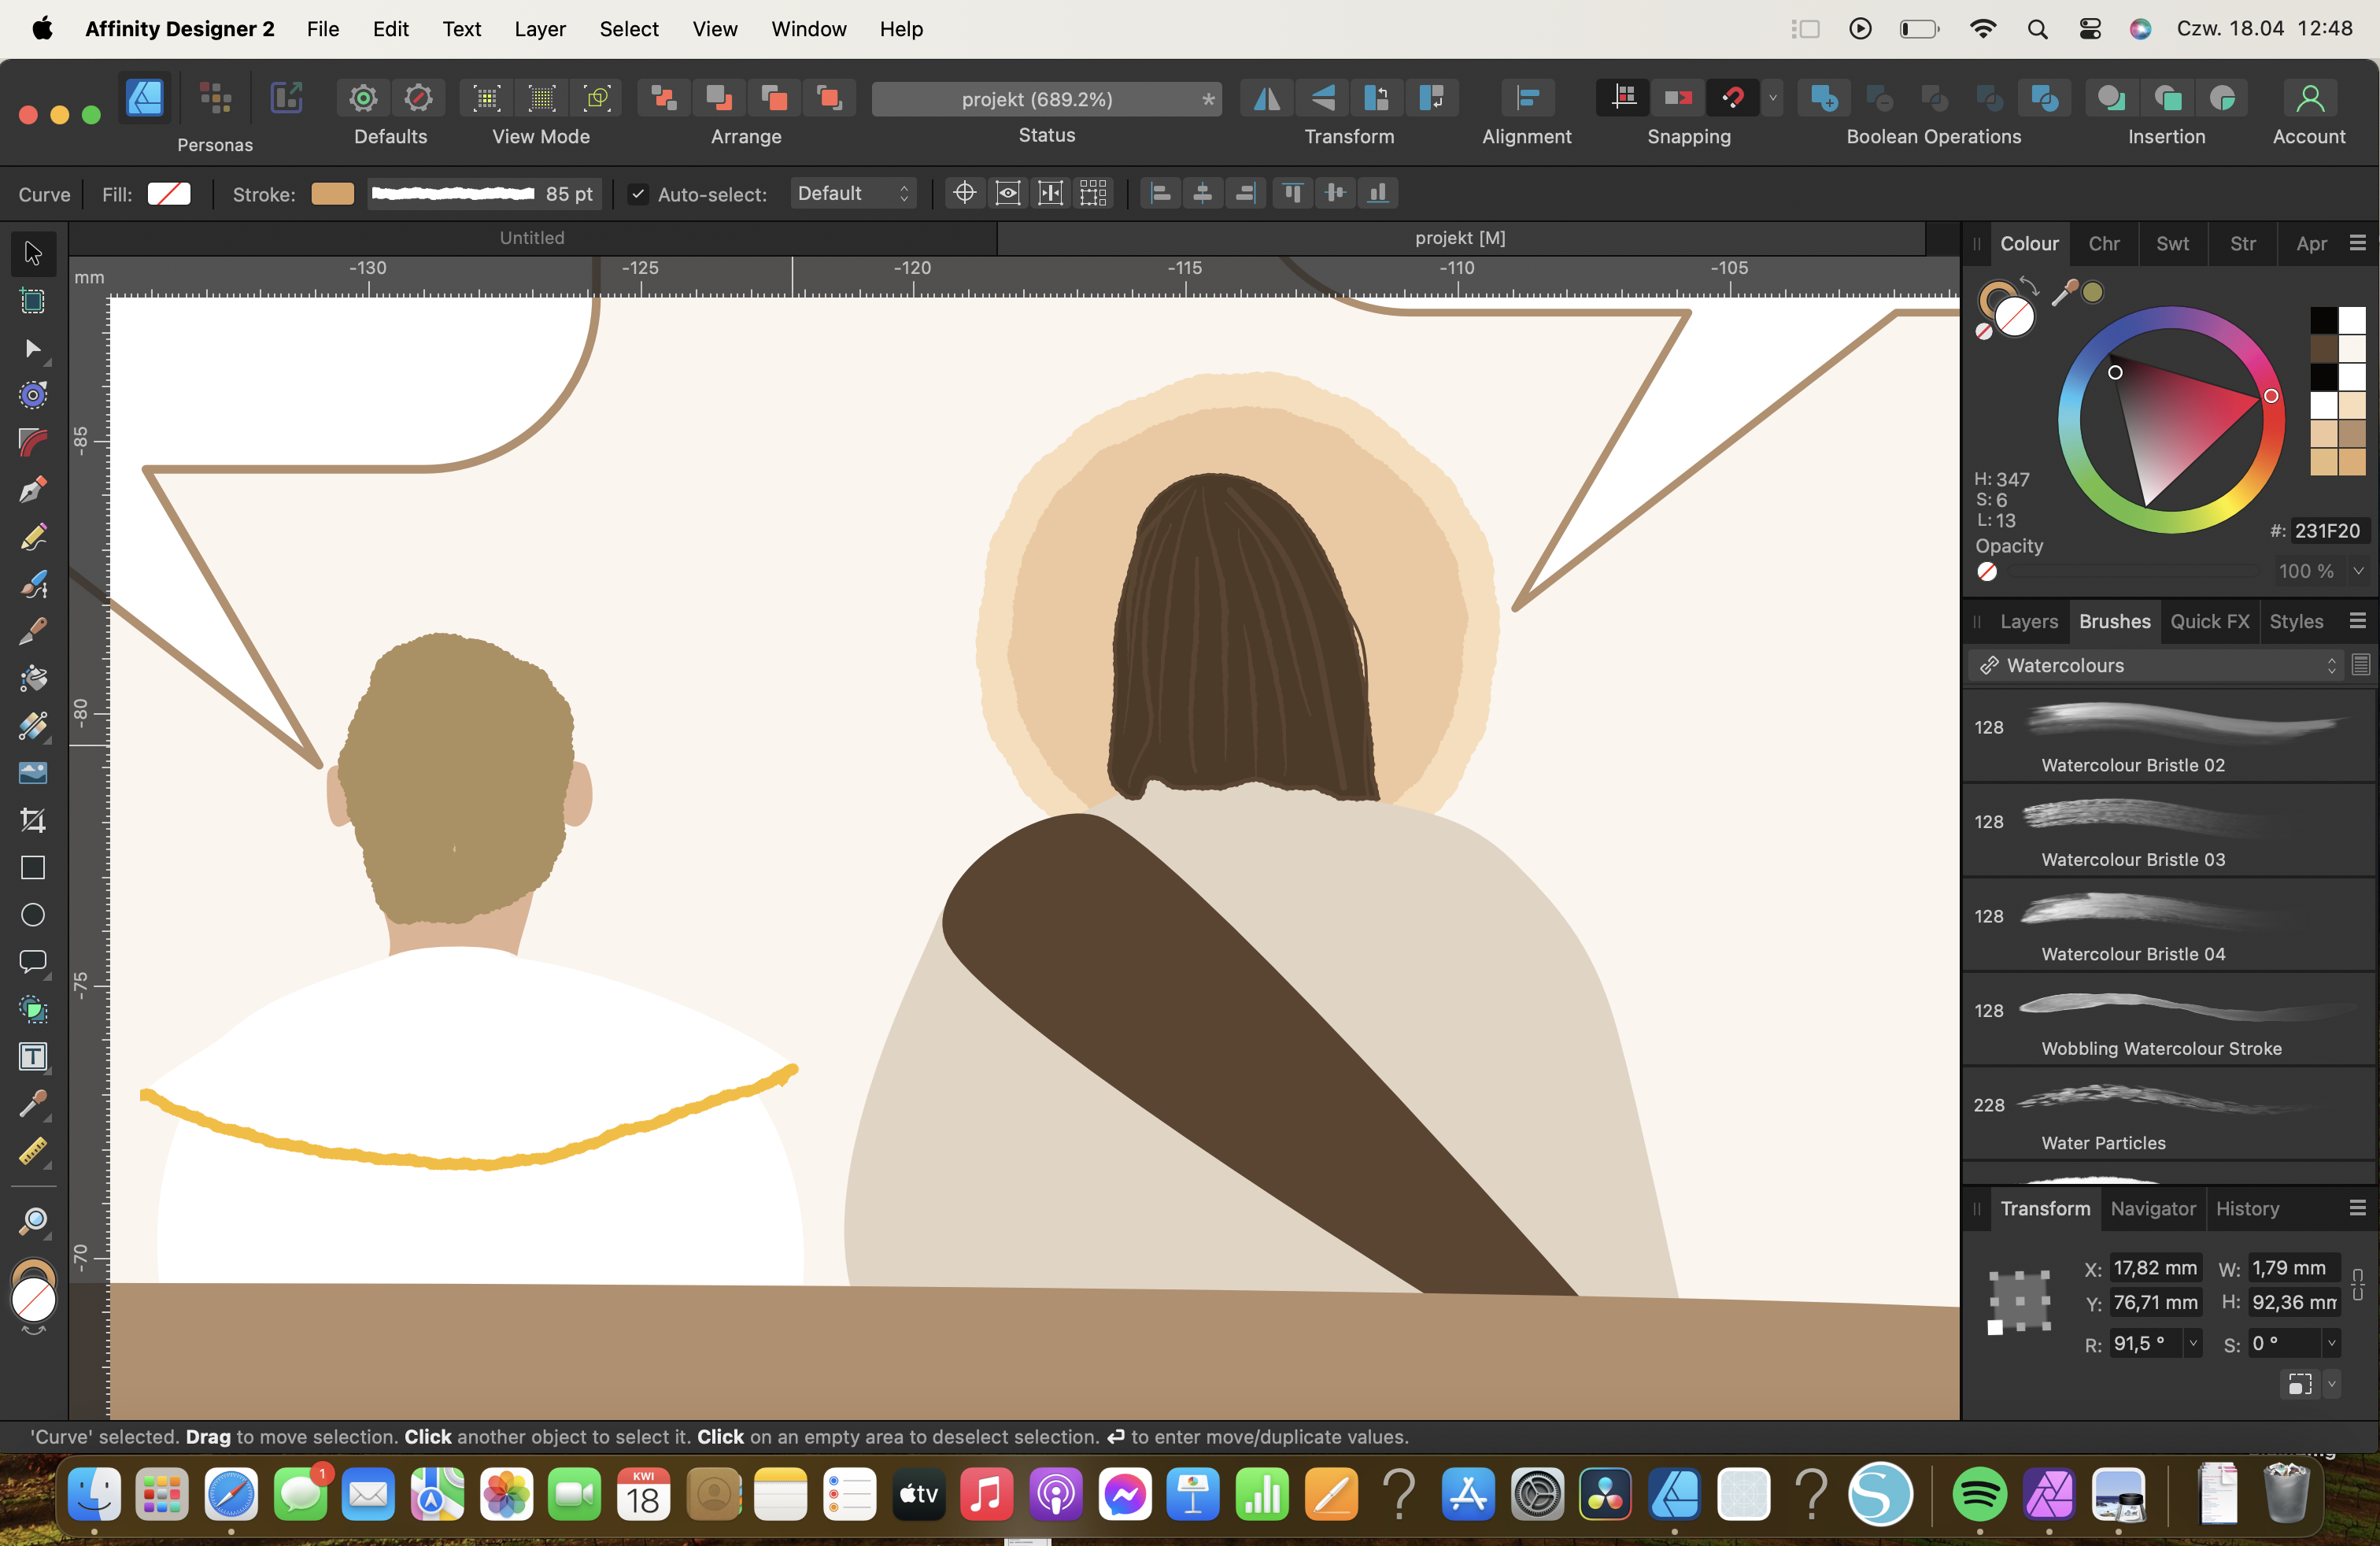
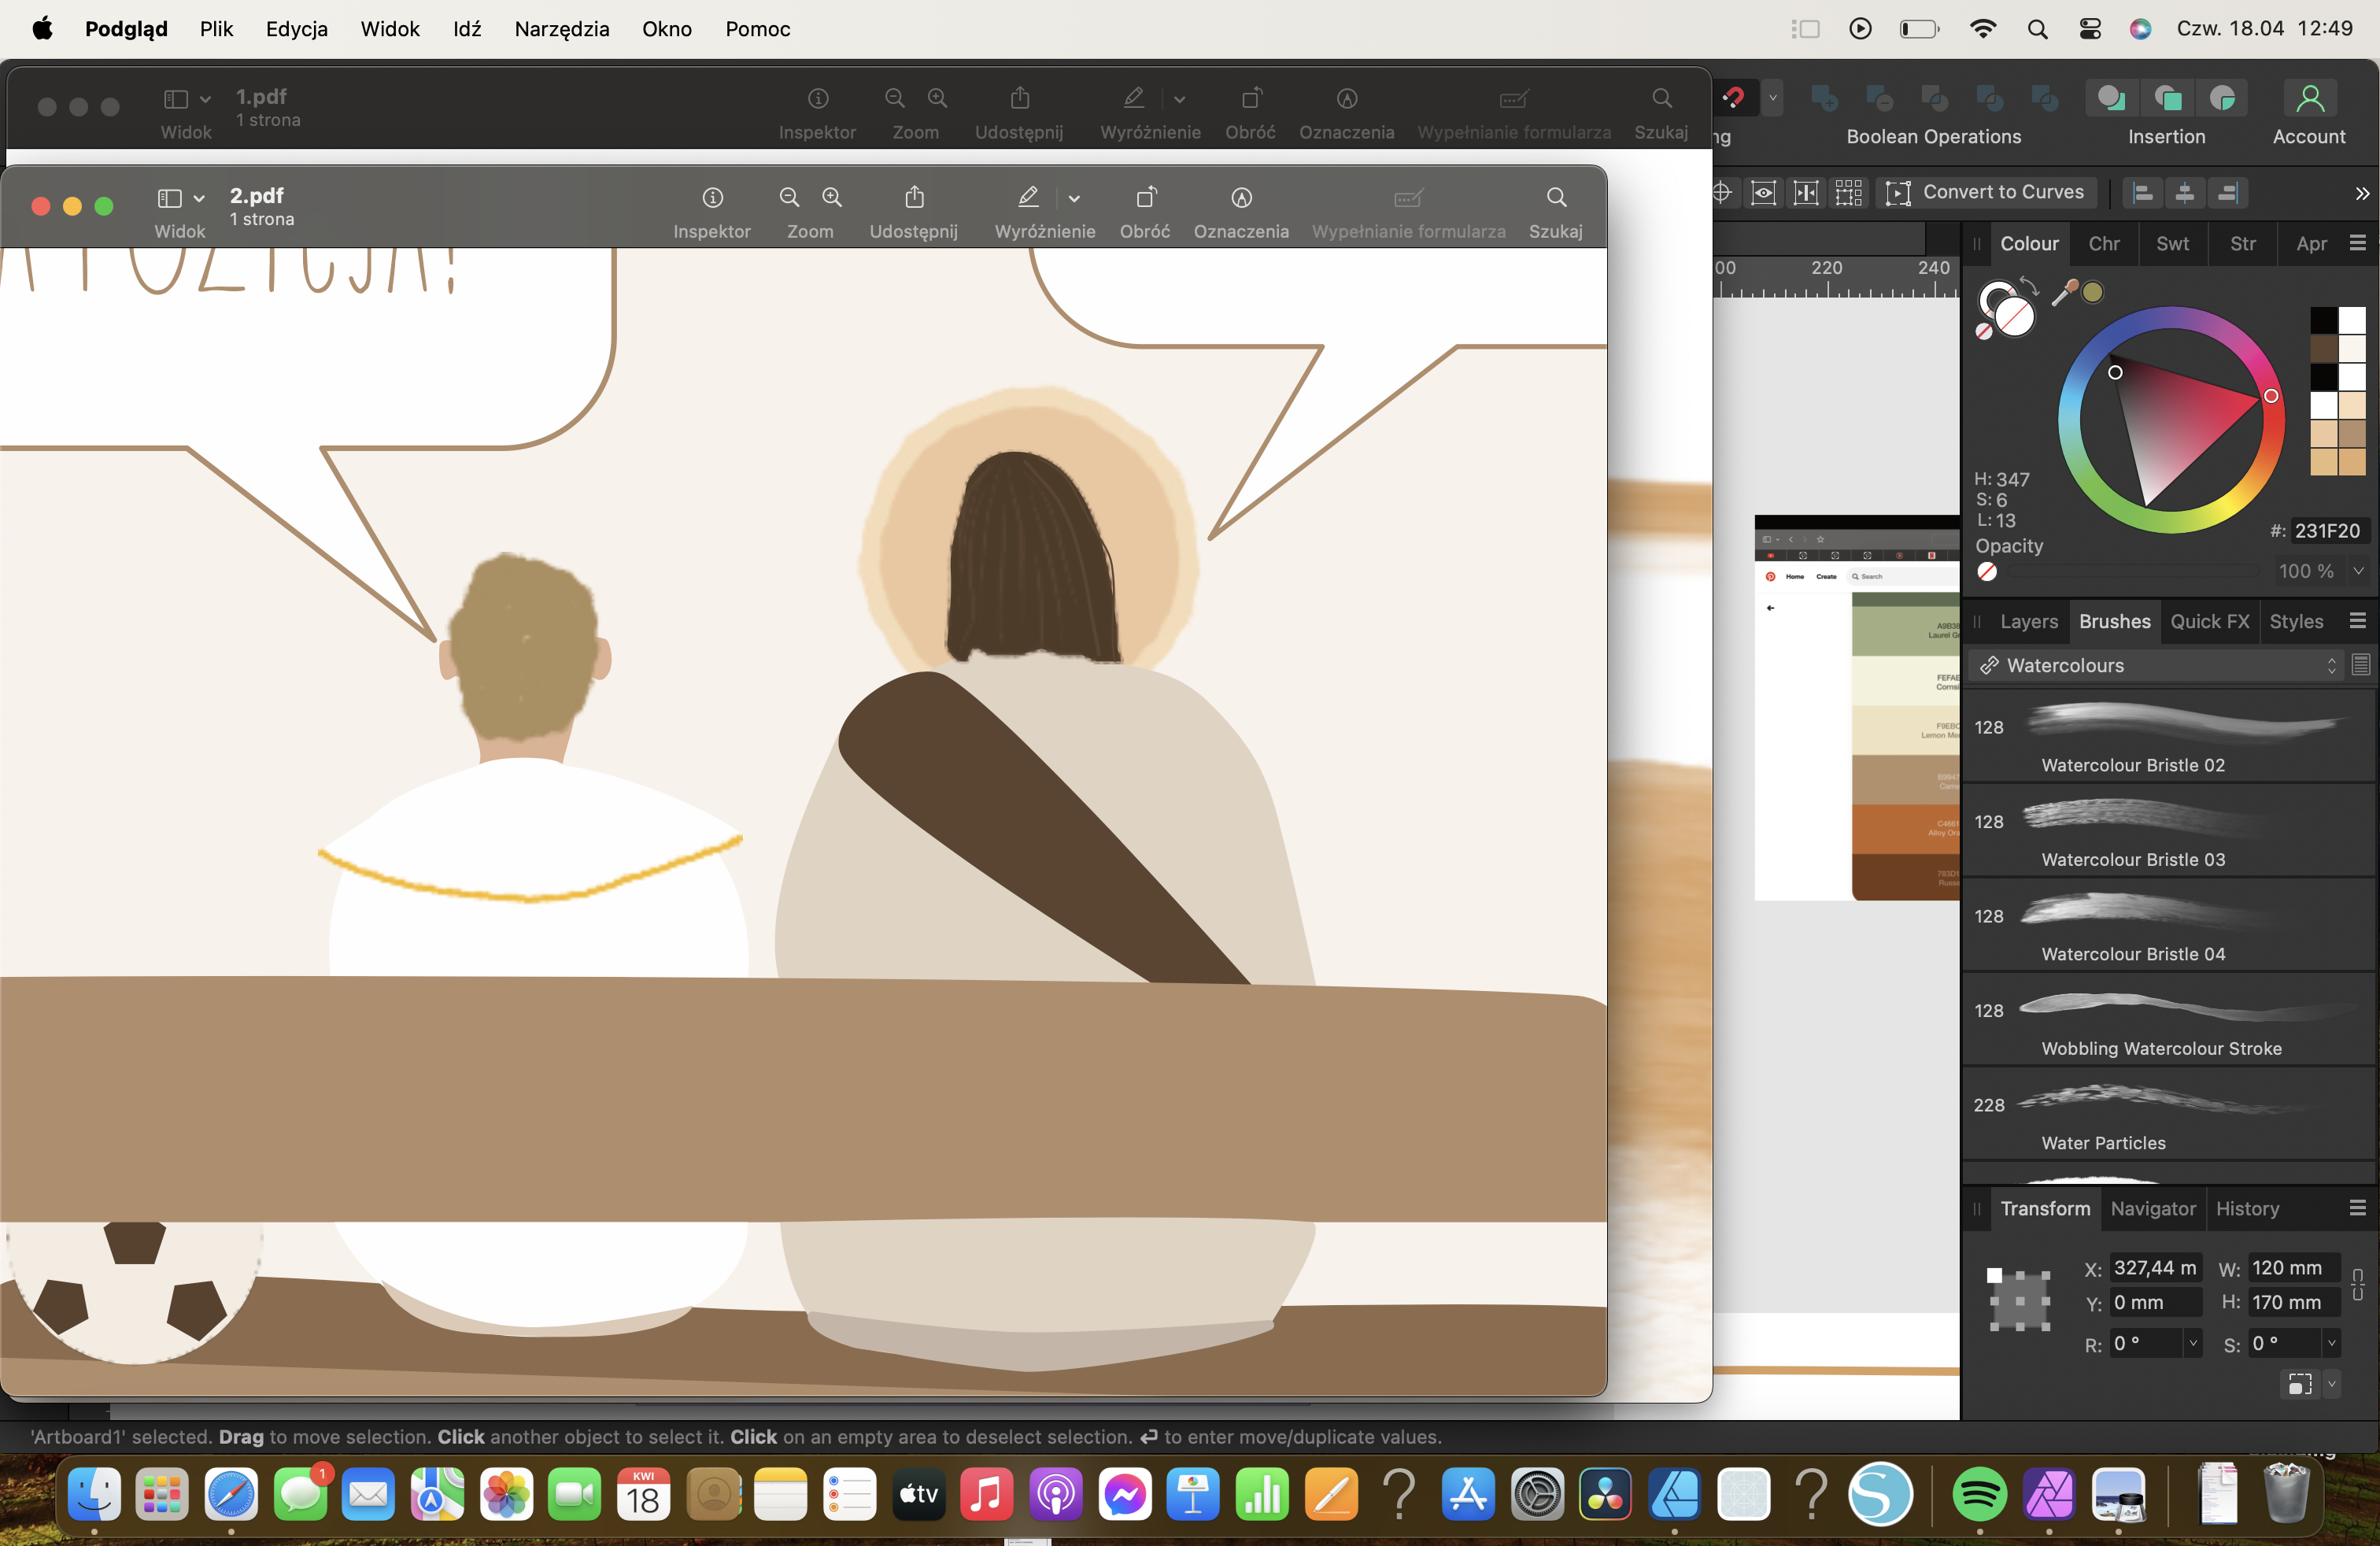
 Hello. I struggle with that problem: I made a design in AD . All my lines were created with vector brush tool. To some, I used "solid pen with pressure"- the basic brush, and to some I used different brush. When in export file as PDF lines that were created with BASIC BRUSH "solid pen with pressure" are beautifully sharp, but lines were I used different brush are pixeled. My settings are dpi 300, rasterise nothing. WHY ? thans, Sara 2.pdf 1.pdf
-
 Hello everyone, I'm currently facing a peculiar issue with Affinity Publisher 2 regarding the exported PDFs. Although the Table of Contents (TOC) works perfectly within Affinity Publisher, it behaves oddly in the exported PDF. Many headings in the PDF's TOC are not hierarchically structured as expected, though a few are correctly aligned. The first chapter has an TOC in PDF as expected. Any other does no hierarchy at all. Every chapter has it's own styled Heading. So that I have H1a, H2a, H3a for chapter 1, H1b, H2b, H3b for chapter 2 and so on. It seems like this is the issue. But I don't understand why Affinity Publisher 2 reads all headings correctly but PDF does not. Steps Taken: I've made sure that all headings are assigned correctly in Affinity Publisher and have tried updating the TOC before exporting. I've also experimented with different PDF export settings to maintain the structure but to no avail. Has anyone encountered this issue before? Any advice on export settings or other adjustments to ensure the TOC hierarchy is preserved in the PDF would be greatly appreciated! Thank you!
-
 SInce I switched to Publisher for all my CMYK work, I thought it might be time to do the same with a project using two spot colors. But I can't find a useful way to work with it. When using overprint properties Indesign makes it possible to do that per object (line or fill). I think it would be ok, to do it upside down, like the user guide of Publisher is promoting. That would mean to make a copy of a color swatch (one overprintig, one knocking out) and to use these on all objects as one wishes. And it does even work when outputing a PDF. But there is one thing missing - a preview of how my layout actually looks when overprinting, simple WYSIWYG (I'm not even speaking about a separation preview). So that is not very useful. With CMYK colors it's quite easy - you can just use layer modes (multiply) - see, what you are doing and even get it exported in a controlled way, when using the right PDF export settings. But with spot colors I didn't get any of these exported, they always change to CMYK. I've tried all possible ways (my document is CMYK, FOGRA39 and exporting as X4, X3 or other variants didn't help; of course honour spot colors is on). Any ideas? Has anybody a real workflow for that? Thanks for any help!!
 -
 Version 2.3.1 Mac M1 with and without Acceleration repeatable. I placed(File->Place) an PDF File with 4 pages. Made 3 copies with Command-C Command-V Grouped all four. Then I chose pages 1-4 in the ArtBoard setting in the context menu so that each PDF page was visible. After saving, closing the document and reopening it, the page settings are random.
 -
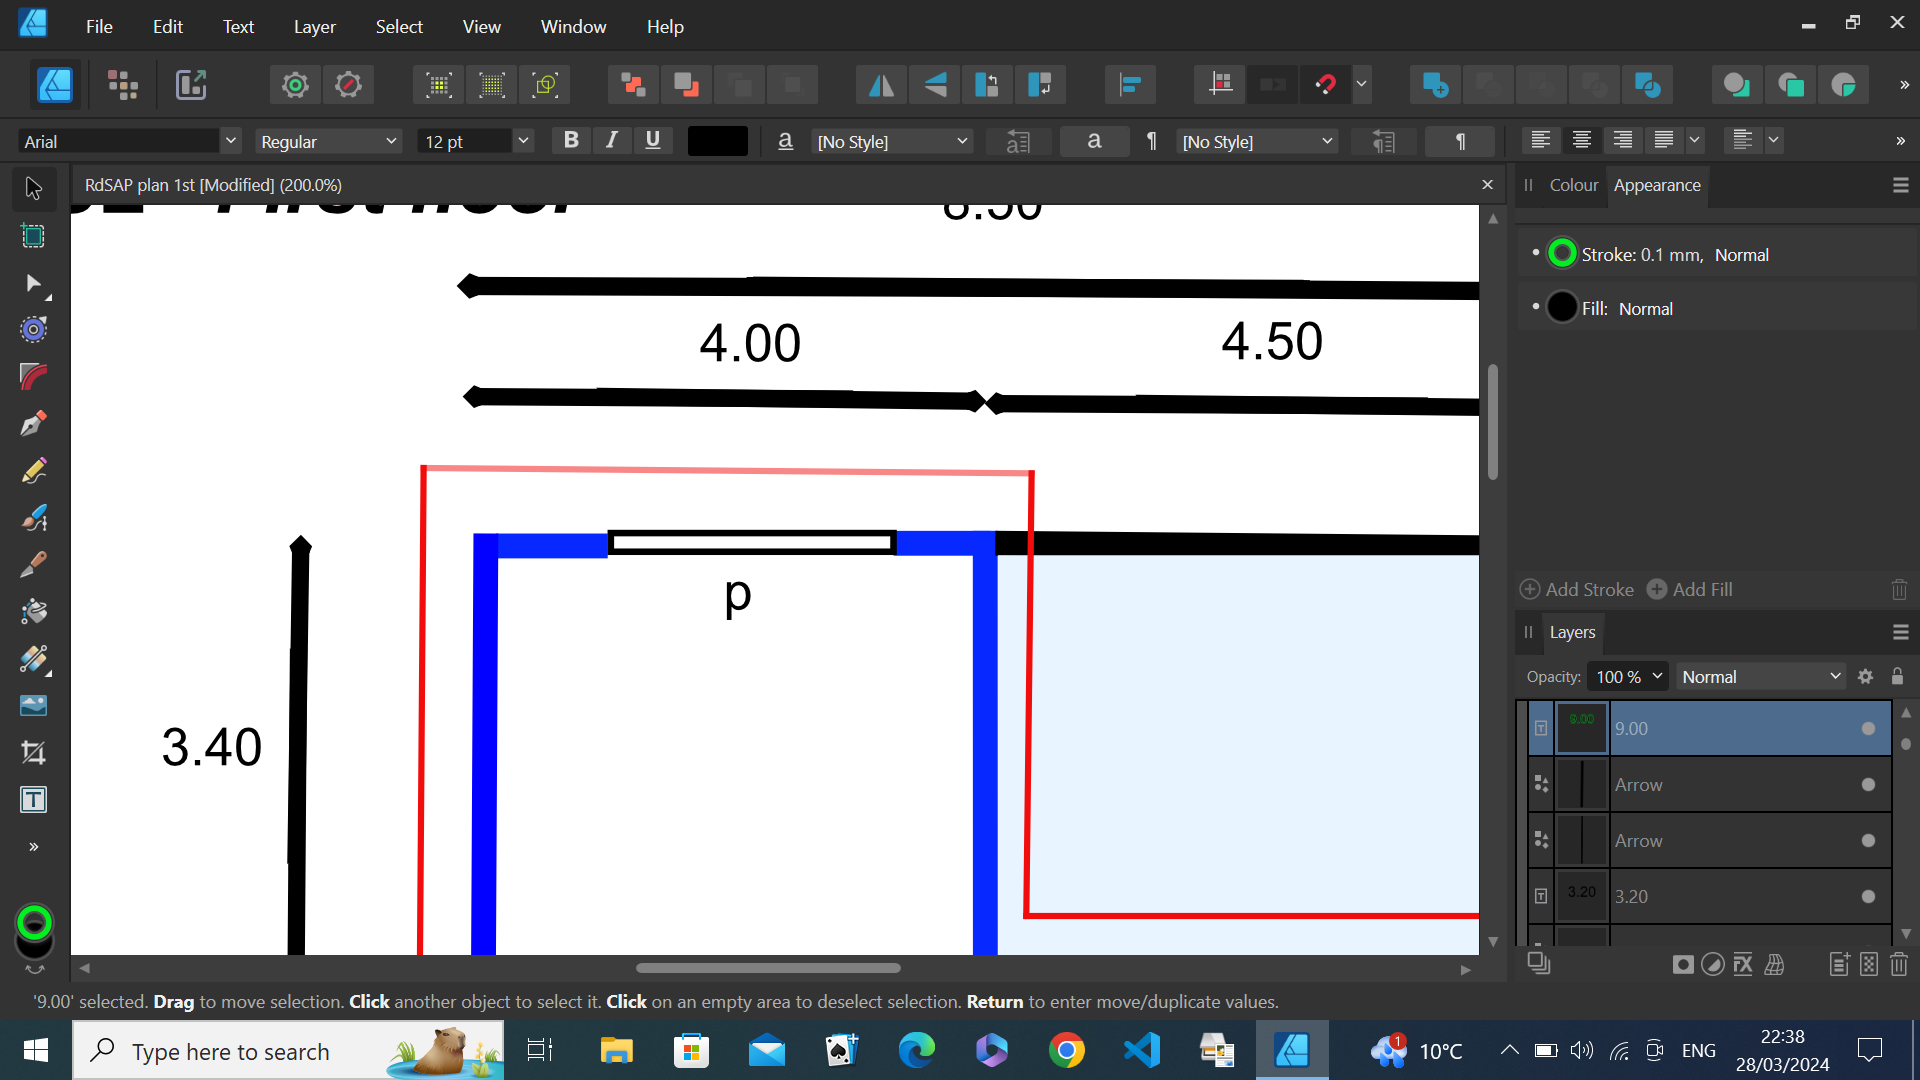
 I am new to Affinity designer and am strugling to get used to it. I am trying to export a floorplan to pdf but the corners on the straight lines are missing in the pdf file. (i've attached a copy of the pdf and screen print from affinity). The lines were originally individually drawn. I then tried ?snapping where I stopped changed direction and carried on. Neither resolved the problem. I've also watched an old Affinity video for drawing plans. I couldn't find a solution. There is a red line around the outside of the walls. I tried deleting them and re exporting but got the same result. Is there a way around this? RdSap plan 1st.pdf
-
 A friend of mine is struggling with the problem that the PDF files she exports from Affinity Publisher version 1.10.5 for our neighborhood magazine do not contain any text information. The PDF only contains the graphic image of the finished page, not the corresponding text. Where / in which settings should she look for enabling text export?
 -
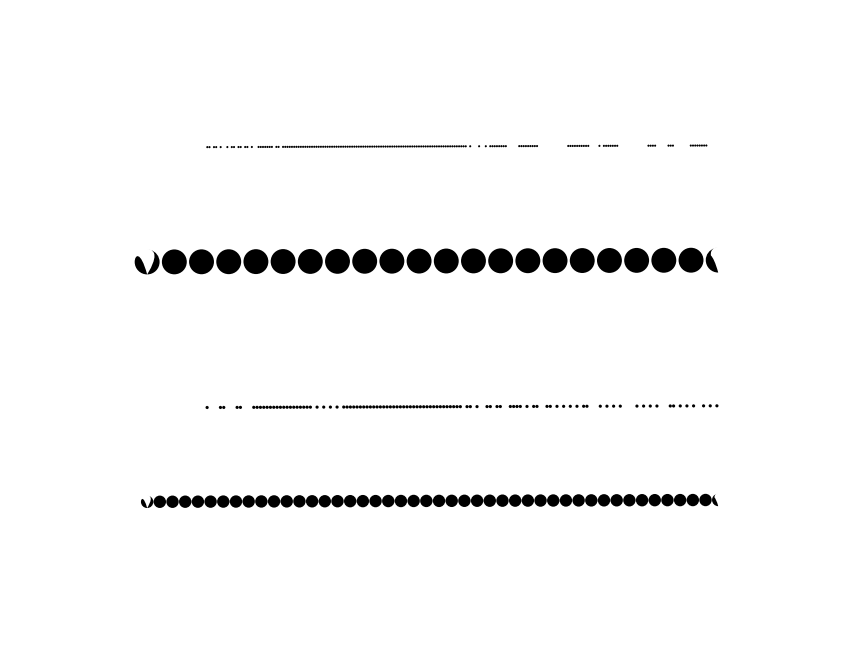
It's a lot of time that I facing with the problem of pdf with dot lines. The problem is in Designer and in Publisher, and I how that in some future version you will fix it Look at the attachments, the dotted lines are interrupted with low thickness values and with high thickness value the first and last dots are incorrect. this image is what I see. and A_untitled.pdf is the pdf this is what I get the only version that works partially (the second and four lines have same problem) is Publisher 2.31 Only the rendering (rasterize all) solve the problem Thanks SO:Windows 11 CPU:12900k 32GB ram A_untitled.pdf
-
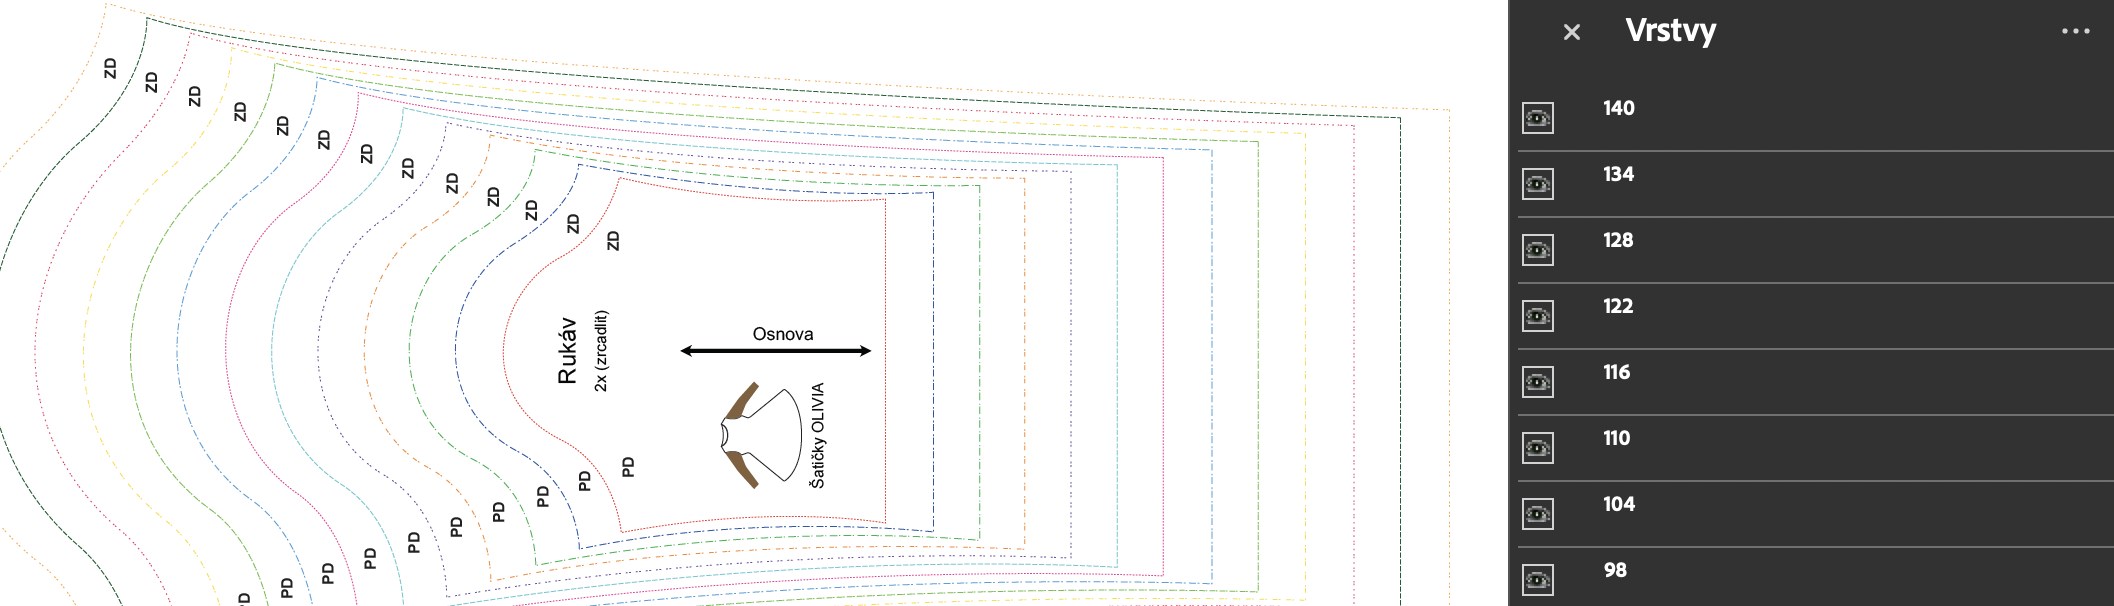
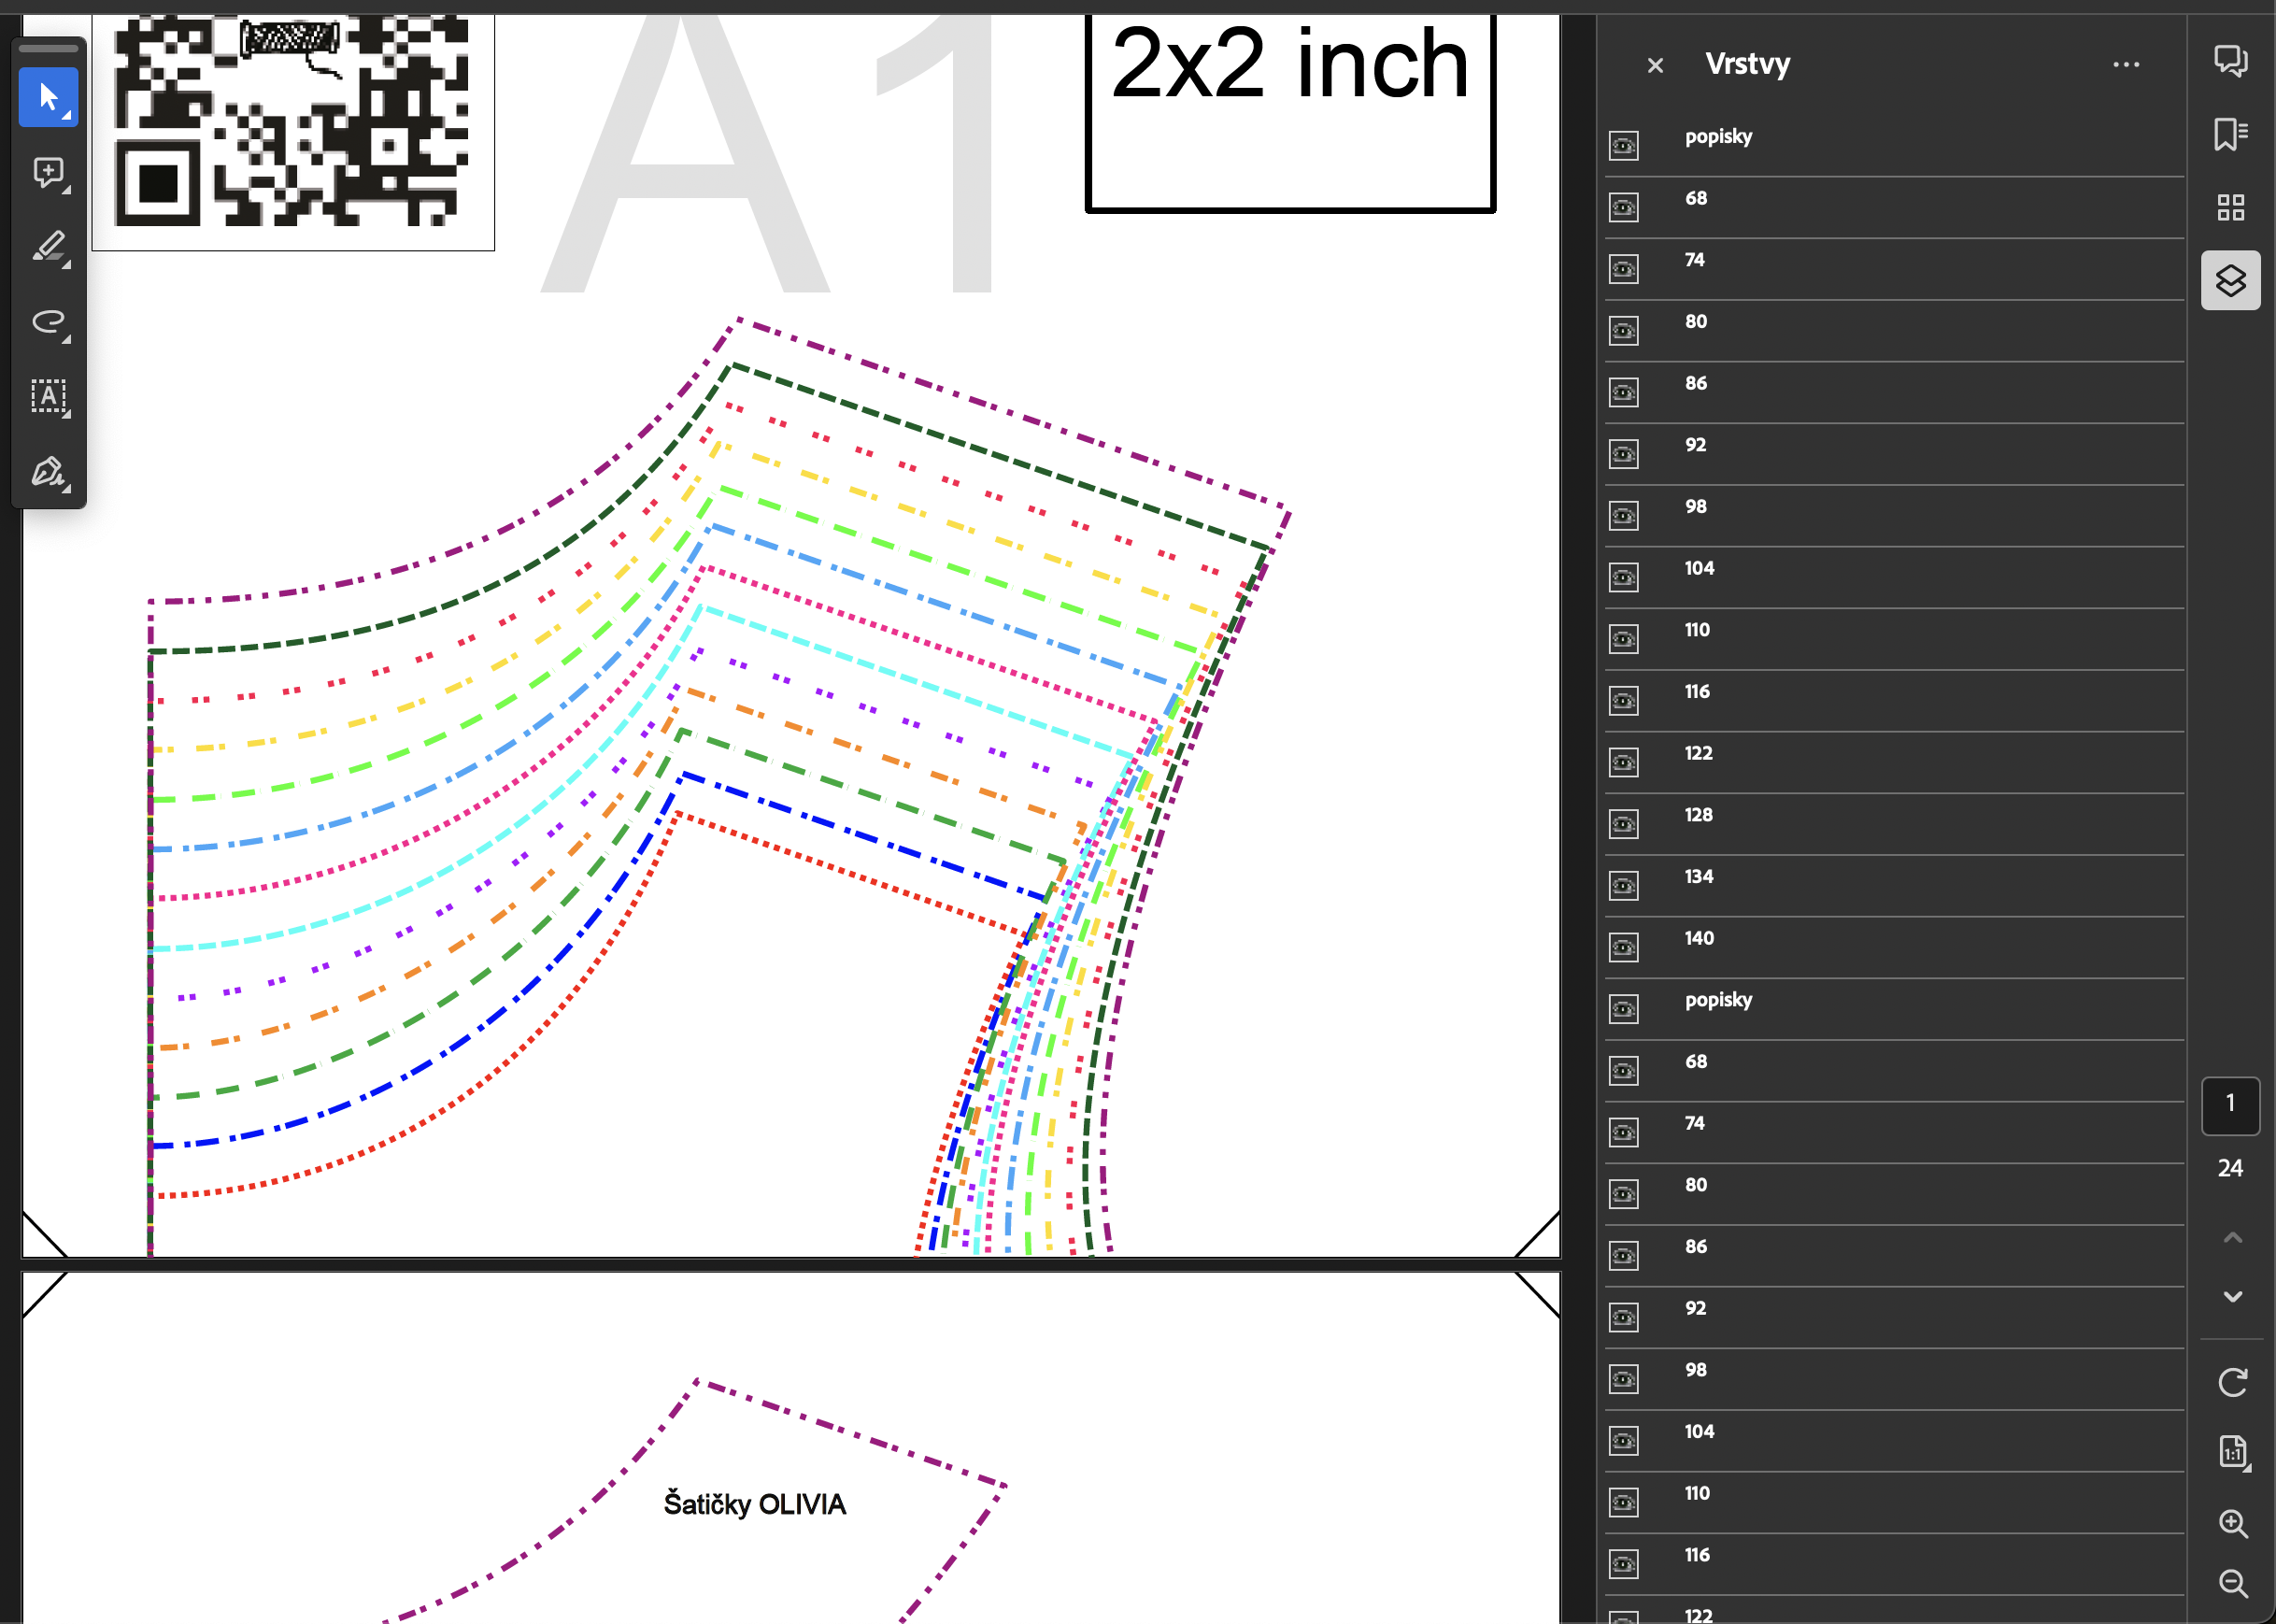
 Hello. I encountered very specific problem I can't find solution to. I am creating sewing cutting patterns. And I wanted to export the file with layers so people can print only the size they are interested in. It should work like this - you have pattern with multiple sizes and in layers you can choose which one you want to see/print. This was created and exported in Illustrator and works as expected. But when I try to export the same thing in AD, the layers on multiple pages are not linked - meaning you'd have to select the visible layer for every page of the document separately. You can see when I am in the middle of two pages I see all the layers of every page but it should be just one layers for all twenty something pages of the document. I also created super simple documents simulating my issue since I am not able to upload the screenshotted document itself. Is there any setting to make the "layers linked" across all the pages or is it something than can not be done in AD? Thank for any kind of help. A4 .pdf A4 Print Template.afdesign
-
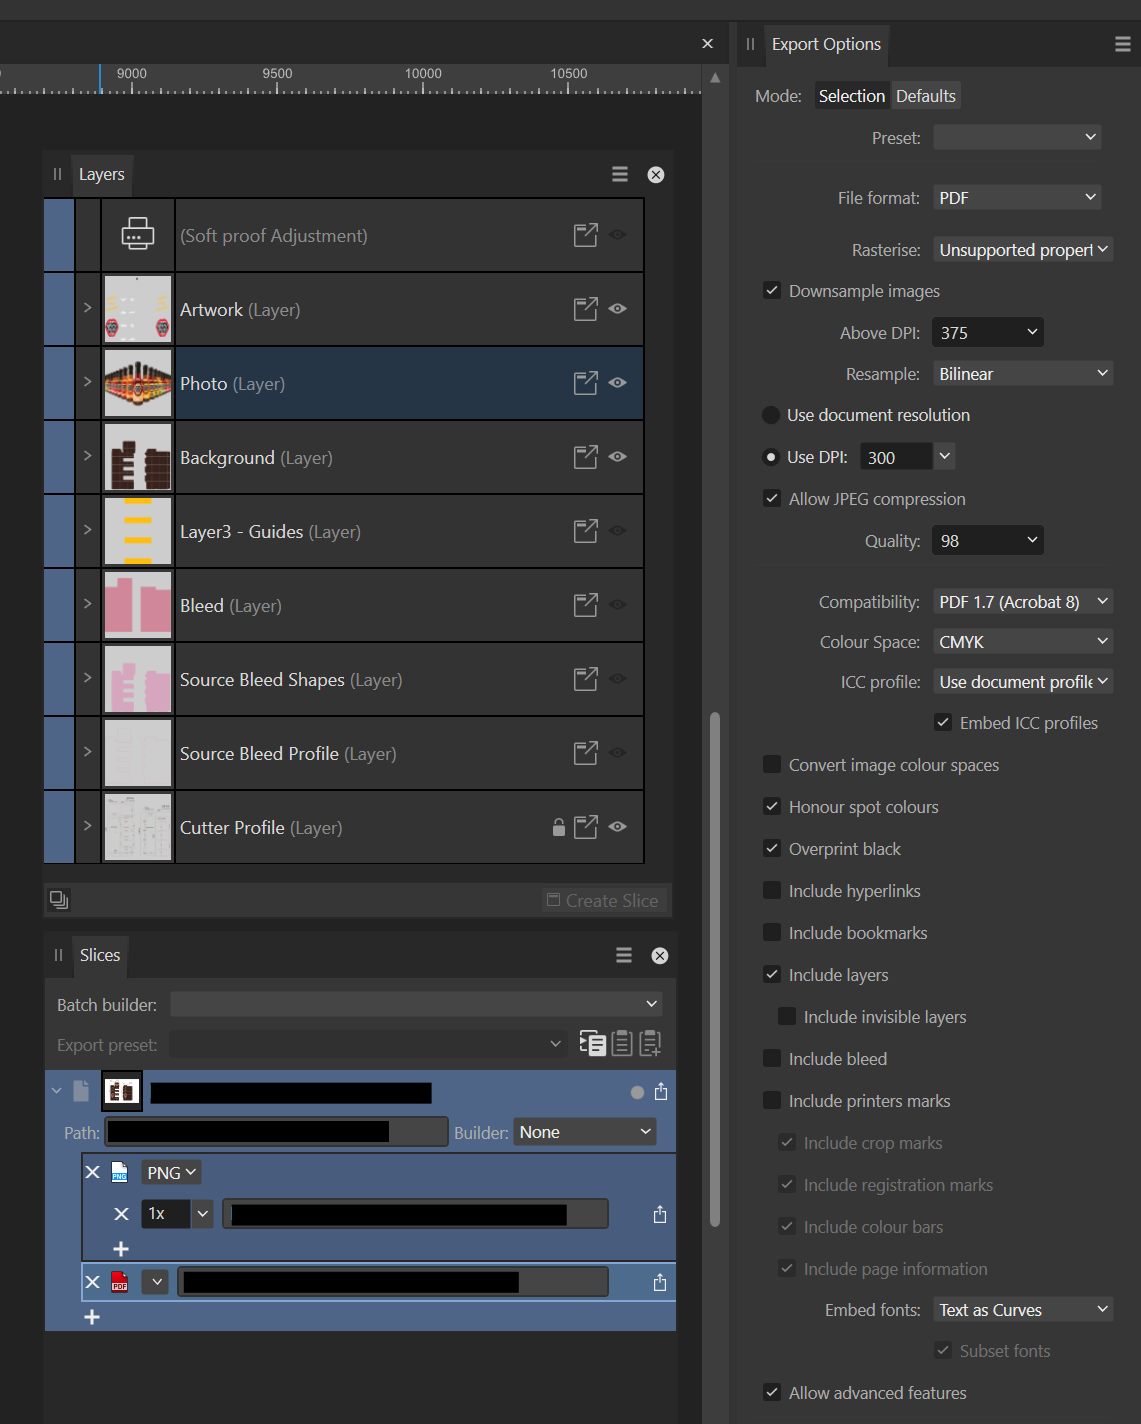
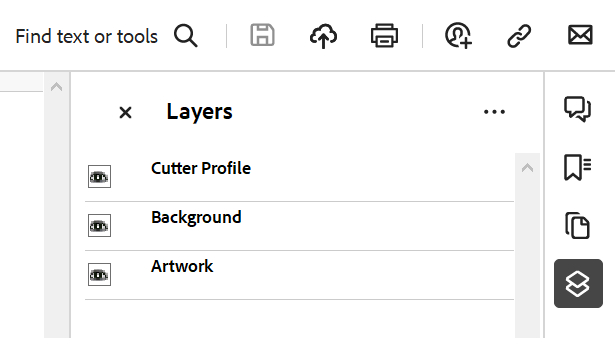
 Hi everyone, I'm exporting some artwork to PDF and I'm unable to export one layer as a layer. The results is that all but one layer export as expected and the contents of one layer appear at the top level and not as a layer. Here's the setup in Designer: And here is the result when opened in Acrobat Reader: The Photo layer is missing. The Photo Layer contents appear at the top level so this might not be a showstopper but I'm curious as to why it didn't export. Any thoughts?
-
 Hello, Just had a print job returned with quite a few errors, especially with a few specialized fonts. I created an OP preset specifically for the job and it seems that the FONTS were NOT embedded in the PDF file. Also when running preflght I am getting some errors when a different (symbol) font is pasted into a paragraph with the main font Bodoni. Here is a sample of the export preset. How can I check the PDF to ensure that the TypeFaces are indeed embeded (MAC OSX VENTURA) Thanks in advance to this great (about to get better??) community. David
-
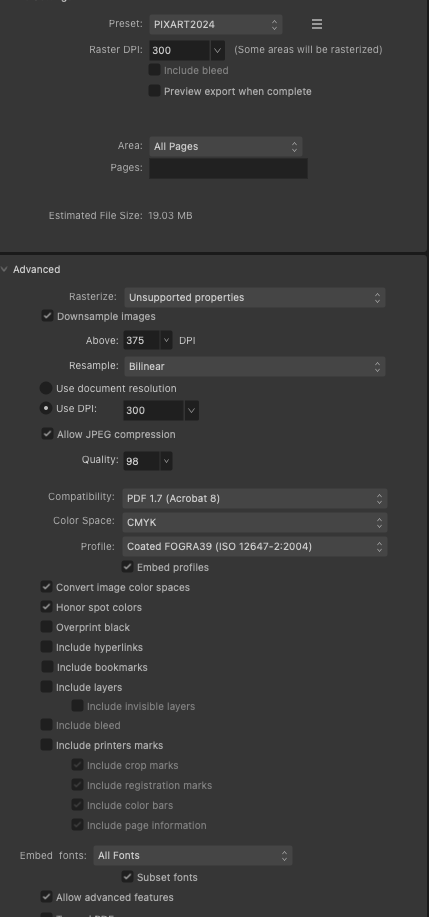
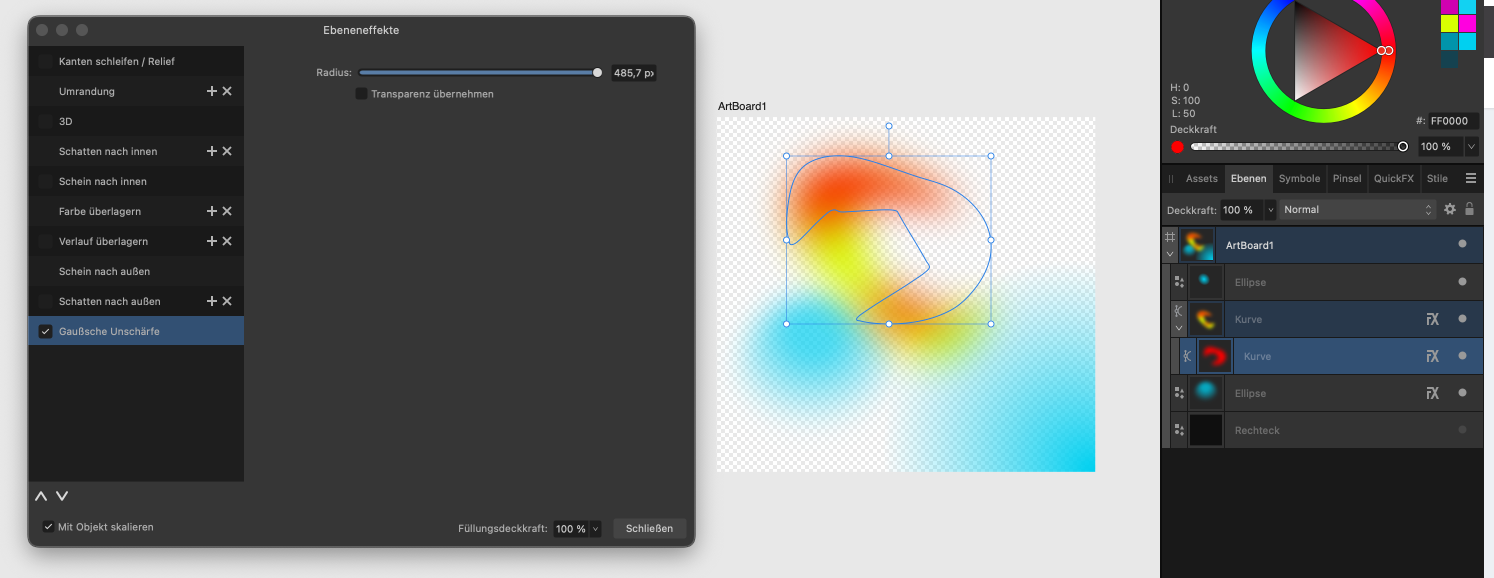
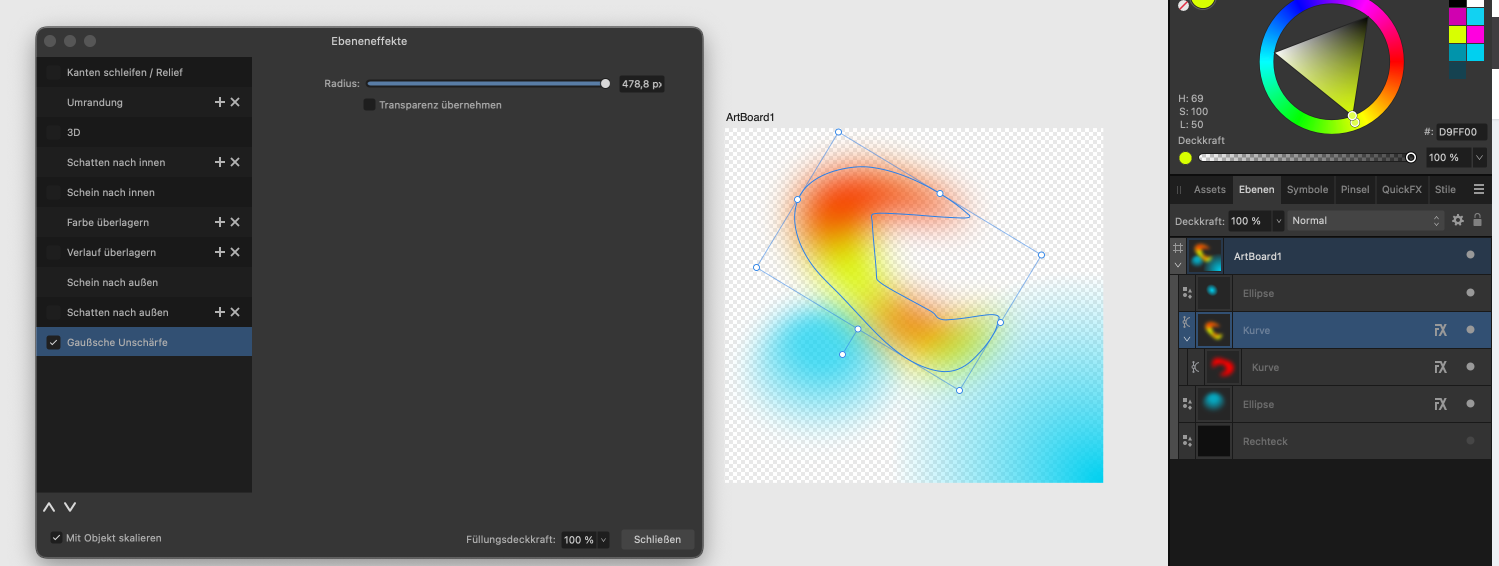
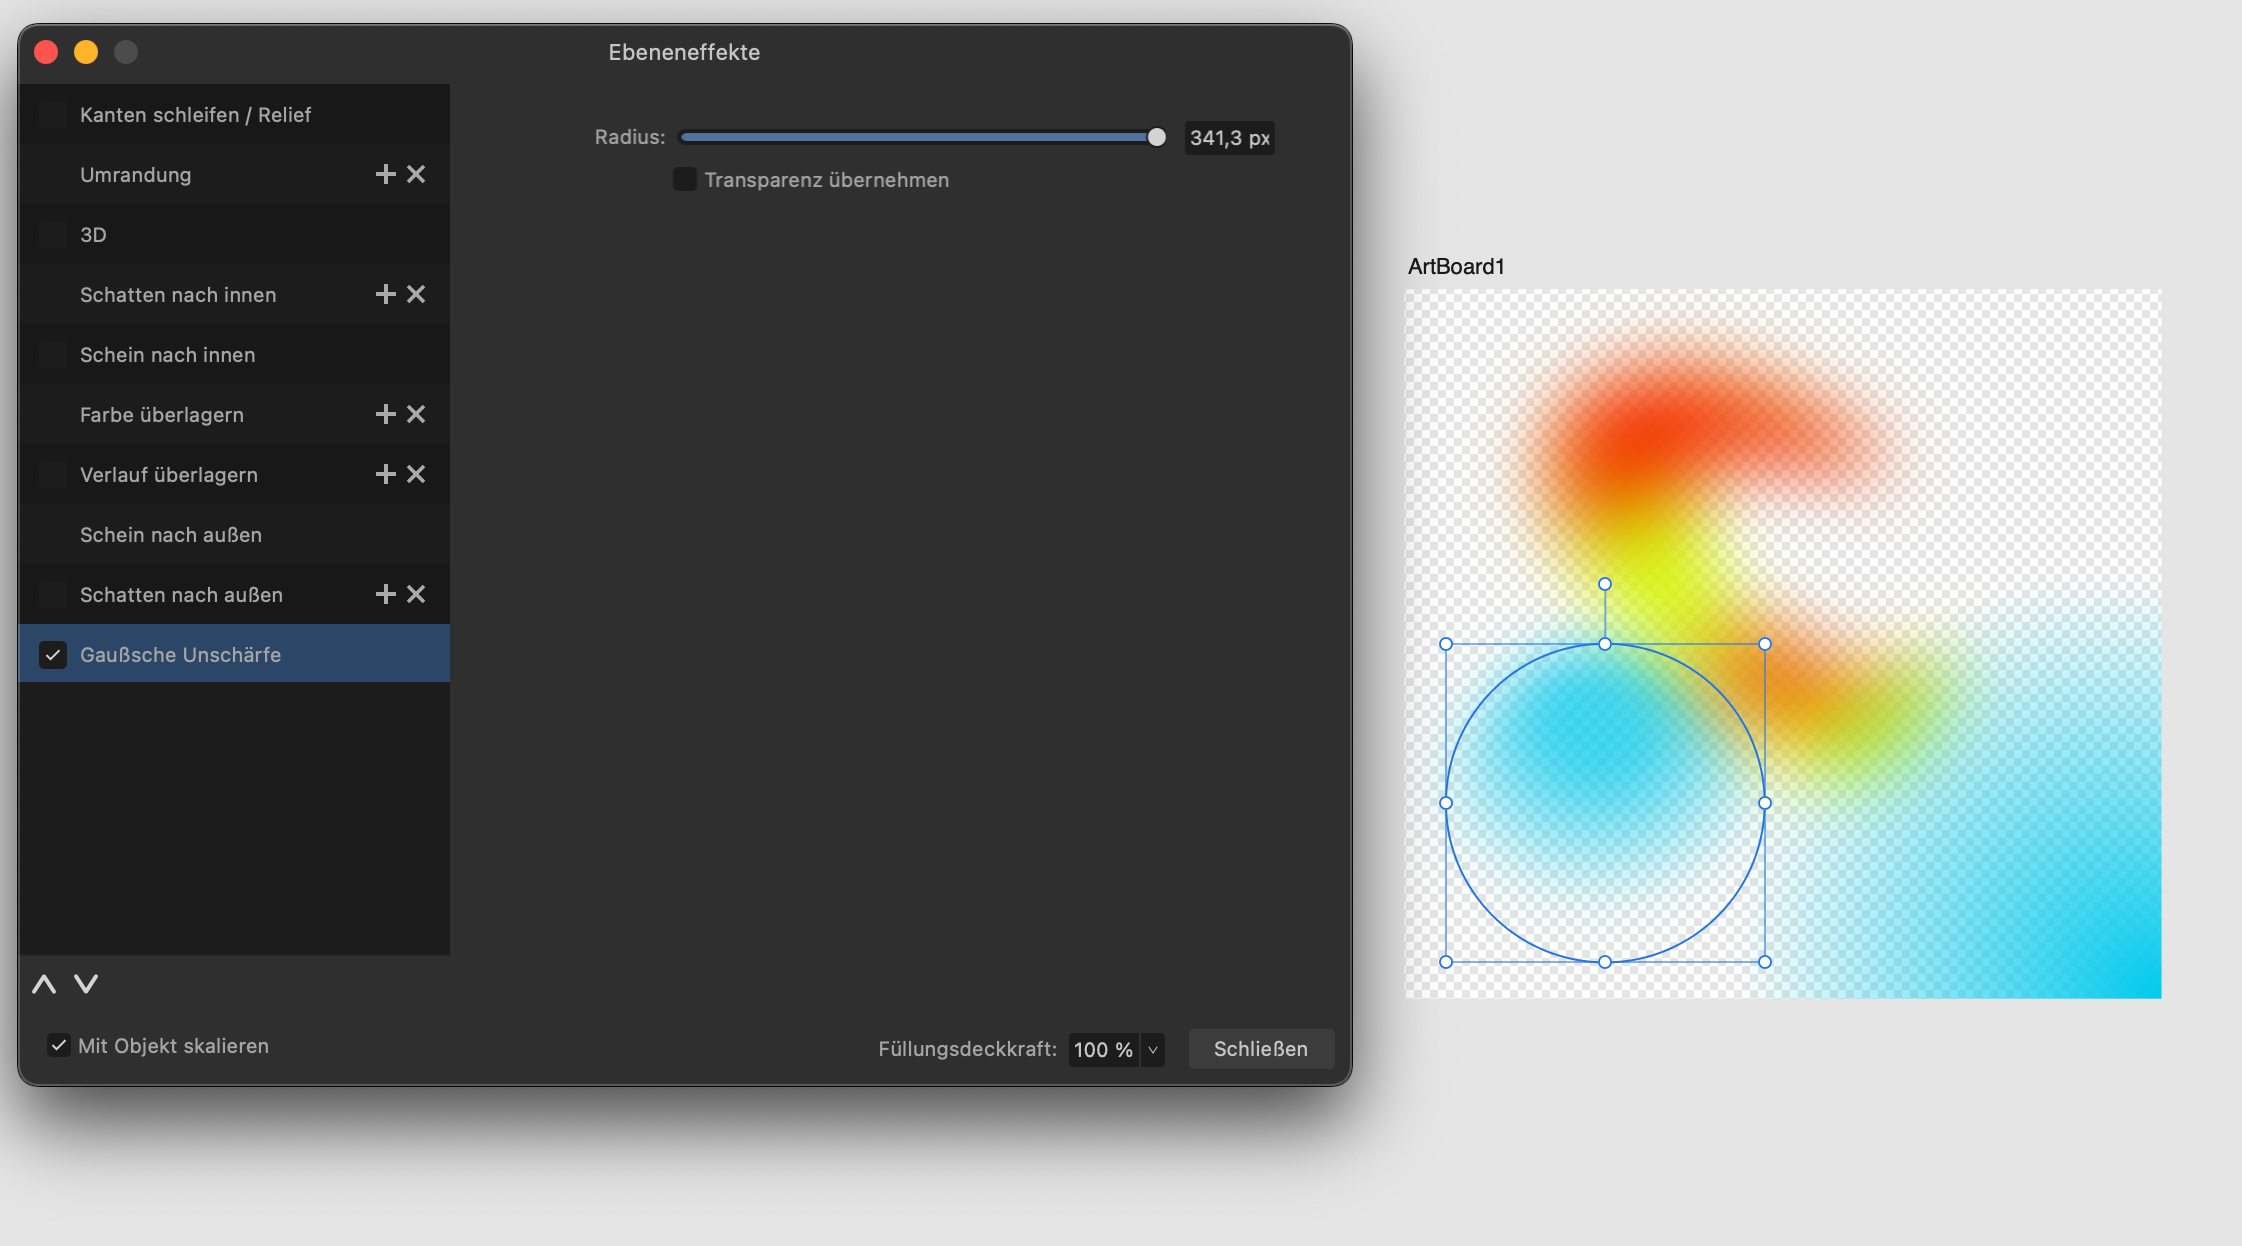
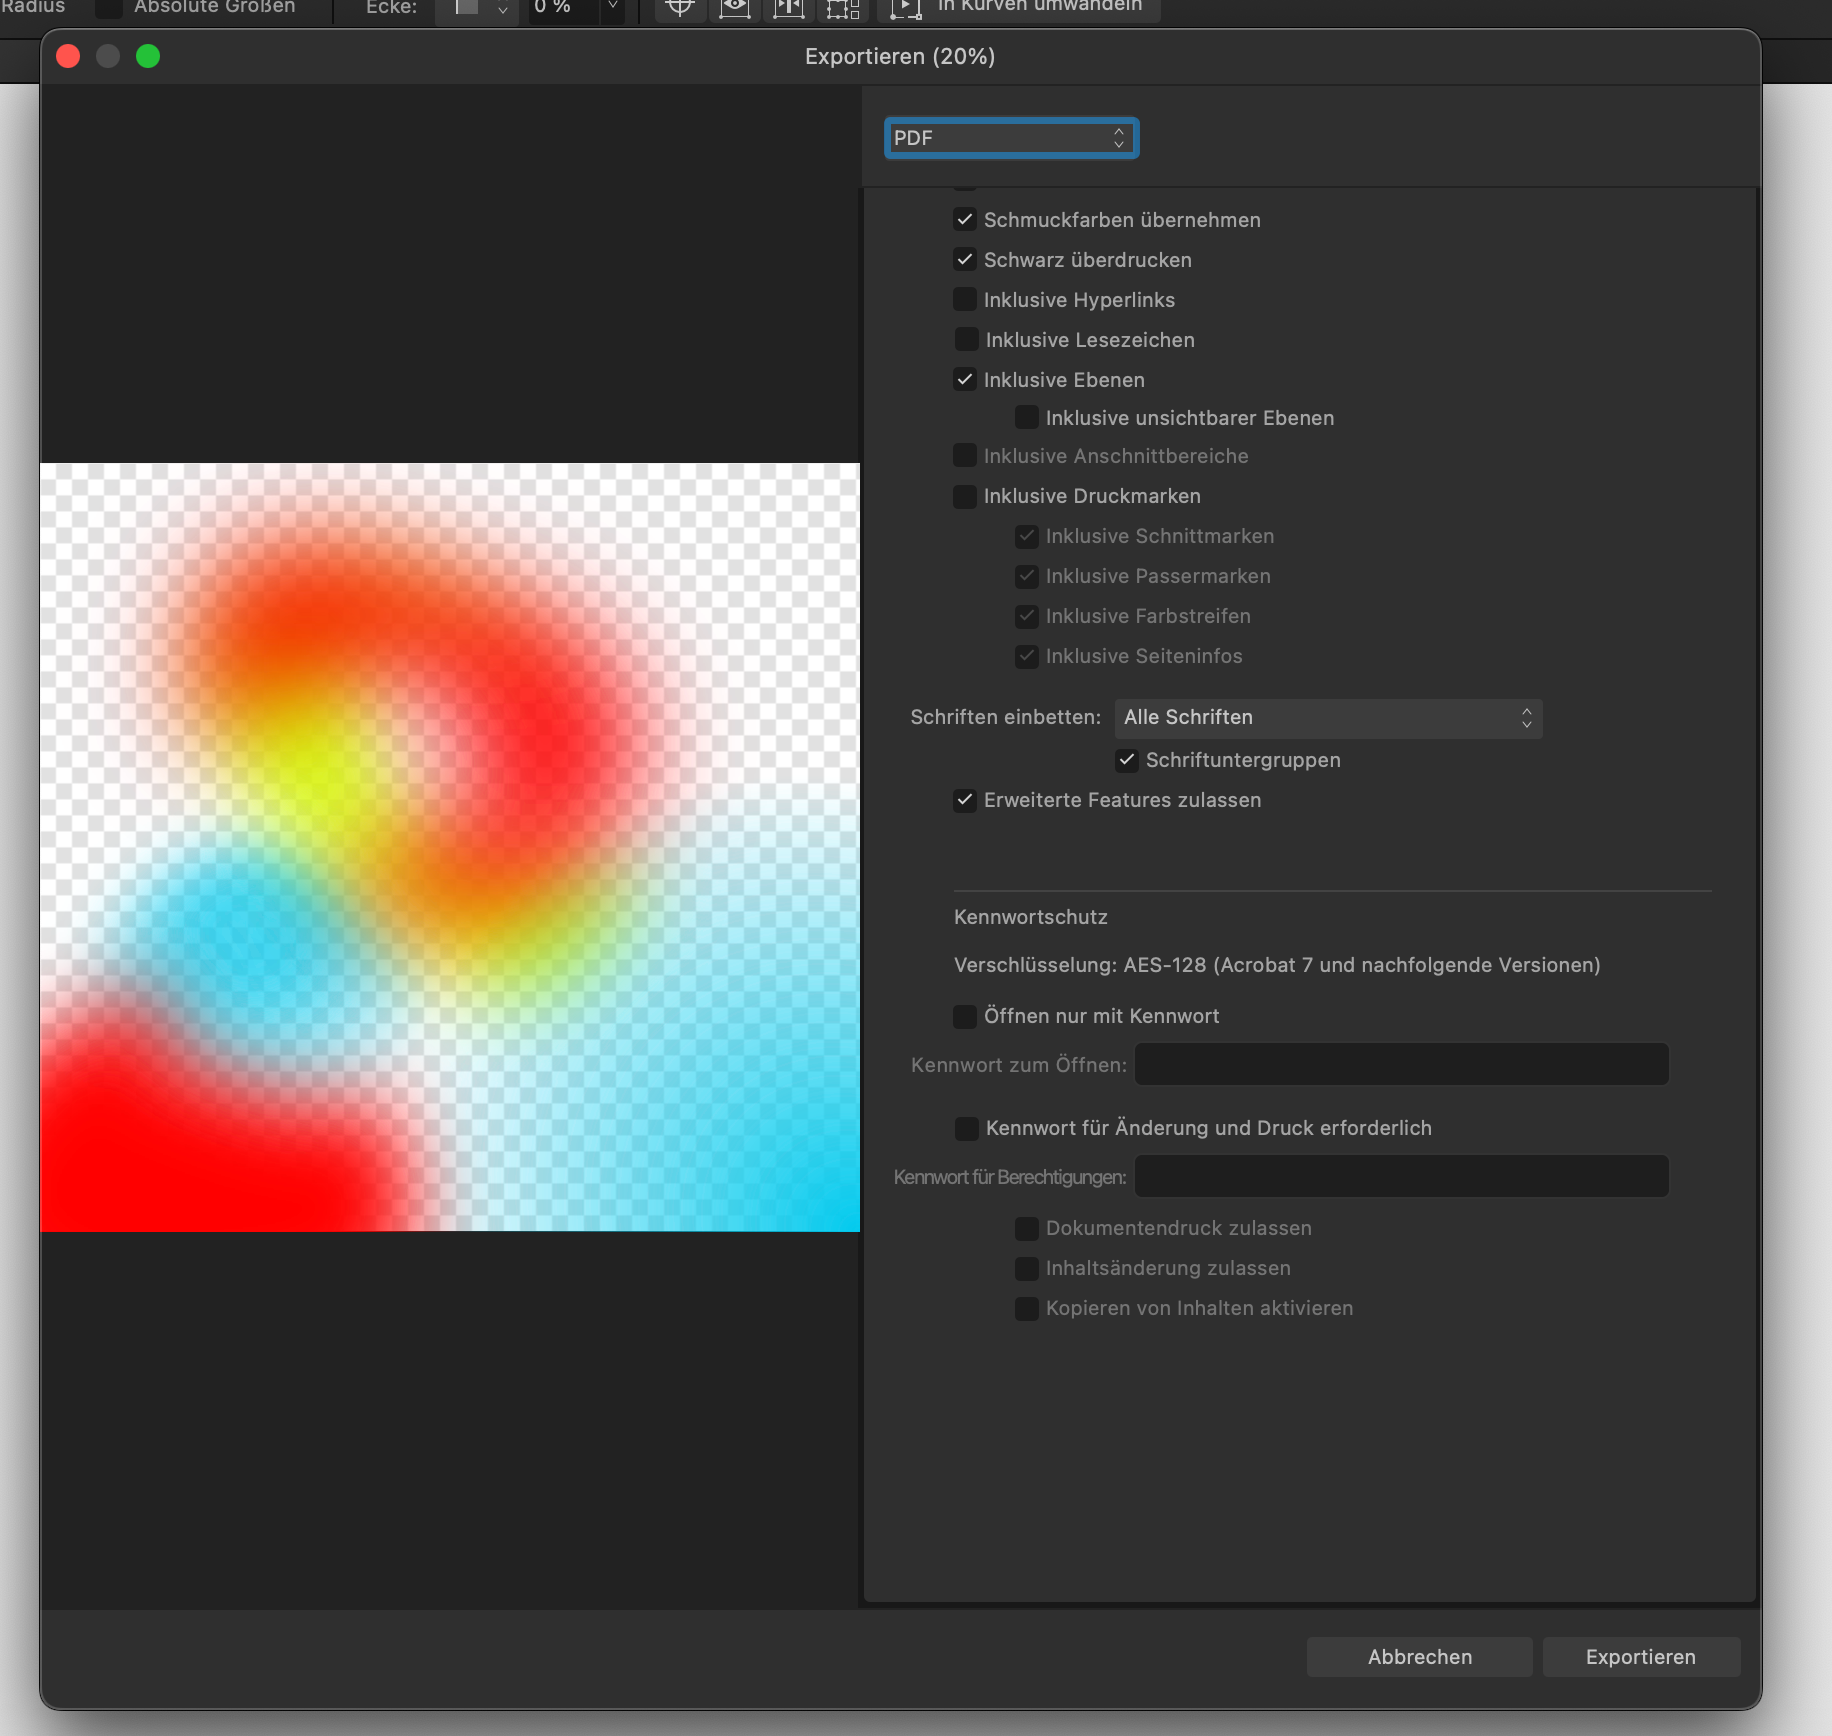
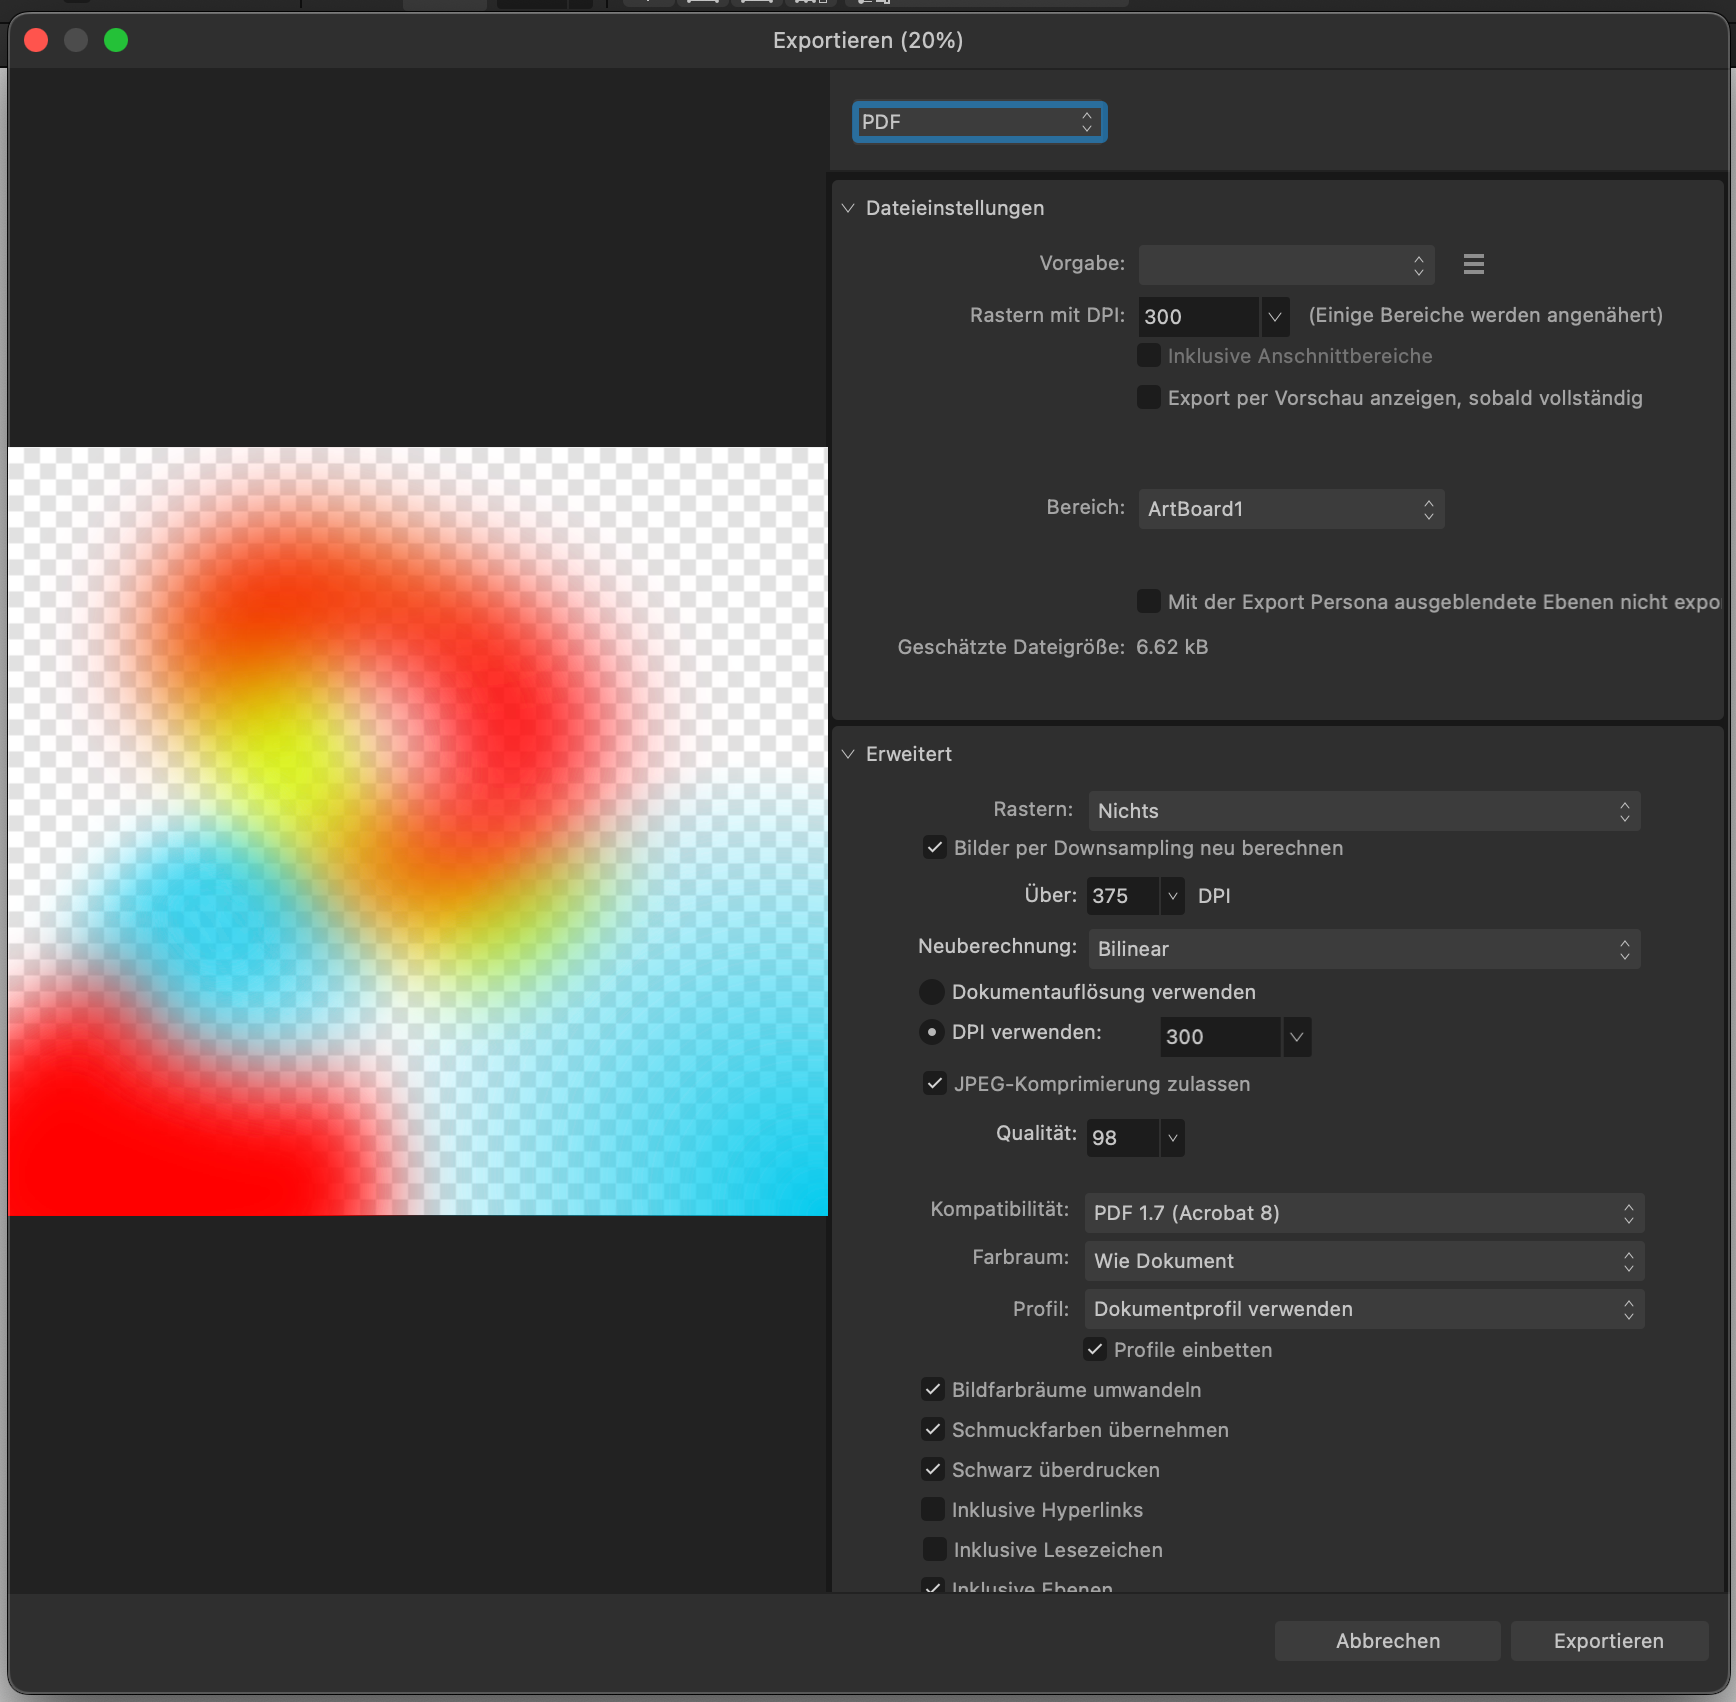
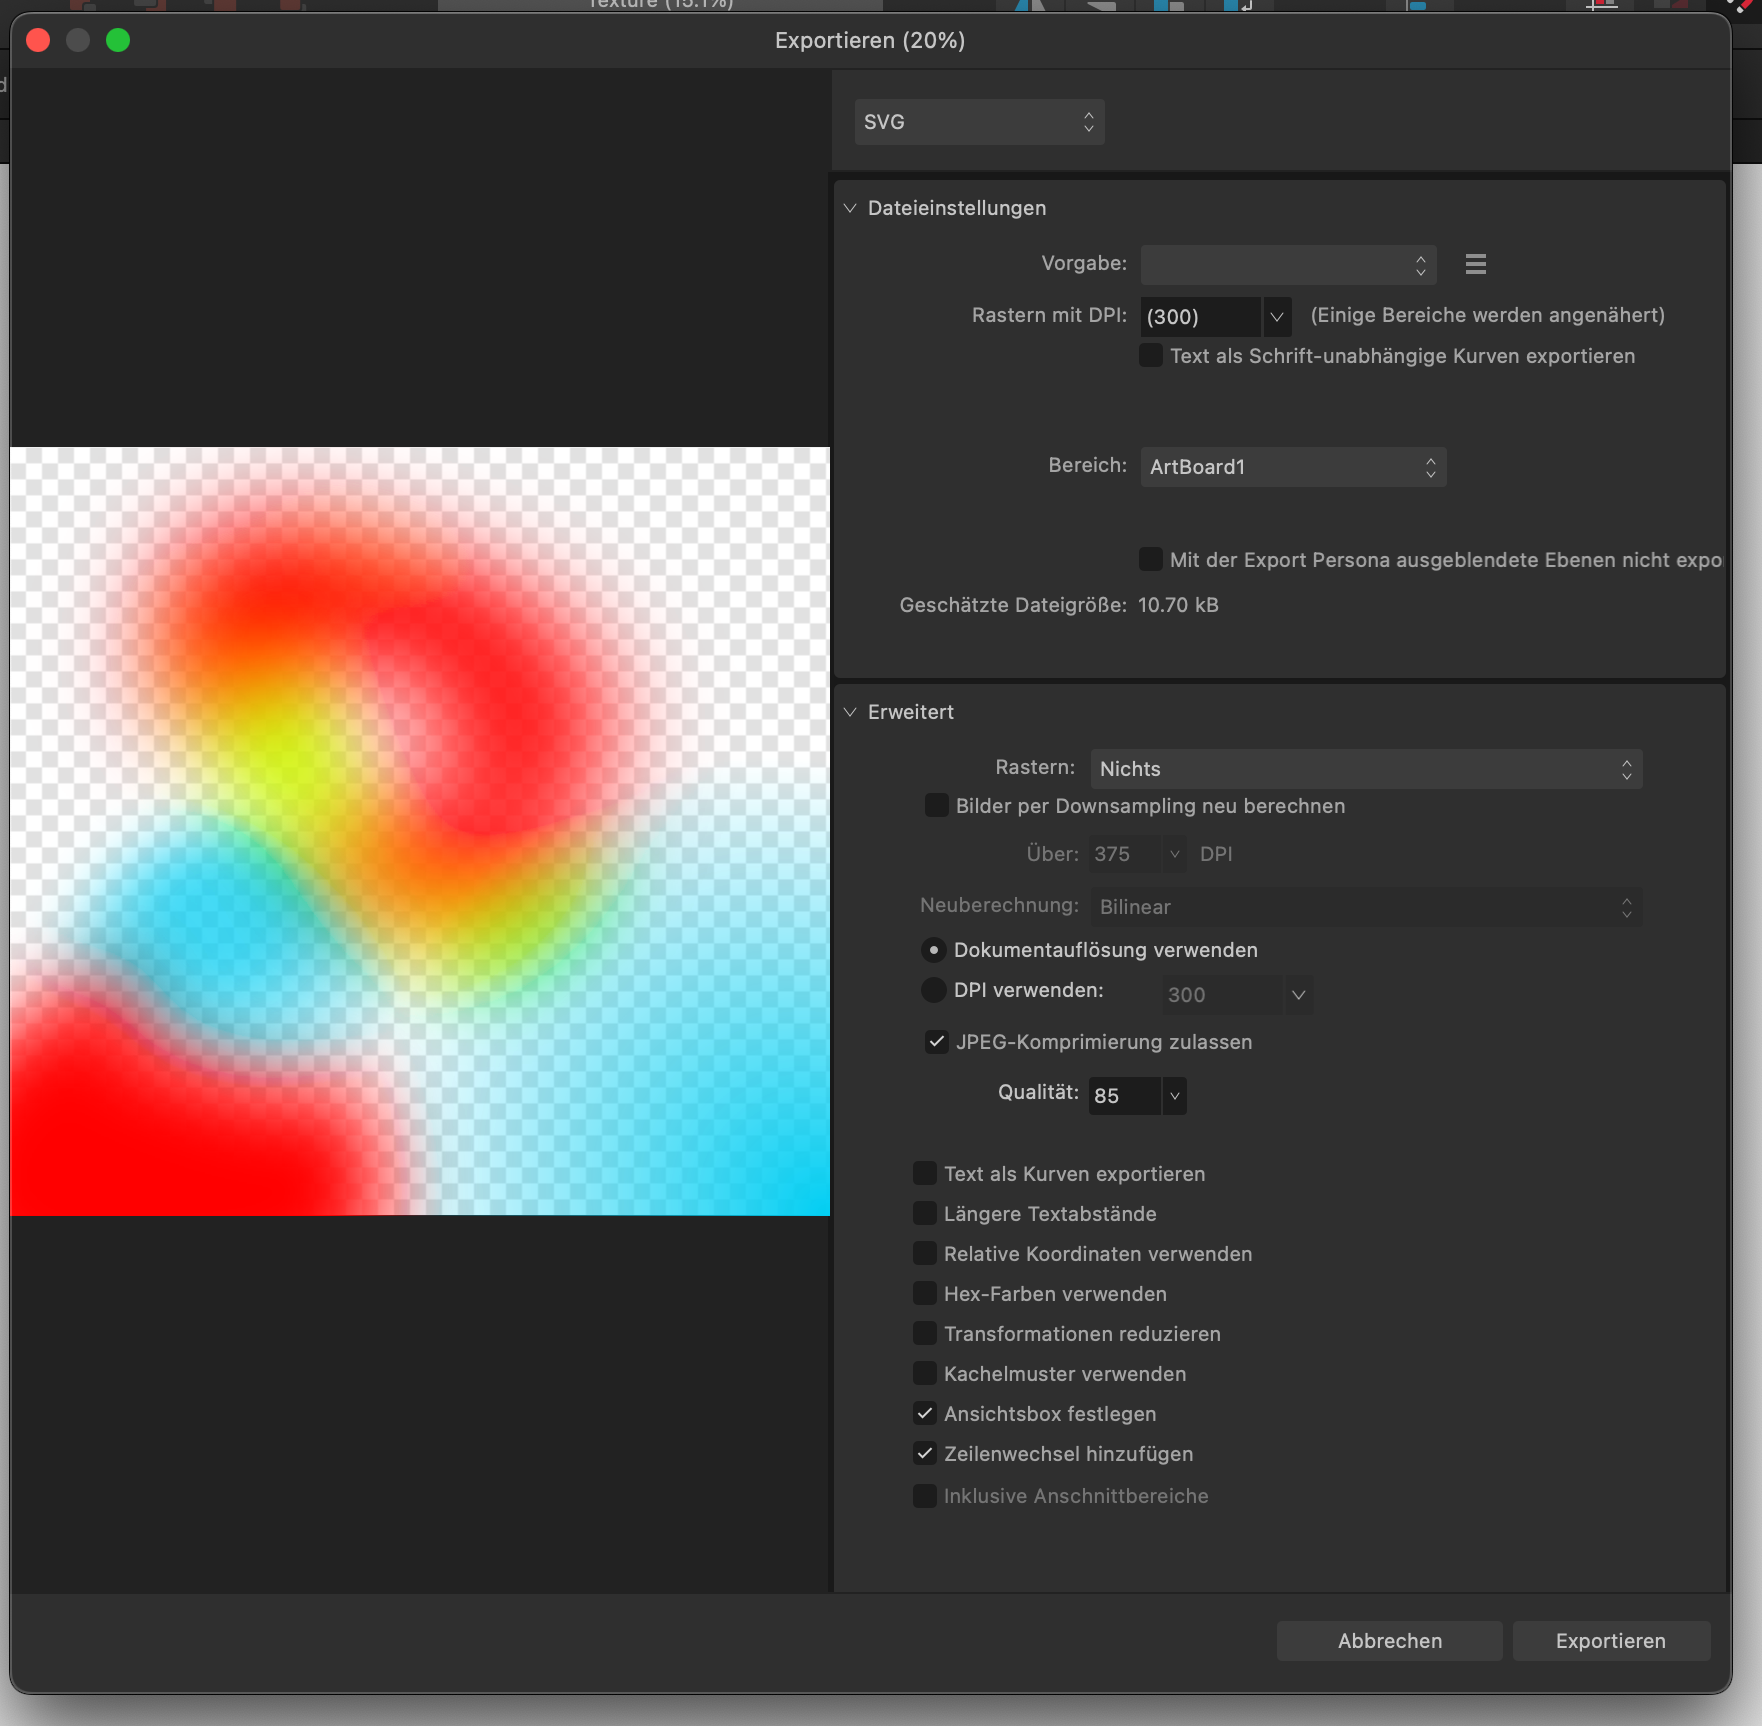
 I want to create with Affinity Designer a gradient mesh. In order to be able to define a brand specific texture, I am experimenting. The texture shall be used in Powerpoint slides but also on large prints like banners. So I must work in a way that it does not raster the image, because I want to scale it infinitly. Unfortunatelly you see in the Texture.pdf that the gaussian blur applied on the shape does not exist any more. Only the color gradients work in the PDF. If I export to SVG, then the gaussian blur exits. Also if I bring the SVG to Powerpoint and Export the Powerpoint as PDF, then the shape is blured correctly. So I assume this must be an export error in the Affinity Designer 2.4. Can you please help? I have posted the export menu screen shots so you may see whether any adjustment should be made, to get it to work. Thank you. Texture.pdf Texture.afdesign Texture.svg
-
 Hello, I'm new to the forum so apologies if this question has been asked before. Anyway, I now and then create vector stock images and this is the first time I've done the work with Affinity Designer, mainly because I cannot stand Adobe Illustrator. But the problem is that stock agencies usually demand you send them Illustrator compatible eps files. Therefor I always check the final art in Illustrator. When importing the eps (and pdf) files I created with Affinity, I noticed that the gradient fills have been rasterized to bitmaps (this is a usual phenomena with other programs as well). Is there any workaround to import Affinity created files to Illustrator with the gradients intact. They are simple two color gradients, nothing fancy. It doesn't have to be eps or pdf, anything will do, as I can save them as eps in Illustrator after I have checked that everything is OK. The only solution so far is to create the gradients in Illustrator. -Paul
- 9 replies
-
- 1
-
-
- gradient
- illustrator
- (and 3 more)
-
 Affinity Publisher V2 Is there a way to export multiple pages in a document, as a single PDF? What I mean is - I have 31 pages in my book and I want 31 single PDF files extracted at a go. At the moment, I have to select each page and then extract.
 -
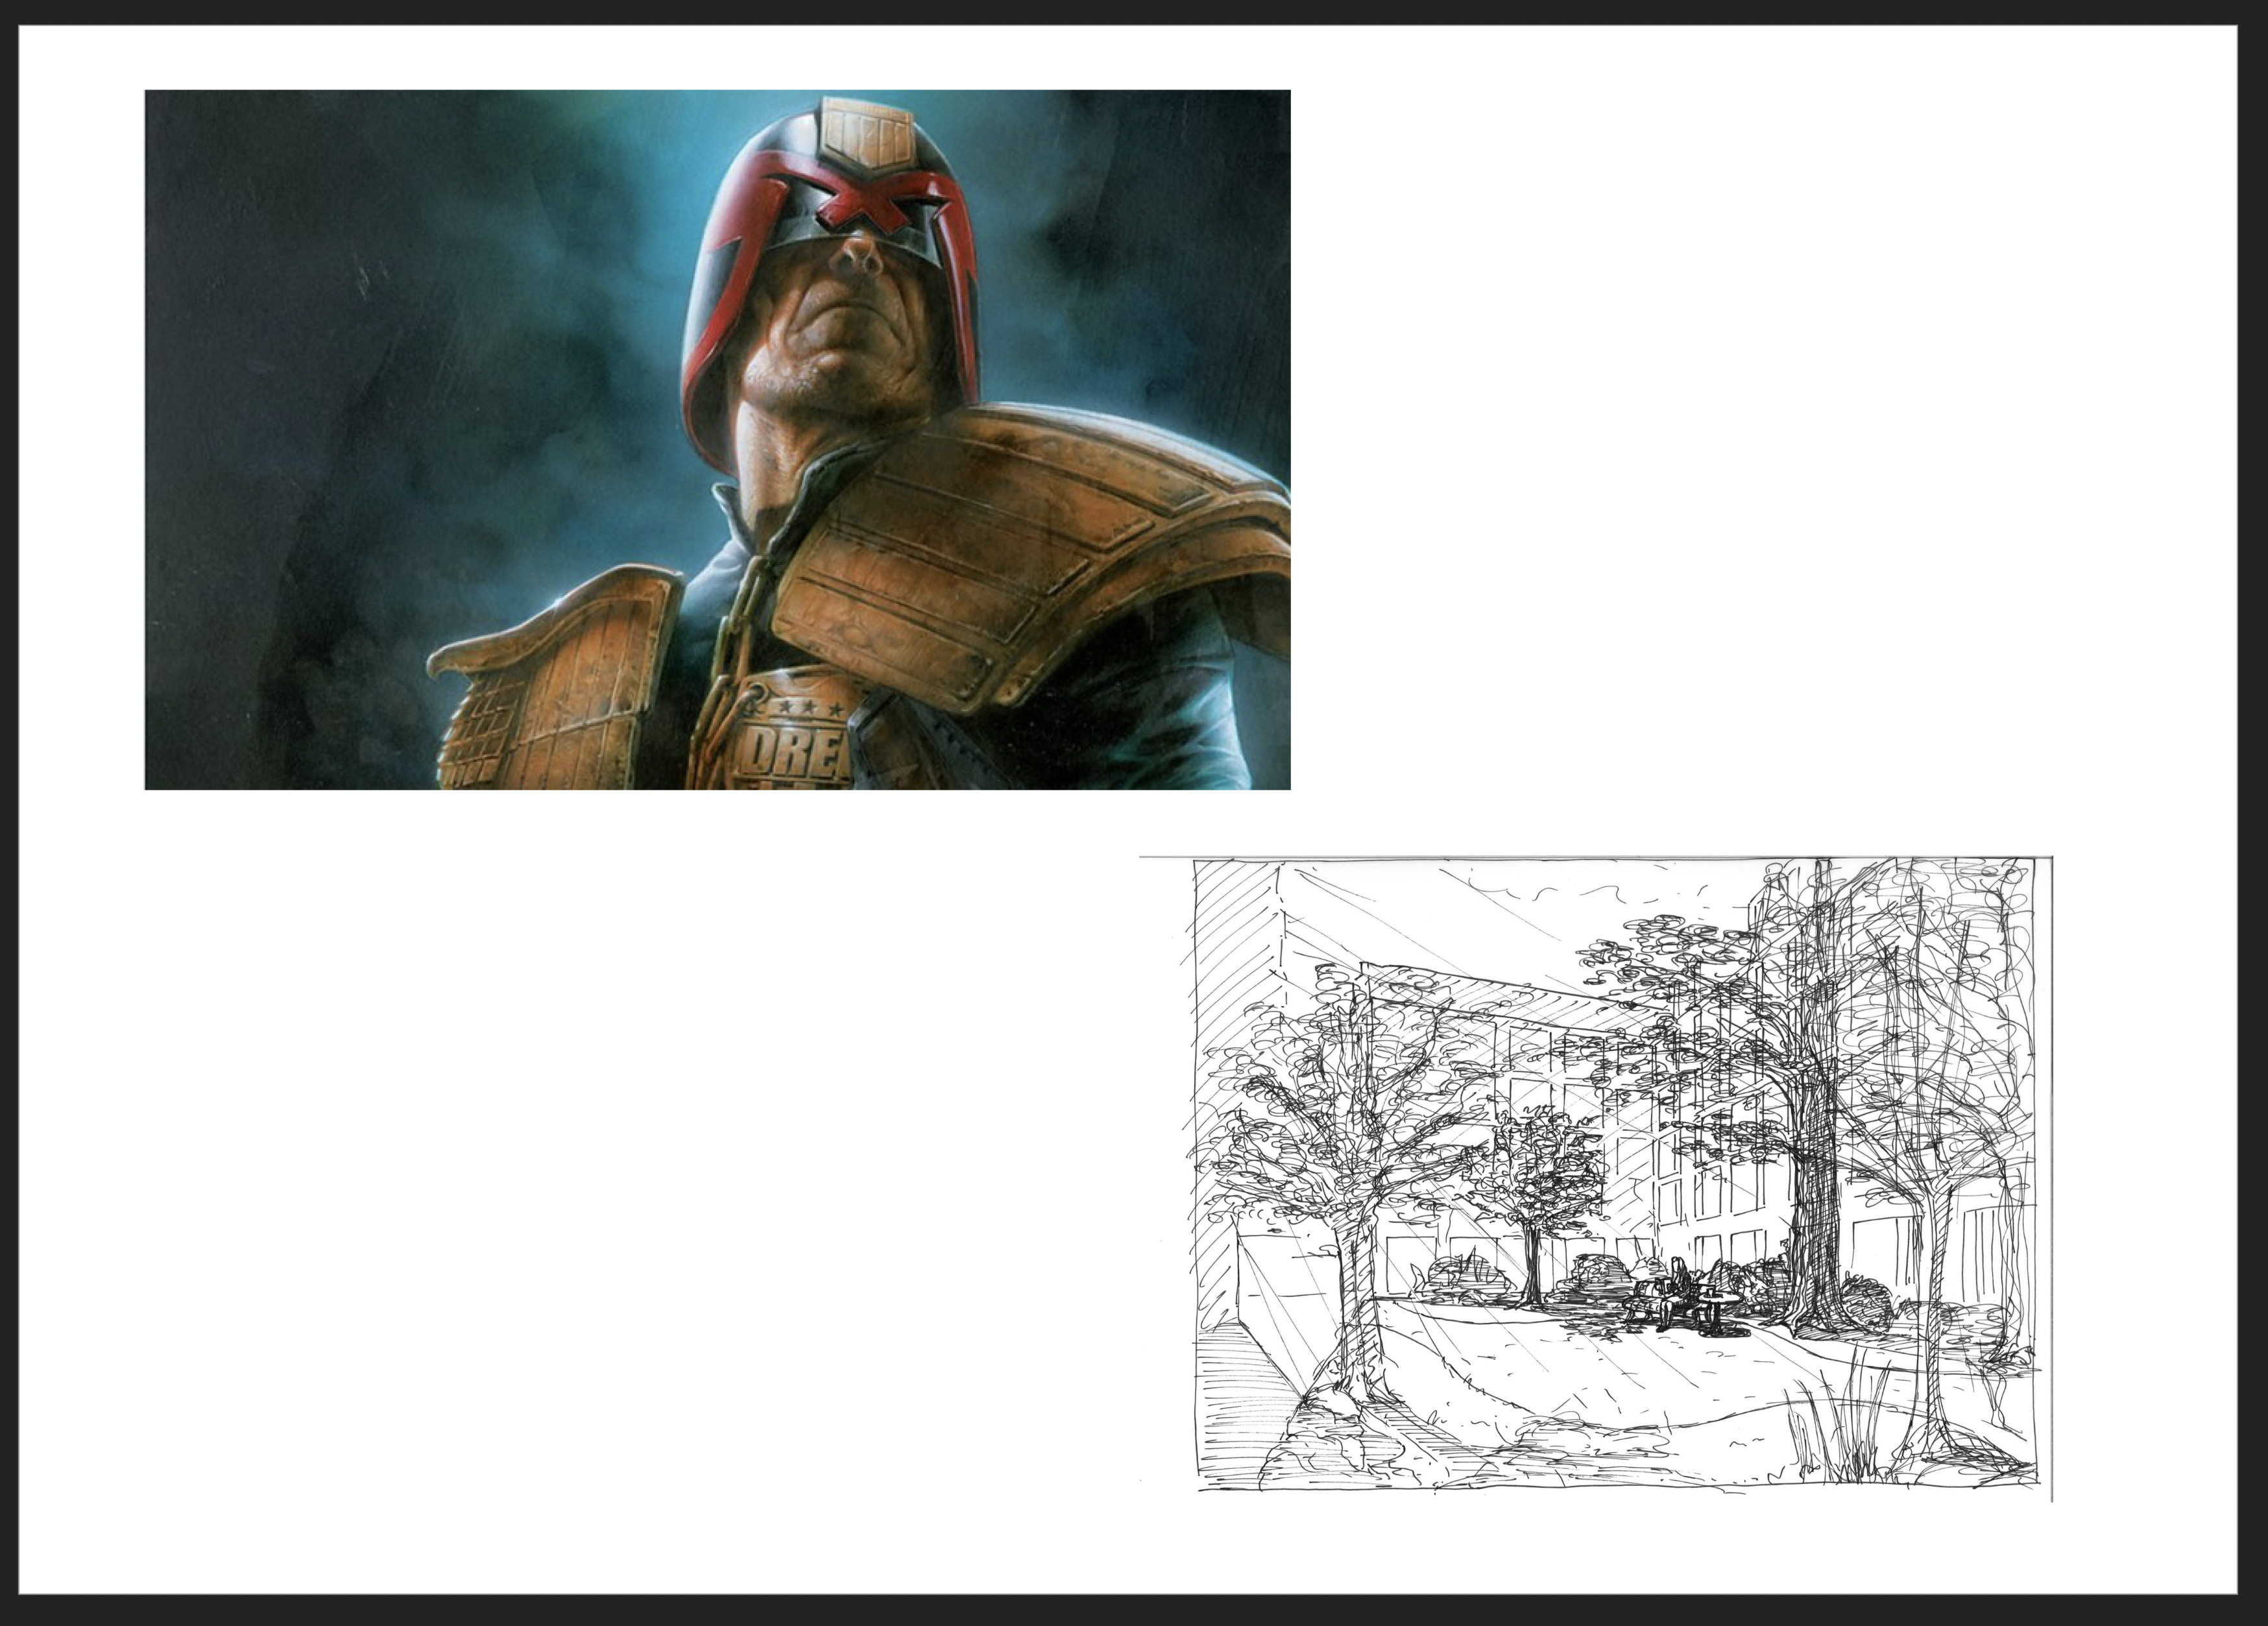
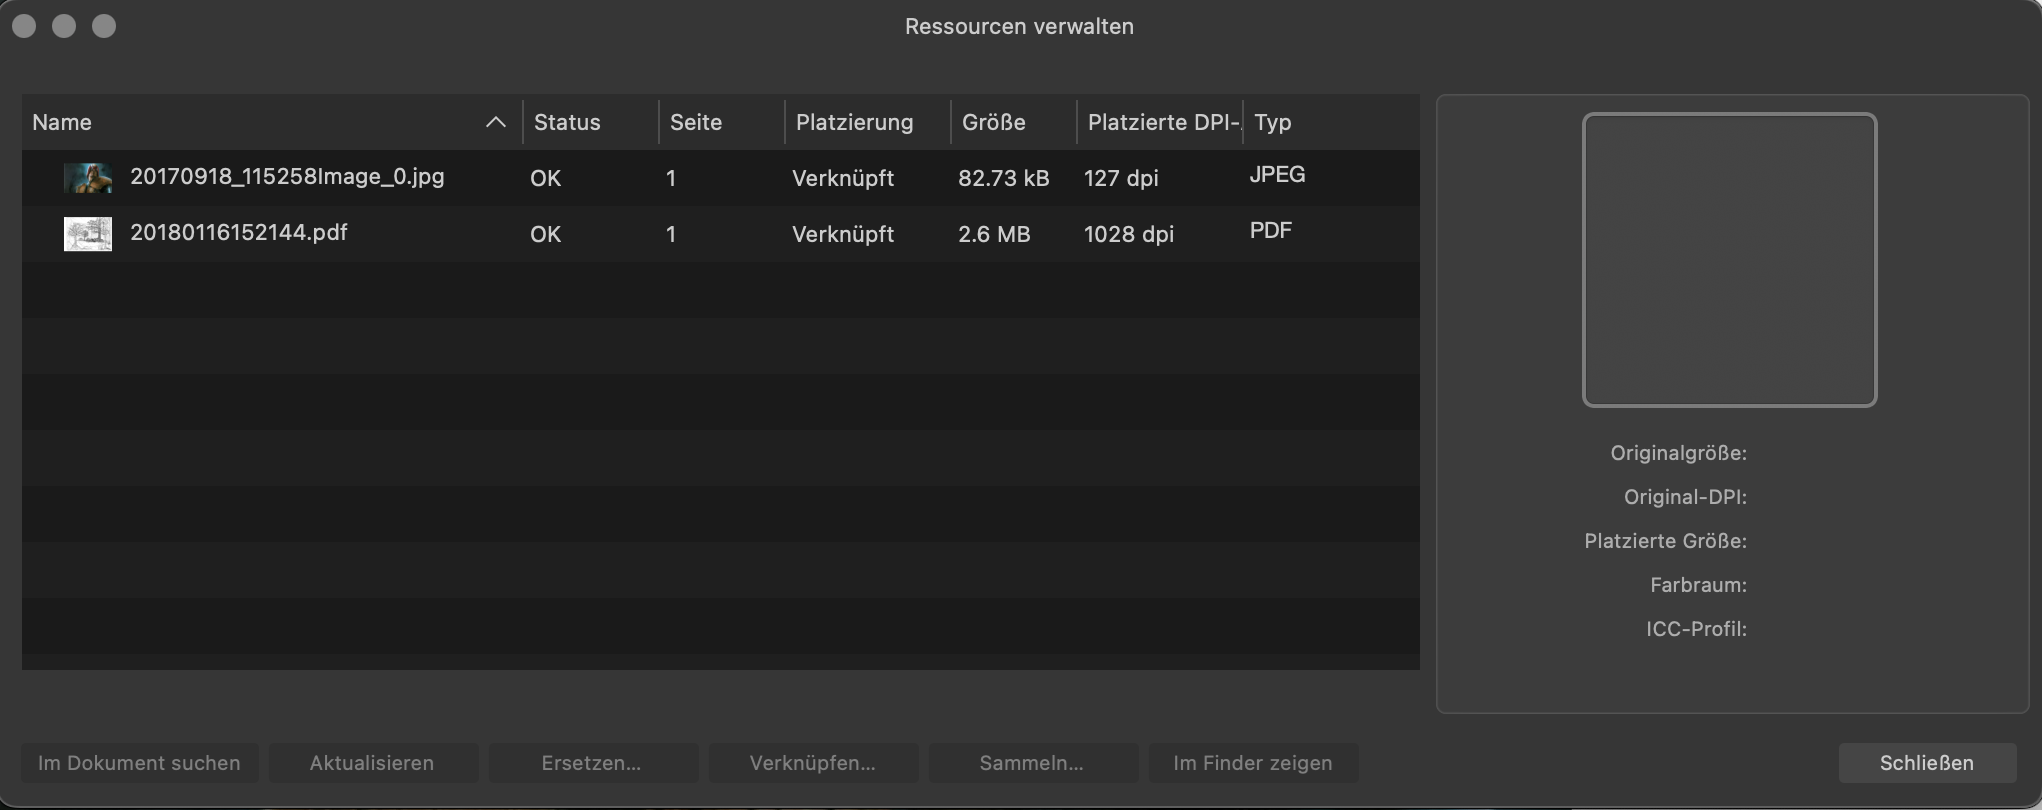
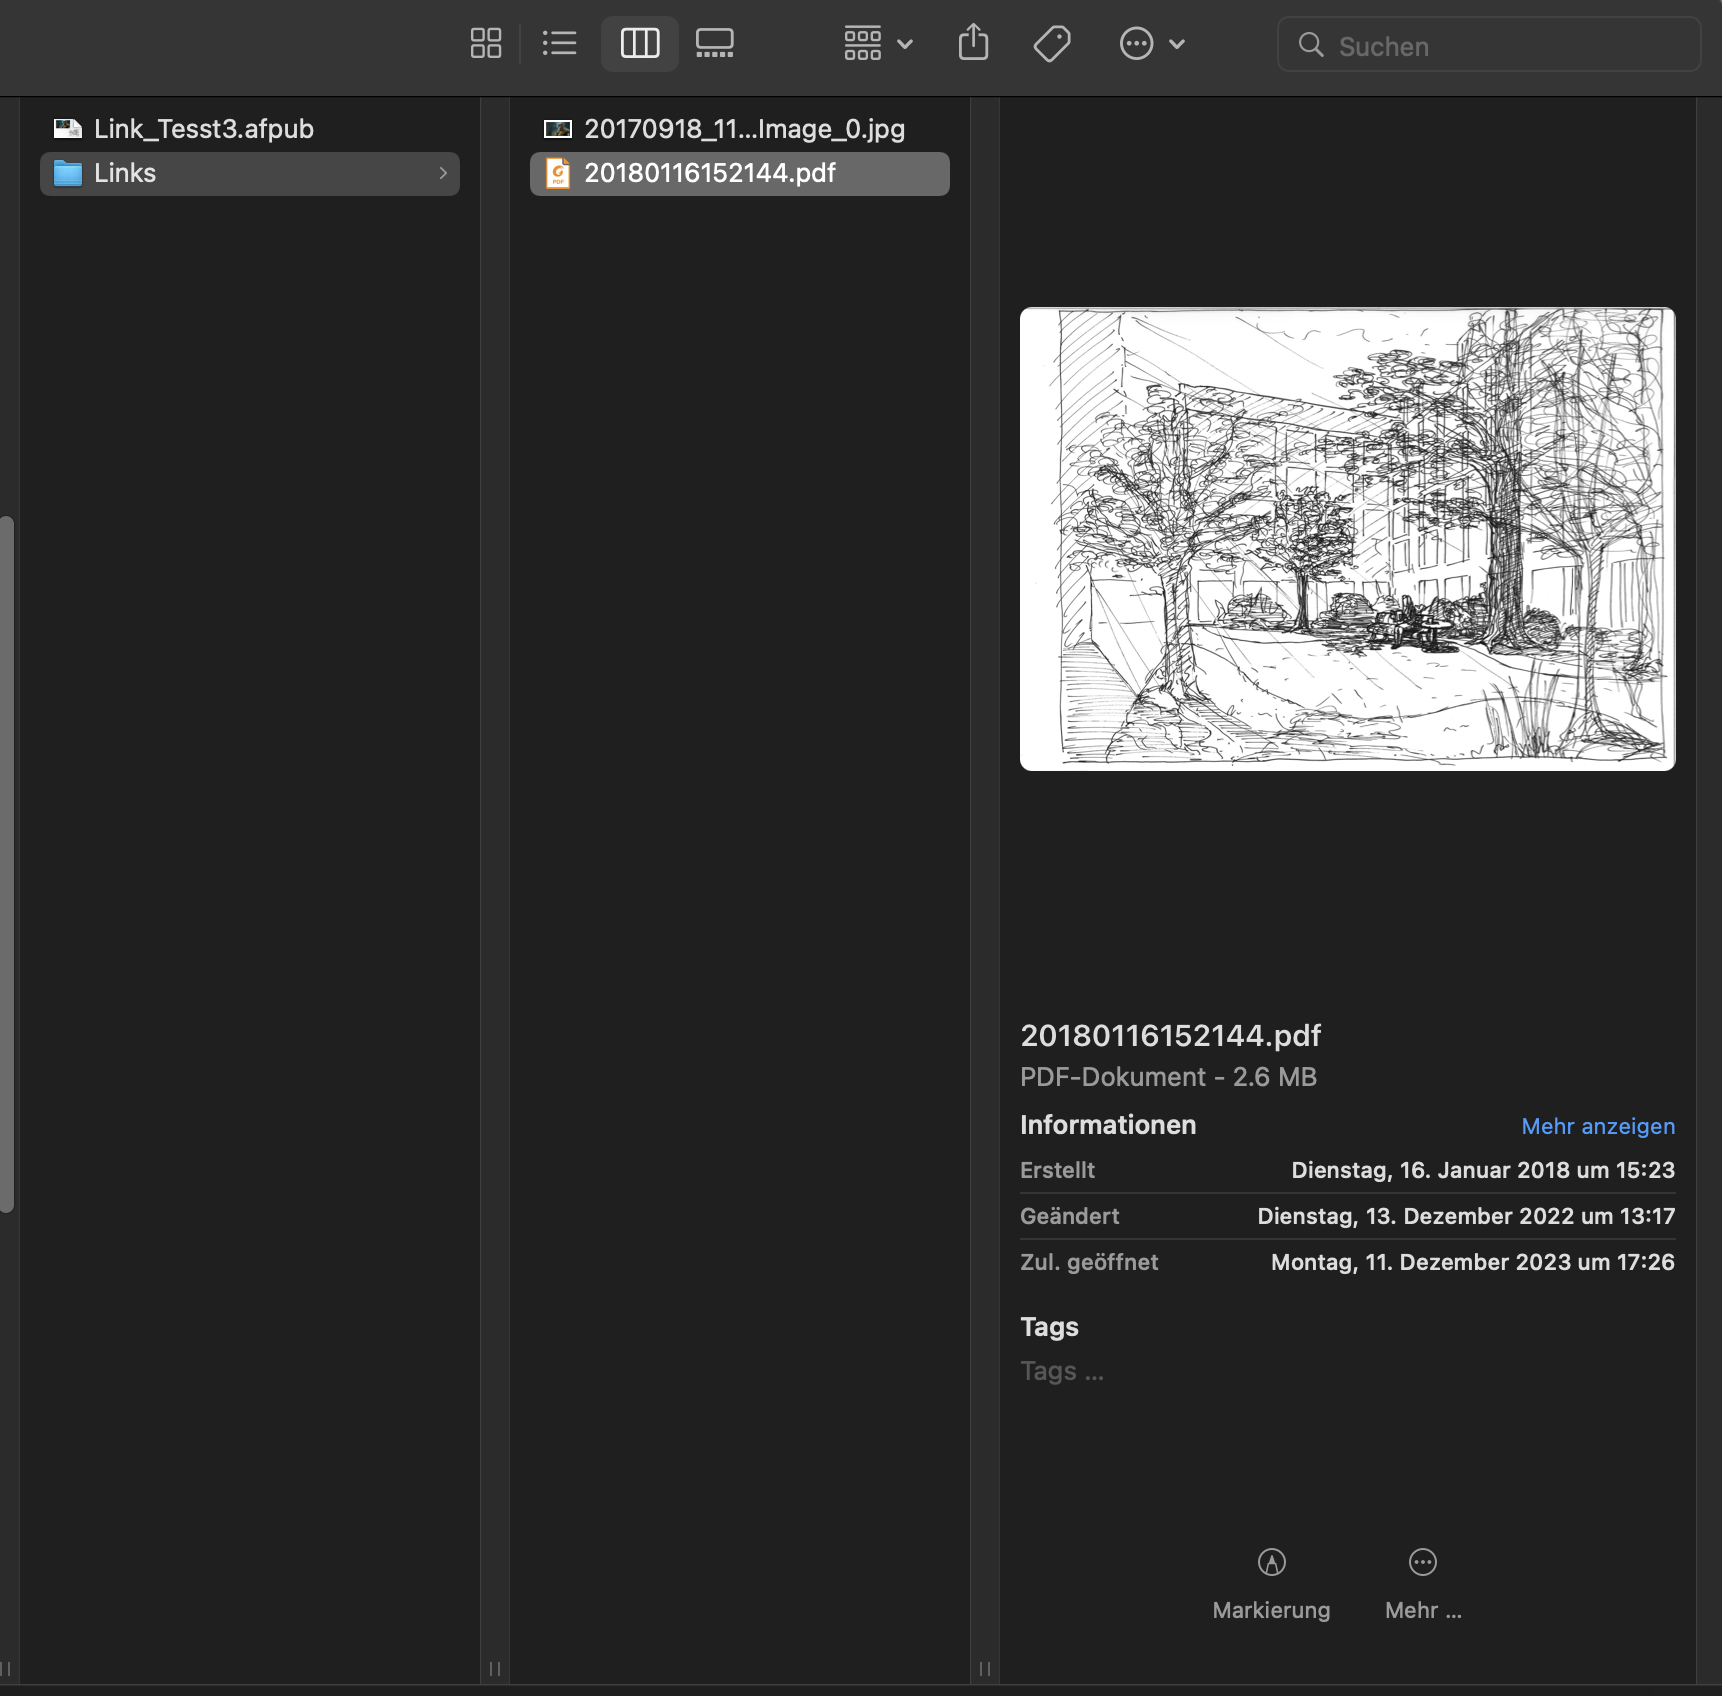
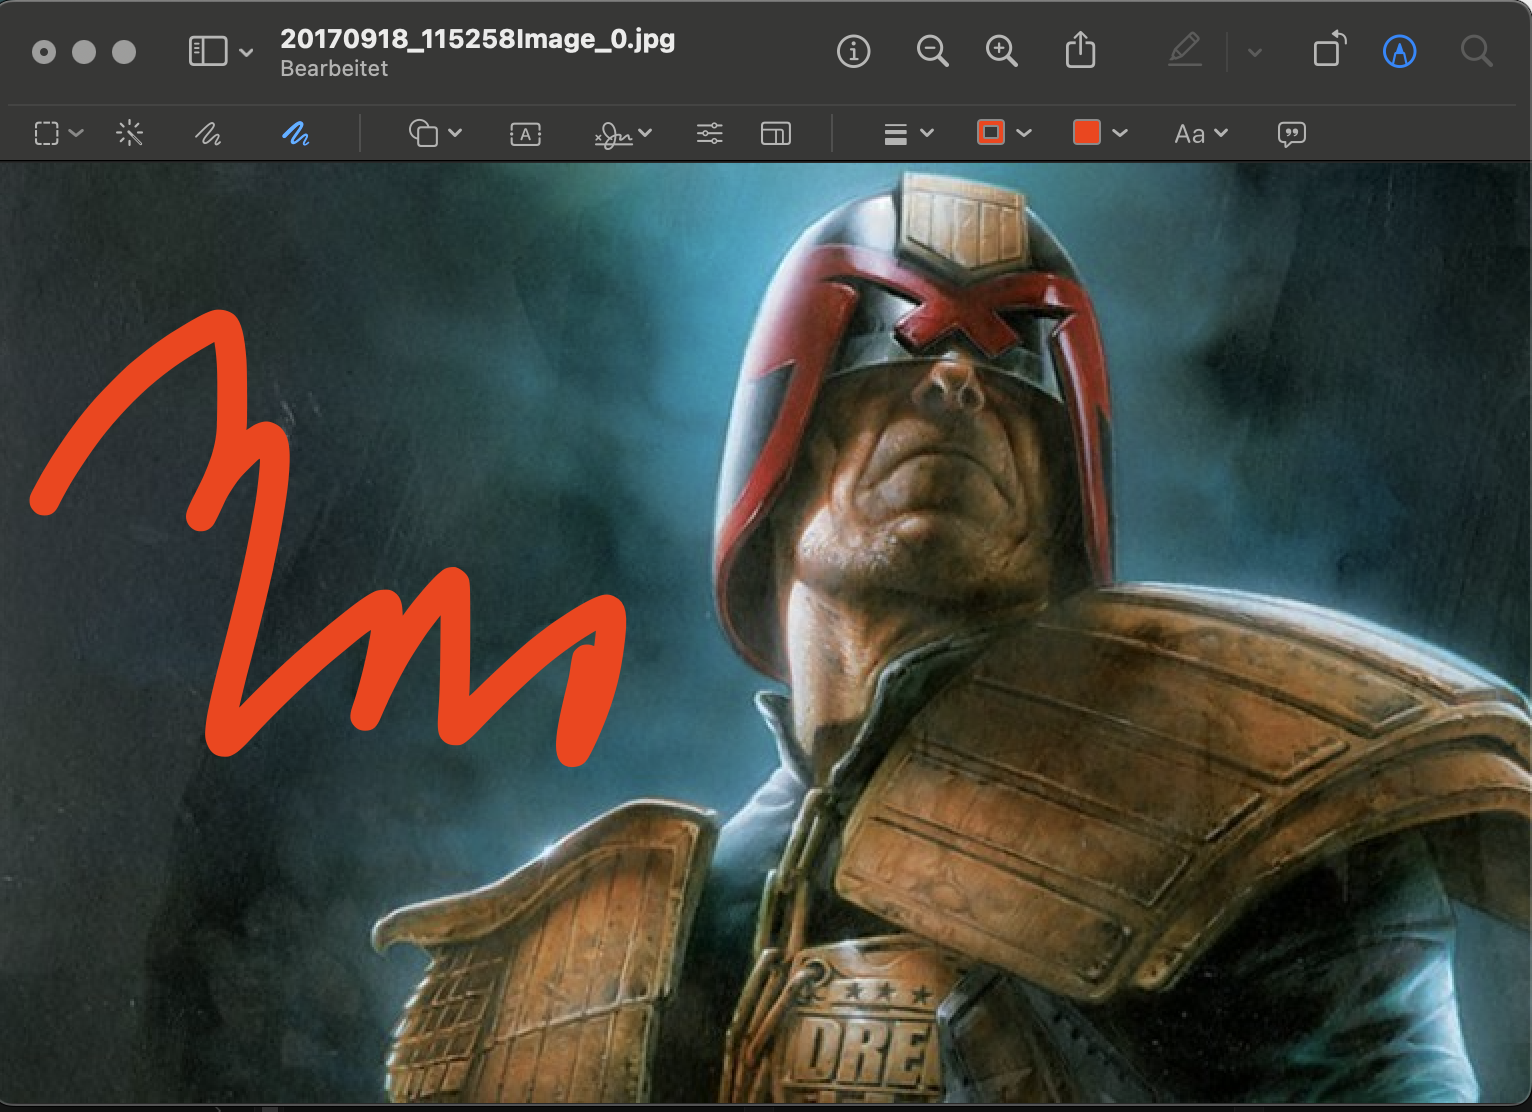
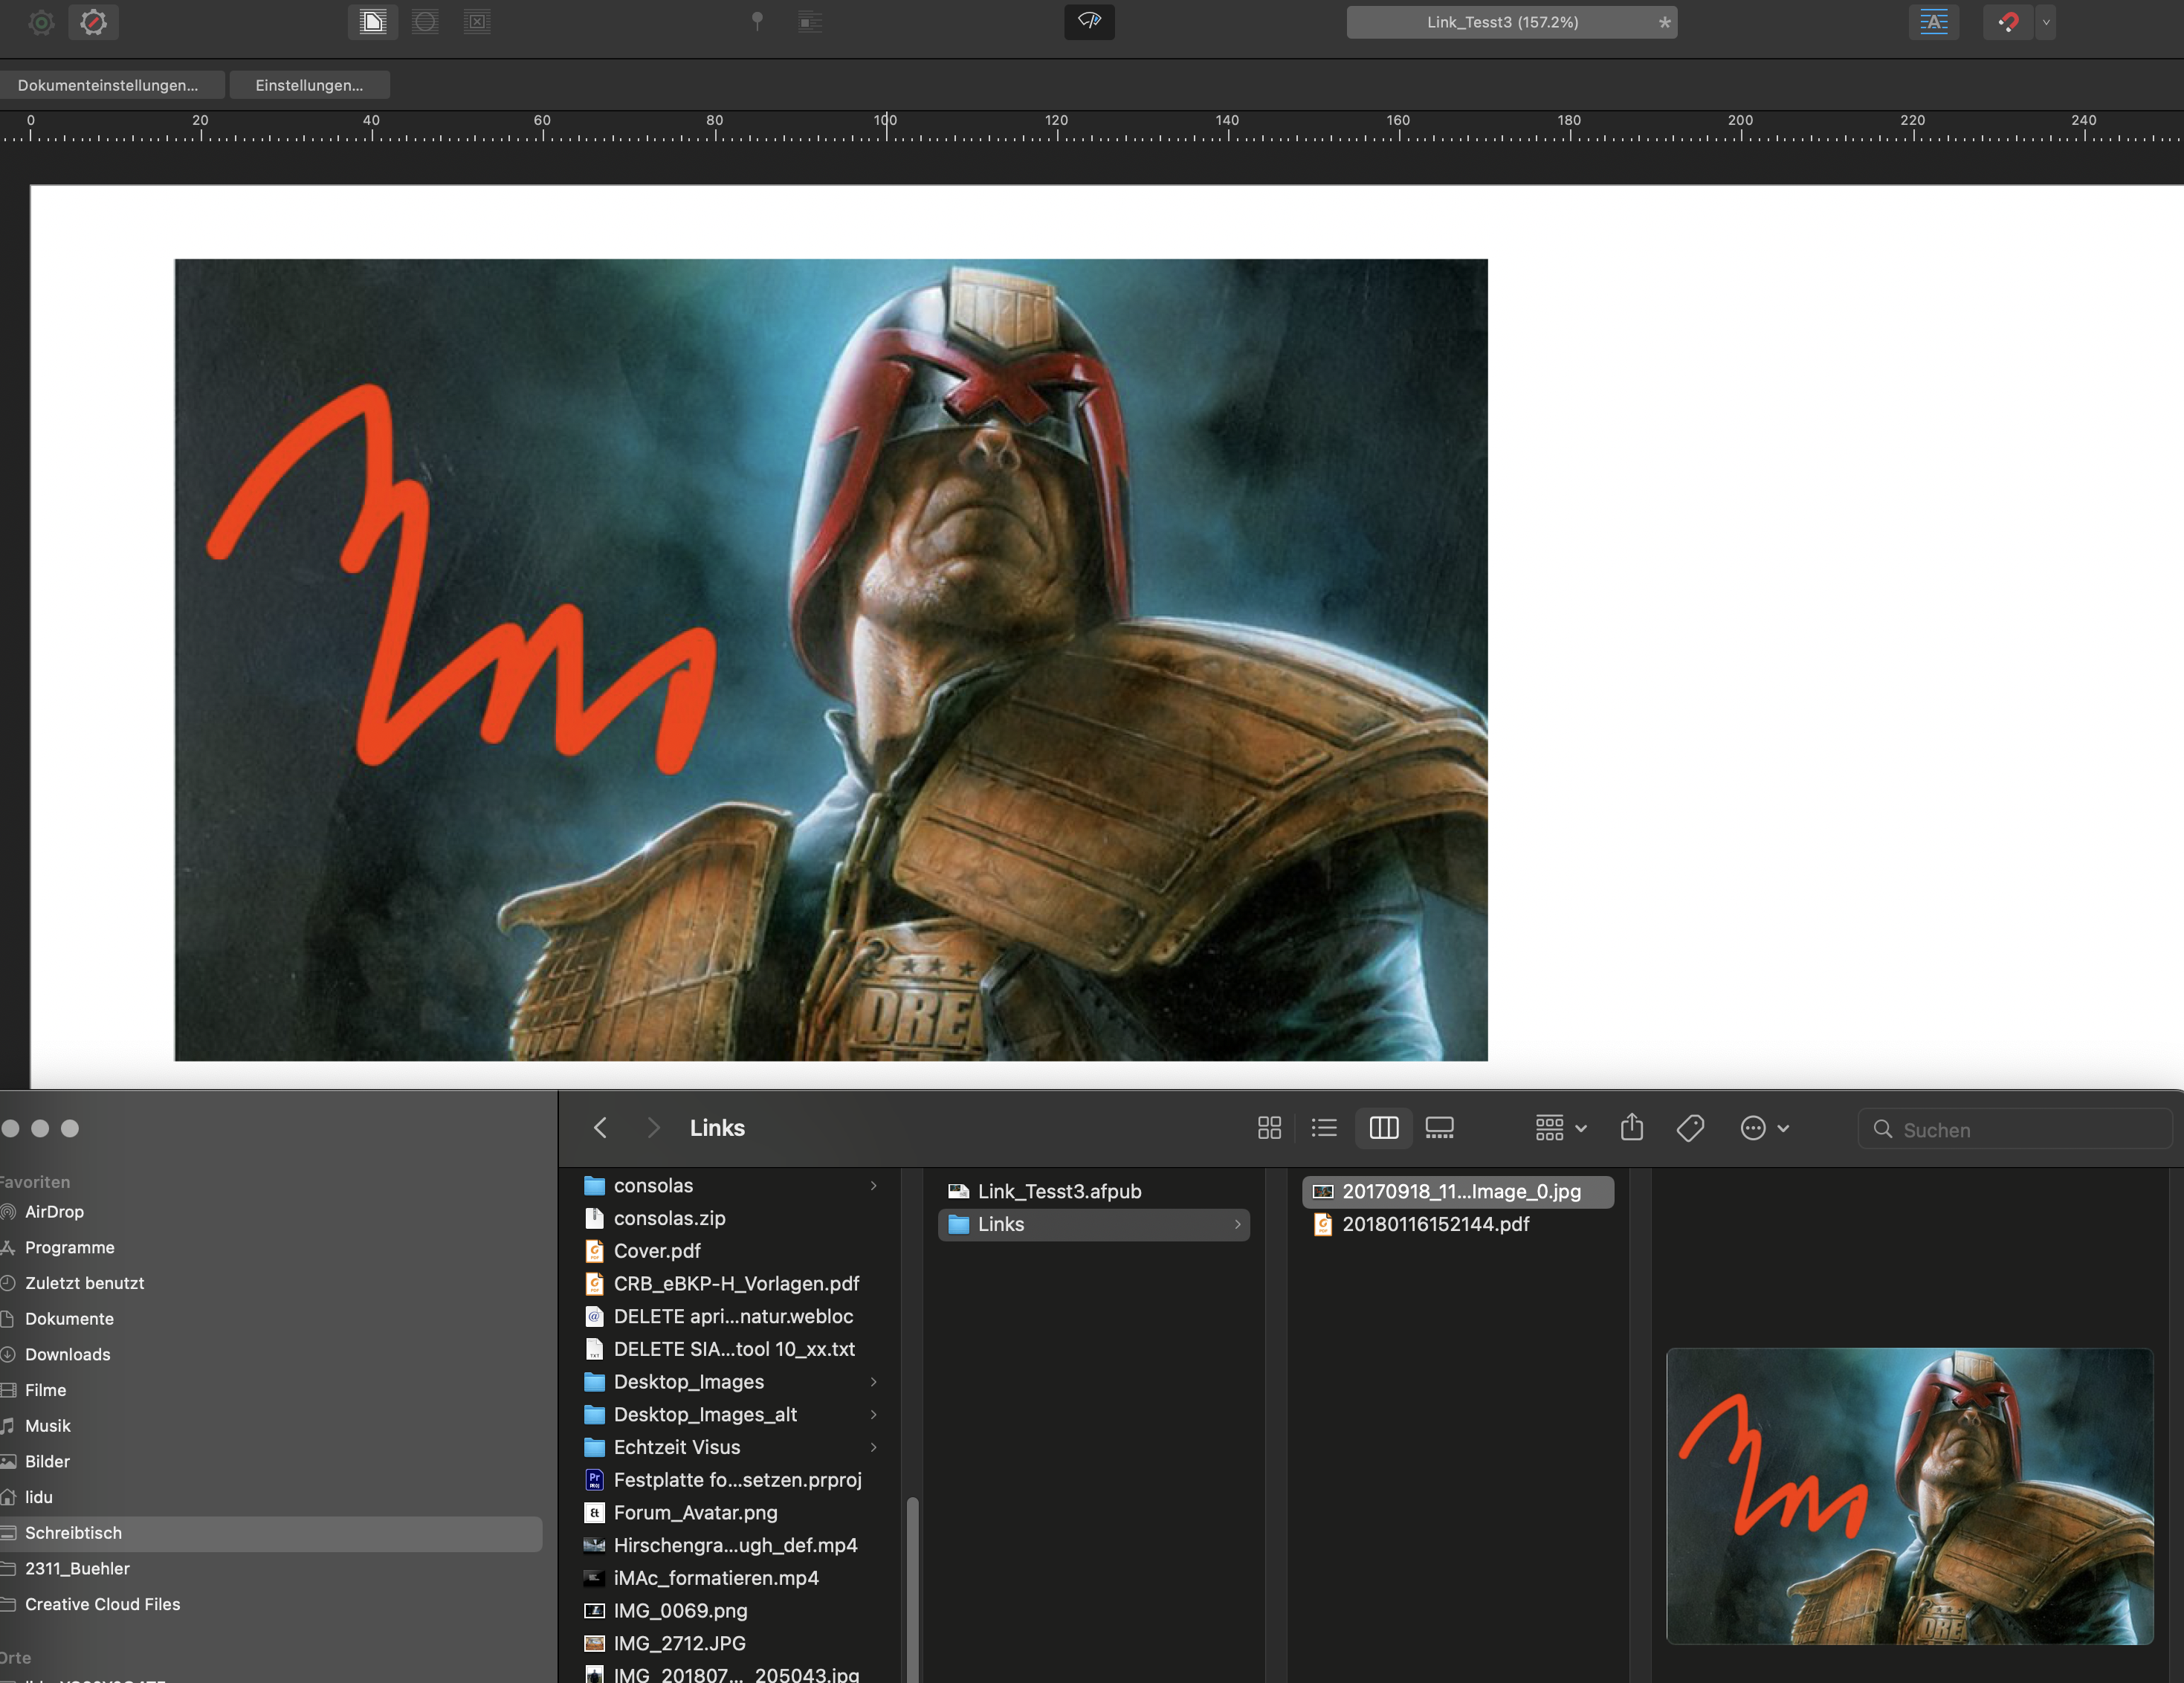
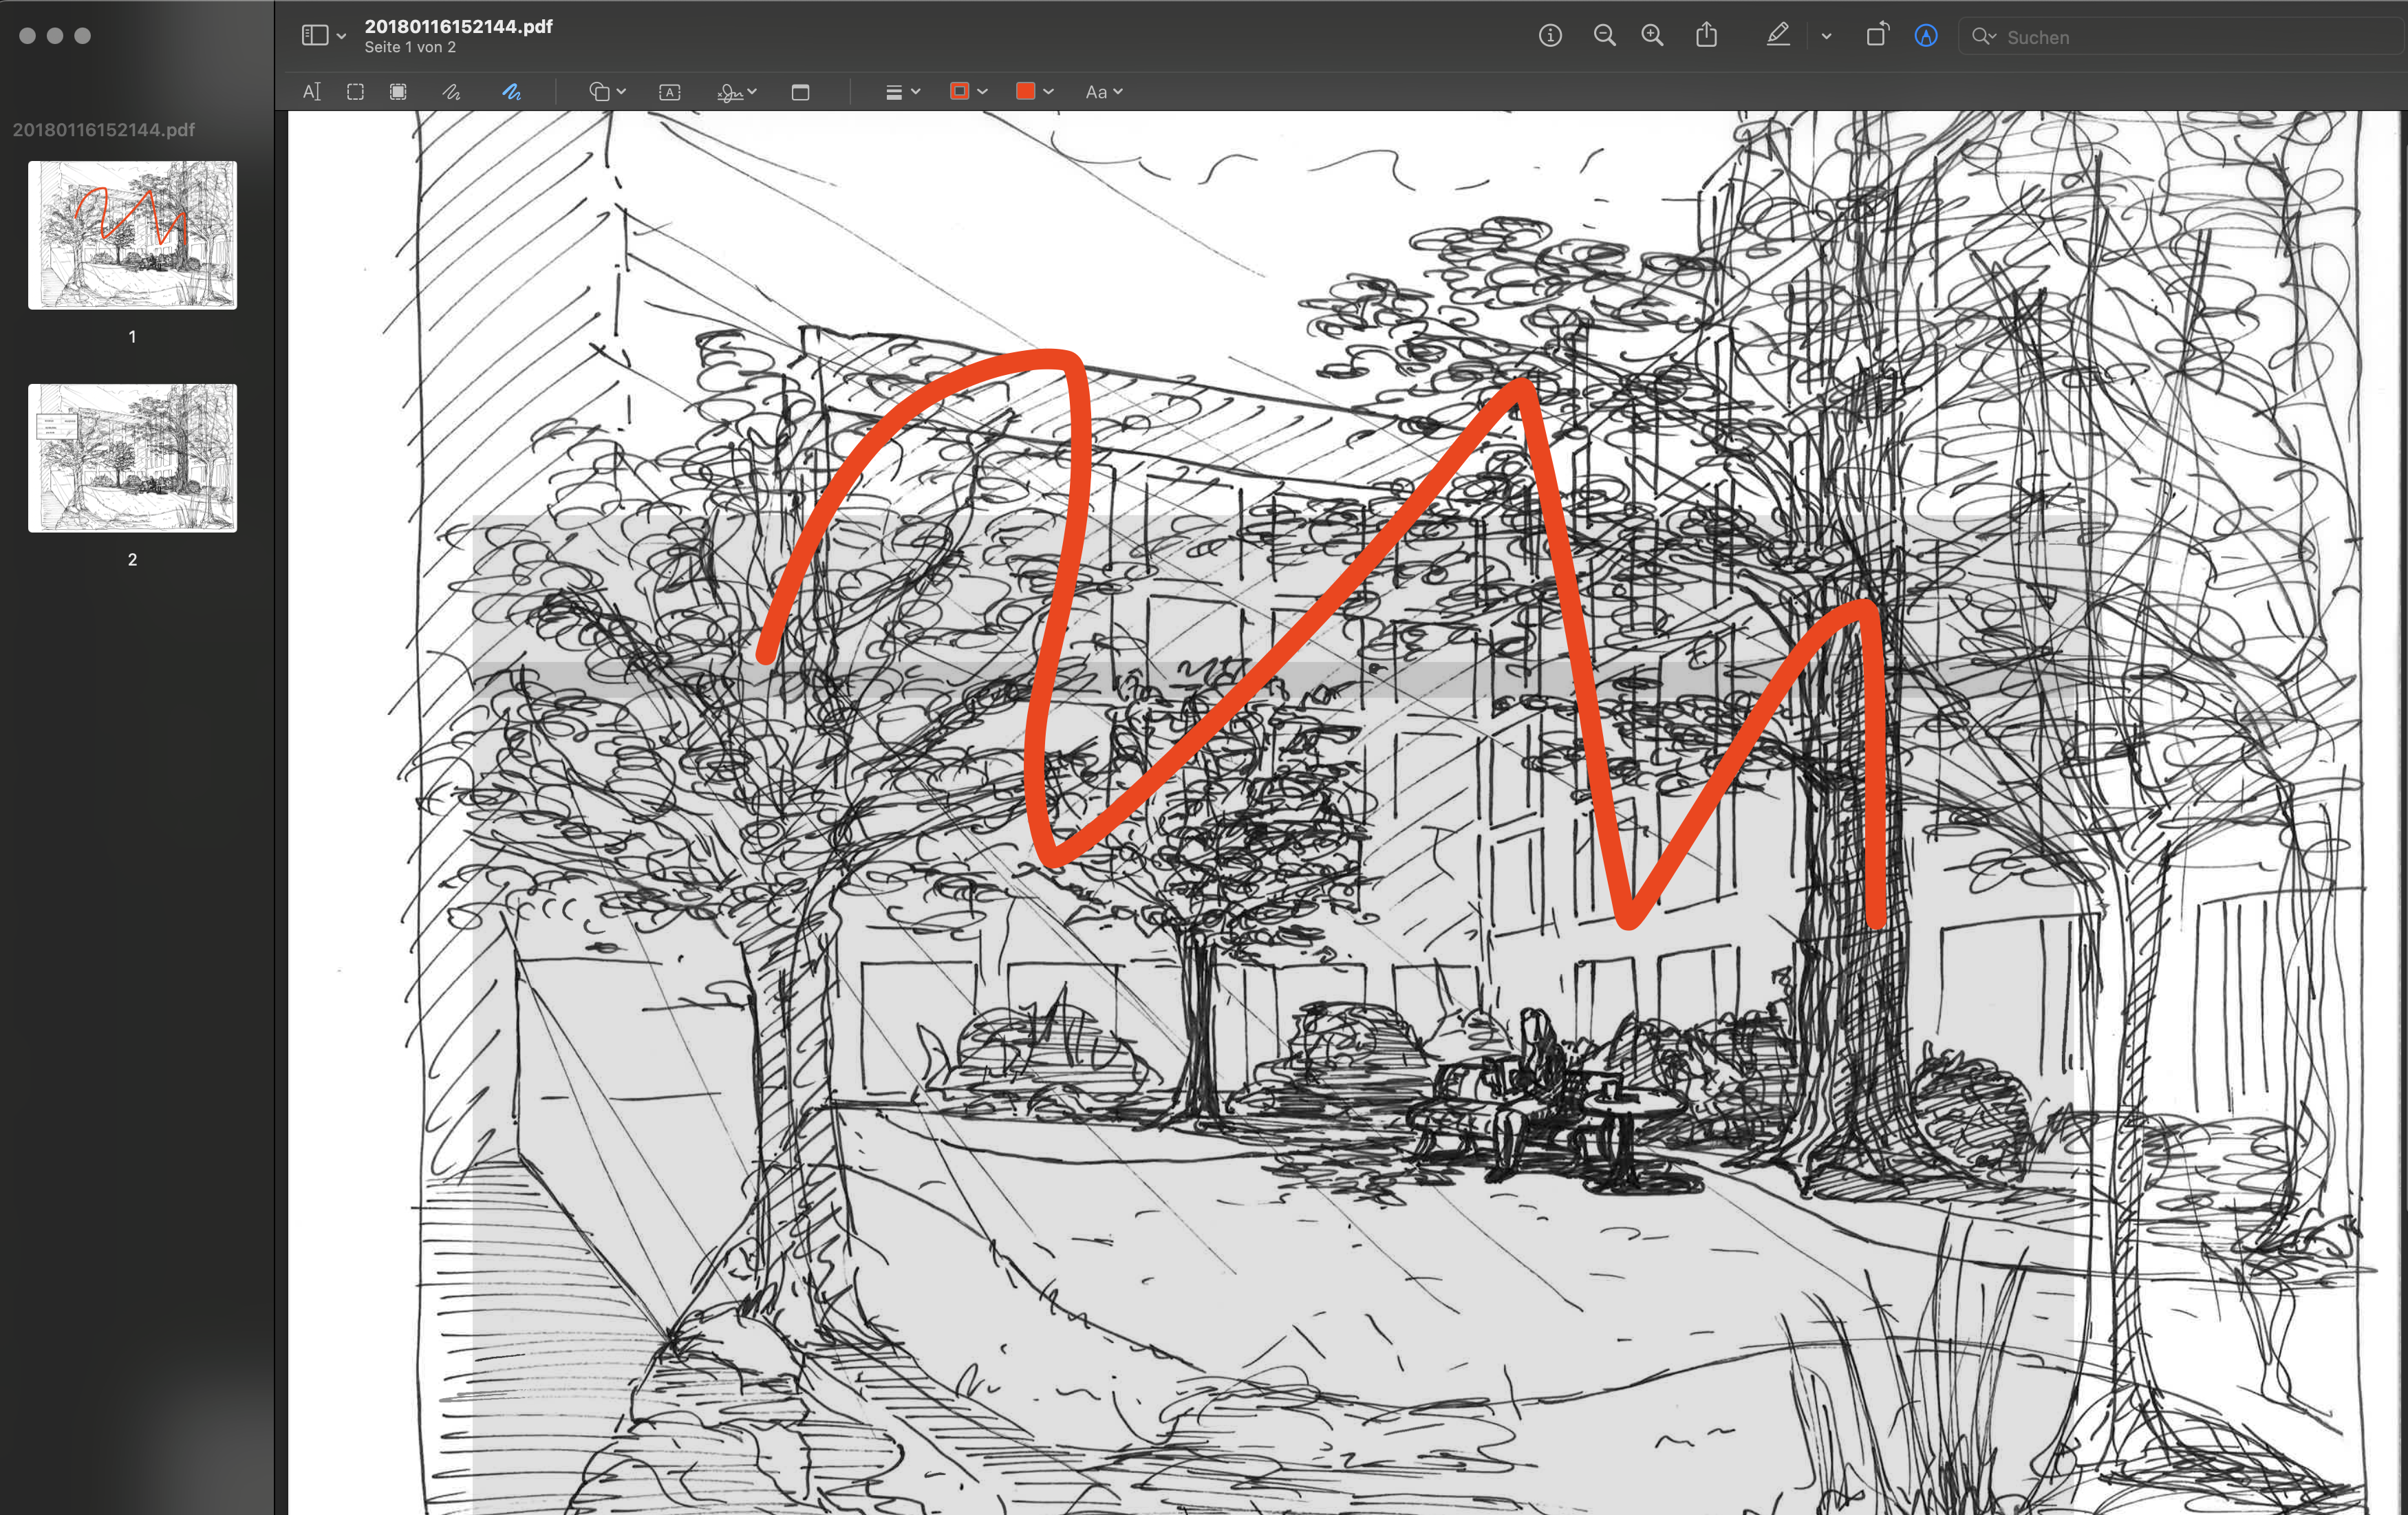
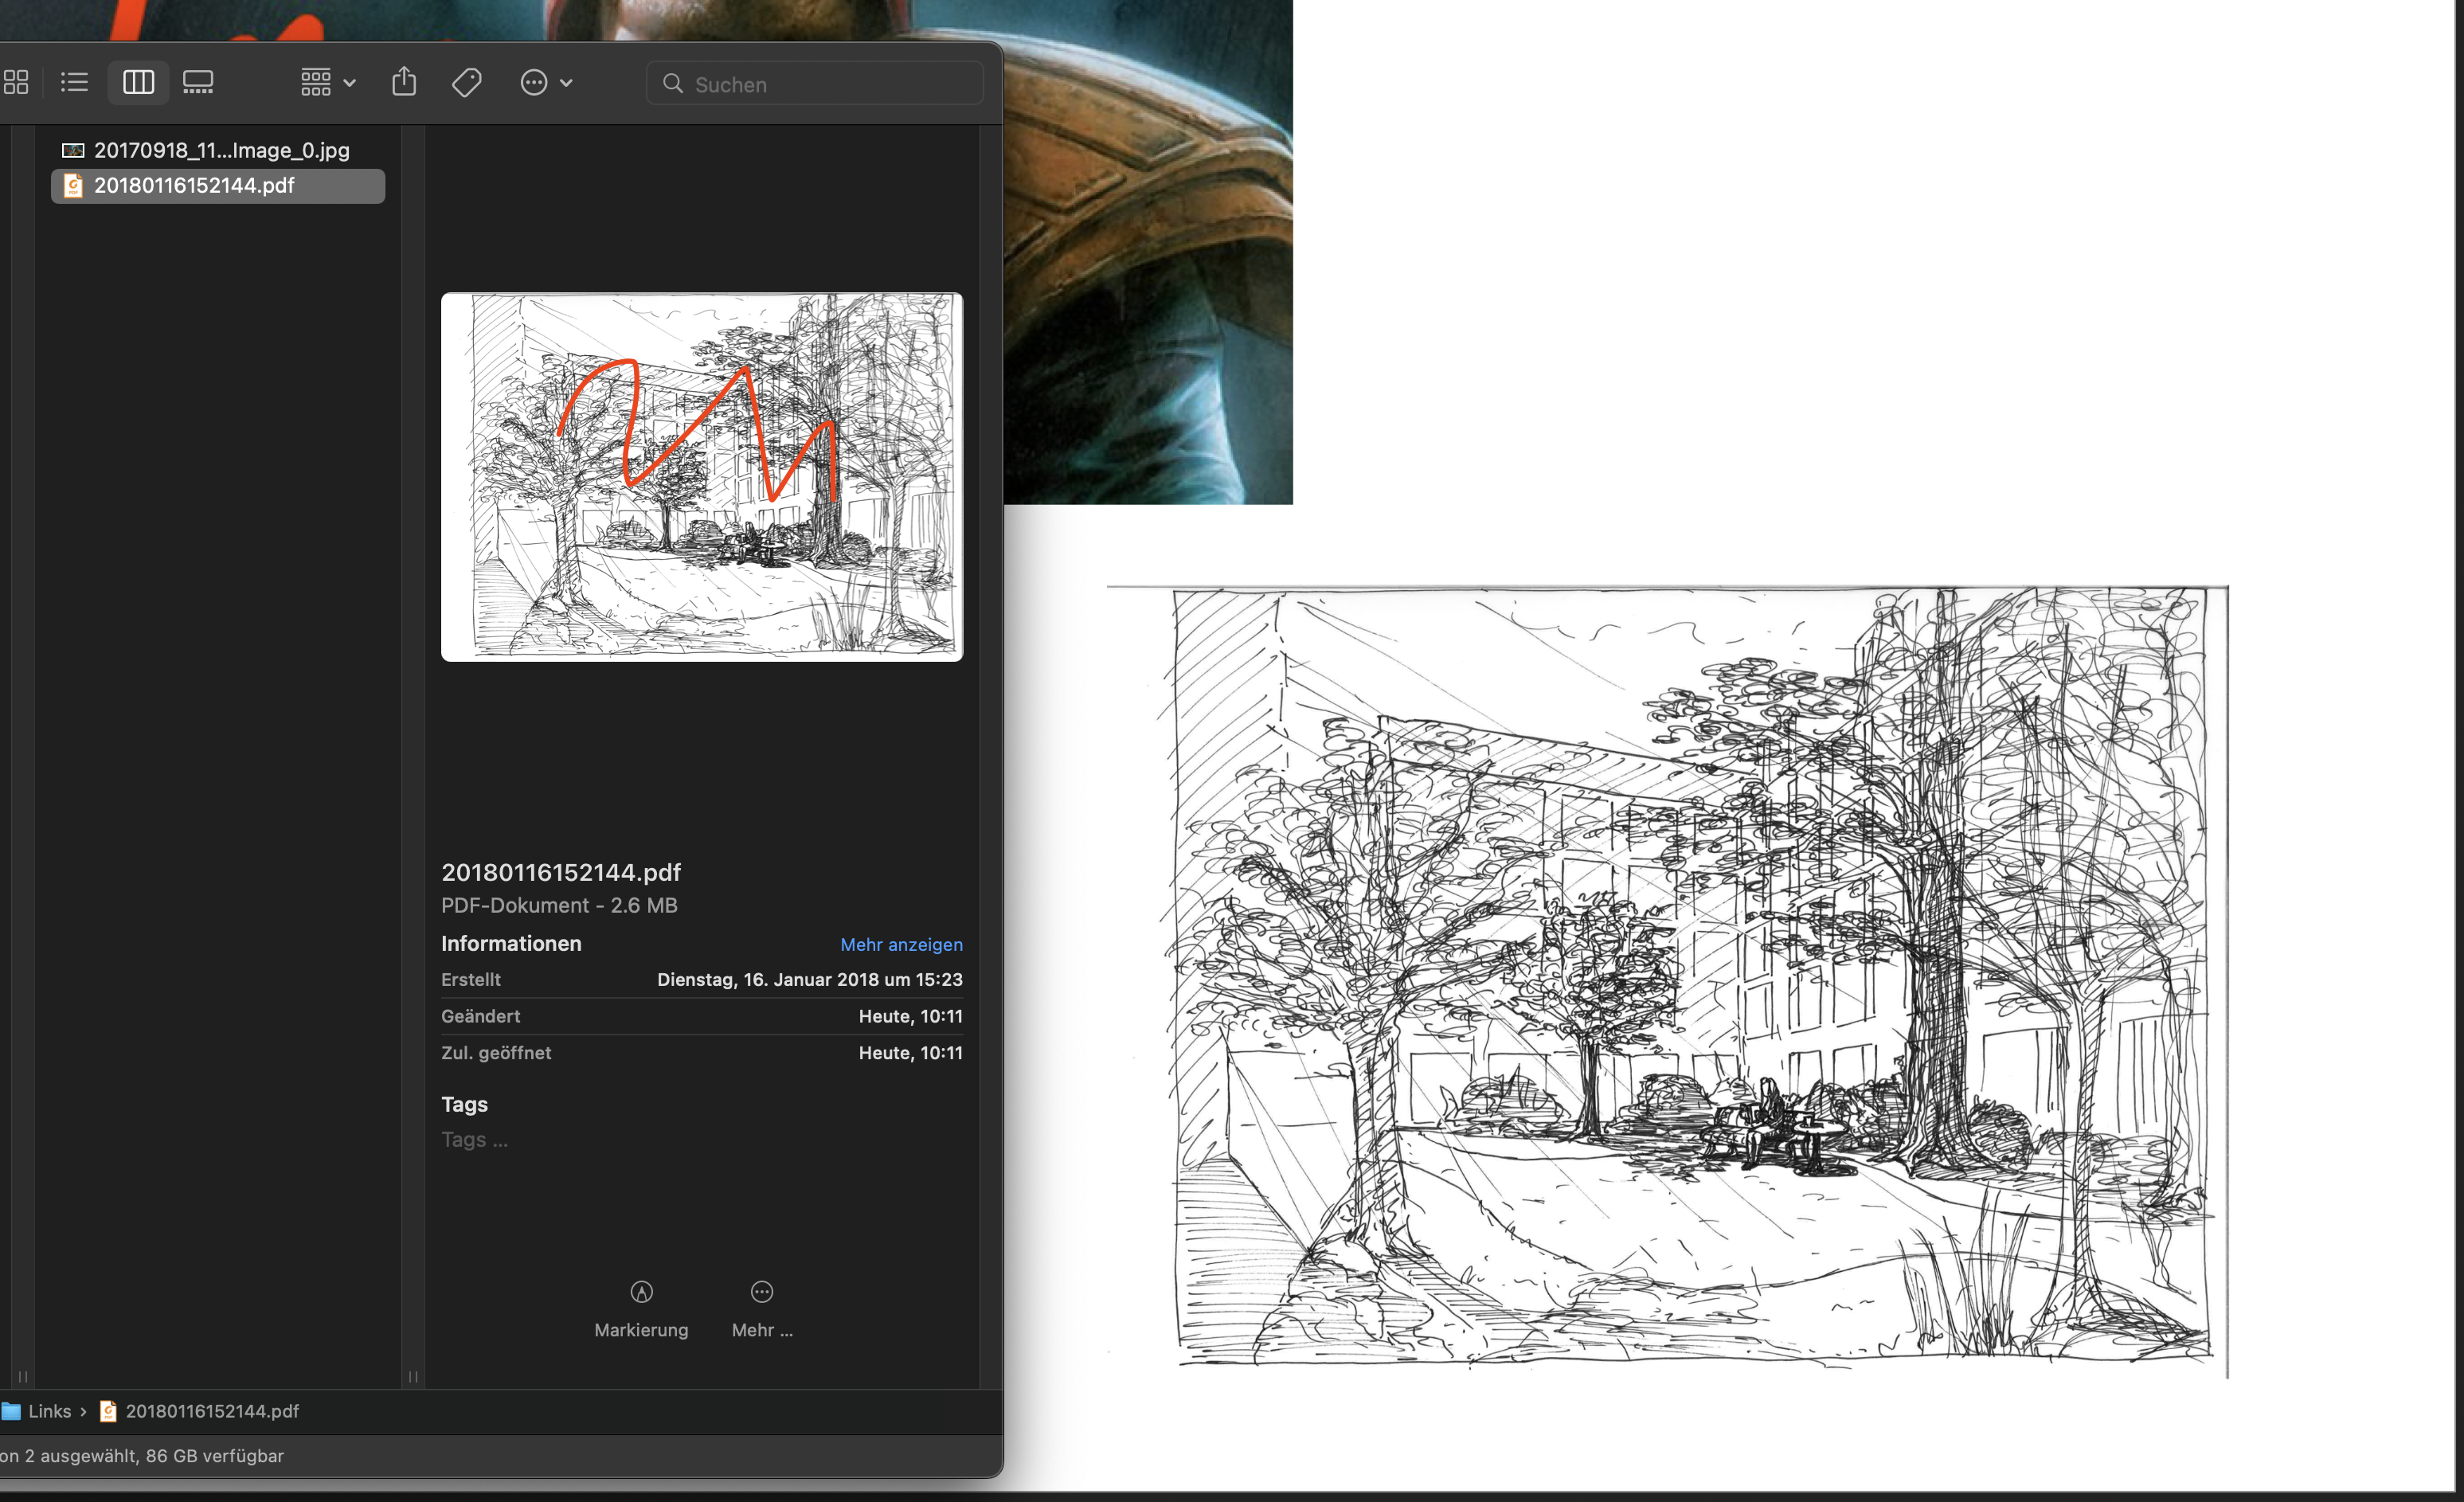
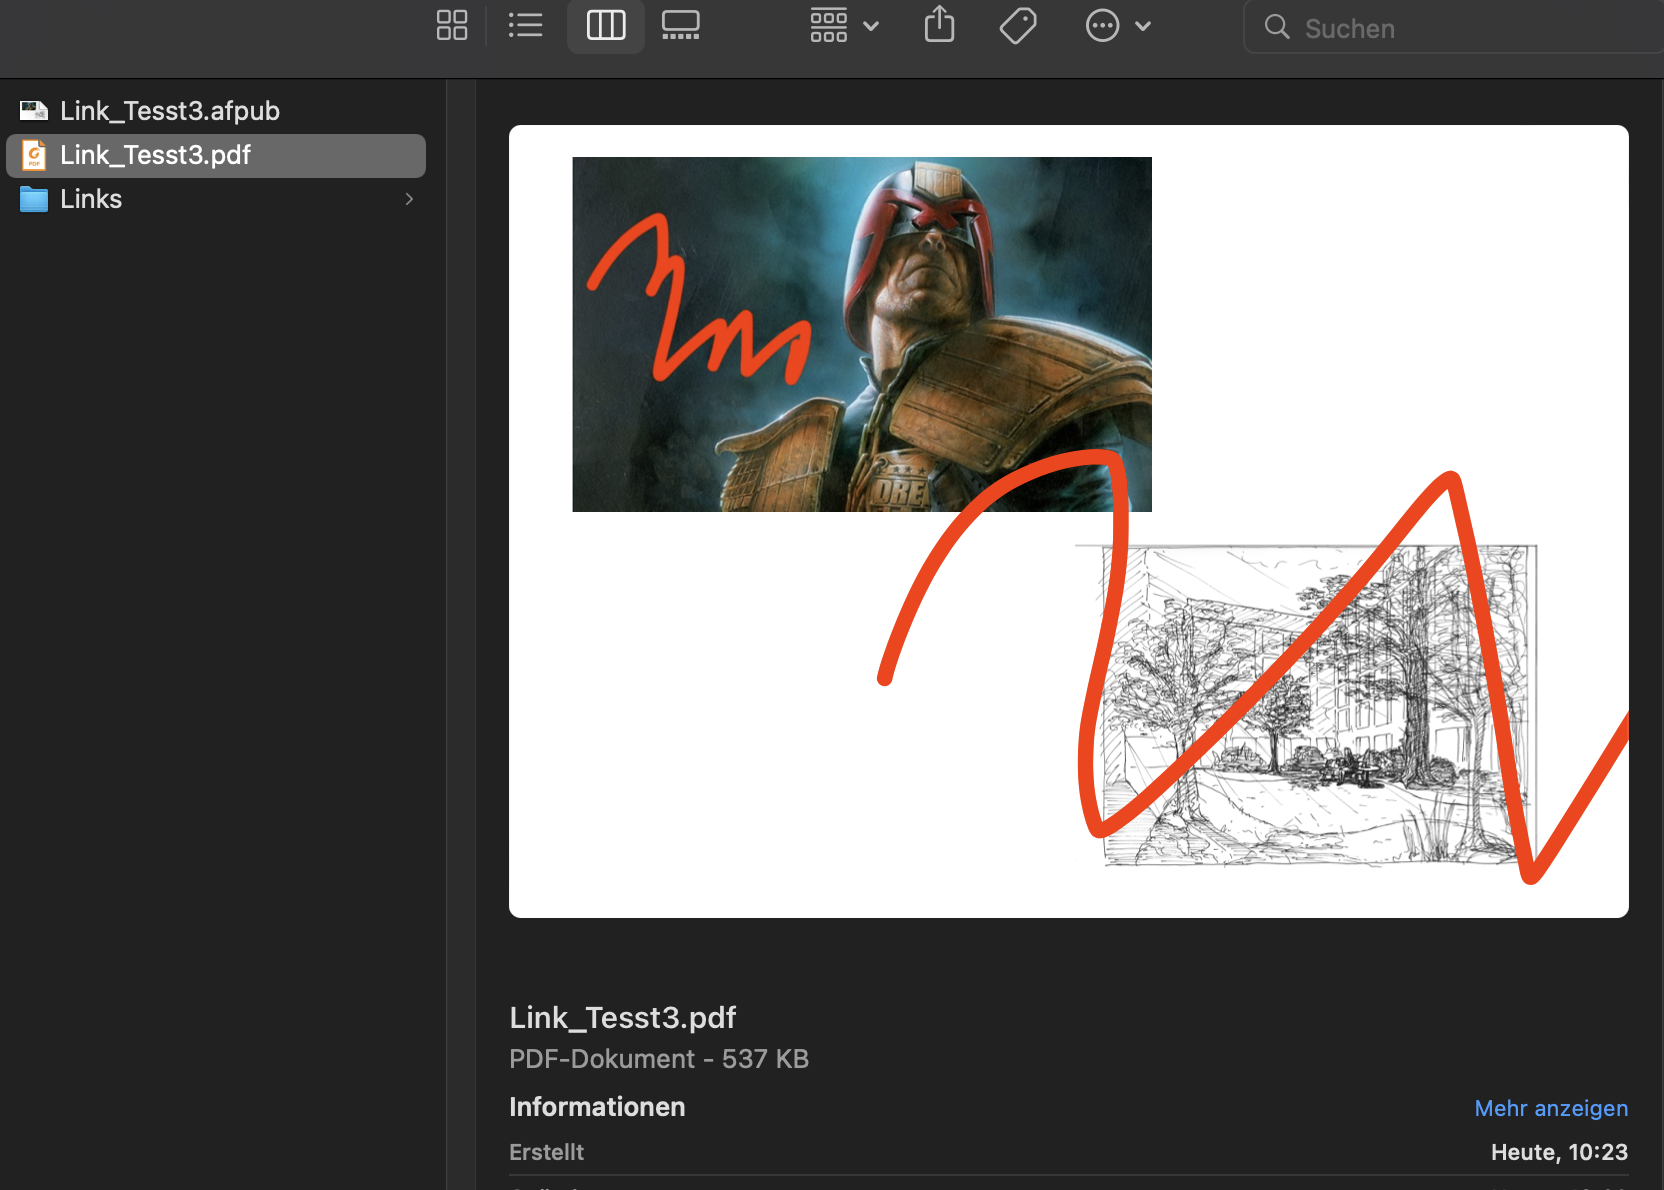
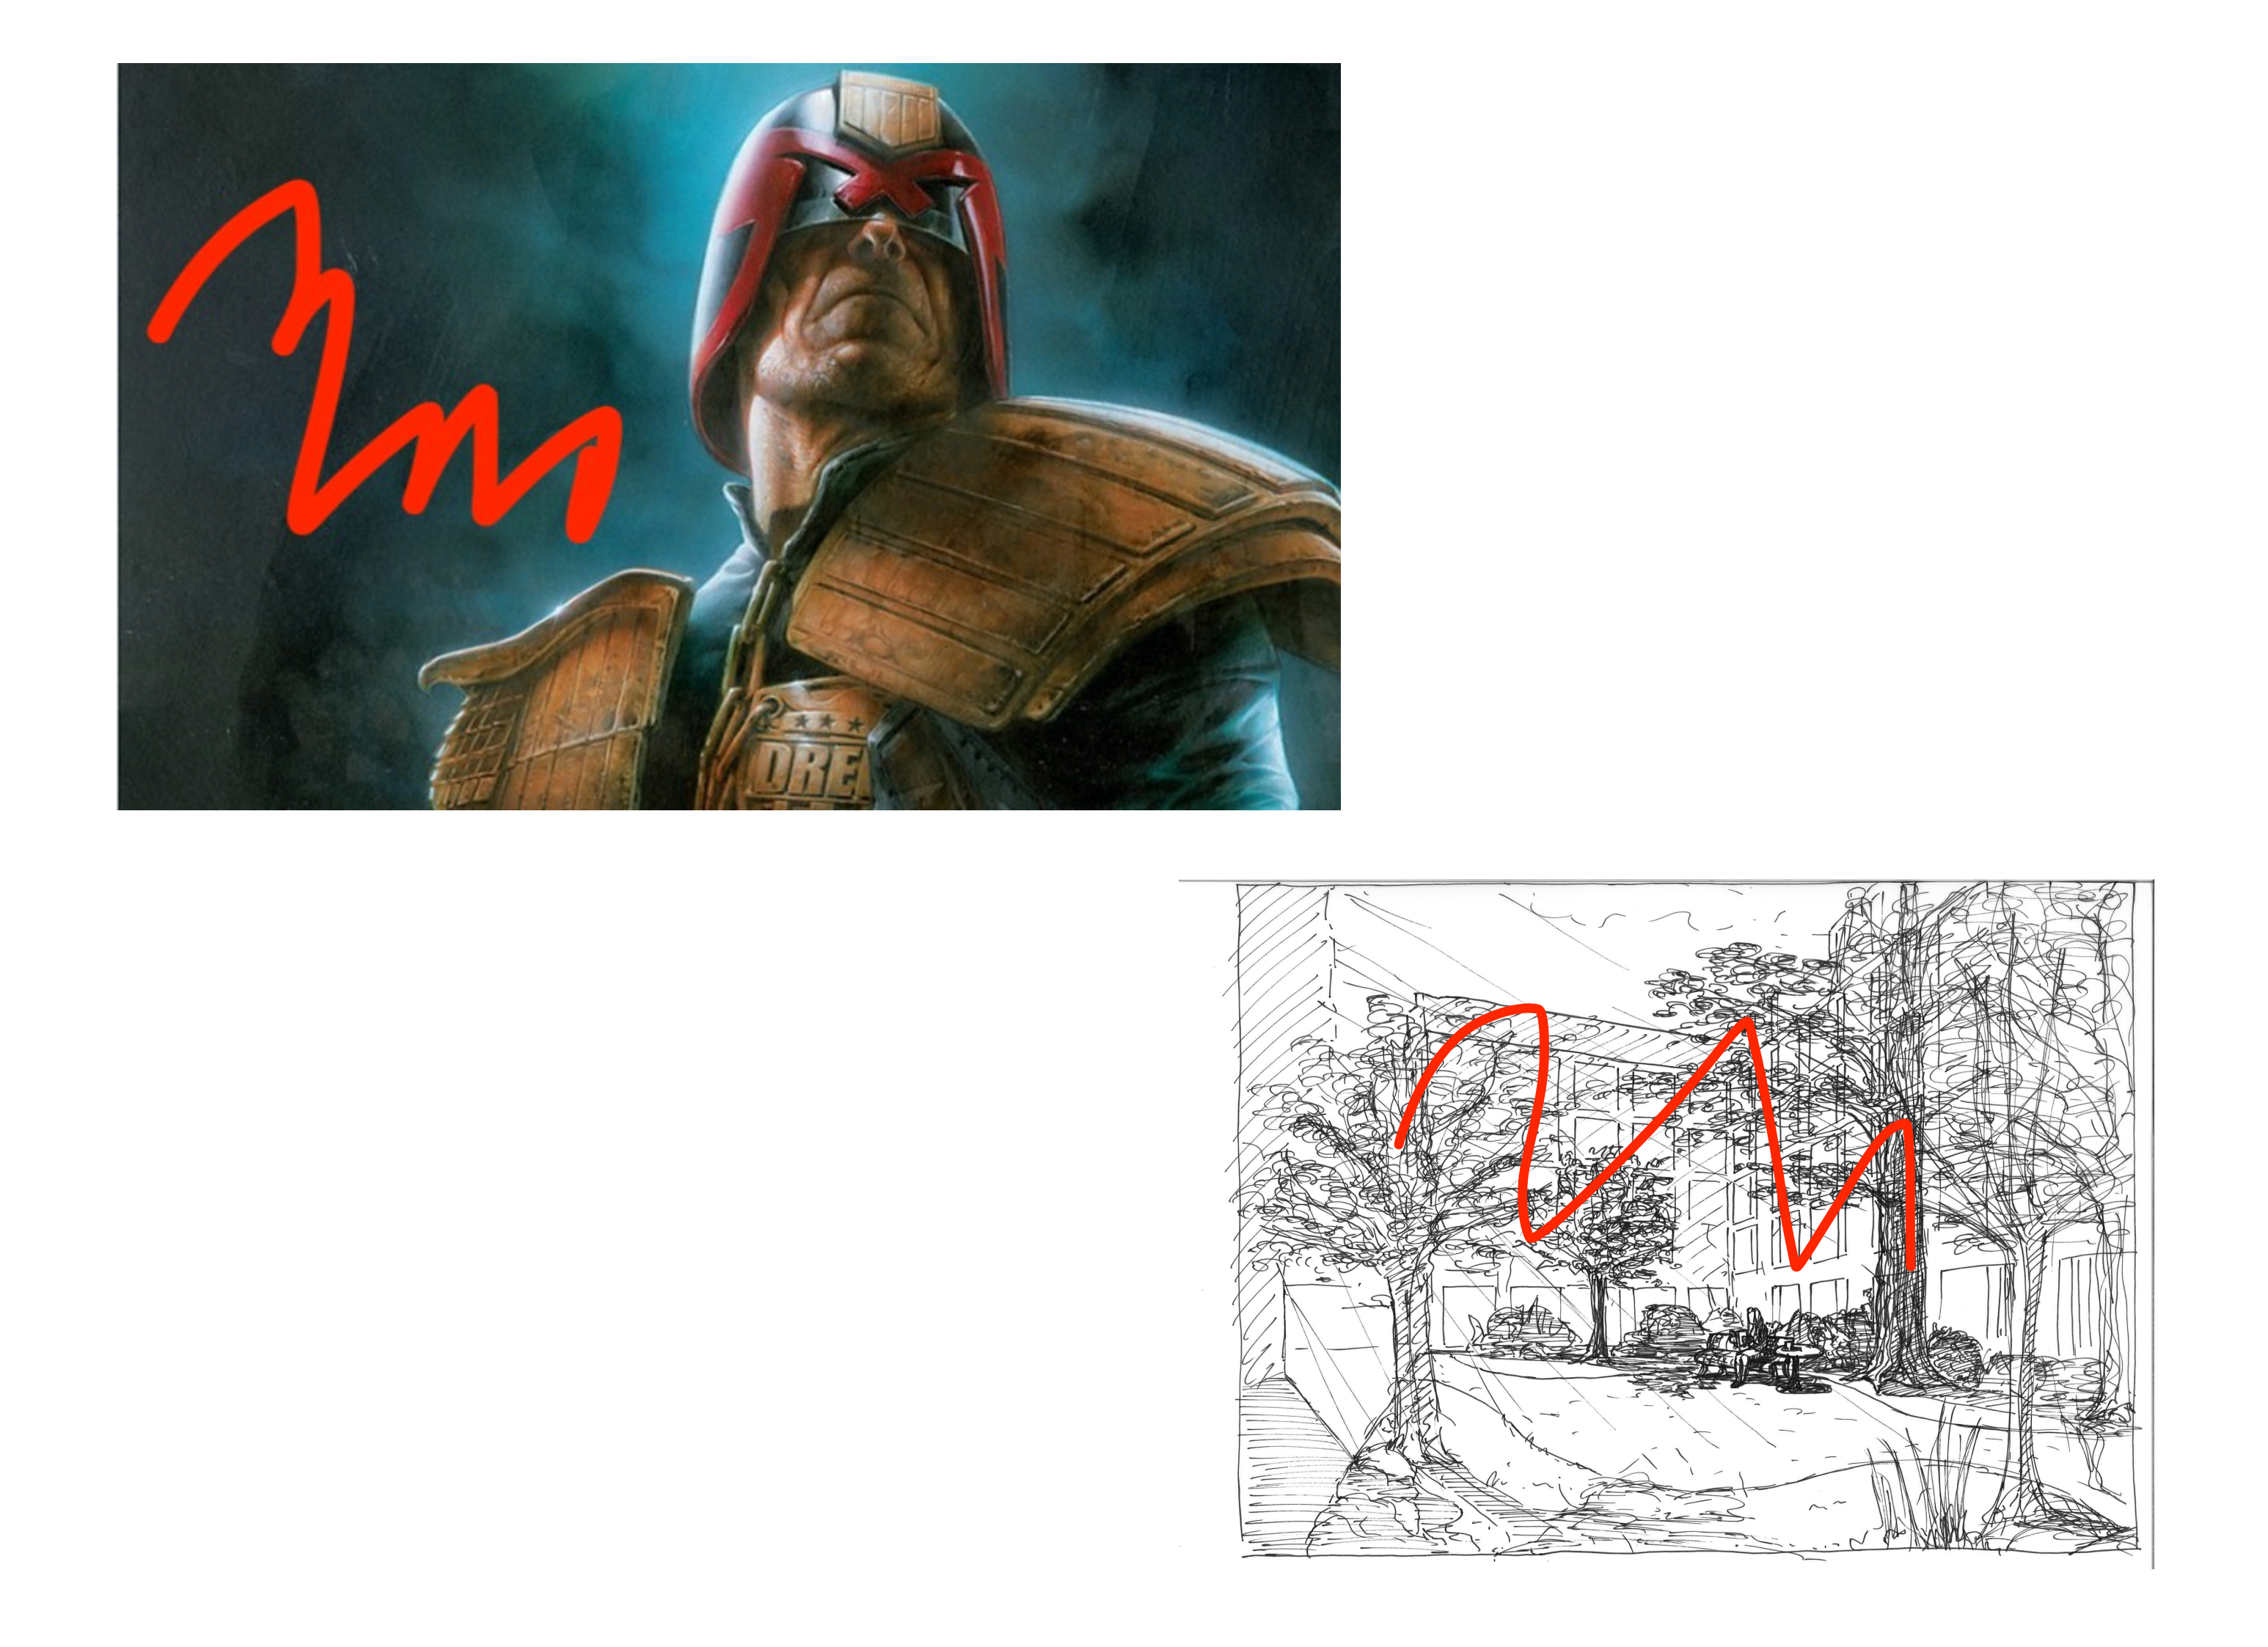
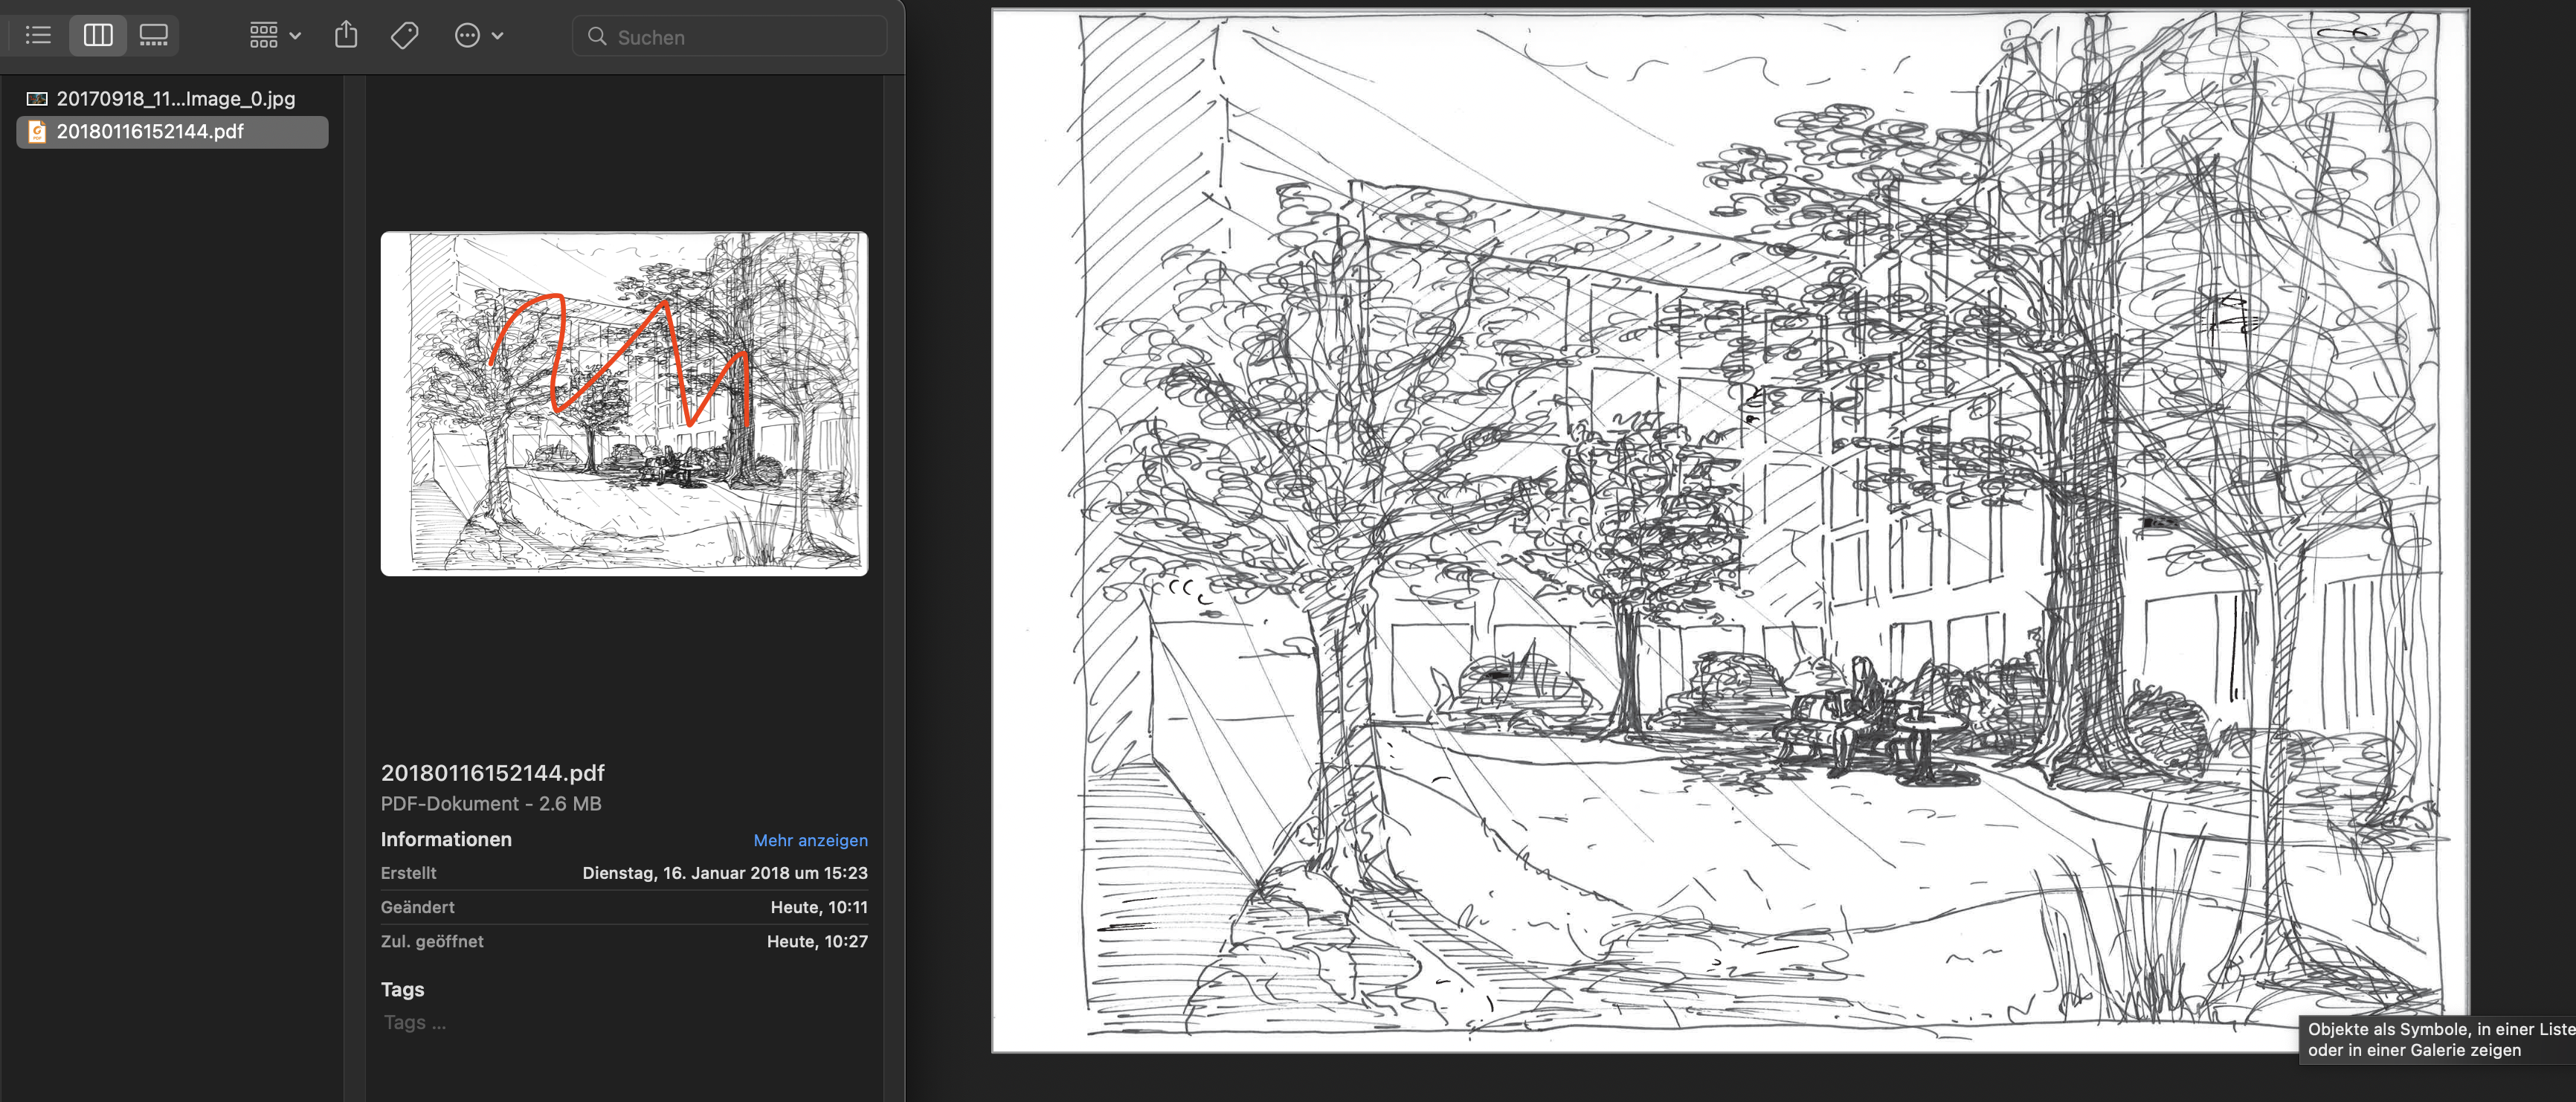
 Hello, this is what happens: - I create a local Publisher-File. - I drag/drop a .jpg and a .pdf file into it and put them on "linked" - I open the .jpg file in Preview and draw something on it and save it - Changes appear immediately in the publisher file - I do the same with the .pdf - No changes appear in the publisher file Further notes: If I export the publisher file as PDFs both changes appear in the exported pdf, however the Finder preview of said pdf looks a bit odd. If I open the changed PDF in Publisher it also does not show the changes I made in preview. It also does not work If I make changes in Adobe Reader. If I open the PDF in Publisher and change something and export it as pdf and overwrite the old one, changes are there, but the old ones are gone System: Mac OS Monterey 12.7.3, Macbook Pro M1 2021, Publisher Version 2.4 Thoughts: I think it seems to be a problem with the way these changes are made in Preview and Adobe Reader. Even worse, if I add some Text in Preview, the file becomes completely unreadable for Publisher, giving me an error. If I re-import it via drag and drop, it is there but without the Scribbles and Text.
-
 OK, here's the deal. Whenever I "place" anything created outside Affinity Publisher into Affinity Publisher, and then export the publication to PDF for CMYK printing, APub changes the CMYK values in the placed file! I have tried placing PDF files and Affinity Designer files, always the same result. I have tried every setting I can think of under preferences and PDF export that I can find. I don't want this! Why does it do this? I want to stay with APub, but this issue has me and our publishing company back with InDesign. I export to PDF from Designer, color values remain correct. I import the same file to APub, then export the page to PDF, the color values have changed! This is especially vexing with 100% black, which ALWAYS gets changed to a combination of CMYK values. My printer can't work with this. However, if I fill a square with 100% black in APub, then export to PDF, the color value remains 100% black. Argh! But, if I import a PDF or a native Designer file, then export the page to PDF from APub, I get a mix of CMYK values instead of 100% black. Argh again! This CANNOT be right. There HAS to be a simple switch fix for this. Surely SOMEBODY out there has solved this. Please help! Thank you in advance.
 -
This is a nightmare. PDF export just mangles all the text - well not all of it, just most of it. Randomly it leaves bits ok even with exactly the same font, styles, colours, weights, and the same master objects applied - you can see in the screenshots one spread in the doc is ok and one is not (most aren;t) . Some headings are ok but body text is mashed. There's no logic to this, nothing consistent about why and how it fails. Publisher came out just in time for me to start these two jobs with a hard print deadline. After 2 - 3 days of arsing about trying to fix this problem after setting 120 pages, I thought I'd finally solved this by stopping using my FontBase font manager, removing all the Montserrat font versions and reinstalling them to system fonts and trying again for the upteenth time. So I started the other doc. But it's back again. The problem is, every time I do this reinstalling fonts process, the document seems to interpret the fonts as new fonts, substituting the old, then I have to go through and set everything again. Like hundreds of Latin names in italic in the body copy I will have to go through and manually do again and again, every time it happens. And many more issues besides will need to be addressed again. This is a real problem. I see someone else has it to - I commented on that thread days back but there's no response on there. This is Windows 10 Pro, Montserrat (Google font) - marked as fully embeddable. I tried turning off the subset option on exports dozens of times and it makes no difference. It's extended this job into days more than it should have been. I really like what you're trying to do with this suite of software but please please please get this sorted - people are trying to produce pro documents for print but we're falling at the last hurdle. It's pretty crashy too but the recovery so far has been reasonably good. Plenty of other niggles with things but the PDF export thing really really needs sorting though. Please can somebody look into this urgently?
-
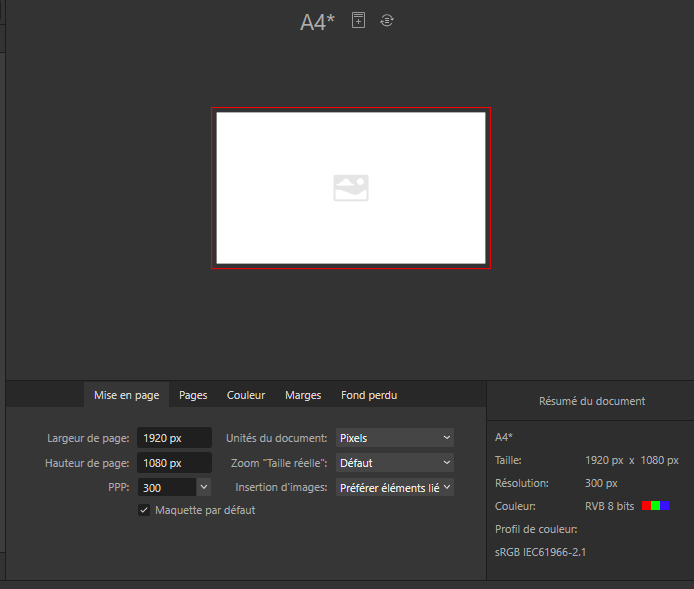
 Hello, I'm trying to make full HD PDF slides, standard 1920 × 1080 px. I create a new document, web (or A4, same thing), 300dpi, RGB, 1920×1080, so far so good. Then I do an PNG or JPG export, all good, the dimensions of the exported images are correct. Then I try a PDF export, with same resolution, 300dpi, same as the document : And when I open this pdf, it's really small, 460×260 approx. (wich seems to be (1920|1080)/300×72, orienting me on a dpi problem) So I tried to change the resolution of the document and export to 72dpi but then the pdf is huge (~2933×1633) and I can't find why. The issue are : If I define a document size in pixel, I want that the output have the same number in pixels, despite the dpi seting. Dpi are for the physical world, and must not be taken in account when setting a document size in pixels How can I export a pdf from Publisher with a precise and predictible size in pixels? How to reproduce : Create a document, any size, any dpi (e.g. 300) Export it in PDF, open it and set the zoom tu true size in acrobat and see that it's not the same size as your Publisher document. Other test : When I export a 100×100 @100dpi document and export it, the pdf export is ~110px, and when I open it in Publisher, the document size is 72pts (wich does not convert to 110px). Please help, I just want to export my slides 😭🤯 Find the tests documents attached. (Designer V2.4.0, Windows 11) Sans titre.pdf Sans titre.afpub
-
 Hey everyone. I need to know if there is a way to establish a page order when we export multiple artboards to a PDF. Currently, even though I set up my artboards in order, once they were exported, they actually came out in the reverse. So instead of 1 to 14, it came out 14 to 1 in page order. How can I reverse this? Is there some way to also set the order on export and is there a certain way we must lay out our multiple documents in order to get the pages right all the time? Thanks.
 -
 Sorry I'm a relative newby to Affinity Publisher, but couldn't find an answer in the FAQs... I'm working on a photo/text book and desire some photos to cross the page boundary and over into the other page of a spread. The printer requires a pdf of the book, so I was running some tests of the story so far but coming up with an issue... The preflight checks indicated a bleed hazard for those specific photos, so I tried to ignore this. When I progressed to create the PDF with "Publisher" it would stick with a continuous rotating wheel on calculating estimated size. If I ignore this and go to exporting it would then produce an error message "An error occured while exporting" . I was able to narrow this error down to only those pages with the spread images. Could anybody please advise me of how to avoid this error and successfully export a pdf file (stage by stage ideally as I have not found my way around the many, many, menus yet.) Other than that I'm loving the program....
 -
 Hi, This one is slowly getting to me now after several tries to fix it... I have a brochure with some basic pages, some text styles and a separate TOC page. So far so good. Chapter headers are a separate text frame/style apart from the text frame paragraphs. No text flow between the two. When exporting the brochure, the PDF comes out fine, and I have perfect pages and a nice page thumbnail list. But when I look in Edge at the List view for the TOC, or in Firefox at the Document Outline (same thing, different name), I see my chapter headers listed, but -also- all my text from the following text frames. So imagine a looong list, instead of just the chapter headers. I also tried to create the chapter headers as a artistic text, but with the heading textstyle attached it does the same thing in the export. I looked at my all my text styles, document and export settings, but cannot seem to find out what is causing this? I probably overlooking something very basic here. edit: oh... Win 11 and Publisher 2.3.1 MSIX Anyone has a tip or idea? cheers! Rob
 -
 Hi there at Affinity forums, I created a calender for a "remarkable" or any other device, being able to "read" pdf files with hyperlinks. I realized one or two mistakings, where I forgot to create a hyperlink to just one page (in February 29th). Without losing my already used calender I wanted to download that calender, repair it and upload it again, realizing that all already existing hyperlinks are not linked anymore - of course? - so I am asking wether there is a way to repair an already existing and fully functioning PDF or not? Thanks in advance and Kind regards, Uwe 2024-clock-MY-VERSION.pdf
 -
 I tried to do the following: Create a 2-page document 90x50mm Create 2 master pages, on each page place one PDF page to serve as the static content, apply them to respective regular pages. PDF file size is 2.5MB Create a single text field on one of the pages, link it to a data field from a spreadsheet, this will be the only dynamic content present, 2000 records total Data merge -> create merged document, goes fast enough, under 10 seconds Export as PDF -> the export process didn't even move past 25% after 5 minutes. This is completely insane, as the only variable element is a single text field, it should be done in seconds. It also eats enormous amounts of disk space, dozens of gigabytes. At around 33% I ran out of disk space, and the job processing was cancelled with an error. PersonaBackstore.dat was 34 GB at the time the disk ran out of space. Seems like its trying to re-print the background from the linked PDF for every single record, rather than once. _____________________ I did the exact same steps in Adobe IdDesign CS5, and export to PDF for all 2000 records took 15 seconds. No additional disk space was consumed, barely any RAM was used. Same export settings. Didn't need to create the merged file too, export directly to PDF.
 -
I have produced a pdf version of the Affinity Photo manual that you can read without starting the program. It can be interesting to put it on your phone or tablet to read when you have some time to spare. Since the file is too big to upload here, I have put it on Dropbox for you to download. It is current for the last version of Affinity Photo. Comments welcomed. Here is the link: https://dropbox.com/s/d3uxmmypdx9ruzw/Affinity%20Photo%20Manual.pdf?dl=0
- 186 replies
-
- 119
-
-

-

-
 I've received a PDF document and imported into Publisher to make some changes. The PDF was exported from InDesign as spreads, so on import each spread is a single page. Is there a way to split the spreads so they consist of two pages each, as they would in an original Pub document?


.png.6a98bd85c15228f10f36e049589eb72a.png)
.png.2c160ff93c1fec1746d9ad78495888f4.png)