Search the Community
Showing results for tags 'flood fill'.
Found 18 results
-
Is there a way to set a keyboard shortcut for the flood fill tool? likewise for the Freeform selection lasso. am really missing these. otherwise great app! Enjoying getting my head around it.
-
 When I press Esc after clicking on an area to fill, the dialog with the progress bar disappears. Usually, I would do this if the computation isn't instantaneous, which indicates there's a slight gap. In that case, the Flood fill should be cancelled/ undone as well. However, this is currently not the case on Windows 22H2. In Photo 2.0.0.
 -
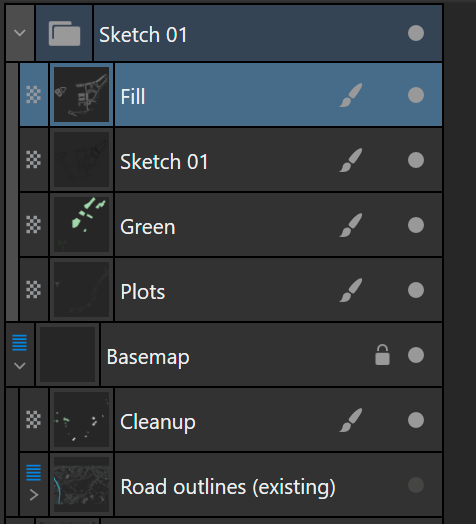
Usually, I work with multiple layers: one is a trace-over background and then I have a group with design layers (line-work, fills and some other miscellaneous pixel layers). Something like this: I would like to have a 4th option in the Flood fill tool, which is: below, only within current layer/ group. This ensures that my trace-over layer will be discarded when filling, because it is outside of the design layer that I work in.

-
It would be nice to have gap detection in the flood fill tool. Ideally, you would be able to fill areas that have gaps below a certain, user specifiable threshold.
-
- 1
-

-
- affinity photo
- flood fill tool
- (and 3 more)
-
 In Affinity Photo you can use the alt key with the brush tool to temporarily bring up the color picker. There needs to be a similar hotkey that can bring up the color picker while using the flood fill tool. I’m a professional cartoonists, and laying flat colors underneath a layer of black line art is a crucial part of my job. The way that the Flood Fill tool and the Freehand selection tool preform will have a direct impact on weather comic artists buy your program or not. Please consider sitting down with some comic artists and hearing their needs. We want to buy this program.
 -
 I'm trying to fill a line drawing. I have one layer on top, my line drawing set to multiply. My colour layer below. I would like to fill in colour on the colour layer but need it to recognize all layers while doing that so parts of the line drawing get filled in colour. (Floorplan). Anyone have any ideas on where to check the box so it can do this? Thanks.
 -
 This is a really odd one using Photo V1.7.1.404. It has happened several times. I have a simple image with three four sided shapes (I'll call them panels). They were cloned from one original and have been filled with various colours as I tried to get my image right. Intermittently one of the panels will no longer accept colour changes by any method, flood fill, transparency changes, nothing works. Even more bizarre the colours shown are clearly wrong and even vary. So I select a panel and it shows one set of values, I deselect and then select it again and it shows a different (equally wrong) set of values, yet I have changed nothing. Saving the image exiting and restarting makes no difference. This is not something I have ever seen before. Stability seems better except for this strange behaviour. Once a panel gets into this state, it cannot be modified, the only solution is to ditch it and create a new one. This is more than a little frustrating in an otherwise excellent product.
-
 Whenever I want to make a fill on a new layer, I am forced to go to the layer that provides the colors I want to sample from, make a selection there, then go back to my empty layer and then color the selection. This is kind of a lot of work for a fairly basic functionality that is crucial for coloring line art, where you have to create lots of separate color layers. I know painting is not your priority, but from another point of view, seeing how you like to advertise this non-destructive workflow (which I LOVE btw!), I do not see much use for a tool that is only able to realize its full potential (namely edge detection with tolerance) when it is allowed to overwrite your base layer.
 -
 Hello, When using the fill tool, it seems impossible to pick colors from your image outside of switching to a different tool. This seems like a very basic and obvious functionality, am I missing something about the usage of the tool? Pixel artists will use this a lot. Photoshop handles this really well, similarly to how it works in Affinity with the pen tool. Press ALT during tool usage to pick a color. At the moment, the ALT key for the Fill tool in Affinity seems to have no use. Adding this would make pixel artists lives a lot easier Thoughts?
- 6 replies
-
- 1
-
-
- flood fill
- tool
- (and 2 more)
-
 I'm a long-time user of Photoplus now discovering Affinity. Impressed, but there's clearly an awful lot for me to learn (the videos are very useful). I've spent this whole afternoon on my Windows 10 Desktop trying to get Flood Fill and Brush Fill to work and have failed miserably. Flood Fill insists on selecting the whole image even when it looks right on screen. Settings used are Mode=Add, Tolerance = 10%, and the third setting= Contiguous. (The Tolerance setting has jumped to 100% after processing). Brush Fill is strange: there are no wriggling lines to show the selection and no selection made. The Mode is set to Add and 'Snap to edges' is set. I've tried several times following the video of how to change a sky thinking it would be good practise but I'm obviously doing something wrong - just cannot see what. Guidance would be much appreciated. Incidentally, I've noticed questions about plug-ins on the forum. I've added the Topaz plug-ins originally obtained for Photoplus and have had no problems.
 -
 Hi, New user on testing Affinity on windows 10 Okay I'm testing out the flood fill tool on an imported pdf. The drawing is on one layer and it is a simple line grid 100mm x 100mm square with 10mm x 10mm squares. I change the persona to pixel draw and start using the flood fill tool but nothing is happening ... I'm guessing it has something to do with maybe changing all the lines to a different state first - but how ? All I'm trying to do at this point is to test out the flood fill tool with adding any different colours to the individual 10mm x 10mm squares! I am new to using any illustrating program at all and I've tried out Drawplus and the flood fill tool works with that, but I'm not getting why it isn't working with Affinity. I'm guessing it has something to do with vectors and pixels? If this option isn't currently available in Affinity yet: 1. Is there a work around please ? 2. Is this option going to be implemented in Affinity for windows ? Kind Regards cct
 -
 In ClipStudio Paint, in ArtRage, in SketchBook Pro, In Photoshop you find the function of filling all layers below the ink layer. If you are in the line art illustration habit, flood filling flat colours on by one on separate layers, afterwords adding tints and shades and some texture, Flood Fill on underlying layers is a must. The line art remains untouched, the colour layers can be masked and evryting gets so easy and fast. I miss this workflow and feature in Affinity Photo and Designer. I really like Affinity Photo as a painting / illustrating program. My suggestion is: add this feature. It will be one more reason to switch over from Photoshop (or any other program)...
- 2 replies
-
- 2
-
-
- flood fill
- fill all layers
- (and 1 more)
-
 I'm a graphic artist who has worked with PS in its various iterations for years. Unhappy about paying thirty bucks a month for a professional subscription with a lot more bells and whistles than I actually wind up using, and seeing a lot of buzz about Affinity as a genuine alternative. (No, thank you, Gimp and Corel, I'm too old a dog to learn your new tricks...) So, I'm checking out Affinity on the ten-day trial right now. At first glance I'm impressed. At second, actually loading and playing inside the program, it seems to have a simple workflow with all the shortcuts and quickbuttons I'm used to, enhancing the learning curve... BUT immediately upon importing a project and trying to work with it as I would normally, I notice some aspects missing that I'd consider absolute essentials for a minimum standard of design and editing, and some peculiar responses that feel like glitches. a) There is no easy way to merge or delete layers en masse - ridiculous. The 'merge visible' or 'delete hidden' control is crucial for getting through blends quickly and efficiently.b) Where is my clone brush? One hard-edge, one soft-edge: so vital for making basic repairs to any pixel-based image. c) copying over multiple layers from one project to another seems to produce uneven results, edges misaligned or showing up in strange ways. C&P should be exact, not approximate.d) Switching from one tool to another should not also switch you into a different layer. You can really foul up your project by drawing or erasing on the wrong layer, especially if it already contains pixels which you are 'painting over' or images you are enhancing. At the very minimum, you lose the work you've done if you've, say, traced directly on your reference image rather than the layer above it, as a simple example.e) This might be me missing something, but the 'flood fill' doesn't seem to have an opacity control with it, just a boundary sensitivity. I tried adjusting it in the colour panel on the right with no results, and then tried 'fill opacity' under the Effects tab, which made my entire original image opaquing, but had no effect on the actual level of fill. Sometime you just want a subtle blush of colour added to an object, not the crude spraycan of MS Paint. (The 'smudge' also has a very different feel, like trying to use my fist instead of my finger to blend. Maybe I just need to fiddle with settings and get used to it.) If I could get a clone brush and a layer merge, I'd pay the fifty bucks for this program so fast Adobe wouldn't see my dust. Can someone give me some workarounds, or are there pro solutions coming to these issues? With appreciation - Bard Judith (http://graphictional.weebly.com)
 -
 Do this: 1. Launch AP. 2. New document. 3. Choose the Paint Brush and a color. 4. >> Note it says: "The assistant has added a new raster layer" 5. Close without saving. 6. New document. 7. Choose the Flood Fill tool (paint bucket) and a color. 8. Click on the page. 9. >> NOTHING HAPPENS. It does not make logical sense to me why the Assistant would assist me in auto creating a pixel layer for the Paint Brush tool but refuse to create a pixel layer when I click the Flood Fill tool on the canvas. Can someone explain the logic to me? If there is no sound logic behind it, I am inclined to submit a new feature request. (Keep in mind I am comparing my experience to Photoshop, where I don't need an assistant to create a paintable layer because a paintable layer appears automatically in Photoshop.) Thanks.
- 10 replies
-
- 1
-
-
- photo
- paint brush
- (and 6 more)
-
 Hello - Am new to Designer after using Photoshop for many years, and simply trying to fill in a solid color on a layer. I tried the Help files, which explain what a flood fill is, but not how to use it. I did locate it in the Pixel Persona. Tried clicking on my layer, no luck. Tried clicking in a mask, no luck. Tried opacity setting slider changes, no luck. Tried googling, but only find flood fill for other programs or else explanations on what a flood fill is. Any help appreciated, realize it must be a noobie deal and obvious once you know the paradigm. Thanks
 -
 Hey all, just bought Affinity Photo a couple of hours ago and I must say I am impressed (in a good way) with the program so far. In the first hour I made one huge panorama from 7 large HDR images, also knocked the sky out and made it transparent. Will be using it in a 3D application as a backdrop in front of another background image. Anyways, Affinity Photo handled this all very well. (Massive image file, a tricky forest image with a lot of leaves) It is very fast for me. I have already used many of the features available to me, but one is missing, or I can't figure it out at any rate. The one main thing I do with a 2D program is fill selections with tileable textures (Raster images, JPG or PNG). I've watched many of the videos and cruzed through this forum, (also read a bit in the program's help) but I do not see that one anywhere. So I want to fill a selection with a raster image so that the area fills with tiled imagery. Since I am a 3D guy I paint on UV maps, a lot. I do paint directly on models more lately since my software is getting more advanced, but for something like the ground, or buildings, I UV map everything into islands and I paint them in 2D. I also paint normal's and bump, spectacular maps, etc, on layers in the same selection so they match up. I hope this is possible in AP, since I am sick and tired of Corel putting spam on my computer and I wish to switch to Affinity software full time. I think it is a bargain for the price, and it handles large files very well. Any suggestions on this type of workflow would be greatly appreciated. And it looks like I will be getting AD as well. I don't have a big need for a vector program, but it just looks too cool to pass up.
 -
 Referring to this thread: https://forum.affinity.serif.com/index.php?/topic/10122-photo-selection-anti-alias-for-flood-and-brush/ I was wondering on the status of adding anti-alias selection for the flood tool. I need to fill some shapes with a single hue as I have a program that recognizes one hue and replaces with another color to show differences in data. If there is another way to do this, I'm all ears. However, I am new to affinity, and just photoshop-like activities in general. Thanks.
 -
 Ok some I'm new to the designer world and I'm pretty much self taught so bare with me if this is an easy answer. I'm taking a low res drawing I made and I've been tracing it with the pen tool. I've got all of the lines connecting and it looks pretty darn good if you ask me. But the problem I'm having is actually filling in different section of the drawing. It seems that even when I create a pixel layer and try to fill it in all I do is color the entire layer. Is there a way to only flood fill the polygon with a specific color? Please help!!