Lorthiz
-
Posts
18 -
Joined
-
Last visited
-
 nodeus reacted to a post in a topic:
Using 'Variables' in 'User Variables' in Export Persona
nodeus reacted to a post in a topic:
Using 'Variables' in 'User Variables' in Export Persona
-
 In previous versions we had ability to insert nodes while using pen tool by quick switching to Node tool(Ctrl modifier), but using it now it will remove the connection instead. Is it possible to insert new nodes without need to switch directly to node tool?
 -
@Sean P Hello, do you know what is the state of this issue? I can see my post has an issue number label pinned to it but I don't have access to your internal issue tracker so I can't check it myself
-
@Callum Thank you for your reply. I can't provide recording until later in the evening today(CET), but here is a file presenting described behavior. You can see that otline on groups is expanding slice more than it should and "outline inheritence" from parent layer is not exported on single slices. SlicesExample.afdesign
-
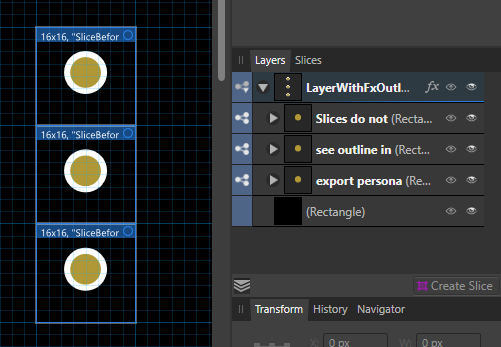
Is it possible: 1) to select multiple slices and rescale them at once eg. select 10 slices and rescale them from x*y to 2x*2y? Right now when I drag one corner only that corner and adjacent row/column are modified. 2) to detach slices created using Layers panel while keeping their position/size and name? After adding adding fx outline to layers/groups it automatically expands their slice size even if added outline is not even close to slice borders eg. slice 32x32px containing objects inside for max 20x20px, after adding 1px outline it changes slice to 34x34px and it's objects to 22x22px. I want to detach it so I can have and outline and 32x32px export(without having to create and name 70+ slices of size that I already have...). 3) to make Layer slices export with a background/everyhing? Right now slices created from layer only exports what is on that layer/group, so is there any option to change that behaviour? It would fix my problem number 2 since I would be able to add fx outline to base Layer node(all child groups and layers would be affected) of my document and keep the size of slices 32x32px. 4) sort/move/rearange slices in Layers panel? Having just many slices it would be nice to rearrange them to have some logical order in there.

-
Lorthiz reacted to a post in a topic:
Expanding stroke results in weird shapes
-
Proxos reacted to a post in a topic:
Expanding stroke results in weird shapes
-
Expanding stroke results in weird shapes
Lorthiz replied to Proxos's topic in V1 Bugs found on Windows
Believe me it's not that simple. For us users it's really simple to thing since "it's just the same but bigger", but having some experience as a programmer I can tell you working with decimal points and small numbers is a lot more problematic than with big ones and for 99% the whole function for the stroke is also changed when scaling. My guess is that alghoritm that expands the stroke must have somekind veird mechanism for rounding values for decimal points or sampling for that alghoritm uses biger values. Less samples used on objects(small objects) creates less points and in the end and precission is worse. Since bigger objects will automaticaly have more samples taken they are expanded with better precision. -
Okay quick addition to the subject: Adding new objects to group not always resizes slice rigth away. Reload of document is needed for a document to update slice size with new objects. But even without reload export works for whole group even with new objects added.
-
Proxos reacted to a post in a topic:
Expanding stroke results in weird shapes
-
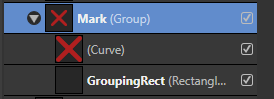
[Version] 1.7.3.481 [Business requirement] Creating sets of icons. I would like to prepare a set of icons but I don't have a current set of names, sizes for them so I am creating easily exportable groups with constrained size NxN pixels made possible by adding invisible rectangle to each icon. Now when I go to Export persona I can create slice form this group and have it's name used as a slice name, size from the "Grouping Rect" and it's positon. When I made changes to the group itself the size was updated correctly, the positon followed the icon but changing the group name did not updated the slice name. Since I am able to move, scale and change icons in Draw Persona I would like to also maintain their names there without maintainig the slices themselves. And since it works on Artboards I expect it to be a bug. [Steps to reproduce] 1) Create a few objects and group them. 2) Assign a name to a group. 3) Go to 'Export Persona' and create slice for this group from Layers->Select group->Create Slice 4) Move group around, change it's scale or add/remove some objects. 5) Change name of the group. [Current result] Size, positon and changes made to group are also updated on exported slice, except for the group name [Expected result] Name should also updated. [Workaround] Using Artboards for every single icon. But that would be an overkill and I lose the ability to quickly add "Layer effects" like outline to all the icons at once since effects are not passed to children from the artboard(1 child/group in this case scenario).
-
Expanding stroke results in weird shapes
Lorthiz replied to Proxos's topic in V1 Bugs found on Windows
Try rescaling objects with Ctrl/Cmd and diagonal handle to constraint proportions(scale stroke with object on paths selected). When you have larger strokes expand them then. It should create smoother result and then you can scale it back the same way to expected size. -
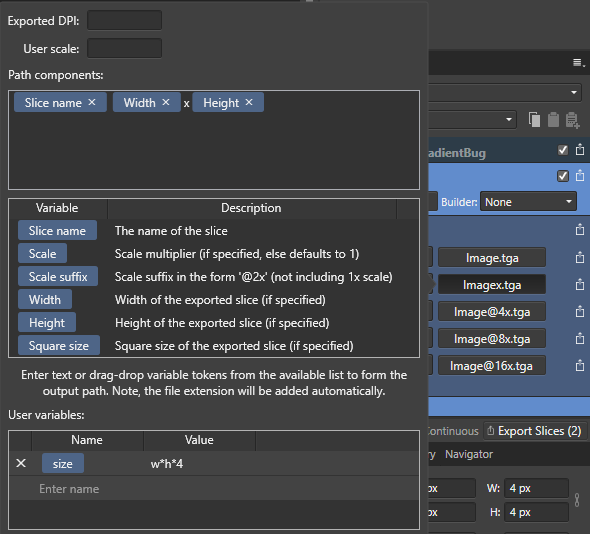
Hello, I have question about exporting multiple slices. Use case is that I want to export multiple copies of the same slice but for each of them would use different scale. I want to specify in pixels w*h*4(or scale) of each slice. That looks like a great place for using a user variable but it does not work as expected. Can I only use string\text values here? Also I tried using a simplified version where I use Width and Height, but they are not specified. Where can I 'specify' them?
-
Lorthiz reacted to a post in a topic:
TGA corner pixels have Red and Blue channels swapped after export
-
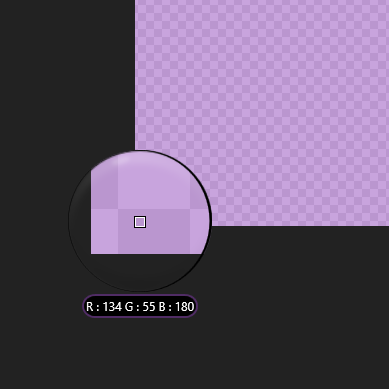
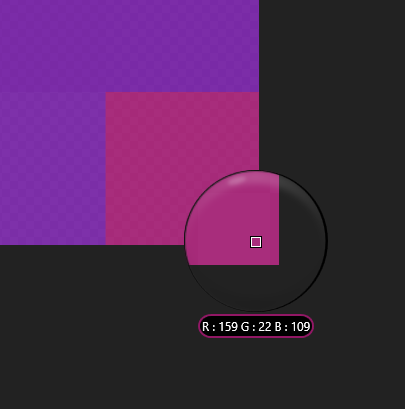
TLDR: When exporting to TGA(Targa) format UpperRight and LowerRight corners have their Red and Blue channels swapped. Steps to reproduce: 1) Create any document. 2) Place in UpperRight or LowerRight corner object with color that has different Red and Blue channels. eg. R:125 G:00 B:00 3) Export image as TGA(Targa) 4) Load exported TGA image to AffinityDesigner. Actual result: One pixel in both right corners has Red and Blue components swapped. If we saved this color in one of corners: (R:125 G:00 B:00) the loaded pixel in that corner will be: (R:00 G:00 B:125) Expected result: components are not swapped during export. Especialy useful if you are writing TGA loaders/converters and you are expecting that data you are loading is correct... Additional info: I have not experienced any problems with Green or Alpha chanel so it seems to be affecting only Red and Blue.' Export size seems to not have affect it's always one pixel from both corners. It's not loading problem. After checking TGA files with Hex editors and checking values stored inside the incorrect values are saved during export. Files to reproduce and screenshots are attatched: 2 .afdesign files with sources that can be used to export check source files. 3 Exported TGA images where inproper behaviour can be spotted 3 Screenshots from symetric gradient presenting incorrect data after export. 4x4.tga TGABug.afdesign 4x4GreenEdition.tga TGAGradientBug.afdesign TGAGradientBugBig.tga
-
Celia at Grafted Works reacted to a post in a topic:
[AD] Timelapse Illustration
-
v_kyr reacted to a post in a topic:
[AD] Timelapse Illustration
-
@Cealcrest First thing I did was to create pattern. One stroke and then power duplicated it. I think at first I just put pattern under path I wanted to mask to but I ended loosing coloring oportunieties for fast receloring it. Then I just used paths as masks. Here is the gif https://drive.google.com/open?id=1l5TsGRSK66WYstxAXcApZ_LkQPUs_1yi Also bonus version that was made thanks to this method
-
GaseousClay reacted to a post in a topic:
[AD] Timelapse Illustration
-
MEB reacted to a post in a topic:
[AD] Timelapse Illustration
-
GarryP reacted to a post in a topic:
[AD] Timelapse Illustration
-
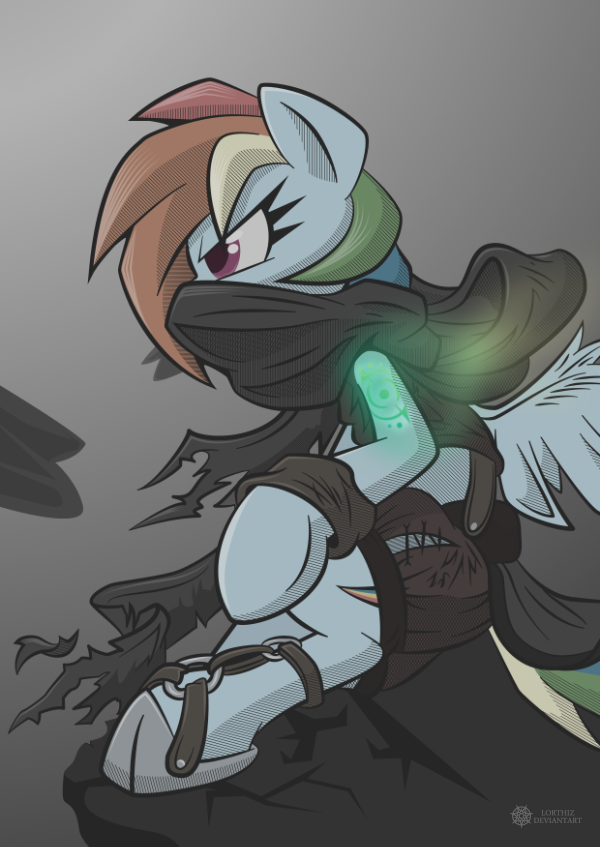
I'm not good at writing so just enjoy the art and video One thing though from around first minute I changed the stroke width and pressure for whole picture. My file got corrupted somehow and it changes later around 1:25. When I try to move in history back and forward around that time it is crashesh AD after a while. If someone from devs would be willing to take a look at the file in search of bugs/errors for the future just send me a message I will share the source file. Full size: http://fav.me/dbx4a8a Timelapse video:
-
Thanks for reply. I know about it. But after importing palete with 10 or more colors that are named after their purpose re-adding them might be tedious. This option would be a life/time saver. :) @MEB Should I add it in a bug section?
-
Then I think we might have a problem ;)
-
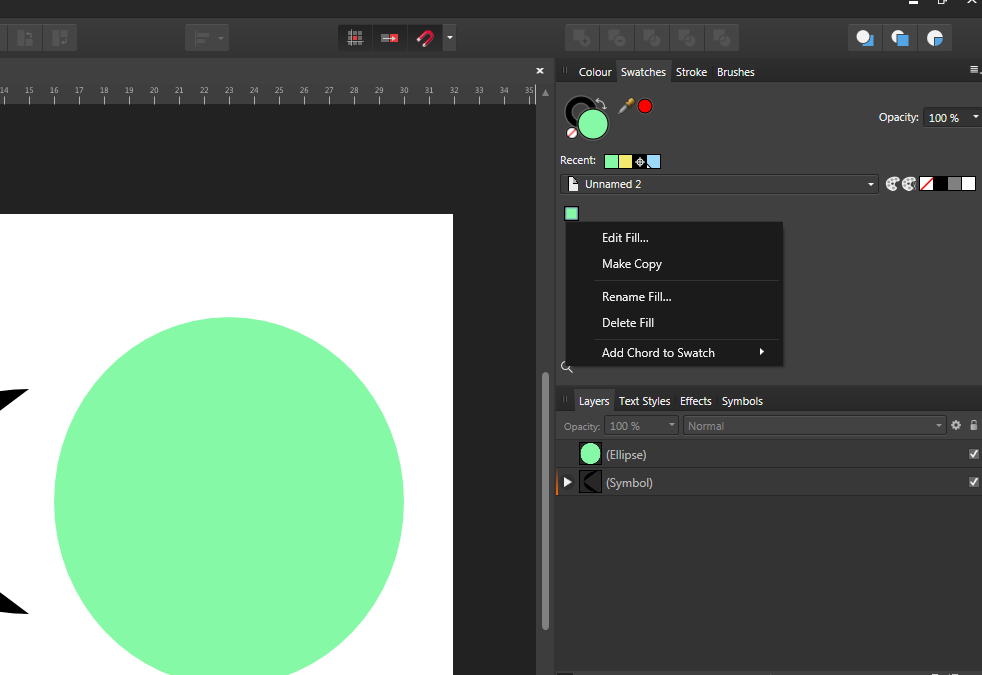
In help I found this: To convert an existing colour swatch into a global colour: In the Swatches panel, choose a Document palette from the pop-up menu. -click a displayed swatch and select Make Global. But I can't find this option anywhere. Is it implemented? Also is there a way to merge color paletes? Or import palete so it would instantly be made of global colors? Also when selecting color from PANTONE color paletes its instantly added to a document palette as global color with spot. Can users make paletes to work the same way or is it just hardcoded? ;P Also I have to say. Color paletes, global colors they work great even now, but they need a little polish in my opinion. They need a little more manipulation options. Should I add it to requests or meaby it's planned somewhere along the way? :)