batvink
-
Posts
15 -
Joined
-
Last visited


-

RAW FILES - SOMETHING BIG IS COMING
batvink replied to carl123's topic in Desktop Questions (macOS and Windows)
Update to the last post. It took around 40 minutes to process 65 images using parallel processing. It took about 30 seconds to process 5 images without parallel processing. It's around 6 times faster single-threaded than parallel. I would imagine based on some basic knowledge of parallel processing and the events taking place that 4 threads would be a sweet spot for optimal speed. Calculating threads based on number of processors would be even smarter. -
RAW FILES - SOMETHING BIG IS COMING
batvink replied to carl123's topic in Desktop Questions (macOS and Windows)
This is a great workflow for many photos taken in a similar setting, thanks for the instructions on how to do this. One word of warning, parallel processing is not the way to go when doing this. For 65 photos it had only processed 2 after 10 minutes. My SSD was at 100% for about 8 minutes which is not healthy state. Memeory usage reached 94% on 16GB, with a total 28GB of committed memory (12GB in paged memory on the drive). I don't know the inner workings of Affinity, but the parallelization doesn't seem optimal. I see around 30 parallel processes which suggest a very high level of context-switching. Anything higher than the number of processors on your machine means that the threads are wasting time switching from one to another. Where you can control the number of threads (selecting a finite number of files to process), this doesn't make much sense, switching takes a significant amount of processing power. So when this finishes (1/3 of files processed in 20 minutes) I'll see how it looks on single-threaded mode. -
 Aria reacted to a post in a topic:
Affinity Designer SVG export with reliable scale
Aria reacted to a post in a topic:
Affinity Designer SVG export with reliable scale
-
Old Bruce reacted to a post in a topic:
Affinity Designer SVG export with reliable scale
-
For anyone wanting the secret recipe for files that can be used with Tinkercad... Use the standard export option Exported "Selected only" for each part Set your millimetre measurements as pixels. e.g a 100 mm design should be set as 100 pixels (no file manipulation required after export) Uncheck all options except converting text to curves Convert all objects to curves "Thick" lines will export as a border, with the thickness ignored. This can be deceptive and your parts will be smaller in Tinkercad, by half the width of the line. I set my borders to 0 pixels That very short list took me 3 or 4 hours to figure out keywords: SVG, Tinkercad, 3D Print, Creality Ender
-
Affinity affiliate scheme
batvink replied to robcubbon's topic in Customer Service, Accounts and Purchasing
Just saw this in passing... https://www.flexoffers.com/affiliate-programs/serif-affiliate-program/ -
Definitely the wrong file. But a very strange occurrence. I did a "Save as..." to create the version I uploaded, but it saved the changes to the original! Anyway, here's the correct version of the file... Product Build with recolor.afdesign
-
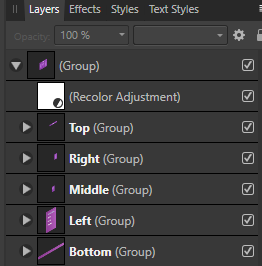
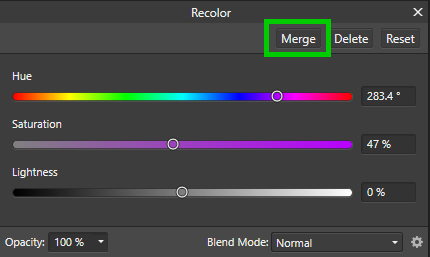
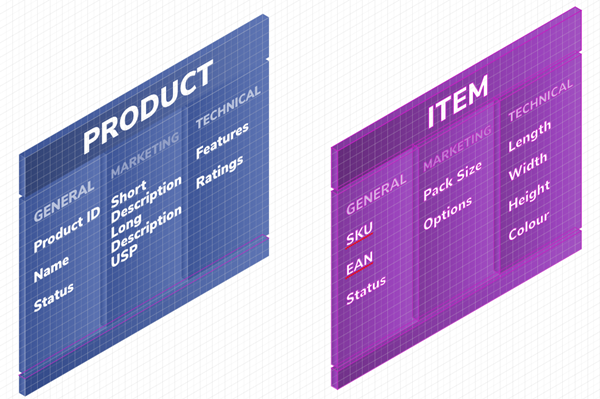
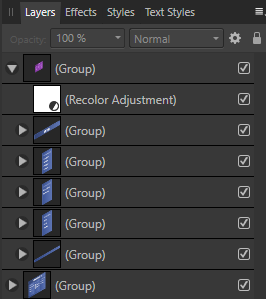
@stokerg, thanks for taking a look. For reference I am using 1.7.1.404. In the attached file, the right-hand purple group is the recoloured one. In case you are getting different results, I have a screenshot here to illustrate. I have added the recolor effect to Top, Right and Middle. Left and Bottom are not recolored. If you look at the thumbnails, you can already see the issue with the bounding box, the images are tiny for the recolored elements. There is also a recolor at the higher level, which is a remnant of the original issue, where the recoloring did not apply in the export. It is harder to see this in the export now, because I have applied a new gradient color to every shape individually, so that I can continue working. You could reset the base colours of the shapes if you wanted to see this in action. Finally, here is the merge button in the recolor panel, maybe it is something that works in Photo but should be hidden in Designer? Product Build with recolor.afdesign

-
I have a number of shapes which I have duplicated, and used the recolor effect to change the second copy. When I export using the Export Persona, with slices (each slice is a shape and some text), the recolor is not applied. It is still the original colour. I have recolored the group, so that all shapes inherit the same new colouring. Although there is a merge button, this does not do anything. I have now moved the recolor to every subgroup of shapes, and the colour has now changed. But as a result, the export dimensions change. Whereas the non-recolored slices export within a box around just the shape, the recolor pushes the boundaries out to the full page (1920x1080). It seems like recolor creates an non-visible composite across the full page to cause the redimensioning. Am I doing something wrong, or have I found a bug or two?
-
PixelDust reacted to a post in a topic:
Brush Rotation
-
When you start the application, you get a window telling you about the update.
-
Wave Filter
batvink replied to Casperwitz's topic in Pre-V2 Archive of Desktop Questions (macOS and Windows)
Late to the party but this is achievable. Add a displacement filter. For the displacement image, use a greyscale ruffled cloth, blur it to get a soft effect Add the distortion, just a little goes a long way Load the same displacement image above the flag. Set the blend to hard light and reduce the opacity. -
batvink changed their profile photo
-
Thanks for the quick reply. I don't have Designer, but I will find a workaround I'm sure. Regards, Steve
-
Brush Rotation
batvink replied to gcshep's topic in Pre-V2 Archive of Desktop Questions (macOS and Windows)
It may not suit your requirement, but you can set Rotation Jitter to "Direction" and 100%. This will follow the direction of your stroke. That is, if you draw a circle, it will rotate 360 degrees as you draw the circle. -
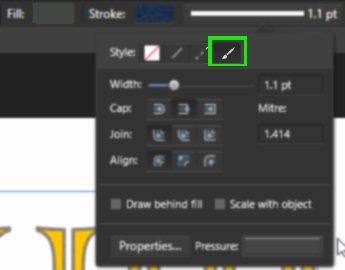
Hi, I want to use an artistic Brush to outline my text. Lines work Dashed lines work The next option - "Texture" - doesn't do anything. If I click on "Properties", it opens up the Brush editing panel, but with no brush shown. If I select a Brush then open the panel, still nothing. What am I doing wrong? Regards, Steve