

user_0815
-
Posts
242 -
Joined
-
Last visited
Posts posted by user_0815
-
-
Opening psb files that have embedded documents is possible. If these files have layers that are embedded documents, Photo 2 cannot open them whereas Photo 1 can. On double-click it opens in a new tab.
V2 shows a low-res pixel layer.
V1 shows a layer labeled as "Embedded Document".Is this a (known) bug? Or does it work differently in V2?
-
Thanks, that's a good feature. Please allow me a quick feedback. The menu wording "Expand..." doesn't seem particularly intuitive to me. Imho "Separate Stroke" could describe it better. The German menu says "erweitern" which has more the meaning of growing or enlarging.
-
Hi,
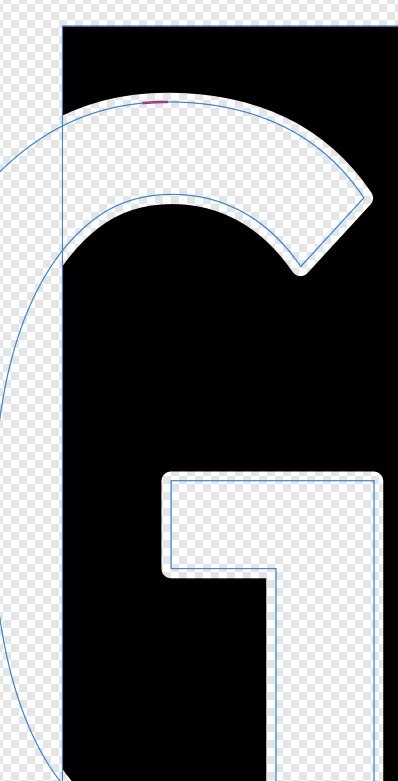
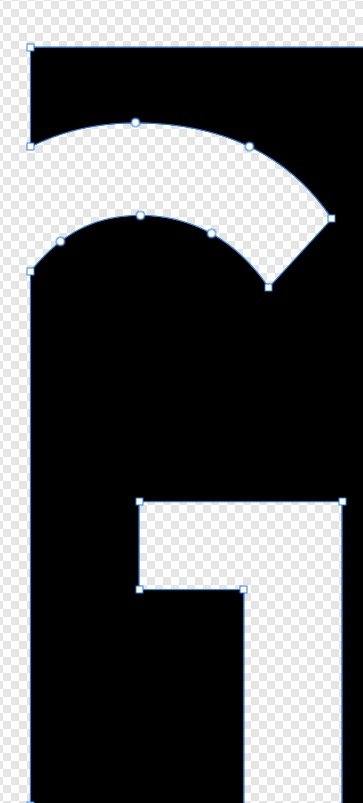
I'm trying to convert a letter which has an outline into a curve. This curve I want to substract from a solid shape.
Currently the letter loses it's outline when I try to substract it (no matter curve or text), which is not the desired result.
How can I substract a letter with outline from a shape? Or do I need a different way of doing it?

-
1 hour ago, NotMyFault said:
it gets clipped to the shape of the parent layer
Of course I know that, but totally forgot in that moment...
52 minutes ago, firstdefence said:I'd say in this instance by design means "We don't know how to fix it"
Yes, so I'll leave this topic as it is and find a way around it when necessary.
-
Just discovered that this border shows even if the on-top shape is 2 pixels larger. But only if I drag it on to the other curve.
In other words: If they are just two regular layers on top of each other, no border is visible. Otherwise yes. Unfortunately it's also visible in the exported pdf.
-
Thanks for clarifying.
The reason I reported this is that I sometimes can't tell the difference whether it is a rendering artefact or an actual stroke applied and I would prefer it to be more precise (or find out whether I'm doing something wrong).
-
Yes it has, sorry. I've been trying to apply different strokes in order to make it display correctly.
However, removing it doesn't make a difference as (it was inset).
After testing a bit further I found out that it occurs whenever the zoom is non-100%. At 100% zoom it looks as expected. Zooming in or out makes the line show again. Can anyone else reproduce that?
-
9 minutes ago, R C-R said:
Are you sure they both have exactly the same pixel dimensions?
Can you provide a sample file with just those two shapes at the same places as in your screenshot?
Yes, see above post.
-
9 minutes ago, NotMyFault said:
Did you check the artboart containing these objects, too?
Yes.
9 minutes ago, NotMyFault said:Can you upload the file?
Yes.
9 minutes ago, NotMyFault said:Which view mode do you use?
IDK
9 minutes ago, NotMyFault said:Did you check if the lower rectangle has a stroke, or layer fx which might increase its size?
Yes, none of them has an outline. It also happens with any other object.
9 minutes ago, NotMyFault said:There are many more things what could cause this obsetvation.
Although, as a user I wouldn't expect such a result. 🧐
-
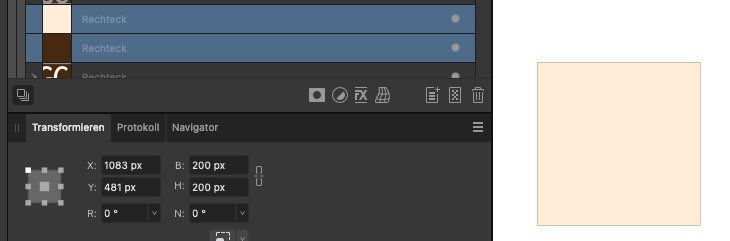
I'm having the same problem that there is an outline whenever two overlapping shapes have the same boundaries. For example two rectangles of the exact same size and position. In the attached screenshot there is a lighter square on top of a darker square. At the edges the darker square is visible although It shouldn't.
Setting all pixels to ".0" does not solve that.

-
-
Yes, it was resized at one point iirc. I've attached the file which I used in the screen capture.
-
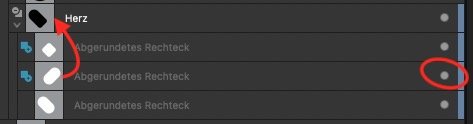
I've created a compound shape where one element sometimes isn't visible although the layer toggle is on. Could this be a (known) bug or am I "holding it wrong"?
-
-
When using the built-in mask, I can't toggle it on/off by shift-clicking on it. I think it would be good if that was possible just like with other masks.
-
I immediately liked and embraced the drop down when I first saw it in 2.0. The extra click is a very low price for me because I use the built-in mask in most cases. I don't add a basic mask via that button often, for example only when masking a group or a pixel layer.
When the drop down didn't show up in the beta, the first thing I tried intuitively was a right click and a long click and an alt-click (in that order).
The way I use it currently is click-drag-release which I find quicker than two clicks for small menus. But most people don't know that way or aren't used to it.
Alt-click seems to be a good middle way.
-
To change colours, I usually make a rectangle with the fill colour to what I want the result to be. Then set the layer blend mode to "Colour". Brightness needs to be adjusted separately (the green jacket needs to be adjusted to the brightness of the orange jacket).
However, I don't know how to target (mask) the exact colour which is green 2B675A in your example. Perhaps make hue range mask and temporarily place an object with 2B675A to help dial in the mask on that colour.
-
I tried to liquify a part of the image and masked out the part that should stay in place. However, not I got both: The masked part is still in place but also moved. I did not expect this. What did I do wrong?
In the video attached I used the "convex" tool to make the sun smaller.
-
Thanks, his explanations are always valuable. After reading that, let me phrase my question this way:
With the tone curve applied, the developed image has values between 0 and 1 and cuts off everything above.
Without the tone curve applied, the developed image also retains values above 1, correct?
-
In the Develop persona there is the option in the assistant to apply a tone curve or not.
After clicking on "Develop", the Shadows/Highlights slider produces different results when reducing the highlights. I'd like to understand the difference because I would expect the same results. Developing to 32bit.
(1) When not applying the tone curve in the develop persona, the highlights can be reduced with very good results. The absolute white parts (255/255/255) will remain so for quite a while (e.g. -30) while non-whites will change.
vs.
(2) When applying the tone curve, even the absolute whites (255/255/255) will immediately change as soon as the slider moves to negative values.
Taking a 16bit tif coming from a raw converter, I get the same behaviour as when not applying the tone curve (1).
Why is this so?
In this example the background is pure white but the subject not.
-
1 hour ago, Javier6754 said:
Close shapes, when I want to join two nodes, in Illustrator I just have to select one node with the pen and join it to the other, they automatically join into a single shape
With the pen tool, hold down the cmd key (idk which one it is on windows) and drag the last node on to the first one. It will snap to join and close the curve.
-
Swapping a white background to a dark one is a challenge due to light spill or reflections on the edges. However, using the "Refine" feature usually brings good results.
This is how I do it:
– Select the subject (or background and then invert selection)
– Click "Refine" in the context bar and brush over the edges to refine.
– Select "New mask with layer" since that gives better results in some cases (colour decontamination).Remaining white edges I usually cut off by shrinking the selection by 0.5 or 1 px and add that to the mask.
With cmd+click on mac you get the content of that layer as a selection (e.g. the mask). I don't know the shortcut for win.
-
-
If I use the "point transformation tool", I can click on the node I want to snap and it will snap to any node of the other polygon.
Is that what the op was looking for? Or did he just want to suggest a different way of doing it?


V2 cannot open embedded documents in PSB files, but V1 can
in Affinity on Desktop Questions (macOS and Windows)
Posted
Ah ok. This wasn't checked. After enabling it, I can edit the embedded documents. Seems like I missed this setting when I installed Photo 2.