Olivier.A
-
Posts
43 -
Joined
-
Last visited
-
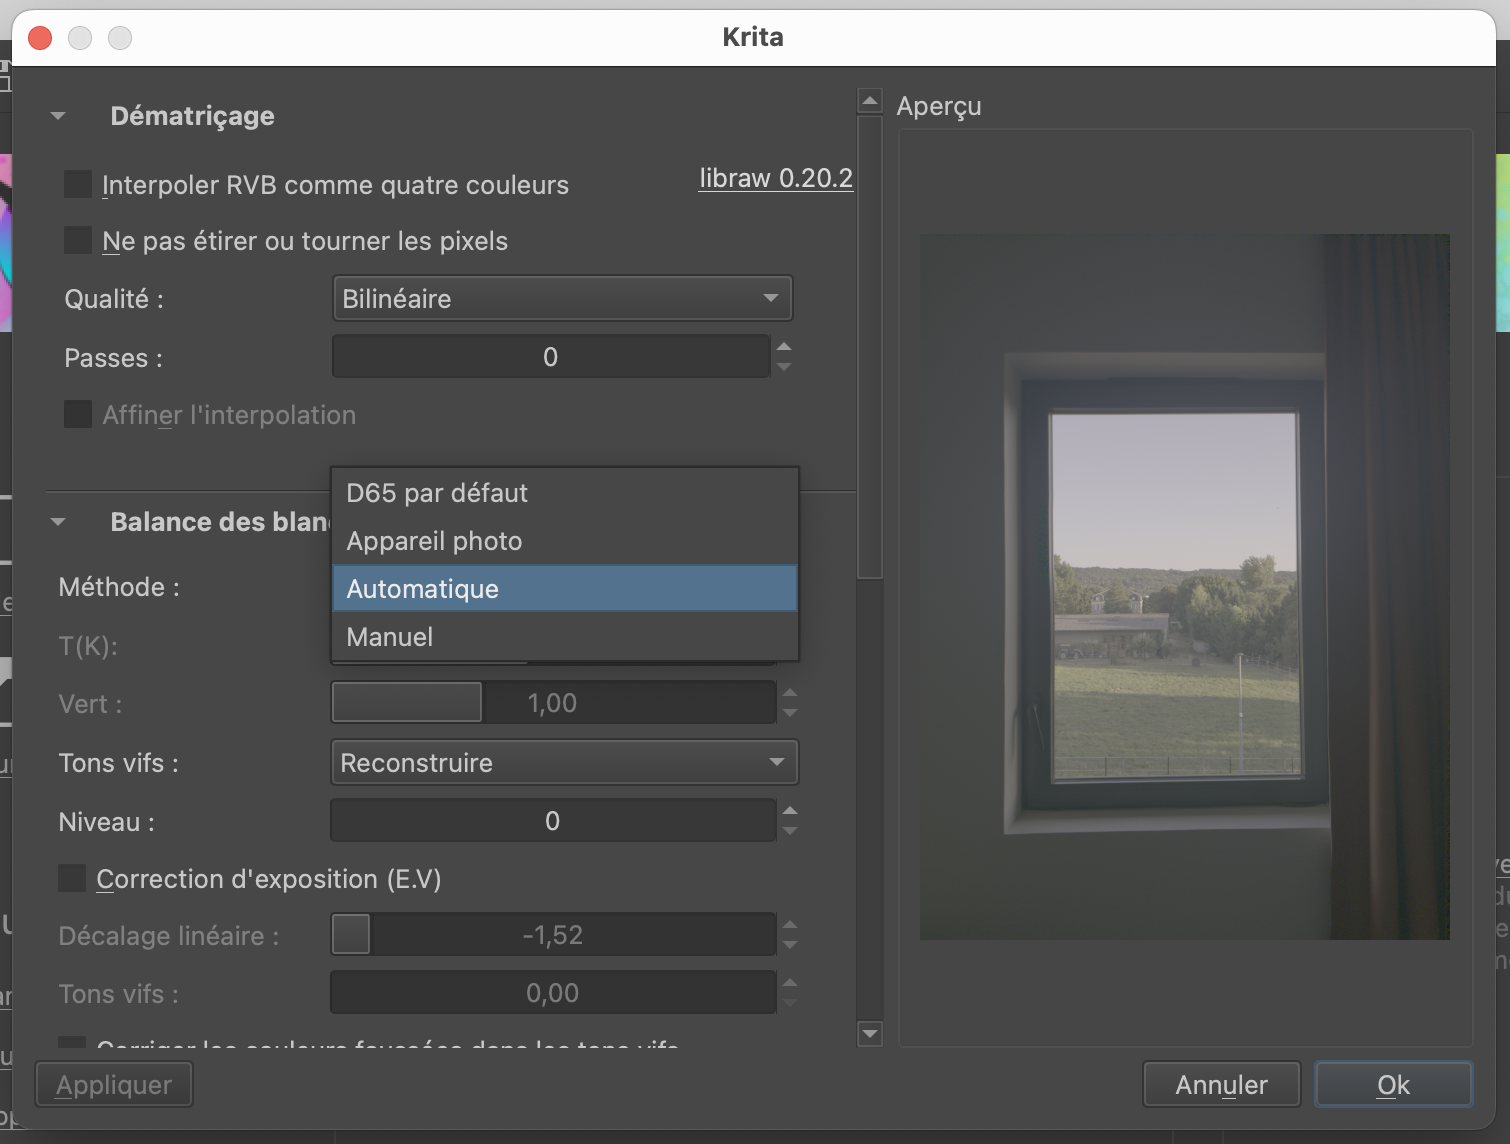
 Little Update, I opened this HDR DNG in Krita (open source drawing application). When you set White balabce to automatic, the image opens correctly ! (D65, camera or manual gives this magenta cast) I'm quite surprised by the result.
-
For these photo, this is certainly something I will do. But in the future I will avoid LR HDR feature :p Pictures I took, didn't need HDR, so I'm fine Thanks !
-
Hi, I think you are somewhat correct ! I googled a bit more and found several people talking about DNG being encoded with 16bits floating point... this is quite unusual, as HDR are usually 32 bits. That may be the issue here, and AF is not capable to using 16bit float images. I found this blogpost from Adobe explaining the HDR process in Lightroom Mobile : https://blog.adobe.com/en/publish/2017/03/06/lr-mobile-update-raw-hdr-capture-mode-for-ios-and-android Non-HDR photo are still 32bits, though...
-
HI ! Lightroom mobile took the RAW photos. I don't know any other way to export the RAW file other than through the DNG format. I don't have Lightroom Desktop. So my RAW is the DNG I provided. If someone have suggestions, you're welcome I opened the DNG in the HDR function of AFPhoto, but the result is not better than the Develop persona.
-
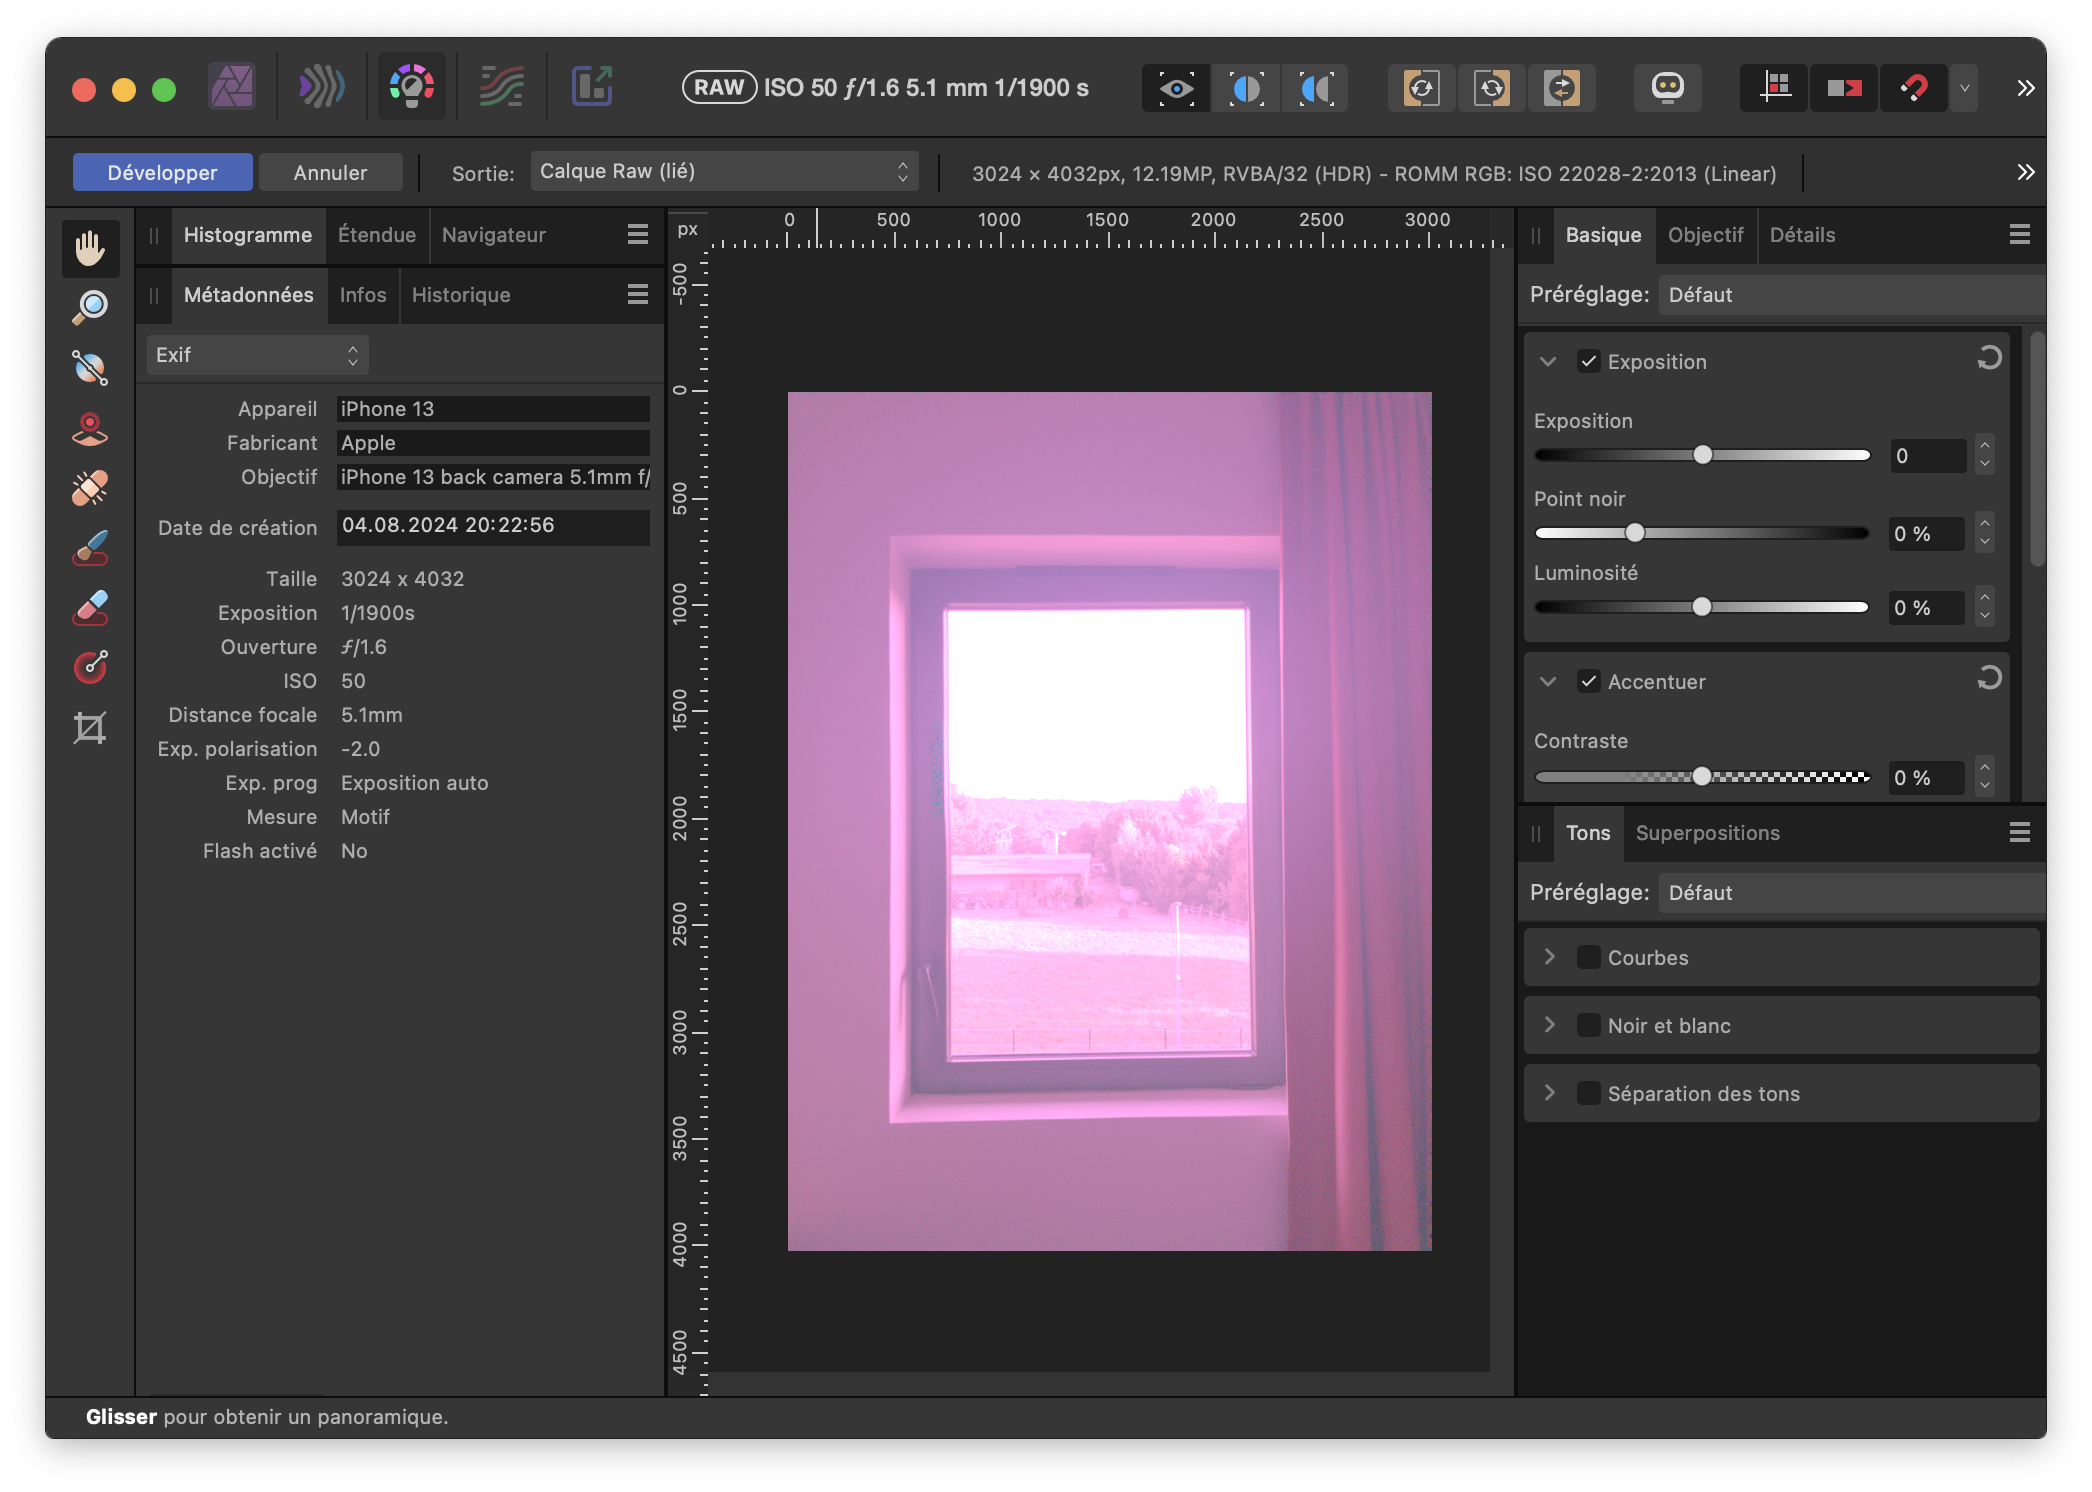
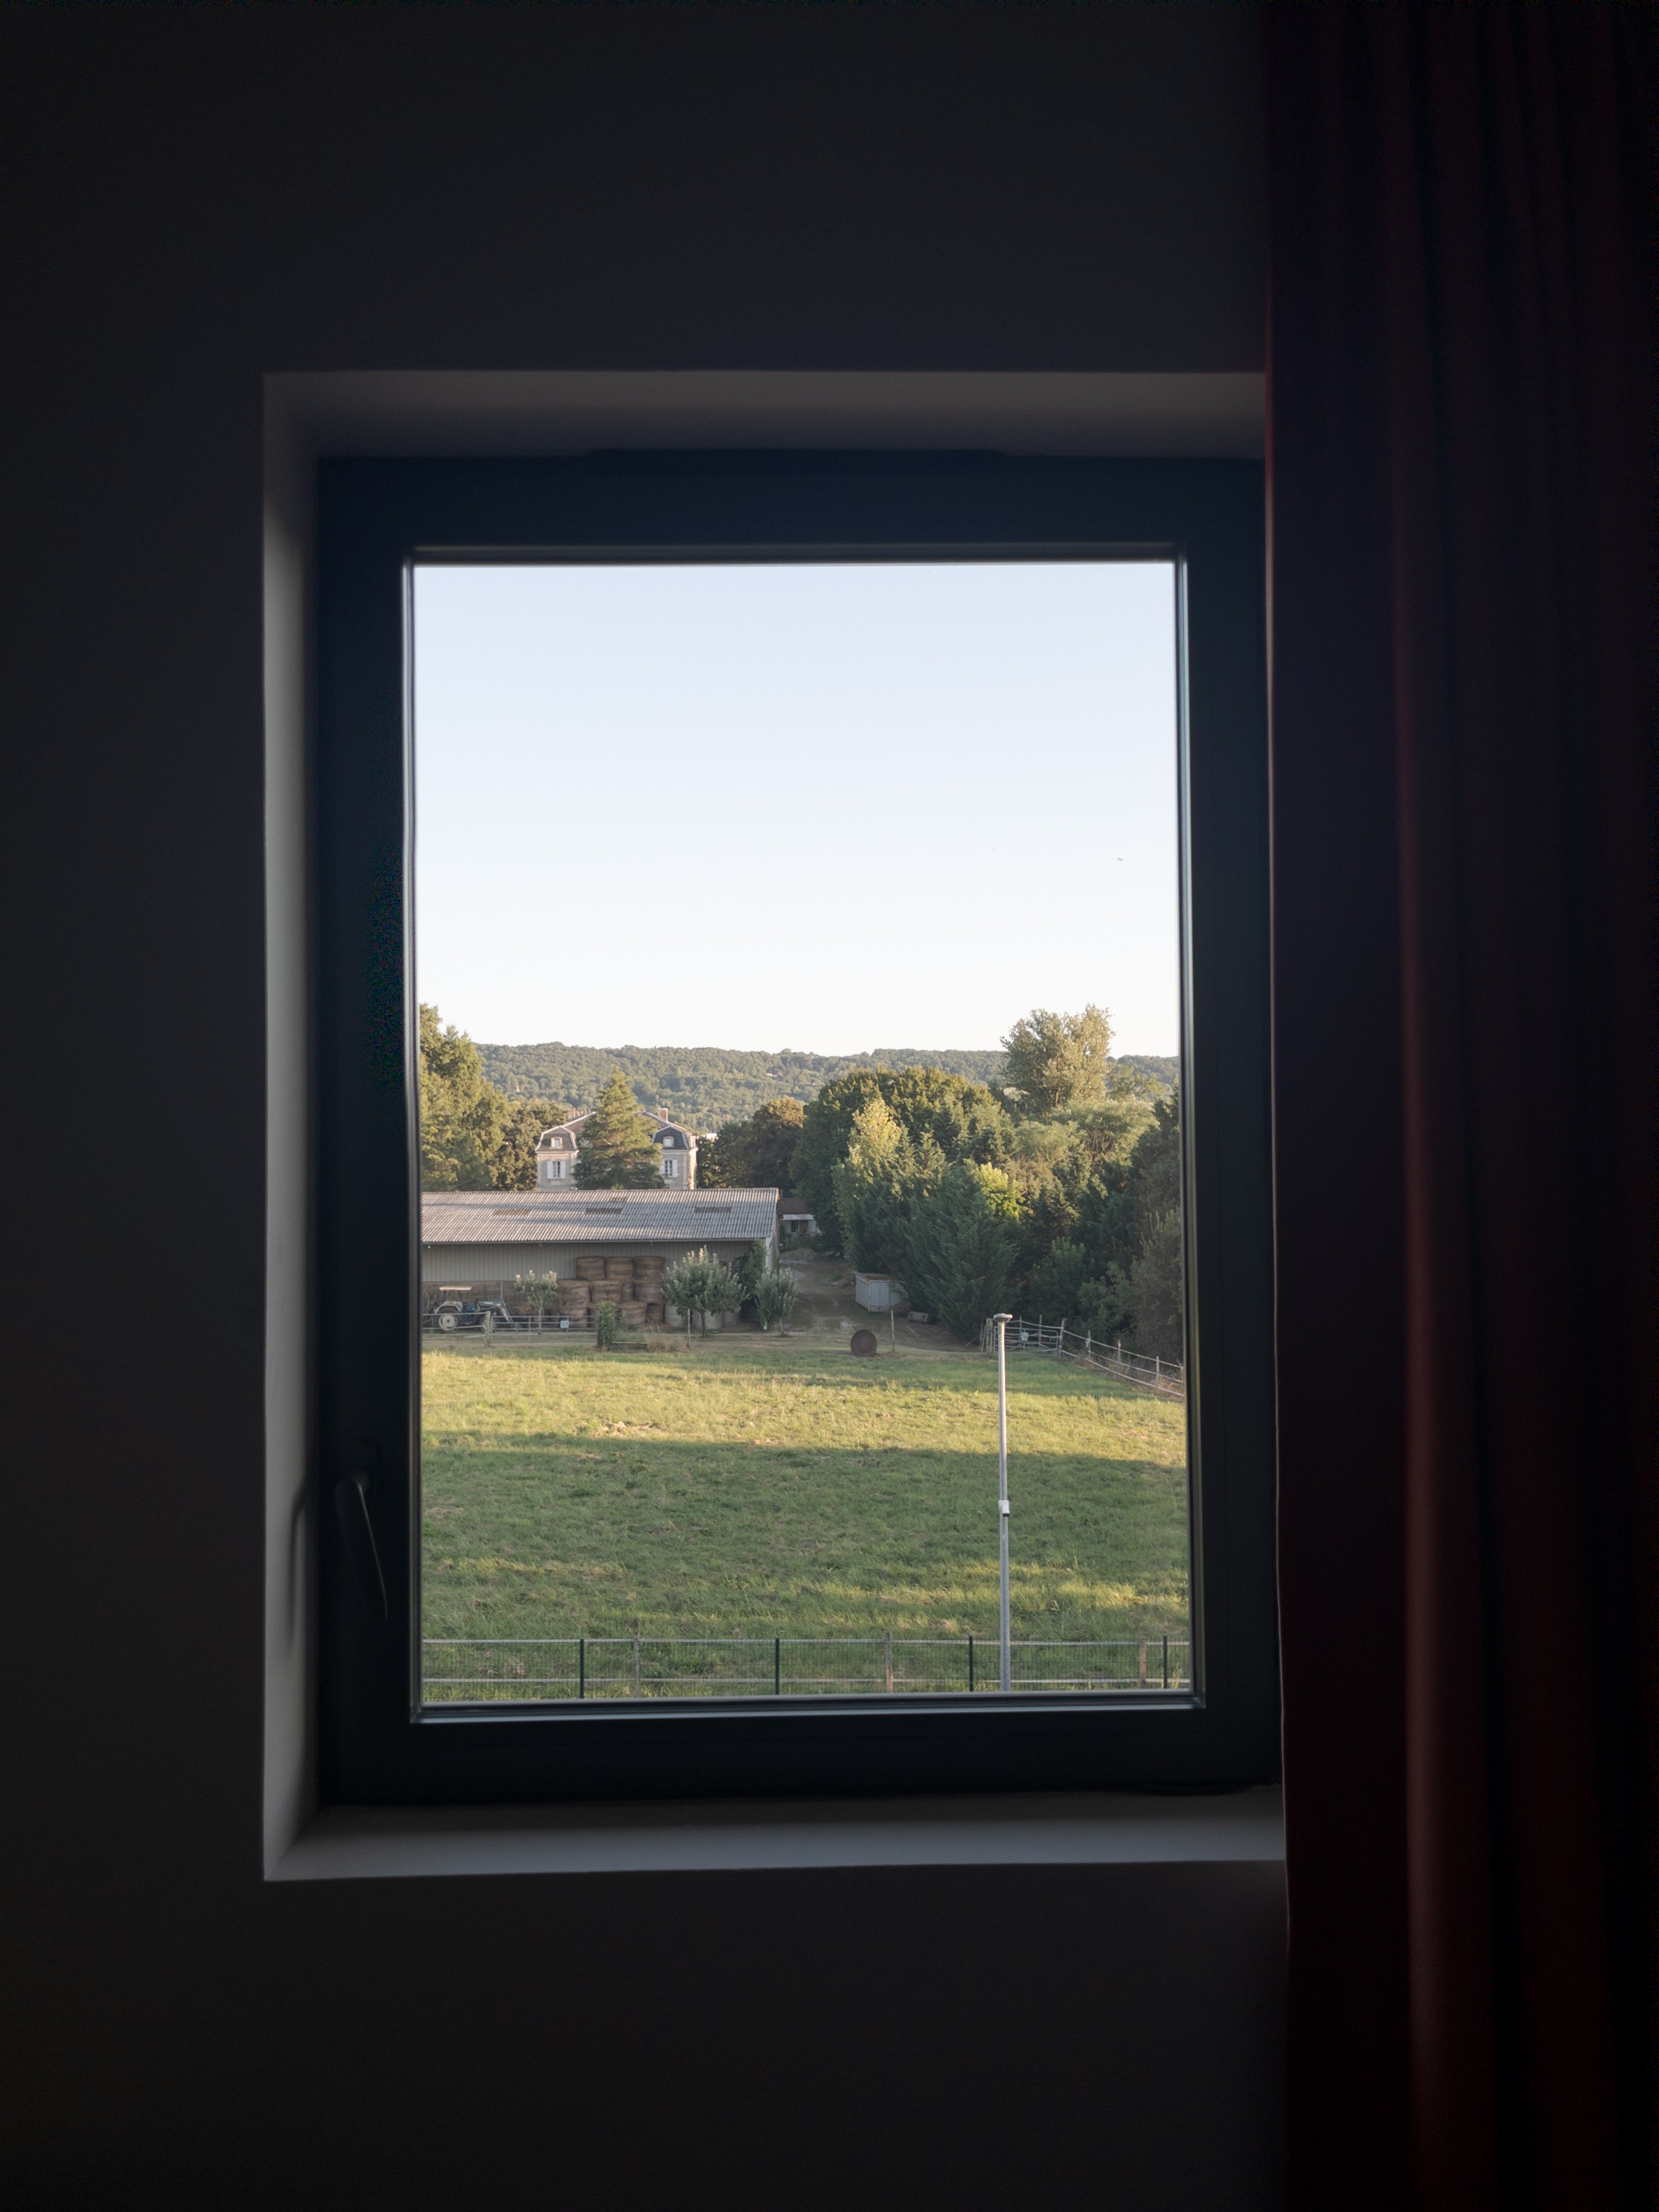
HI, thanks for the comment, Sure, it is a complete mess. I don't know what kind of HDR format is used inside the DNG. I tried to open it in Affinity photo on my old iMac 2016, the image was overexposed, on top of having this magenta cast. But this "problem" only happens with HDR photos. Non-HDR are fine. Sadly, lightroom mobile is very limited to export RAW image. The only way is using DNG. I could export as TIFF, but this is no more RAW (TIFF is limited to 16bits depth). Exporting as TIFF produces a correct image though ! Please note that Lightroom mobile took the photo, not iPhone built-in Camera app. the iPhone 13 is not capable of shooting RAW image.
-
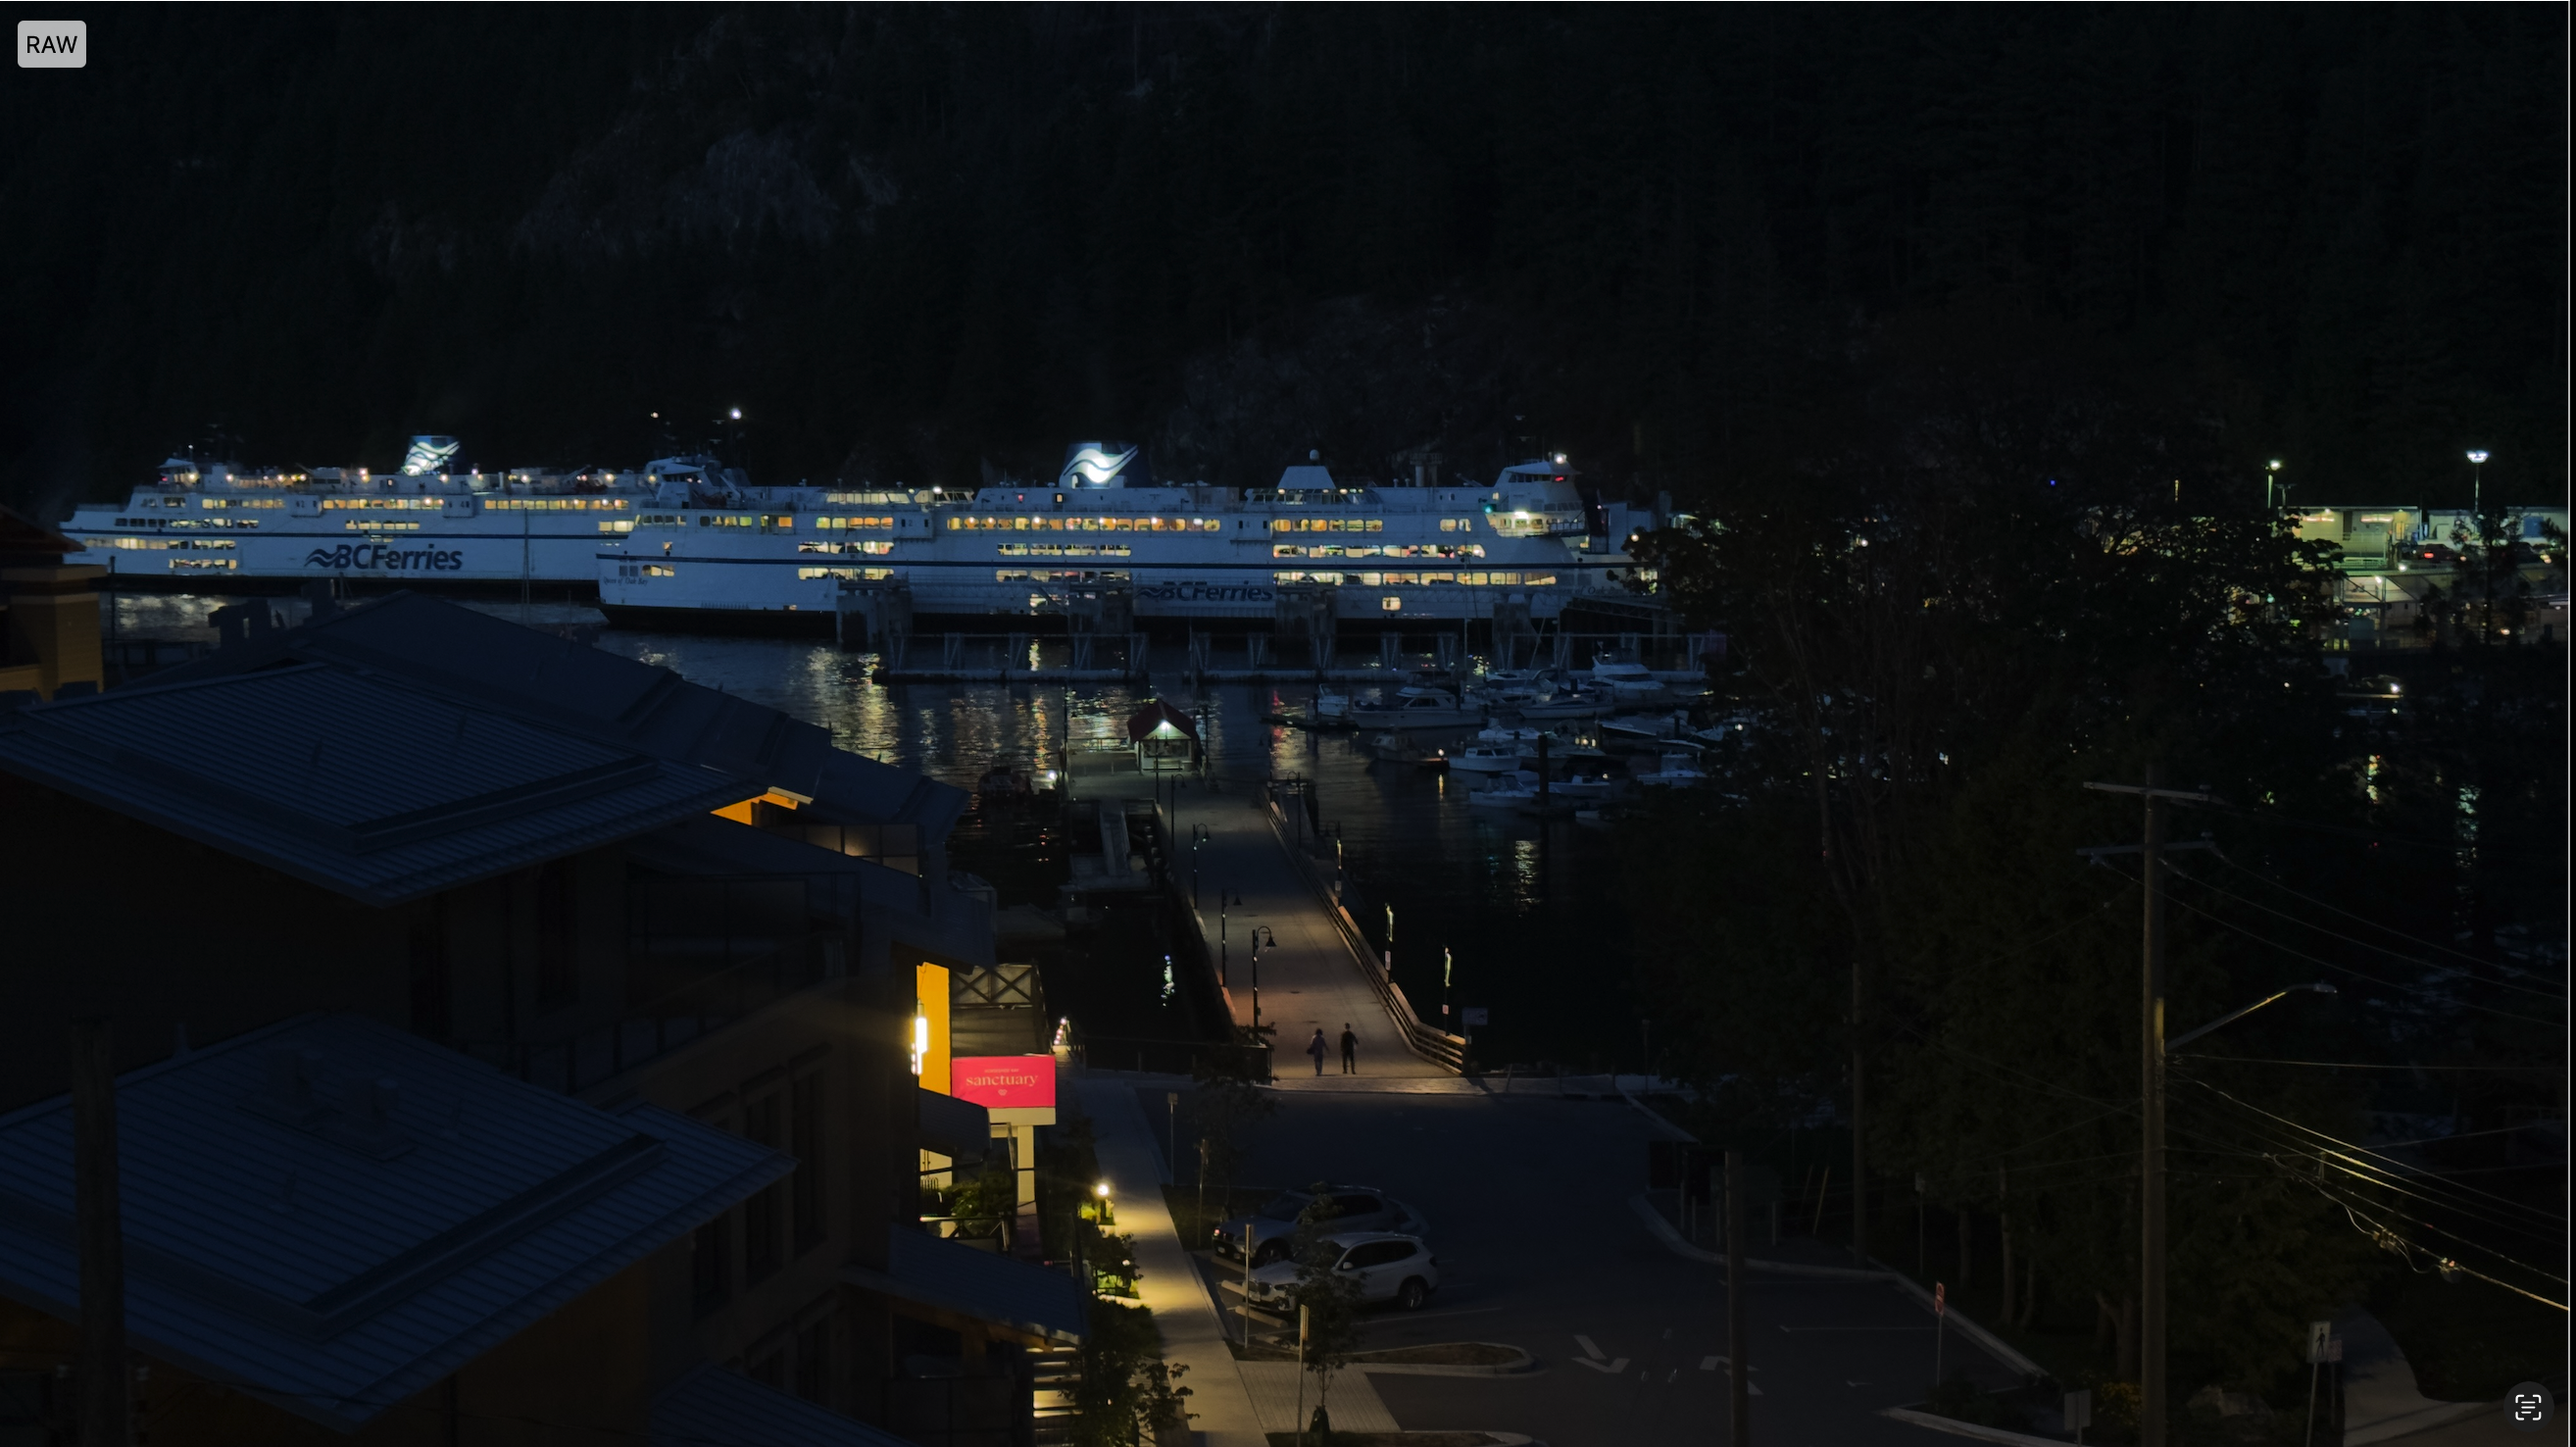
HI everyone ! I took several photo using Lightroom Mobile. I forgot I set the mode to High Dynamic Range instead of auto. So I took a bunch of image, and I don't know how I could process them. On Develop Persona, the image has a magenta cast. If anybody has suggestions how I could proceed. I attached - a jpg exported from lightroom mobile, and - the DNG also exported from lightroom Mobile - a screenshot of the DNG in Affinity Photo Develop persona Thanks ! APC_0147-hdr.dng
-
Emoji flags not supported
Olivier.A replied to Olivier.A's topic in Desktop Questions (macOS and Windows)
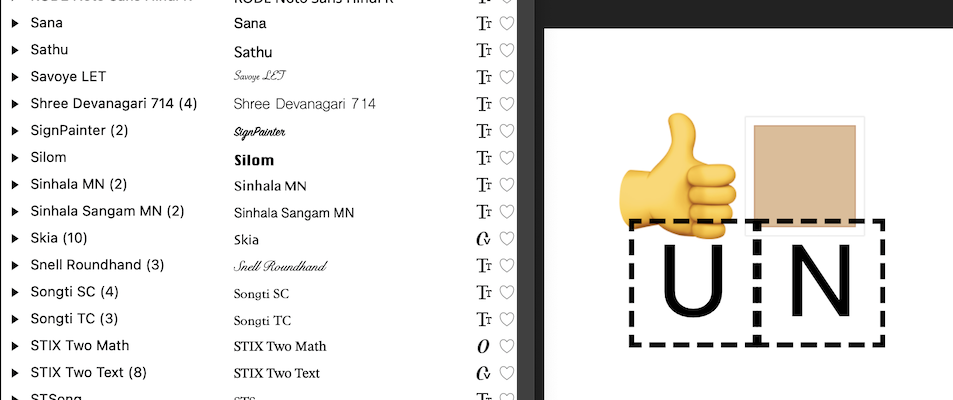
Ok, I see. Thank you for the explanation 👌🏼 (this emoticon comes from the characters panel) I made a test. Correct, a thumb up with skin-tone 2 has 2 characters. The UN then also. However as I don't have Segoe (I'm on MacOS), I don't know which font is it. Affinty shows !Arial (with the ! character, I guess it means not arial).
-
Emoji flags not supported
Olivier.A replied to Olivier.A's topic in Desktop Questions (macOS and Windows)
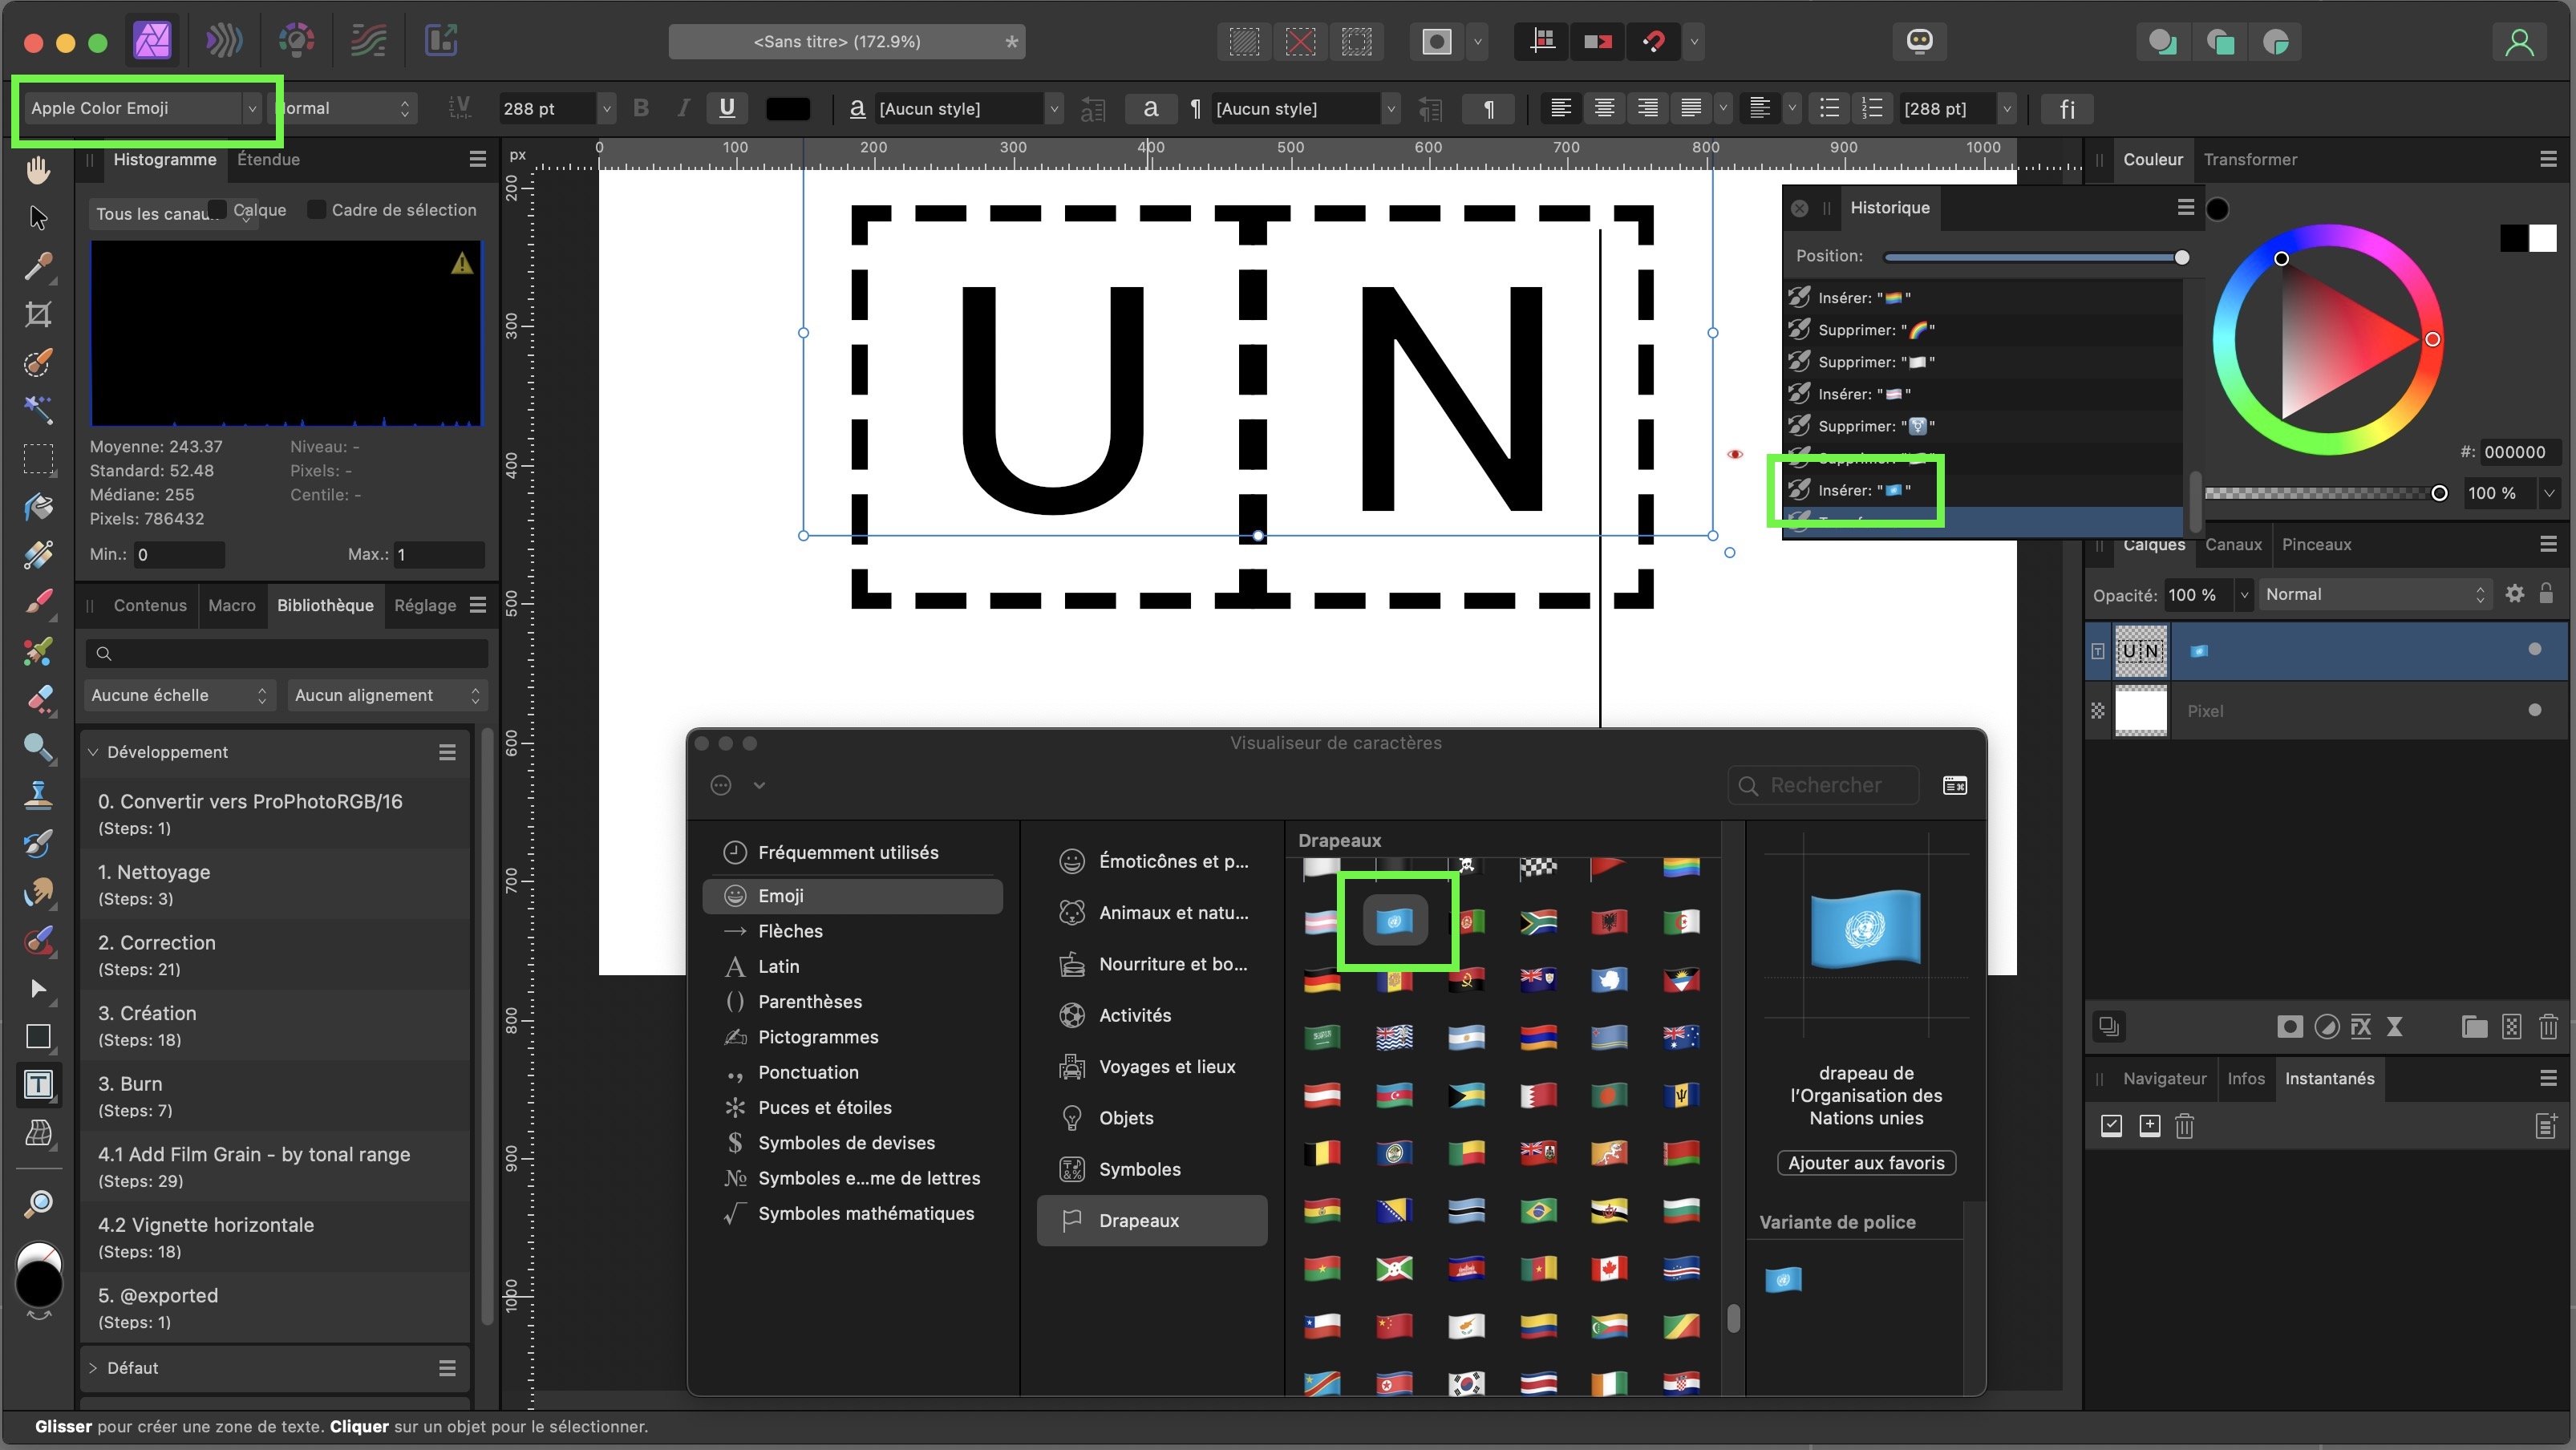
Android, Windows and MacOS all 3 supports emojis with different colours, should I suppose Windows and Android uses standard code, and Apple, non-standard, then ? In the screenshot, you can see in the history that UN emoji is correctly displayed. Just not in the text tool. It seems only it lack support. Right ? -
Emoji flags not supported
Olivier.A replied to Olivier.A's topic in Desktop Questions (macOS and Windows)
Interesting. There is a difference between the glyph browser and MacOS Emoji and Symbols WIndow (as shown on my screenshot). Are Emojis from MacOS considered as ligature ? Just curious. -
 Olivier.A reacted to a post in a topic:
Emoji flags not supported
Olivier.A reacted to a post in a topic:
Emoji flags not supported
-
Olivier.A reacted to a post in a topic:
QR-code panel typo in french
-
 R C-R reacted to a post in a topic:
Emoji flags not supported
R C-R reacted to a post in a topic:
Emoji flags not supported
-
Alfred reacted to a post in a topic:
QR-code panel typo in french
-
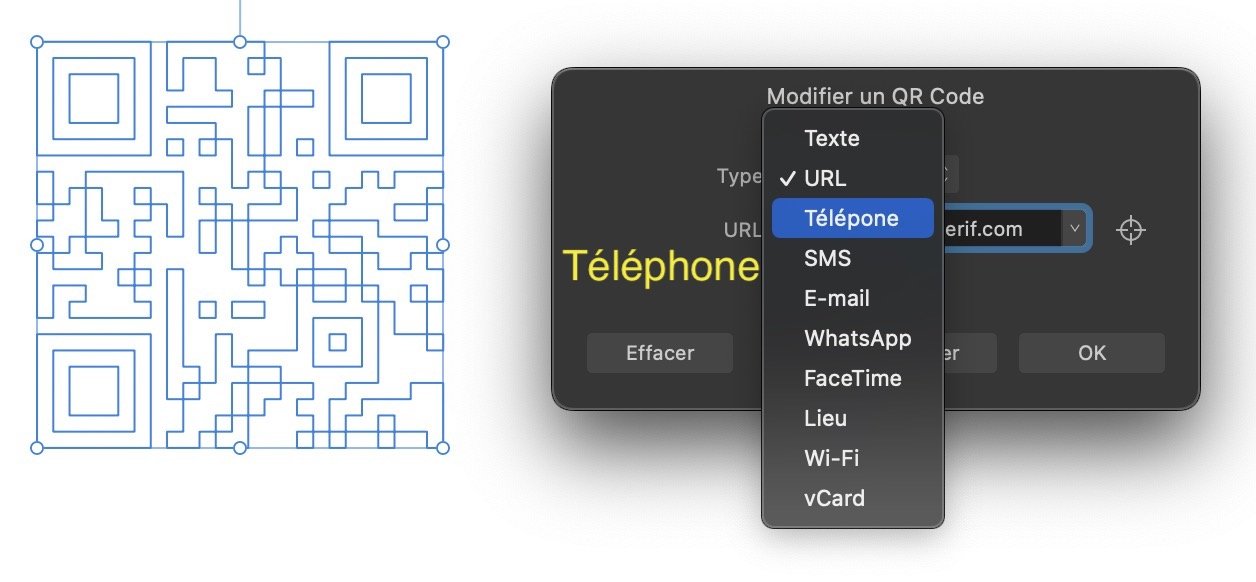
Tried the QR code tools yesterday, to find out a typo in the french translation. It should be Téléphone instead of Télépone (the H ismissing)
-
Hi, WIth the release 2.5, I found out this morning, Flags from UN and after (white, black, proud flags are no affected) are no more supported in text layer, displaying now 2 characters. However, the font and th history pannel displays them correctly. See screenshot. Hope this helps
- 13 replies
-
- 1
-
-
- affinity photo
- 2.5
- (and 2 more)
-
Oidyuk reacted to a post in a topic:
Develop vs. Edit persona
-
Old Bruce reacted to a post in a topic:
Develop vs. Edit persona
-
Develop vs. Edit persona
Olivier.A replied to Pito Salas's topic in Desktop Questions (macOS and Windows)
The "develop" term comes from the analog film world. When you needed to "develop" you film using chemicals and masks. Depending of what chemicals, quantity and time, you would get different developed images. With digital, you have basically the same, but everything is done either in camera or on computer/phone/tablet. Let's say you set your camera to produce RAW+JPEG, you get 2 files on your card. As you mentioned, RAW is just data from the sensor. It can't be even displayed because they are just voltage of the sensor. JPEG is an RGB version of the image, and is coming from the RAW data too. What separate RAW from JPEG on the card, is that the camera processed all the numbers and converted then into RGB format, and added some process that nobody knows but the manufacturer. The image is not only converted but also processed. Then, it is saved in a quality loss format : jpeg. You can be really be happy with the result, as the camera manufacturer has a process that xou like. This is specifically the case for Fujifilm user who really like the different looks available. But each manufacturer has its own receipe. Sony jpegs are more cold / neutral, Canon jpegs more warm. Now, you may be not happy with what the camera do to the RAW file. Don't like the look for example, or you want to get your hand dirty and use the RAW to developp yourself, using all the tools available in Affinity Photo. Yes you are right, developing a RAW add complexcity, but gives you the opportunity to add you tweak during the process. In comparison, you could say, why do I need a raw meast, when I can eat a cooked piece of beef... you can choose the restaurant or chef you like to cook it for you. you might be pleased with the result, and you don't care about how it's been cooked, boiled, grilled etc... and that's toally fine. Now, you might want to have your raw meat and cook it yourself, the way you want. Yes, it add complexity because you have to find out how to cook this raw meat... If you let the camera manufacturer do the developement for you, along the process, some data have to be left out, and you can't decide which one. It's part of their process. If you decide to start with the raw, it's up to you to find out how to keep the details and make them hide or shine. You decide. Back of the piece of meat, either the chef or you decide what flavour you want to enhance when cooking. It's all in the process. You might want to trust your chef, or you can master the skill of enhancing the flavour you like. -
Why RAW files doesn't open in develop persona?
Olivier.A replied to Kaveh's topic in Desktop Questions (macOS and Windows)
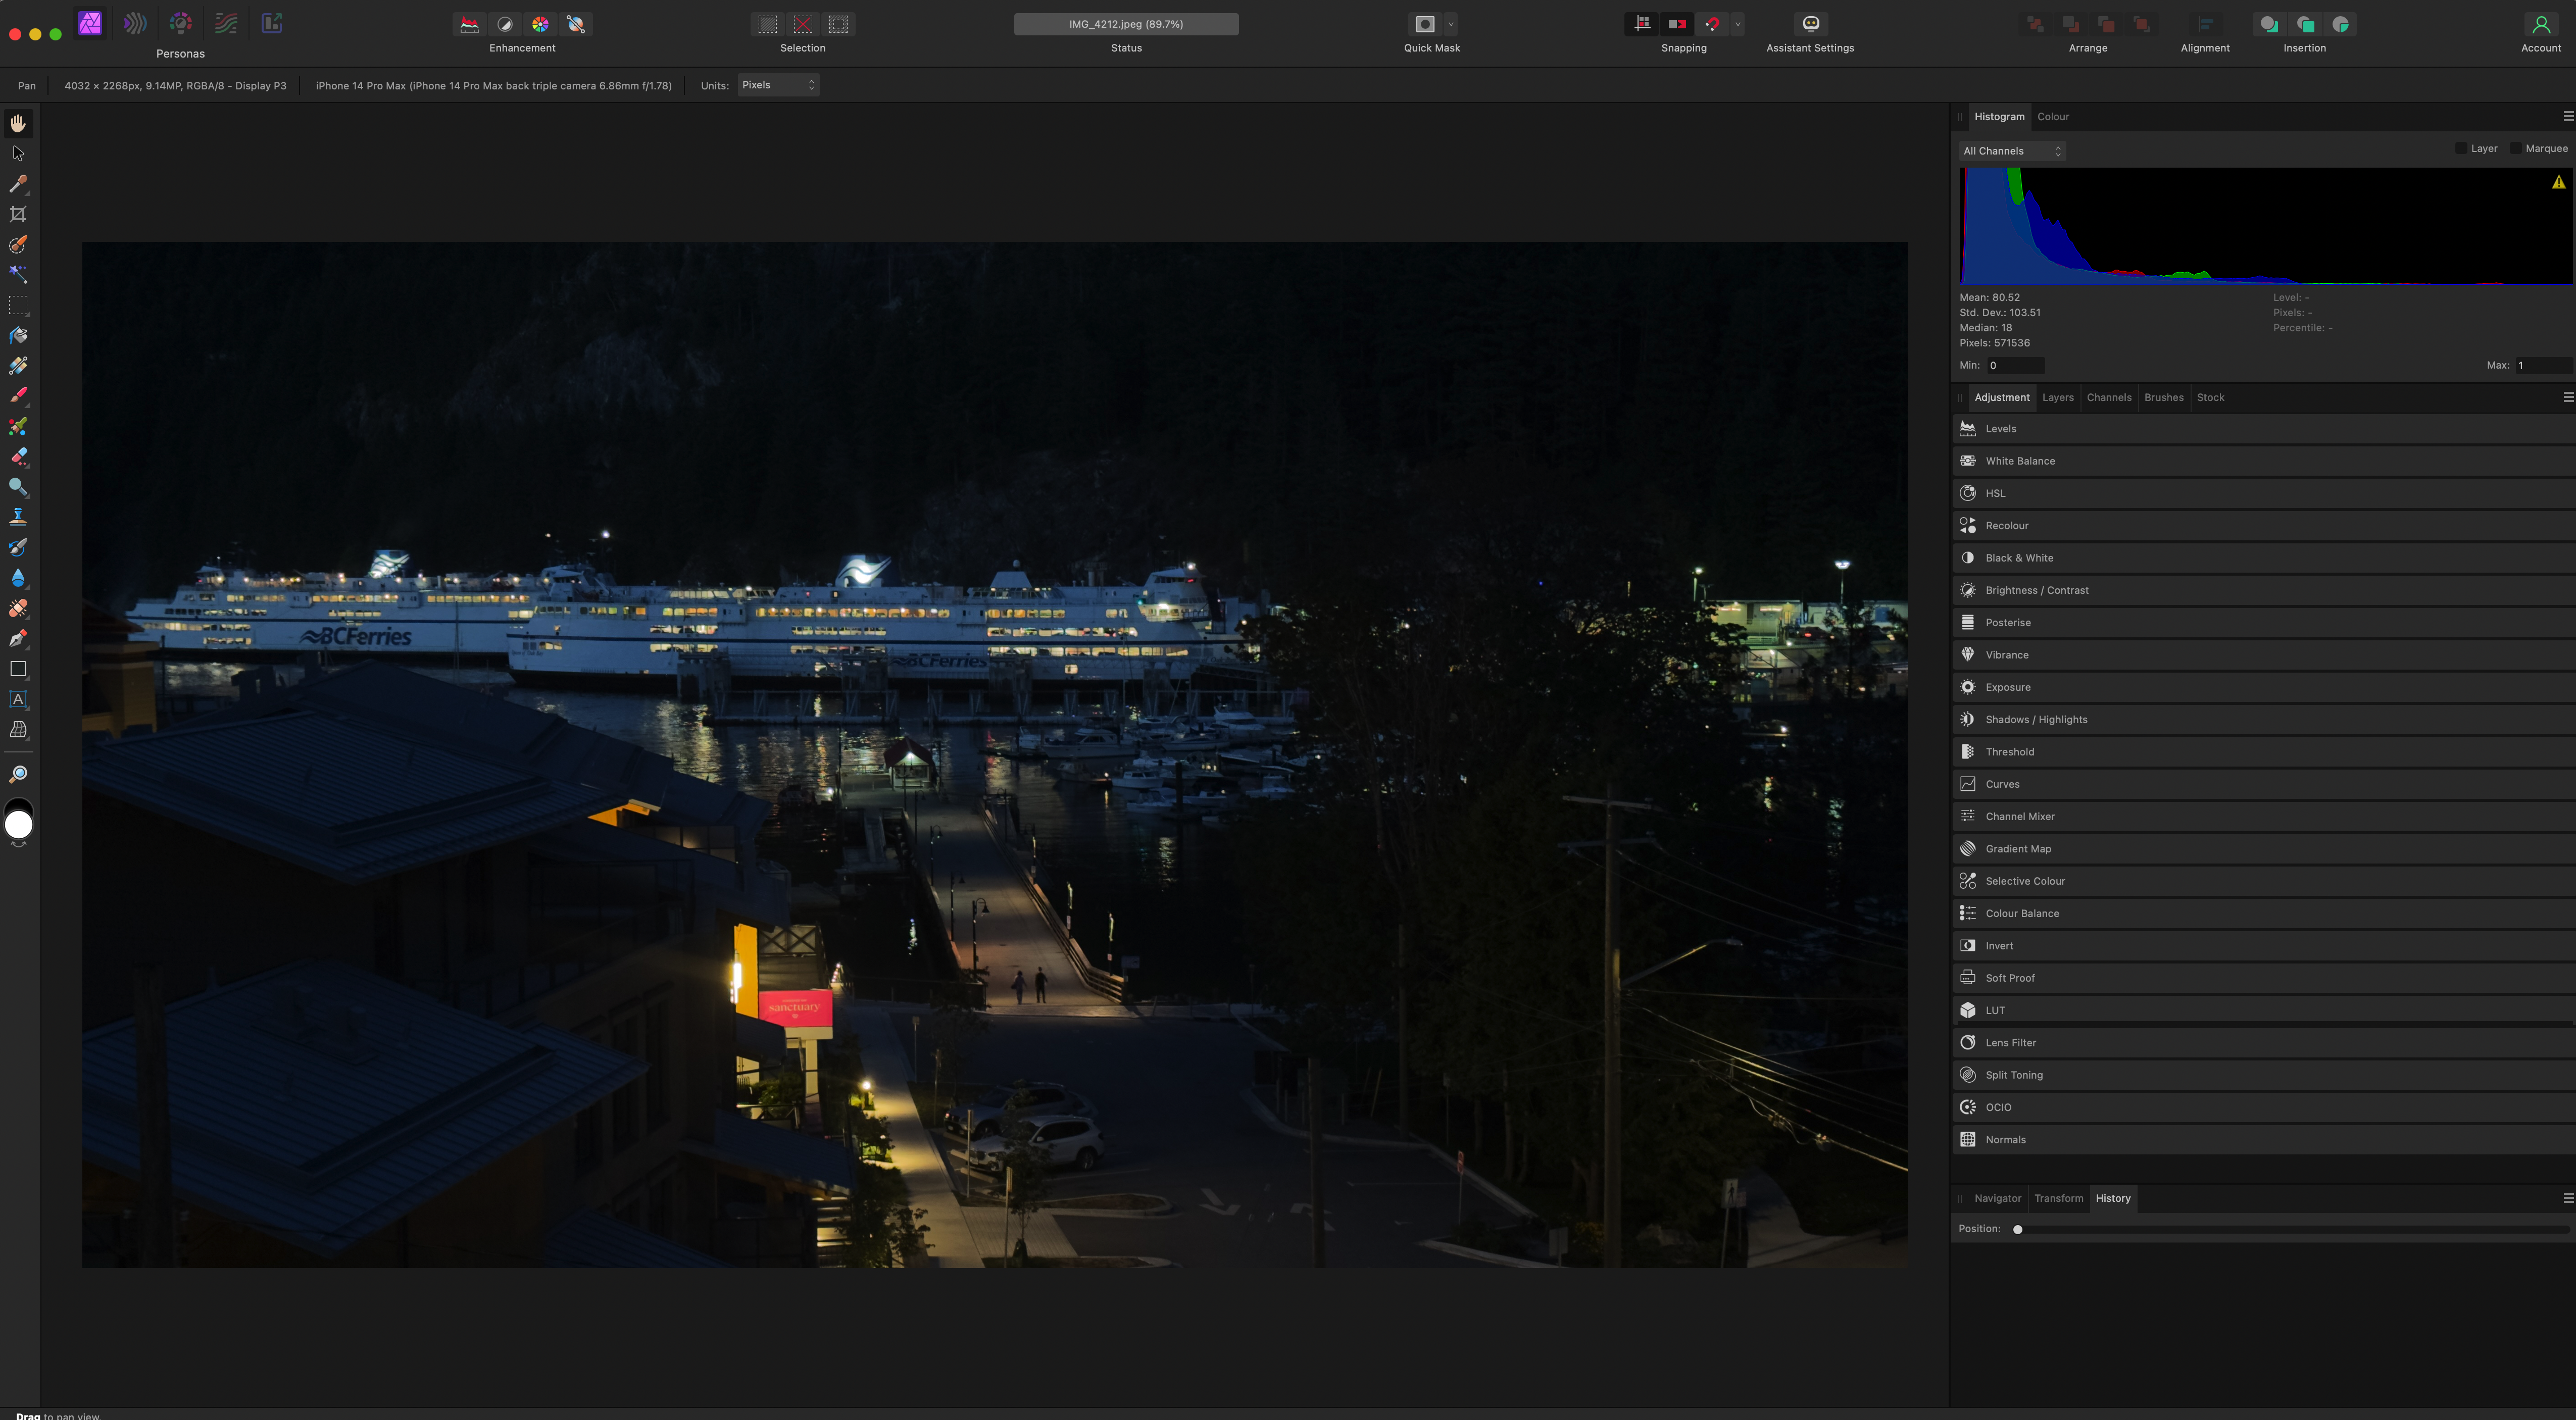
From your screenshot, Affinity Photo has loaded the file IMG_4200.jpeg If it's a iPhone Pro Max RAW file you would have the file named IMG_4200.DNG You should check Camera settings on the phone if Apple ProRAW is switched on. When not : the camera produces jpeg. Affinity doesn't convert file format on the disk. Only when you use the export menu, and you select which format you like to save.
-
When creating a new stack image, the target document uses sRGB colour profile. Bit depth is correctly managed by the assistant. There should be an option to set the colour profile of the target document (like it is possible when going from Develop Persona to Photo Persona). My use case is I'm loading multiple RAW file (DNG) to the stack panel. I like to keep as much information as possible, but the resulting document always default to sRGB. The current workaround is to first convert all RAW file to DNG setting colour profile to my prefered profile (ROMM RGB), then stack TIFFs. that is an extra step ini the process. Regards,
-
You are may be right, stacking may be not support RAW files. And AP 2 is only using embeded jpegs instead. I think I found out ! It's in the prefs pane under the Colour tab: When "Convert open files to workspace" is UNchecked (which was at the beginning), Stacked photos are using sRGB color profile. (but why sRGB, when it's raw ?) When "Convert open files to workspace" is CHECKED, stacked photos are using ROMM RGB profile, that is set under the RVB colour profile above. This also means that any photos (RAWs as well as jpegs, tiffs, etc...) will now open with ROMM RGB profile. Which is fine with me