travisrogers
-
Posts
27 -
Joined
-
Last visited
Everything posted by travisrogers
-
 It's funny how the quirks (UI, workflow, bugs) with Affinity apps make them either incredibly difficult to use because you can't for the life of you figure out how to do something that should be simple and logical, or there's weird bugs like this that don't let you paste in a screenshot from a Mac with a P3 display profile without it rendering it as a linear image. How do you even end up converting the image back to 8 bit without it applying a rendering intent that converts the washed out look into a different bit depth?? Converting the profile is not the solution. Do I need to create a procedural texture to convert from linear? Do I need to use an ACES OCIO adjustment layer to convert from Utility Curve sRGB to Utility Linear P3 D65? I'm happy that this has been acknowledged as a bug and hopefully it'll be solved sometime in the unknown future, but at least give us some 'Affinity recommended' hack work-around to dealing with this issue while we endlessly wait. I honestly can't stand Adobe, but I sure miss being able to jump into a graphics app to throw down an idea without constantly tripping over the software, wasting hours of my time and eventually giving up 🤯
 -
Thanks Nathan, I just installed the beta as I wasn't using the MS Store version. It opened without issue. Will check back to reinstall the public version of 2.5.2 once it's released.
-
Just updated to 2.5.0 and now I can't get Photo to open. It gets to the 'Loading fonts...' message on the loading screen and then crashes. I tried clearing user data and hardware acceleration as suggested above, but no luck. I've also tried turning off any installed fonts. Anyone else getting this issue or have any other solutions? I can only imagine that this will happen to Designer and Publisher as well if I update. Running Windows 11 23H2 OS build 22631.3593 Thanks!
-
To add to the discussion here. The Assets gallery functionality does not seem to be something that was intended to be used with adjustment layers. It does seem to work with single layers from some adjustments for example if I use a single curves layer I can drag it out onto my image and it works fine. For most of the other adjustments however it just makes the entire image go black or it does nothing at all. I've been editing a lot of renders in the ACES color space and I use the same two adjustment layers to convert the image back to sRGB in order to export a final PNG (Image attached). OCIO and or the LUT adjustment layers do not work with the Assets system. If I try to apply them from the Assets panel individually they make the image go black and if I try to add them to the Assets panel as a group they have no affect on the image once added. I get that this feature was added as a way to support interface designers by providing a repository for their most used UI elements, but it would be great if it could be extended to fully support adjustment layers as well. Finally, even if this was only intended as a system for pixel or vector layer elements, it's still confusing and seems more like a bug than intended functionality that you have to select 'Show As List' from the parent submenu in order to see any assets that have been added. Additionally the fact that you can't drag and drop layers onto this list is also confusing. Maybe I'm missing something and there's a system that's intended to be used to save adjustment layer sets, if so I'd love to learn where that is and or how to use it. Edit: I figured out how to add the adjustment layers individually as presets which helps, but it would be great to be able to save out stacks / groups of adjustment layers that could be added as an entire group. Best / Travis

-
Update to OCIO v2.0
travisrogers replied to theartofsaul's topic in Feedback for Affinity Photo V1 on Desktop
+1 Here as well. Would love any update from the Affinity team on the planned or in progress support for v2. -
Hi, I just wanted to mention that I'm also experiencing this. My second display is also a 4K TV and I don't always have it turned on. It's listed as display 2 in my Windows system so it shouldn't take priority over display 1, however if the 2nd display is off when I launch AP or AD, neither apps will display. They show the interface thumbnails if I hover over the icon in the task bar, however. If I then turn on the 2nd display then the UI will show up on my main display. Turning off the 2nd display doesn't cause any change as the apps are open. Clearly this isn't a huge issue, but now in order to open either app I have to turn on my 2nd display. Best / Travis Update: I managed to get AD to reset to display 1. Just moving it to D1 and exiting didn't solve the issue. I had to create a new document (the document creation dialog opened on D2 which I moved back) save the doc and exit AD. This seemed to do the trick.
-
I’d like to promote that the Align tool set be made available in the Selection tool’s contextual tool bar at the bottom of the screen when items are selected. Currently it’s buried several levels deep in the main tool bar and is cumbersome to access when performing multiple different alignments. This functionality is readily available in the top bar on desktop and should be promoted on iOS. Additionally it would be amazing if we could use keyboard shortcuts to quickly align to top, bottom, left and right. Thanks!
-
I don’t believe this feature is working in the latest version of the app v1.8.6.1. Sliding the Background Grey Level to either side does not change the background in the app.. it’s always a light grey. It would be great to be able to darken the background, especially when working in low light conditions. Has anyone else experienced this or is it working as expected?
-
I second the need for a keyboard shortcut to delete. Having to tap the trash can icon when I want to delete something is cumbersome and breaks my flow. It’s also a different behavior from the desktop app so as a Pro user who uses both I have to pause each time I want to delete some element in Designer on my iPad and will always hit the Delete key several times before I realize that I have to tap the icon. If you’re worried about people accidentally pressing delete as you would on desktop and.. deleting something, maybe you could add a switch in the preferences to enable this function for those of us who just want to get our work done
-
Loading OCIO configs on iPad
travisrogers replied to alexfry's topic in Pre-V2 Archive of iPad Questions
Ok, it's Sept. 2020 and unfortunately this still doesn't seem to be working 3 years later. Regardless of whether or not this worked in-house when originally implemented, it's a temporary workflow that should not rely on unknown iOS file app processes that can and do change without notice. I've tried to get a folder to covert to a package using the description in the help files several times from my MacBook Pro and there is no conversion happening, it's still a folder. I'd love to see a real solution to be able to edit OCIO / ACES files in AP on iOS. @Lee D Is there any new progress on this or are there new tricks to get this to convert? Has anyone been able to get this to work? Thanks / Travis -
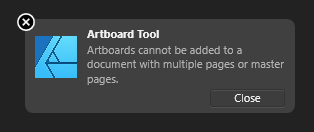
I'm not exactly sure how to recreate this issue and it may be an artifact of Affinity crashing while working on this document, but either way I'm not able to create a new artboard in this document that was started without initially adding an artboard via the document creation dialog. When clicking on the artboard tool the tool bar options are greyed out and if I attempt to draw out an artboard I get the following error message: "Artboards cannot be added to a document with multiple pages or master pages." As far as I know pages and or master pages are not capabilities available in Designer. Is there some mix up here with Publisher (which is not installed on my machine)? As mentioned, I haven't been able to recreate this issue as new documents seem to work as expected whether I create the artboard on document initialization or after. Attached is the error message, the tool states and the Designer document. no-artboards.afdesign
-
iPad colour calibration
travisrogers replied to Jason Holt's topic in Pre-V2 Archive of iPad Questions
@Dan C and @Blende21 thanks for the updates. I appreciate it! Looking forward to this feature in iOS. -
Attempting to print either via the keyboard shortcut or the File menu causes Designer to immediately crash repeatedly. I'm running v1.8.3.641 on Windows 10 x64 (Version 10.0.18362 Build 18362) and also just attempted to repair Designer via the most recent installer with no luck. Please let me know if you need any further information. Best / Travis
-
iPad colour calibration
travisrogers replied to Jason Holt's topic in Pre-V2 Archive of iPad Questions
Hi @Dan C, I'm currently looking to set up my photographic workflow on my iPad using Affinity Photo and was researching how I could color calibrate my iPad display. Is this functionality discussed in this thread implemented currently and if not, is it currently being planned for implementation? Thanks in advance! Travis -
How to add ALPHA CHANNEL
travisrogers replied to hl24a3's topic in Tutorials (Staff and Customer Created Tutorials)
Hi, I'm currently trying to achieve the same thing here in April of 2020 and it seems it's still not yet possible, or I can't for the life of me figure it out. I want to make a 1024 x 1024 PNG image with an alpha area in a particular position. If I export the layer with the area I want to keep and I specify in the export dialog that I want to export the selected layer without the background it works as expected (I get a PNG that's transparent except for the area my selected layer occupied), however, the image is now cropped to the area of the selection and is no longer 1024. Ultimately I want to keep my image 1024 so that when I map it in the 3D app I'm using I don't have to guess at the correct scaling and positioning of the image as the 3D app is assuming it to be a square format. I've played with every combination I can think of in the Layers and Channels menus, but I can't seem to achieve what I'm looking for. In Photoshop I can create a 1024x1024 canvas add a layer with the graphic I want, position it how I want, delete the background layer and export with transparency which gives still gives me a 1024x1024 image. Is this possible in Affinity without the use of a third party app? Thanks in advance! -------------------------------------------- Edit: I think I figured out how to do this using the Export Persona. If you select the layer you want to be opaque and then create a slice for that layer, you can expand the slice to take up the entire canvas and when you export that slice it will retain the scale of the canvas and layers / layer position and alpha out the background. I'm happy to see that this is possible for my workflow as I would prefer to us AP vs PS. It would be great and so much easier however if there were an option in the regular export dialog Area pull-down to export 'Selection without background full canvas' or something to that effect.. Maybe it's a checkbox below the dialog 'Export full canvas size'. Please let me know if there's a more efficient way of doing this. Thx! -
Adding to selection
travisrogers replied to matthias.linsbauer's topic in [ARCHIVE] Photo beta on Windows threads
I'm surprised that this is still an issue. I've been a graphic designer for over 20 years and I had to research how to add to a selection in AP. Then I had to get my head around how that would actually work (clicking left, clicking right, dragging).. and then it took me several tries to actually get it to work as the first 4 tries it would cancel my existing selection in favor of the new selection instead of adding. Seems that the order you release the left and right mouse buttons has to be specific. I'm all for innovating and I've switched to AP as I believe that Serif is a much better company than Adobe, but some of the choices for interface interaction still baffle me. @MEB is a fix, or a user select-able modifier for this functionality at all in the works? Best / Travis -
Cryptomatte
travisrogers replied to Pixelatedvertex's topic in Feedback for Affinity Photo V1 on Desktop
ThiThis isn't the best solution as Photoshop is an expensive plugin in this case, but I open the file through EXR/IO in PS, have it auto generate the alpha masks from the cryptomatte and then I re-save it as an EXR that I then open in Affinity. This gives me perfect masks without having to do crude color selects in AP. Of course this functionality is a must have for AP. Hopefully they'll get around to building it in sooner than later. @James Ritson I'm sure the AP team already has this on the to-do list, but I thought I'd copy you just in case. Best / Travis -
Hi Lee, Thanks for the reply and sorry for the delay in mine. James came to the rescue and showed me the gamma trick with the Live Procedural Texture tool https://forum.affinity.serif.com/index.php?/topic/102122-aces-exr-challenge/&tab=comments#comment-549916, which worked out well enough for my needs. The other side of the equation is getting the rendering engines to fully support this.. It's early days, but it's getting there. Best / Travis
-
ACES EXR Challenge!!
travisrogers replied to travisrogers's topic in Pre-V2 Archive of Desktop Questions (macOS and Windows)
Oh James Brilliant man! I believe this is the magic button I was looking for! I honestly would have never thought to use the procedural texture to modify gamma and couldn't figure out how to get around the Levels gamma limit of 2. Now I have a new tool to play with and am super happy to be using the wider gamut of ACES. I'm certain that the difference is due to moving from 32 to 8 bit, but otherwise the outcome is well within the acceptable range. Thanks as well for putting together your workflow bundle. I'll say that both the bundle and the procedural texture gamma trick would be great quick tip videos for the community. One quick question if you have the time. If you were working on an ACEScg file and you wanted to save it out to a wider gamut than sRGB for fine art printing. Would you output to Rec.2020 via an OCIO adjustment layer and then convert to something like Adobe RGB through Document Convert / Format (8 bit)? Or given that it's already a linear file, will setting the output to out_srgb allow you to convert to AdobeRGB and take advantage of that wider space? I'm still getting my head around linear files and how they can be converted as traditionally if the image was in sRGB, you could convert it to AdobeRGB, but there would be no advantage as it wouldn't add any more color information. Again, thanks for your help here, it's much appreciated! Challenge won! Travis -
Sounds official anyways.. Can ANYONE take one of the ACEScg Golden Images https://github.com/ampas/aces-dev/tree/master/images ( SonyF35.StillLife.exr ) and save it out from Photo as an sRGB JPG or TIFF and match the EXR as it's displayed in the OCIO Display Transform (It should also match the golden image reference 'SonyF35.StillLife_ODT.Academy.sRGB_100nits_dim.tiff') ? Theoretically this should be a SIMPLE challenge and maybe I'm just dumb as a post and I'm missing the magic button right under my nose. If so, please put me out of my misery! Travis
-
I'd like to add to this that I'm noticing the 32-bit Preview settings are also not updating properly when only using one image. I just changed the profile assignment for my image while viewing it through the ICC Display Transform, then I undid the change, but the image did not update to the correct look until I toggled the display transform settings (clicked on OCIO, then back to ICC). Thanks
-
Thanks Gabe, I appreciate the help! Best / Travis
-
Thanks Chris, glad you’re able to reproduce it on your end. Let me know if you need any further info from me. I appreciate the help!
-
Hi, I'm noticing that when switching between 2 documents, Photo briefly flashes the image for the tab I'm switching to at the 'Zoom to fit' size when the size is actually at 100%. If I have two versions of an image open and I'm trying to switch back and forth between to get a sense of the differences this creates a distraction. To reproduce: I'm using 2 1280 x 720 images that I have on two different tabs, both are set to view at 100% and I'm just switching between tabs. Photo will briefly show the image when you switch as though you had zoomed to fit before it shows the image at it's actual zoom level of 100% I'm running Photo on Windows 10. Thanks!
-
Sorry for posting in the wrong forum. I moved this to Bug Reporting, but can't seem to delete the post here as I'm new. Hi, I'm not sure if this is a feature or a bug, but the expected behavior (mine) is that the Display Transform settings would be specific to a document so if I have 2 documents open each using a different display transform (one might be ICC and the other OCIO) and I switch between them the DT settings would respect the document and switch. Additionally I'm noticing that when using the OCIO Display Transform setting if I focus on another app and the back to Photo and I switch between documents, the image will blow out requiring me to switch to another setting (unmanaged or ICC) and then back to OCIO to reset it. I'm running Photo on Windows 10. Thanks!