Chris26
-
Posts
915 -
Joined
-
Last visited
Everything posted by Chris26
-

Find and Replace - a tiny thing not working
Chris26 replied to Chris26's topic in V1 Bugs found on Windows
Hi Walt, the problem is that glyph is not the same. More to the point though, I can not get theseglyphs into the find and replace dialogue, I mean what the heck does the U+Nummerical number mean when you hover over these glyphs in affinity? The only way that glyphs go into the dialogue is via Windows own Unicode. So these glyhs seem redundant in Affinity right? An apostrophe from the glyphs is not the same as one typed in via unicode windows alt + numerical number, this is quicker and it works, in the find/replace as well. Ok, so It really does not matter any more, just a small niggly thing of no consequence I suppose. Windows own Alt unicode works for everything in Affinity so that is all that matters. I’m happy! or rather I Alt+0146 m happy It is short for "This is" or more commonly "It is" used in olde English vernacular and spoken even today, but I am using it for upper Medieval language. -
Find and Replace - a tiny thing not working
Chris26 replied to Chris26's topic in V1 Bugs found on Windows
Walt, the glyph browser has U+0027 as the code for this. Well double clicking on the apostrophe in the glyph inserts it into the text, great. That's fine. Thankyou for that. However I have now the problem that I do not know how to use the U 0027 becasuse double clicking this glyph into the FIND dialogue does not work, and holding U while typing the numbers does not work either in affinity text or the find dialogue, so I need educating here please.. I have never needed to use glyphs before, I used the windows keyboard UTF codes in the past but that was on the apple. Since if the Find dialogue does not recognise a straight apostrophe, then it has no point trying to replace them using this method. So I suppose I will have to do it manually. EDIT: OK, ALT + 0146 gives a much nicer looking apostrophe than affinity's glyphs. Also it is accepted by the Find and Replace Dialogue, which I did not expect. So Affinity might want to change this or not, or maybe it has its reasons for this I do not know. But using the windows UTF code works perfectly. Here is the ALT + 0146 T’is it's actually nicer than the curly one in Affinity's Glyphs which still looks too straight. Yes, I know, I'm a perfectionist. -
Yep - Publisher for this one.
-
Find and Replace - a tiny thing not working
Chris26 replied to Chris26's topic in V1 Bugs found on Windows
Ugh? I only know curly apostrophes, you remember, those good old original ones from the days when we used to write things with a thing called....a, now what was it called? Oh yes - a pen. But the keyboard has only straight apostrophes Walt. Here it is: ' and this is what I used to write the word : T'is. -
It depends upon what the "Stuff" is. But it seems to me that you could do this in either publisher or designer. Publisher is not a designing package. Boxes and grids coloured and shaped can be done in publisher. But personally, it sounds to me that you would be better off having both programs for nothing more than sheer felxibility. Why don't you do the designing in designer and then try and repeat that in publisher if you only want to use one program. You can still employ text in designer.
-
Windows10 up to date.The Purchased Publisher. Typing the following into "Find": T'is - does not find this particular word, however "Tis" is found. I have tried many combinations involving an apostrophe and it appears that the Find and replace can not recognise this form.
-
Yes..... but with a however included: If you are designing a single page flyer I am sure designer would be all you needed.
-
My twopenneth's worth Martin: Designer is for designing things, it's for artists and those that design, hence its name; whereas Publisher is for placing what you have designed mixed in with text and pictures etc, it's for making booklets, books and magazines.
-
No doubt a suggestion that is useless, since I have no idea the length of text that you are talking about, but if it is a case of one header and then a body of text, why not just make two text frames? And position according to taste? As said I bet you have a good reason why not to do this, but I had to suggest it.
-
Colour difference opening PSD file in Af Photo 1.7.1
Chris26 replied to StefanSweden's topic in V1 Bugs found on macOS
Actually when I saw this the first thing that really popped out was NOT a difference in colour but in CONTRAST and or a blue colour cast. If you were to take the second washed out image and apply a gentle curve you would then get all that colour back. If however you want to apply contrast to the first image WITHOUT changing the colour at all you would apply a curve and select Luminosity blend mode. it might also be a colour cast, a blue one. Change the colour temp to a warmer one, or apply a gentle warming filter for a quicker result. -
The spectrophotometer (or spectrometer) is a device that you place over your screen. When you click 'Go'' it analyses the RGB values and tones and white point of your monitor. The software then loads this into your system and your screen will change from its manufacturer's default setting to a new setting which will always be more accurate according to your ambient light temperature in your room as well. Which is why you should never view a computer screen with the sunlight from a window in front or behind you for example, and try to keep the lighting in your room at a constant, this affects editing. Your screen is now set for perfect viewing conditions provided that you always view your screen within roughly the same lighting environment as when you callibrated it. This calibrated profile for your screen is automaticallyloaded into your computer hardrive and used as the new setting for how all colours and tones appear on your screen You need do nothing further. An ICC profile for paper is a profile which is selected in the PRINTER when you go to print. It has nothing to do with the screen. As above, you set a consistent working condition for your monitor. Not too bright, not too dark, RGB values nicely set so to speak. Now, you contact a company that specifiaclly does ICC profiles for any paper you choose. Go to their website, download their required image, put this image into your chosen software, AfPhoto or photoshop for example, now you print that image WITHOUT colour management, you set all colour management policies to either off or None, you print it, send it back to the company, they profile it with their expensive equipment, they then send you an email with a file that has an ICC extension. You right click on this and load this into your computer, and the software and the printer will automatically have access to this ICC profile so that when you go to print you select this paper and not a generic profile that came with the printer. On the matter of the profiles that came with the printer, these will be for Epson papers. So no point in sending these away, epson's own icc profiles for this printer are good. The only time you Definitely need to send away for a seperate ICC profile is for third party papers. This is far more accurate than tryng to find one for a non-generic paper from epson's settings. Callibratng a monitor for optimal viewing conditions and an ICC profile for a specific paper are two different things. My colours on my Laptop are so off and my tones are not that good, when I edit my photo in photoshop on my mac, I know it is how I want it. When I transfer to afPub on my maccheesburger and onion windows laptop it looks such a mess, its embarrassing, but I send it to the printer in this horrible messy condition Knowing that what prints out will be perfect, and it matches well with my apple screen. I hope you understand and can work out why I am never dissappointed with my prints. Thought I would give you this link, I do not know anything about "colourmonkey" except that it is very good and popular and reliable. But I have used datacolour so it is my personal choice https://spyderx.datacolor.com/about-spyderx/
-
May I just chip in to compliment what BofG just said.....I use a monitor callibration tool from Datacolour. They have an excellent customer service. As for callibrating a printer, strictly speaking you Profile sheets of photographic paper, which are then used as the ICC profile that you select when you go to print. Having said this, unless you are doing a lot of photography, and unless you are using many different kinds of paper, then It is far cheaper, a lot cheaper, do send away for a custom ICC profile, this is what I did since i was only using about two or three different media types. All you do is download their chosen image that you use to print on your media (it is a complex series of tones and colours - not a photograph) send your chosen photograpic media through the printer with the printer set to No Colour management and send that away to the company. Usually 15 euros per ICC profile unless you order one or two more then it is cheaper. Hope this helps in your decision process. As a final word, some people, like myself, used to misunderstand the concept of matching screen to printer, that one is not so much matching screen to printe, since this can not in reality be done 100% accurately, though this actually does happen for 95% of tones and colours, one is profiling for consistency between screen and printer, this subtle difference is very important. Consistency means No dissappointment, and also means you know exactly which tones or colours need adjusting literally just before you print, which in reality are usually very very minor changes if you are perfectionist.
-
Ah yes Bruce, you are right, but, this oxymoronic approach benefits me since if I were to create rules guides and master pages for certain documents I would be making 12 master pages and 125 ruler alignments, you see my friend, if I may call you that, each page requires a different approach, and of course I change my mind like the wind changes direction, so for creative and flexible purposes of an unstable, mentally multi-directional interaction with the creative process - this method is absolutely ideal. For my other documents I do indeed create rulers and master page alignments - hope this last remark re-assures you that I have not lost it....just yet!
-
Firstly, even Einstein was a beginner. All the developers were beginners once and every single person on this forum was a silly person once, ignorant and asked silly questions, idiots and whatever other insults I can throw at them..............started with a smile and then... Secondly, yes, just as you have shown, this is correct. And if the cover was a differnt thicker material or something then this would be a seperate file, 4 page, (One piece of paper or card). Also make sure that your document is a multiple of FOUR. So it needs to be 4,8,12,16,20,24 and so on in size. Take note, your page one is actually a cover, page two is actually page one. Remember that the cover will have page one on its inside left. So you see here 10 pages, bt actually there are only 8 pages on 4 pieces of paper.
-
Hallo Craiigman, if your publisher file is setup like I suggested, you simply then work in WYSIWYG context, IE, what you are seeing on the screen is exactly how it will appear in print. Page 1 and Page 40 are the outside front cover and outside back cover, page 2 listed here is the inside left when you open the booklet. One other thing, your printer needs to have duplex facility. Does it print on both sides automatically?
-
Gentlemen, I have no idea whether this is a popular idea/request/desire/want/ or a selfish ambitious demand but I thought I would suggest it anyway since it is My selfish Demand As you can see from my 'B' movie, I do a lot of precise measuring on the fly, but what is just a wee tat of a whimsical pain is the fact that as you nudge with the arrows the measurements are dissappearing too quickly, I would prefer at least another two seconds before they dissappear. At the moment my work around is to flicker my eyballs constantly at the speed of light from right to left measurement and back again quicker than Spock could navigate the Star ship Enterprise through a time warp (No I am no fan of this series sorry). Thankyou Gentlemen. Have a nice day. PS; I would settle for a futher 1.2 second delay, I'll compromise.

-
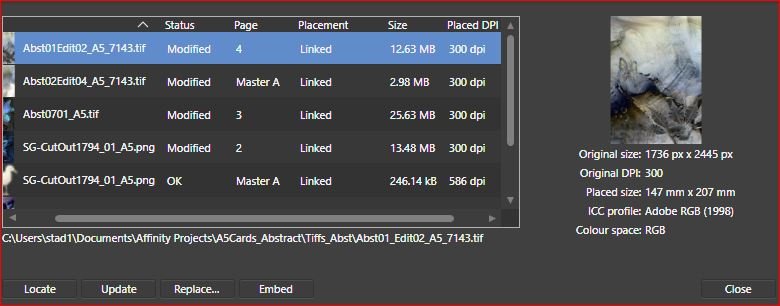
Hi Walt I think, my fault, you misunderstand me just perhaps? (Have no fear even if I did nothing wrong it must be my fault somewhere so I am constantly reminded) Firstly I never closed the document, I was still working on it while posting this message. Secondly, I placed the same images TWICE: on the second placement, which I took from my Image Document folder directly, not copied, I simply dragged the handles to size. That's it. Nothng more nothing less. I then luckily noticed when going to the pages where my other images were that they had indeed remained all the same size in mm, But, had become pixelated, in other words, the resolution of 300 for my 30x21mm images had affected my A5 300 pixel images to 20 ppi BUT this was not reflected at all in the resource manager, it still claimed that the A5 image had aplacement of 300 ppi, which clearly it did not. Something else also: I have the same image on my back cover photo in TWO seperate documents. But both images are linked to the ONE image in the ONE folder, when I adjusted one image 'A' in one document, my other Image 'B' in a completely different document) took on the adjustments of the altered image 'A' and became pixelated. As I said, no problem, I will just quickly re-do the document, thank goodness they are only cards. Anyway no matter, I simply went back to photoshop and made seperate thumbnails from originals as I did before I got lazy, and thought that I could do it in publisher without re-importing. It's really no big deal, lucky that this was not on my larger documents. My Musing: Theoretically I do not think really that this should happen, I am sure that once an image is placed and linked it should retain its info regardless of whether the original is then a second time placed, and that should retain its info and then so on and so on, I mean we have the technology, we have the brains, we have the sophistication to send drones to Mars and beyond...what more do I need to say
-
Gentlemen, well this is no real big deal since I am only talking about 8 images spread over two documents thank goodness. I decided to get lazy and could not be bothered to go back into photoshop to make seperate thumbnail images of my original ones which are placed oooo soo nicely in Publisher. So .I grabbed them and placed them and minimized them. To my absolute horror all my originals were then pixelated to 5 pixels per inch. (Exaggeration neccessary).....Is this actually normal behaviour, I'm talking about Publisher not mine. I know they are linked, so I suppose if they were embedded then this would not happen. But is there a way to select the same image and have it appear in different sizes without having to make multiple copies of the original? By the way there is no way that the modified thumbnail is 300 ppi, more likely 2000 but resource panel does not reflect this.
-
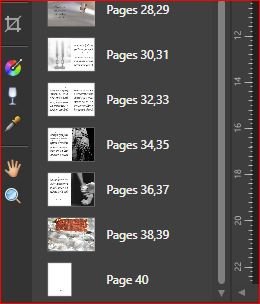
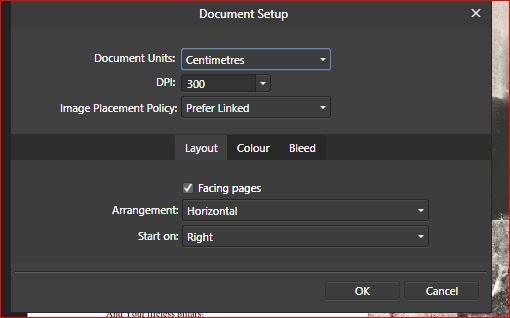
It is certainly good to read what Craiigman and Fixx have offered. However if you are just beginning it can be a little overwhelming reading all this for the first time. To start you off in affinity publisher I have presented an example that I hope helps. I have an A5 booklet of 40 pages here. Set up as Landscape. Page 1 you can see. Here is the end page 40. Set up the document thus, important point set start on dialogue to RIGHT. And you want Facing pages. A5 Portrait, despite being a landscape document is because it is in reality an A5 booklet. No need for any mental agility if you are printing at home. Hoever for PDF export and Outside Printers you may have to adjust, for example I had to once make front and back covers a seperate document and PDF and wasgiven detailed instructions on how I should export the PDF, a good printer will give you this information before you begin with document setup. Otherwise for home printing this is straight forward as shown. If I have missed something don't hesistate to ask.
-
Go to VIEW in the top toolbar, scroll down to STUDIO, Navigator is in that long list.
-
Hi Walt and Murfee, Solved. Completely missed the fact that I exported this image (due to its small size) as a PNG (24 colours only). All my images regardless in all documents are Tiffs. But this one and only one is PNG. The original is far more colourful I really thought I had a problem with common sense, but now I realise it was simply - memory!.... not noticing the file extension.
-
Yes Walt, , I went back to the original file to take another look, Logic states that this is what is happening, but I see nothing here that can promote this in publisher. I will have to figure this one out since it certainly can not be Publisher's fault. I will download the original and replace and see what happens.
-
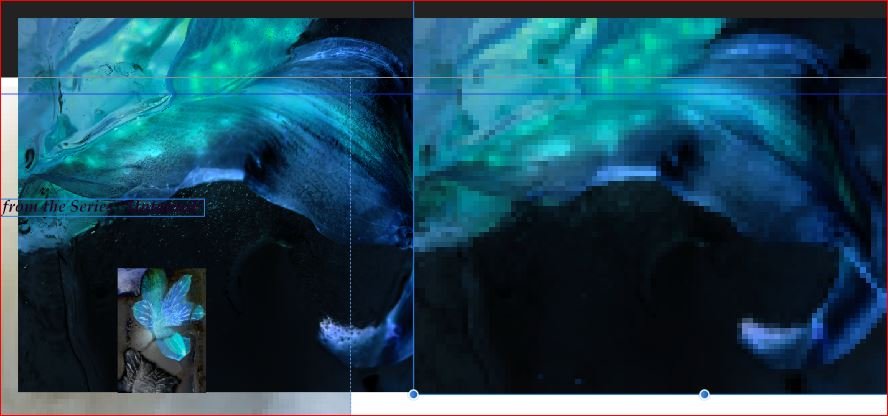
Windows 10. AfPub 171. Do not know why this happens. When I place an image on top of another image, in this case seagulls on top of a lightly toned image, the top image acts like a window, the underneath layer affects the top layer. I have done nothing to command this at all, theoretically I would never have expected this. I used the Place CMD in both cases, no alterations have been made inside publisher. First screen shot shows the iayer as it should be, the second when placed on top of another image. The change is most noticeable with the bird on the right. In the past I have simply used an adjustment layer to bring back the colours, but I do not think I should have to do this. The top image should never be affected by an image underneath unless one reduces opacity - as is standard practise. Thankyou.
-
Text inside Shape
Chris26 replied to robjenko's topic in Pre-V2 Archive of Affinity on Desktop Questions (macOS and Windows)
Ah that top bar in your image looks familiar, I remember having something similar to that on an Amstrad back in 1991. Pixel by pixel, I think a drawing once took me half the day. Then to save it, yep, bring out your notebook and type in a whole string in the command line just to save, another 5 minutes gone. -
Text inside Shape
Chris26 replied to robjenko's topic in Pre-V2 Archive of Affinity on Desktop Questions (macOS and Windows)
Don't you just love it? For this you needed a whopping amount of Ram - 16 Mb!