
ianrb
-
Posts
469 -
Joined
-
Last visited
Posts posted by ianrb
-
-
This image may help those not sure which tools to have available for editing photo -- everyone will have different ideas
Also; I have this screenshot to help put the tools back as they were before a program crash --- or ; I do something dumb . Yep; there needs to be a way to save our preferred window; even if that replaces the APPs default settings
For those new to editing ; keep it simple folks to save time looking for that tool you used once a month ago ---- you may notice I have very few multi choice tools . Keeps it simple for my older brain 🤣
If I notice I have not used a tool for sometime I often remove it
One column would be better ; however I like having the colour icons available --- not sure why the colours cannot be in a single column (??)
-
22 hours ago, gabrismart said:
Thank you, that is exactly what I was searching for
You are most welcome . I'm going to make similar macros for other adjust layers I seem to use often one way or the other --- Saturation and Vibrance in two macros --- and/or HSL saturation . Black and white could handy at times . Too many possibilities really and why I still do so much in the old faithful Lightroom 5.7 ; I would be totally lost if I lost that app .
-
Bugga!! Was hoping I was the only one; don't feel so important now
.
Thank you for the answers
- markw and firstdefence
-
 2
2
-
On 1/26/2020 at 12:05 AM, Old Bruce said:
Back in olden times pranksters would put a stone/marble/nut in a hubcap (remember those?). Rattles when you drive but is silent when you are idleing/gunning the engine in the shop.
like my brother chaining and locking a large cowbell to the axle of our very new brother in law's car
-
On 1/23/2020 at 7:16 PM, firstdefence said:
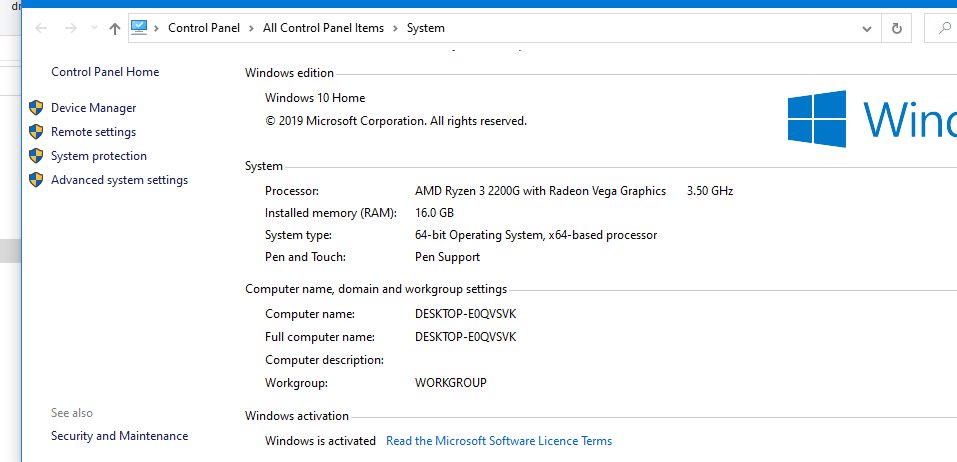
Can you add the computer model numbers, it seems odd that a newish laptop will not run OpenGL, this is a list of all hardware that can utilise OpenGL: https://www.khronos.org/conformance/adopters/conformant-products#opengl
Is your hardware in the list, i.e. GPU, Integrated GPU, CPU etc.
Is this the information you need ?
Where /how do I find more if needed ?
I need something to take to the tech bloke .
It's all getting a bit too frustrating --- perspective /warp seems to cause a lock ups ; occasionally
Ap has locked up with no file open .
Opened a file >did lots of editing >locked up >closed >opened again via original button >locked on opening >closed /reopen again as before with no (more) problems
Do I mention the day I fiddled around with a number of various files and never had a problem all day
OpenGL is out of the equation -- I don't need it
Cheers and thanks for your time -
Do you ever have this annoying problem of layer icons being blacked out after doing things like grouping, duplicating plus others ?
Plus a request -- can the tick boxes be made larger please ?
Both only small annoy hiccups but when one is having bigger ongoing annoying problems with AP ; any tiny hiccup does seem bigger .
thank you for reading
-
On 1/23/2020 at 7:16 PM, firstdefence said:
Can you add the computer model numbers, it seems odd that a newish laptop will not run OpenGL, this is a list of all hardware that can utilise OpenGL: https://www.khronos.org/conformance/adopters/conformant-products#opengl
Is your hardware in the list, i.e. GPU, Integrated GPU, CPU etc.
Sorry for the delay in replying .
Briefly ---Not a new laptop but locally built ''old fashion'' tower --- late 2019 --- Au$1,500 tower only
Spoke to the person who put it together and he told me I have no need for OpenGl --- when I tested On1 it worked . No idea why the oldish wacom bamboo didn't work before the upgrade but does now (??)
I have a feeling something has changed in Lr5 but cannot understand why the image freezers after some edits have been done with Ap .
All very much like the rattle in the car that doesn't rattle when paying someone to find the rattle . >> .
-
On 1/24/2020 at 12:48 AM, walt.farrell said:
You can Follow the topic, which is about all that's provided in the forum itself.
Or, you can bookmark the topic using your browser's bookmark feature. Or, if you're using Firefox or if you have the Pocket extension installed in your browser, you could Save to Pocket.
Copy and paste the best parts and/or copy save the url
There is also a mountain of online info --- most it can be converted the Ap way .
Great to see to found it of interest
-
On 1/22/2020 at 10:41 AM, firstdefence said:
There are lots of things that could cause intermittent behaviour,
Thanks for thinking about it and the comment which explained my total frustration
(this was the last line) . Stopped typing for a while to try sometime that was one reason I had to buy the Acer laptop ---- run Opengl to run On1 . And openGl will not run on this computer . Brilliant !!!
That might be it in round about way
The bigger problem is two programs are involved and they seem to be linked in some way to cause the problem .
No one else is having the problem and I certainly don't point the finger at Ap only . I will not be surprised if the problem has more to do with Lr5.
>> What might have changed because of the upgrades ?
Remember there were no problems when the tower was first used . However the problem was present when using to older Acer Laptop and was one of the reasons I decided to purchase a new tower . -
Thank you all for sharing ideas
Since I started this thread I have been exploring and now often using a variety of inverted adjustment layers for subtle selective adjustments ; many of which would only be noticed if not done . -
0500 hours -- to add to the frustration
ORF >basic edits in Lr >sent TIFF to Ap "with adjustments" >fiddle with various manual mirroring ideas > not saved >decided to open the same ORF again with LR adjustments (nothing done in Lr since open the first file) >that second TIFF file froze AP ! > after 12 hours (night here) file and Ap are frozen /locked /or whatever you call it .
The image can be scrolled up /down >closed as normal >original mirrored tiff is still frozen >closed /saved as normal >opened another copy of the ORF without any problems >opened the first TIFF again as "original" without problem . Ap was not turned off
Now I have the new and the older file working but have forgotten the idea /reason I wanted the second image
No problems with this "light at the end of the LR-AP tunnel" photo >> Ap edited >saved >reopened with Lr adjustments >edited > placed > perspective + warp tools > saved > opened with Lr adjustments (?? why ??) .
-
And the drama returns
(Started this around new year --- Now added more January 21 . Been putting up with the drama; but to be honest it is really starting to annoy me . )
Some upgrades added to the new Win 10 tower before the dramas returned. Upgrades included something (??) so Opengl worked --- needed to run On1 that I don't use ATM . The old bamboo pad/pen is now working --- wasn't before the upgrade.
Upgrade as I understand it : 1Tb SSD added . RAM boosted to 16 gb
I will add a SS and photos of the boxes from the update .
All above my head.
When the file is locked
files open/ can be edited with adjustment layers / resized/ resize canvas /add layers+fill/ most macros/ save selections/ open saved selections/ duplicate layers
Not working when the file is locked
Cropping/ Liquify/ inpaint/ paint brush [A curved brush goes in a straight line from start to finish points >hold the shift button with brush tool the effect always starts where the last finished .
Half working when locked
marquee tool does not show the marching ants when being drawn out .. marching ants appear when left button is released .
Any file can lock when opened with Lr5 adjustments , or original file , or as copy . JPEG and TIFF can lock . Even files opened /edited before can lock . Any file can lock during editing .
Opening another file from Lr5 will sometimes unlock the file . Closing / reopening a locked file sometimes works . Turning off Ap is often needed. Turning off computer sometimes needed .
As I type this there are now four locked files in Ap. Closed those files >reopen the iPhone6 files with no dramas at all !!
AP can also totally lock as various adjustments are added . Only fix is do a forced computer shut down . I need to start making notes; but there does not seem to be any obvious pattern .
There are times I haven't realised the file is lock until I try to move the file inside the window, or use the brush, inpainting and crop tools.
One good thing is all edits done can be saved back to Lr. Or in the case of a forced shut down; Ap will ask if I want to reopen the unsaved file . Great feature IMO even if the file number/name becomes ''untitled''
Well that's half a day gone – now a day ++ . No way I could be doing this rather expensive hobby as a job, and often wish I never moved from Lr5 /PSE12 /Nik/ ICE. Blaming Adobe for most of it!!
I can still not see any explainable pattern .
What else can I send you ?
I hope the above understandable and sorry for length --- I do find it had to explain when I don't understand any of it myself
Cheers -
Olivio's videos always show me something didn't know and often thing I don't really need know ---- information overload setting in again
--- like; I have never really found a use for average blur until yesterday
The hardest part; or the impossible part for me is coming up with the ideas -
2 hours ago, p_mac said:
Excellent tutorial. Thank you Multi4G.
The tip on background colours with average blur was enlightening.A little off topic
''average blur was enlightening''.
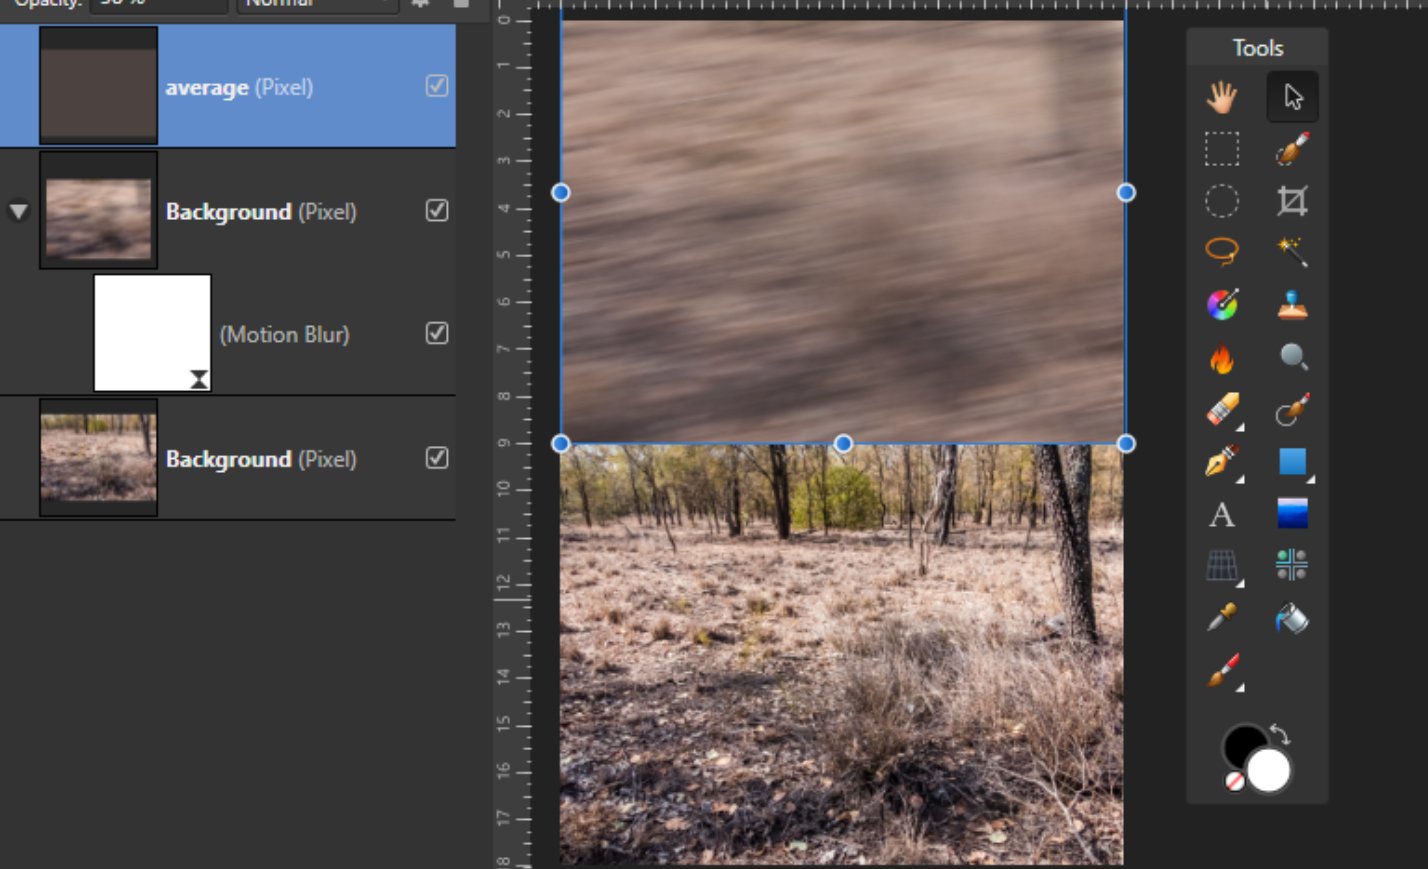
Average blur can be a bit flat/boring
A variation as screen print >top lay averaged blur at 50% >middle motion blur > bottom original . Made the green disappear by dragging the layer up
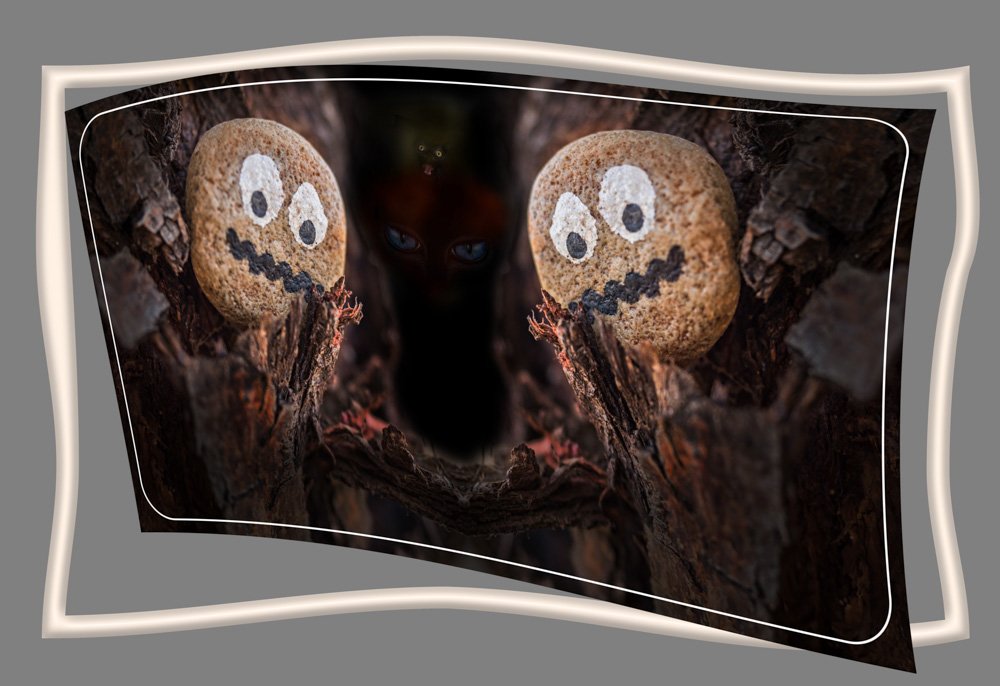
Then there are a million and one other variations like making the second photo (long story LOL
I do make a lot of pictures from one file by blurring the subject > put the original subject onto the blurred layer as in the third image --- the real problem there is no one right way
-
On 1/12/2020 at 4:00 PM, Max P said:
Thank to you , ianrb, smadell, John, RNKLN
I use a variant of these methods
Above the Dodge curve, I use a pixel layer and I paint on it in Luminosity mode, with a brush that is a little more "vigorous"
like this, I can see my effect, blur, ajust,move with rectangle tool... and modulate the opacity at any time.I can stack other pixels for this purpose
Finally I separate this in a groupDodge Group
- Pixel layer Luminosity mode,
- Dodge curve,
- Background copy
And I made an another Burn group with same structure
Note if i put a second pixel layer in saturation mode I can desaturate locally, for me sometimes more consistent, in areas to darkenThanks to ideas Max. I would need to explore more before commenting ---- at the moment I'm suffering from idea overload
-
16 hours ago, dmstraker said:
Most excellent and thoughtful conversation and ideas.
Some open questions (no judgement, just curiosity), numbered to facilitate replies:
- Grey layer needs contrast mode blend, such as Overlay. What is the difference if you just use a transparent layer and no blend? Or just a transparent layer and Overlay? It would seem you can still revise painted effect with lower opacity brush or simply erase brush (easier than grey brush).
- When using curves, eg, darkening pull-down, there will be a greater effect in mid-tones. Helpful if this is what you want, though decreasing effect towards shadows and highlights. What if you set the curves first (any shape) then moderated these in masking either by selective black erasing or invert and selective white paint-back?
- What is the difference between using Luminosity blend (which could impact Opacity usage) and setting the colour space of the curve as CMYK Black or LAB L?
- What is the balance between manual, painted dodge and burn and using various forms of generated masking, such as Blend Ranges luminosity constraints, Channel-based masks, vector shapes, general selected area, and feathering/blurring to soften selection edges?
1] not sure I have the complete answer ; however, without the blend layer you would be painting on a solid colour . Like many; I follow along as other show me so I can't really explain it all .
2] there could be many variation to actual settings used . For me; I like [need!!] it fairly simple, however there may be times when I need to adjust highlights or shadows only . I would more likely add another adjustment layer targeting those . You could also do similar as D+B by using a brightness / contrast adjustment layer . The same could be done for most inverted adjustment layers you happen to use often. Perhaps a shadow and highlight adj-layer could used to target the dark and light areas (??) (not that one works overly well though)
As with all editing tricks, we need to find what works best for us and then make it work better for us . -
On 1/12/2020 at 4:26 AM, smadell said:
For completeness sake, I'll attach a macro I've used on occasion to do this. Like the macro above, it creates two Curves adjustment layers, one for dodging and one for burning. Three differences here: (i) I have not attached separate Mask layers, since this is redundant – the Curves adjustment layers already have a built in mask, and I don't see where anything is gained by duplicating this; (ii) I have set the Blend Mode of each of the Curves layers to Luminosity – this keeps them from affecting saturation and hue, and limits them to changing the lightness or darkness of the areas being affected; and (iii) I have changed the Blend Options on each of the layers, so that (at least in theory) the Burn adjustment layer should preferentially affect the darker areas, and the Dodge adjustment layer should preferentially affect the lighter areas – this is the technique one might use for dodging and burning portraits, for instance.
One other thing: when using any form of dodge and burn, I typically use a brush that (i) has a soft edge, so 0% hardness; and (ii) has 100% opacity but only about 1-2% Flow. This way, I know I can eventually build up to a 100% effect, but I only do so very slowly because of the low flow rate.
NB - this is an .afmacro file, so import it through the Macro panel, NOT through the Library panel.
(1) mask -- you are very correct; the mask is not needed .
(2) luminosity blend -- now that's clever thinking and works well .
(3) don't do much in the way of portraits so i will that one for others .
Opacity Vs Flow > gave your flow way a quick try but still prefer the Opacity as I am so used to it , but mainly because I can quickly adjust the opacity with the number keys . The brush strength can also be adjusted via the curves panel, as can mid, shadow, or light tones if need be .
I have download your macro, so that saves me editing mine --- thanks for that
Would be or will be great when affinity has a smart brush similar to the Lr adjustment brush -- still my best mate for selective edits .
Thanks again for your input -
11 hours ago, dmstraker said:
Most excellent and thoughtful conversation and ideas.
Some open questions (no judgement, just curiosity), numbered to facilitate replies:
- Grey layer needs contrast mode blend, such as Overlay. What is the difference if you just use a transparent layer and no blend? Or just a transparent layer and Overlay? It would seem you can still revise painted effect with lower opacity brush or simply erase brush (easier than grey brush).
- When using curves, eg, darkening pull-down, there will be a greater effect in mid-tones. Helpful if this is what you want, though decreasing effect towards shadows and highlights. What if you set the curves first (any shape) then moderated these in masking either by selective black erasing or invert and selective white paint-back?
- What is the difference between using Luminosity blend (which could impact Opacity usage) and setting the colour space of the curve as CMYK Black or LAB L?
- What is the balance between manual, painted dodge and burn and using various forms of generated masking, such as Blend Ranges luminosity constraints, Channel-based masks, vector shapes, general selected area, and feathering/blurring to soften selection edges?
some good and interesting thoughts and questions there ; some of which I have asked myself but have not explored
Trust me to make an easy tool complicate
I will come back to this later --- in other words the body is here but the brain is not -
3 hours ago, smadell said:
For completeness sake, I'll attach a macro I've used on occasion to do this. Like the macro above, it creates two Curves adjustment layers, one for dodging and one for burning. Three differences here: (i) I have not attached separate Mask layers, since this is redundant – the Curves adjustment layers already have a built in mask, and I don't see where anything is gained by duplicating this; (ii) I have set the Blend Mode of each of the Curves layers to Luminosity – this keeps them from affecting saturation and hue, and limits them to changing the lightness or darkness of the areas being affected; and (iii) I have changed the Blend Options on each of the layers, so that (at least in theory) the Burn adjustment layer should preferentially affect the darker areas, and the Dodge adjustment layer should preferentially affect the lighter areas – this is the technique one might use for dodging and burning portraits, for instance.
One other thing: when using any form of dodge and burn, I typically use a brush that (i) has a soft edge, so 0% hardness; and (ii) has 100% opacity but only about 1-2% Flow. This way, I know I can eventually build up to a 100% effect, but I only do so very slowly because of the low flow rate.
NB - this is an .afmacro file, so import it through the Macro panel, NOT through the Library panel.
Thanks for sharing! Great additional information like I was hoping to get . Would not surprise me if the AP dodge and burn used curves similar to your ideas .
I will try your ideas; especially using flow instead of opacity -
4 hours ago, John Rostron said:
try making the macro without the masks --- I had a some trouble at that point also .
-
4 hours ago, RNKLN said:
Thanks for this tip. An even more elegant solution than with a 50% gray layer.
I’ve recorded a macro which makes this very easy to do.Thank you for link; I must learn how to share links
I have use 50% grey for years [ps], however I was having problems with colour saturation in the darkened areas (???) . I found having a mask attached handy also . -
PLEASE NOTE: I don't use this method any more -- see new posts on page two
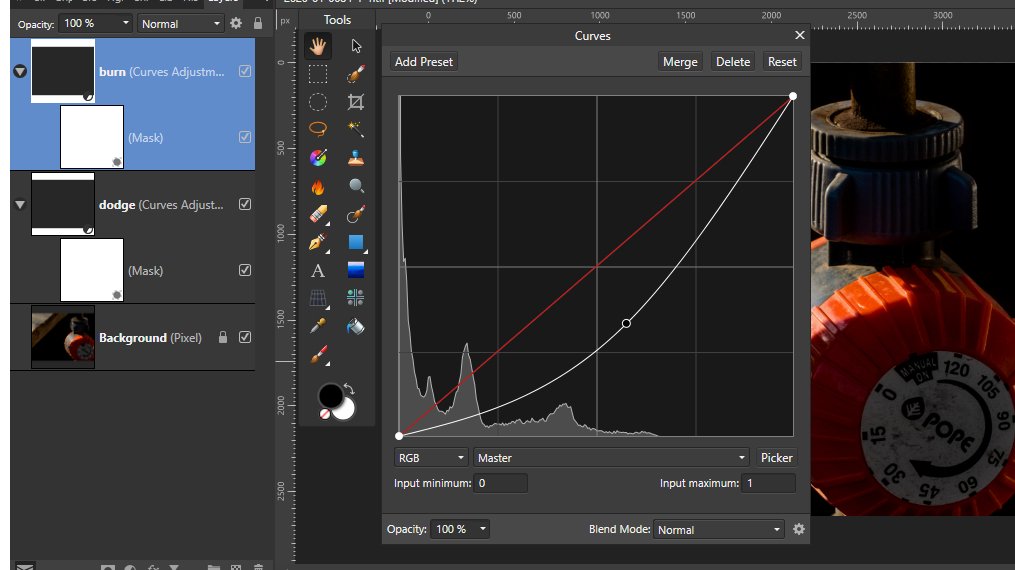
My different dodge and burn way using two curves adjustment layers . Seems to be less saturation I was having trouble withOpen photo
Add two curves adjustment layers [open one >Ctrl+J]
Set one to darken similar as screenshot – does not have to match perfectly
Name “burn” [or darken
Set other to the opposite to lightening
Name “dodge” [or lighten.
Invert both > Ctrl + I
Add a mask to each (especially if making a macro
To use
Bush settings >standard round brush >hardness 0 >opacity 10-20 are a good starting point .
To darken >have burn layer active >paint with white
To lighten >have dodge active >paint with white
That's about all there is to it.
Options
Make yourself a macro /action --- pity we cannot make an action “with current settings”
Use the layer mask + black brush to reduce /soften the effects especially on the edges.
You can also reduce effects by lowering the opacity of the curves layer
Open the adjustment panel to adjust curve settings – I am considering making the settings stronger .
Tips to use.
Little at a time is best. Or in other words, 10 brush strokes are better than one heavy brush stroke.
Experiment with blend modes (not that I have yet)
Not sure you will be able to paint in colours as can be done with the 50% grey method . I use that trick a lot so I now have both methods as macros and part of the ''start'' macros .
The built in dodge and burn tools are great to target highlights or shadows
With practise, and experience, you do do so much photo editing with only the dodge and burn tools that were used in the earliest darkrooms . Digital makes it so much easier!
Honestly; I feel we are making photo editing more complicated than it already is, or needs to be .
Would love to hear your thoughts, suggestions, and questions .

-
couple of things I have learnt to do >make a screenshot of your screen layout -- that well help the reset >save or export your brushes/ macros and the likes so they can be imported.
Being able to save /move layout to another computer would be great for some .
A big help would be the option >view >studio >click all apps required at the one time .
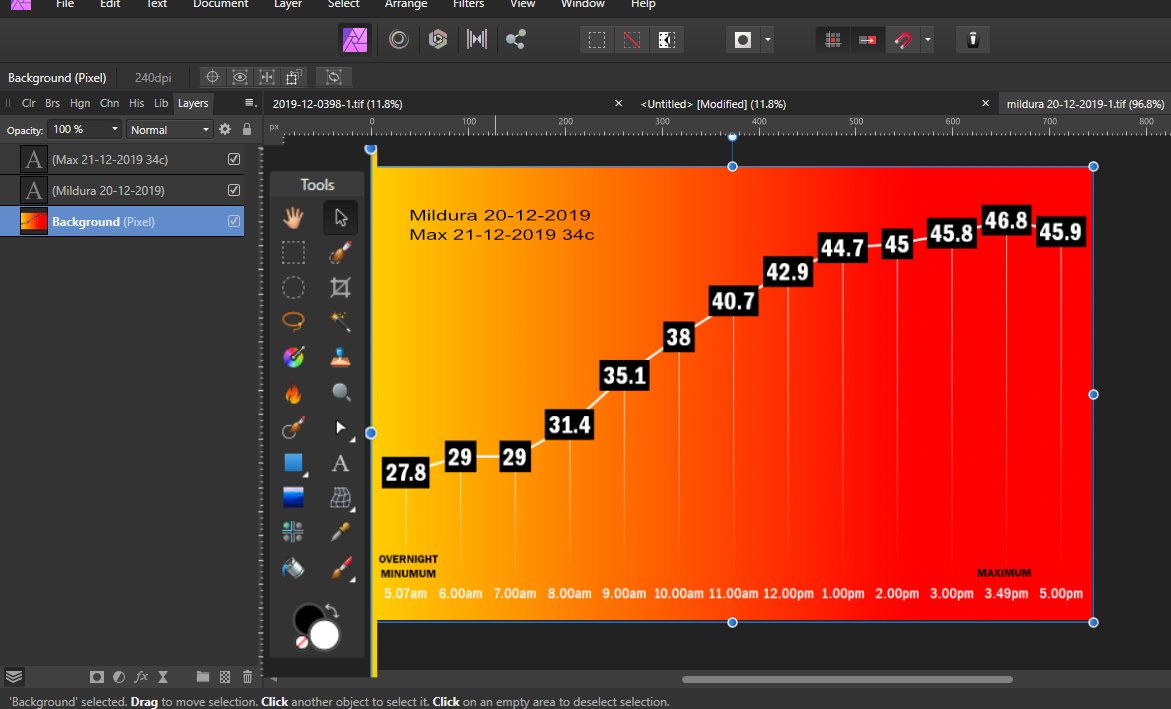
SS of my current layout with the temperature graph for yesterday [ 20-12-2019 ] --- .2c off the record .
All good ideas are only good if we do it NOW ; then they may become a great idea . -
Thanks Lee --- here's hoping I can upload a dng file
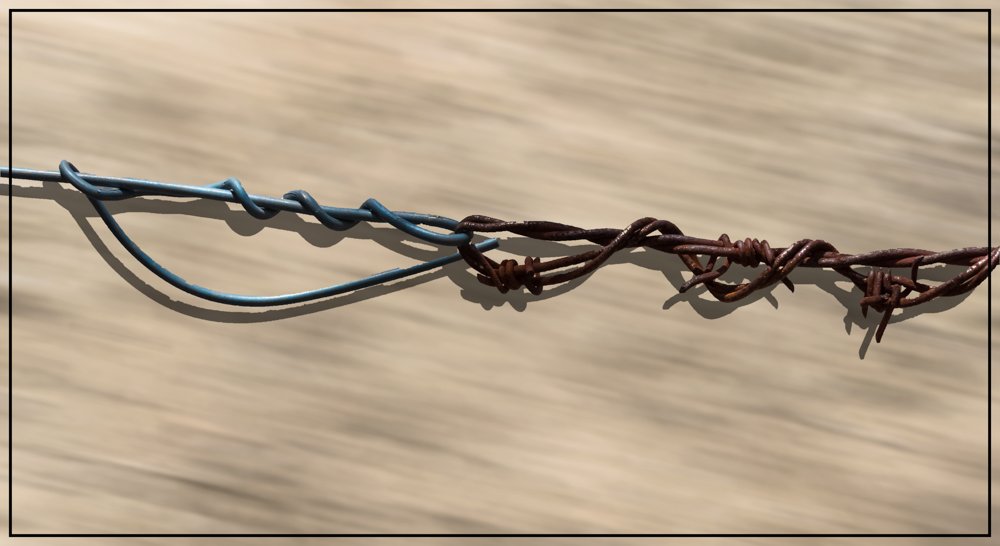
You can likely work what I've done >raw file edited in Lr5 >sent to Ap >no edits done Ap >add black and white adjustment layer >burn/dodge macro added >top layer painted once with 50% opacity soft brush.
I pick this file to show the difference between the B/W and colour after burning --- surprised me when the B/W layer was turned off
cheers


mesh wrap not it was ALL SORTED THANK YOU
in Pre-V2 Archive of Affinity on Desktop Questions (macOS and Windows)
Posted
Hello; I hope all are staying sensible to stay safe") --- original pano image
--- original pano image
I can no longer add extra adjustments points to the mesh wrap as in the past
What have I broken this time ?
used here to pull a panorama in line