pixupdate
-
Posts
10 -
Joined
-
Last visited
-
 pixupdate reacted to a post in a topic:
Make it a little different...
pixupdate reacted to a post in a topic:
Make it a little different...
-
pixupdate reacted to a post in a topic:
Make it a little different...
-
pixupdate reacted to a post in a topic:
Master Page Content Disappears
-
Same in german language.
-
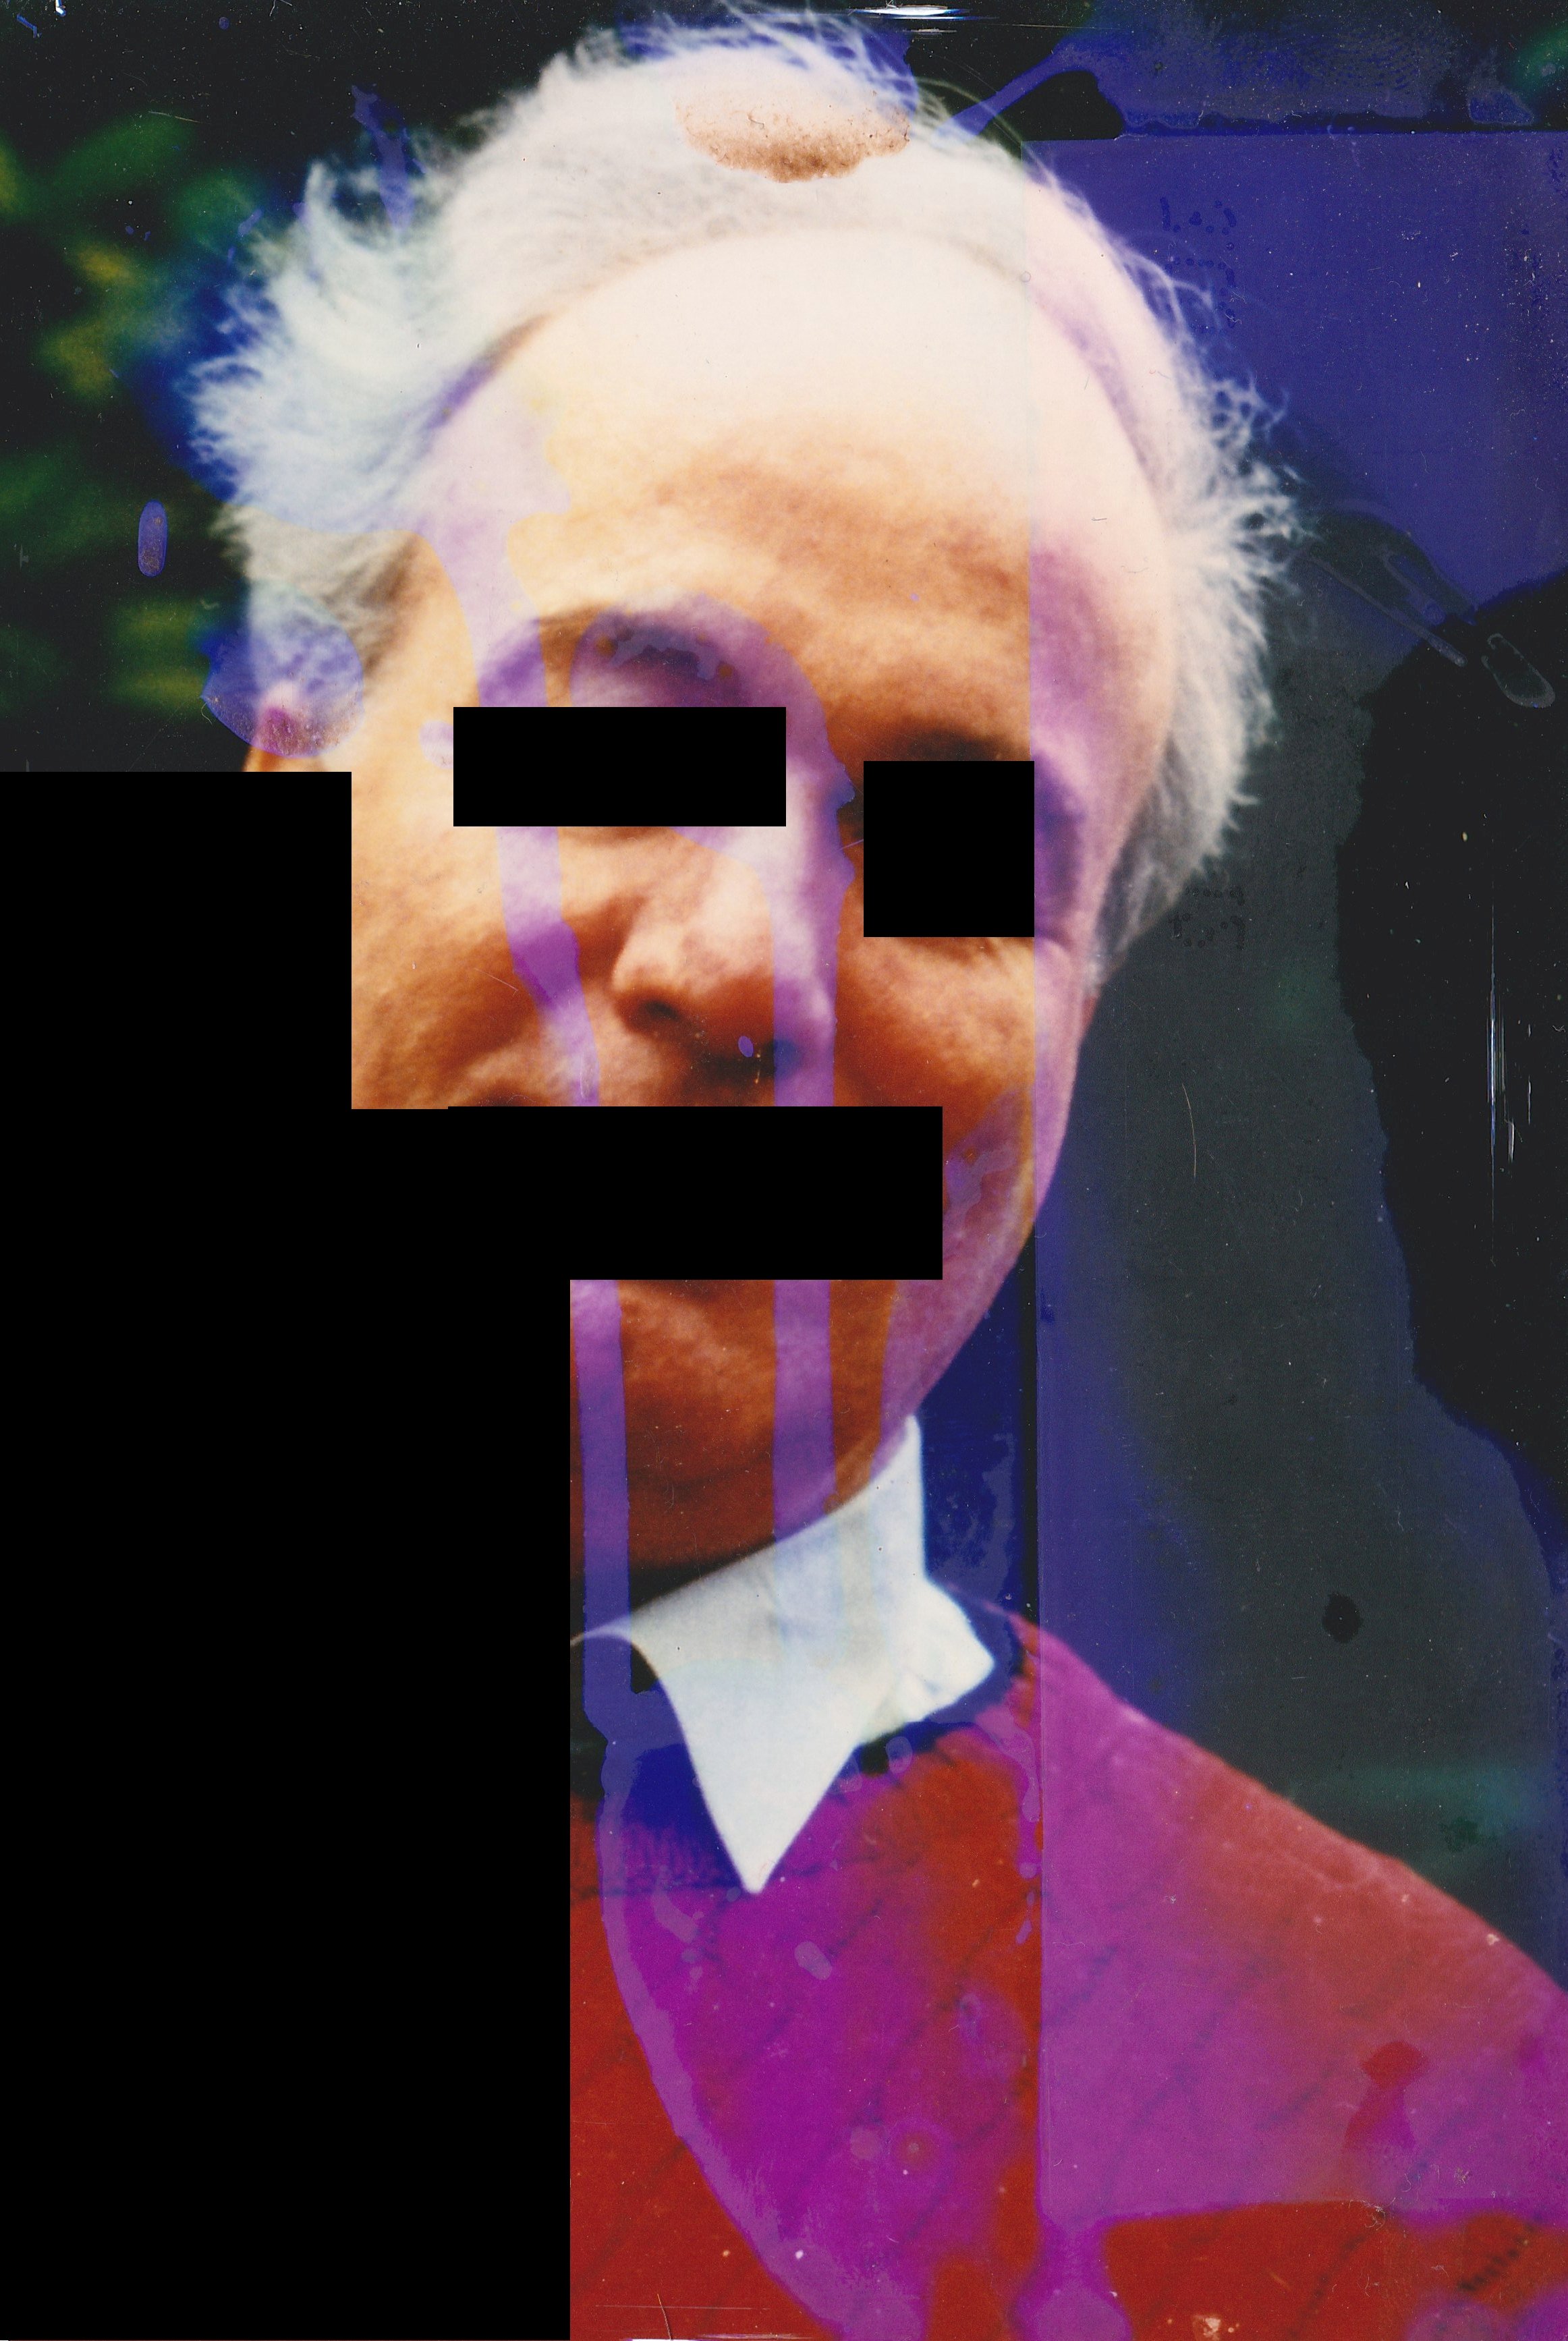
So this is my result. To get the structure of the jumper I worked with the cmyk-chanels one by one and partly copied them into eachother.

-
Well altough you work on another layer "cloning" is "copying" pixels from a similar looking region to another. This changes the microstructure for example of the skin. The result could be great looking but it is not authentic in its microdetails.
-
It's great to get so much support. Thanks a lot! I'm sorry for the black on the image, but I got to keep the privacy of "Mr x". If I have a look at the suggested methods I'd prefer the filtering because cloning and paintig changes the content. Cloning and inpainting might be ok for cars, landscapes etc. But I'm not sure if this ist the right way for a face. Nevertheless your results are astonishing and impressive! My efforts have not yet come to an end (and probably I also would have to use a mix of all methods). I'll post my result a.s.a.p.
-
 pixupdate reacted to a post in a topic:
Any hint howto get rid of water stains on photo?
pixupdate reacted to a post in a topic:
Any hint howto get rid of water stains on photo?
-
pixupdate reacted to a post in a topic:
Any hint howto get rid of water stains on photo?
-
pixupdate reacted to a post in a topic:
Any hint howto get rid of water stains on photo?
-
pixupdate reacted to a post in a topic:
Any hint howto get rid of water stains on photo?
-
pixupdate reacted to a post in a topic:
Any hint howto get rid of water stains on photo?
-
Thanks for your answer. So it is as complicated as I thought. Maybe it would be a great feature to implement a mode: "Source colour only" to the patch tool? So for example I would be able to transfer the colour of the pullover to the damaged areas without changing their gray values.
-
Hi, could anyone please recommend me a way how I get rid of the water stains on this photo? I thought of seperating the colour-chanels first, but this did not lead to apropper sollution. Especially the area around the eyes seems to be complicated. Thanks für any hints, Georg
-
pixupdate reacted to a post in a topic:
good tutorial for colourize bw images?
-
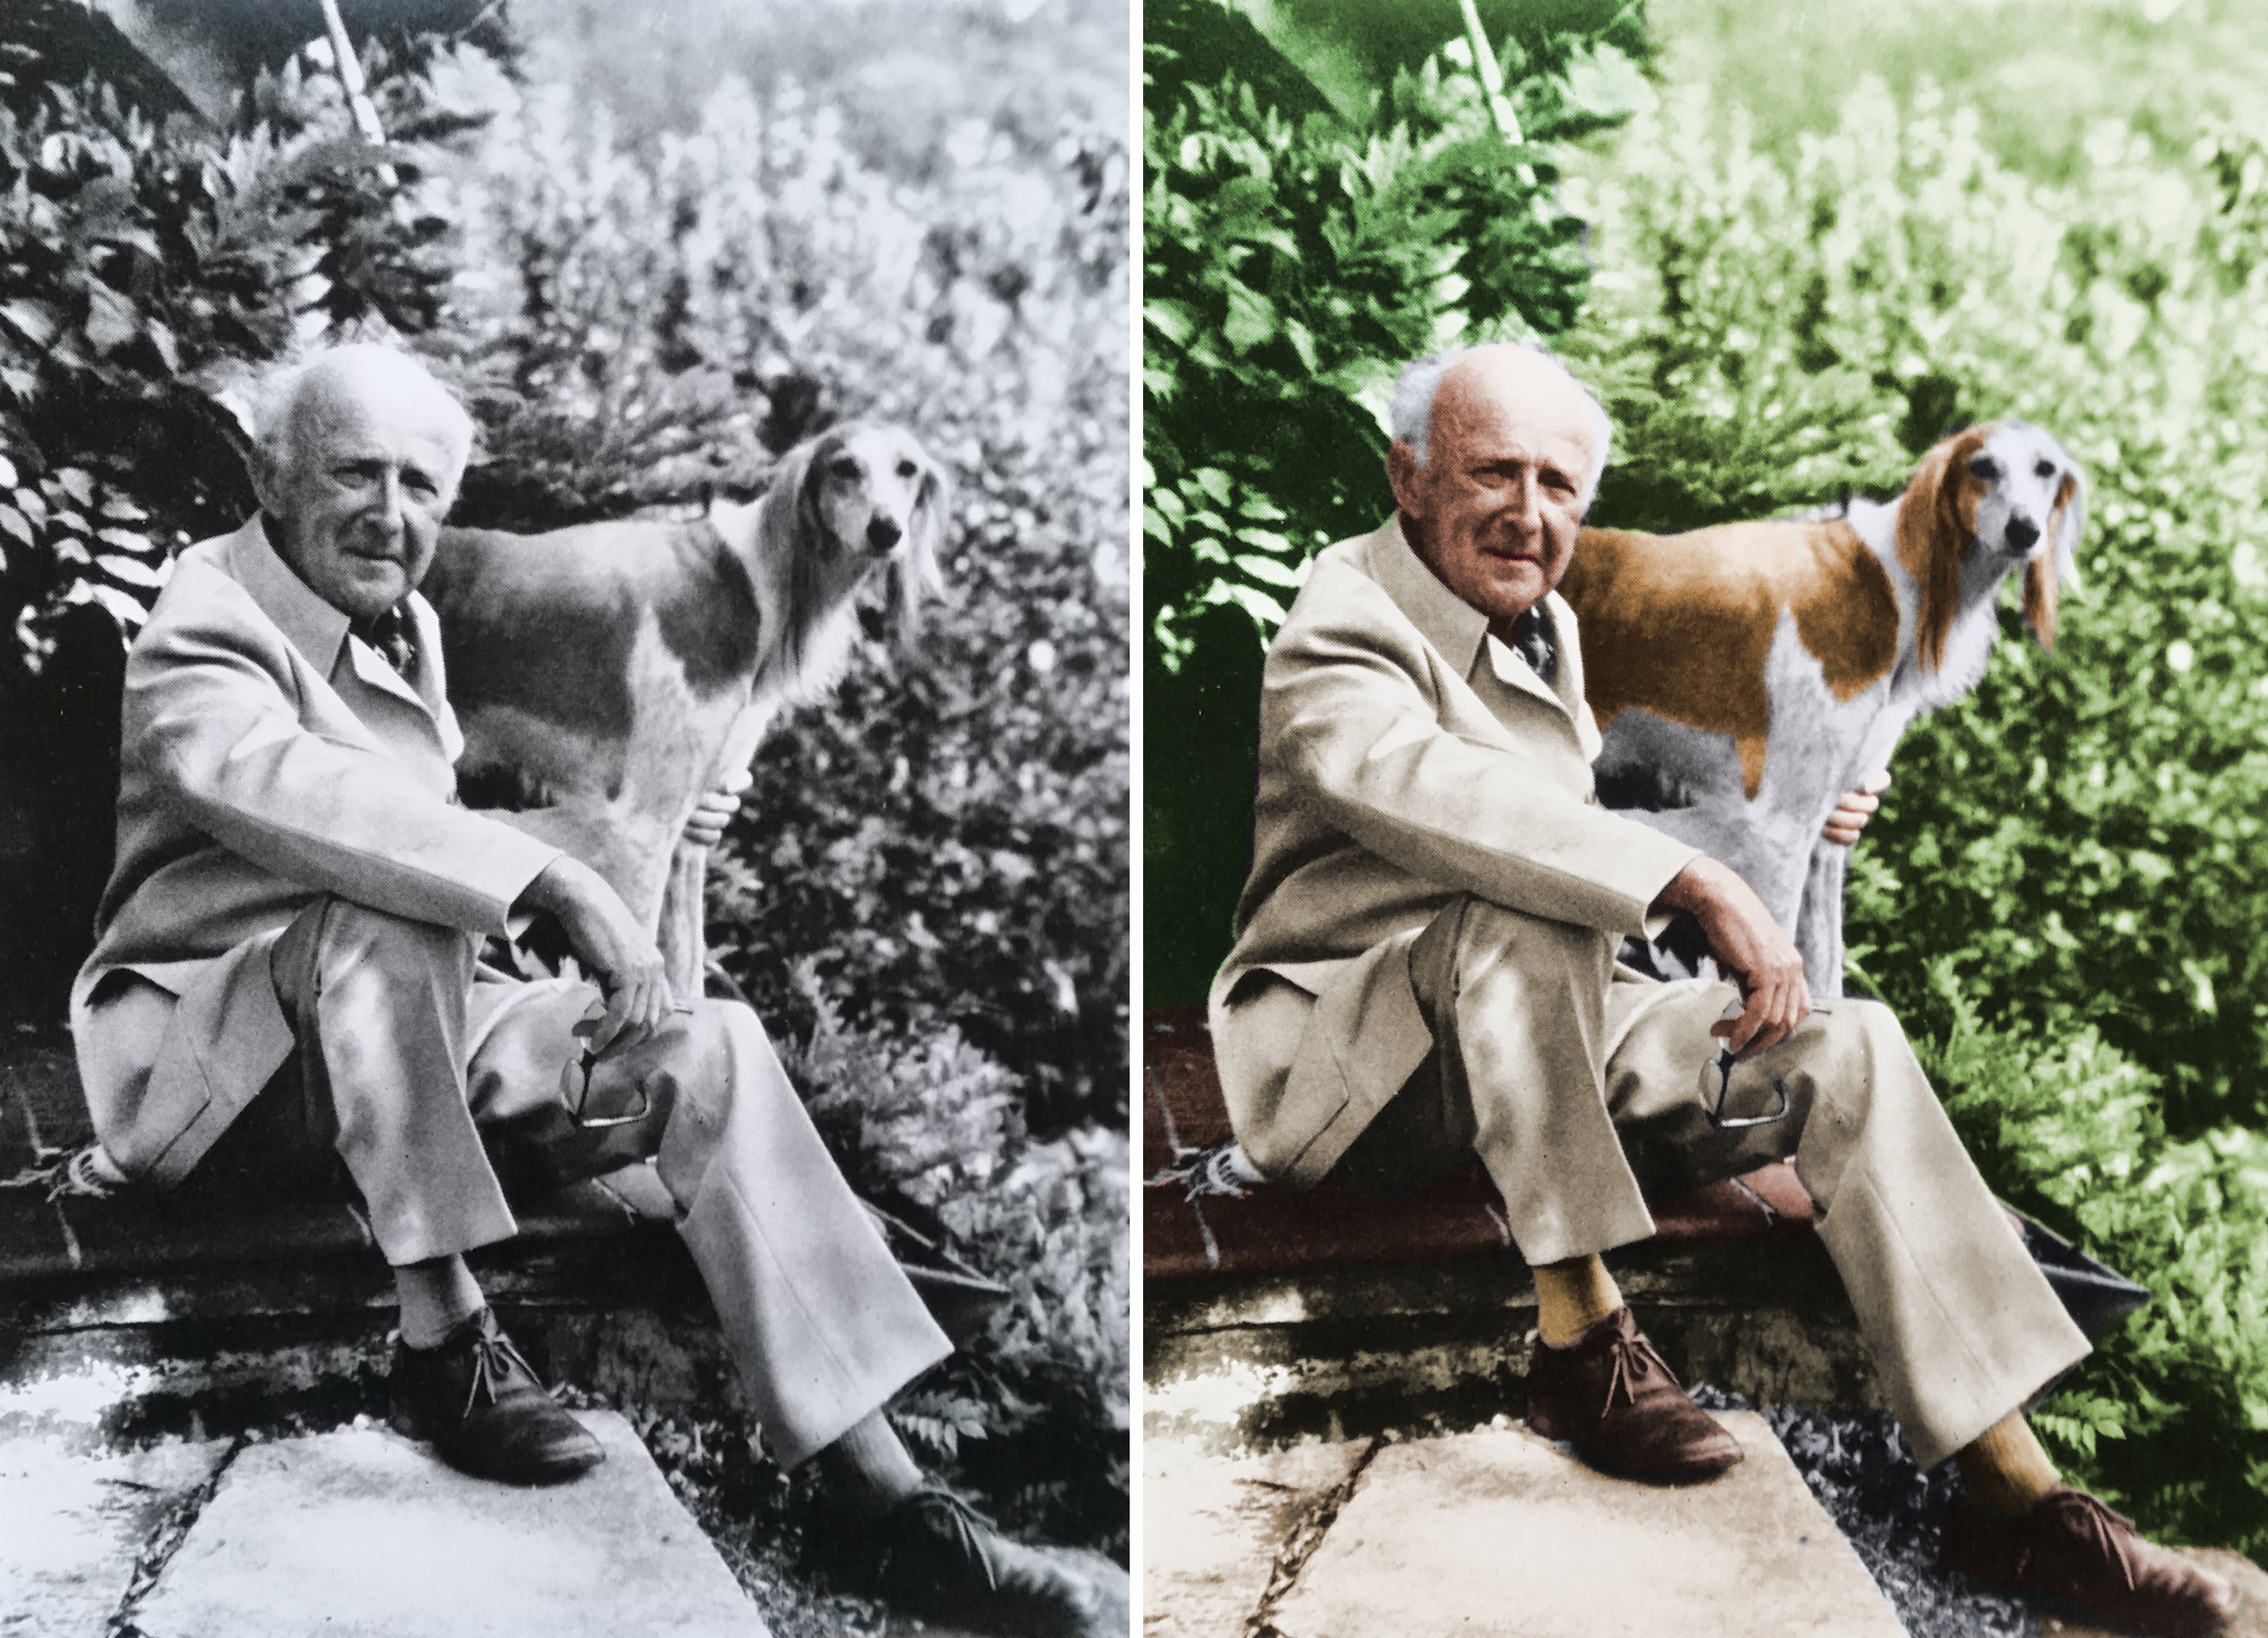
Hi @EZeemering, it is nice to hear, that you think about doing a tutorial someday. This would be so great! I have done some more photos since the first atempt you see above. It works quite well, but I still have problems with areas like the green and the dogs fur on this example.What could I do to make them look more realistic? Would you be so kind to share your workflow in colourizing areas like that? Thx, Georg
-
pixupdate reacted to a post in a topic:
good tutorial for colourize bw images?
-
Madame reacted to a post in a topic:
good tutorial for colourize bw images?
-
jer reacted to a post in a topic:
good tutorial for colourize bw images?
-
carl123 reacted to a post in a topic:
good tutorial for colourize bw images?
-
Dear Carl, thank you so much! I do not know, why I didn't find them. I googled several times. Maybe I just had the wrong words. Thanks, Georg
-
Hi, I'm searching for a good step-by-step-tutorial explaining how to colourize ancient b&w images. Unfortunatedly I found only photoshop tutorials but none for affinity photo? Do you have any suggestions? Thanks Georg