Jokinb
-
Posts
24 -
Joined
-
Last visited
-
ADD PAGES FROM FILE...STRANGE BEHAVIOR...GHOST PAGE
Jokinb replied to Jokinb's topic in Desktop Questions (macOS and Windows)
Yes, they look similar. In my case, the pages are not facing each other and there are no different sections that could hinder the correct import. My file is very simple. Text boxes linked sequentially. I have to add that if I import the pages from a PDF file the import is correct. -
I have an original file (document 1) from which I want to extract 8 pages to document 2 (document 2). For this I use the add pages from file menu. I create a new empty document (document 2) and "ADD pages from FILE.." option menú appears. In the menu that appears, I select insert from page 13 to 20 and replace page 1 of the new document (document2). I can see in the tiny menu window that I have correctly selected the pages since the image of page 13 appears. I click and the pages are inserted in the new documento(document 3). BUT a ghost first page is created and only 7 pages are imported (from 14 of the original document to 20th). Therefore, the first page to import has been replaced by a blank page I think of a way to correct this... if I import page number 13 replacing the first one, the problem is solved. But this doesn't work, what I get is: Instead of importing page 13, pages 4,2,3,4,5,6,7 and 8 of the original document are imported incorrectly. Clearly something is not working right. Could someone clarify for me what is happening? DOCUMENT 1.afpub DOCUMENT 2.afpub DOCUMENT 3.afpub DOCUMENT 4.afpub

-
Thanks
-
I can successfully place a table of contents at the beginning of a document, but I find it impossible to create one at the end of the document. Does not recognize any paragraph style. . I am trying to create the same table of the beginning at the end, so the paragraph styles are correct, but "No table of contents entries found" mensaje appears.
-
On "book" and "booklet" print modes
Jokinb replied to sfriedberg's topic in Feedback for Affinity Publisher V1 on Desktop
I want to be able to print an entire book in groups of 2, 3 or more signatures. Each group would be made up of a certain number of signatures. Each group would be like a booklet (composed of several signatures) that, sewn together, would form the binding of the book. I know that this option as I describe it, does not exist in Publisher. I can print a book but this only generates groups of a single signature. In some cases this is appropriate. If I choose the Booklet option, it prints the entire document as a booklet. If within the printing option of a Booklet I choose a range of pages, it prints that range of pages but taking the entire document as a reference. It would be interesting if there was a button that would allow to consider that range of selected pages as an independent booklet and print them as a booklet…. group those various booklets, stitch them together and form a complete book. Currently, to achieve the same goal I have to create a second document where I insert the range of pages of the original document that I want to print as a booklet. A much more tedious process. -
Yes , but I can´t do like in the desktop version. I want to fix some points in the picture and check how these poits RGB values changes , when I apply a filter of effects...
-
 BennyD reacted to a post in a topic:
INFO PANNEL IN AFFINITY PHOTO
BennyD reacted to a post in a topic:
INFO PANNEL IN AFFINITY PHOTO
-
Affinity Team has intention to implement the INFO PANNEL in affinty photo? (to check RGB values of diferents points.) Jokin
-
I have linked an image in my document. I close the publisher file. I edit and change the original linked image. I open again the publisher document. The image does not update automatically. I must go to Resource manager and manually click in "UpDATE" I have checked the "Automatically update linked resources when modified externally" option in Prefences panel. What is wrong? Jokinb
-
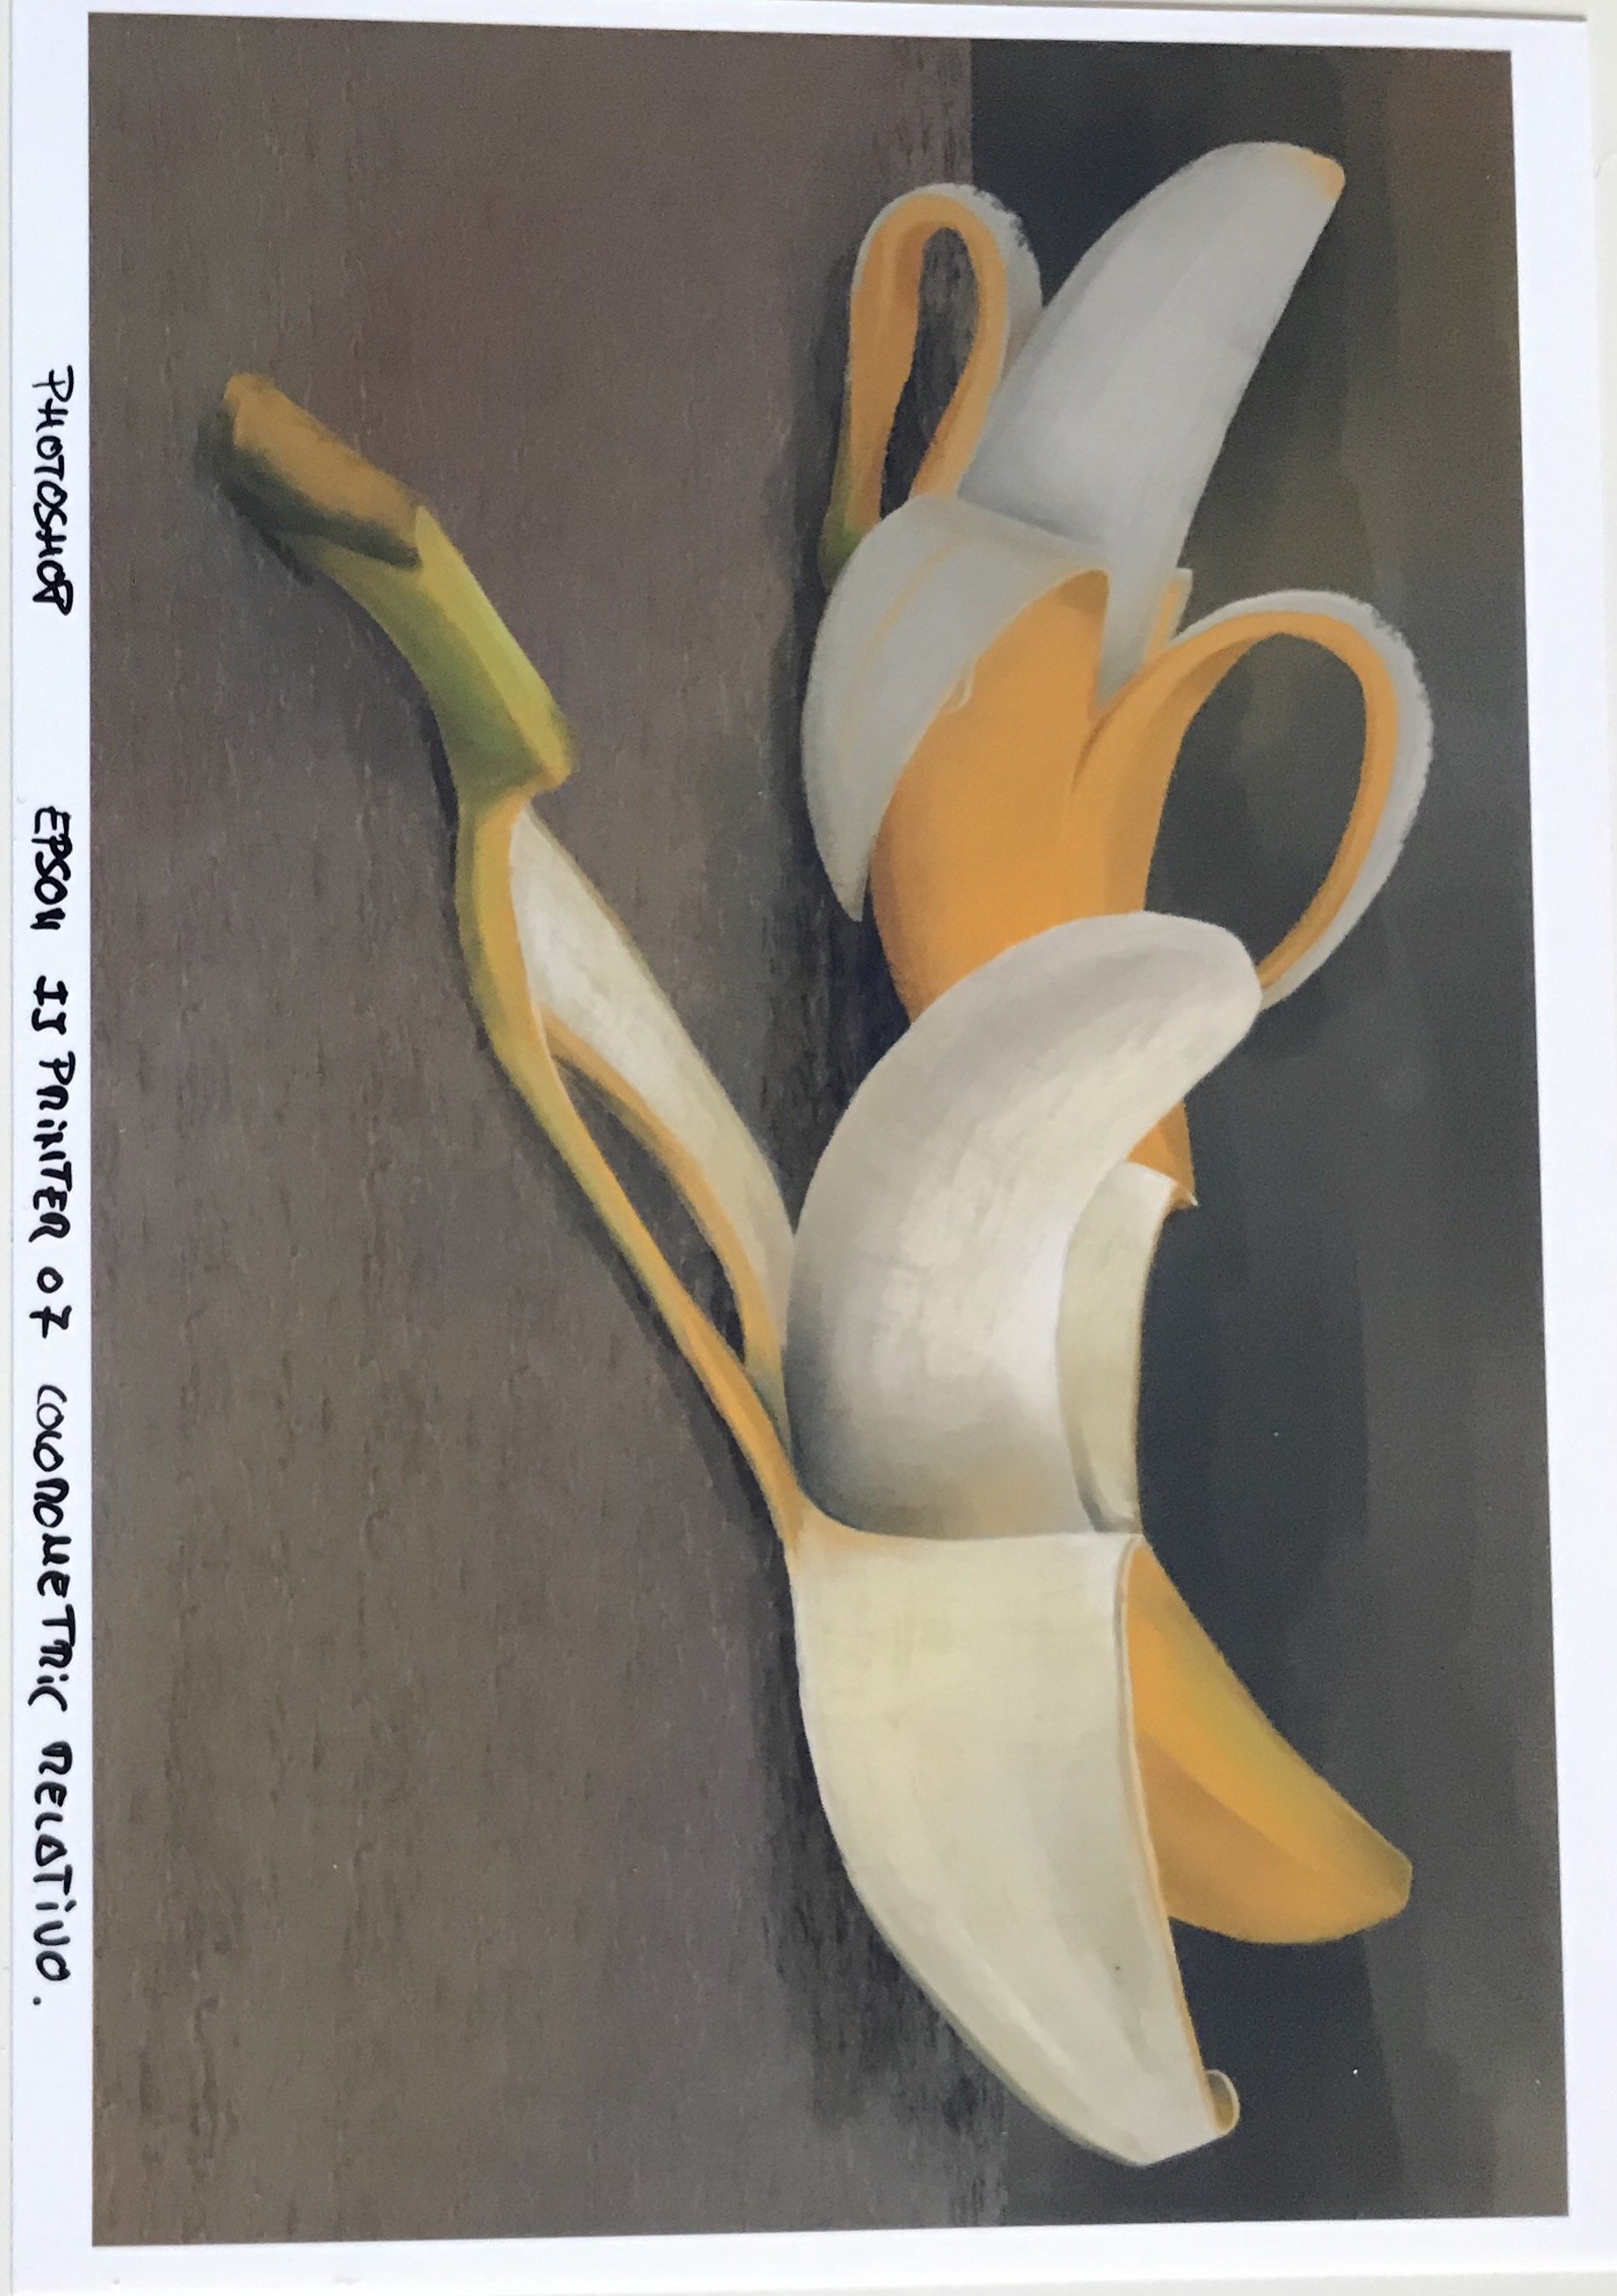
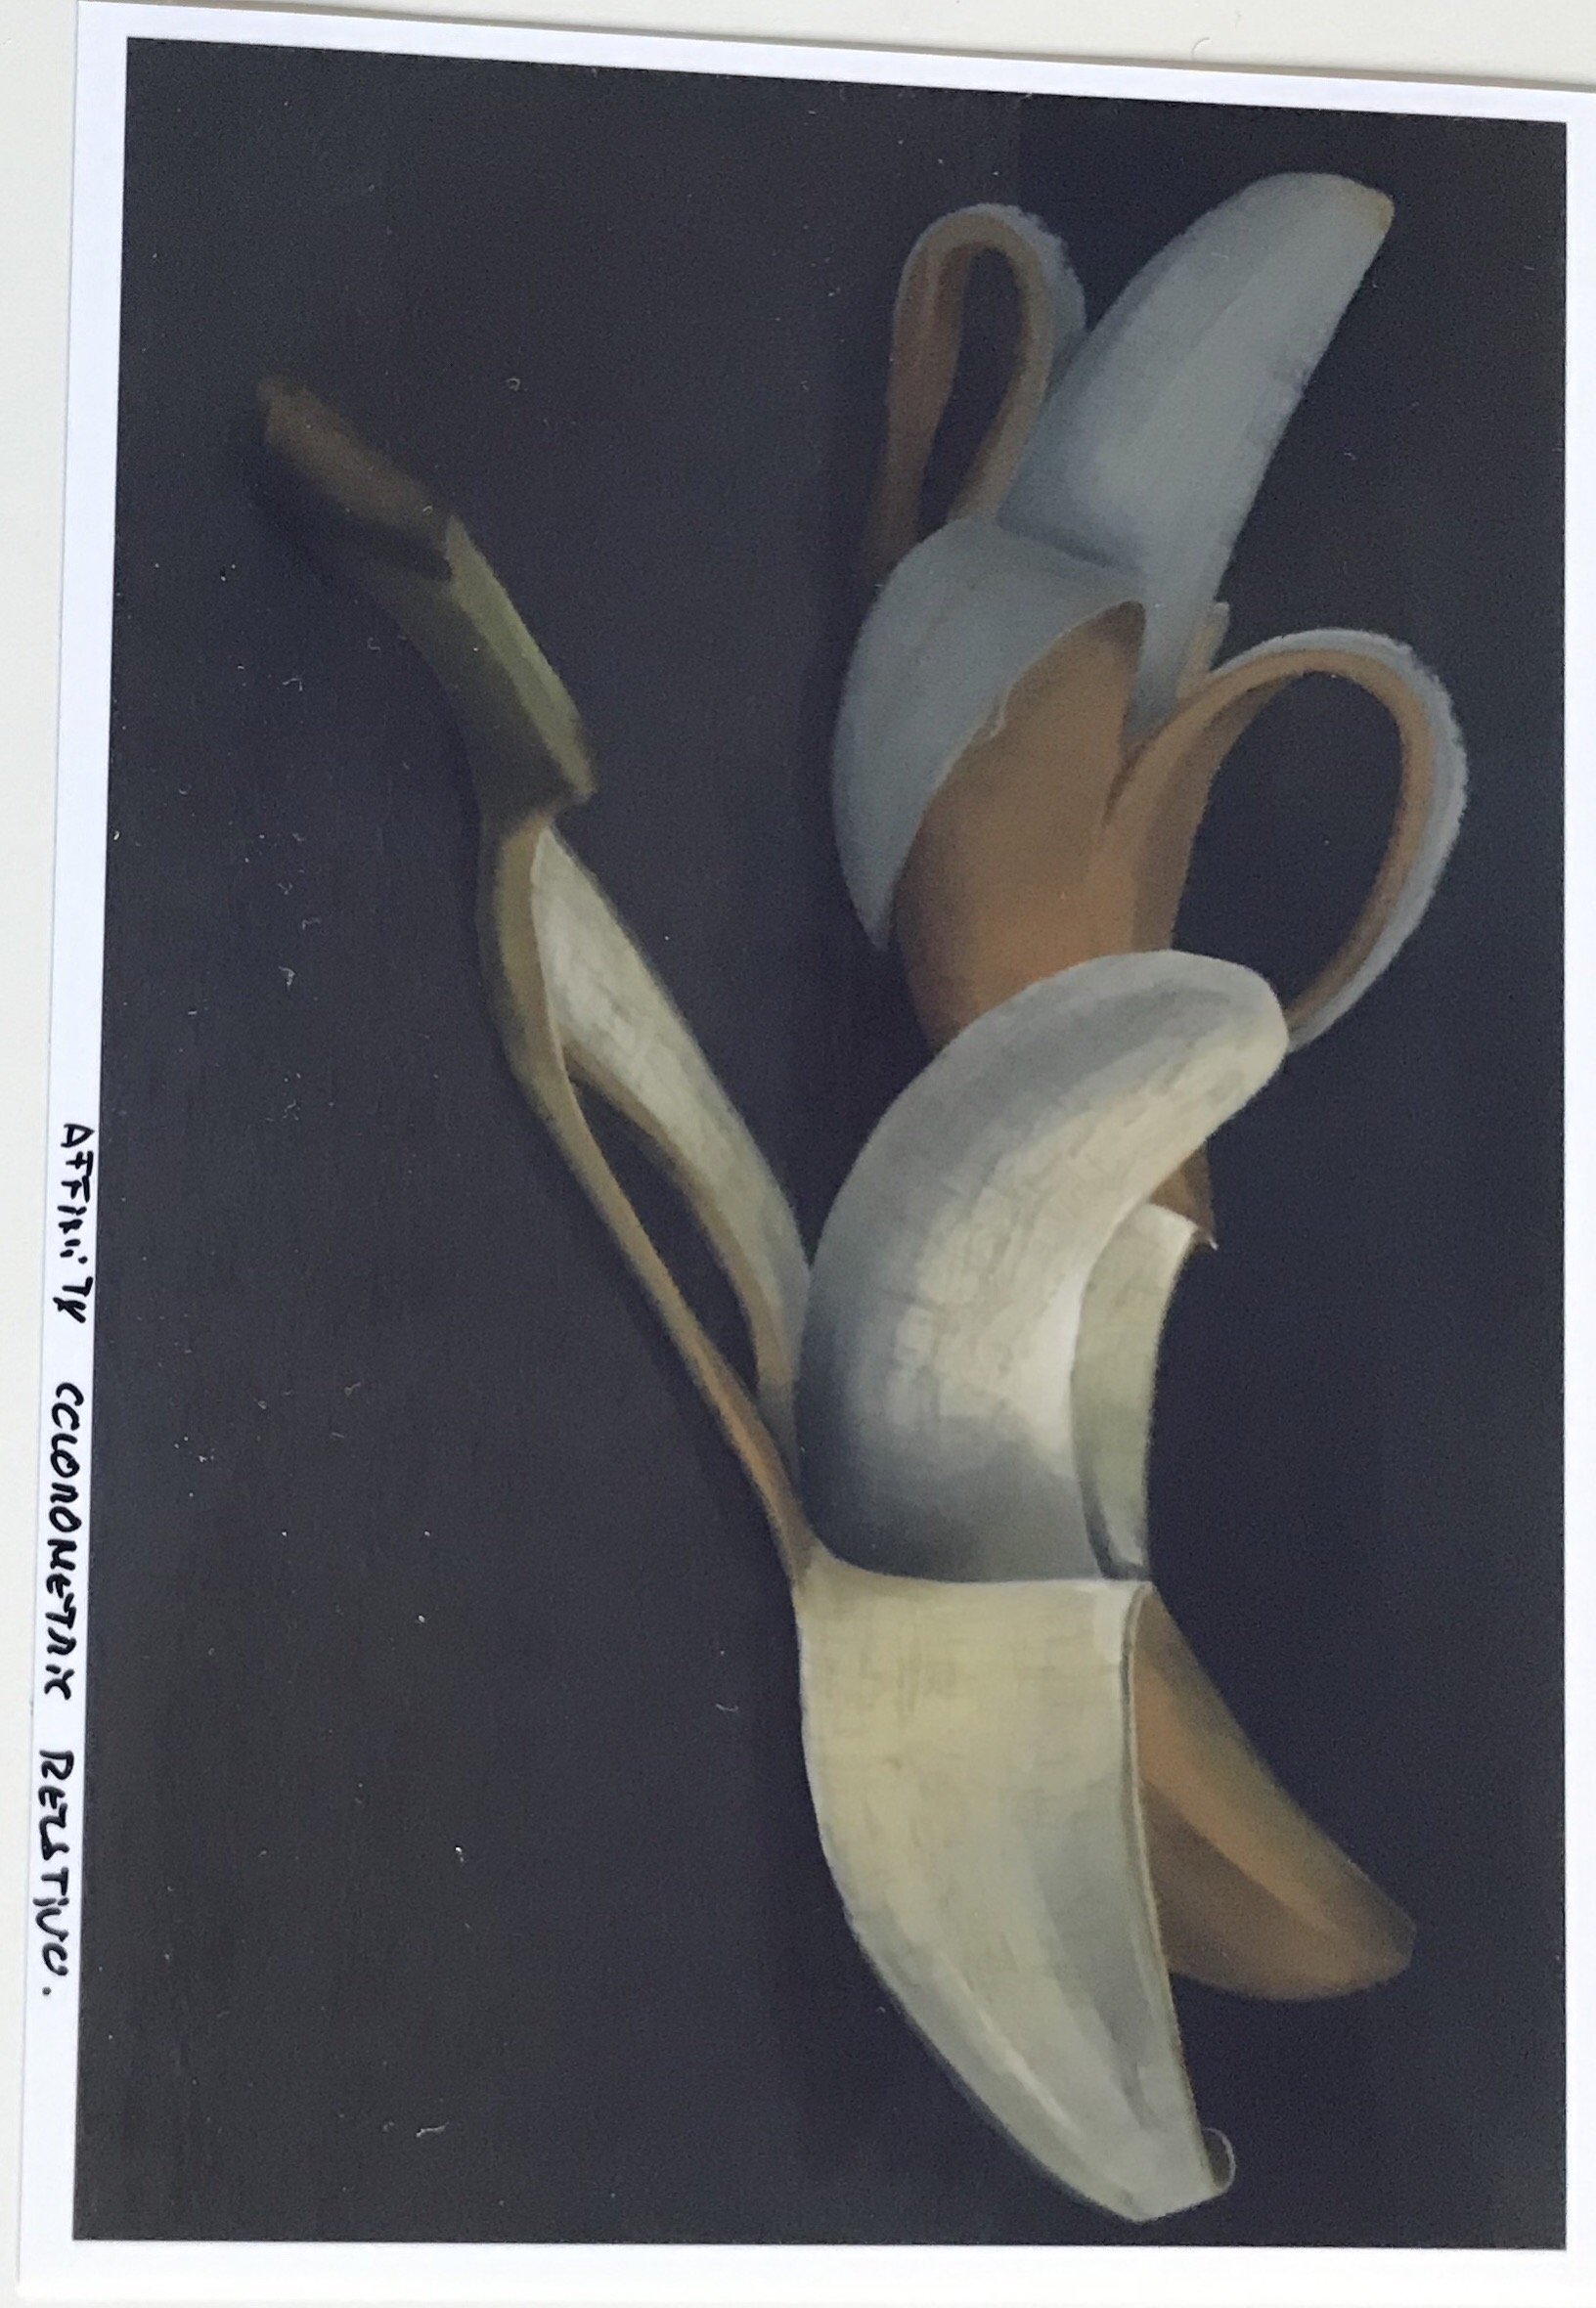
I ´m printig in affinity photo, in the print menu I select: the program control the color I use the Epson IJ printer 07 icc profile I select relative colorimetric I disable the printer driver’s control of colors I print the same picture in Affinity Photo and in Photoshop but the results are completely diferents. In Photoshop I get a clear and good print. In affinity photo I get a dark print. I use the same configuration in both programs. I have test with relative and absolute colorimetric and the result is in both case is dark in Affinity ( There seems to be no difference between the two colorimetric types in Affinity). In photoshop the absolute colorimetric print a dark picture but the relative colorimetric a correct image. Jokin
-
COLOR PICKER AND PRIMARY COLOR
Jokinb replied to Jokinb's topic in Pre-V2 Archive of Desktop Questions (macOS and Windows)
Yes, but the most logical thing is to change the primary color directly with the color picker -
Affinity photo and designer in the Desktop version. With the color picker tool ( tool bar) only the secondary color is changed. If I´m painting with the brush tool and I want to select another color in the canvas, I must: 1.- select the color picker tool (I short key) ( then the secondary color is selected in the color wheel, so the color that will pick the color picker tool will be the secondary color)),. 2.- drag to select a new color,. 3.-select the brush tool (I shortkey) (then the primary color is focused in the color wheel and the secondary color will pick the new color). 4.- Exchange the primary and secondary colors . 5.-Paint now. A lot of works. The most logical thing would be for the color picker tool to change the primary color directly. In the Ipad version there is not this problem I am doing something wrong?
-
There is Sub Brush system-option in the Ipad version?
-
WOW 1.7 new isometric function also on iPad
Jokinb replied to Angelos58's topic in Pre-V2 Archive of iPad Questions
Sure!, I can´t find the new functions in the ipad version -
In the new version of Affinity Designer (1.7.367) in the pixel persona it is not posible to draW anything with the stylus. I can select tools, menus but any brush stroke is not registrered. (doesn´t draw anything with the Paint brush tool) I can draw with the pixel tool In Designer persona it works ok It works fine in Affinity Photo. (1.7) It works fine in the Affinity Designer customer beta.(1.7.0.367) I have uninstall and install again . The same problem. What is the problem? NOTE: finallly solved The Protect Alpha was checked. Sorry
-
Page numbering Publisher
Jokinb replied to Rubyjim's topic in Feedback for Affinity Publisher V1 on Desktop
Go to Document/ Section Manager and create a new section. You can select the "Restart page numberint at" option