ButchZ
-
Posts
26 -
Joined
-
Last visited
Everything posted by ButchZ
-

AF PHOTO v2 - GUIDES Technical Question
ButchZ replied to ButchZ's topic in Affinity on Desktop Questions (macOS and Windows)
Ahhhh. I never knew what those guides were Just the name of them made me ignore even reading about them as I thought werent needed Thank you for the guideance! -
AF PHOTO v2 - Bleed Technical Question
ButchZ replied to ButchZ's topic in Affinity on Desktop Questions (macOS and Windows)
So, if I add a 0.125" bleed, thats exactly what Ill get around the image area? Thank you for the reply and waiting on the clarification as I dint understand fully your reply -
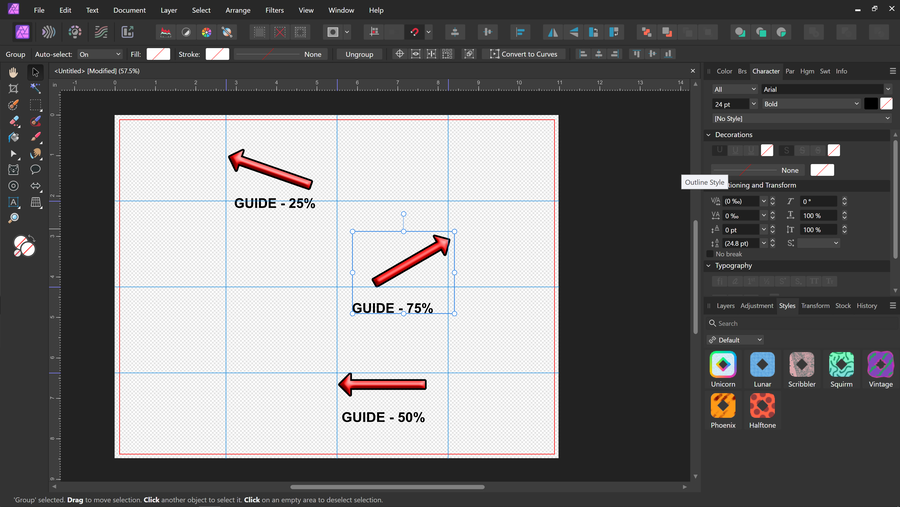
When adding guides such as my image attached, with 25%, 50%, and 75%, are te guides figured out from the edge of the paper or the margins? When sublimating, it is important for center guides, especially in my photo where Im going to place 4 cork coasters at 4" each and split the paper 8.5 " x 11" into quadrants so I can fit 4 coasters on each print See photo attachment for details This is a simple project, but im going to be sublimating a 17 oz Latte mug which is tapered, and since its on an angle, I have to place the center of each image for each side of the mug centered. Attaching that image too The latte mug guides are 25%, 50%, and 75% at the top. Are the guides figured out in percentage from the paper or the margins? Thank you in advance for the help as this has been driving my mind trying to figure out If the guides are correct, I do add another layer with a filed in thin rectangle, so I place on the top guide and move the bottom to the center of the bottom of the mug layout since the guides don't angle like that. PS: I can change the color of the margins, but can I change the color of the guides? Id like to see that simple featured added if not

-
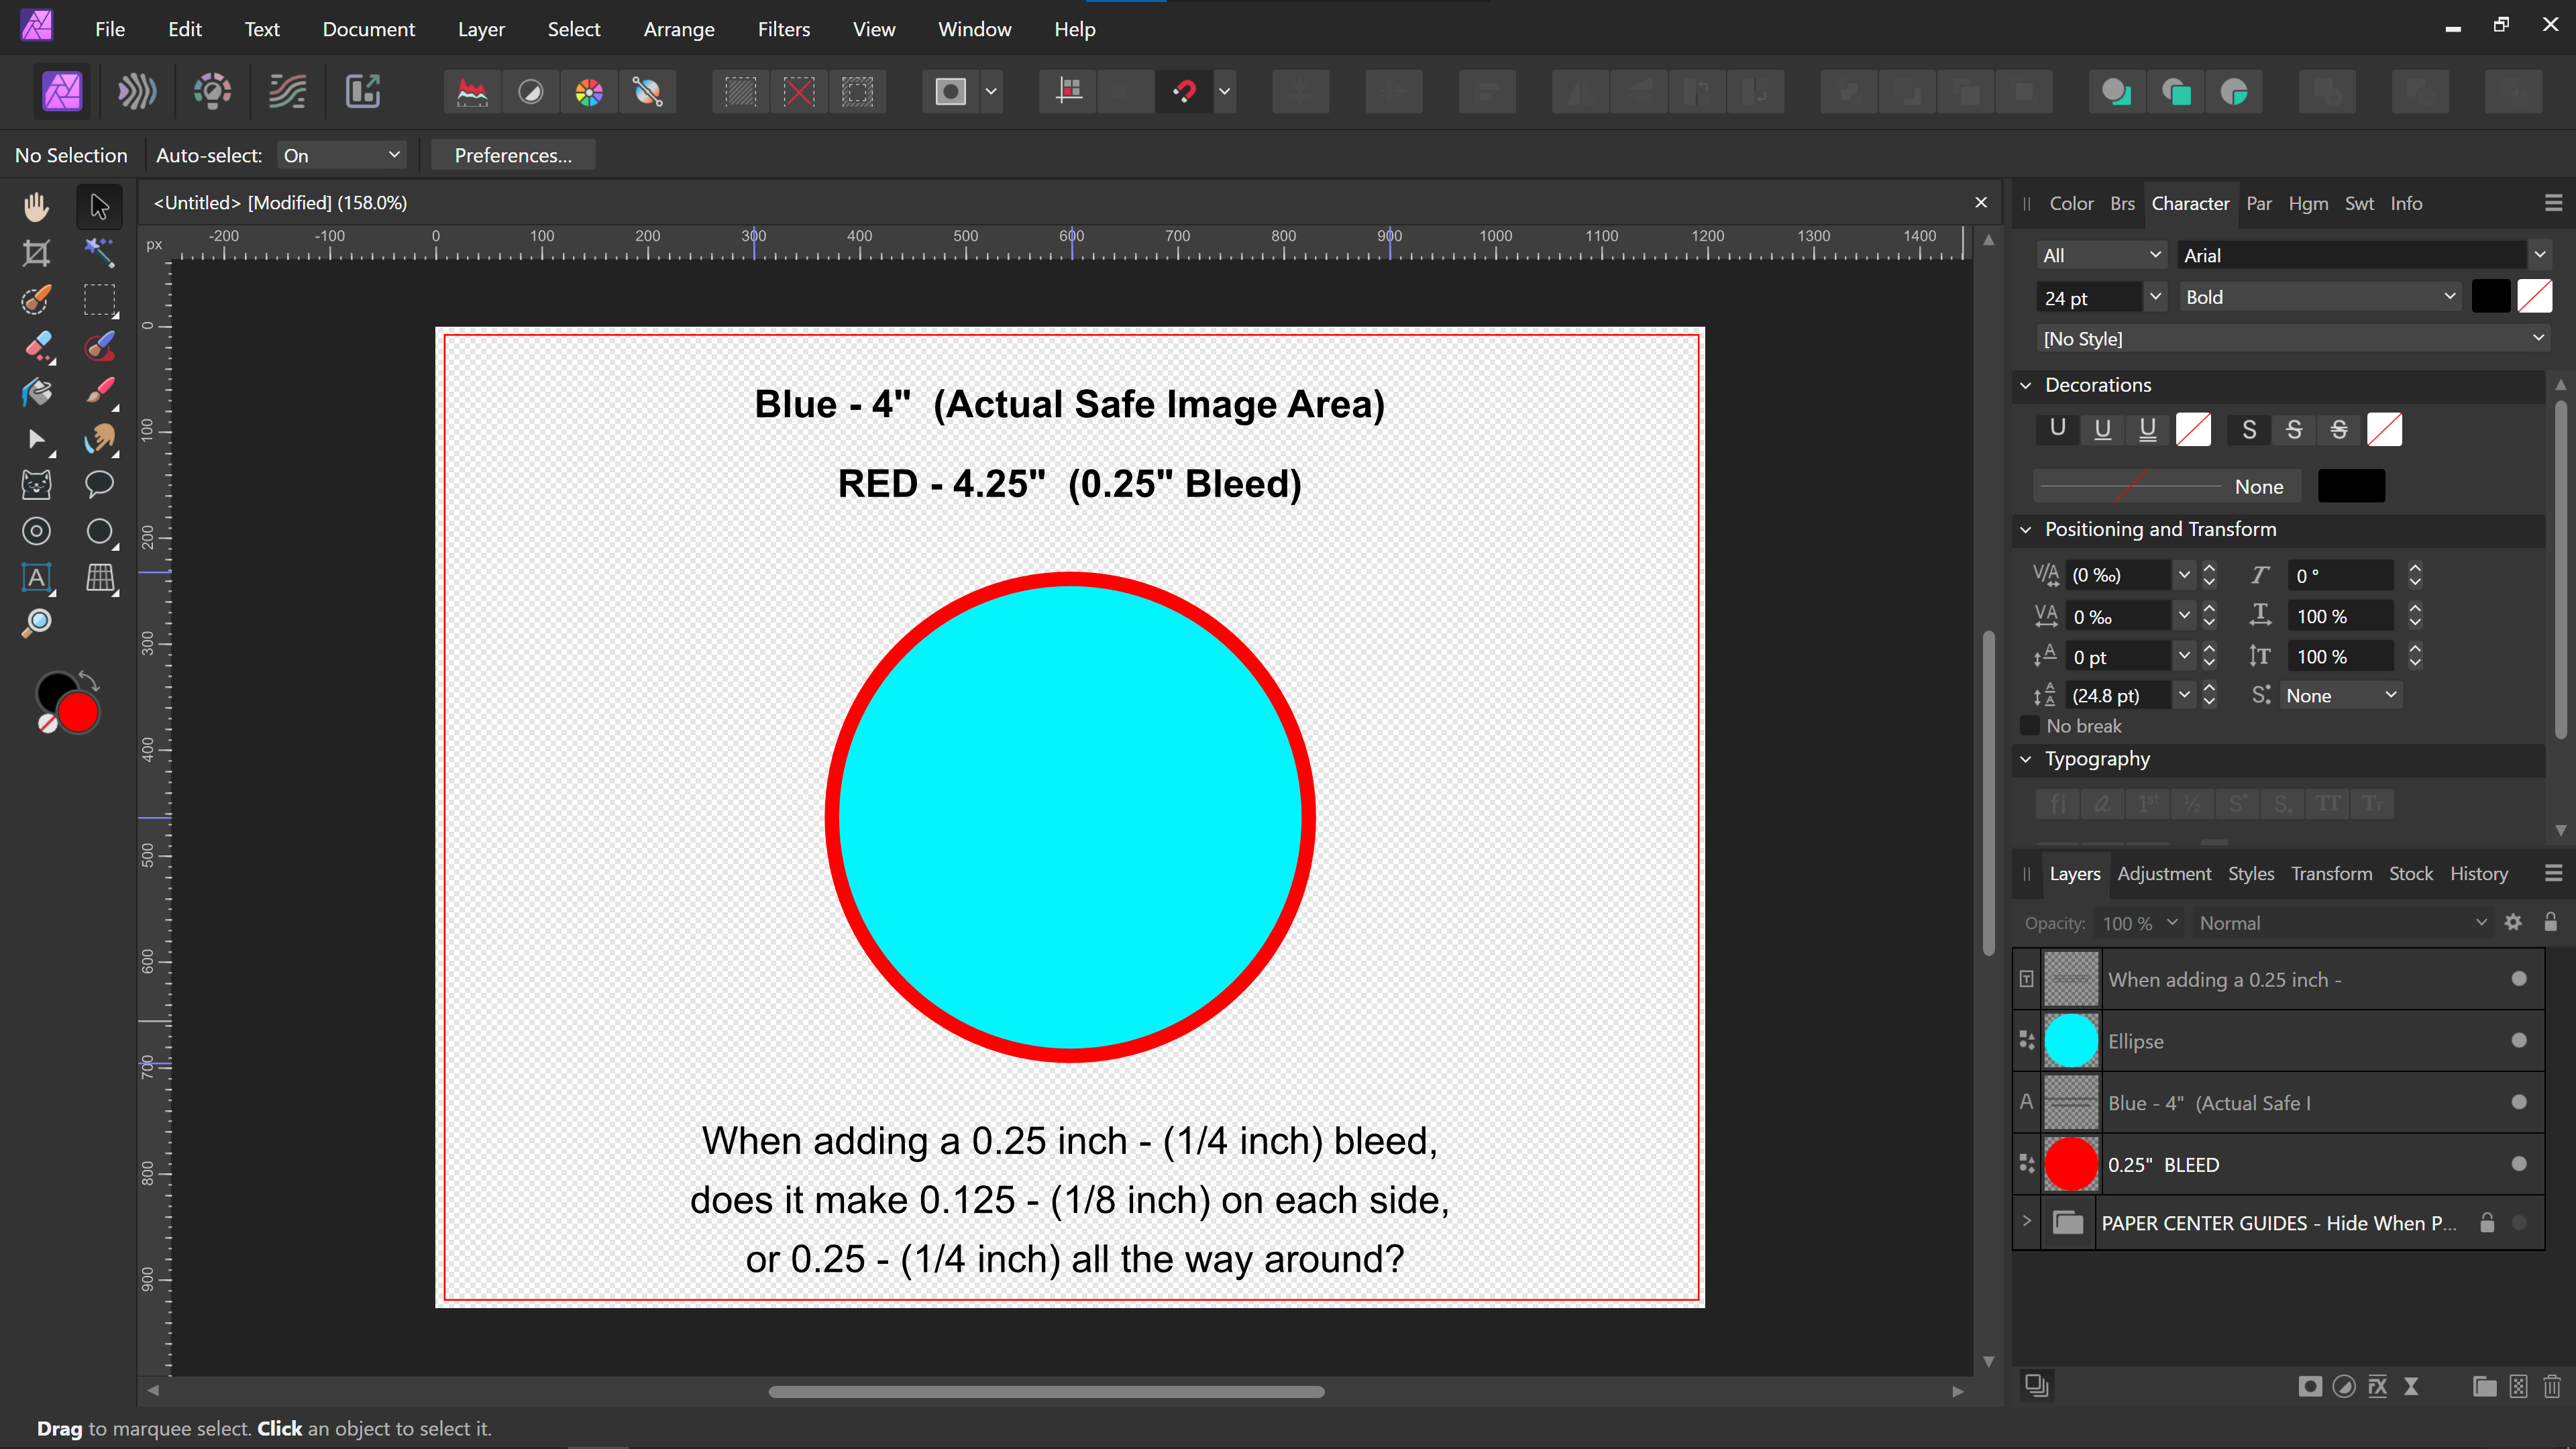
I use AF Photo to edit my photos, create templates for sublimation. When I add a bleed, and make the underlying circle (RED) 0.25 in or 1/4 in larger, is the bleed a full 0.25 in (1/4 in) all the way around the blue circle or is it 0.125 in (1'8 in) around the circle? See photo for details on what im asking In the photo, Im making a template for cork coasters to sublimate My printers margins are shown in Red. The blue circle is the actual "Safe image area" The red is a 1/4 in bleed (0.25in)
-
AF PHOTO v2 - Tools - previewing tool size
ButchZ replied to ButchZ's topic in V2 Bugs found on Windows
I just checked, the CAPS button being ON, DOES hide the size marquee off the tool youre using such as paintbrush, inpainting brush is the 2 I checked Very weird! Thanks all for the help Very much appreiated! -
AF PHOTO v2 - Tools - previewing tool size
ButchZ replied to ButchZ's topic in V2 Bugs found on Windows
yeah, who would of thunk that I will have to check but the net reply that in v1 it wasnt that way just seems very weird -
Thanks I will give this a try I thought maybe when cutting using the refining tool would do this in 1 step BTW, I have email notification checked and it didnt let me know you replied
-
Thanks Lee! Great video! I learned more about the soft proofing. I wasnt using it correctly but now I know 😁
-
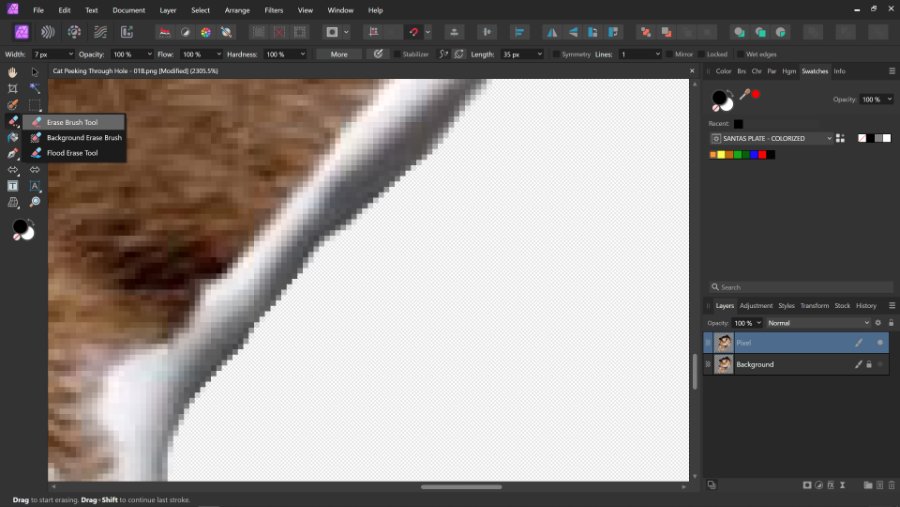
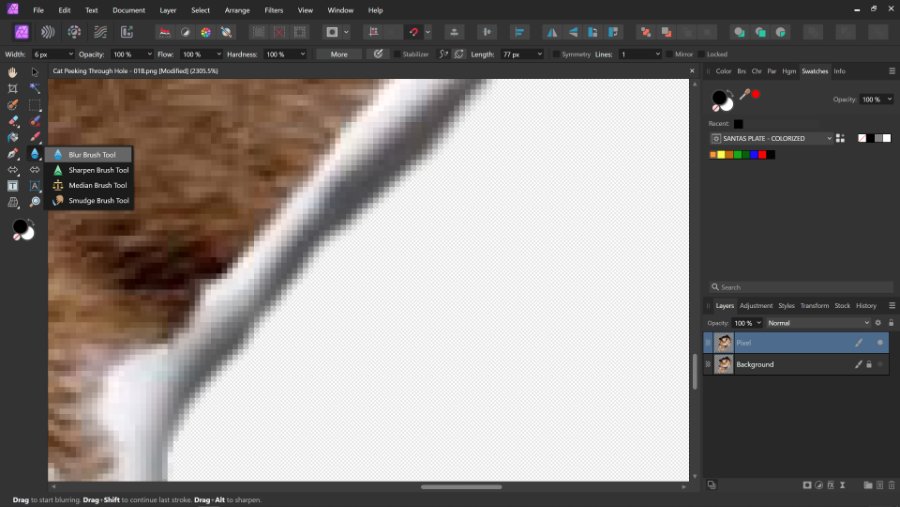
I do a lot of overlayering cutout images and place them on mockups. Right now, I cut out the image, use the eraser tool to removed jagged edges (Image 01), then follow up with the blur tool to blend the edges so they dont have that jagged raster edges (Image 02) Is there an easier or quicker way to do this? I know in the selection magic wand tool, you can refine the cutout with feathering and smoothing, but just trial and error im not good at this, yet Is that the correct area I should be concentrating on to learn to do what my first sentence of what im trying to accomplish? Any help in pointing me in the right direction is appreciated Im on hands on type of guy and thats how I learn, but some of these videos are way too long with frivolous stuff that make them boring, and they take the long path to do what i trying to do
-
I'm not sure if this is a bug or not in the latest version of AF PHOTO v2 In my example image, the tool didn't show up on the image, not the bug But in v1. I select the selection tool, even with the paintbrush tool, and say enlarge the size of the tool to 36 from size 10, on the image, the marquee would show the tool size before using so I could visibly see if it would be the right size. Now, in v2, I am blindly using the tool because the marquee doesn't show up, in any change of size and this would also help in my starting point. I don't see any marquee to even get start and just hope I'm far enough away from the image to start making my selection or painting. It also does it with the inpainting tool too. So, I'm just going to say it's all the tools. I don't know if this is a bug or not, or a change within the software, that I have to go into preferences to show the marquee when selecting a tool Im not an expert, so Im not even sure what it is called to do a search for previous reports if anybody is having the same issue but It is very frustrating to edit an image and not knowing where your starting point is and visible size to know if I need to make the tool smaller or bigger In my example image, I have the selection tool selected and a tiny cross displays. It didnt on print screen so I have to edit to show approx what I see
-
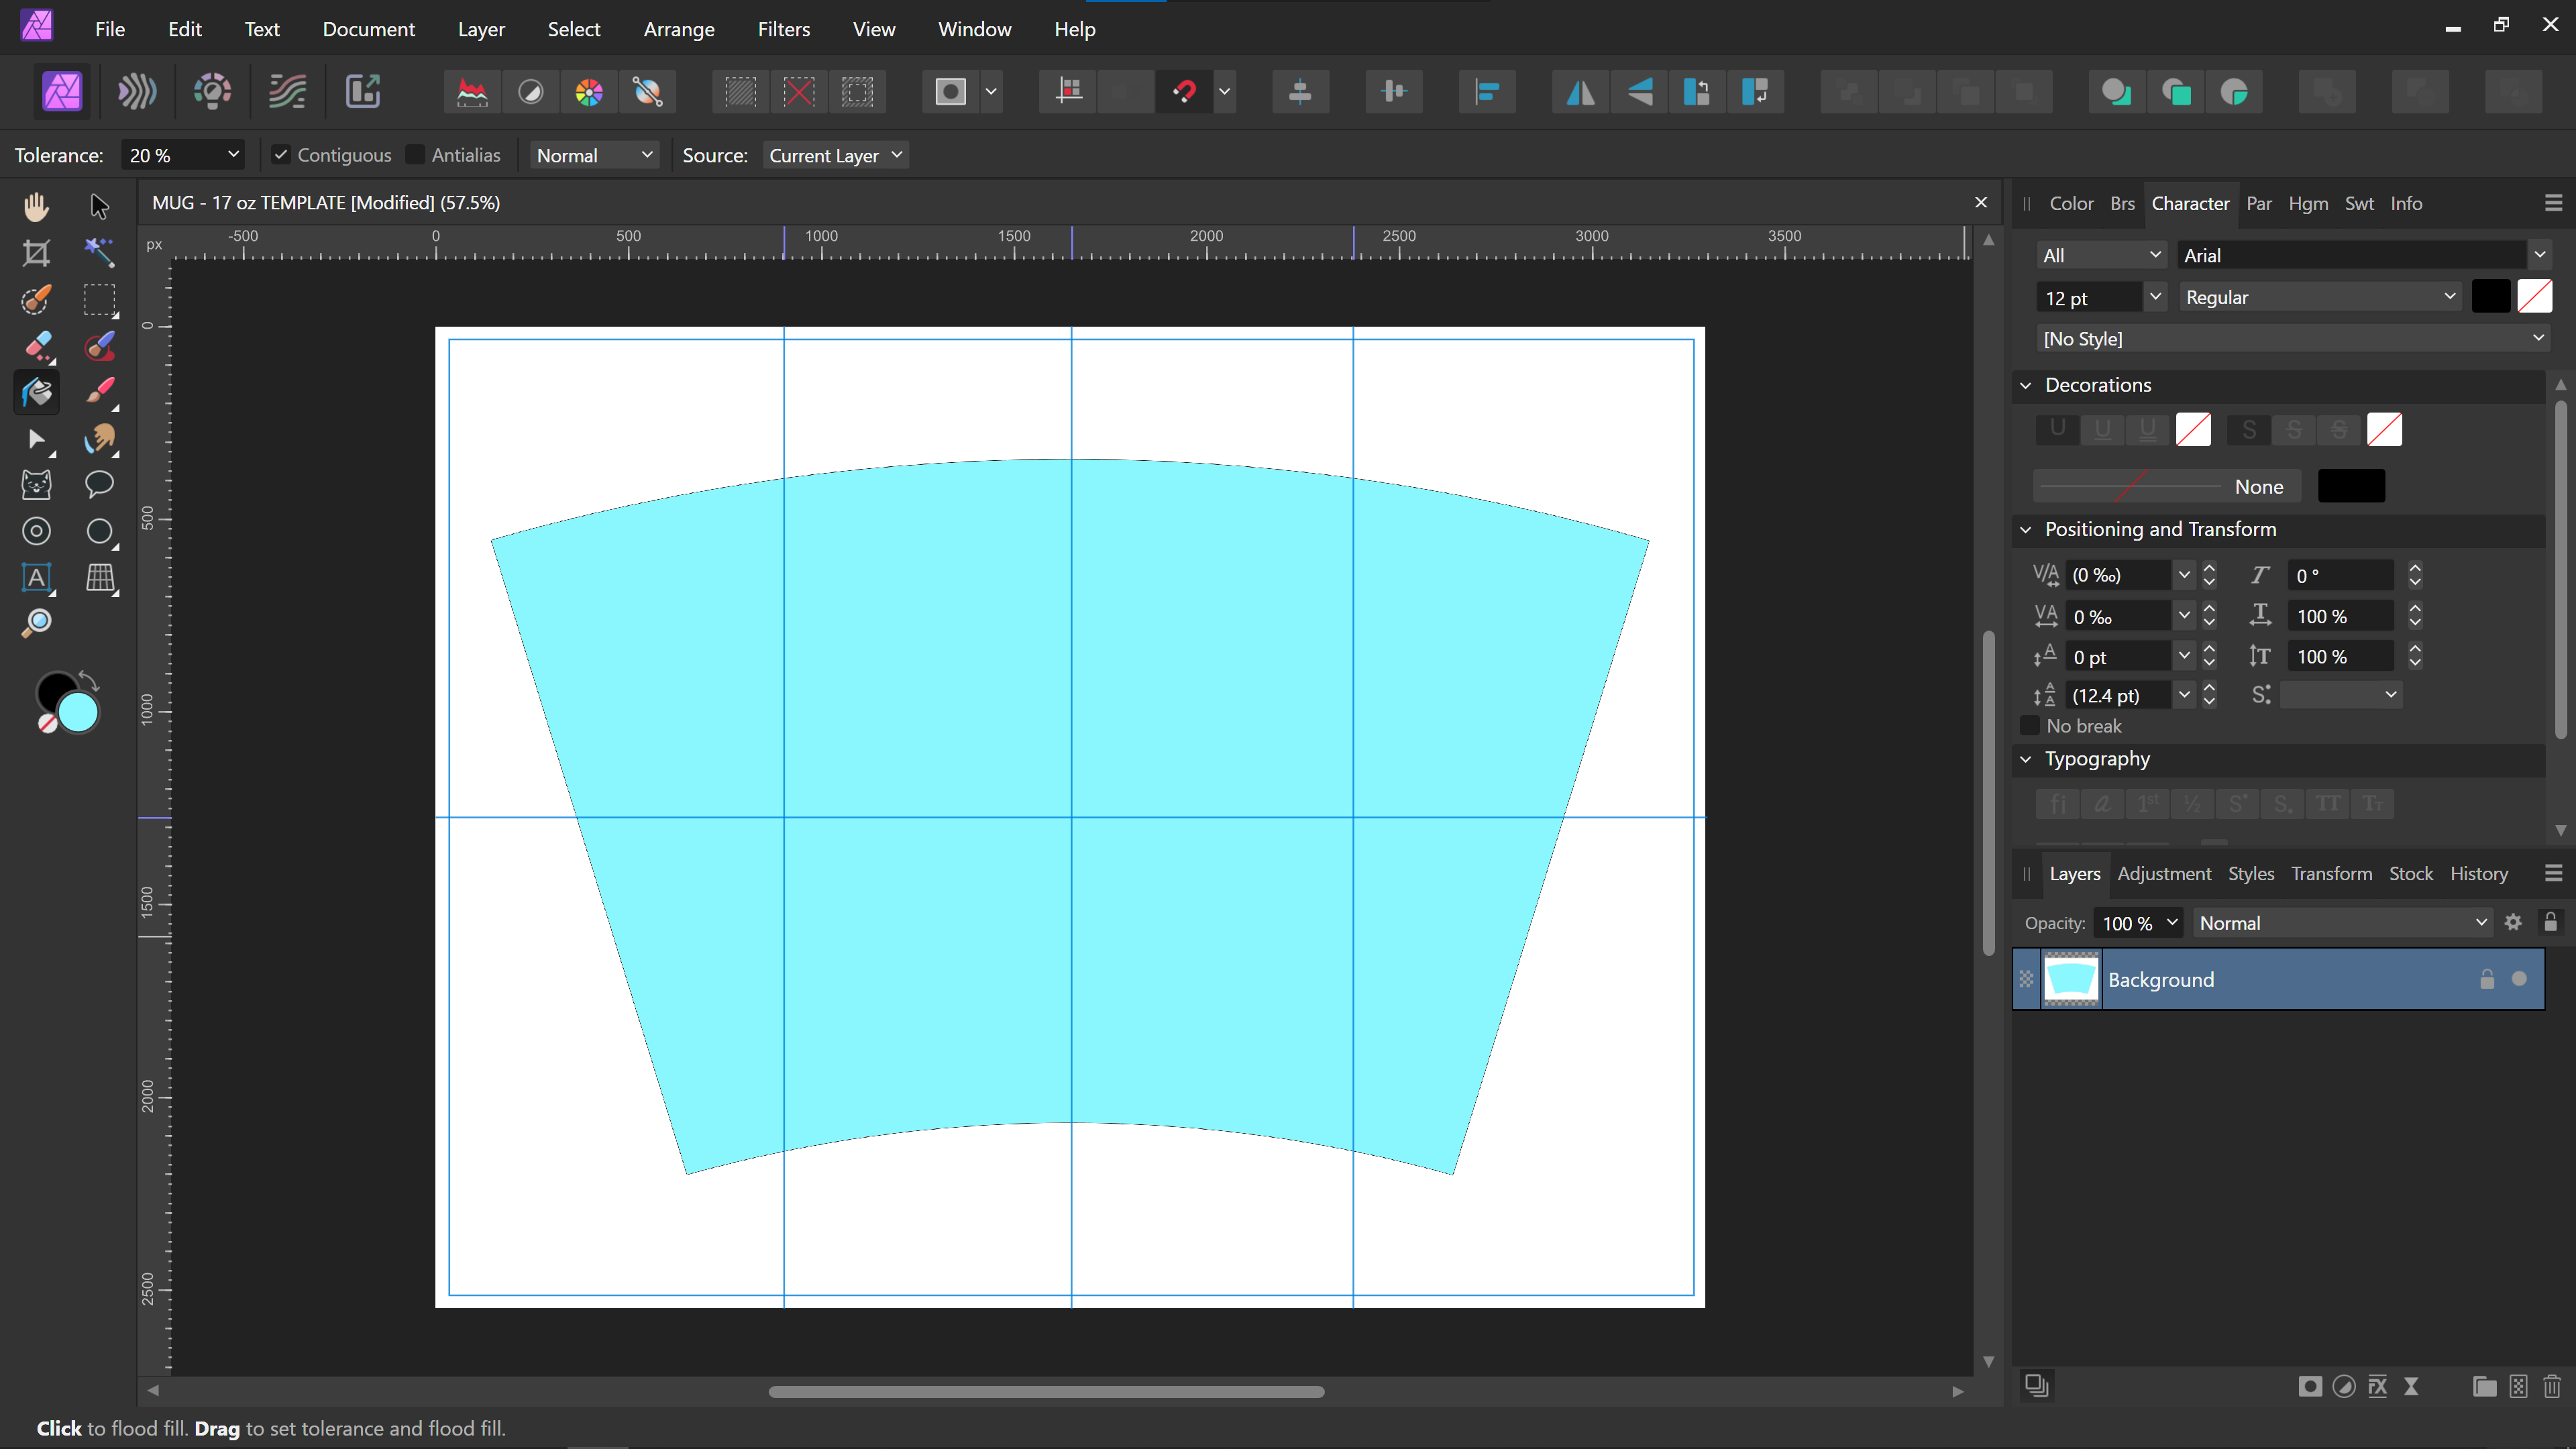
Im making templates for mugs The paper is 9.5 x 4 with 1/4" margines. When I create an image area of 9.25 x 3.75 and add guides 25%, 50%, 75% what are the guides aligning to? The canvas? If thats the case, can the guides be aligned to the rectangle shape created in percentages without manually adjusting?
-
Photoshop Bad Habits
ButchZ replied to ButchZ's topic in Pre-V2 Archive of Affinity on iPad Questions
THAT WAS IT!!!! I guess I didnt look hard enough. Sometimes, since Im leaning AP, that while in a project, I get stuck on a procedure. Some of the terminolgy is change and not sure what it is called and dont know where to look except to ask. Thanks. Much easier than Adobe i my opinion -
YEah its a busy street in the morning. But, Im liking Affinity. Havent got frustrated yet with learning new menus because it seems that powerful. Ive been posting in my die cutter groups about checking out the programs
-
I made this video to show a friend how to make a watermark by creating a custom brush. When added as a layer, click once to act like a "Stamp" Only drawback is, once saved as a PNG, you cant change the color of your text, BUT, layer "Effects" work on the layer including, resizing, rotation, etc. How to Make a Custom Brush / Watermark https://youtu.be/9QBCKDGk8X0
-
This was just a fast edit and not worried about final product except to show off the "Inpainting" tool. I get confused at times whether to use the "Selection Brush" or the "Inpainting Tool" But either way, it removes objects quite well on default settings. I have to play around more to limit the "Blur / Smudge" area once the object is removed
-
Wrong zoom origin / center
ButchZ replied to Wiredframe's topic in [ARCHIVE] Designer beta on macOS threads
If doing a large picture and really zooming in for "Fine" adjustments, this behavior is a pain with scrolling Left/Right. IF it is a bug or not, then maybe a "Feature Request" to zoom in on center mouse point? For instance: say I have a pic for printing 8.5" x 11" and I place the mouse pointer over the area I want to zoom in on to edit, as it stand now I would have to muse scroll (my preference) THEN scroll Left/Right. I would be nice to place mouse over are to edit, zoom in and that area be center screen with no scrolling Left/Right -
I like the panoramic feature. It stitches very well and doesn't give you a "Fish Eye" Im also playing around with the inpaint tool and removed the cars from the picture. Does a really good job, but i have to learn the settings so after the item is removed, I have less of a "Smudged" look. But here's what I did this morning playing around and trying to learn
-
alignment
ButchZ replied to leonahussey's topic in Pre-V2 Archive of Affinity on Desktop Questions (macOS and Windows)
Is there a way to set the default alignment to margins? I cant seem to find any info on setting defaults for that -
Im trying to break free of Photoshop because or numerous license key issues they haven't corrected yet and stupid cloud programs. As i play with Affinity Photo, I am doing video tutorials which are GREAT! But one I havent found yet and trying to break myself of Adobe Habits. I do a lot of blending/copying/pasting between 2 pictures. I used to do in Photoshop "PASTE INTO" a selection. In Affinity, how is this done, with masks? In the menu "EDIT" there is a paste into command but doesn't work like Adobe. For instance, I do this for buddy's FB page, put their heads on women's bodies. So what area should I start in to take 1 picture of buddys head, and paste "INTO" area on picture 2 to replace head? I Just need an area to start and will watch tutorial from there. Need the right direction to follow. Thanks in advance
-
THANKS! Works good for me!
-
Thanks for the replies. While Carl's suggestion works, Alfreds way is what I was looking for. Working around the program and finding things along the way I was accustomed to in Photoshop that are missing and trying to figure out the programmers thinking along the way
-
#1 - Can the transparency background be changed to a default color of Pink? Its sometimes hard for me to see missed areas when erasing backgrounds. Pink has worked for me in Photoshop #2 - Can I set a profile I made to be the default export setting? Any quick help is appreciated while I try and find the answers myself
-
Ive searched the forums but Ive had no luck finding answers or questions on "Reverting to Original Image" When testing certain functions as a Affinity Noob, Ive tried to find the "Revert" to original image erasing all the history all in one shot instead of using the layers/history panel. Is there such a feature or do I have to get accustomed to the history panel use? Any help is appreciated as I relearn some new things in Affinity Photo
-
After a couple of hours getting used to nw menus, terminology, etc. I am very impressed with Affinity Photo. Masking and textures is a breeze! Im uploading a test photo I made this morning just exploring the program. With more experience, I should be able to produce better projects
-
Embed New EXIF Info?
ButchZ replied to ButchZ's topic in Pre-V2 Archive of Affinity on Desktop Questions (macOS and Windows)
Ok thanks. I did find that and thought I could edit info from within. Back to exploring!