

^-^
-
Posts
26 -
Joined
-
Last visited
Posts posted by ^-^
-
-
4 hours ago, NotMyFault said:
Alternatively, use a non-destructive workflow:
- add a curves adjustment (or hsl or levels or exposure …)
- adjust curves to achieve the burn effect you want. It is applied globally but
- invert the inherent mask
- use any suitable brush, color, opacity, hardness and
- paint over mask to apply effect where you want it
the big advantage is you can adjust the strength of the effect any time
thank you, notmyfault
")
i am going to try this, it appears that this way the contrast is preserved making the tonal values match the rest of the image
the best way for me to describe it is that in an organic darkroom we choose papers first that have the total value we want, this tonal value never changes. for example, we choose the contrast we photographers are known for.
if we want high contrast we choose 3-5 papers, if we want low contrast we choose 0-2 papers being very low contrast, would like to do this using affinity photo during adjustments so that the tonal range does not drift into something not achievable in an organic darkroom (read unnatural & garish).
🎞️🎥🎬🎭
-
3 hours ago, thomaso said:
I am not sure what visual result you want to achieve. If you consider what "burn" does a workaround could be to paint gray colour with a wanted opacity + blend mode. You have opacity options for the brush + the colour + the layer and blend mode options for the brush and the layer.
thank you, yes, thomoso, this is my workaround as well
i was hoping for a wireframe (linear) to drag across an area of an image for example an edge towards the middle of image
this is something we can do in movie editing to draw the audience's attention by darkening the frame, for example, creating negative (dark) space so that their eyes go to the lighted areas instead, i made it work using Affinity Photo layer/burning/brushing gymnastics was hoping for a simpler adjustment feature
thanks again!
using moviemaking software we can draw a rectangle for example on the rightside of this image & darken, blur, feather/blend the edges on either one side of the frame or all four edges of frame, it takes us like 12 seconds using a wireframe layer (overlay) then setting adjustment settings, the adjusts stay isolated, fixed & adjustable within the wireframe

-
howdy,
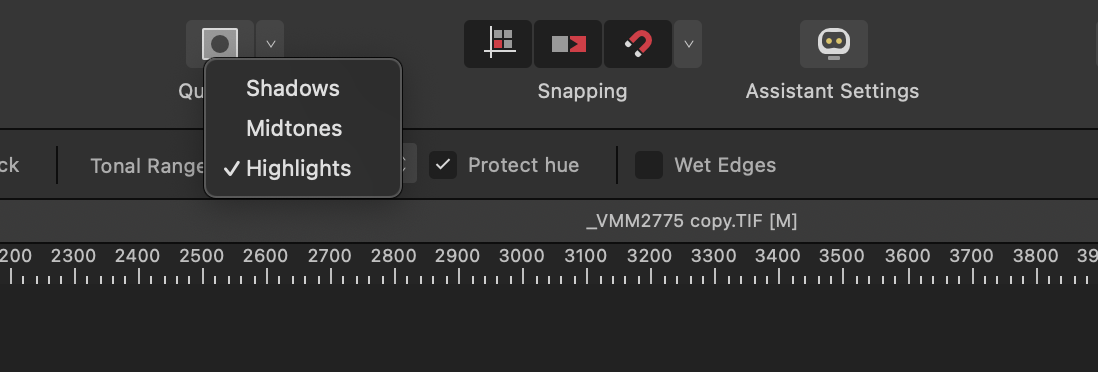
is there a way in affinity photo to burn all tonal ranges at once?
for example,
i would like to burn all pixels from darkest to brightness & NOT isolate any tonal range individually.
is there a feature Tonal Range ‘All’ for Burn?
is there a linear (rectangular shape) setting to burn instead of just circular?
thank you in advance
-
thank you for your help
i started from scratch, works as advertised as an asset
-
thank you @walt.farrell for your response
yes, that is exactly what i would like to do!
for some reason,
maybe an error on my part,
but once the custom arrow is made & saved as an asset for reuse the functionality of the Arrow Tool (your demo) goes away so that click dragging the tail of the line modifies the entire arrow
typically there is a modifier key that a user can press which allows only the selected points to move in unison without affecting the rest
im going to remake the an arrow save it as an asset to see if the features you demoed hold
thank you walt!
-
@v_kyr thank you for your response
im using the arrow tool in affinity photo persona & saving a custom arrow in assets which gets used regularly in different documents
the created arrow is a ‘marketing’ icon which cannot change in color & proportions except for the length of the line
-
thank you for your response
contingent upon the application, for example, Affinity Photo>Metadata>IPTC (Image) you add the metadata from IPTC to identify the genre, subject codes...without the #
# are only used contingent upon application's requirements
IPTC metadata has been an international standard for decades
as i demonstrated,
# narrowed the subject search & did not pull up all the other ‘garbage’ words like your search did, your search was a bomb search, my search was a refined surgical query so that not all words are queued in the queryinternet 101 targeting a subject
some #, some commas ‘,’
peace -
howdy
does anyone know how to adjust the length of the line on arrows after they have been placed in the document without affecting the arrowhead?
for example,
i created a custom arrow to use in architecture presentations saved it as an asset for reuse, i would like to only change the length of the line, (not the arrowhead) so that arrowhead is not modified but the line can be lengthened preserving it's width
thank you
affinity photo 2 #macos #arrow #linelength #line #arrowtool
-
hello, fellow affinity photo user walt
thank you for the topic tip!
#hashtags (metadata) do in fact work & are useful in these forums see enclosed image
side note,it may not be routine but users should think about incorporating them to quickly narrow down their forum search query, they are a powerful way to find stuff especially when the tags are combined with media industry protocol standards establish decades ago
a hashtag query goes quickly & directly to the hashtag & is more surgically targetedAffinity Photo uses ‘Metadata’ in which a user can import their #IPTC, #EXIF, #Copyright etc #tags as #metadata via #XMP
for those new to metadata,
Affinity Photo can import/exportr these hidden data that travel in images & can be later read by all professional photo & video editing softwareAffinity Photo > Menu > Window > Metadata
i make an XMP file for main clients & locations that i can use in all media including social media
example of IPTC protocol,
IPTC->Motion Picture Industry
Concept ID (QCode) = medtop:20000307, ID (URI) = http://cv.iptc.org/newscodes/mediatopic/20000307
Type: cpnat:abstract created: 2009-10-22T02:00:00+00:00 modified: 2021-02-18T12:00:00+00:00 retired:
Name(en-US): motion picture industry
Definition(en-US): The business of movies, film, and cinema
Broader concept: medtop: 20000304
Related concept (skos:broader):medtop: 20000304
Related concept (skos:exactMatch):subj: 04010003
Related concept (skos:exactMatch):https://www.wikidata.org/entity/Q1415395
Member of scheme: http://cv.iptc.org/newscodes/mediatopic/
reference:
https://www.iptc.org
take care walt! 📷🎬🎞️

-
howdy
does anyone know what the keyboard shortcut is to reveal ‘hot spots’ in a #photo (#affinityphoto v2)
the #hotkeys to show over #exposure & under exposure?
i can see the pixel information of the #hotspots using the histogram but i cannot find the keyboard shortcut to view the hotspots in the image
thank you in advance
#overexposure #underexposure #keyboard #shortcut
-
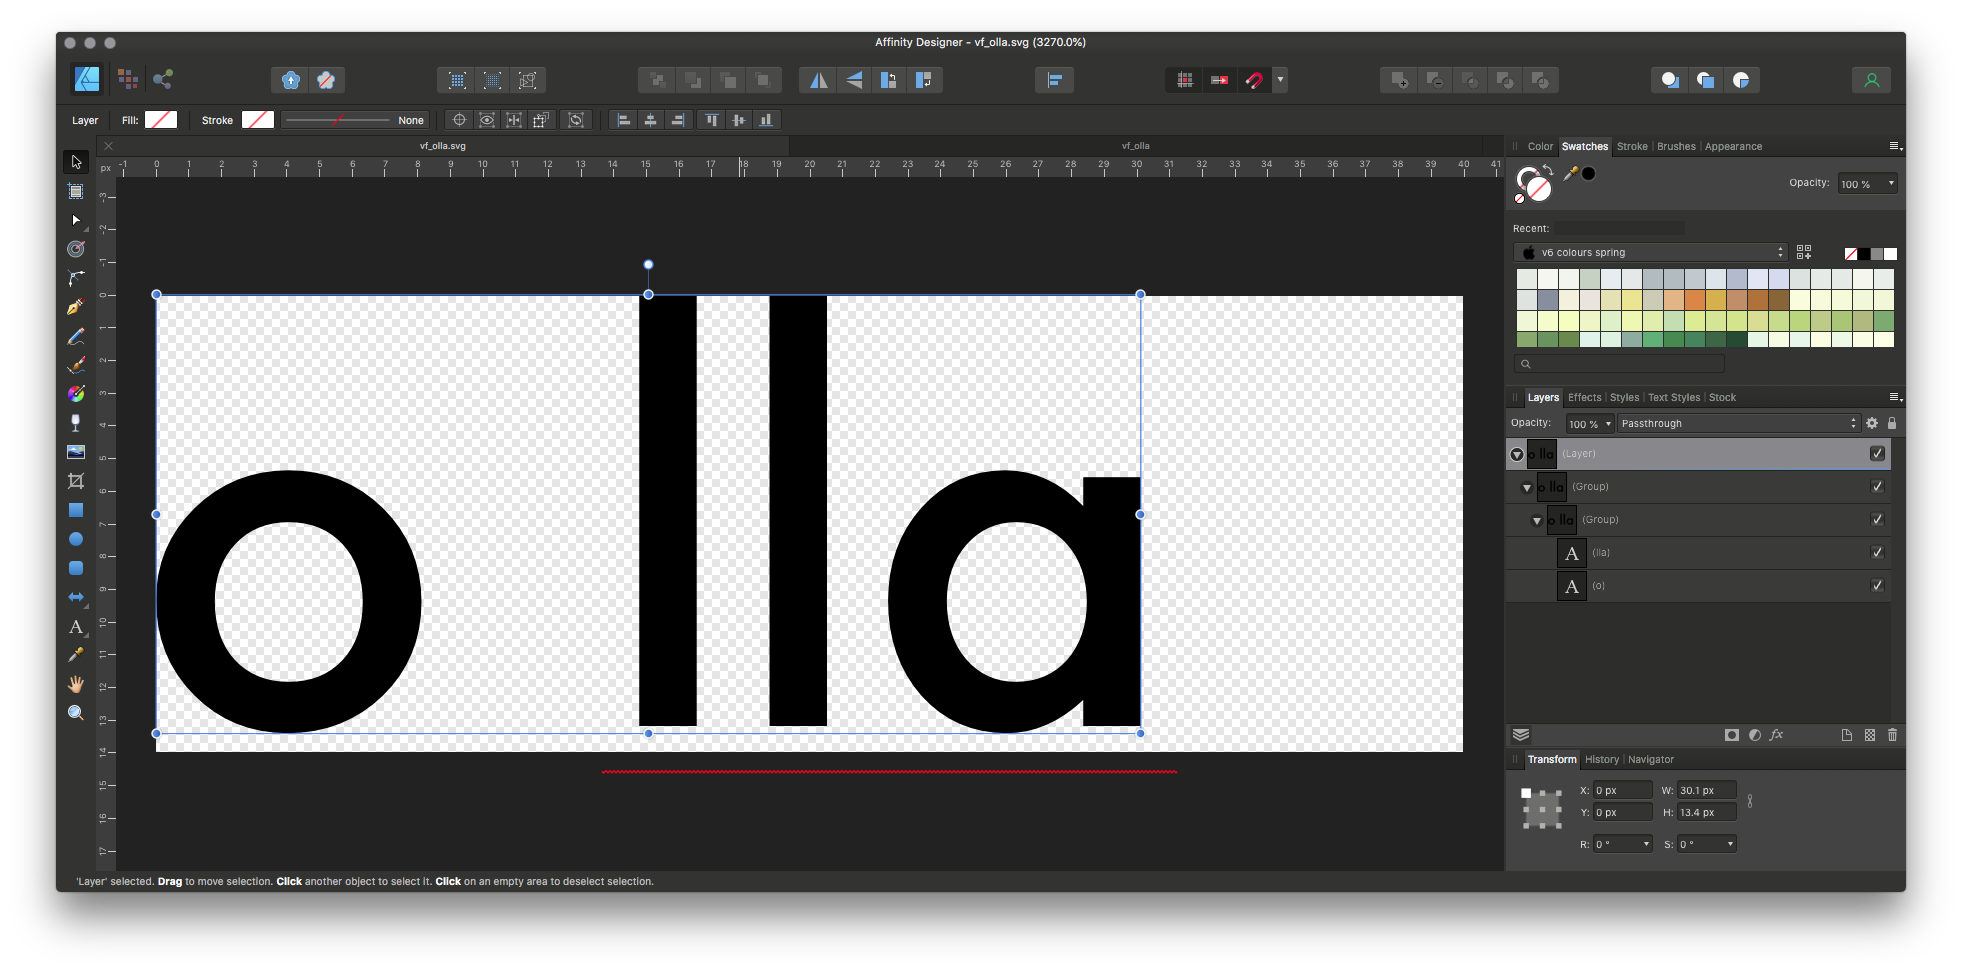
On 7/15/2021 at 11:12 PM, firstdefence said:
When I export based roughly on your images above I get a clean tight cropped export to SVG, I used SVG Digital Small size and under Area I used Selection Only, I was also exporting with a large pt size, approx 100pt
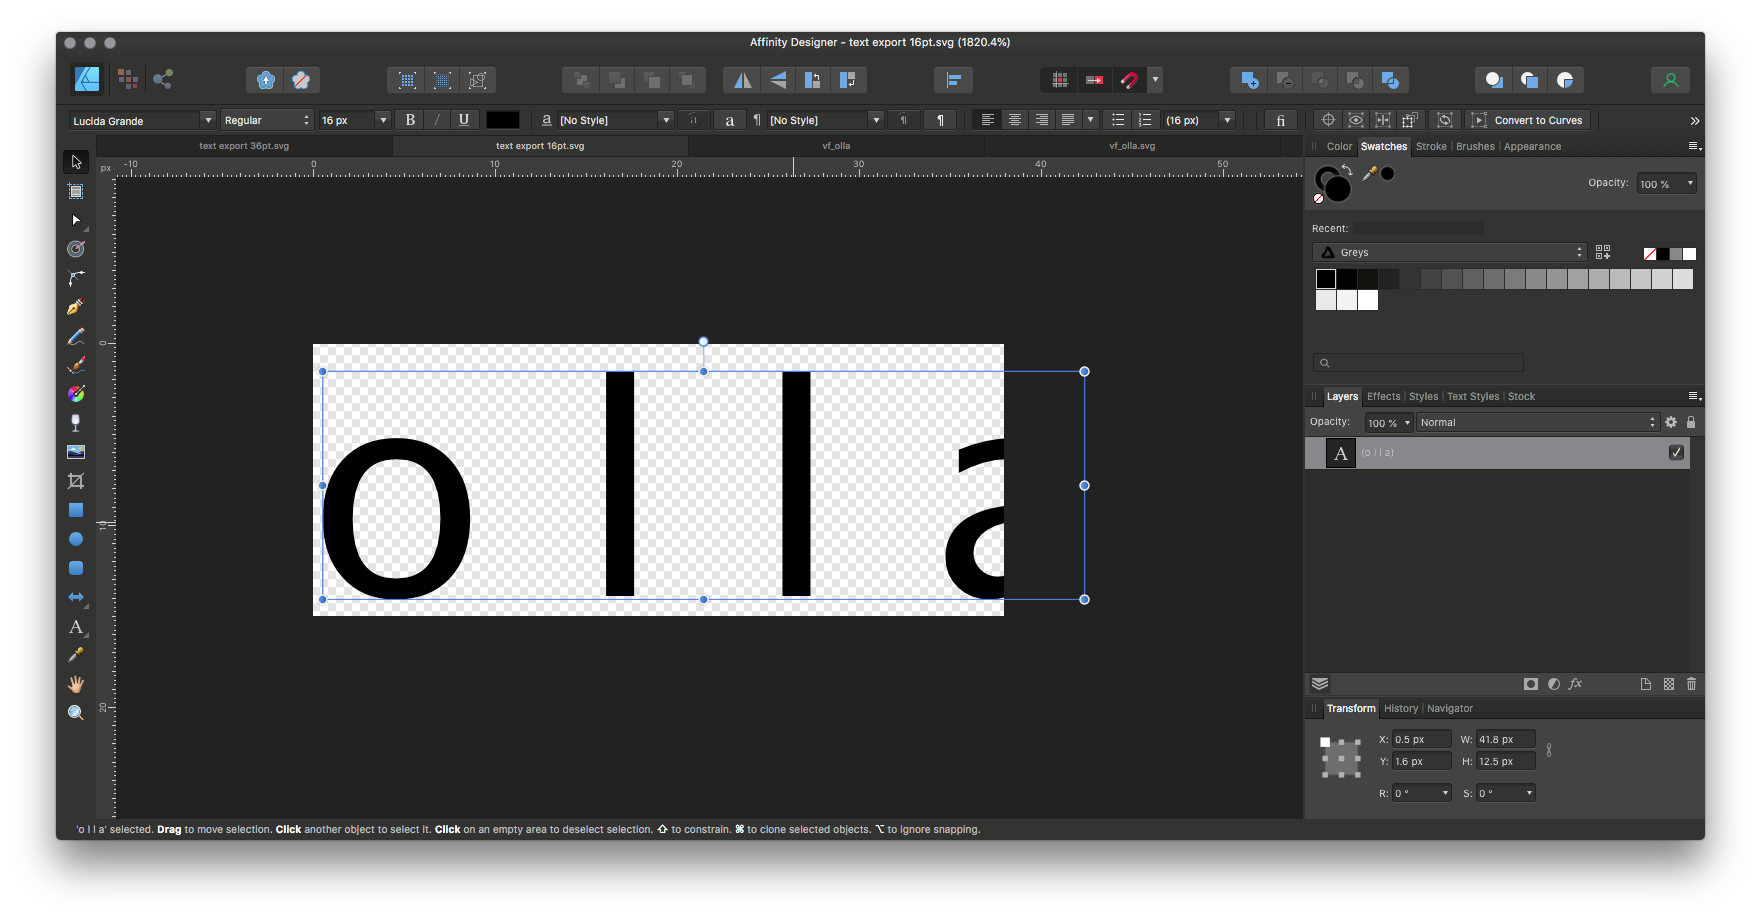
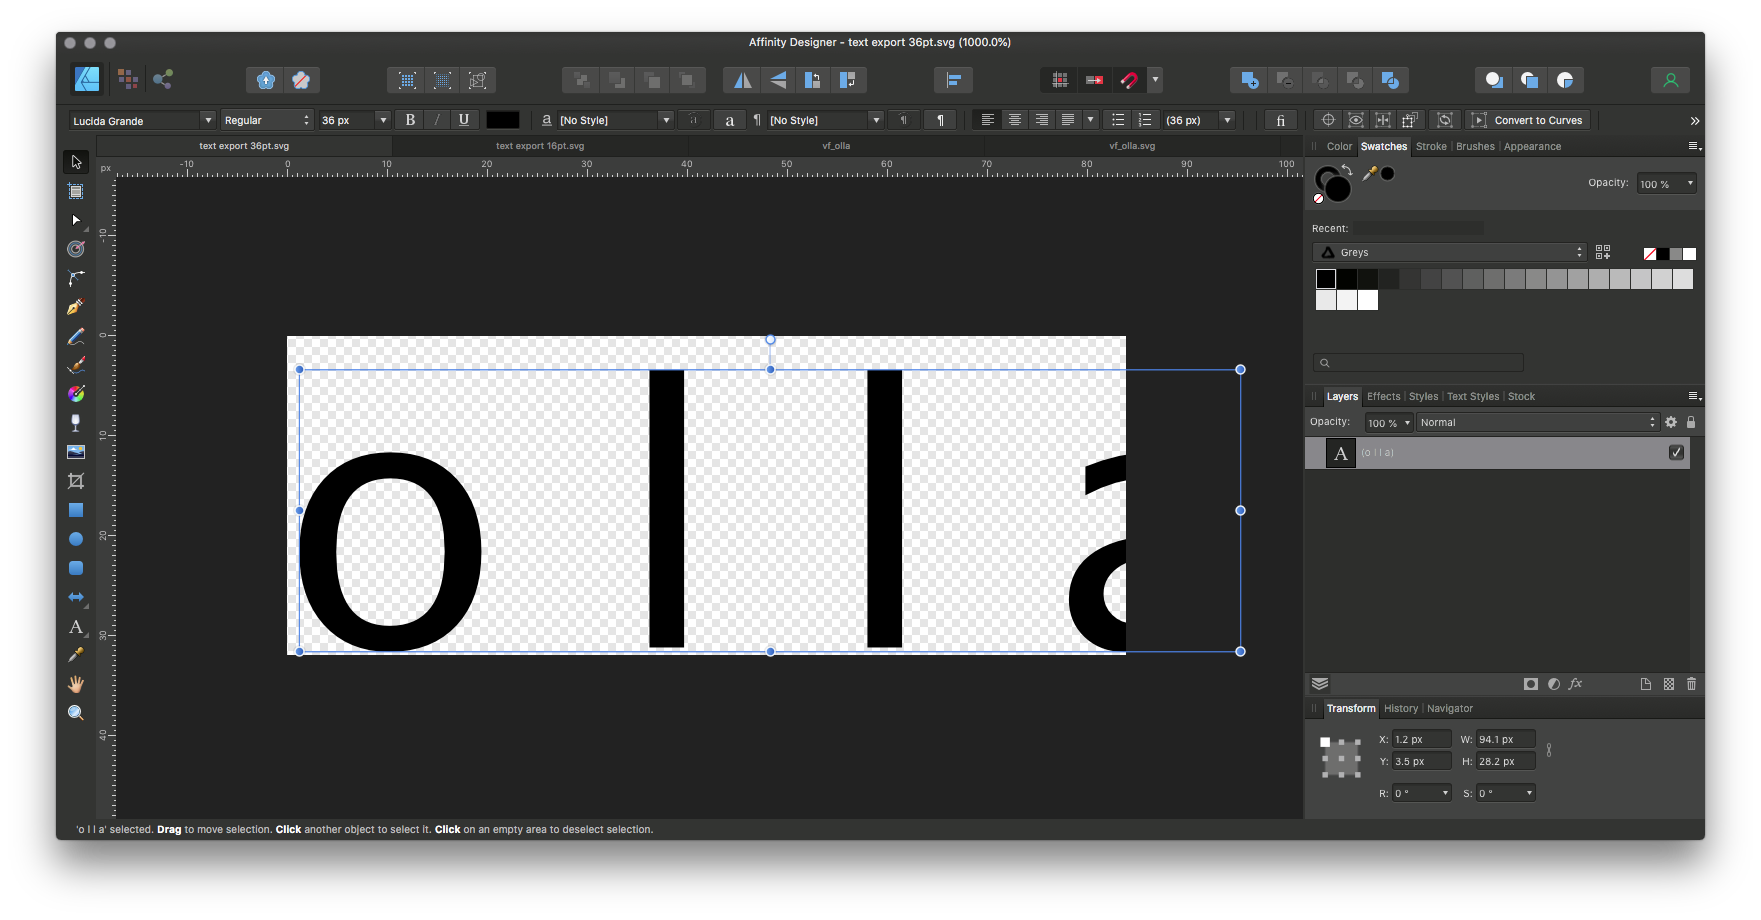
One thing I did notice during testing was excessive transparency space was more prevalent when the font was small as in your screenshot, when I exported with the font set to 16pt I got excessive transparency, if I increased the size to 36pt I got practically no excessive transparency.
thank you for your response, firstdefense
i opened your examples.
with css coding & film editing, tolerances need to be zero pixels (without any excess transparency) in the image or text image files,
when we code or edit we add pixel 'padding' or 'margin' or adjust the frame size or mask as needed during the design phase of building websites or editing/animating footage (respectively).it is the job of the designer to hand the film editor &/or coder proper files so as to not create more work down the line in the workflow/production
future feature request 'trim' 'based on transparency'
thanks again!
-
On 7/14/2021 at 3:51 AM, Dan C said:
Hi @^-^,
Unfortunately Affinity Designer doesn't support such an option, my apologies. Affinity Photo has the option to select pixels based on transparency - do you by chance have access to Affinity Photo also?
If possible, could you please provide a sample of the image you're looking to trim so I can provide my best suggestions for within Affinity Designer?
Many thanks in advance
thank you for your response
we are a production company making movies, animations, websites from scratch via coding, all in house. we are adding 'padding' with css & animating affinity exports in final cut pro & motion from affinity exports
yes, we have affinity photo
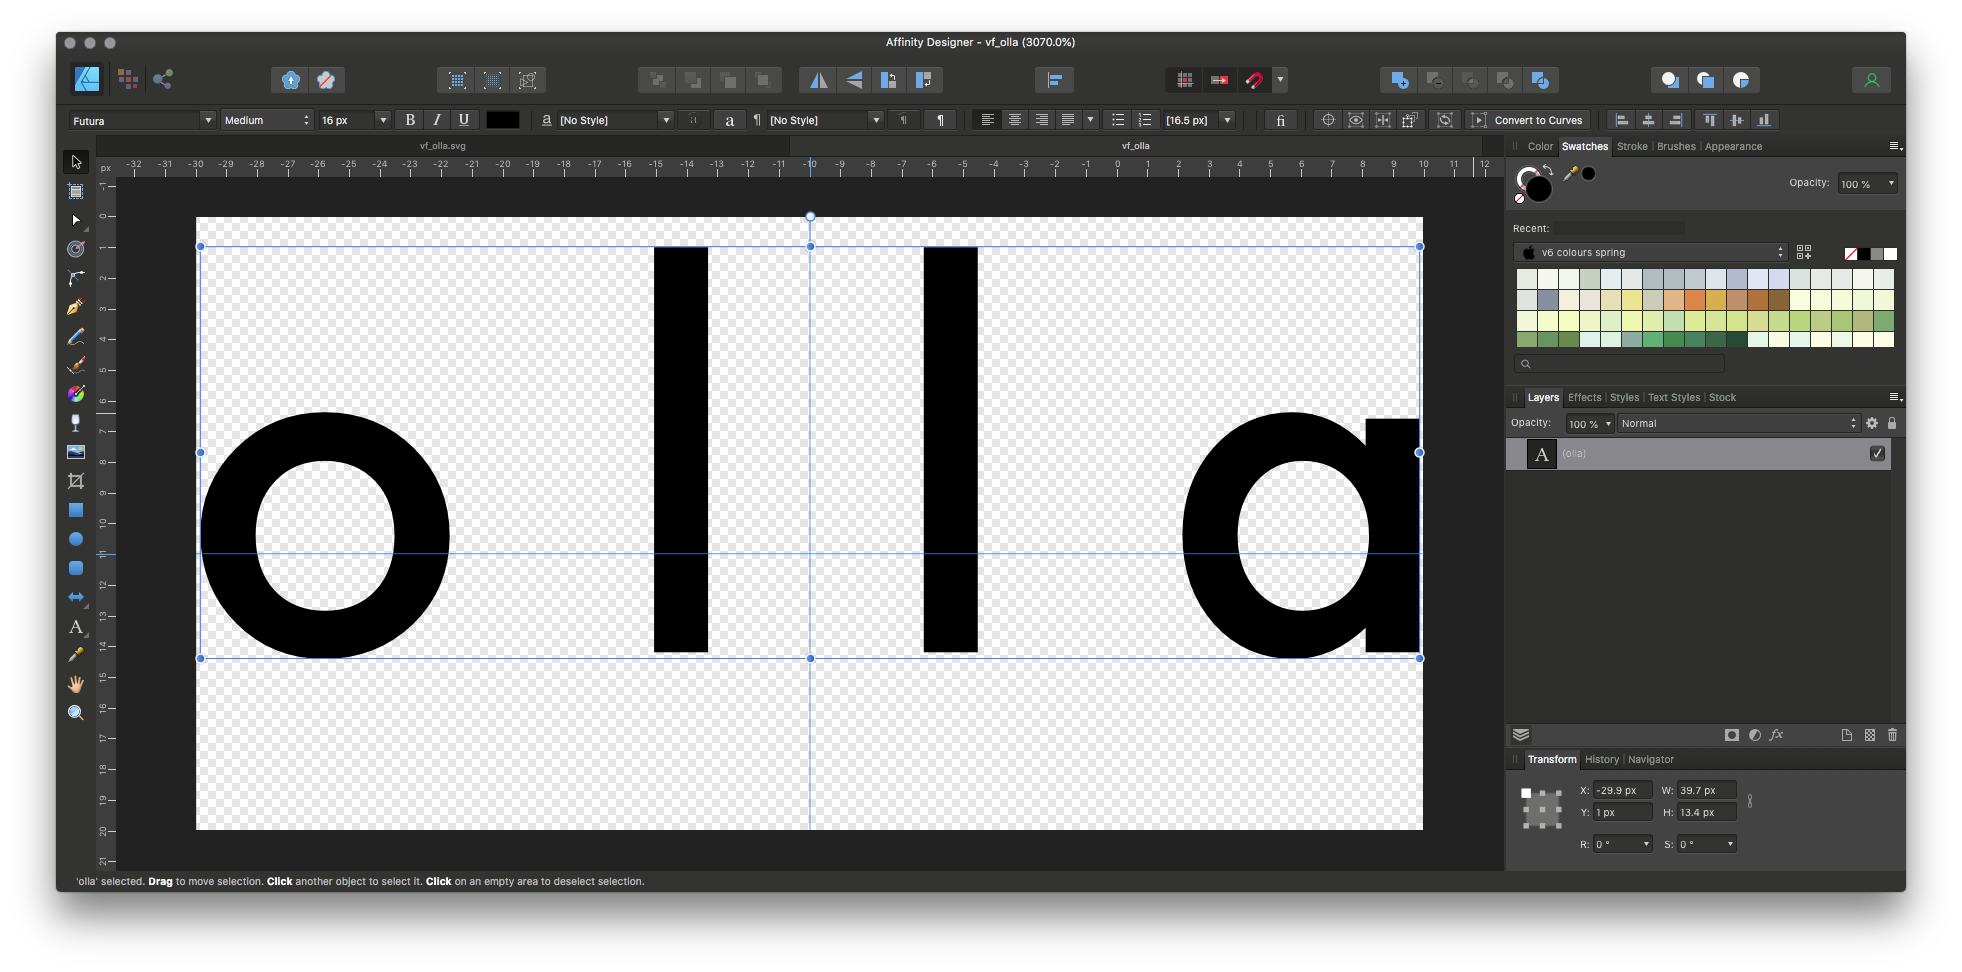
we want to quickly remove excess transparency & keep the art only, to code affinity exports & also for animating layers (both text & image layers) during production (also using alpha channels) here are two screenshots of before/after->
thank you!
amazing app, love affinity, affinity rocks, we use it in all productions!
-
11 hours ago, Fixx said:
Can you apply export with only selected objects export option here? Resulted SVG is cropped like you ask.
thank you, fixx! :)
but,
selecting text (with selection tool or text tool) & exporting as .svg & Export > 'Selection area/only' didnt work, it did export but Designer added extra transparency to the file & also added extra kerning.thank you though! :)
-
howdy
Designer — Trim/Crop based on transparency?
im trying quickly to trim/crop/remove area of several documents based on empty/transparency
i only need the images/text without any excess transparency, the .svg files will be coded in css stylesheets
is there a feature/tool for this?
thank you in advance
#trim #crop #transparency #designer #html5 #css #code #stylesheets #website
-
19 minutes ago, walt.farrell said:
Via the Preferences dialog, in the section for Keyboard Shortcuts.
https://affinity.help/photo/English.lproj/pages/Workspace/customizingShortcuts.html
lol! how did i miss that big button in preferences that says — 'keyboard shortcuts!'
thank you, @walt.farrell! stay safe!
-
howdy :)
does anyone know how to customize the keyboard commands in affinity photo?
thank you in advance :)
^-^
-
2 hours ago, carl123 said:
Pretty sure that's a bug which has already been reported.
thank you, carl123!
-
howdy :)
is this a 'feature' or a #bug?
with more than one photograph open,
& i select & try to edit the selected image with let's say text, the edit does not occur on the selected document instead a non-selected document becomes selected & the one which is suppose to take the edit deselects.this behaviour forces affinity to not be able to work with multiple images opened at one time. is this a feature or a bug?
to reiterate,
with multiple photographs open,
a selected photograph never takes an adjustment, instead an unselected photo (document window under selection) becomes selected to take the edit. (an unselected photograph — not the intended one — becomes selected.)any ideas?
thank you in advance
macos 10.13.x
affinity photo 1.8.3
-
On 3/22/2020 at 2:57 PM, Old Bruce said:
Have you restarted your computer after changing the "Open With" in the get info window. Happened to me once before with other software and this restart usually reset things properly.
thank you for your advise, bruce & kaffeepause & rc-r
i'll work on this after i finish an editing project im on. i havent reinstalled Publisher & stopped using Designer until film editing project is finished.
i dumped the finder cache ~/Library/Caches/com.apple.finder/Cache.db, Cache.db-shm, Cache.db-wal
'safe mode' -> https://www.victorfoto.com/tutorials/e_osx_vf/e_osx_vf.html
thanks again
-
i uninstalled Affinity Publisher now the Affinity Photo icon appears instead of Quicktime.
also,
as a test i created a new macos user to access the external media drives & the same thing happened Affinity Photo incorrectly thinks it is one of its files but it is not — these are Camera RED RAW video filesthis should be a thumbnail icon of the RED RAW footage
i verified this on two different user operating systems
any ideas?
thank you in advance
i do not want to uninstall Affinity Photo nor do i want to uninstall Affinity Designer
-
thank you, old bruce for your response :)
yes, i restarted but issue is still there.
im about to uninstall Publisher
-
macos 10.13 Affinity Publisher 1.7.3 is Defaulting as the Default app for video?
when/after importing many thousands of video files from professional cinematography cameras, canon, red, etc into macos 10.13 Publisher is defaulting as the application to open the file causing the video to be inoperable? video used to import fine prior to installing Affinity Publisheranyone else having this issue?
the video & icon should be defaulting to Quicktime file format & Quicktime icon not Publisher
changing the default application in the 'info' window in the Finder does not help
any ideas?
thank you in advance
-
howdy :)
is there a way to save export settings in affinity photo — make user defined presets?
for example,
different size .jpegs, resample & quality settings for future use & applications?i dont see an option for this in the export window nor a way to edit/save the default presets
thank you! :)
-
integration with canon proline printers
canon pro-4000 printer plug in for their canon 'print studio pro' interface so we can make sweet prints that we've made using affinity photo :)
pretty please with sugar on top :)


is there a way in affinity photo to burn all tonal ranges at once?
in Desktop Questions (macOS and Windows)
Posted
oooohhhh, yeah! like that!")
")
thank you for showing me!