

Checkmate
-
Posts
133 -
Joined
-
Last visited
Posts posted by Checkmate
-
-
I have had Affinity Designer setup for years to use CTRL and the Plus/Minus keys on the number pad for 'Geometry Add' and 'Geometry Subtract'. I think it's because Inkscape had those and they made sense to me.
Anyway, recently the behaviour has changed and this key combination now creates a 'compound' shape every time. However when I use the buttons from the menu it works as before (destructive).
Is this a bug, or is there a toggle to prevent this behaviour?
-
I've noticed a slightly annoying bug when trying to edit guides on a document in Affinity Designer 2.2.1.
How to replicate the issue:
- Open the Guides Manager
- Single-click on an existing guide
- Start typing a number
The focus is still on the document so it starts changing the opacity (as would happen when using the number pad within a document).
I realise I actually need to double-click on a guide to edit its value, but I often forget this.
Is it possible to remove the focus from the document when in a popup window, to avoid unexpected changes being made?
-
As a side question (cos it's kind of related to resizing artboards) - In my document above, I can't get the artboard to snap to to the edges of the text box (or anything else for that matter). Is there a reason artboards don't snap when dragging the edges?
Sometimes I will want to resize my artboards to match the contents, but this is difficult when they don't snap.
-
Ah okay, I didn't realise that extra handle only appeared when a frame text box was within the artboard!
I will just use the regular handle with Shift to resize whilst keeping the aspect ratio.
I'm actually curious as to why this detached handle even gets added to the artboard? It means we have to be extra precise to only select the 'inner handle'.
-
I've just discovered this weird glitch in AD V2.04.
When resizing an artboard with 'Lock Children' ticked, frame text will still get affected by the resize.
This only happens when using the extra bottom-right corner node.
Interestingly, the tooltip at the bottom of my window shows "Drag to resize text', even though I was resizing the Artboard.

To replicate the issue
- Open the attached .AFDESIGN file.
- Drag the bottom right corner node of the artboard to resize it.
- Frame Text gets resized, but Artistic Text does not.
-
Just found this error too - any idea on timescale for it to be rolled out in the main release?
-
Hi there, I always change my background to transparent and insert an artboard when creating a new document.
I know I can tick those options when choosing the new document size, but I don't believe I can set those things as the defaults.
Can you add an option in preferences or on the 'New' screen to remember my preferred options?
-
Thanks, I'll bear that in mind for future use. Hopefully a better solution will be added in a future update.
-
Hi there, I have a particular use case scenario for gradients that I'm sure I've seen in other apps.
Let's say I have a gradient going from blue to green. I want to now have it going from blue to green to yellow (ie. Green in the middle). However I can't add a colour beyond the end points, so I have to add a new mid-point, change that to green, then add my yellow to the end point. This involves adding the green to my colour swatches or filling something with it first so I can colour pick it after.
Wouldn't it make more sense to allow the end points to be dragged further in than the edge of the gradient, then allow whatever colour is last extend to the end?
Eg:
Blue 0% --------------- Green 75% -----|
This would start at blue, blend to green at 75% point, then continue as that green to the end of the gradient.
That way if I decide to add my yellow afterwards, I can do this easily by clicking anywhere after the green.
-
-
My workflow often involves grabbing a hex code from a website, then working to create different shades that work with it. I find that adjusting 1 or 2 of the HSL sliders will ensure any new colours still work with the original. The most common action for me is to simply adjust the lightness up or down, so i want that granular control.
-
I've tried the colour wheel but I've never got on with it. It's sliders all the way for me!
-
Hi there, I see that you've added a hex code box in the 'Wheel' view in the colour panel.
Is there a reason you can't add this in the 'Slider' view too?
My standard colour panel view is HSL, but I regularly paste in Hex codes from websites. Currently I have to switch to RGB Hex, paste the value in, then switch back to HSL.
- Alfred and thedivclass
-
 2
2
-
I got around this by creating manual shortcuts to the Affinity 2.0 apps, using the exe locations from this thread:
C:\Users\username\AppData\Local\Microsoft\WindowsApps\AffinityDesigner2.exe
C:\Users\username\AppData\Local\Microsoft\WindowsApps\AffinityPhoto2.exe
C:\Users\username\AppData\Local\Microsoft\WindowsApps\AffinityPublisher2.exe
(Replace 'username' with your own).
Instructions:
- Right click on the desktop and choose New > Shortcut
- For file location use the relevant location above
- Once the shortcut is created, right click and choose Properties > Change Icon
- Choose the appropriate .ico file for each app (attached)
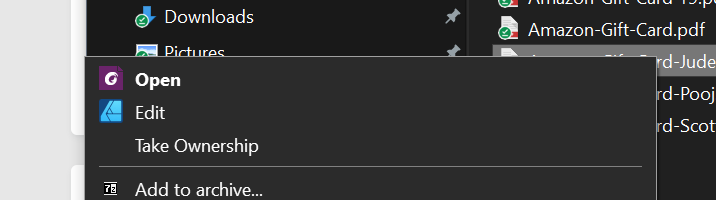
Note: I also used these .ico files and exe locations to add each app to my right-click context menu for certain files like PDFs:
Affinity Designer 2.ico Affinity Photo 2.ico Affinity Publisher 2.ico
-
Have you made sure to save as a 'regular' SVG and not an Inkscape SVG? The latter has extra code that can't be read by other apps.
-
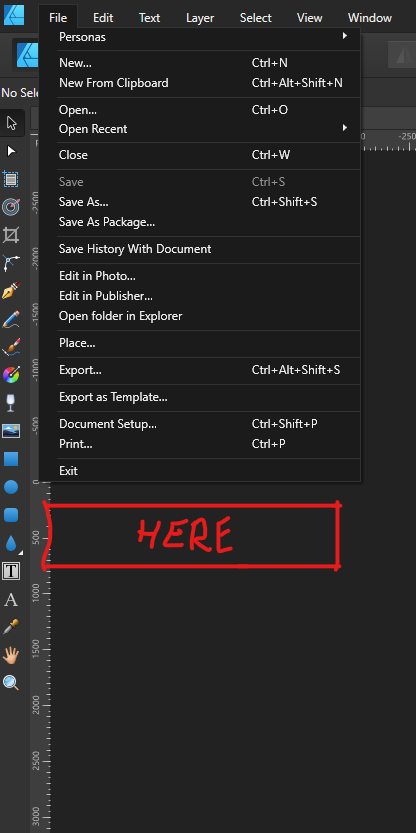
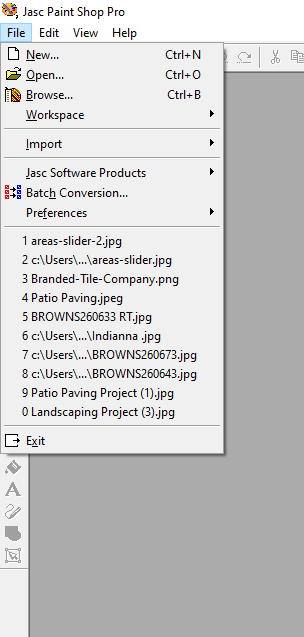
I never got a reply to this 5 years back so I'm going to bump it!
Can we please have a simple option to show recent items on the main 'File' menu, at the bottom? Just a tick box and 'number of recent items to show' (like PSP screenshot).
It REALLY bugs me having to have 2 steps for this when there is a ton of space on most screen sizes for this.

-
Hi There, how on earth do I pick colours from an existing gradient, without just using the eyedropper as close to the edges as possible and hoping i get the 'full' end stop colour, not just one of the in-between shades?
Lets say I open a file provided by a client and an object has a gradient of blue to grey.
I want to use the same blue and grey to create other objects.
I can't use the eyedropper as I might not get the full blue or the full grey if I don't click right at the edge of an object fill.Is there an easy way to 'name all colours' or 'add all colors to swatches' that will know the gradient is basically just comprised of 2 solid colours?
-
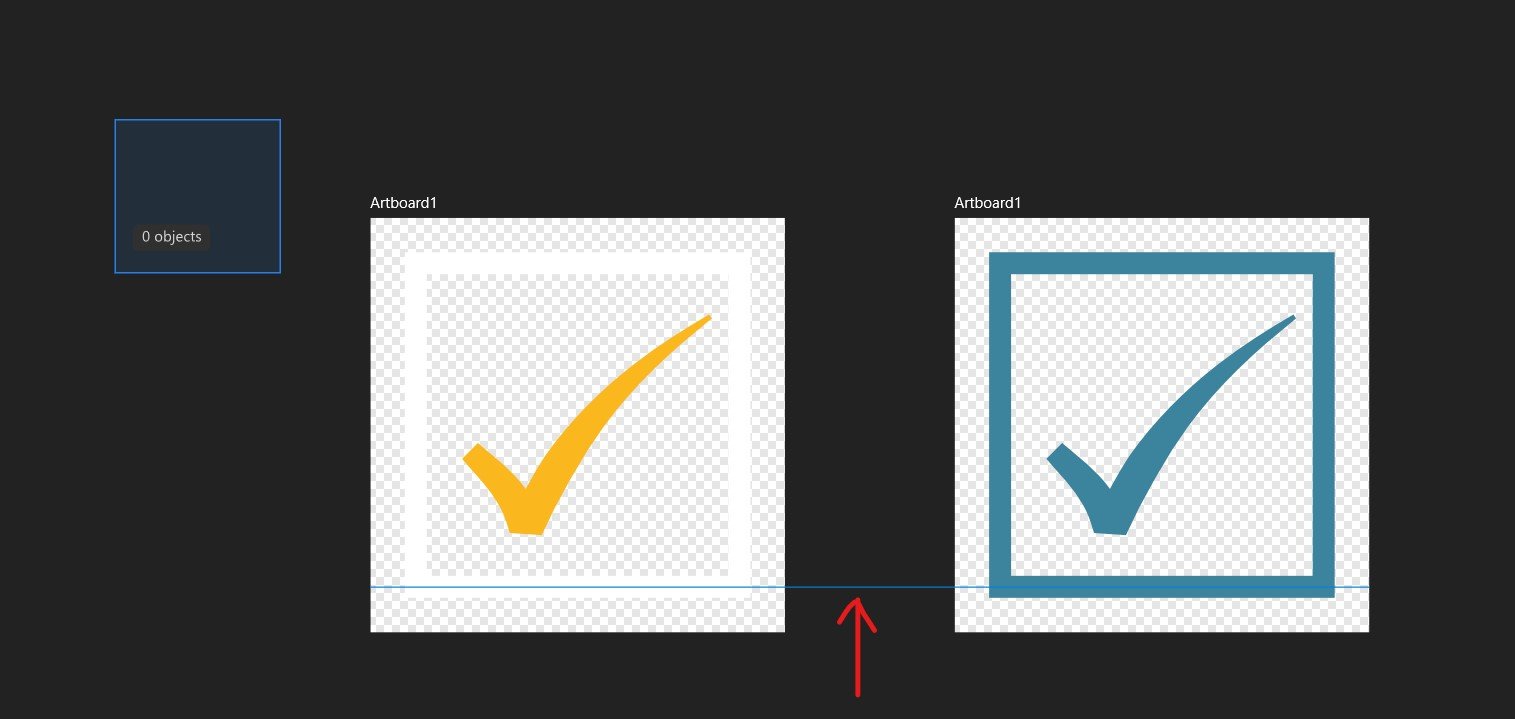
I've noticed a strange bug when using guides.
Please see the attached .afdesign file.
I dragged from the top ruler to create a horizontal guide on the page. I then used the 'create artboard' button which replaced my page with an identically sized artboard. I then duplicated that artboard.
I decided I no longer wanted the horizontal guide, so I dragged it back up the the ruler to remove from the page.
When I go to View > Guides Manager it shows no guides on the page. Same thing if I select each artboard and check the Guides Manager.
However, if I click and drag a selection square anywhere on an empty part of the page, my removed guide shows up on the screen! (see screenshot).
-
2 hours ago, Alfred said:
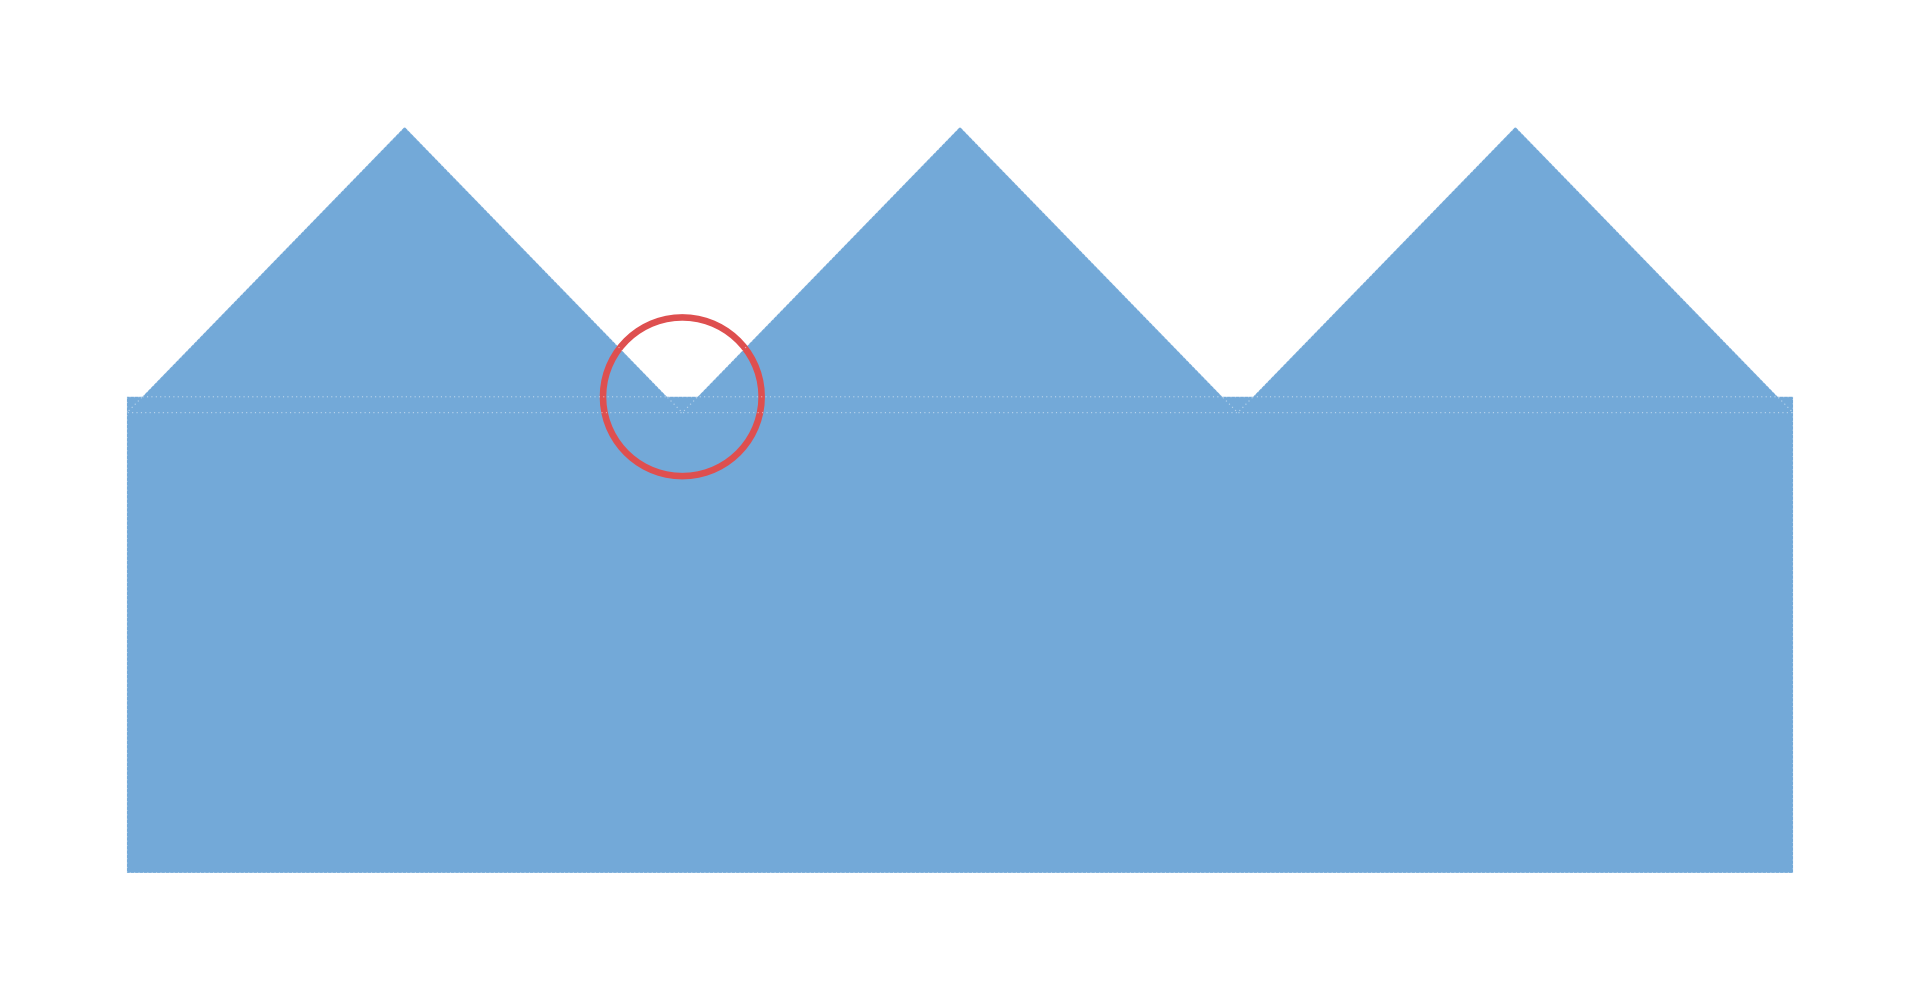
Why do you need to do it for every little triangle? Can’t you simply drag on the edges of the inner square?
Because dragging the edge of the square results in an unwanted overlap, so the corners of the triangles no longer meet (see image).
-
Has there been any progress on this bug?
I am creating a 'swatch' shape with jagged edge and there are dozens of triangles along each edge that I need to combine with the inner square.
I realise I can add an overlap, but it'll be very time consuming for every little triangle (yes, yes, I could have used symbols then only had to edit one triangle, but too late now!).
-
Any update on a global 'scale with object' toggle?
I think this should apply to Strokes and Effects (effects are even harder to manage in this regard as you have to select each object and then go into its FX setting to tick the box).
-
I have a weird bug in the latest version of Designer.
In the attached file, when I group the two objects (circle and text box), the text scales up a little bit.
-
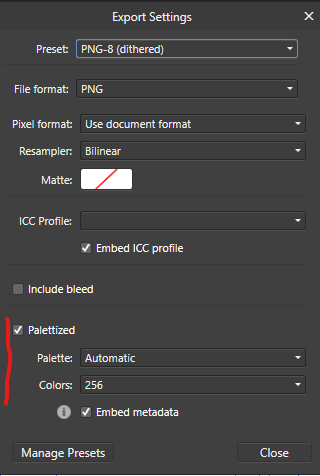
25 minutes ago, walt.farrell said:
If you click on More... in the Export dialog you'll get additional options, including one that I think may be what you want:
Yes but that is on 8-Bit PNGs, which do not support alpha transparency, just single colour transparency.
The method I'm referring to will allow pixels to have multiple levels of opacity, but it will still reduce the number of colours to save file size.
It's like the best of 8-bit and 16-bit PNGs combined.
-
Hi there, is there any plan to introduce more options for compressing PNG image exports?
I've noticed I can add my transparent PNGs created in Affinity to an online image compressor like Optimizilla and it will compress the image considerably, whilst retaining the quality and the alpha transparency.
It uses something called "Indexed RGB" colours to do this, reducing file sizes by between 40% and 60% for most PNGs with alpha transparency.
In Affinity, there is just the option of 16 Bit or 8 Bit (dithered).
When exporting logos for the web, this helps improve Pagespeed Insights scores, in addition to reducing load times.

Keyboard shortcuts for Geometry always create 'compound'
in Affinity on Desktop Questions (macOS and Windows)
Posted
Hi there, thanks for the reply.
Here is my shortcuts screenshot:
I tried removing those and re-adding them, this didn't sort the problem unfortunately.
I have also tried this on my other PC and it also has the same issue.
When using the buttons from the menu bar....
...the behaviour is different and it just creates a path (which is the behaviour I want).