Sunset
-
Posts
361 -
Joined
-
Last visited
Everything posted by Sunset
-
Hi everyone, when the very first iPad version came out I bought an iPad Pro 10.5" and I've used that for all sorts of things - the best fun was designing the layout for a fair in a circular building and being able to stand in the room and move the tables around, with the pencil, on my scale plan, then sending it out to attendees - without moving an inch. Updated Affinity suite constantly, of course. My grandchildren are going to get that iPad now (they'll be watching kids stuff!), and I'm looking at an iPad Pro 11" with keyboard and pencil (I also do a lot of admin work), and lots more uses for the Affinity suite which is so adaptable over Windows, MacBook and iPad. Nearly 10 years on the Macbook and 7 years on the iPad? I wouldn't have changed a thing. I'm assuming that the latest updates cater for the iPad M4 chip? I'm looking forward to using Affinity when I get the new iPad. Sunset
-
Hi Richard, and welcome to the forum. I was also a great fan of the Serif range, and I found Affinity Photo to be easier to use. I'm not in your league as a photographer, but I do have to turn my 'snaps' and supplied images into eye-catching illustrations for events on a charity website, and I use Photo to do that every day (It's a huge website!). Enjoy the forum and the videos and using Affinity! Hilary.
-

Affinity 2 Designer Warp Perspective crash and error report
Sunset replied to Sunset's topic in V2 Bugs found on macOS
Thank you, Ross, and others, I'm sorry I couldn't reply earlier, I had a deadline to write a presentation! Ross, nice work. If I remember rightly, before I saved the mesh warp I'm quite sure that I could add a node with one click: before I saved I got a 'node', it was nothing with white on white or anything like that. It was only after saving that I got the marks on the line where the node should have been. Hilary -
Affinity 2 Designer Warp Perspective crash and error report
Sunset replied to Sunset's topic in V2 Bugs found on macOS
Hi Myke, When I tried this after the update it seemed to be OK. I had problems when I extended the Mesh "too far", I was adding points, too. When I restarted the program I couldn't take the mesh back to its original state to try again. I have tried to recreate your issue but no success. I have found that if I go from Mesh to Perspective and back to Mesh I lose the ability to add new nodes, but that returned after I clicked 'Apply'. I tried it again, after another 'Apply' and I can't add any more nodes - not a crash, just no new nodes. At one point my element just disappeared off the page but reappeared when I used Command+Z. NOTE: when I tried to add new nodes I did get minute breaks in the bounding box - and I really do mean minute - but when I clicked away and reselected the mesh the bounding box was complete again. You can just see two tiny breaks near the bottom of the bounding line in this image. This I CAN reproduce, every time, with this file on my MacBook Pro 2021. Hilary Mesh Warp Points.afphoto
-
Edit: I had been to that menu before, but what I can't do is create a New Folder. I can go out of Affinity, and create a folder, and choose that folder, I just can't actually create a folder. I can also go to the + icon to add new, but that only offers a new Preset - which I associate as being different from a template. My template has pre defined vector shapes on it for slotting in the content. (It's quicker to keep on reusing and 'saving as' the basic template than trying to create a new folder within Affinity). Hilary I am using a MacBook Pro 16 inch 2021 M1 Pro 16 Gb
-
Thank you. I had seen the three 'arrows' that led to the file, but I had not seen the words "please choose a folder for your templates" above the file selection (which in my case was showing Downloads), it just didn't stand out. Looking at it now, the text is a standard size, but it appears just where my lens changes for long distance, so it was slightly blurred. For me it would be better placed at the bottom of the box, aligned with Cancel and in slightly larger text? Thank you for your help and for getting me straight to the point! Hilary
-
ADD NEW TEMPLATE QUESTION A slightly different question - I used Designer 2 help to try to create a new template. It says To set up a target template folder: From the New Document dialog, with Templates selected from the left-hand side, click Add template folder. A file browser window will appear, allowing you to specify a folder location. I can select templates, but i cannot Add template folder, I can also use the Add button, but I cannot, anywhere, find Add template folder. ................................................... Please don't offer me alternative ways to do this, as a customer I should be able to follow the instructions in the Help on the top menu bar, and that is what I would to resolve, please, as that would be most helpful to other users.
-
Full details in the attached doc, started a file in Designer 2, added a photo, tried to edit in Photo 2, crop didn't work properly. Eventually went the long way round and started the photo in Photo 2, placed in Designer, tried to centre the image, Designer 2 closed. The Apple report is in the Word Doc along with details of the system I was using. Could be two separate problems, I don't know. Affinity Crop Photo Crashes.docx JFK_limousine 2.afdesign
-
Affinity 2 Designer Warp Perspective crash and error report
Sunset replied to Sunset's topic in V2 Bugs found on macOS
HI, No problems, I knew you'd get here eventually Here is the Apple report. I have tried to reproduce the crash, but I can't. Sorry! Hilary (Sunset) Designer 2 Crash.docx Designer 2 Crash.docx -
Affinity 2 Designer Warp Perspective crash and error report
Sunset replied to Sunset's topic in V2 Bugs found on macOS
Thank you for that, I could continue to warp with the node tool selected, but I noticed a few times that if you warp, then work with another element, then go back to warp, it changes the effect, as if it has a horizontal line through the letters and moves the top and lower halves of the letters in different ways. BUT - good news, I have worked out that I just need to go through the layers to find the point where I left off, and now I can continue to warp nicely. I think I can see why it was spitting the letters, too. An interesting first look at warp. The issue, of course, was when the program suddenly closed. Thank you for your advice. Hilary -
Just installed Designer 2 on MacBook Pro (16-inch, 2021), Apple M1 Pro, 16Gb, played with gradient fill, slice (brilliant) shape builder (love it) and warp perspective on text "mouse". I added one new node too many (attempting to create a tail for the mouse...) and the program closed. I have the error report for Apple if that is any help to you. The file seems to have restored OK but I notice that I can't carry on warping in the same way because I saved the file when I restored it. (logical) affinity-design-2-mouse1.afdesign
-
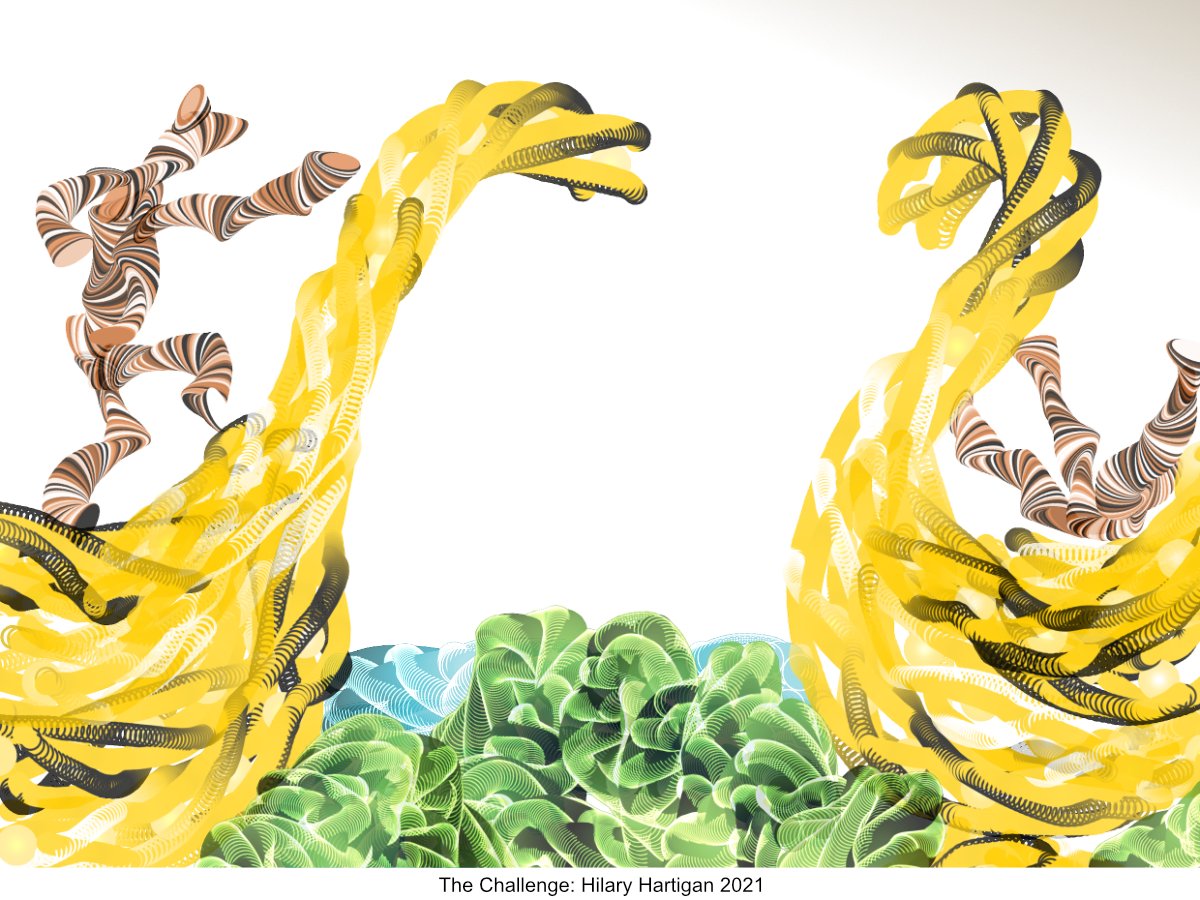
It's a long time since I last posted, I've been busy all through lockdown, using Affinity Designer and Photo everyday for creating content for a large charity website. All enjoyable, sensible work! But I've been a Serif customer for 12 years now, and this experiment with Affinity Photo and Twisted Brushes stems back to the days when a group of us just used to experiment and push boundaries. Using just three Twisted brushes, I first created the yellow shape on the left and thought it looked like an angry ostrich. Mmm. Better make another ostrich opposite - these brushes are great and create unexpected patterns when woven around the page. The second ostrich seemed to be recoiling from the first. Chosse a different brush and create fabulous foliage and some water. But it needed a story - so a third Twisted Brush creates a couple of rather supernatural beings who are trying to goad the two ostriches into a proper fight. I just loved what I could do with the brushes.
- 1 reply
-
- 4
-

-
Anything is possible, I was working to a tight deadline, I hadn't done a flowchart since college in 1973 so I created my own symbols, it is possible I also flitted between my desktop Windows and my Macbook - all of which I love being able to do with Affinity. And, although I'm 'absolutely certain' that I opened the afdesigner file from the 'Open Recent' menu today - perhaps I didn't! Thanks for checking and forwarding it to the developers. I've fixed what I needed to do, job is done ahead of schedule, I'm happy. Hilary
-
Thanks, I confirm that I opened the .afdesign file, the PDF file was only for sending by email to others, Font - interesting, all the 'changes' were in one text box only, and I can't tell whether that is relevant or not, but the font used was calibri regular 10. No changes have been made to the fonts on my system in the relevant period. The document is of a slightly sensitive corporate nature, but I trust the staff at Affinity to recognise that. I'll send the file as requested. Note - I had already correct some errors on chart 4, starting with 'newsletter' at the bottom of the page and working upwards).
-
A closer look suggests that most of these 'translations' involve limited combinations of letters such as 'ting' in existing and printing; 'tion' as in option, and 'till' as in still. Must get the job done, though, deadline looms. Hilary
-
I created FlowCharts using Artboards with Affinity Designer, very easy and successful. The text was in English, I saved copies in AF format and as PDF. The PDFs were printed and all the text was, as expected, in perfect English. I have just reopened the file in Affinity Designer to incorporate suggested amendments, and notice that some letters in some words have been replaced with symbols that I don't recognise. The attachment shows the 'new' version of what I typed - and I checked the previously printed copies which confirmed that this change has only occurred on re-opening the file today. The text was entered as: Limited information to branches, e.g. advertising meetings b.... Foreign membership number queries... I checked the language in preferences and it was set to English (United States), I have just reset that to English (United Kingdom and (not surprisingly) the foreign symbols are still in the text. This means I have to check the spelling in 14 artboards/flowcharts, thankfully the red underlining will help. Any ideas why this happened, please? Hilary
-
Drop Shadow?
Sunset replied to Cailean's topic in Pre-V2 Archive of Desktop Questions (macOS and Windows)
It certainly works for me every time. -
Drop Shadow?
Sunset replied to Cailean's topic in Pre-V2 Archive of Desktop Questions (macOS and Windows)
I am learning a lot! I don't need macros and styles much...... but this is good. -
Drop Shadow?
Sunset replied to Cailean's topic in Pre-V2 Archive of Desktop Questions (macOS and Windows)
The best thing about this thread is that it has been healthy discussion and very interesting. Some of us used Serif's previous software for many years and we got used to the comfort of having some processes 'pre-packaged' - pre-packaged but infinitely variable as to width, length, shear, opacity, offset, blur and orientation (and maybe more), it was so easy that we never had to really think about how a shadow was created, but we knew all about how to get the effect that we wanted and the right effect for the job - as has been mentioned, unless you are doing a series of identical projects, all shadows are different. The interesting thing for me, with Affinity, has been coming out of that comfort zone and thinking about what was in those 'pre-packaged' tools. At first I missed the convenience of the older options and, because I do different things these days, this thread made me look at shearing shadows for the first time - and by time I'd done those very simple examples, I was perfectly at home with it all. I have absolutely loved all the conversations though, from here to the sun and the moon and back again. Thank you to Cailean who asked the question - and welcome to Affinity! - and to everyone else who has joined in. -
Drop Shadow?
Sunset replied to Cailean's topic in Pre-V2 Archive of Desktop Questions (macOS and Windows)
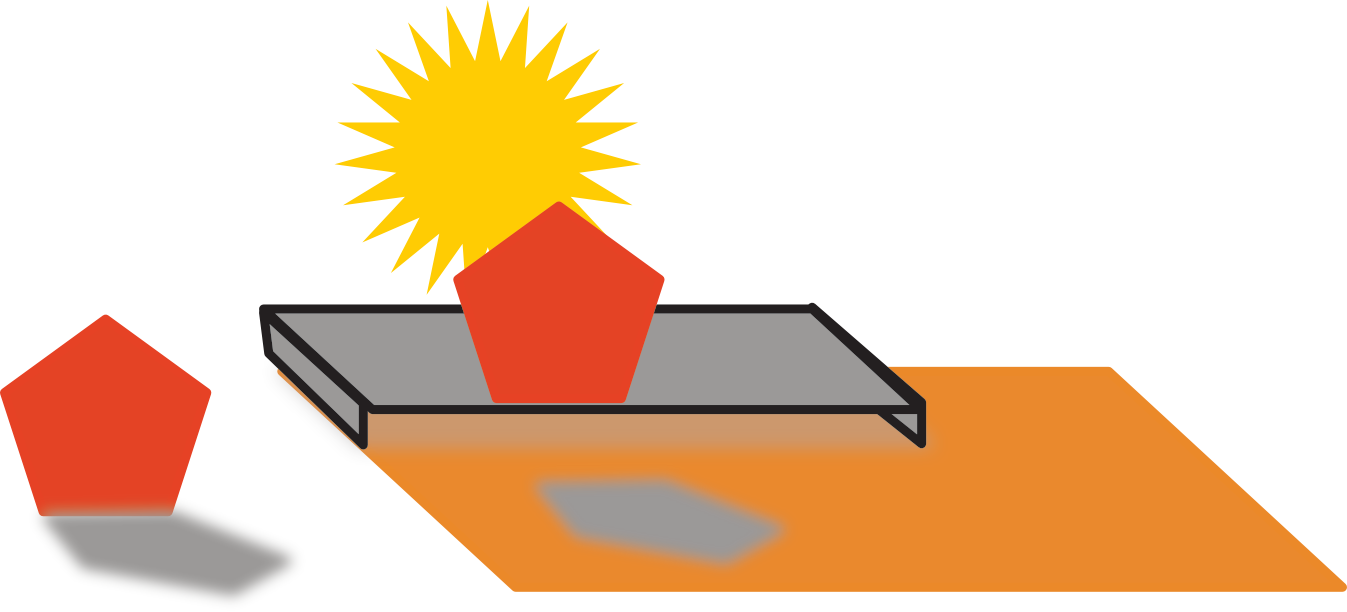
Very nice, but it is the process that matters. If you follow the light and the red polygon in front of it, then what you see on the layer below is a shadow, not a reflection. It is like looking at your own shadow in front of you when you walk along a road. In this example, though, the shadow is offset from its origin. I could have shown a simple drop shadow of a painting on a wall and the light source creating a shadow beneath and to one side of the painting, but that would not have provided the opportunity to shear the shadow to show the effect of an off-centre light source and the distance between the object and the surface on which the shadow would appear. -
Drop Shadow?
Sunset replied to Cailean's topic in Pre-V2 Archive of Desktop Questions (macOS and Windows)
I also believe that drop shadow is different from an outer shadow and comes in many variations. To recreate some things in Affinity I think about how they were created in DP, what we had there was a nicely packaged, user-friendly version of drop shadow creation. Here is my view on how to replicate it in Affinity - using copy, colour, shear and a little gaussian blur if appropriate.
-
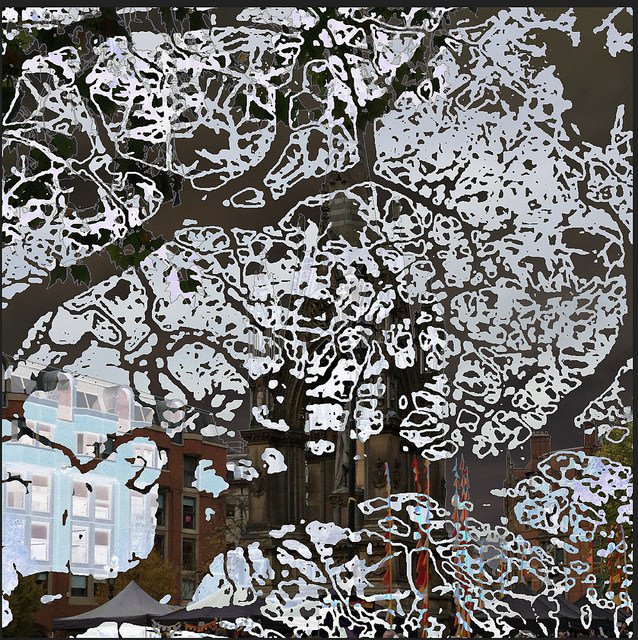
A rare chance, lately, to just be creative for half an hour. The result if a mix of two of my photographs - the Albert Memorial outside Manchester Town Hall and a bright, dazzling sunset from one of my upstairs windows. Fast forward a couple of weeks to a very cold day, a little light blending in Affinity Photo, and I now have 'Manchester in the Cold'
- 1 reply
-
- 4
-
-
Just to say 'thank you' for the Beta, I have had a quick look at it, anything that I can get started on without a manual is always a winner for me! Very happy with the interface, etc., time to redesign my calling cards.... and then watching the tutorials.
-
Vector Fills
Sunset replied to Sunset's topic in Pre-V2 Archive of Desktop Questions (macOS and Windows)
Thanks for that. I hope it will be included one day. I can buy vector fills and make my own for graphic design, but I will have to use an older program to get the flexibility that I need. Hilary -
Designer - both windows and Mac: Is it possible to create, and use, vector fills? Apologies if this is already asked, I did search.