h_d
-
Posts
1,623 -
Joined
-
Last visited
Everything posted by h_d
-
 And we never got to see it...
 -
Glad it works for you! 😀
-
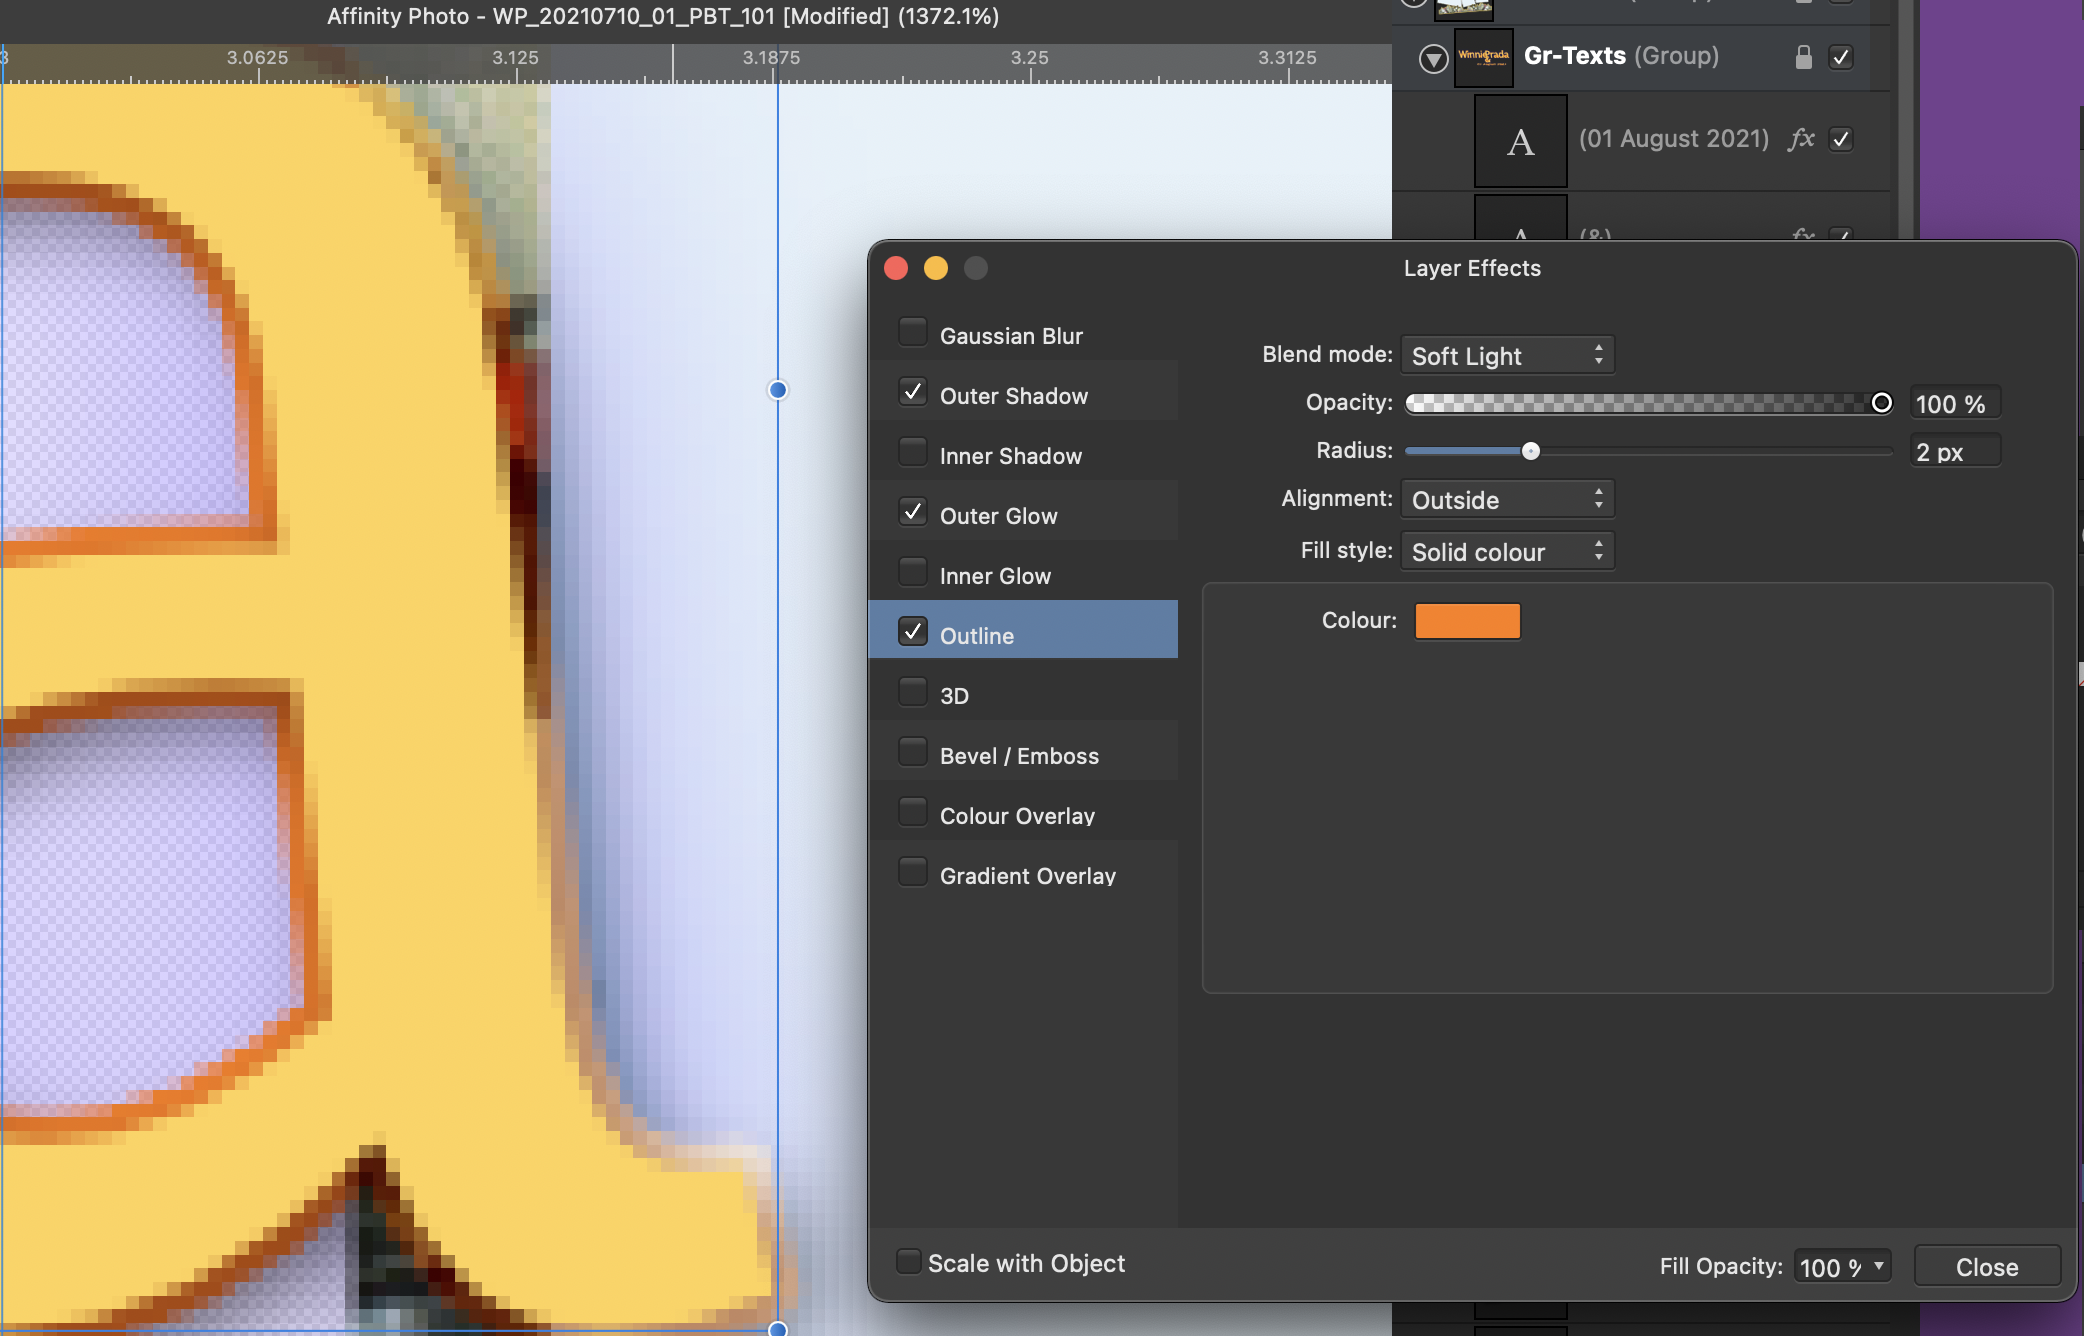
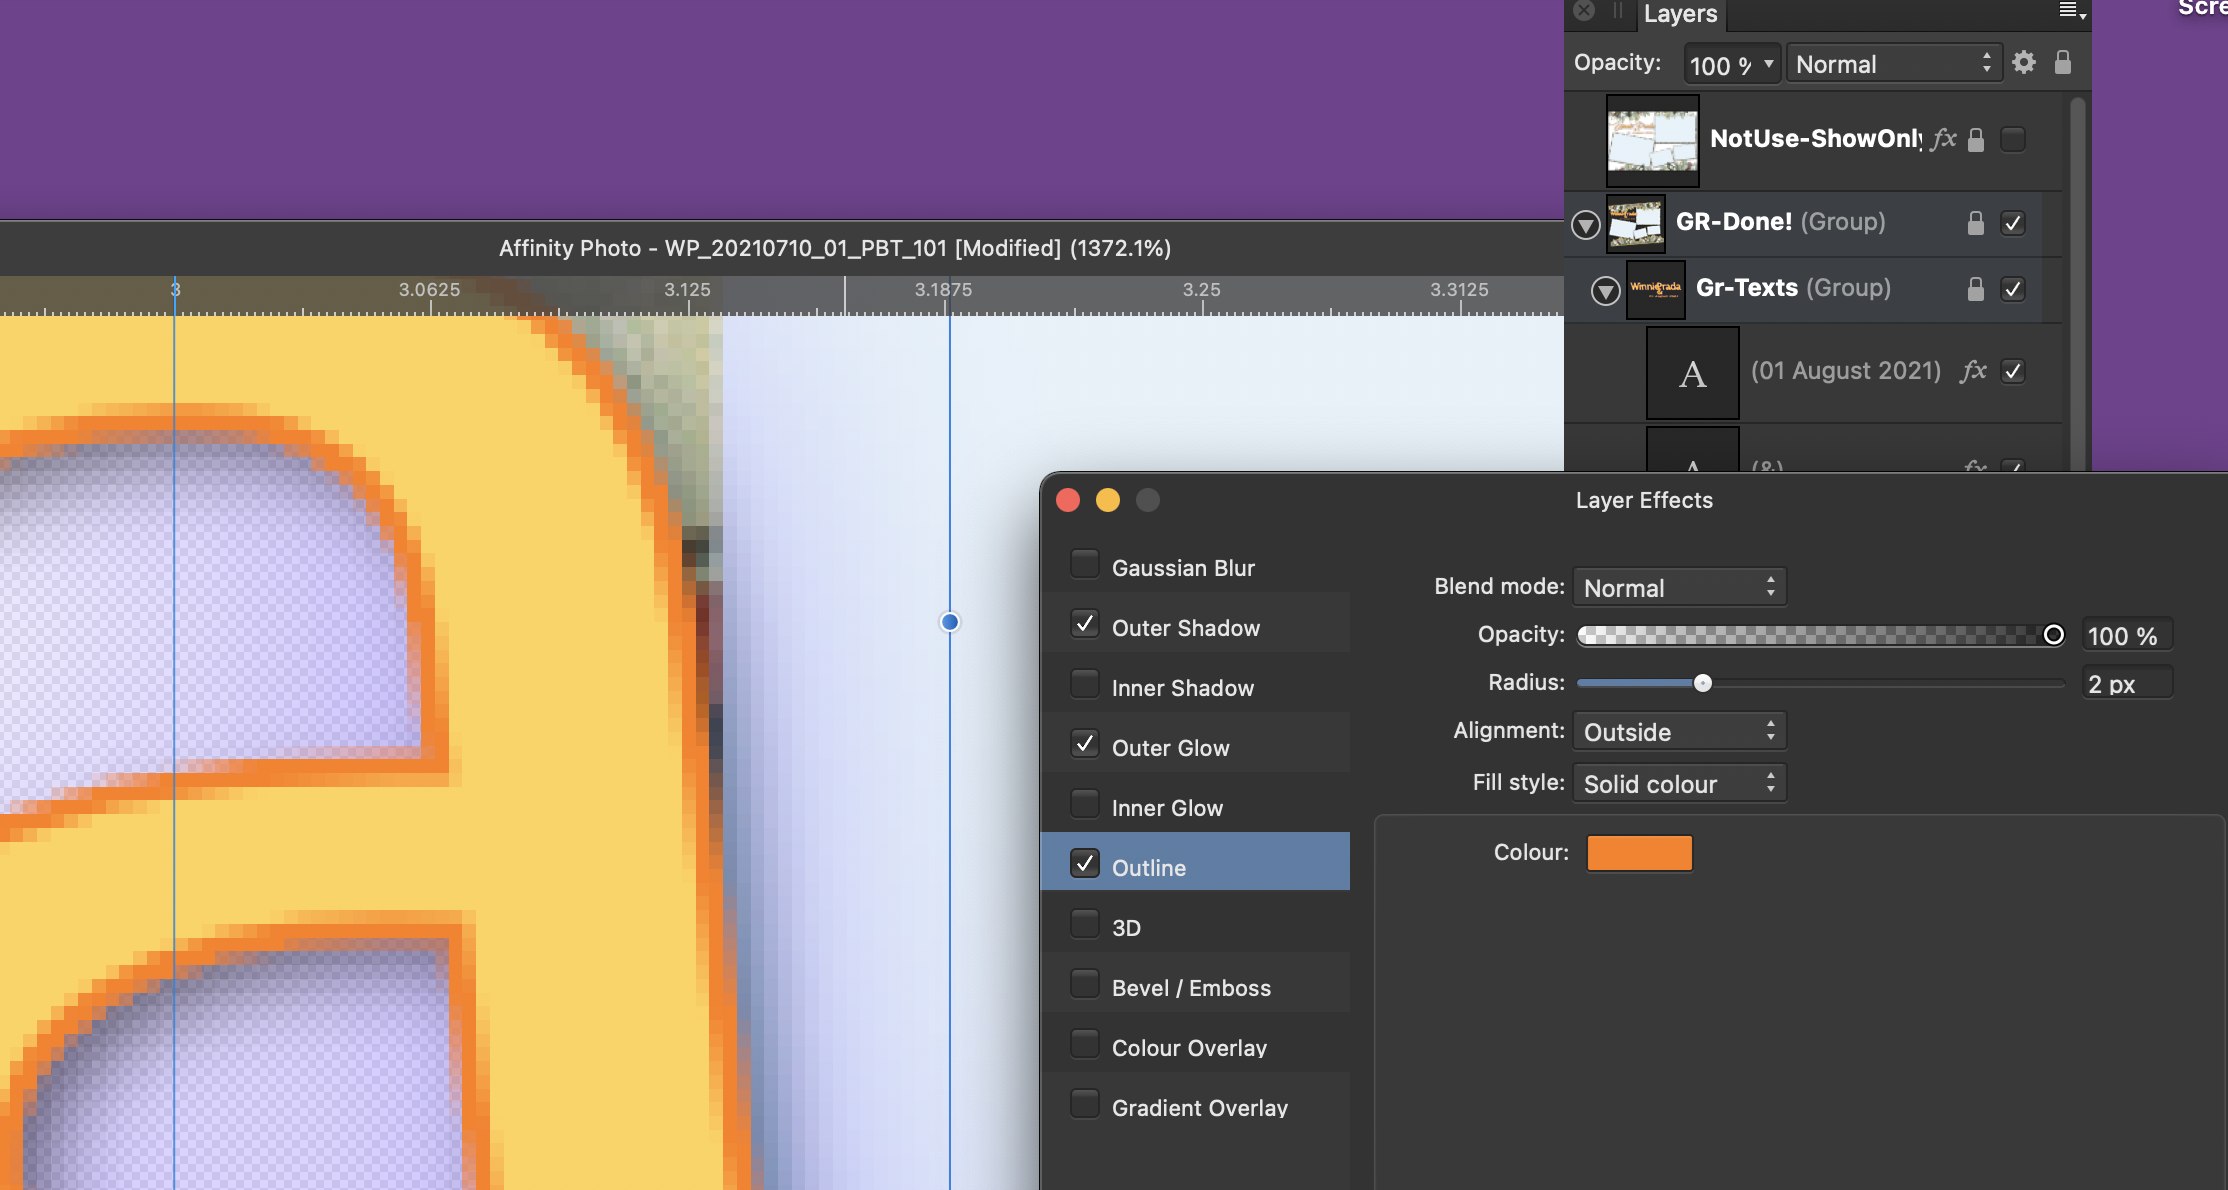
Hi @Darwin Lau and welcome! The blend mode on the outline Effect for your text has been set to Soft Light: One way to improve the result would be to change the blend mode to Normal: (I don't have the font you've used but the results should be the same.) Cheers, H

-
I don't know, but my suspicion is that the original file is on a remote server. User A has opened the file and made some edits. This has locked the file out to user A, but it's a filesystem lock rather than Publisher versioning the edits. User B has then opened the file and made some additional edits. But the file is locked to User A at system level, so User B has effectively opened a read-only file and cannot save her edits. Affinity applications, and Affinity documents, and the entire Affinity ecosystem, are not collaborative. They assume that files are opened by one person, on one local machine, at one time. If you go against that, things will break. The problem goes back to the OP's first sentence: Either the filesystem, or Affinity Publisher, should recognise that the file is already open for editing, and prevent User B from opening it in the first place, or at the very least warn User B that her edits will not be committed or saved.
-
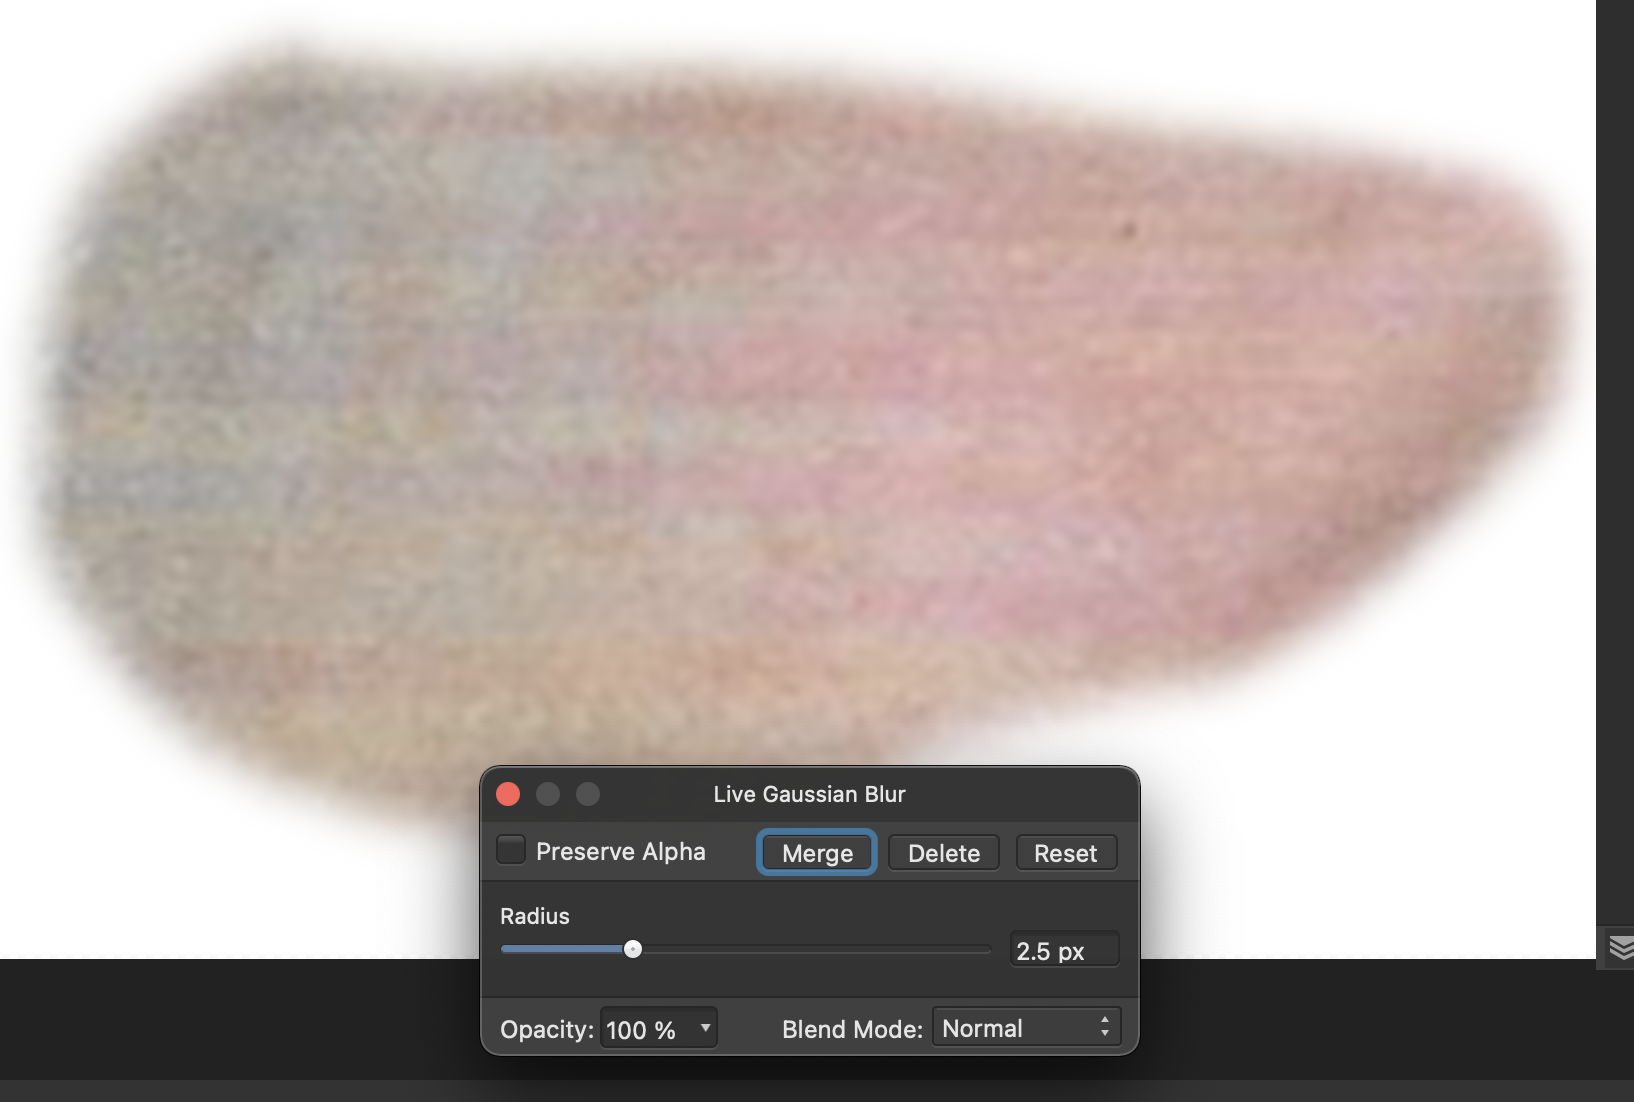
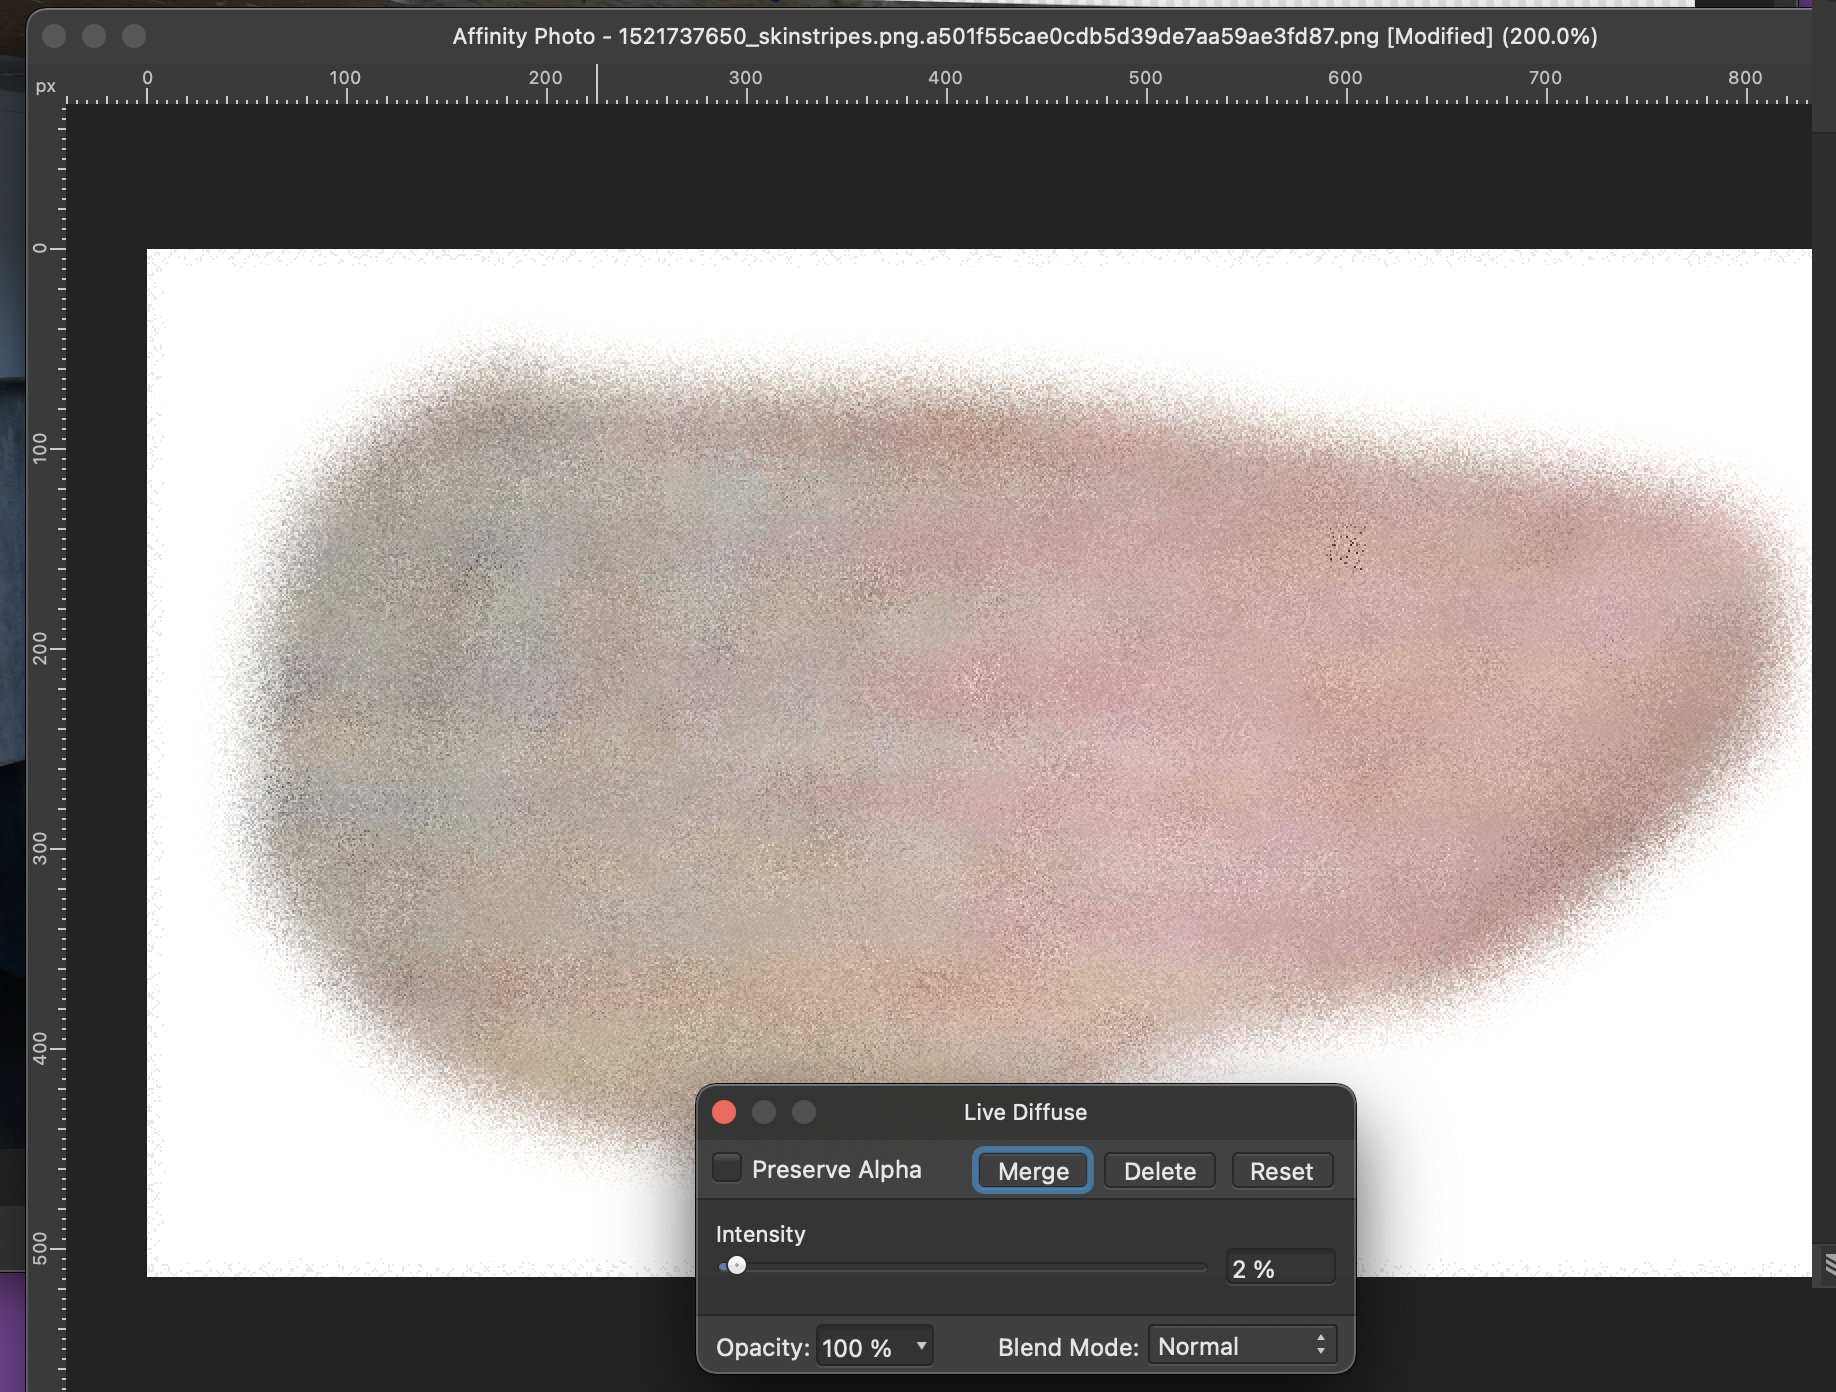
Hi @SamSteele You would probably get better answers if you uploaded the original image rather than a screen grab of a tiny part - if I sit way back from my screen it looks like a spectacularly unsuccessful bowel movement 🤧 You could select the offending area and try a Gaussian Blur. Or a Diffuse: But without sight of the original it's hard to tell. Cheers H
-
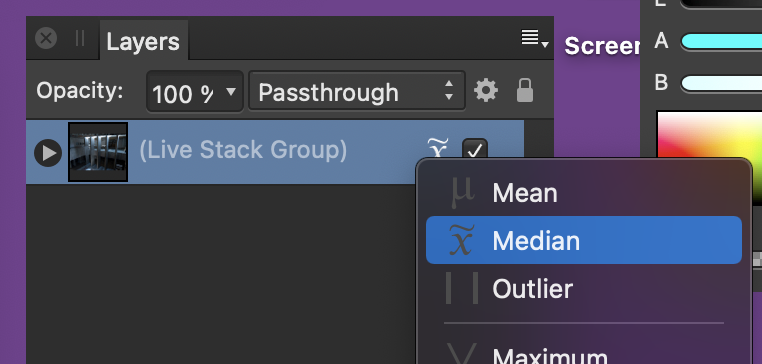
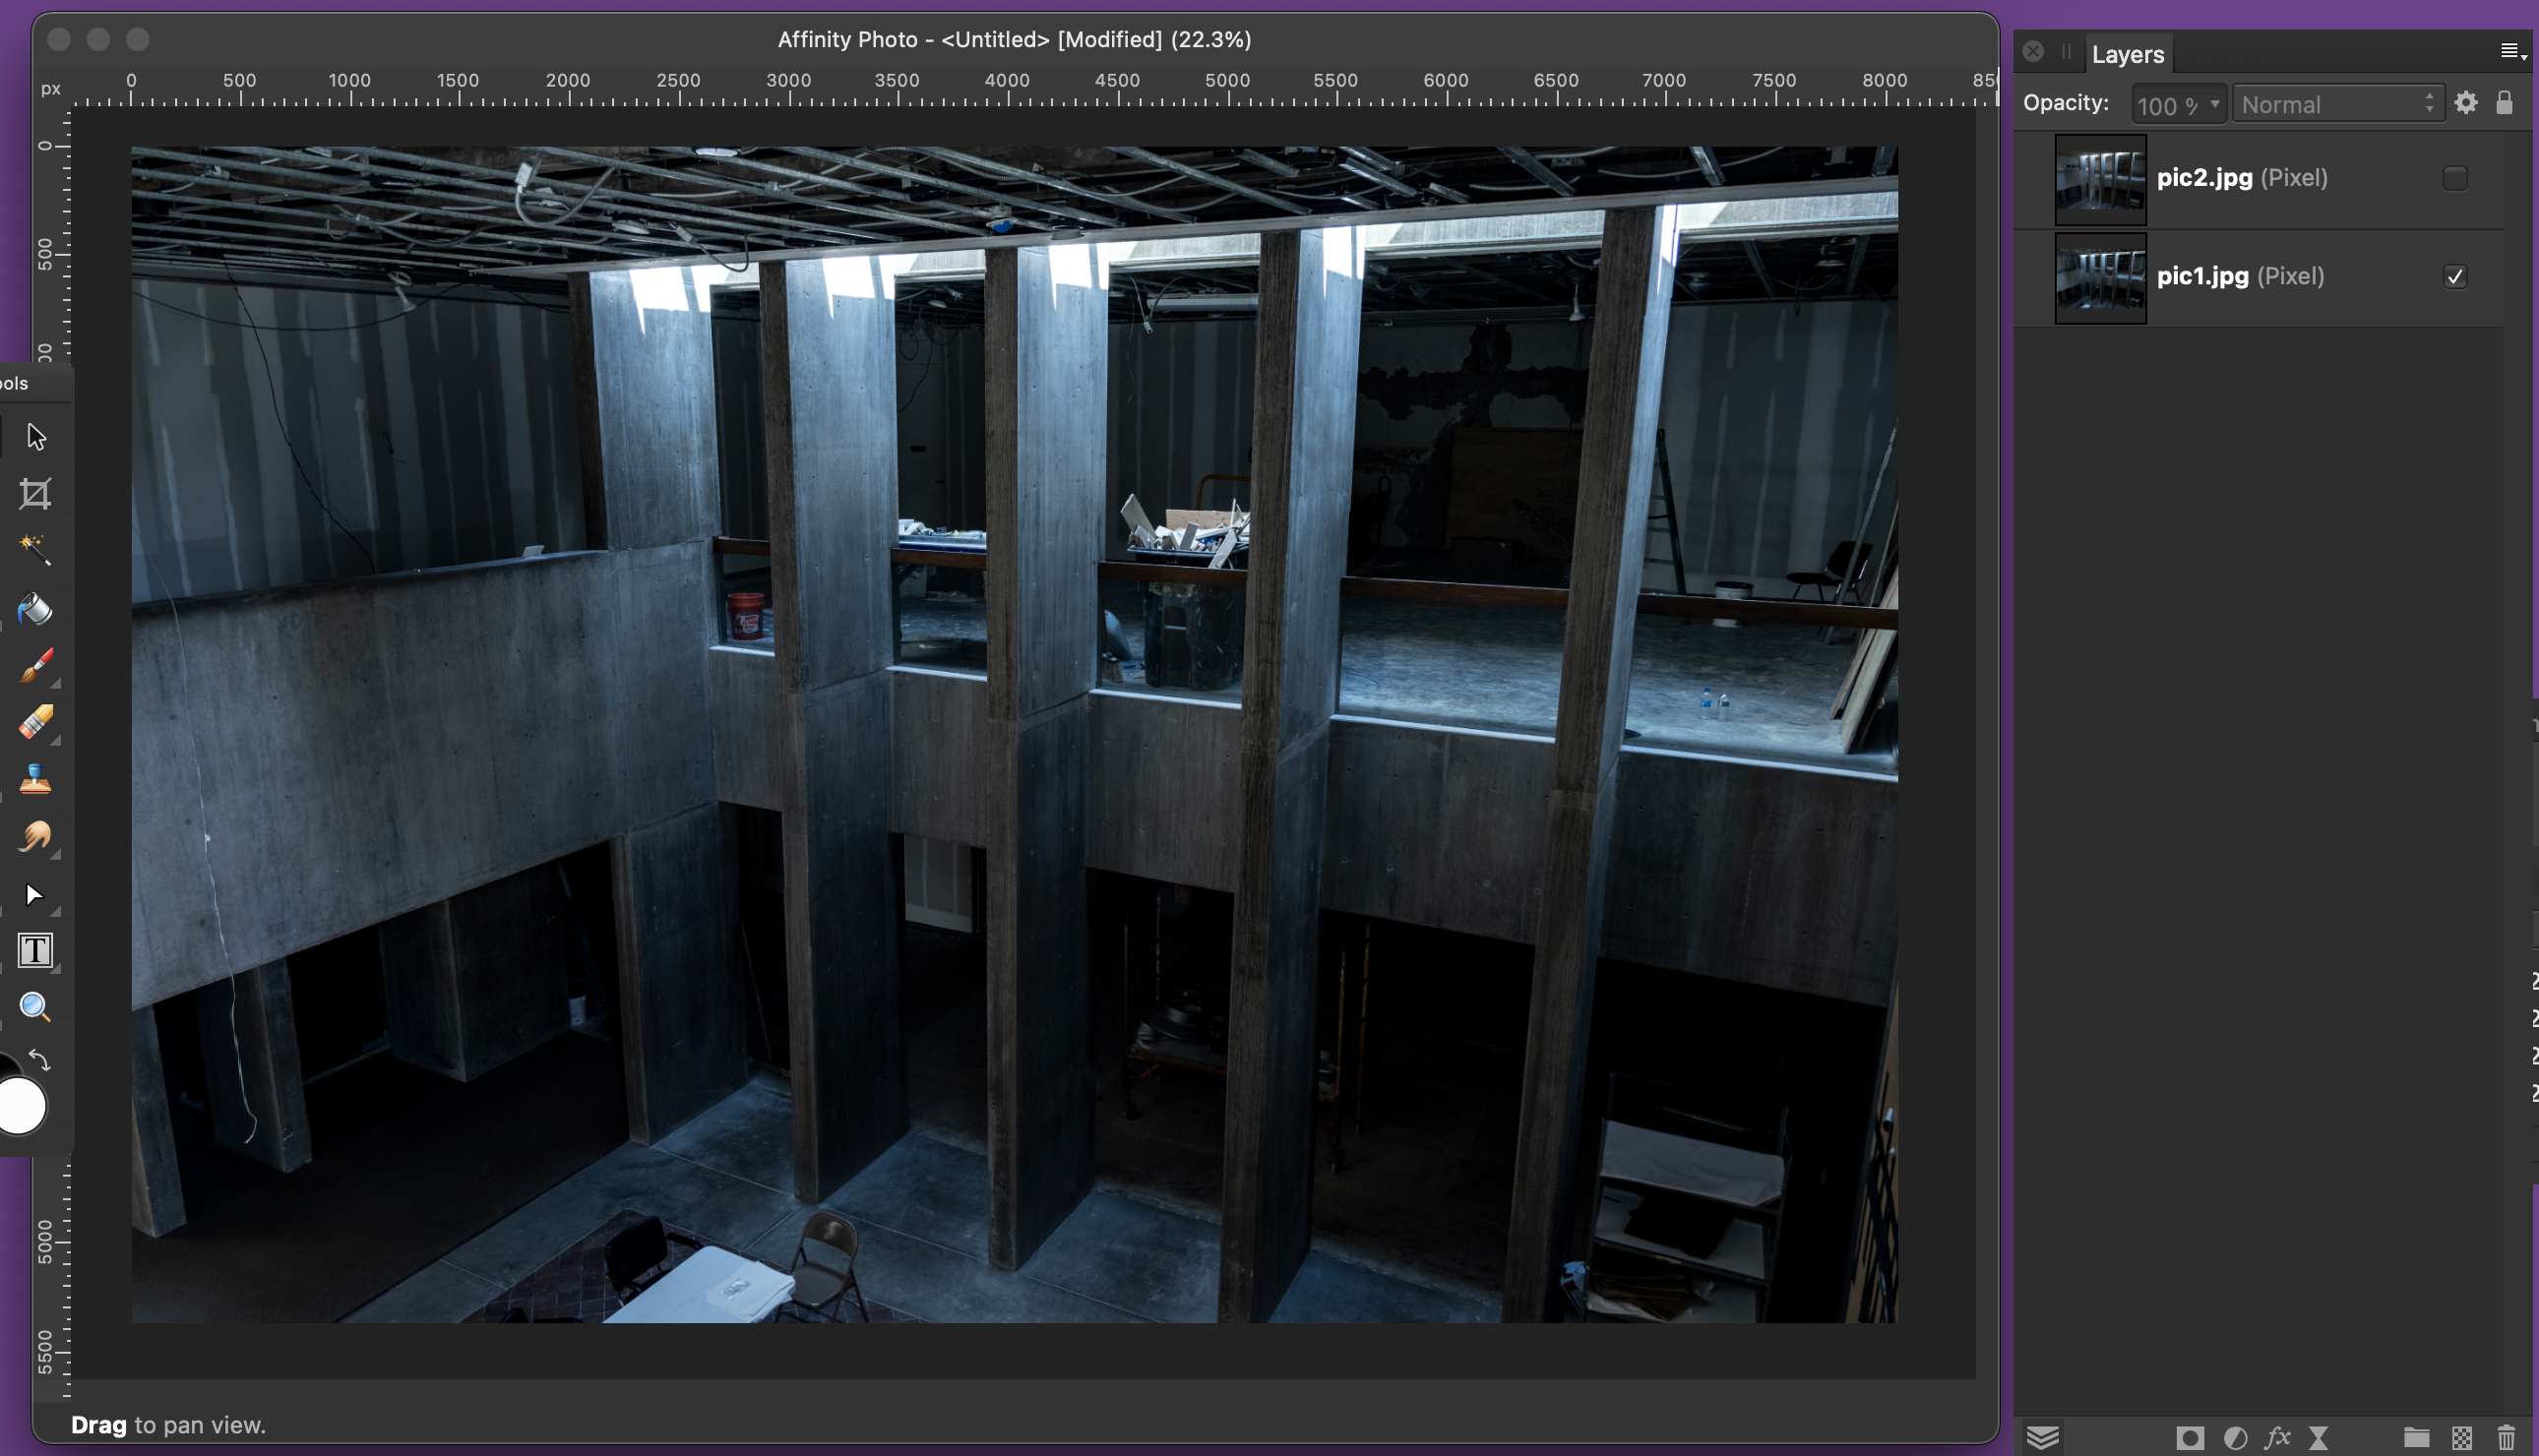
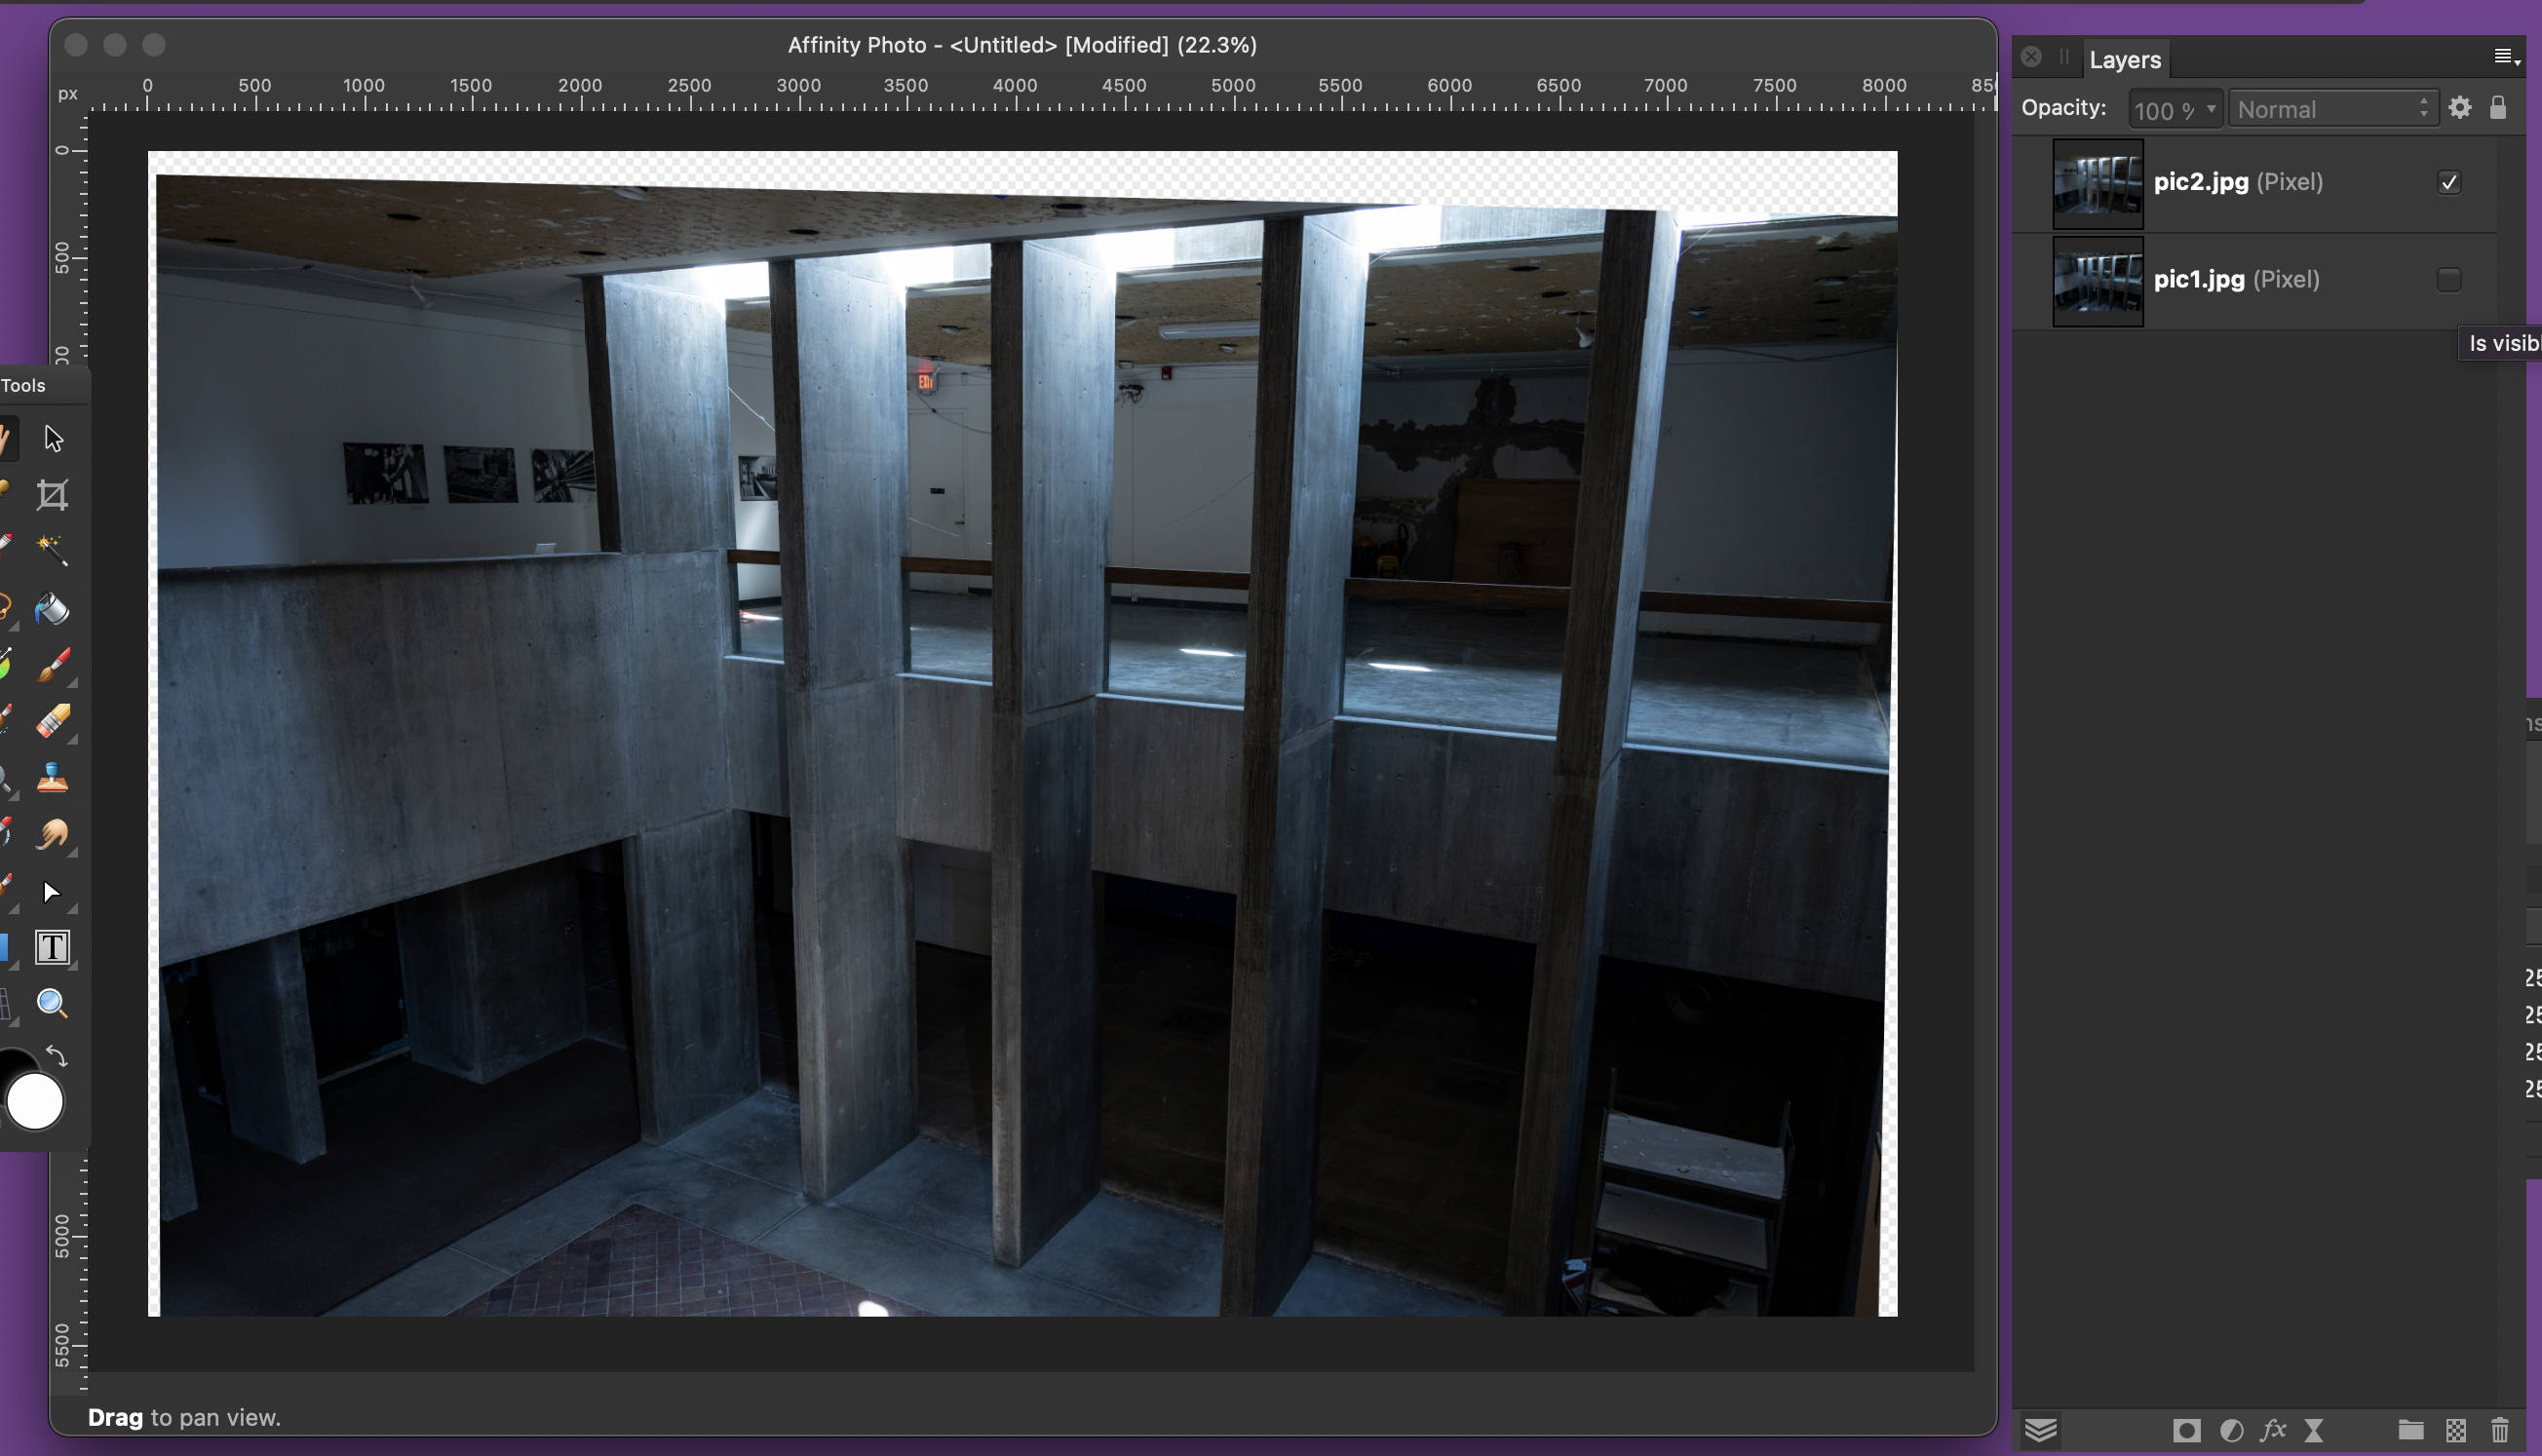
Hi @Aaron Cass and welcome. I think this is possible. With nothing open in Affinity Photo, go to File and New Stack... Click Add, select both images and leave the default settings in the Stack dialog as they are: Click OK, wait for it to process. You'll now get an Affinity Photo document with a Live Stack Group. Click the x with the wavy line over it and set to Median. Right-click on the Live Stack Group and choose Ungroup (or cmd-shift-G on a Mac). This will give you two separate aligned layers, one with the old view, one with the new. You'll need to crop the document to remove the blank canvas behind - I suspect the client won't notice the trimming - and you should now be able to export the two layers as individual images. Really hope this helps, no doubt others will have better ideas. H
- 4 replies
-
- 1
-

-
- photo
- affinity photo
- (and 6 more)
-
Or create and assign a master page that doesn't have a number. Or place a white rectangle over the number on the edition page.
-
If you're on macOS, then Automator has a Split PDF action that will do the job:
-
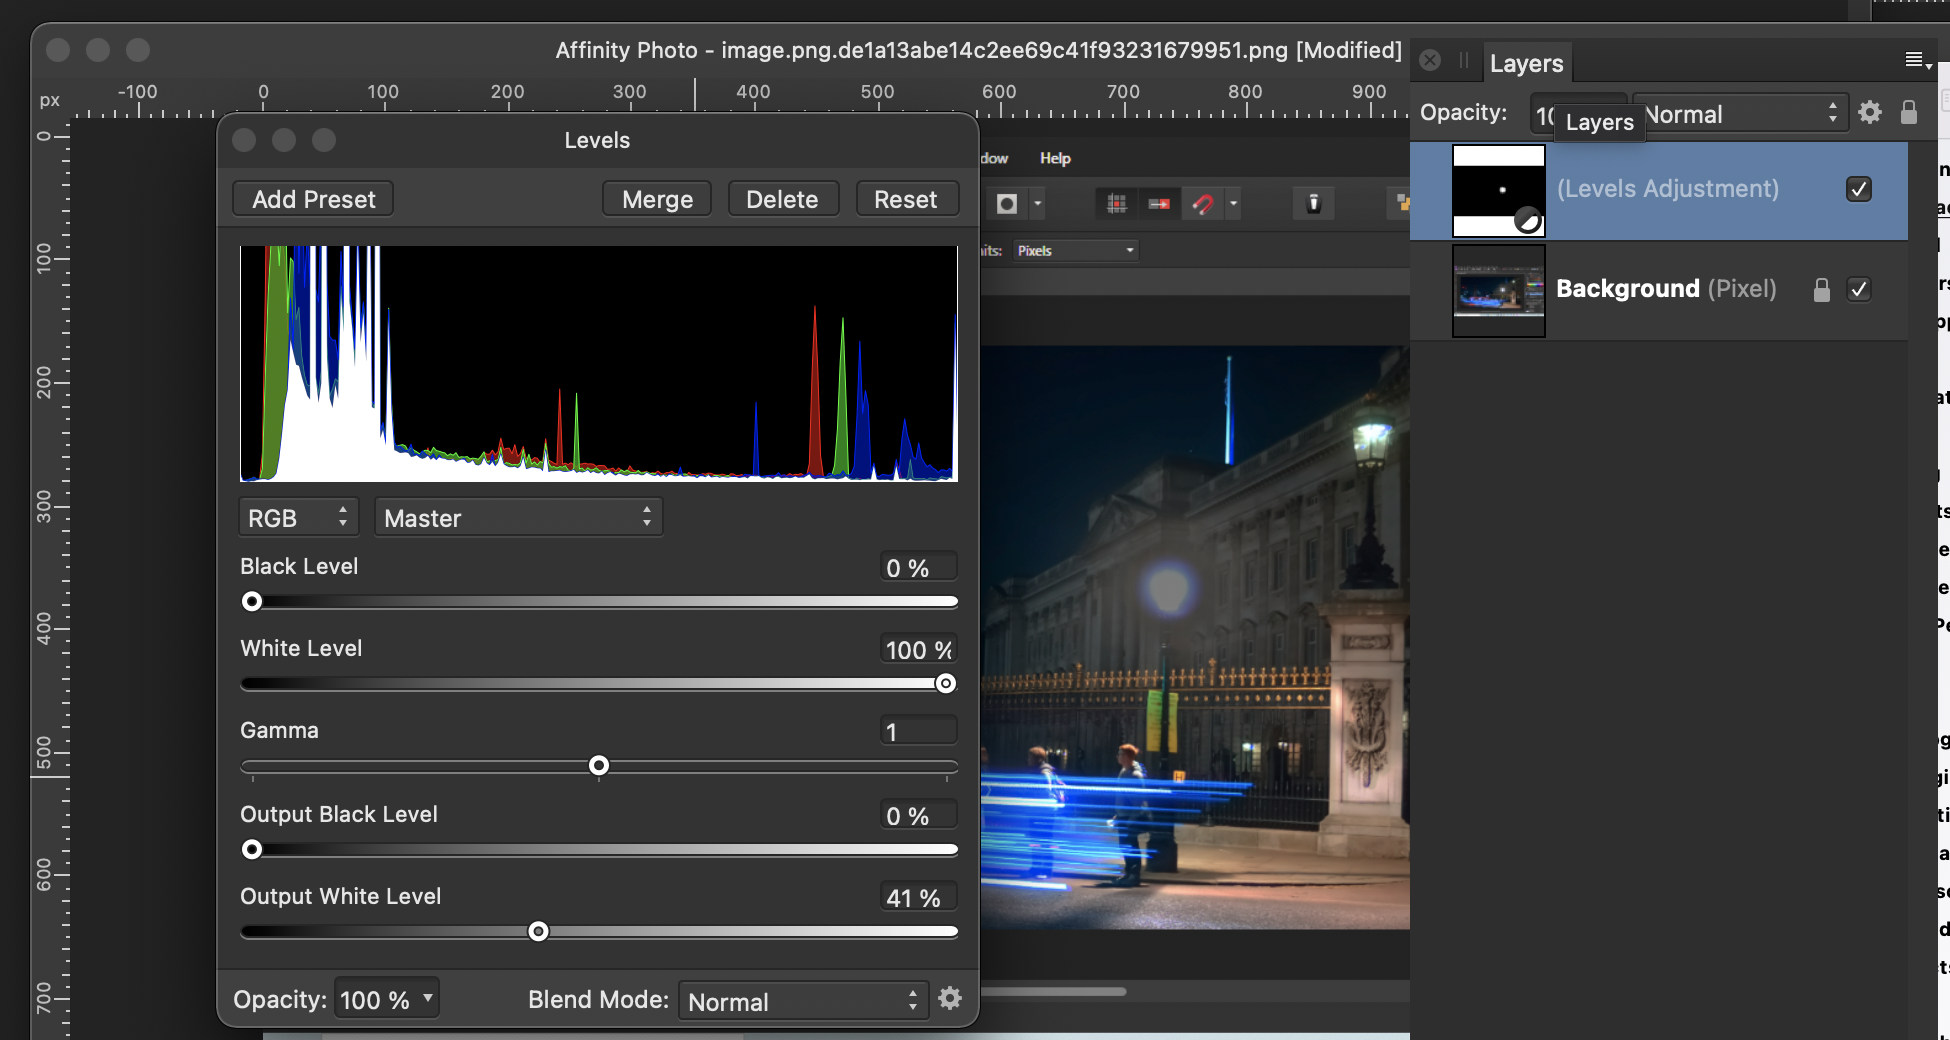
Alternatively, use the Flood Select tool with a fairly high Tolerance setting (about 60%?), Contiguous checked. Feather the resulting selection to give a soft, smooth edge and add a Levels adjustment. Dial down Output White to the desired level:
-
Advanced search/replace
h_d replied to tépè's topic in Pre-V2 Archive of Desktop Questions (macOS and Windows)
-
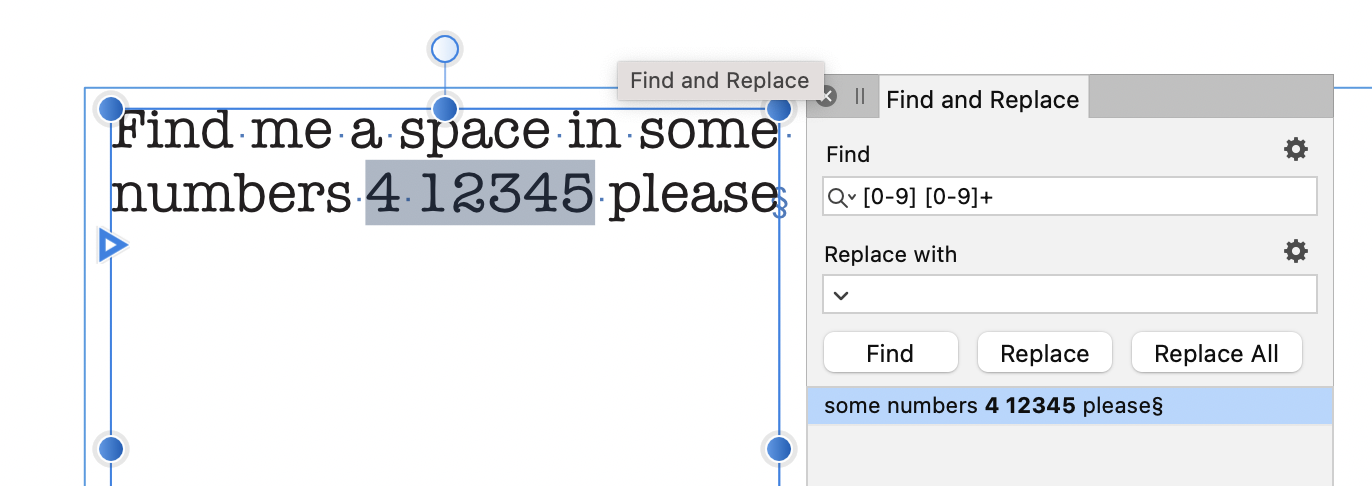
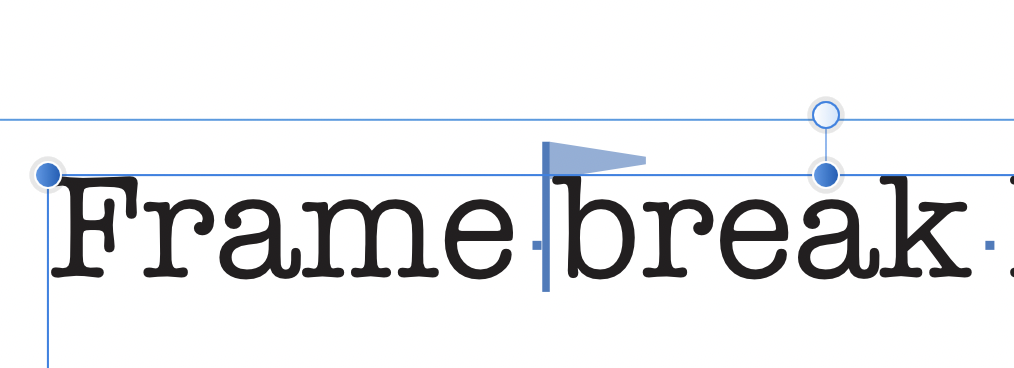
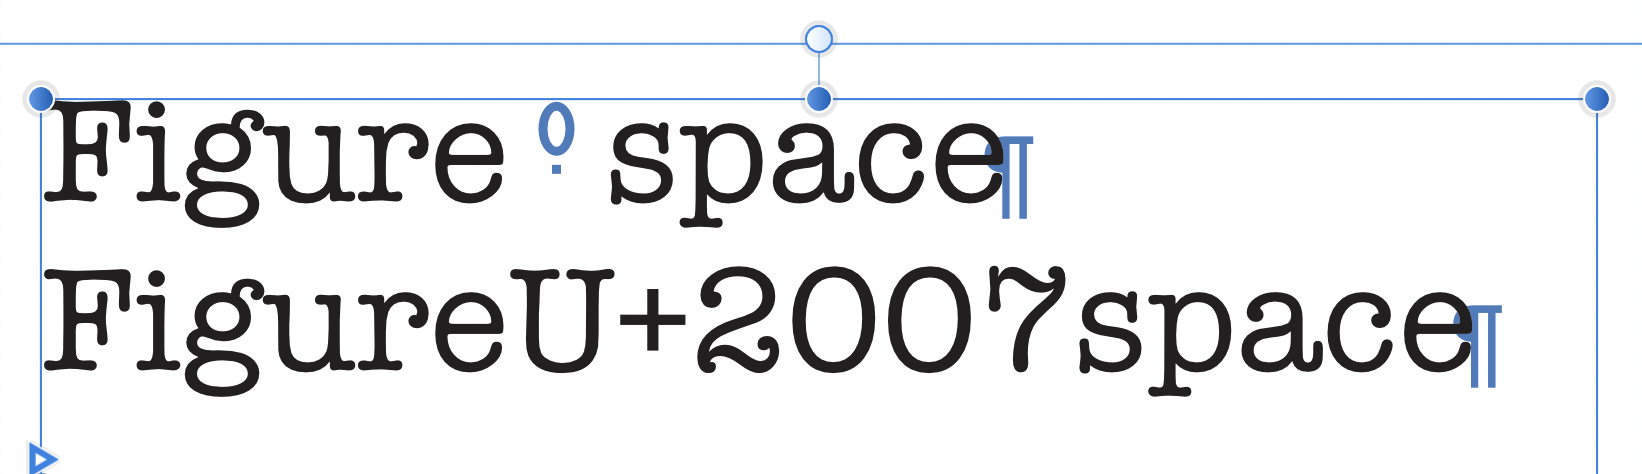
Sorry, I didn't explain myself fully. If you choose (eg) Frame Break in the Find and Replace dialog, then the symbol that is displayed in the Find field corresponds to the pseudo-character in the text. It would certainly. be a bit laborious to go through each special character, but at least you would have a reference to their appearance, from which you could construct your table of equivalences : There doesn't seem to be any way to search for Index Markers, though: And there may be others that don't appear in the list above: EDIT: from the Help, you can also identify the Unicode values of special characters in running text by placing the insertion point immediately after them and and choosing Text: Toggle Unicode But as @Alfred says, I don't think there's any single reference for all invisible characters.
-
You could use the Find and Replace dialog:
-
ruler track tools
h_d replied to designperson's topic in Pre-V2 Archive of Desktop Questions (macOS and Windows)
I'm not seeing that - I get the crosshair, but not the tool position in the rulers: Screen Recording 2021-07-08 at 09.09.32.mov macOS, Affinity Photo 1.9.3 -
Straighten a specific object
h_d replied to OldHickory30's topic in Pre-V2 Archive of Desktop Questions (macOS and Windows)
There's something very naughty going on in that bedroom... 😝 -
Both of these can be risky. There have been a number of posts here from people who have had Affinity documents corrupted after working with them on remote storage platforms, and Serif's advice has always been to keep all working files on the local drive. Not sure if that's what was causing the original issue, but it's worth eliminating as a cause. Keep backups... 😁
-
I suspect it boils down to how big the source images are. You've got 540 of them. If their total size is greater than your 16Gb RAM (or indeed your disk size if you're embedding them) then I fear you're in trouble, because it's my impression that the data is all processed in RAM before being rendered to the individual pages. Your solution may be to reduce the size of all the original image files before the data merge.
-
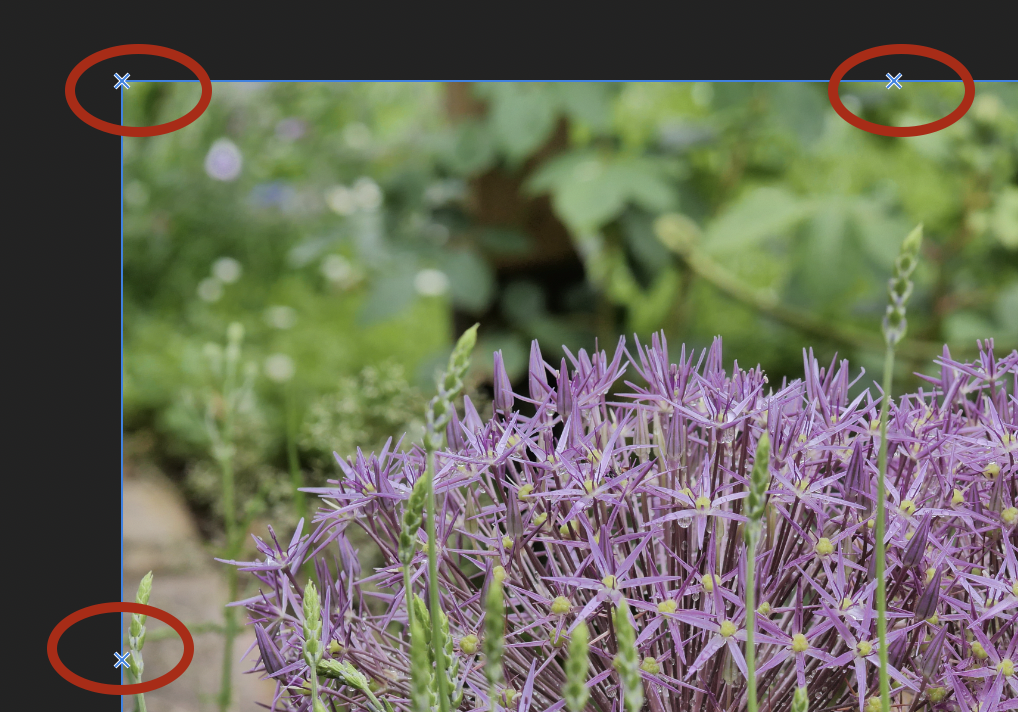
Most formats for online images (in particular .jpg and .png) do not support layers. So if you export an Affinity Photo document to one of those formats then you will produce a 'flattened' file. If you then re-open one of those exported files in Affinity Photo then you will only see a single "Background" layer. If you save your Affinity Photo document as an .afphoto file, and then close it then you will continue to have access to your layers when you re-open it. (The difference between Affinity Photo and Adobe Photoshop in this respect is , if I remember rightly, that Photoshop lets you "save as" a .jpg, .png etc from your working document and keeps that .jpg, .png whatever open on screen. Affinity Photo will only let you export your working document and the original .aphoto document will remain open on screen after export.) You appear to be working on a saved document, as it has all the .afphoto layers in place. So far so good... As @Old Bruce says, your Background layer is locked. This will prevent you from transforming it - if you click it with the Move tool (black arrow pointer) you'll see crosses at the corners and at the centres of the outside edges: Somewhat counter-intuitively you can continue to paint on it, and change its position in the layer stack, despite it being locked. But if you want to change its shape you need to unlock it first by clicking its padlock icon. The layer called "guitar small..." is an Image layer, and is unlocked, which means that you can adjust the shape and position within the document but you cannot paint on it unless you rasterise it first - right-click on the name of the layer and choose Rasterise... from the pop-up menu. The unnamed layer with the gold rectangle and '33' in a black circle is an embedded document so your editing options may be limited. Again, rasterising may help. The other layers in your screenshot are text layers and should be editable if you select them in the layer stack and then double-click on the text frame to select the text. So the question is, what exactly are you trying to edit? Cheers, H
-
Go to Document and uncheck Transparent Background You could also add a Fill Layer below the Background image layer if you wanted a background other than white.
-
You're clicking the so-called "Hamburger" menu to the top right of the panel, not the name of the category. What happens if you click here: It should bring up a list of categories. (Could you also post a grab of your Brushes panel in its current state - ie nothing clicked or selected?)
-
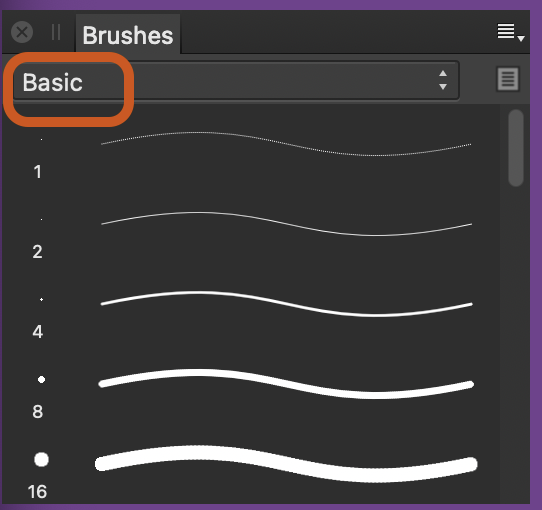
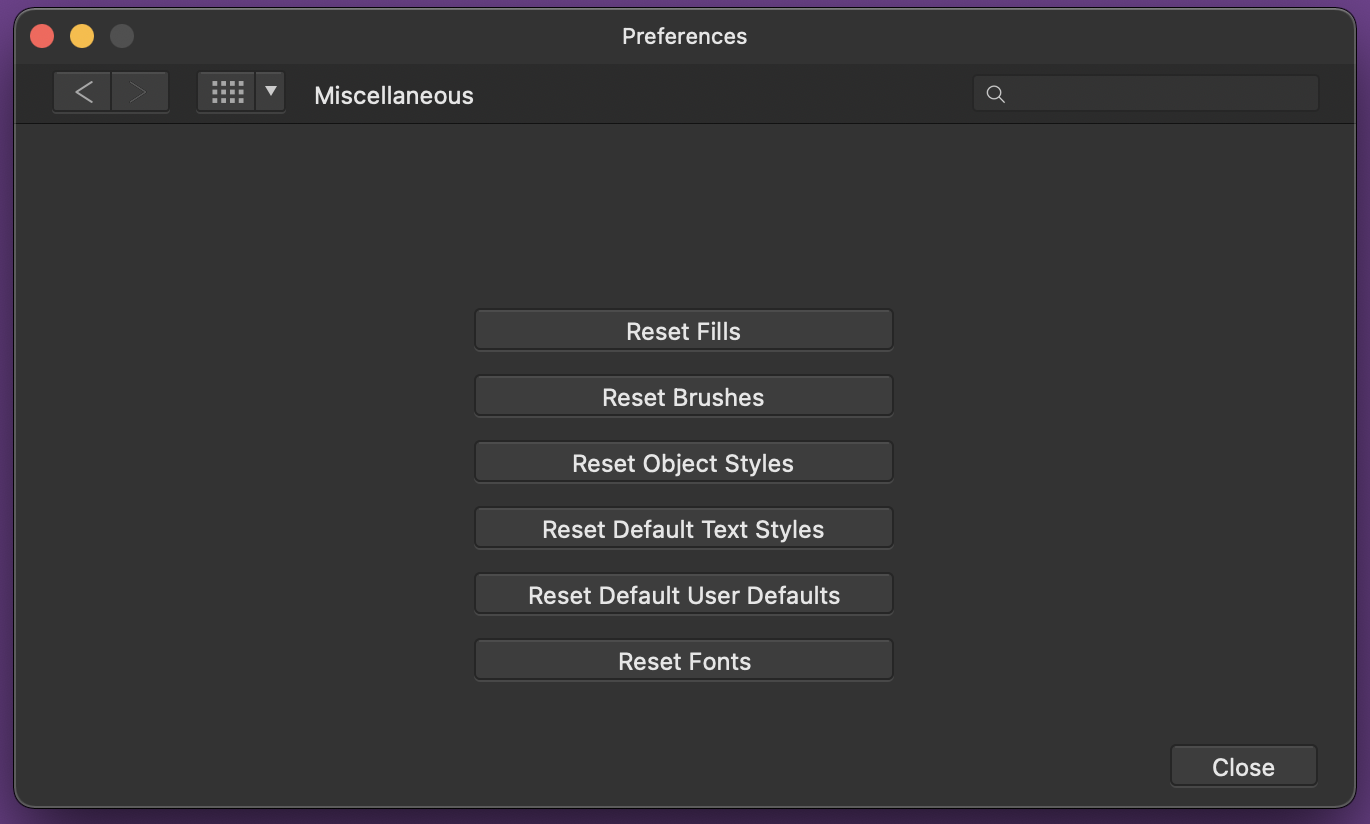
Is your Brushes panel showing the Basic category: If it's showing any other category (it may read "Brushes"), then try clicking on the name and choosing Basic from the pop-up menu. Alternatively and as very much a last resort, you could try Preferences - Miscellaneous - Reset Brushes: Screenshot is from macOS but it should be similar on Windows. But beware - it will remove any purchased brushes and revert to the original set of basic brushes that ship with Photo. At your own risk...
-
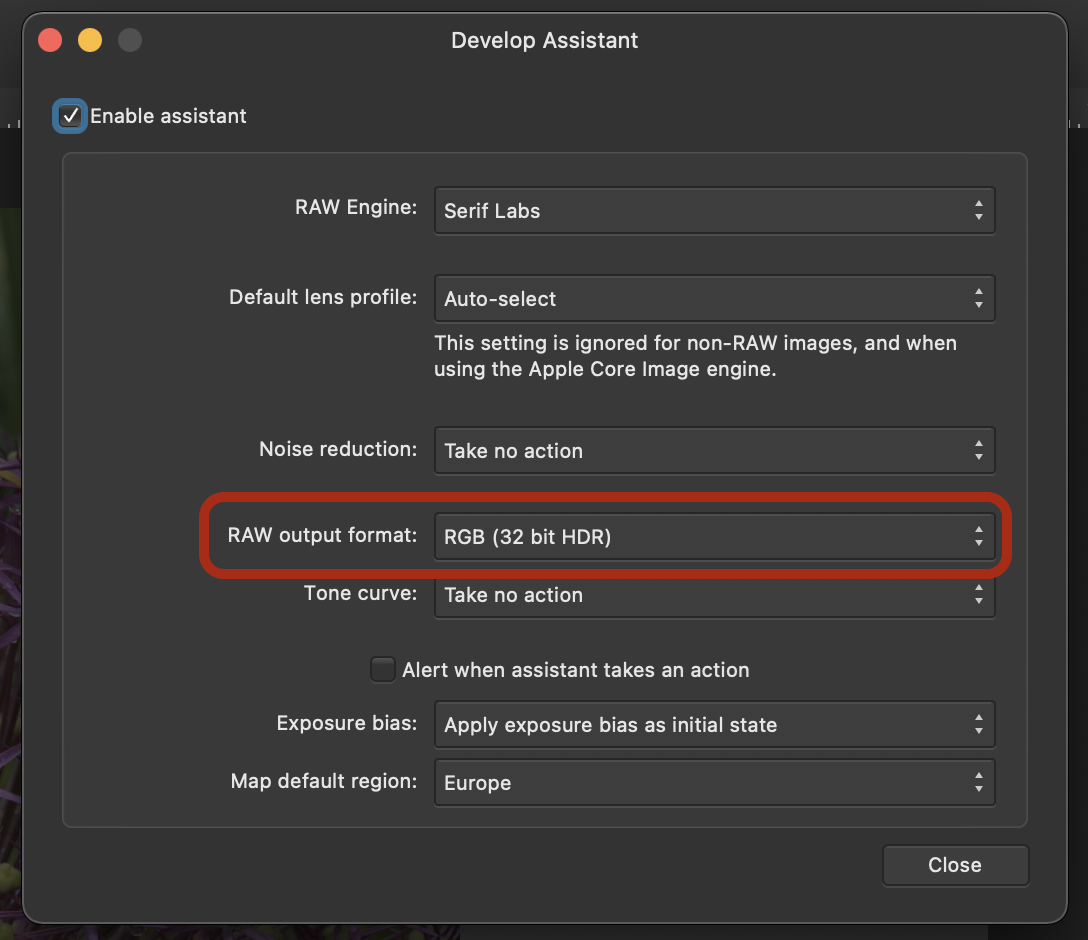
I believe some third-party plugins only work with 8- or 16-bit images. If your developed .nefs are 32-bit, you might need to convert them or change the Raw Output Format in the Develop Assistant:
-
non proportional scaling
h_d replied to boorowaboy's topic in Pre-V2 Archive of Desktop Questions (macOS and Windows)
-
non proportional scaling
h_d replied to boorowaboy's topic in Pre-V2 Archive of Desktop Questions (macOS and Windows)
It's a labour of love isn't it? There are plenty of indexing services and freelance indexers out there (Google is your friend) but I don't imagine they come cheap. (Incidentally it probably helps future readers and anyone trying to follow the answers if you post totally different questions in separate threads 😃. Difficult to see the wood for the trees here.) -
non proportional scaling
h_d replied to boorowaboy's topic in Pre-V2 Archive of Desktop Questions (macOS and Windows)
You can set the effects for one image, then either (a) copy the image, select another image, choose Paste FX from the Edit menu (command-control-v on Mac, don't know on Windows); or (b) select the effected image and save its settings as a new style in the Styles panel and apply that style to subsequent images. However, both methods depend on the original pixel dimensions and resolution of the images. When I try it with same-sized original images, it works fine. But with different-sized originals, the pixel dimensions for Offset and Radius differ from the the first image. So it may not be a perfect solution. -
Hi @ScottF2000 and welcome! Search the Help files for 'Creative effects using stacks'. The example image is a bit different from yours but I think the technique should be the same.