Mr. Sam
-
Posts
29 -
Joined
-
Last visited
-
FX: shadow rotation with object (Affinity V2)
Mr. Sam replied to ADRlAN1988's topic in Desktop Questions (macOS and Windows)
This is very helpful and I appreciate the reply, but wouldn't we all agree that having a checkbox with "Lock shadow on rotation" be super convenient, I mean, it's kinda there when you rasterize it? I often will forget that the FX are not rotating with the layer, and I'm like "why does this look so off". It is annoying when I'm designing something like a box/packaging, where the Logo or Design goes on all sides with a drop shadow or 3D effect, I have 2 options: Convert the Layer to raster (not my preference) & uncheck "Preserve Layer FX" Rotate the FX for every single side to match the shadow of the other sides I really appreciate your step by step reply, unfortunately it doesn't seem work in circumstances where there are different viewing angles. -
FX: shadow rotation with object (Affinity V2)
Mr. Sam replied to ADRlAN1988's topic in Desktop Questions (macOS and Windows)
Resurrecting an old post here, but I'm surprised this hasn't been addressed, and I'm getting tire of adjusting drop shadows one by one. I just wanted to throw out an example of when this issue becomes very tedious work. If I have a piece of art that has many layers, of which maybe 50 have drop shadow. The artwork has been designed on a vertical plane/canvas (normal). I go to send the art piece to print (fabric, cardstock, etc.) and the manufacturer gives me a template and states "Do Not Adjust Template" for print reasons. Sometimes the manufacturer will have a horizontal templet, but my design was designed vertically... I now have to adjust every single drop shadow. Ugh! I can't just simply rotate the design as the shadows rotate with the "sun angle." I often will adjust one layer, then paste effects on the other drop shadowed layers, but not all layers have the same effects, so it's still crazy tedious, not to mention difficult to get the same exact shadow angle from a now different angle. The global light mentioned above could be one solution, but I think a little check box in the drop shadow effects panel that states "Lock shadow on rotation" would be so nice. -
 Petr Bajer reacted to a post in a topic:
Affect both handles simultaneously
Petr Bajer reacted to a post in a topic:
Affect both handles simultaneously
-
Can't create a new document in Designer v2 (PC)
Mr. Sam replied to Pep75's topic in Desktop Questions (macOS and Windows)
Having the same problem here in version 2.5.5 Windows 11 Ended up having to uninstall the entire Affinity Suite and reinstall it. Settings... Gone! SUCH A PAIN! At least I can now open a new document. I was searching for hours online, no real answer other than create your own preset, which isn't a real solution. I believe the bug was that I had the latest Designer installed, but not the latest Photo or Publisher. That's my guess, because I uninstalled ALL the apps, then downloaded all of them again to make sure I had the mostest most currentest versions. Reinstalled, and now I can open a new doc with/without presets. -
Mike W077 reacted to a post in a topic:
Character Panel Not Displaying
-
Or Affinity could just include a toggle in the settings for a Windows/Mac view. This way us Windows users wouldn't have to decipher, study, and memorize the Mac functions. Hamburger > Command Controller > two toggle menu options: 1. Toggle Command Controller 2. Windows Controls
-
Return of a bug? Exporting bitmap fill to pdf.
Mr. Sam replied to Mr. Sam's topic in V2 Bugs found on Windows
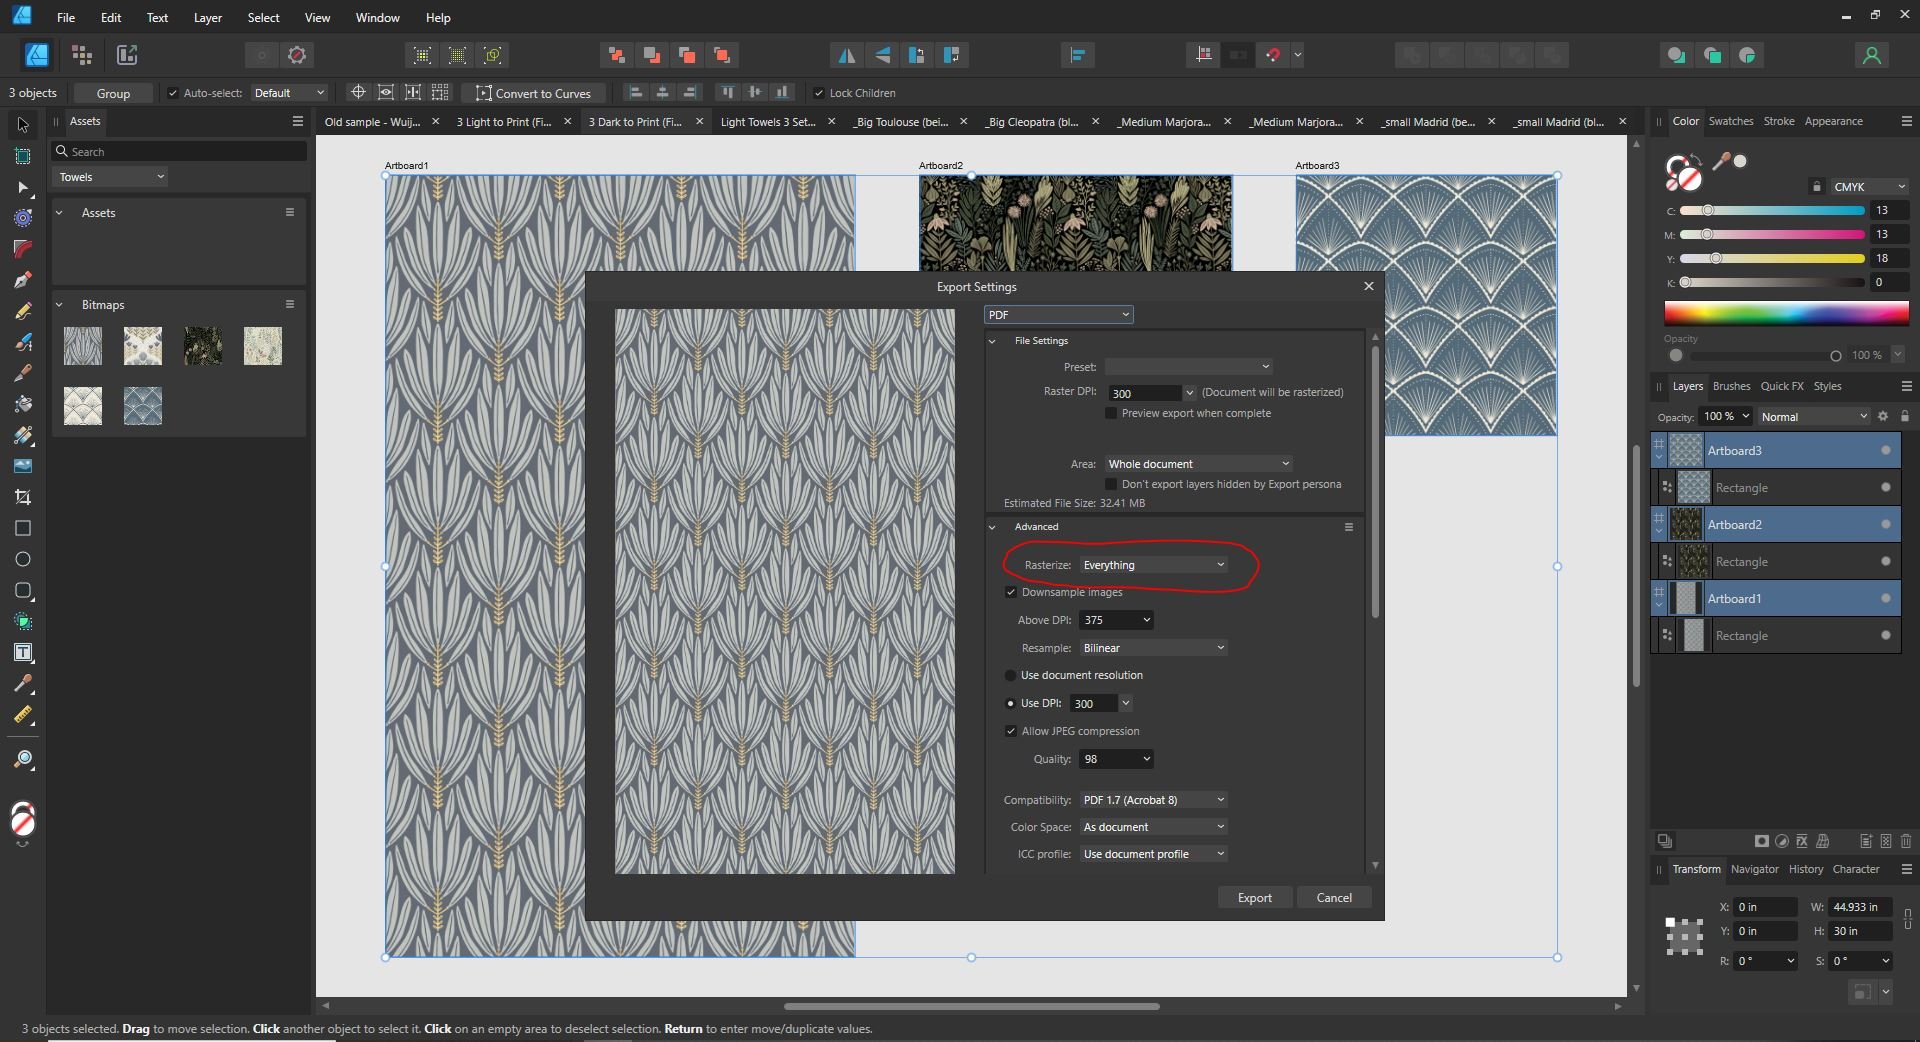
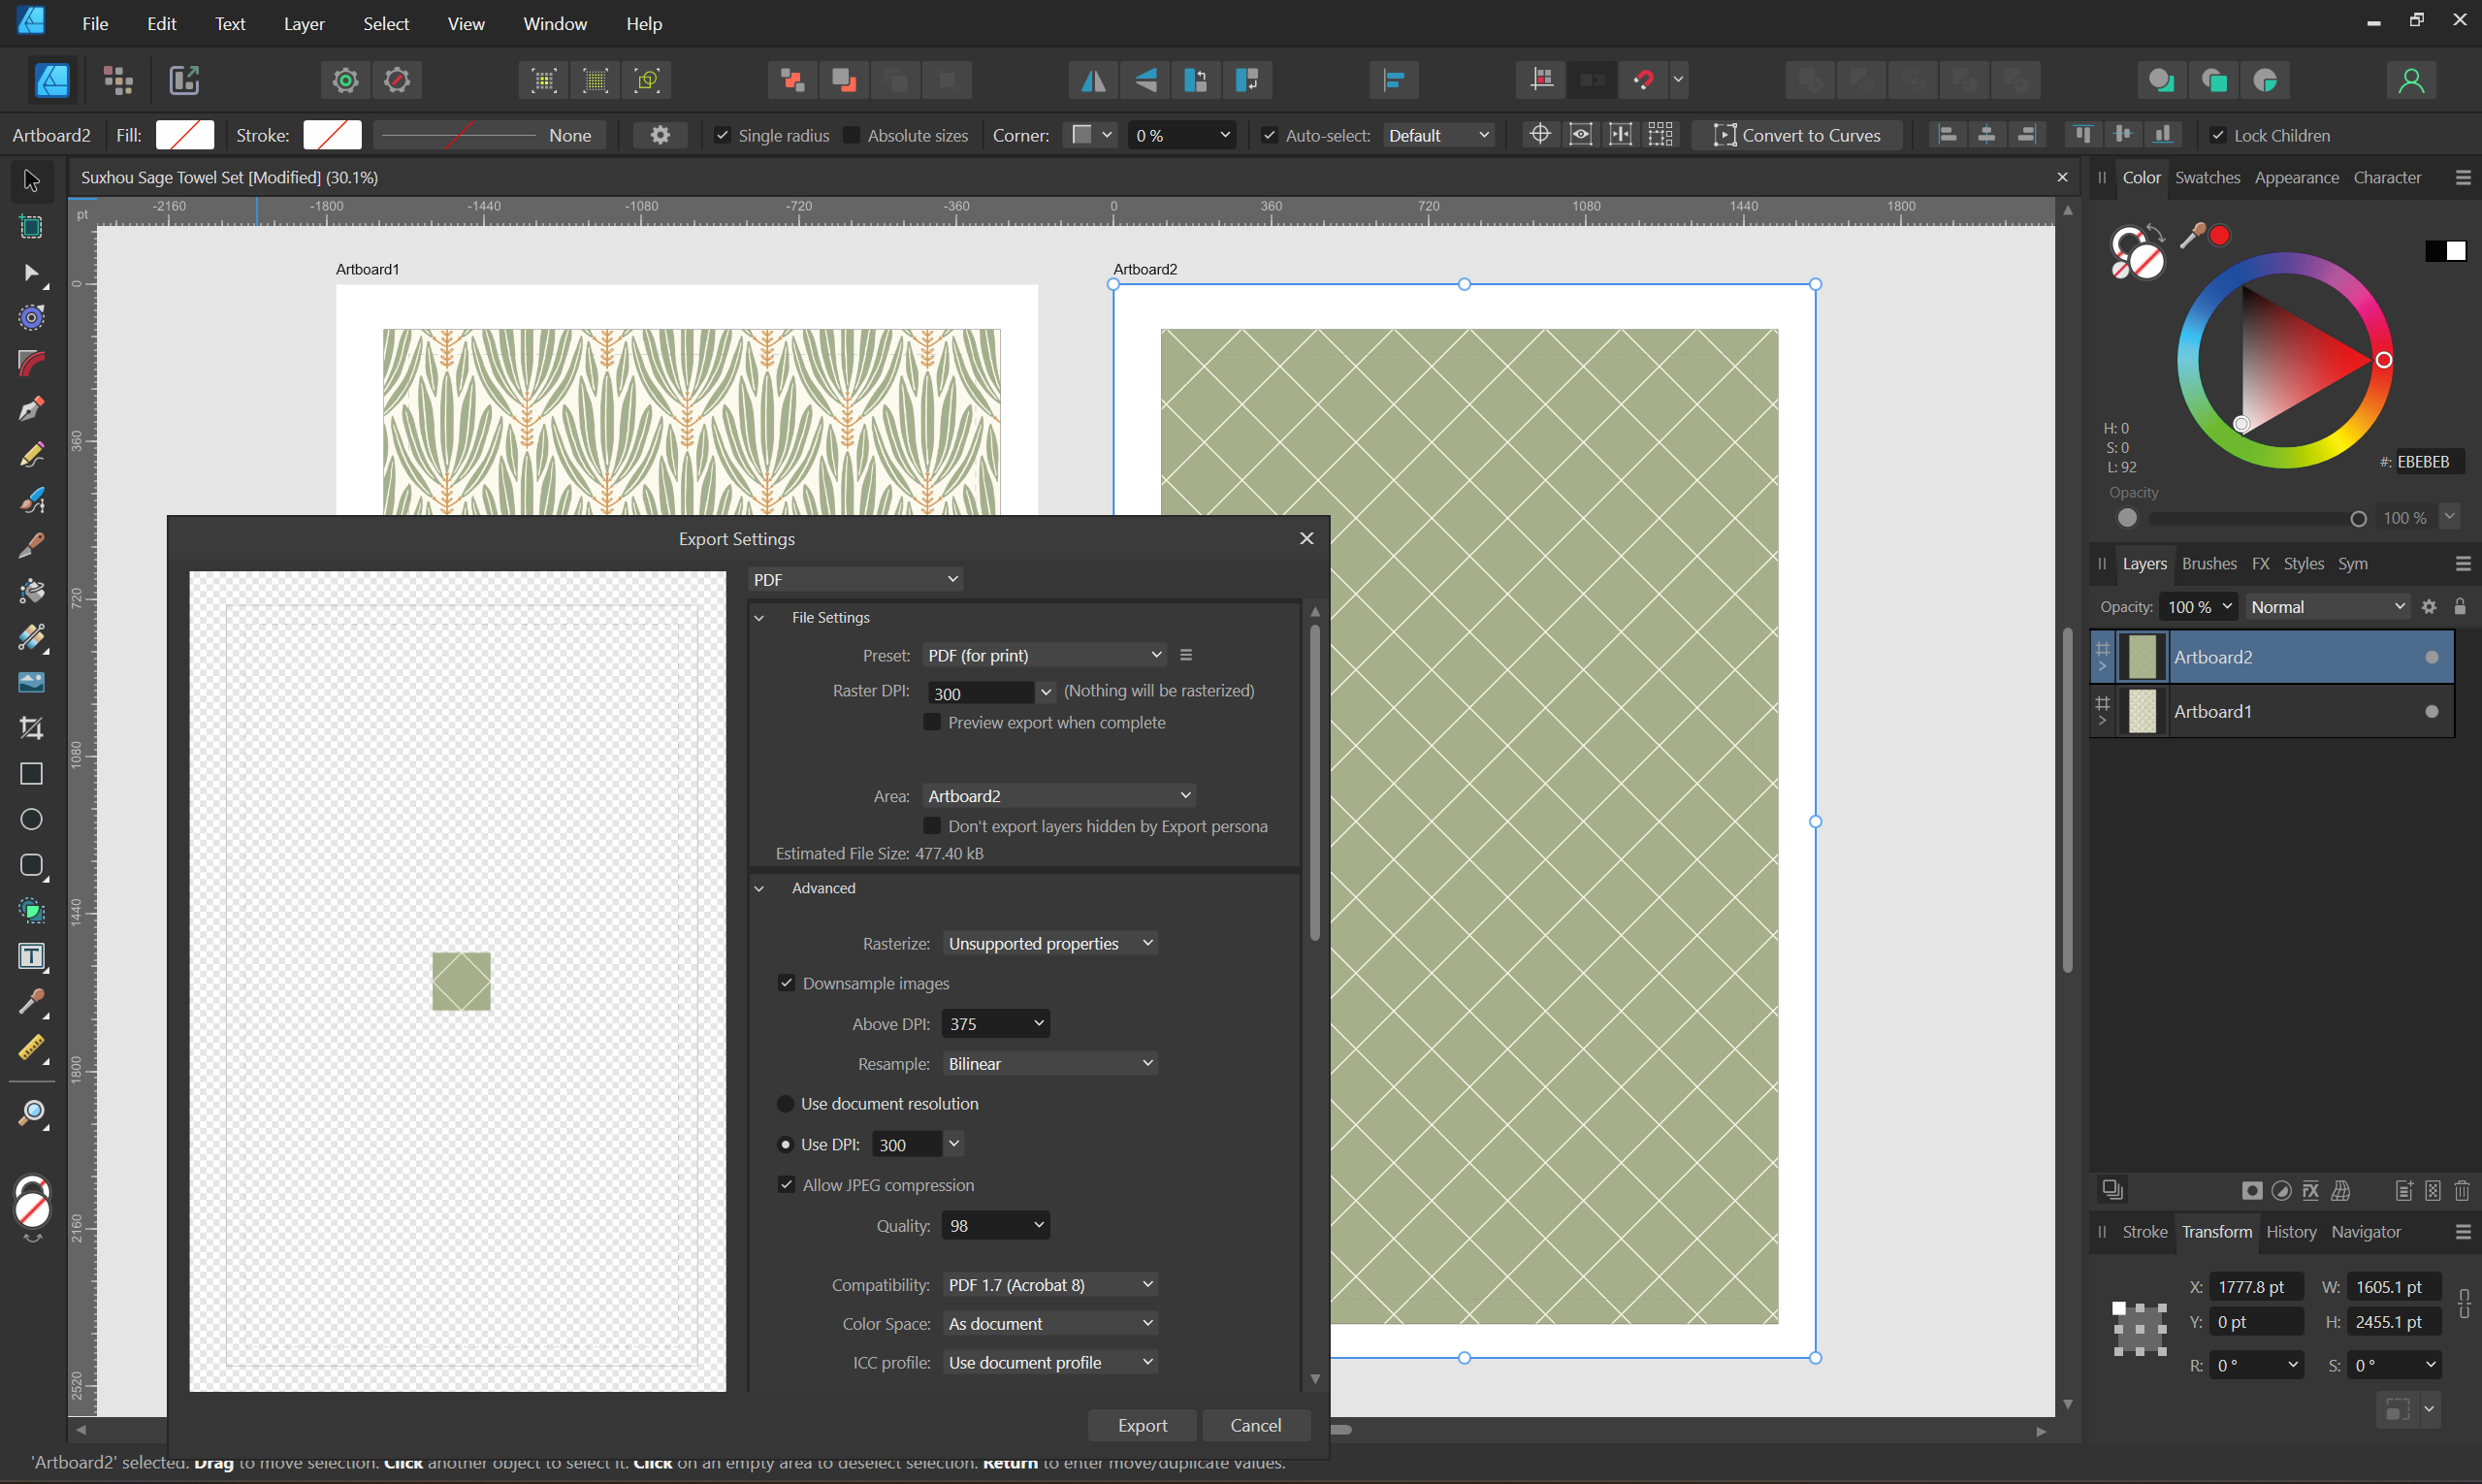
Ugh, I think I may have figured it out. This is so strange. This is the resolution I found for those who run into this in the future: Under Advanced > Rasterize, change "Unsupported Properties" to "Everything" Thank you for the help community!
-
Return of a bug? Exporting bitmap fill to pdf.
Mr. Sam replied to Mr. Sam's topic in V2 Bugs found on Windows
@walt.farrell thank you for the information. I don't think it would be wise to share this publicly as the design patterns are licensed. I'll message @DWright to see if he can help out here. -
Return of a bug? Exporting bitmap fill to pdf.
Mr. Sam replied to Mr. Sam's topic in V2 Bugs found on Windows
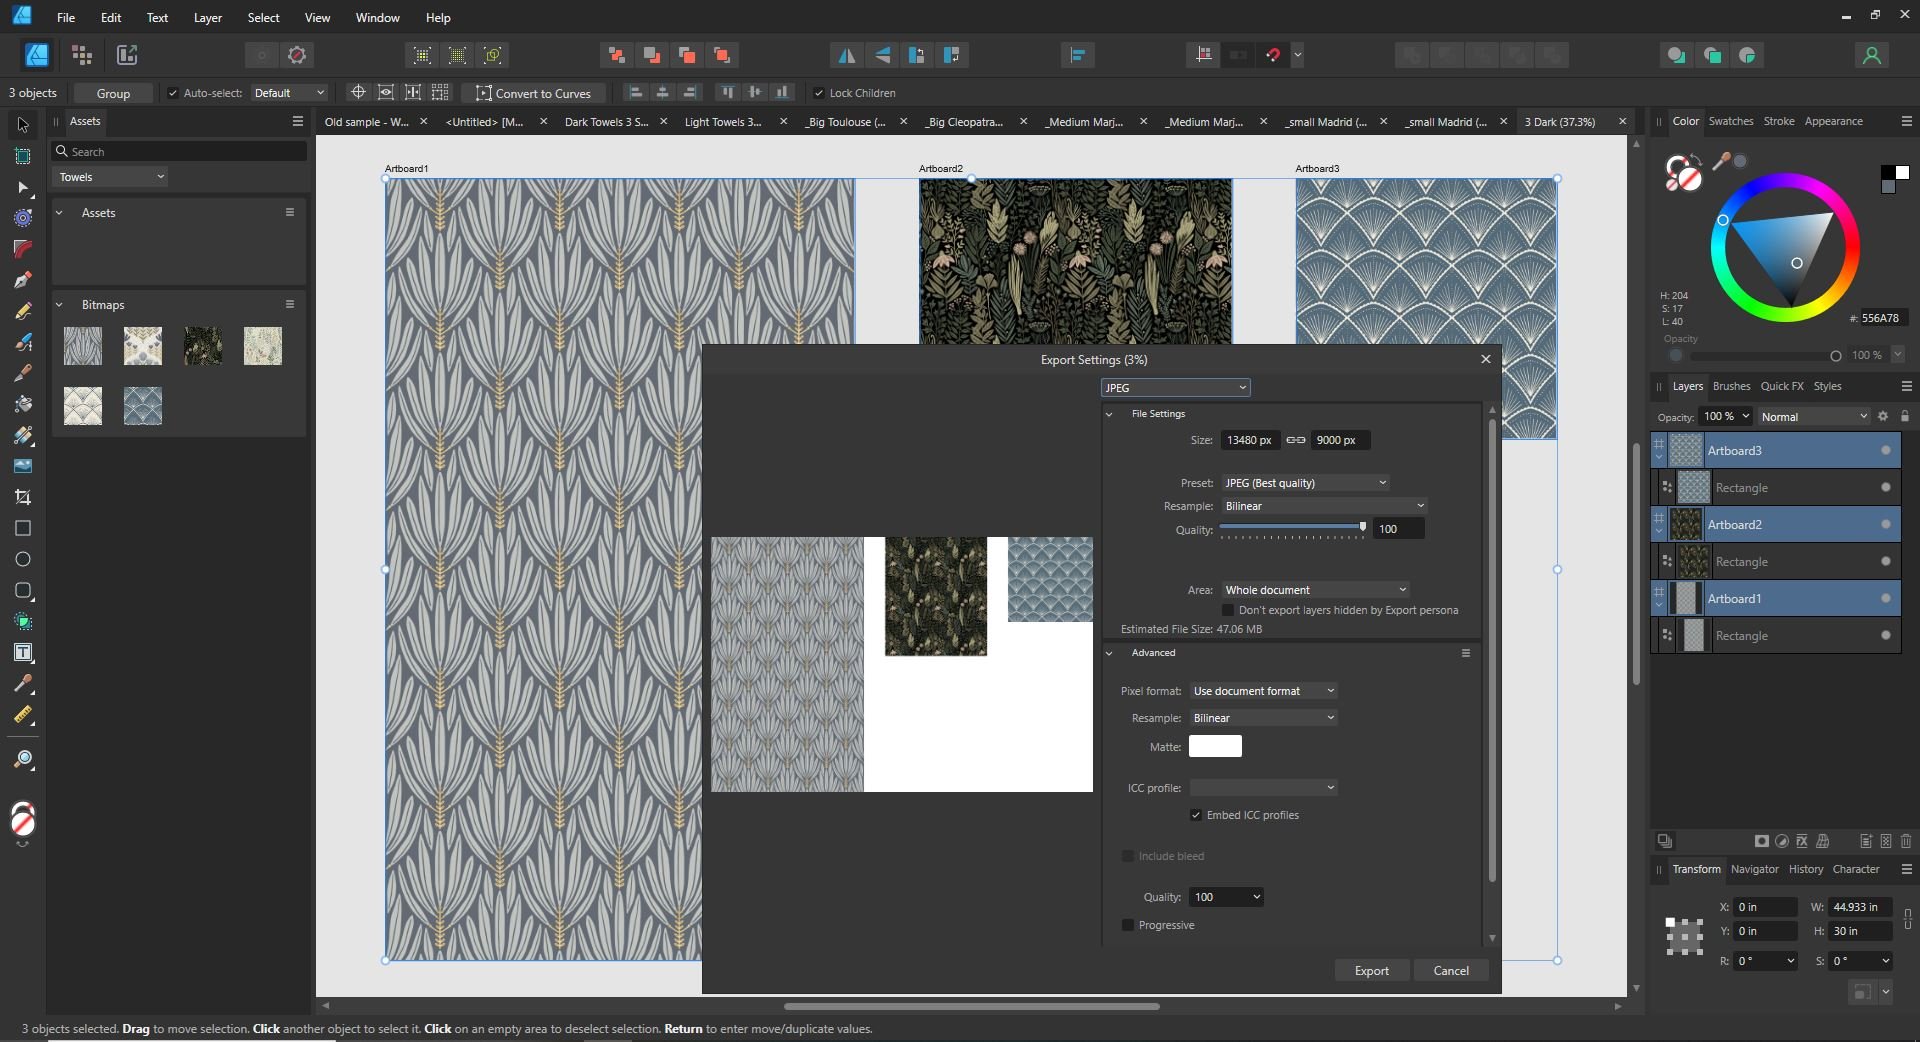
Any chance I can revive an old post? I ended up switching back to Inkscape for this problem in the past, but I am now back at it with Affinity and the same (insert curse word here) problem. I have tried filling the artboard background, no dice. Then I tried creating a new shape and filling that shape, no dice... After several updates, I'm stumped as to why this bug persists. I'm happy to share the file if I can get this resolved. As you can see below, I can export a large JPEG, but it won't let me export the PDF as it only wants to export the single "pattern" .png on one of the artboards.
-
Pbj reacted to a post in a topic:
Mapping overlapping ways in a parallel manner
-
Return of a bug? Exporting bitmap fill to pdf.
Mr. Sam replied to Mr. Sam's topic in V2 Bugs found on Windows
@Old Bruce Good point; sure wish we could fill with vector shapes... anywho, the image had some vector layers I wanted to keep; but since this had to go to print yesterday, I had to export as "flattened" PDF and remove the vector layers. I hope Affinity can get this bug fixed. I do a lot of pattern prints. -
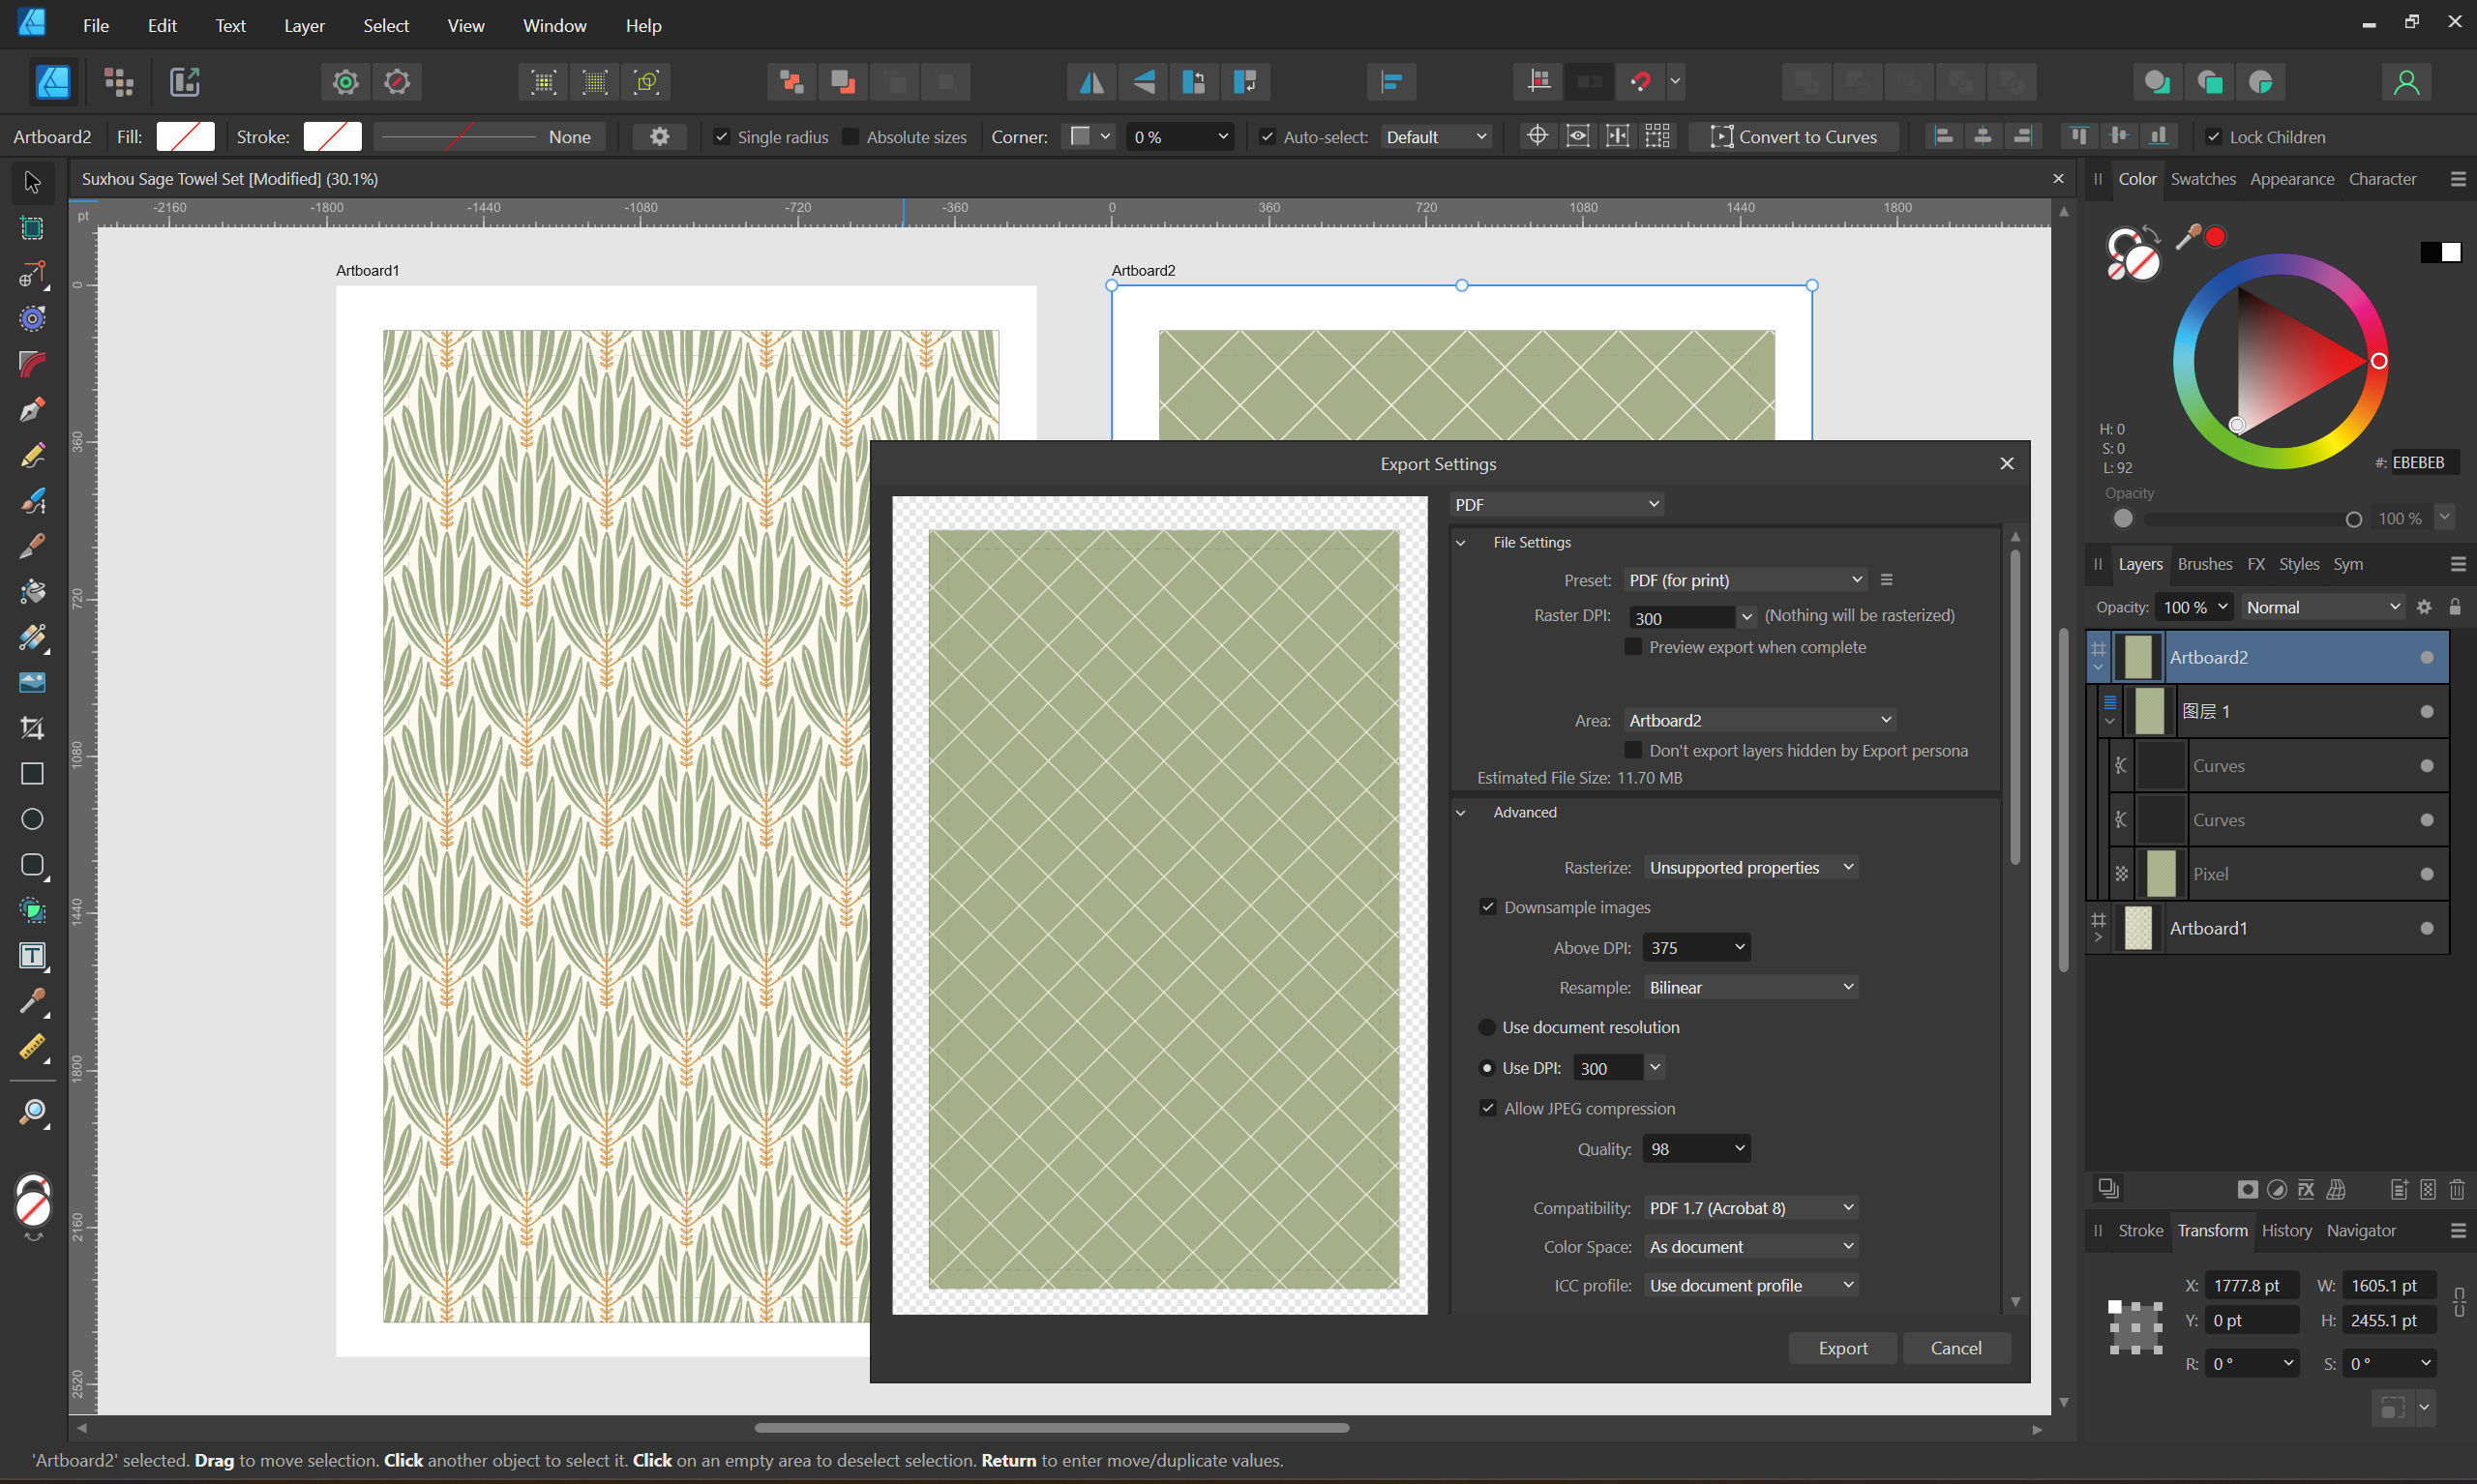
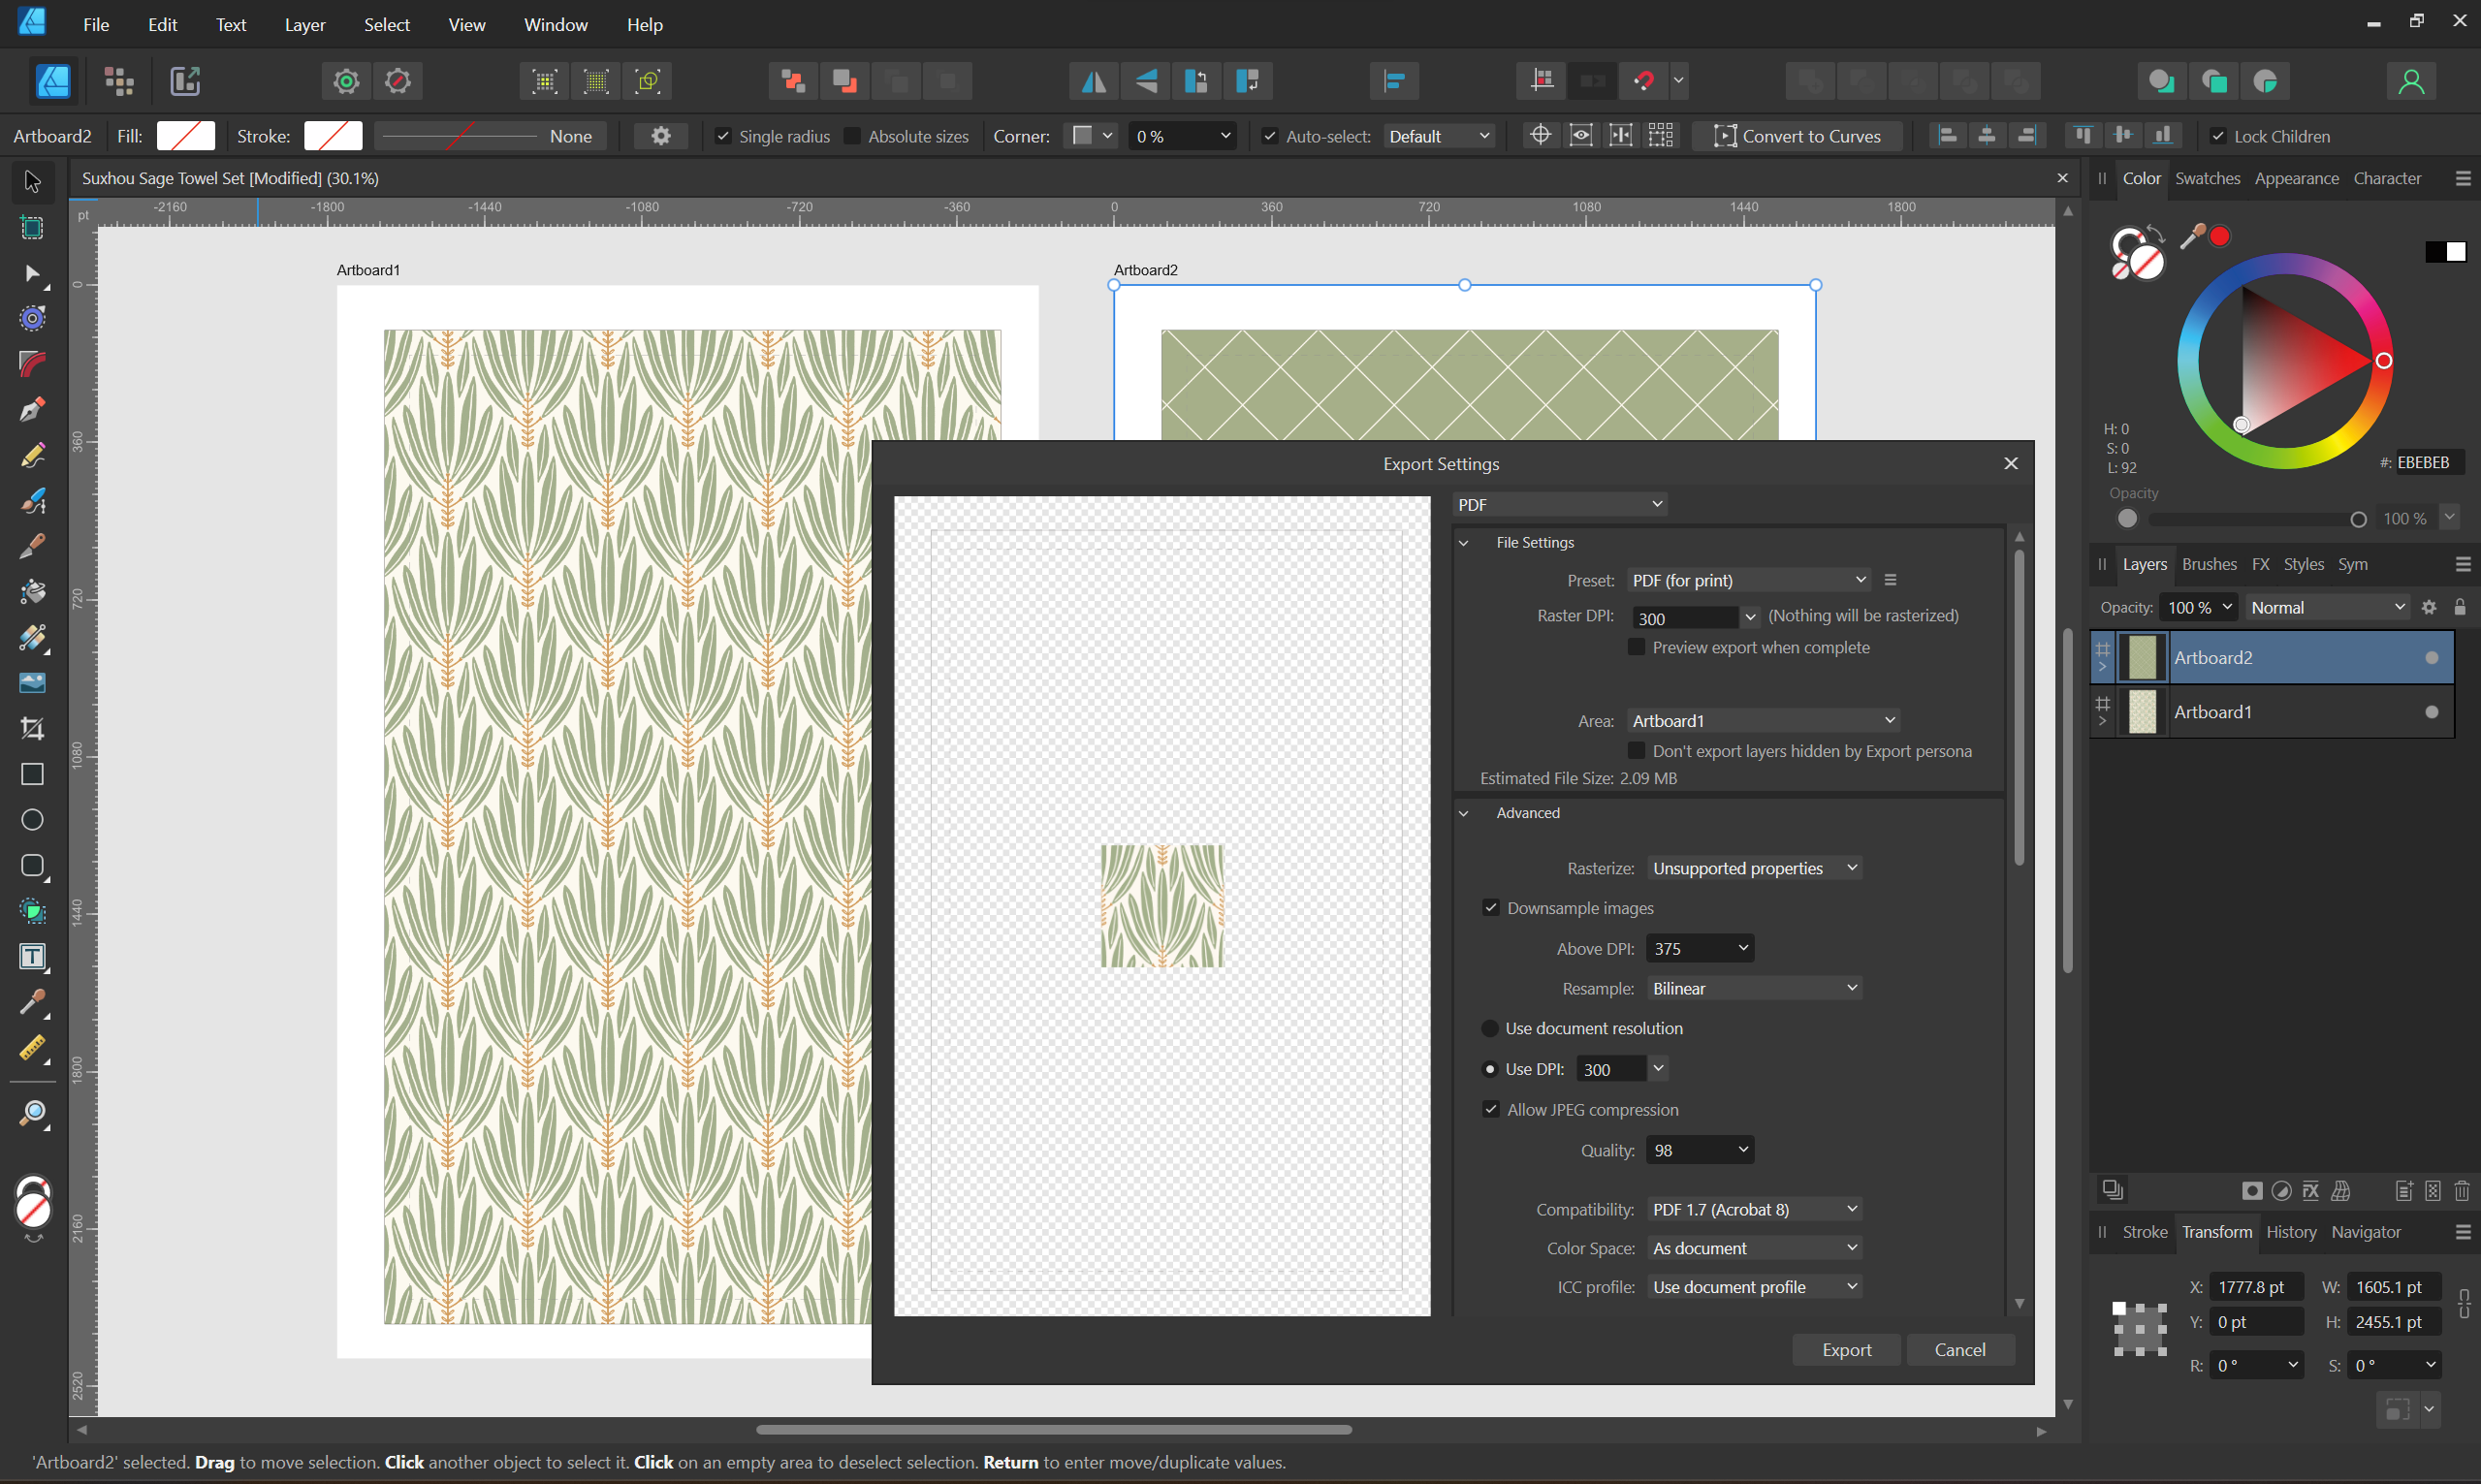
I have posted this on the forum here, but thought I should report this issue. I just downloaded the most recent version 2.3.1 and I can't get around this. Designer is only exporting the .png, not the tiled fill when a fill is set to bitmap. I have included 2 bitmap fill images; and you can see that they are both exporting to pdf with only the center, original .png, not the tiled fill. The other picture is exporting artboard 2 after rasterizing the rectangle on artboard 2, but I don't wanna export a rastered image, I wanna export to PDF as a vector. Help!🙏
-
Was this bug not fixed??? As you can see in the attached images, the export is only exporting the original .png and not the bitmap fill. Any suggestions? @stokerg you mention to rotate the fill... in this case, I can't rotate the fill and get the desired result; but in any case, how do you rotate the fill "after" you have set the fill. In Inkscape (I use both), I can easily click on the fill, and the "fill" adjustment nodes are there; in Affinity Designer, the adjustment nodes seem to be gone forever once I have clicked off of the bitmap fill. If I want to adjust the fill, I have to re-fill the area with the bitmap image. Is there a way to adjust the fill after?
-
I am still having this issue. Does anyone know if it was resolved, I am on the latest version and it is doing this exact same thing.
-
firstdefence reacted to a post in a topic:
Help! Designer Is Only Selecting Background
-
Help! Designer Is Only Selecting Background
Mr. Sam replied to Mr. Sam's topic in Desktop Questions (macOS and Windows)
@firstdefence, thank you for your reply. I am aware of the ctrl left click to select an object, but that wasn't working. Strangest thing... This was taking so much time trying to find the correct ellipse to fill, that I ended up shutting down my PC for a day and taking a brake. Now, I'm back at it, and for some reason the standard double click on the ellipse/object works. There must have been some sort of bug in the program; but now we're back in business! Thanks again. -
Help! Designer Is Only Selecting Background
Mr. Sam replied to Mr. Sam's topic in Desktop Questions (macOS and Windows)
Update to the issue. I can select the parent object, but can not multi click objects nested under any parent object to select them. This is becoming SO time consuming. Fish 3.mp4 -
See posted video. All of the sudden, Designer won't let me double click to select any object, it will ONLY select the background. This is getting SO tedious when working with multiple objects. I have always been able double click (maybe more clicks) to select any object, even if it is grouped inside other objects... Click enough times, and the software will select it. About an hour ago; this stopped happening and I have no idea why. I click 1000 times and it will never select the object, only the background. I can click on the layer to adjust, but if I accidently click off, I'm back to the background and have to scroll to find the object I was on... This is maddening! Can anyone help me understand why Designer isn't allowing me to click to select an object. Test 1.mp4
-
Character Panel Not Displaying
Mr. Sam replied to Timothy NEWFIELDS's topic in Desktop Questions (macOS and Windows)
Thank you to all who posted here. I lost mine as well until I found this post. Ugh! this was berried way too deep!