JohnPNJ
-
Posts
21 -
Joined
-
Last visited
Everything posted by JohnPNJ
-
Edges of Objects are not opaque
JohnPNJ replied to JohnPNJ's topic in Desktop Questions (macOS and Windows)
Thanks again for all the help - this is great! -
Edges of Objects are not opaque
JohnPNJ replied to JohnPNJ's topic in Desktop Questions (macOS and Windows)
I'm not too familiar with the integer values of the objects - but for the rectangles, you are correct - changing the values to integers worked - so I thank you for that. Is there a way to ensure this doesn't happen so I don't have to change the values manually for every shape or object I transform? -
Edges of Objects are not opaque
JohnPNJ replied to JohnPNJ's topic in Desktop Questions (macOS and Windows)
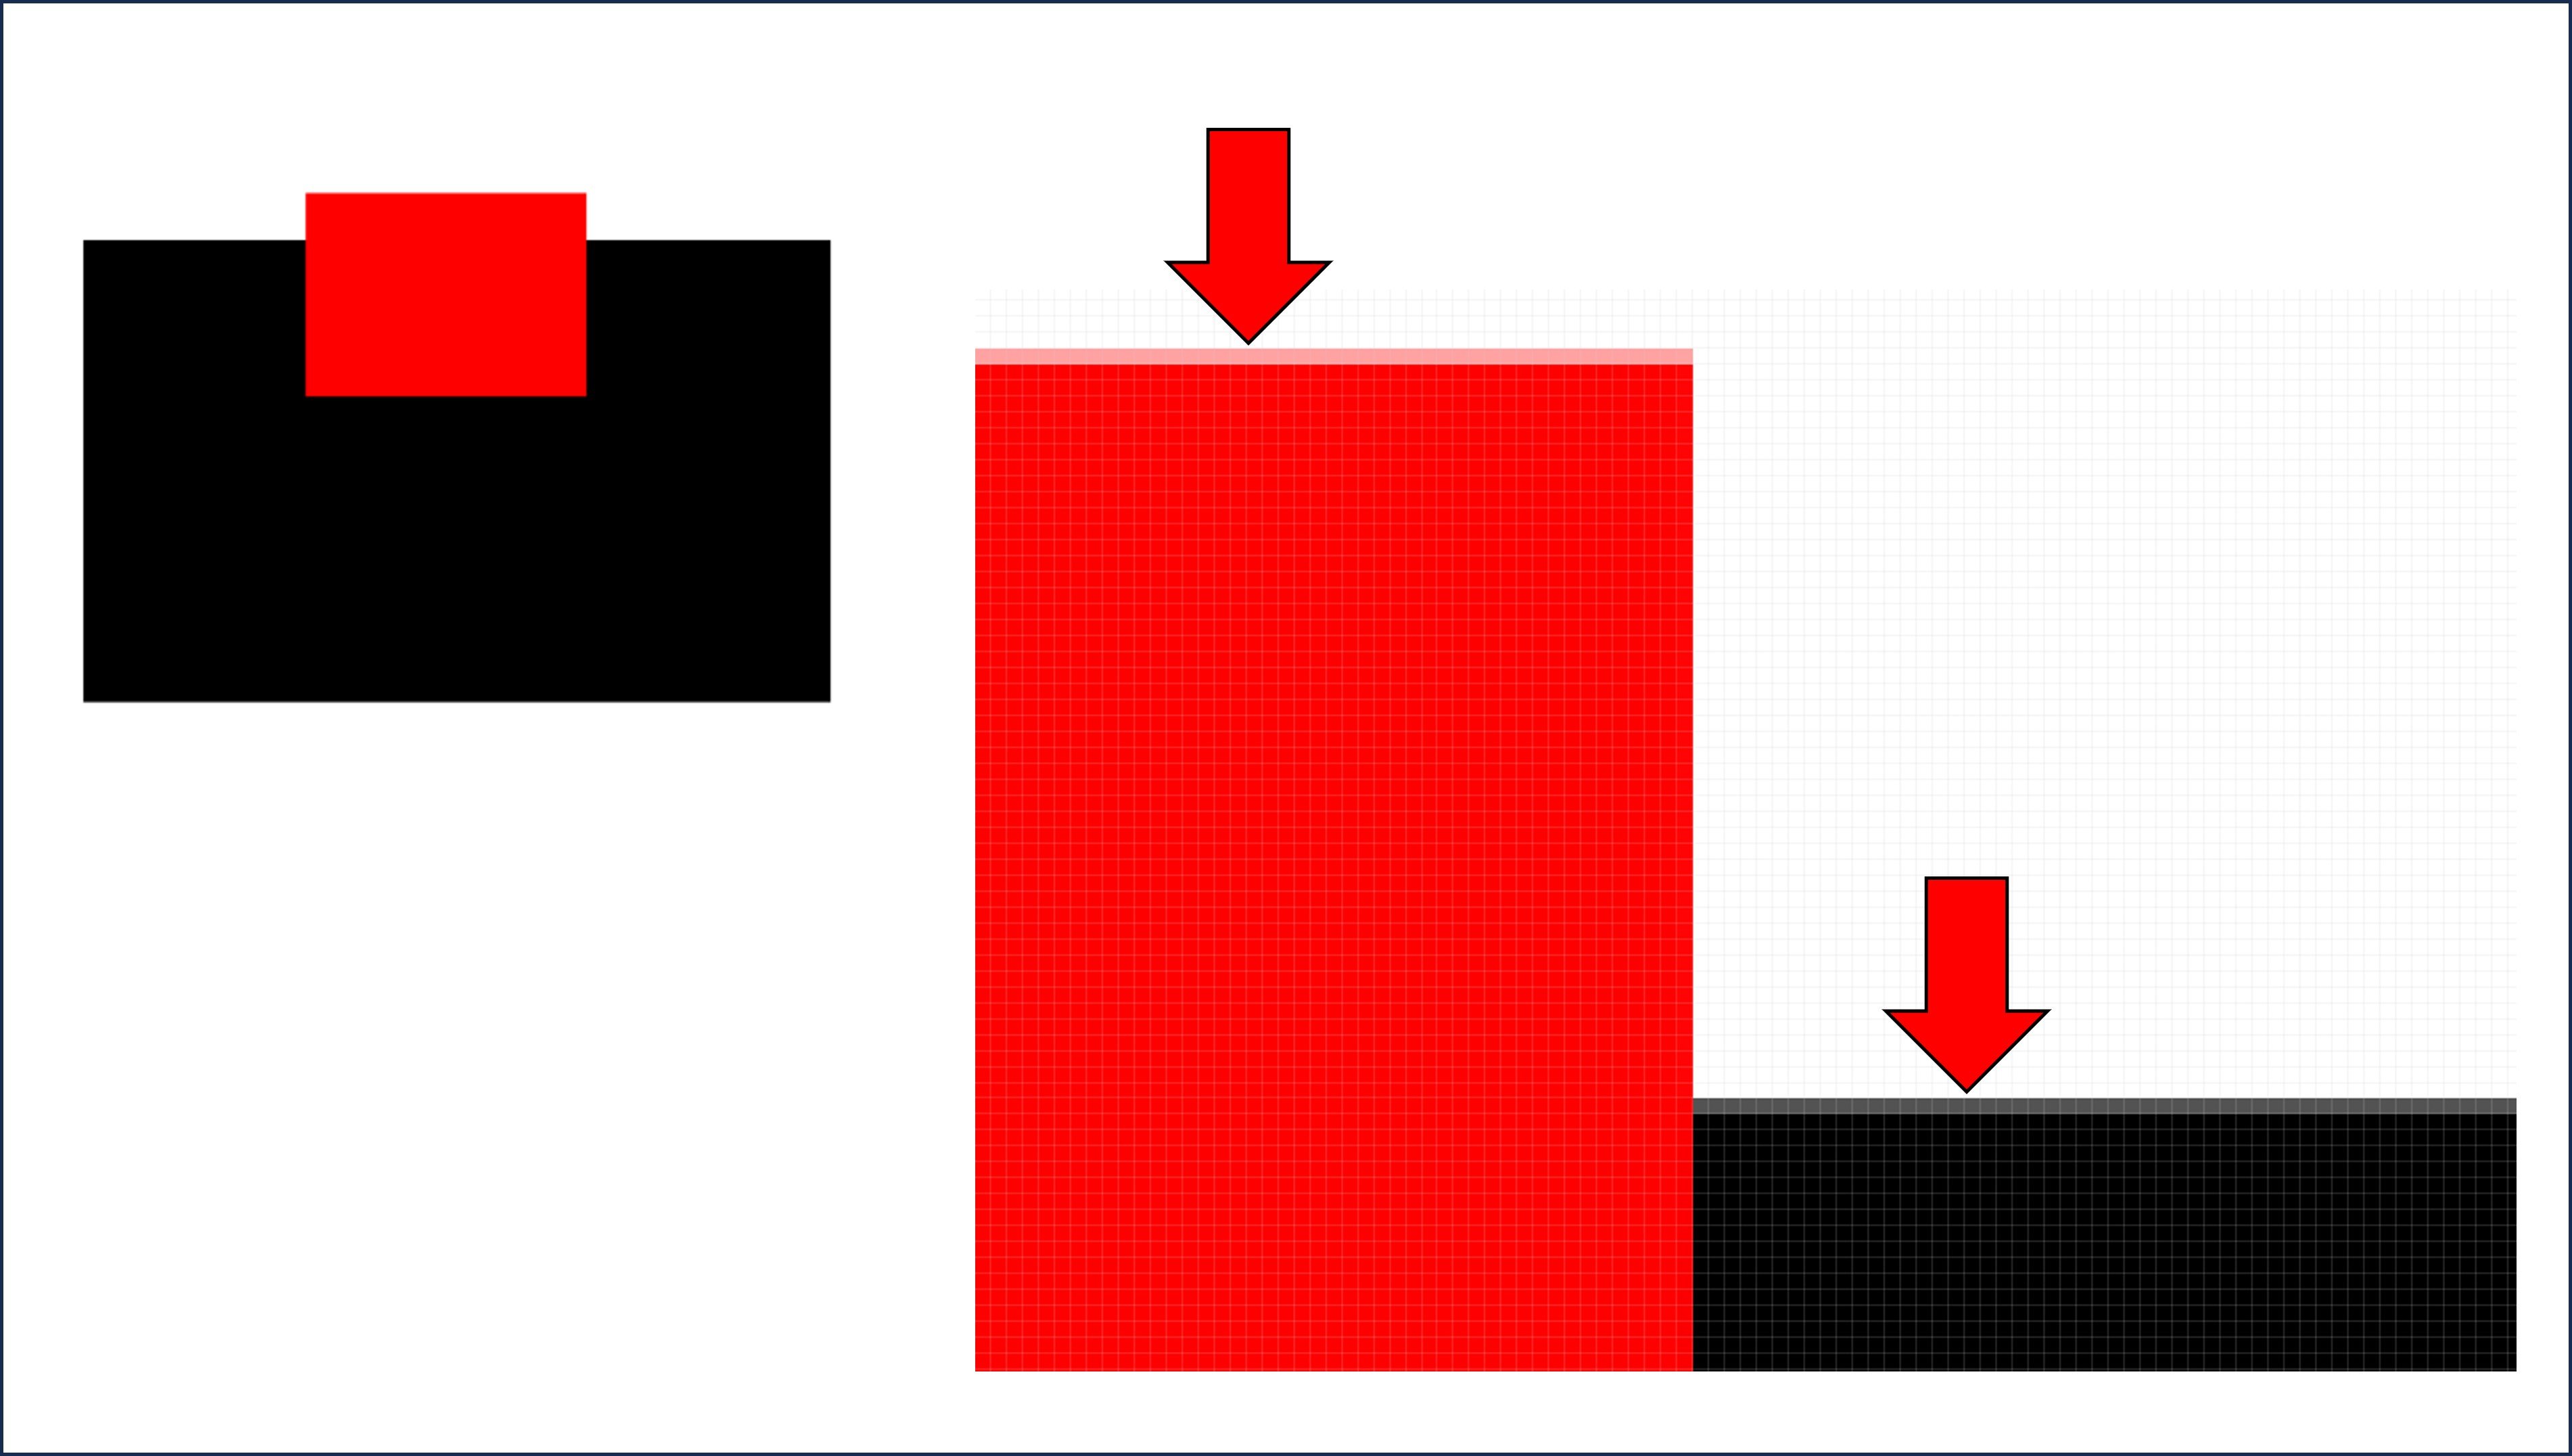
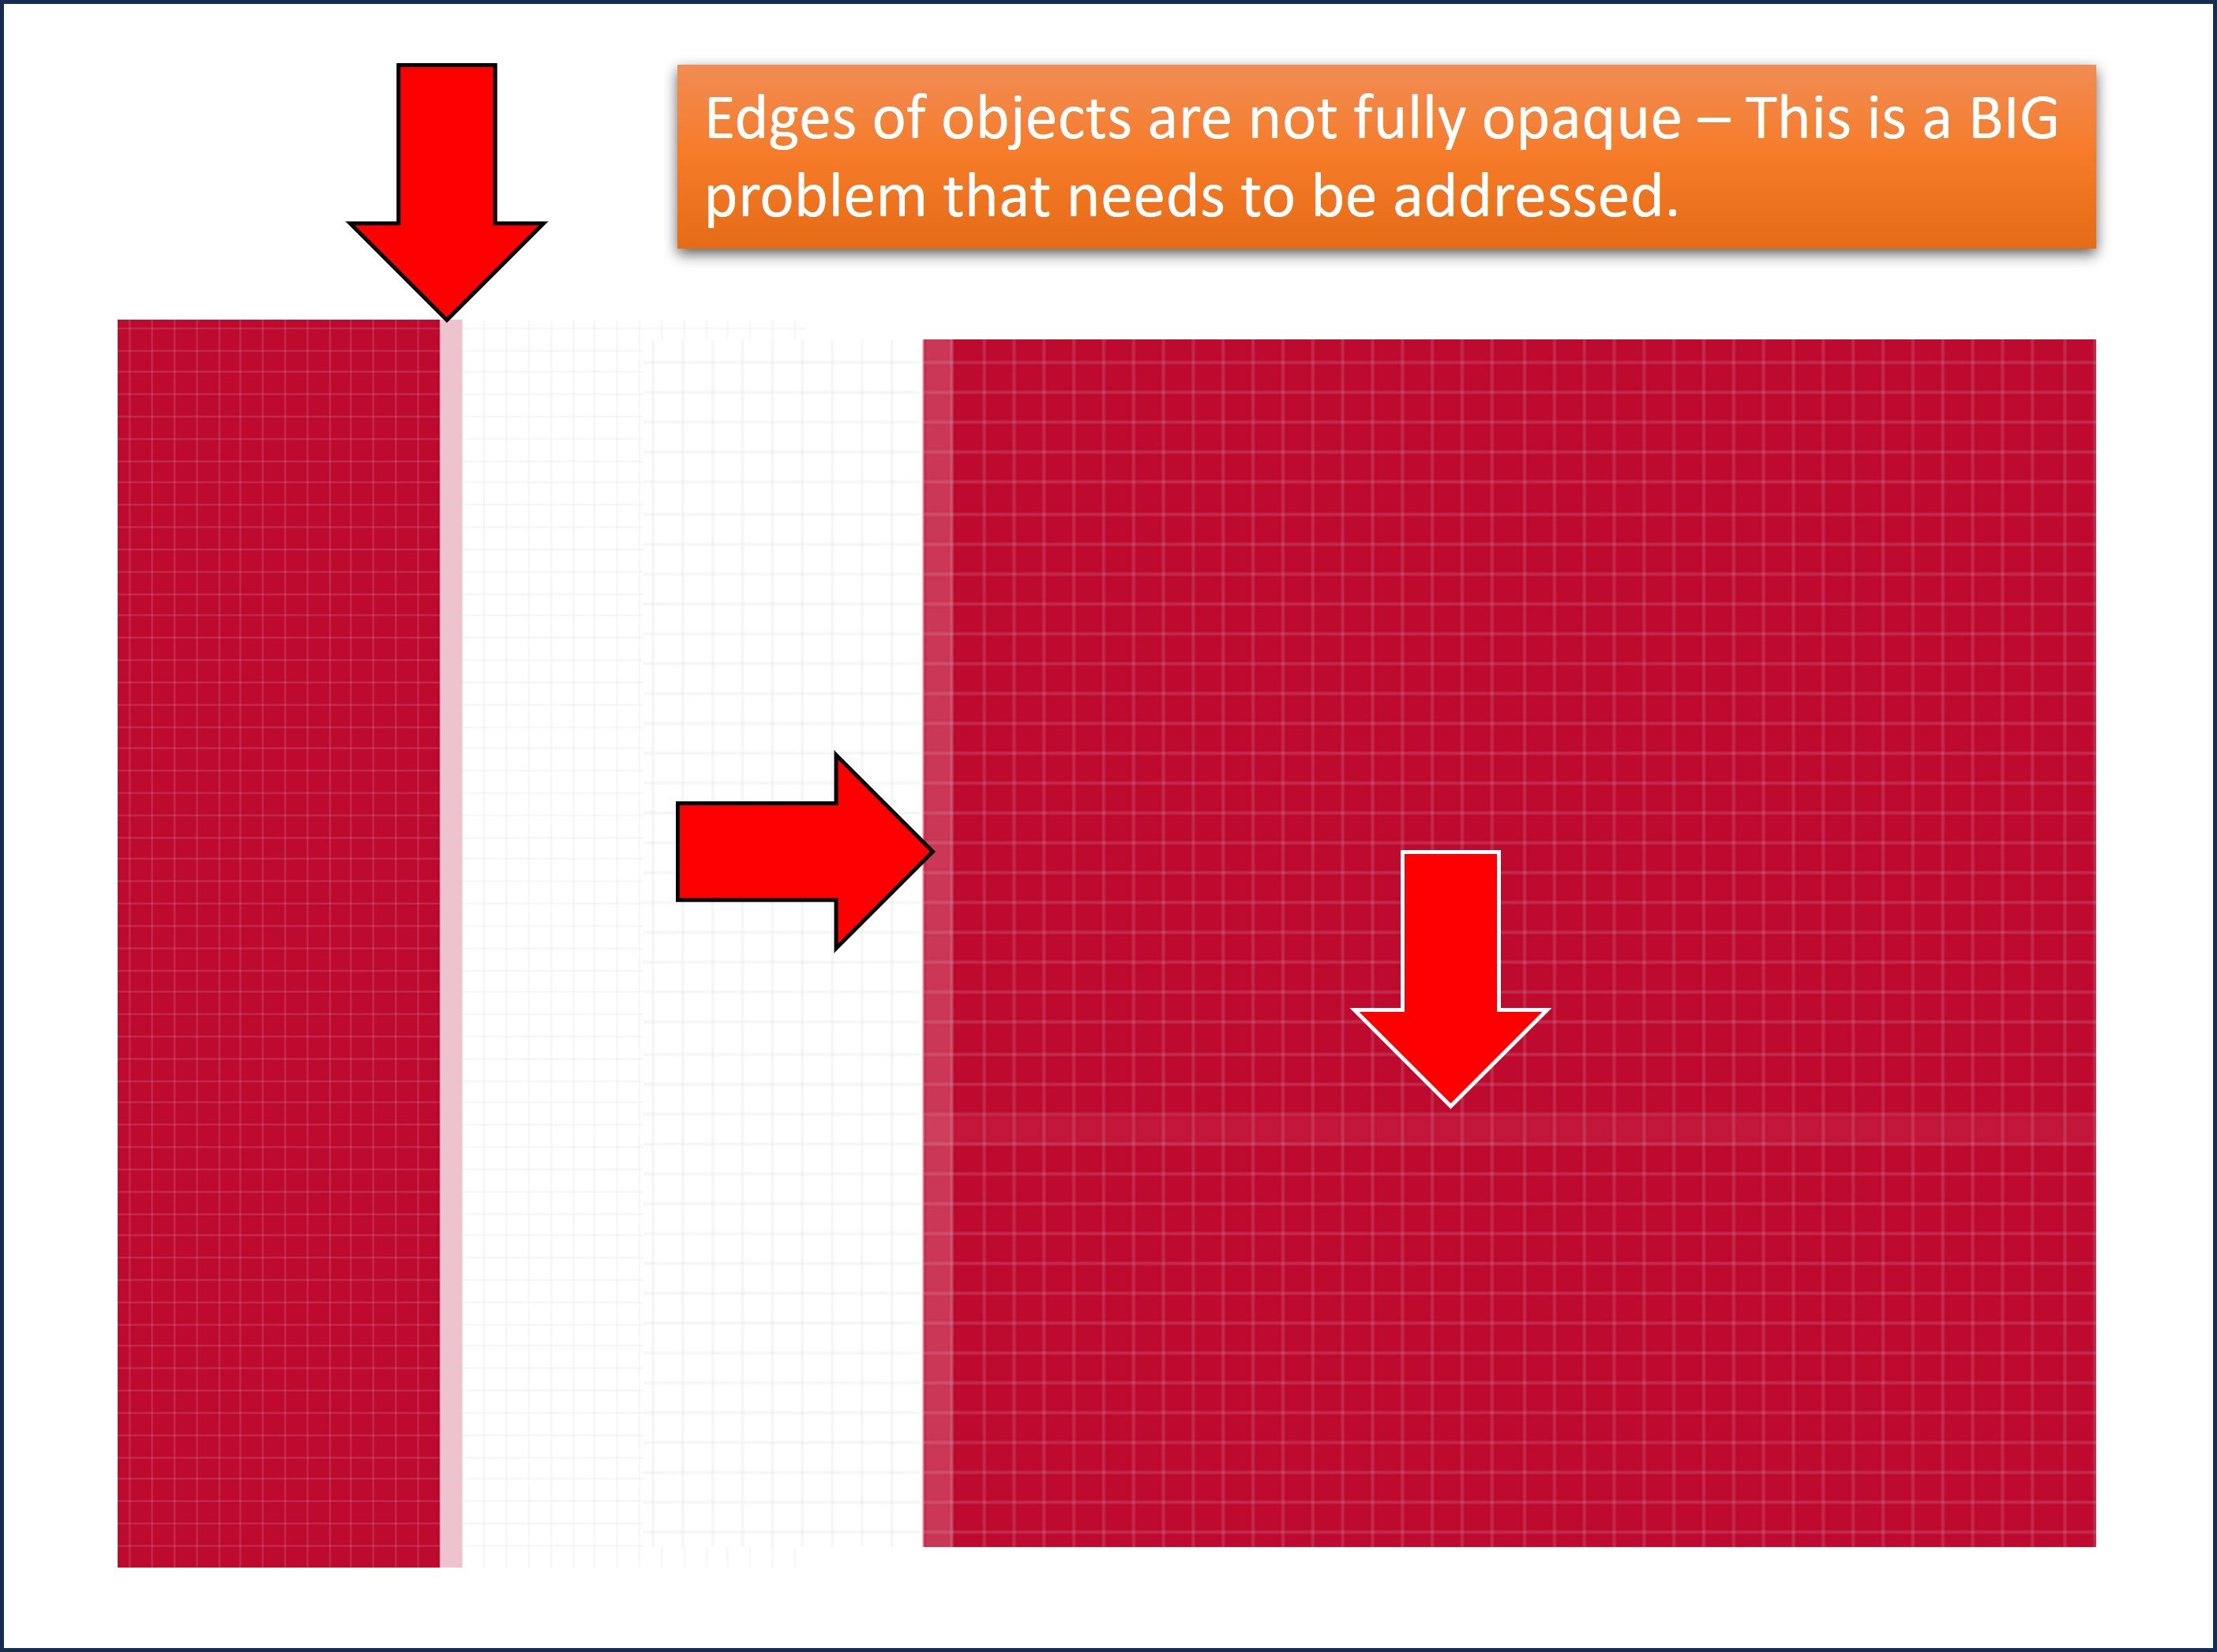
It's basically any edge - so if you try to overlap two objects - you will see the edges are partially transparent. I've attached a screenshot showing two simple rectangles on a white background. One is black, the other is red. From a zoomed out perspective - it looks ok. When zoomed in - you can see the edges. The problem is - if exporting to print - these will show up as small lines across the solid colors.
-
I apologize if this has been asked before - I tried searching but didn't find anything. In both Affinity Photo 2 Beta AND the non-Beta, the edges of ANY object has a half-opaque line of pixels. Are there any plans to fix this? This issue makes any seamless design IMPOSSIBLE (see attached image). Thank you for any help that can be provided for this.
-
This is a very good quality of life improvement - thank you.
-
Can't lock layer names: Affinity Photo 2
JohnPNJ replied to JohnPNJ's topic in Desktop Questions (macOS and Windows)
Ah ok - I didn't know the beta is going to expire soon - thanks! -
Can't lock layer names: Affinity Photo 2
JohnPNJ replied to JohnPNJ's topic in Desktop Questions (macOS and Windows)
Ok noted for future reference thanks -
Can't lock layer names: Affinity Photo 2
JohnPNJ replied to JohnPNJ's topic in Desktop Questions (macOS and Windows)
This question IS for the Beta version of Affinity Photo 2 -
I create templates in Affinity Photo 2 - and in many cases, I'll create a layer or layers where I'll place an image in that layer. Then I'll name the layers - for example "Left Page" and "Right Page". After exporting that image - if I click on that layer and "Replace Image" to swap with a new image - the layer renames itself to that image file name. Is there any way to lock the layer name so it doesn't change each time I replace the image with a new one? Locking the layer doesn't protect the layer name. I was able to do this in Photoshop - the layer name didn't change whenever I replaced the embedded image.
-
Sure it does - maybe Serif can leverage technical support from Canva.
-
Agreed. Hopefully that changes at some point. Now with Canva's backing - it may be possible.
-
I don't need a trial for six months. Why?
JohnPNJ replied to Mckpx's topic in Feedback for the Affinity V2 Suite of Products
I also use PSD mockups - so a Mesh Warp Live Filter that correctly converts PSD smart object mesh warps would be a real game-changer for sure. Keeping my fingers crossed that we see this update in the near future. Especially now that many people are seriously considering leaving Adobe for Affinity - this would be huge. -
I'd personally love to have these available for Android as well - Photo in particular.
-
Product Mockups Question
JohnPNJ replied to JohnPNJ's topic in Desktop Questions (macOS and Windows)
Cool - thank you for the info! -
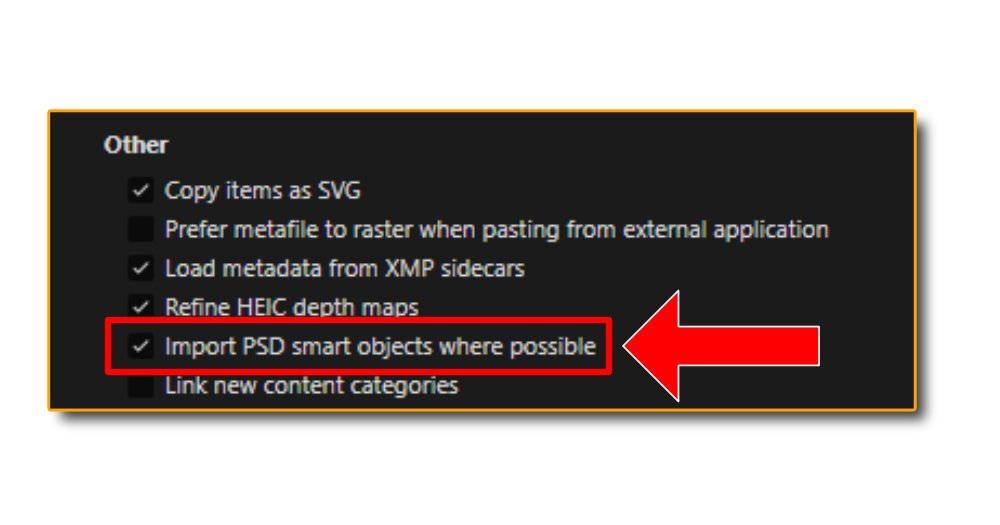
I'm a huge fan of Affinity Photo 2 - and while I have the "Import PSD Smart Objects where possible" option checked - I'd like to know if it's possible to create these templates from scratch within Affinity Photo 2 without the need to open a pre-made PSD template.
-
QR Code Tool
JohnPNJ replied to Ash's topic in [ARCHIVE] 2.5, 2.4, 2.3, 2.2 & 2.1 Features and Improvements
I dig it. -
Thanks - I'll check it out!
-
Agreed. I'd like to see more options for transformation than just Mesh Warp and Perspective Warp, like skew, distort, etc. If there are more options than the two I mentioned, I'd like to know how to access them.
-
Thanks for the update! I haven't attempted replacing a PDF yet. The image replacement for my mockups do work now which is great. Thank you for your help!
-
So far in my tests, this has indeed been fixed in the latest update. This is very helpful when creating mockup templates. A big thank you to the team for fixing this!
-
I created a few product mockup templates - which work just fine on my 2.1.1 license version. On the Beta version, when I try to click "Replace Image" in the mesh warp layer, it crashes every time. On my normal version, when I click "Replace Image", I can choose the image, click on it, and the mockup will be updated correctly with all warping working perfectly.
- 1 reply
-
- 1
-