Thane5
-
Posts
21 -
Joined
-
Last visited
-
 Thane5 reacted to a post in a topic:
How to Edit the Alpha Channel
Thane5 reacted to a post in a topic:
How to Edit the Alpha Channel
-
I also just tried the workaround with "alpha layer on top set to erase", and was a quite confused why it wouldnt work with my pixel layer at first. Turns out i had to lower the left end of the "Source layer range" down just a bit, or else the hidden pixels would be gone still. Aufzeichnung 2024-04-21 172132.mp4
-
I just ran into this issue. Very annoying. As flawed as GIMP is, it deals with my transaprent textures much better. It even has this checkbox which lets me choose the exact behavior when exporting: However what i don't get, is why Affinity photo seemingly discards transparent pixels already on import, at least with certain textures i'm currently using. Maybe they are hidden in those background channels? I couldn't really find out how those work. Small edit regarding that second issue, i just managed to get the entire color channel back by inverting the background alpha. But man, this should not be so confusing.

-
Thane5 reacted to a post in a topic:
Photo 2.2.1 - Tone Mapping GUI: no "double click to reset" on sliders
-
Olidoesaffinity reacted to a post in a topic:
Collapse panels to the side
-
Ugly color shifts in RAW highlights
Thane5 replied to Thane5's topic in Affinity on Desktop Questions (macOS and Windows)
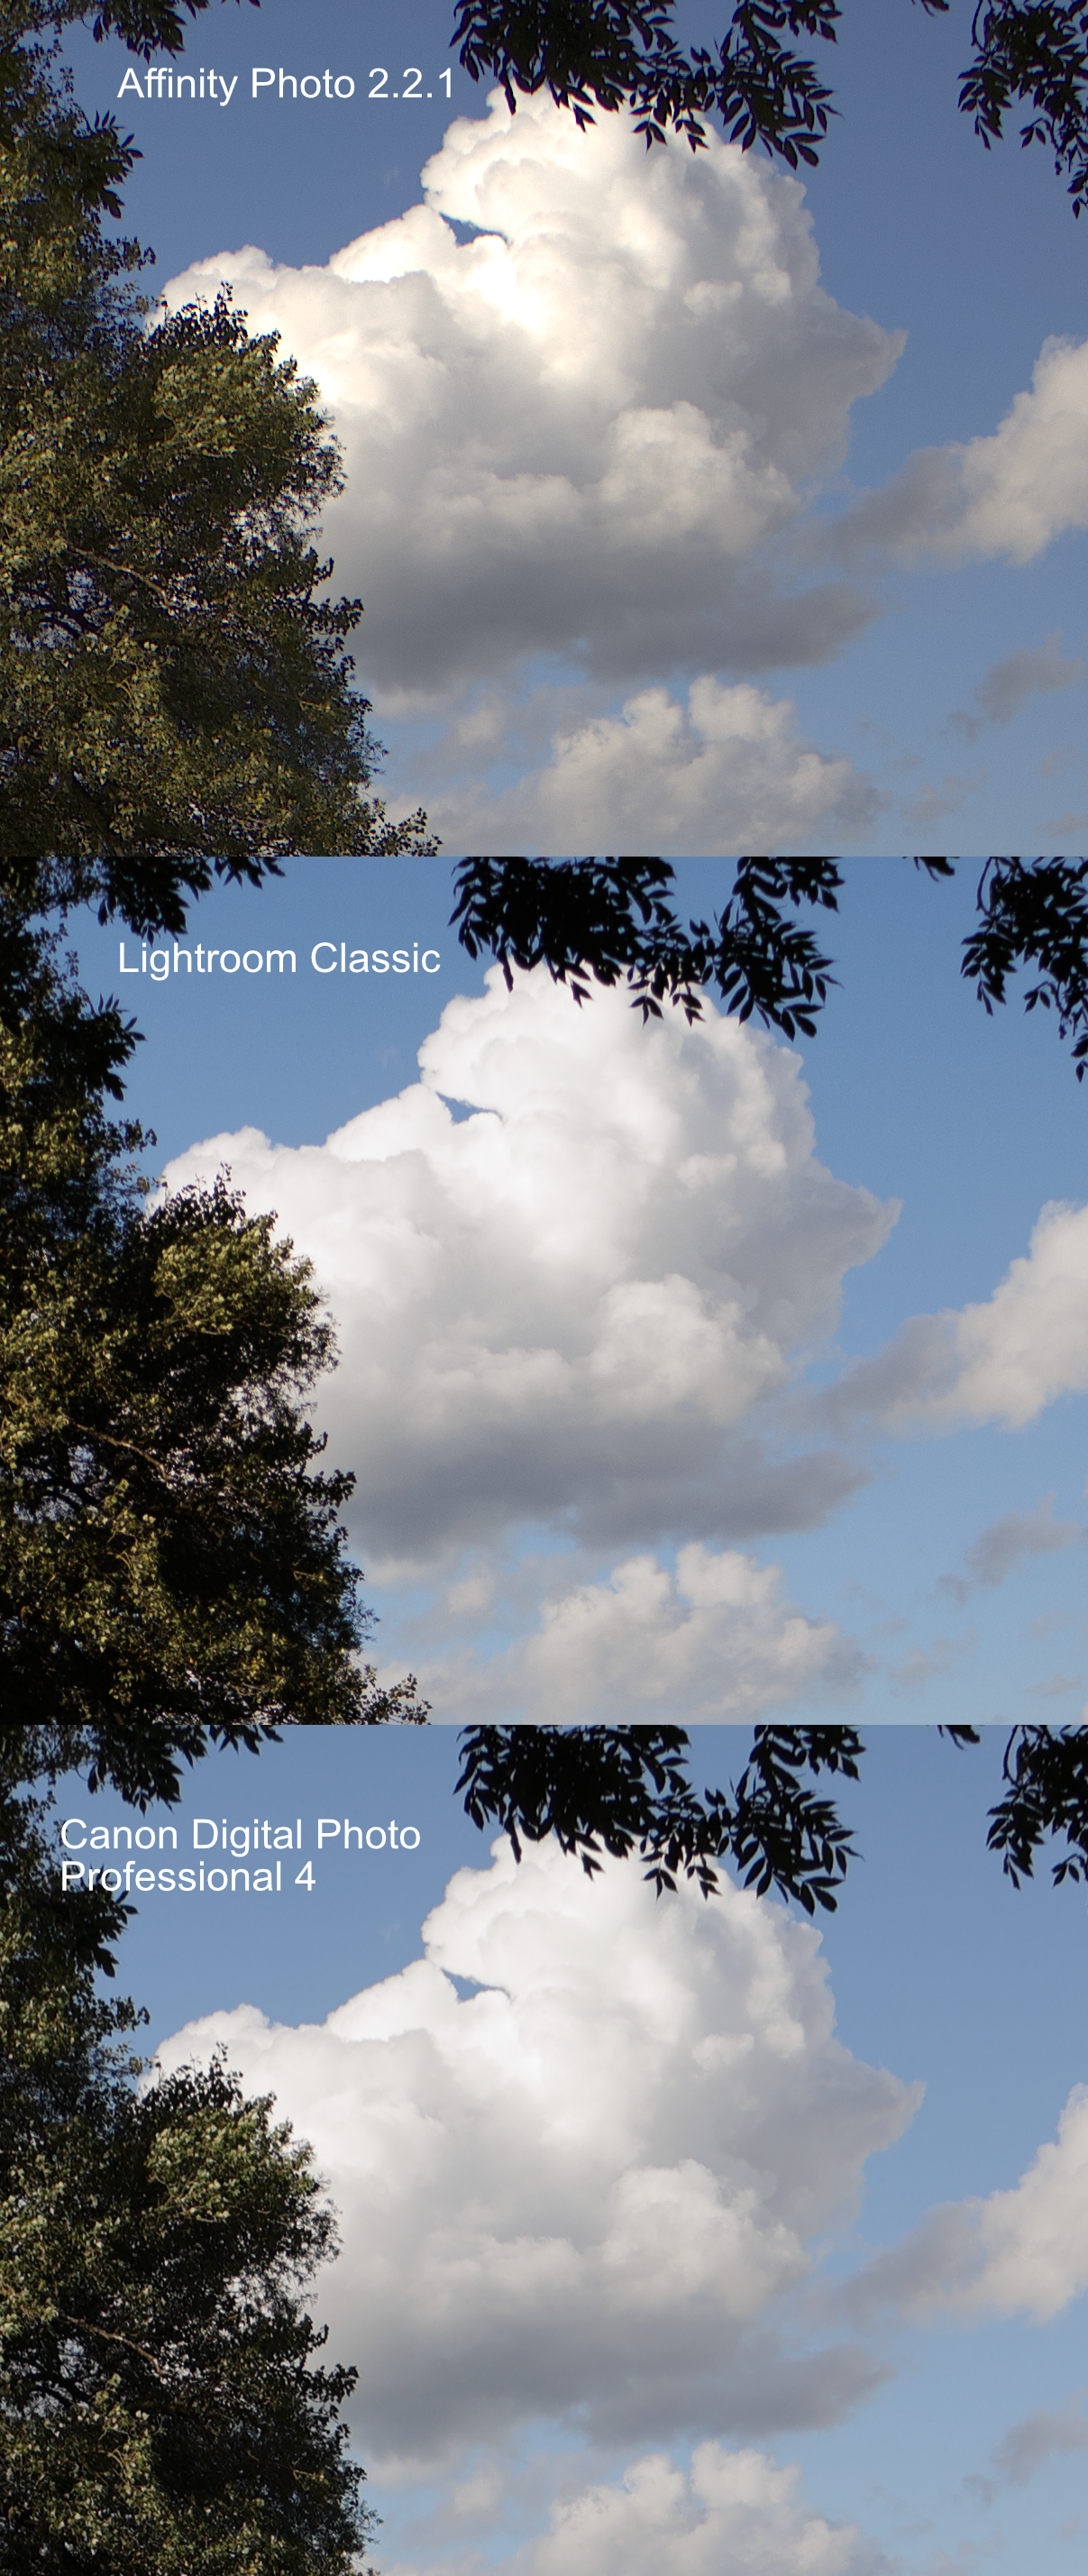
Ah, good to know. This is definitely annoying, especially now that i'm starting to see it everywhere... I also compared the same file using Darktable, which to my understanding, also uses LibRaw. Surprisingly, the clouds looked perfectly fine in Darktable by default. However in the "History" panel i saw that its automatic adjustments applied the "Filmic RGB" Module. When disabling that, the clouds suddenly look near identical to Affinity Photo again. So it seems there is an open source solution to this problem available, it is just missing from Affinity Photo. Maybe AGX can be that solution? From my understanding it is a similar colour-space transform thingy like "Filmic", except newer and better. In fact, Darktable is also currently working on an AGX implementation for their next update. -
Hi, I wanted to edit this raw photo (See attachement) in Affinity Photo, when i noticed that these clouds looked quite ugly. Their highlight falloff is steep and the colours shift towards orange. I tried various adjustments in the "Develop" persona (Exposure, highlights/shadows, tone curves), but i did not manage to get rid of it. Because i wanted to make sure it was not an issue with the raw file itself, i opened in two other tools, Lightroom Classic and Canon's free, in-house raw developer, Digital Photo professional 4. The two other tools handle this case visibly better. Why is that? And how can i get the same results in Affinity Photo? IMG_0426.CR3
-
Preset is automatically selected, but not applied.
Thane5 posted a topic in V2 Bugs found on Windows
In both the stable builds and the 2.1 beta, when i open a RAW file in APhoto, it will automatically show my preset as selected, but the preset will have no effect. As a workaround, i have to deselect, and then select it again. Video example: I have a special preset for the "Tones" panel, that is supposed to make my image brighter (to compensate for Canon's Highlight Tone Priority feature). I use it on every image, so it always is selected when i close affinity. Here, when i open a new photo in it, the panel seems to have my preset selected. However the brightness is not changed, unless i deselect it and select it again, which means several unecessary clicks. Aufzeichnung 2023-04-30 143648.mp4 -
walt.farrell reacted to a post in a topic:
Development Persona: Image metadata not updating in context toolbar
-
Dan C reacted to a post in a topic:
Development Persona: Image metadata not updating in context toolbar
-
Looking into the 2.1 beta, that seems fixed, yeah.
-
When opening two raw files in a row, specifically two that were taken with different cameras, the context toolbar will only display the file info of the first image that was opened, even if you switch between the images. For example here, first opened an image taken with the Canon R10, then one with a Panasonic GX9. The latter is now my active open image, but the text in the context toolbar never changes, and is stuck with the info of the Canon R10 image that i opened first.
-
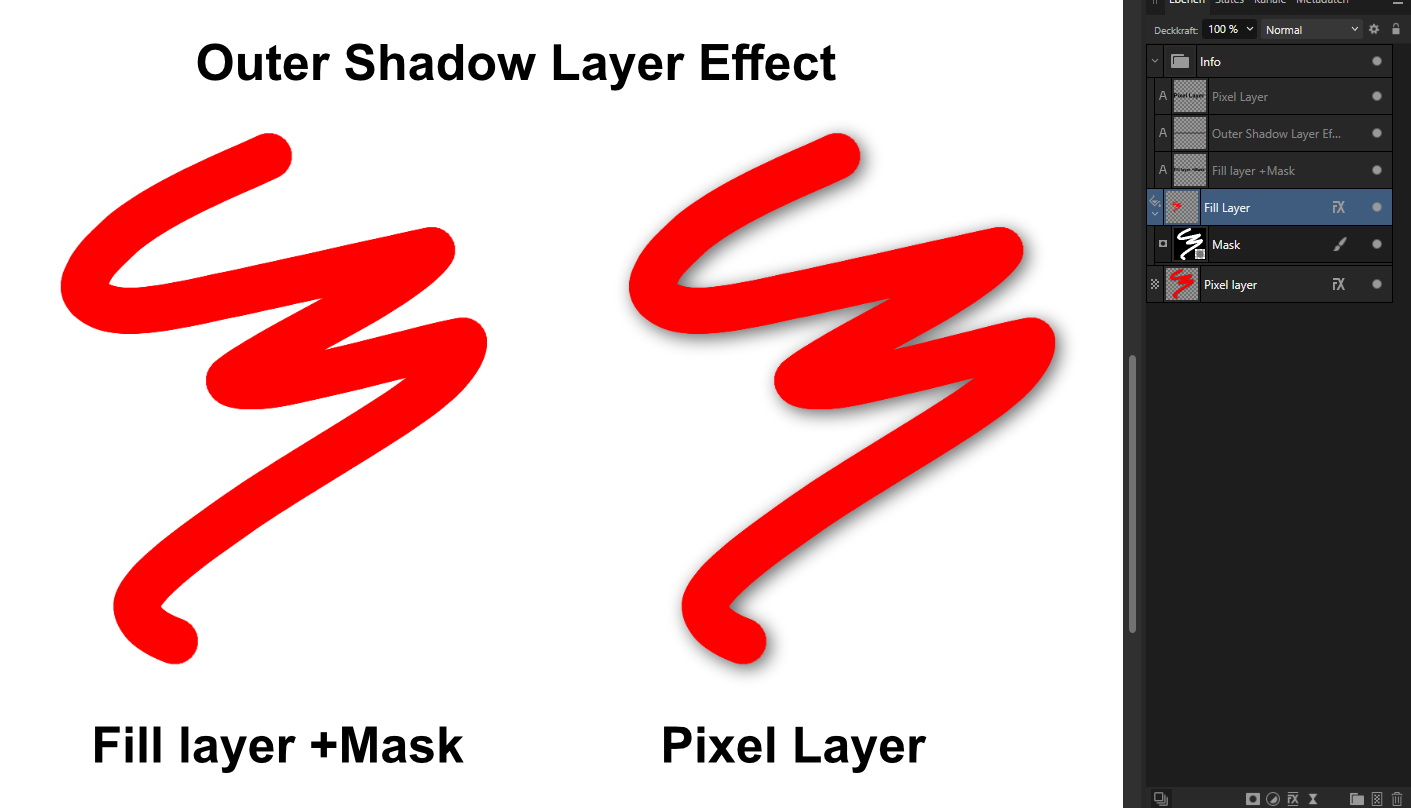
Here i created a red fill layer, added an empty mask, then painted this stroke into the mask. None of the layer effects have any "effect"😶 on the fill layer. Only when i converted it to a pixel layer, and added the shadow effect again, it would be visible. It seems to me like this should be working, so i guessed this might be a bug.
-
Aufzeichnung 2023-03-04 104930.mp4 Here is a video of me stacking two warp groups on top of a simple vector shape. It is broken to the point that it is barely usable. Tested in release 2.0.4 and beta 2.1.0.
-
Thane5 reacted to a post in a topic:
V2 / Windows / MSIX: Files won't open when dragged onto Affinity Program Icon / Shortcut (On the Desktop*)
-
Oh awesome, i wasnt aware of that option. Even better news for Affinity 2 users: In this window (Which btw you open with the gear icon next to layer blend modes) You can simply disable Anti-Aliasing in a dropdown!
-
We really need a way to turn off the bicubic filtering when rasterizing or exporting vector shapes. I was thinking there could be a workaround by rasterizing the shape at four times your export resolution, then downsizing it using nearest-neighbor. But for some reason, that still introduces some soft pixel edges, even if all points are aligned to the pixel grid of that lower resolution.
-
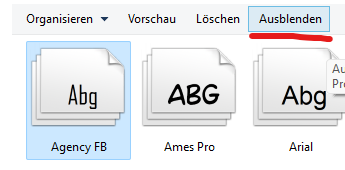
Picking a font from the dropdowns can be annoying, because it is often cluttered with system fonts and fonts for foreign languages that one rarely uses. Because of this, windows allows you to selectively hide fonts in either the control panel or the settings app. These fonts are then excluded from font selection dropdowns without having to delete them from the computer. Unfortunately not many programs support this feature, but one of them is the classic windows text document editor, WordPad. Maybe this is something that could be implemented faster into Affinity, rather than building a new solution for hiding fonts within the app itself.
-
Some recent cameras, like the Canon R7 and R10 still are not supported for RAW development in Affinity Photo 1. I read that version 1 will only get smaller fixes from now in, but could that include updates to newer RAW formats, or will i have to buy 2.0 for that?
-
Thane5 reacted to a post in a topic:
Affinity V2, updates, pricing and no subscription [repost]
-
Huge file size after RAW developing with embedded Raw-Layer
Thane5 replied to Guenterm's topic in V2 Bugs found on Windows
Same issue here: a Compressed CR3 raw file (by Canon) that is only 15MB by itself, ends up beeing 178MB when saved as a embedded raw file in APhoto. Not as much of a crazy file size, but i'll probably rarely ever use embedded raw, especially when the linked one exists. -
Chris B reacted to a post in a topic:
Cycling through presets in develop persona does not apply the presets
-
Oh, i was not aware that this is a windows feature. I've always scrolled through layer blending styles this way and assumed it was meant to work that way everywhere.