Peter Brunette
-
Posts
11 -
Joined
-
Last visited
-
 Old Bruce reacted to a post in a topic:
I can't get the blur brush to do anything
Old Bruce reacted to a post in a topic:
I can't get the blur brush to do anything
-
walt.farrell reacted to a post in a topic:
I can't get the blur brush to do anything
-
walt.farrell reacted to a post in a topic:
I can't get the blur brush to do anything
-
Thanks, Walt. I hadn't read your latest post when I made my last one, but you hit the nail on the head.
-
Hello walt.farrell, PaulEC, and Old Bruce. Thank you all for your help. I've finally got the brush to do what I wanted it too. In the end, what had stumped me was how subtle the blurring effect is (as Bruce kindly pointed out). Even with the Opacity and Flow set at 100%, and even with the image magnified at 2X or 3X, it still took more than one pass with the brush for me to notice any effect at all. Cheers, Peter
-
Hi, Old Bruce. Perhaps I didn't express myself very well. I wasn't trying to blur the adjustment layer. I was working with the image itself (the pixel layer) after the adjustment had been applied. Nevertheless, I couldn't get the Blur Brush to apply any blur at all, even a subtle one.
-
Hi, PaulEC. The problem doesn't seem to have anything to do with the fact that I had selected a portion of the image. I know that because I tried the same thing on a fresh image before making any selection, and it didn't make any difference. I wasn't trying to add any colour. All I wanted to do was to blur some of the hard edges in the image by painting over them with the Blur Brush. What is the Blur Brush for, if it won't do that?
-
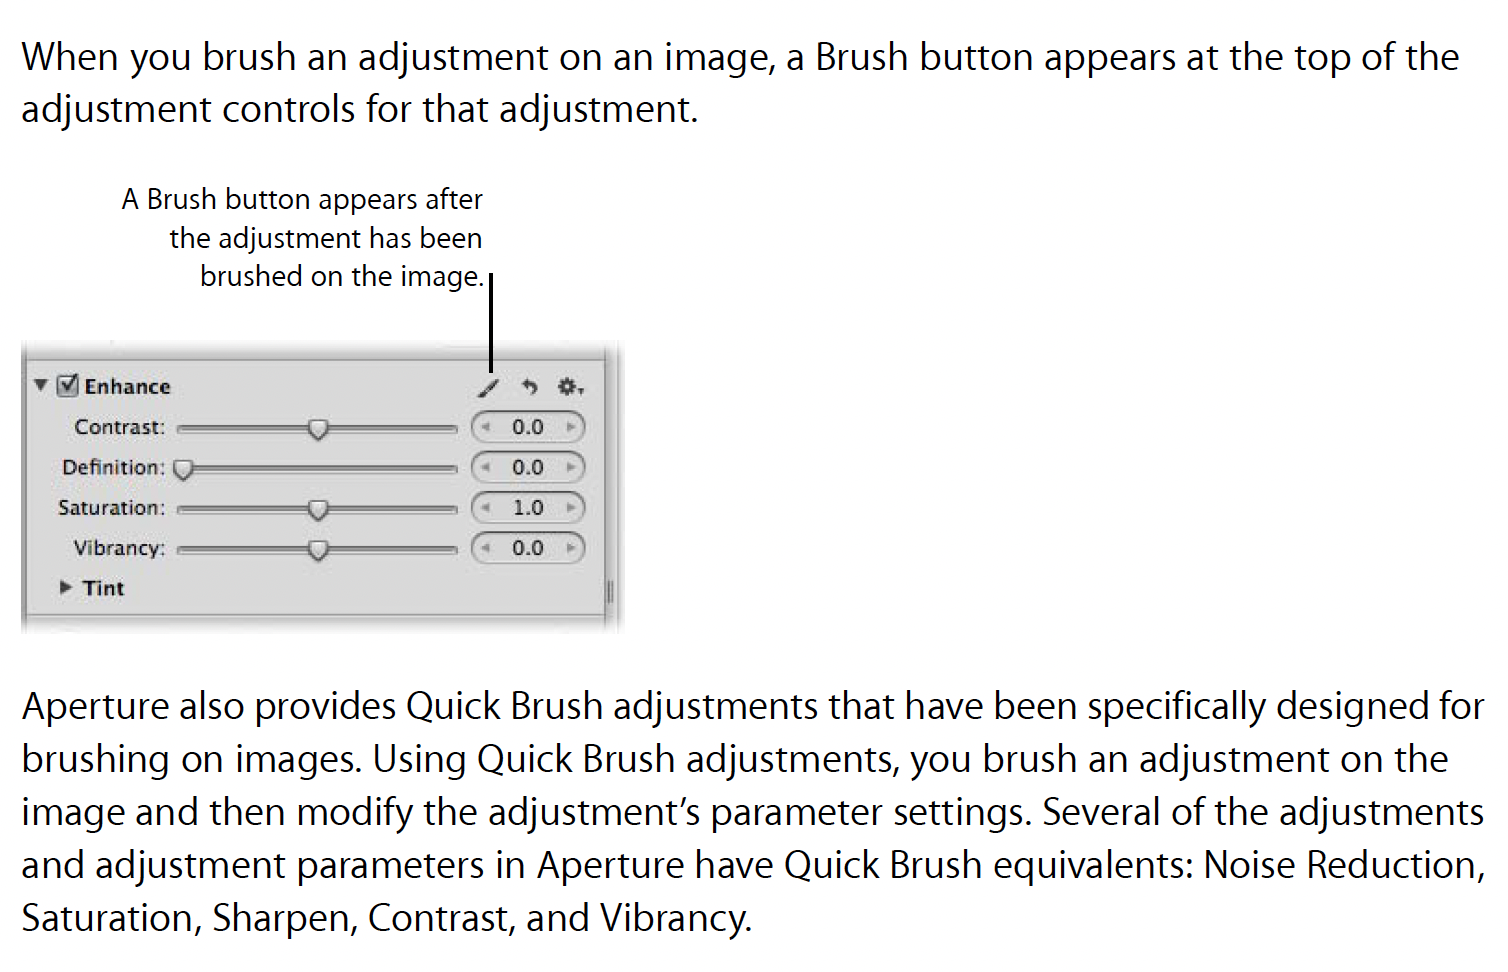
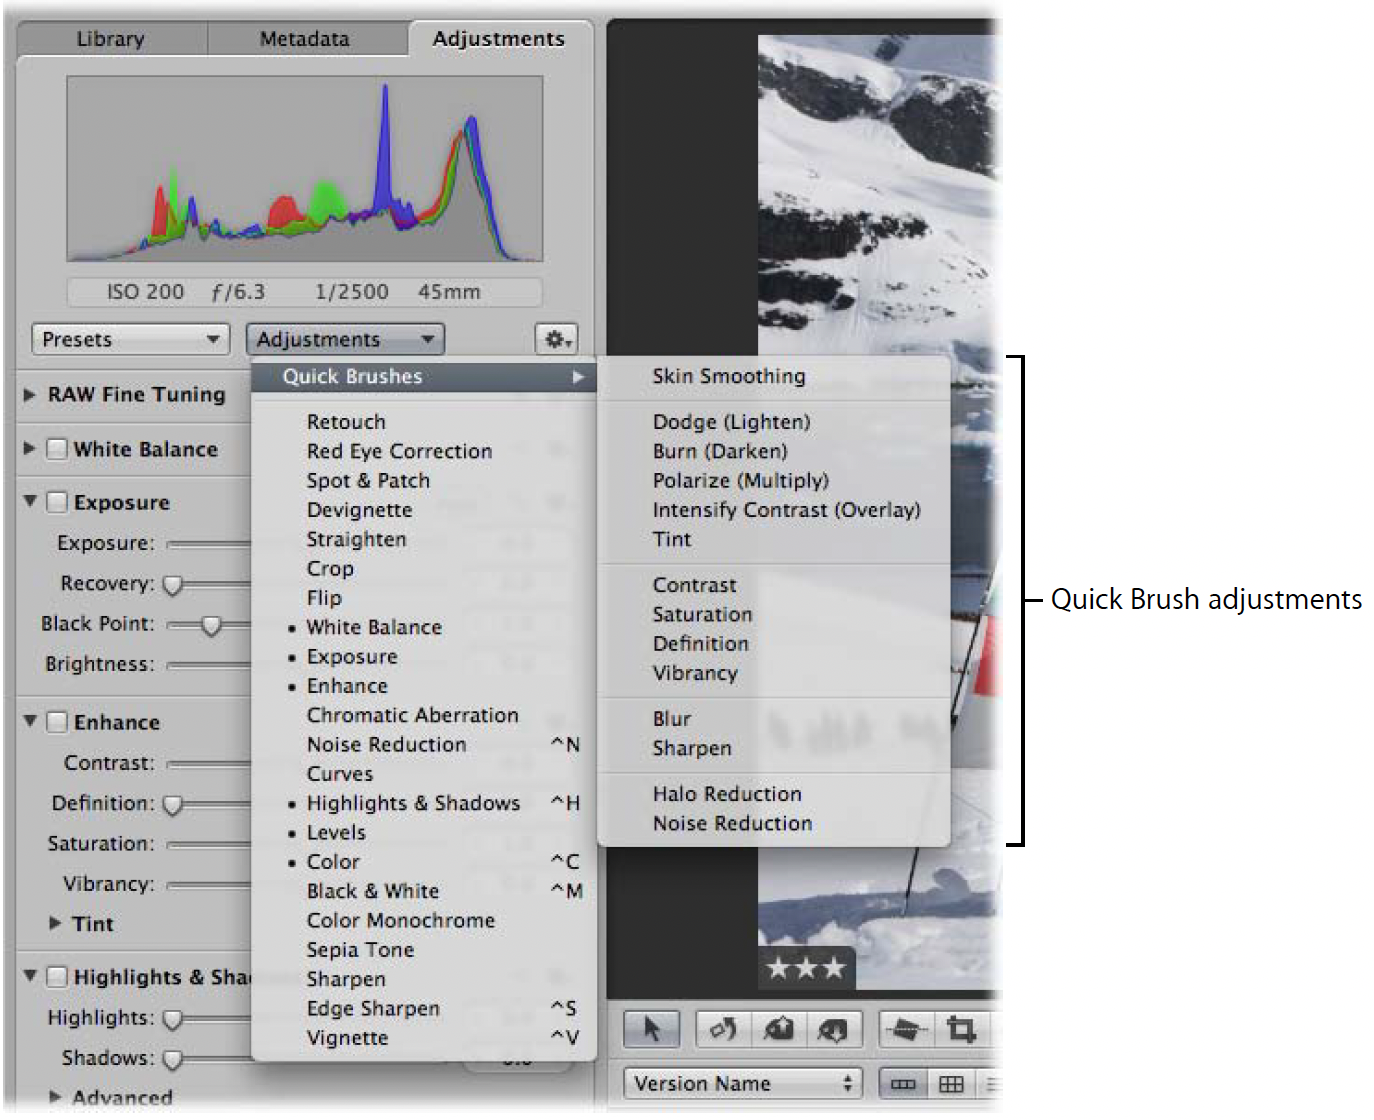
Affinity Photo has a pretty good selection of brush tools, but I wish it had a few more. One reason I miss Apple's discontinued Aperture program was that, with one click, you switch between applying an adjustment to the whole image and brushing it in to selected areas (see screenshot). In addition, Aperture had several ready-made brush tools that seem to be missing from Affinity. These Quick Brushes provided a simple, fast, and intuitive way to apply Tint, Contrast, Saturation, Definition, Vibrancy, and Noise Reduction adjustments to selected areas of an image (see screenshot). Correct me if I'm wrong, but doing the same thing in Affinity Photo would seem to involve creating a mask layer and several additional steps.

-
What I was trying to achieve was to use the Blur Brush to soften the edges of the Selective Colour adjustment which I had applied to the sky. My understanding is that when I use a brush tool I can either paint in white, which applies the effect, or black, which erases it. These are chosen by clicking on the white or black circle at the bottom of the left tool bar. Metal is greyed out in the Performance panel of my Affinity Photo Settings (see screenshot below), so I can't seem to alter it.
-
 walt.farrell reacted to a post in a topic:
I can't get the blur brush to do anything
walt.farrell reacted to a post in a topic:
I can't get the blur brush to do anything
-
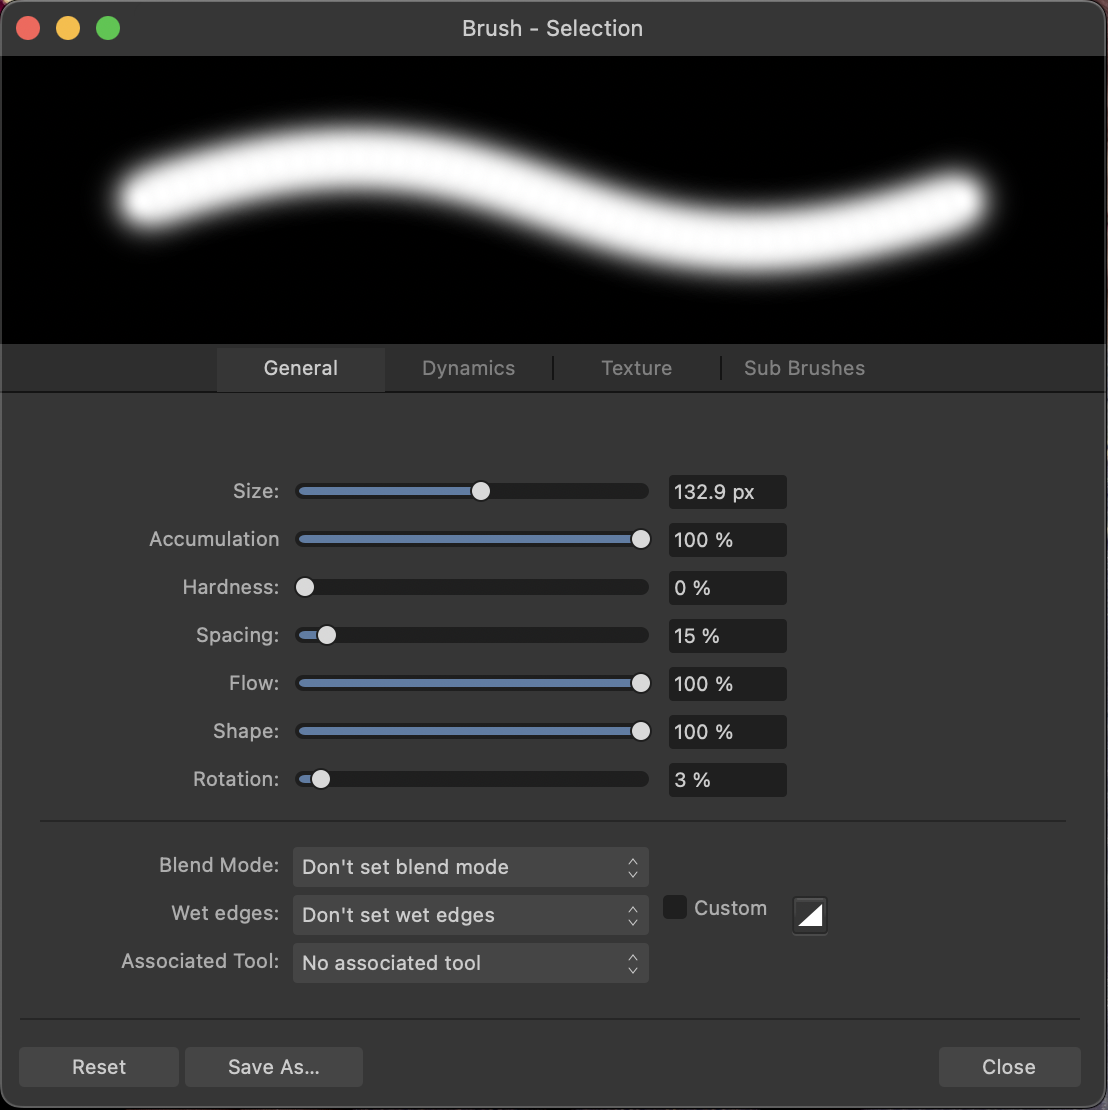
I selected the Blur Brush Tool in the left tool bar. Here's a screenshot of the kind of brush I had selected.
-
I'm using Affinity Photo 2.5.3 on Mac OS Sonoma 14.5.
-
I click on a pixel layer in the layers panel, click on the Blur Brush tool, set both Flow and Opacity to 100%, and paint in white. Nothing happens. What am I missing? 1974-11 S&P Wedding 2#5.afphoto
-
BeccaT reacted to a post in a topic:
Document will be flattened
-
Dan C reacted to a post in a topic:
Document will be flattened
-
Thanks, Dan. You cleared that up for me very nicely.
- 5 replies
-
- 2
-
-
- affinity photo
- apple photos
- (and 1 more)
-
When I use the Affinity Photo extension in Apple Photos, I get this message: "16MB change limit exceeded -- document will be flattened." This topic was raised in the forum a couple of years ago and some workarounds were suggested. However, nobody explained what "flattened" means. I'm using a 27-inch, 5K display, and I can't see the difference before and after the flattening. What exactly do I lose if I let Photos flatten the image?