Our response time is longer than usual currently. We're working to answer users as quickly as possible and thank you for your continued patience.
Search the Community
Showing results for tags 'AF-2116'.
Found 8 results
-
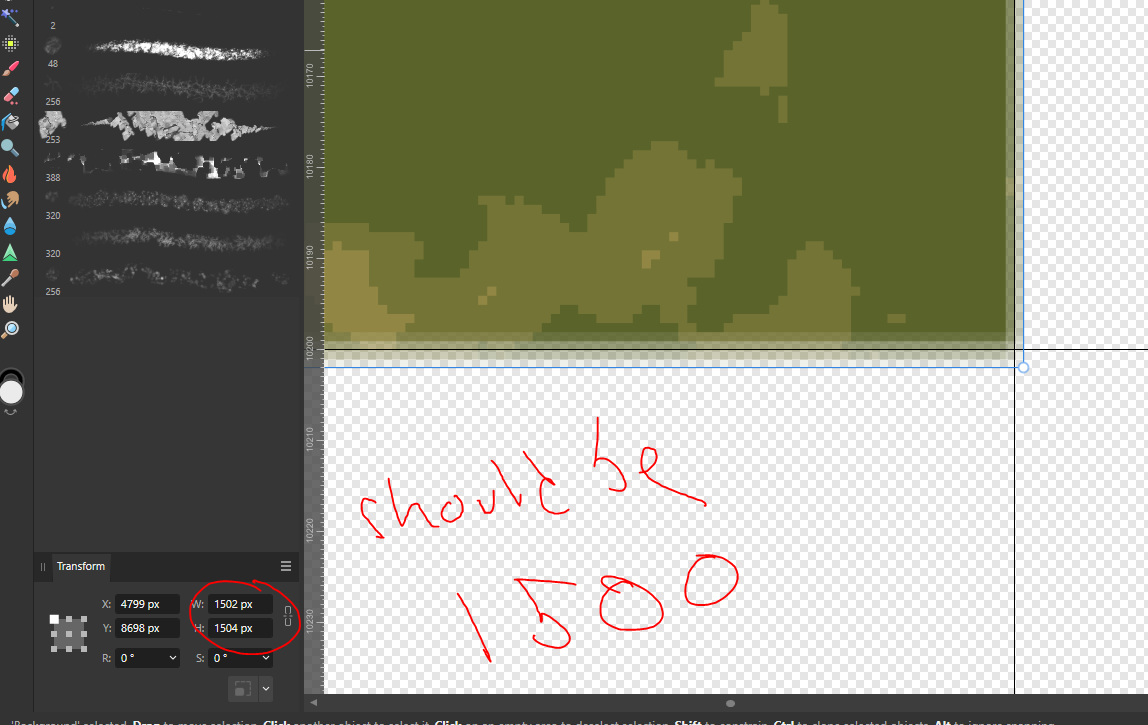
 Using marquee tool copy and paste to new layer adds transparent / semi transparent pixels on the pasted image - *when manually adjusting the size in the navigator. I've followed the online help doc to precise selecting but nothing helps. Selections should be pixel precise.
 -
 I'm trying to use the selection rectangular box to cut a clean, unantialiased chunk out of a bigger image and for some reason the program is cutting out a piece slightly bigger than the selection is and using it to antialias it. I don't want this, it want it to do what I ask it. The Antialias box is unchecked. How do I stop this, please.
-
 Hi, Affinity apps show a bug when using a pixel layer and creating pixel selection using the transform panel (while staying in e.g. rectangular selection tool) to increase size of selection copy, duplicate, or CMD+drag the selected area Expected: based on pixel perfect position and size, a sharp area should be copy/pasted. Observed: Bug 1: the selection gets extended by 1px on each side with semi-transparency Bug 2: while dragging the selected area, a semi-transparent residue stays visible, until switching to another layer (TC 0:12-0:20) Related to this thread Screen Recording 2023-07-04 at 22.03.18.mov selection and transform bug.afphoto
 -
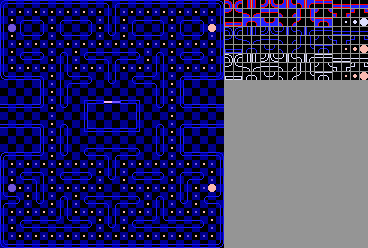
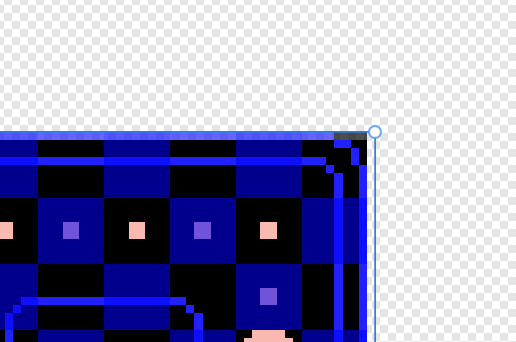
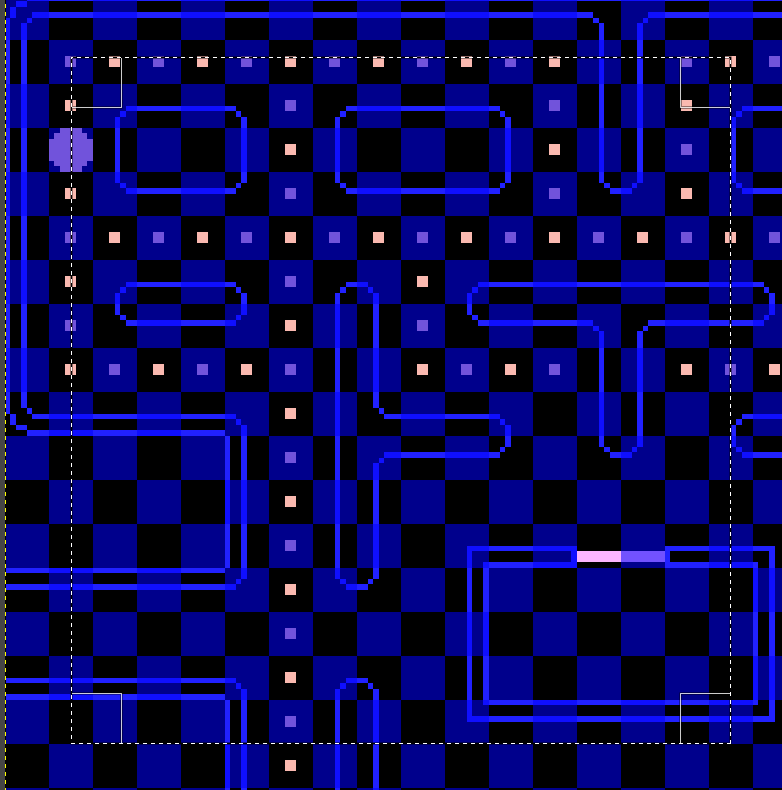
 Now this is probably me not understanding how the application works, and as someone who has come from Gimp, I am expecting what I am trying to do, to not be as difficult as it is. I have attached the original image I downloaded from the internet, and I am just trying to take the games grid and separate that into its own image. And this is where my issues begin. First thing that I do is place a marquee down as such, which fits the grid perfectly. From here, I have tried various methods to copy that marquee and past it into a new layer, every method that I have tried and found as ways to achieve this on the internet, always ends up the same. I end up with the pasted image 1 pixel bigger in the width than it should be. I could use some help as to what I am doing wrong. I have also tried to crop, and while that has cropped the image on the screen the layer shows it as not cropped and I do not know what I should be doing from that point on.
-
This is on Windows 11, I will attach a link that has the files necessary and a video explaining the issues. The problem is that as a new user, I have come accustomed to selecting something, changing that selection via resize handles, and/or manipulating its position and size. Which in Affinity Photo's case causes unexpected results, in some cases 3 different results. I have also made a suggestion, that the marquee tool can be manipulated via handles, an example of this would be like this I have attached the link below to the uploaded file to show what I am doing and the different results that I get.
-
 I've made a rectangular selection and I need to adjust its size to line up with an underlying image. But there are no resizing handles on the marquee and no way to invoke any that resize the selection and not the selected part of the image. This is a fundamental UI affordance in this kind of application. Its absence is embarrassing.
 -
 Version: 1.9.2.1035 Steps to reproduce: - Open a large image (I tested a 2048×2048 PNG) - Set Feather to 0 - Make a very small pre-selection (e.g. 16x16) - Use the Transform Panel to make the selection substantially larger (e.g. 1024x1024) - Copy - File -> New From Clipboard If the pre-selection is closer to the intended selection size the feathering becomes less.
 -
 Since there is no proper way to define precise selection size, the suggested way is to select an area with a selection marquee and scale and move that selection marquee using the transform panel. There is an issue with this approach however, as it seems the selection marquee scaling has some weird sampling and the resulted selection has blurry edges and is actually of a different size than what is specified in the transform panel. This behavior is amplified if the initial selection marquee is very small and is scaled to a very large size, as shown in the following example. Steps to reproduce: 1. Open a 2048 image and select a small area in the middle of the image using Rectangular Marquee Selection tool 2. Change X, Y, W, H of the selection to 0,0,2048,2048 3. Copy selection to clipboard and go to File -> New From Clipboard You can clearly see that the resulted pasted image has weird blurry edges. In a lot of cases when you copy and paste a scaled selection, the resulted pasted layer also has a weird increase in size and it differs from the selection that you specified and copied to clipboard. When the difference between the initial selection size and the final scaled selection is small, the issue is not so apparent but it is still there and is very frustrating. It's a "gamebreaking" issue when you need to precisely re-arrange parts of a flat image. You copy one area to the clipboard, you paste and the resulted pasted layer has the wrong size and blurred edges and is impossible to align and position to a new spot. It is mind-boggling that such a basic feature is so broken.